


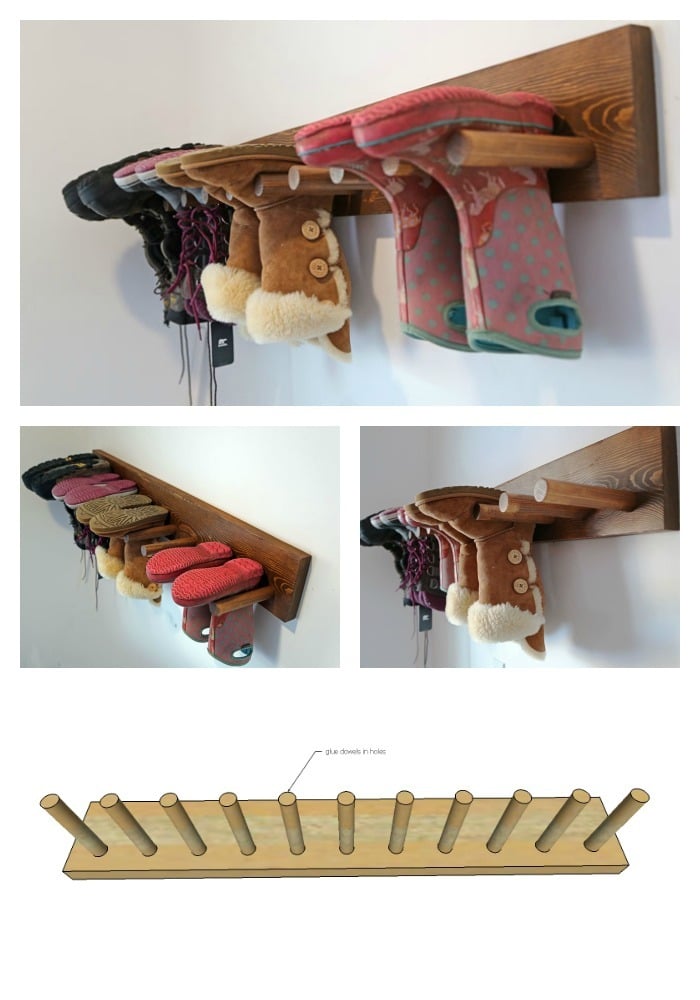
Easy DIY wall boot rack for storing boots on the wall upside down. Free plans by ANA-WHITE.com

Is there anything worse than wet boots????
Living up here in Alaska where it's winter 8 months out of the year, boots - especially wet boots - are a major storage issue. Where to put them all?
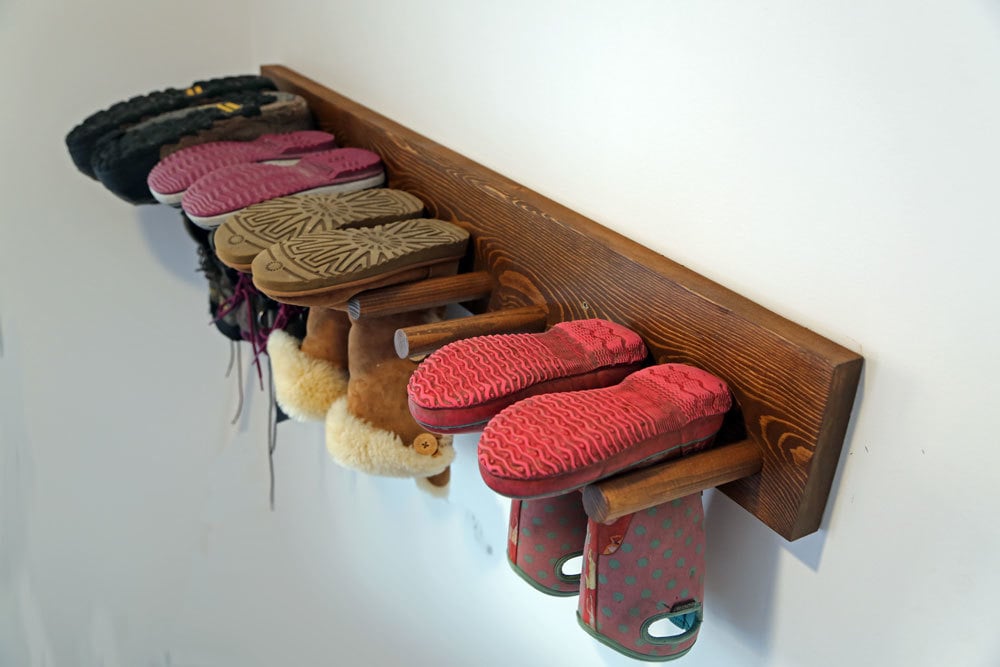
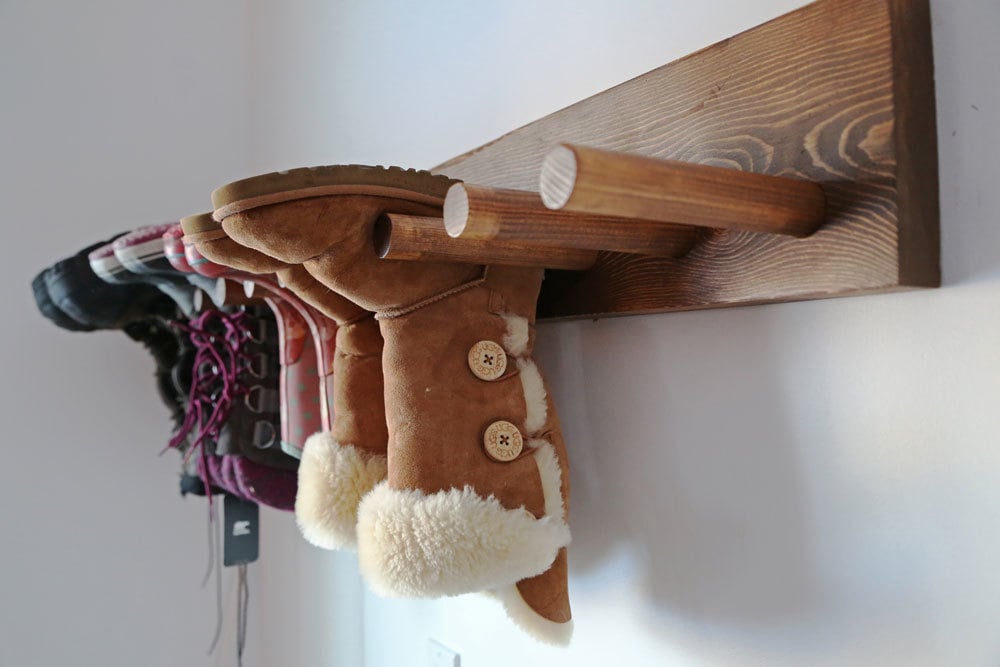
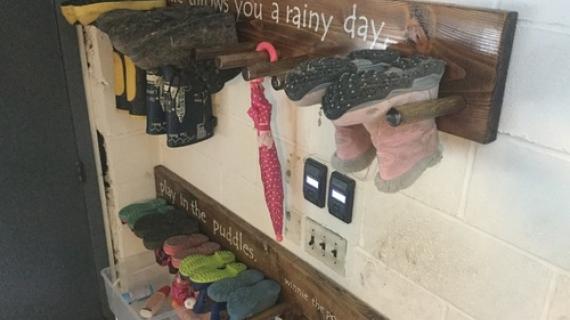
Well, why not hang them upside down on the wall?

We love how it turned out!!!
So much that the hubs actually went and made a couple more - one to keep, one to gift!!!
This is a great holiday gift item, and there's still plenty of time to build it.
I'll be posting a video tutorial soon and you can find the plans below!
Happy Holidays!
Ana + Family

Preparation
1 - 2x8 @ 4 feet long
8 feet of wood closet rod dowel (1-1/4" diameter)
1 - 2x8 @ 47-1/2" long
11- 1-1/4" dowels @ 8" long


Please read through the entire plan and all comments before beginning this project. It is also advisable to review the Getting Started Section. Take all necessary precautions to build safely and smartly. Work on a clean level surface, free of imperfections or debris. Always use straight boards. Check for square after each step. Always predrill holes before attaching with screws. Use glue with finish nails for a stronger hold. Wipe excess glue off bare wood for stained projects, as dried glue will not take stain. Be safe, have fun, and ask for help if you need it. Good luck!
Instructions
Step 1
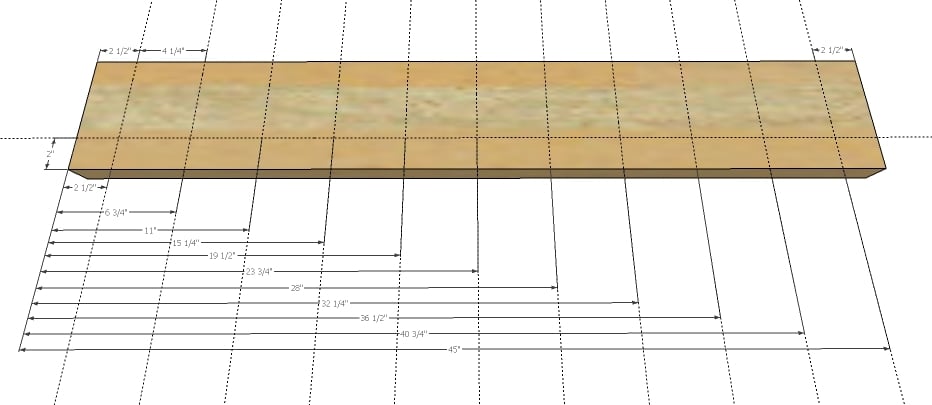
Mark the 2x8 board as specified above - dowels are space 4-1/4" apart from center to center, 2-1/2" spacing from outsides
Step 2
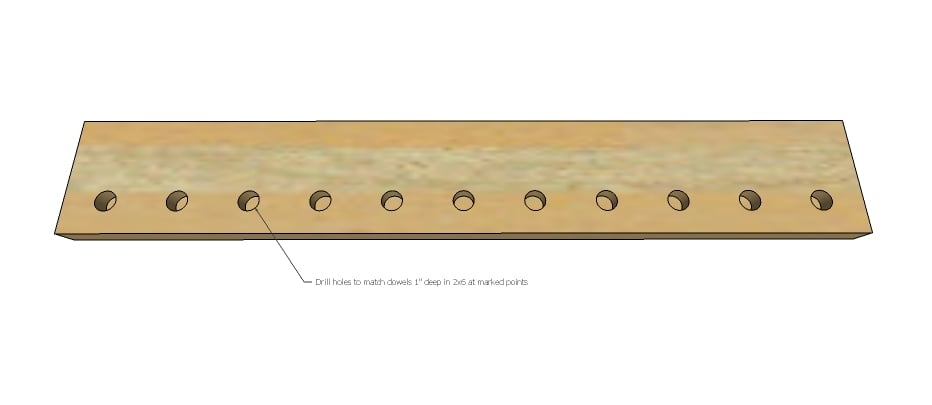
Drill holes for the dowels with a bit sized for the dowels.
Step 3

Drill smaller holes inside the larger hole for attaching screws through the back. This screw should go all the way through the back.
Step 4
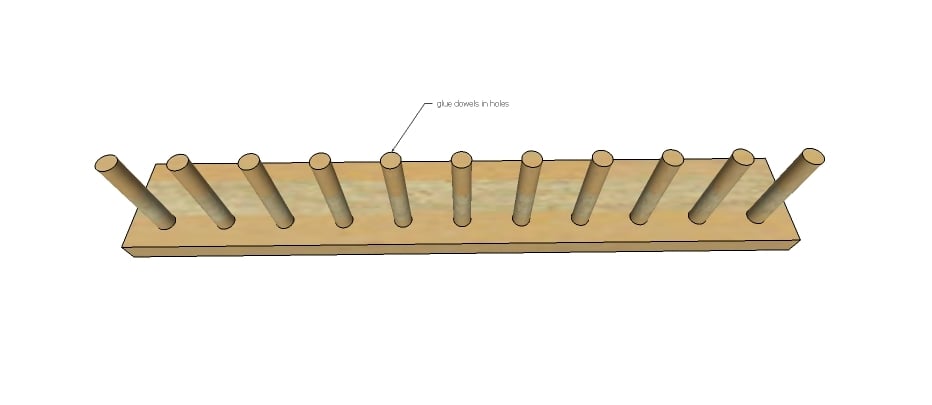
Glue dowels inside the larger holes.
Step 5

It is always recommended to apply a test coat on a hidden area or scrap piece to ensure color evenness and adhesion. Use primer or wood conditioner as needed.
Comments
UlrikeDG
Wed, 12/10/2014 - 20:41
Formatting note
It looks like you forgot to delete the placeholders for steps 6-17.
birdsandsoap
Thu, 12/18/2014 - 21:55
great idea!
I am so embarrassed at the pile of boots at my front door, this is a great idea to get them out of the way and drying!
kellyjo32
Sun, 01/01/2017 - 13:51
Too wide...
We made this for our kids and our puddle boots and all the boots slid through, so we're narrowing the space between the dowel rods to 3.25 on centers. Since this grips on the heels and not the toes, you have to take that width into consideration. Looking forward to making the adjustments and getting the boots off the floor!