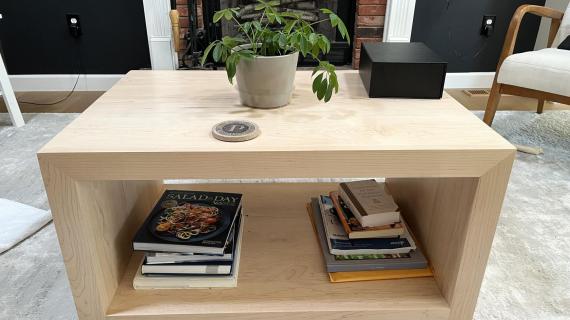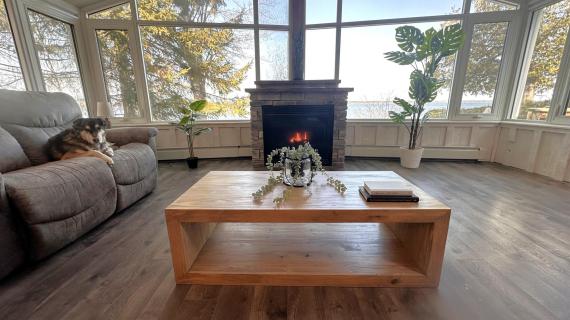


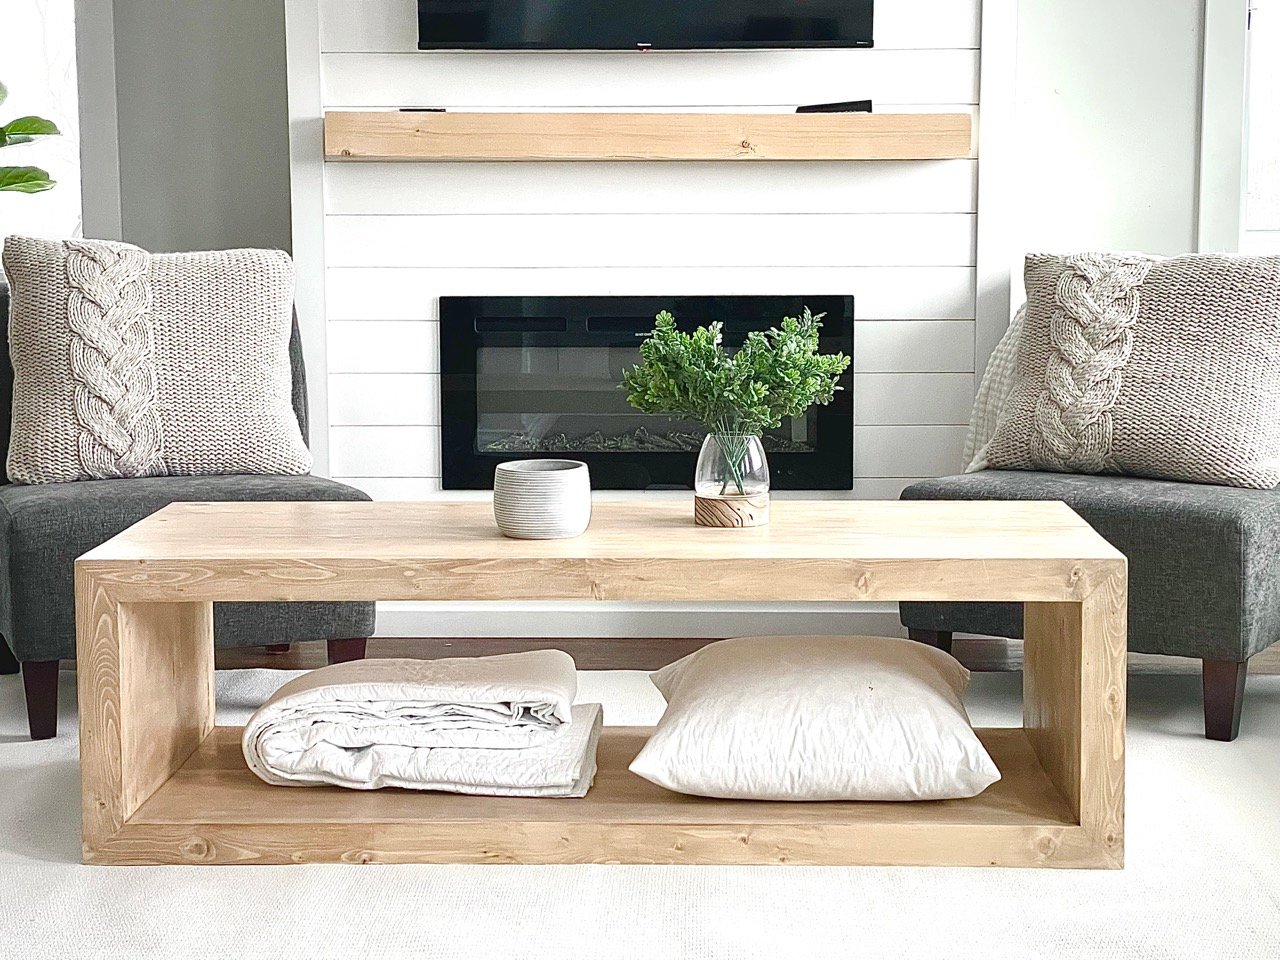
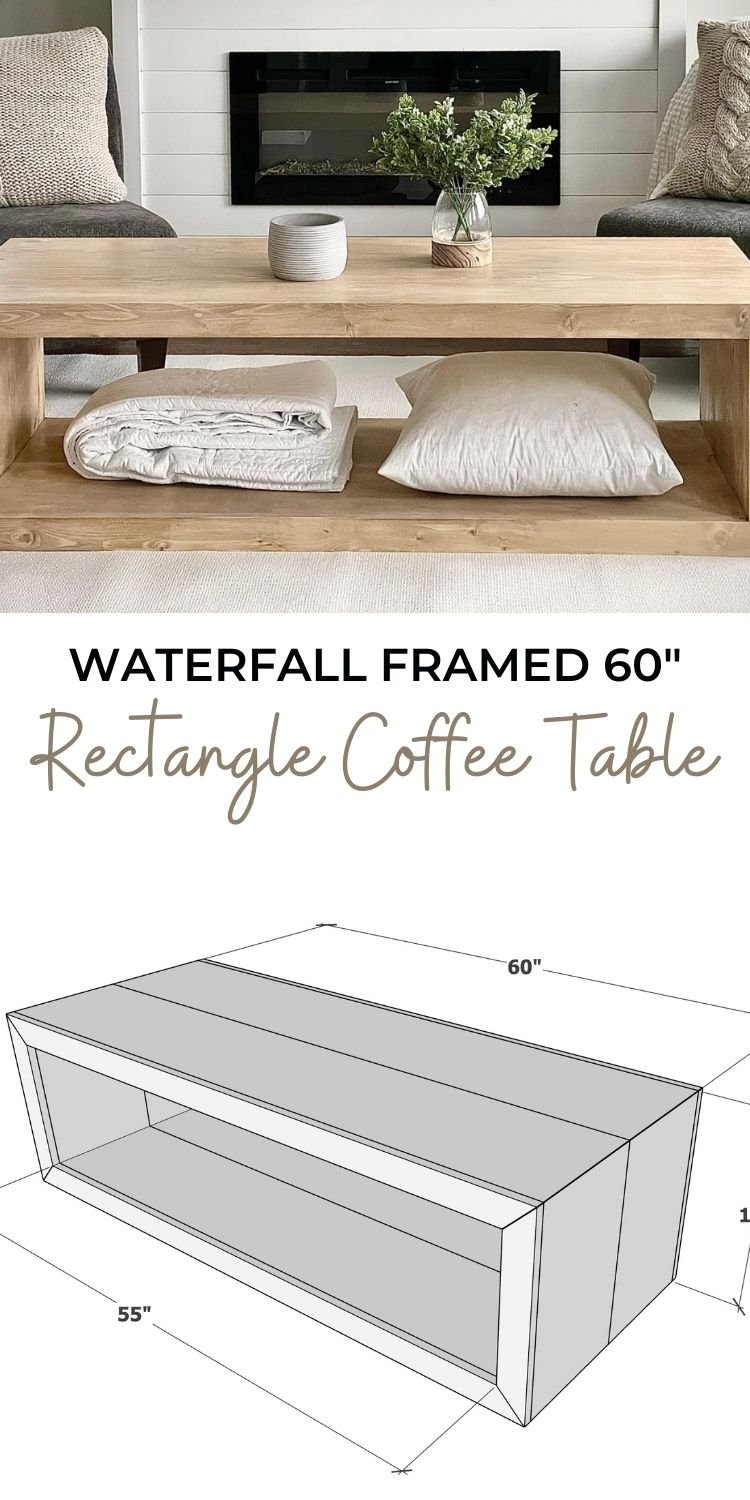
Free woodworking plans to build a modern, waterfall framed coffee table using 1x12s and 1x3 boards. This generously sized coffee table features mitered corners, a minimal, modern design, and large bottom shelf for storage. It's a beauty! Cost of lumber was about $150. Step by step plans from Ana-White.com
See Also: Easy to Build Shiplap Fireplace Tutorial
Why I Built This Coffee Table
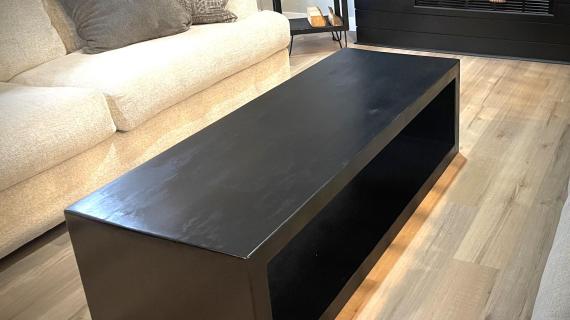
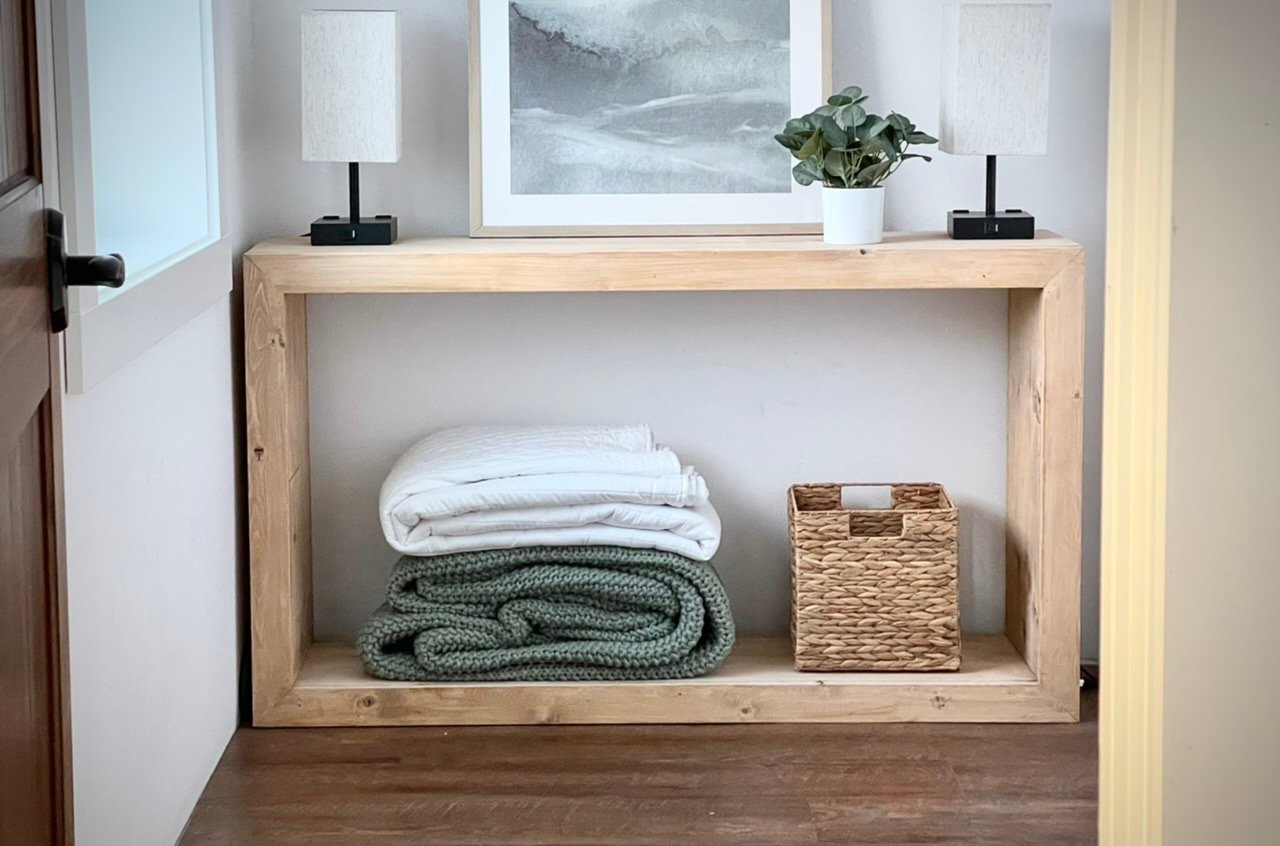
I built a similar styled console table here and the 52" version here (pictured below), and was just smitten with the sleek but rustic design, and just had to build the matching coffee table.
This entire collection is so beautiful!
Watch the Console Table Build Video
While I did not film the coffee table build, I did film the matching console table build, and the build steps are very similar. Please take a second to watch that video -
How I Built this Coffee Table
This coffee table was a challenge for me, but I enjoyed stretching my skills and creating something I was super proud of in the end. Do not attempt this project without the right tools and a good amount of building experience. This is an advanced project.
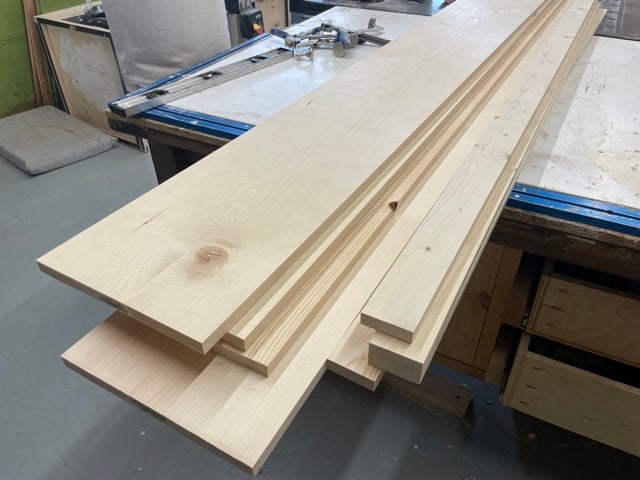
Here's the lumber I started with. I did run the boards through the table saw to create the square edges. My 1x12s ended up measuring 11-1/8" wide - just make sure all the 1x12 widths are the same. The 1x3s I actually ripped from 1x6 boards to get that square edge.
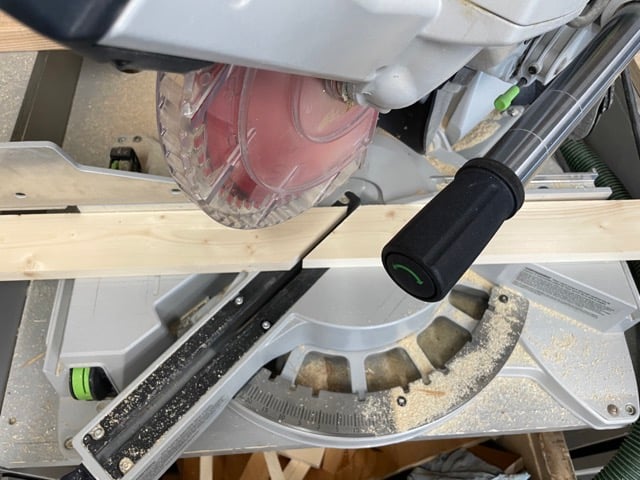
After testing my saw, I cut the face frame boards first. I am using a 10" sliding compound miter saw. This is the smallest saw I would recommend, a 12" would work better.
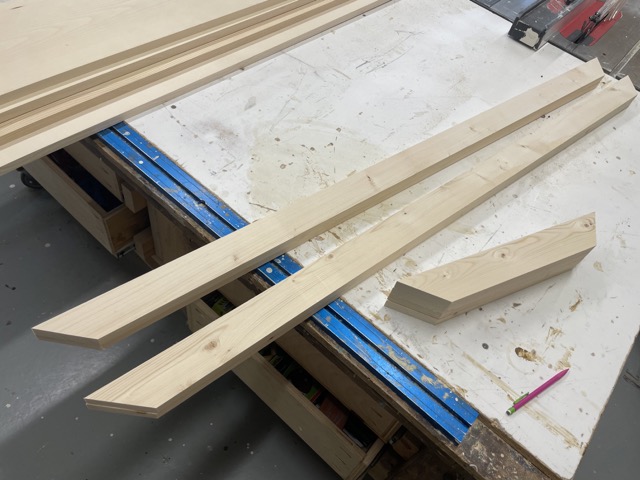
Here's the face frame pieces cut.

Then I drilled 3/4" pocket holes on the ends of the shorter face frame boards. I was careful not to let any pocket holes show on the side edges of the face frame boards.
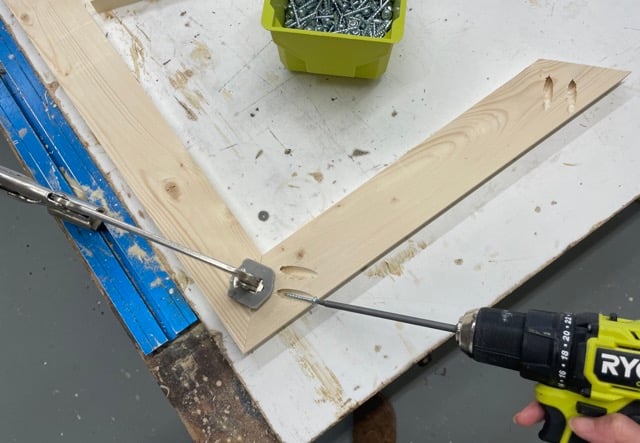
Then I clamped the face frame boards and attach with 1-1/4" pocket hole screws.
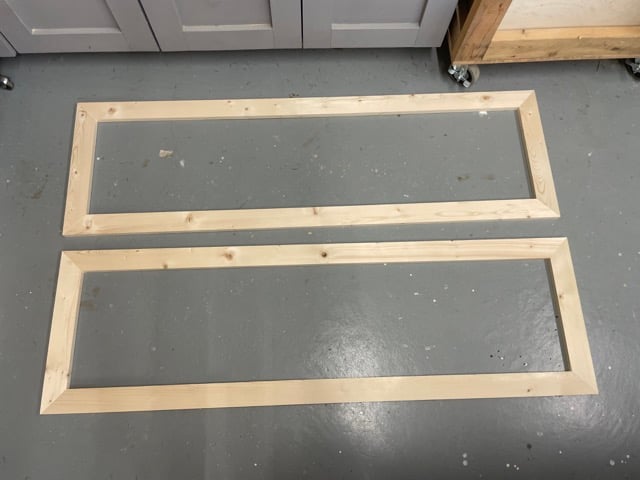
The two face frames need to match EXACTLY.
Now for the 1x12s.

It was actually a challenge to make the 45 degree bevel cuts on the saw, the 1x12s wanted to move on me as I was cutting. Do double check your cuts and make sure they are straight all the way across.
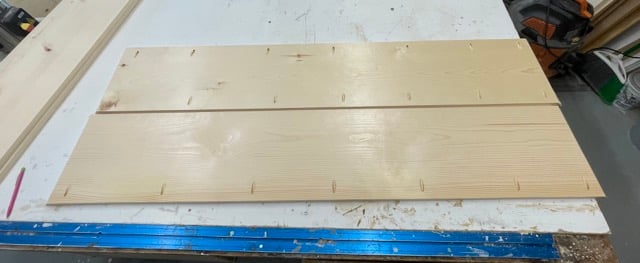
Here's the two top pieces. I drilled pocket holes to attach the two pieces together, and also pocket holes to attach to the face frames.
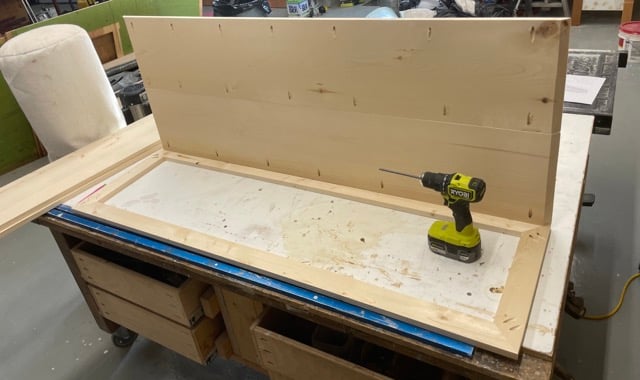
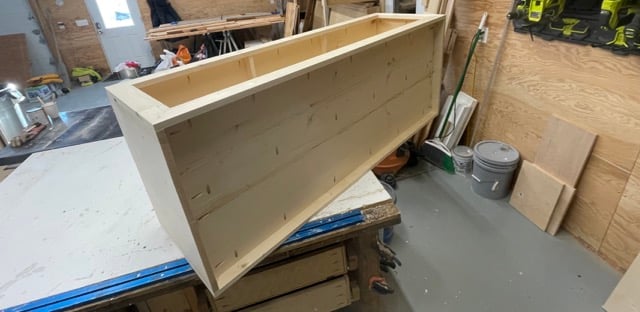
After joining the two 1x12 pieces together, I attached to one of the face frames.
Then I repeated those steps for the two side panels.
Then I attach the second face frame.
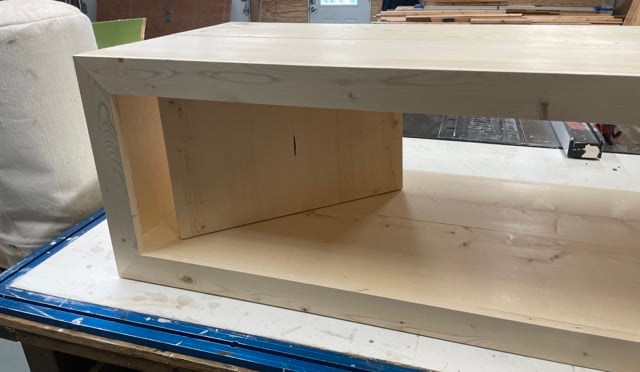
For the corners, I nailed with 1-1/4" brad nails.
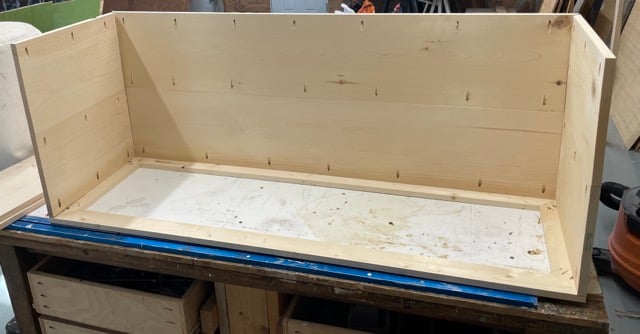
On the underside of the top (and later the bottom shelf) I added the 1x2 supports to help support the center of the coffee table.
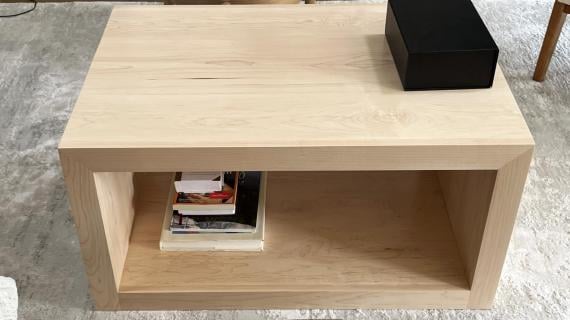
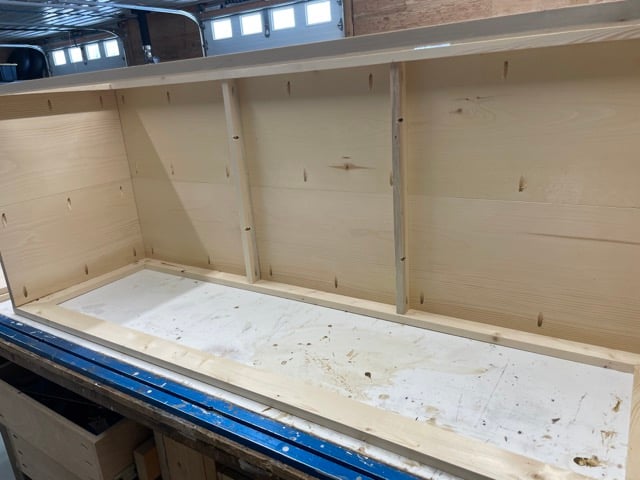
Then I cut the bottom pieces, attach together and then fit inside the two face frames and attach to the coffee table.
The inside pieces are 1x12s pocket holed together and set in place.

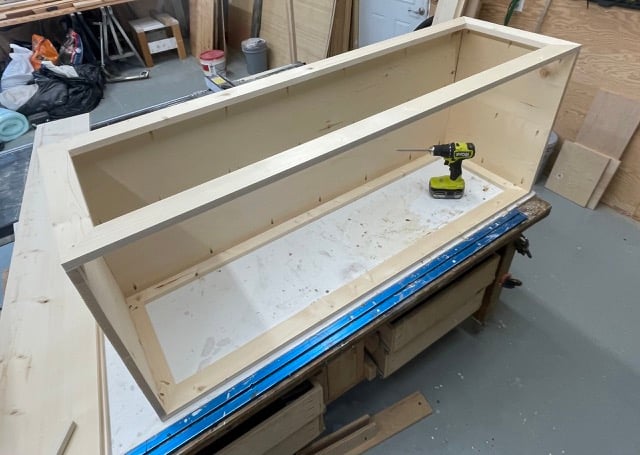
I had to use a screw to help me pull the panel back in place when I was setting it (see the screw at the top left?). Then later I removed the screw.
I nailed the inside panels on with 1-1/4" brad nails.
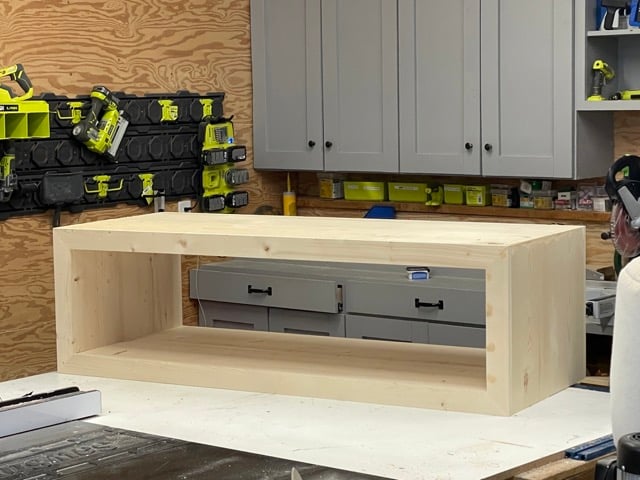
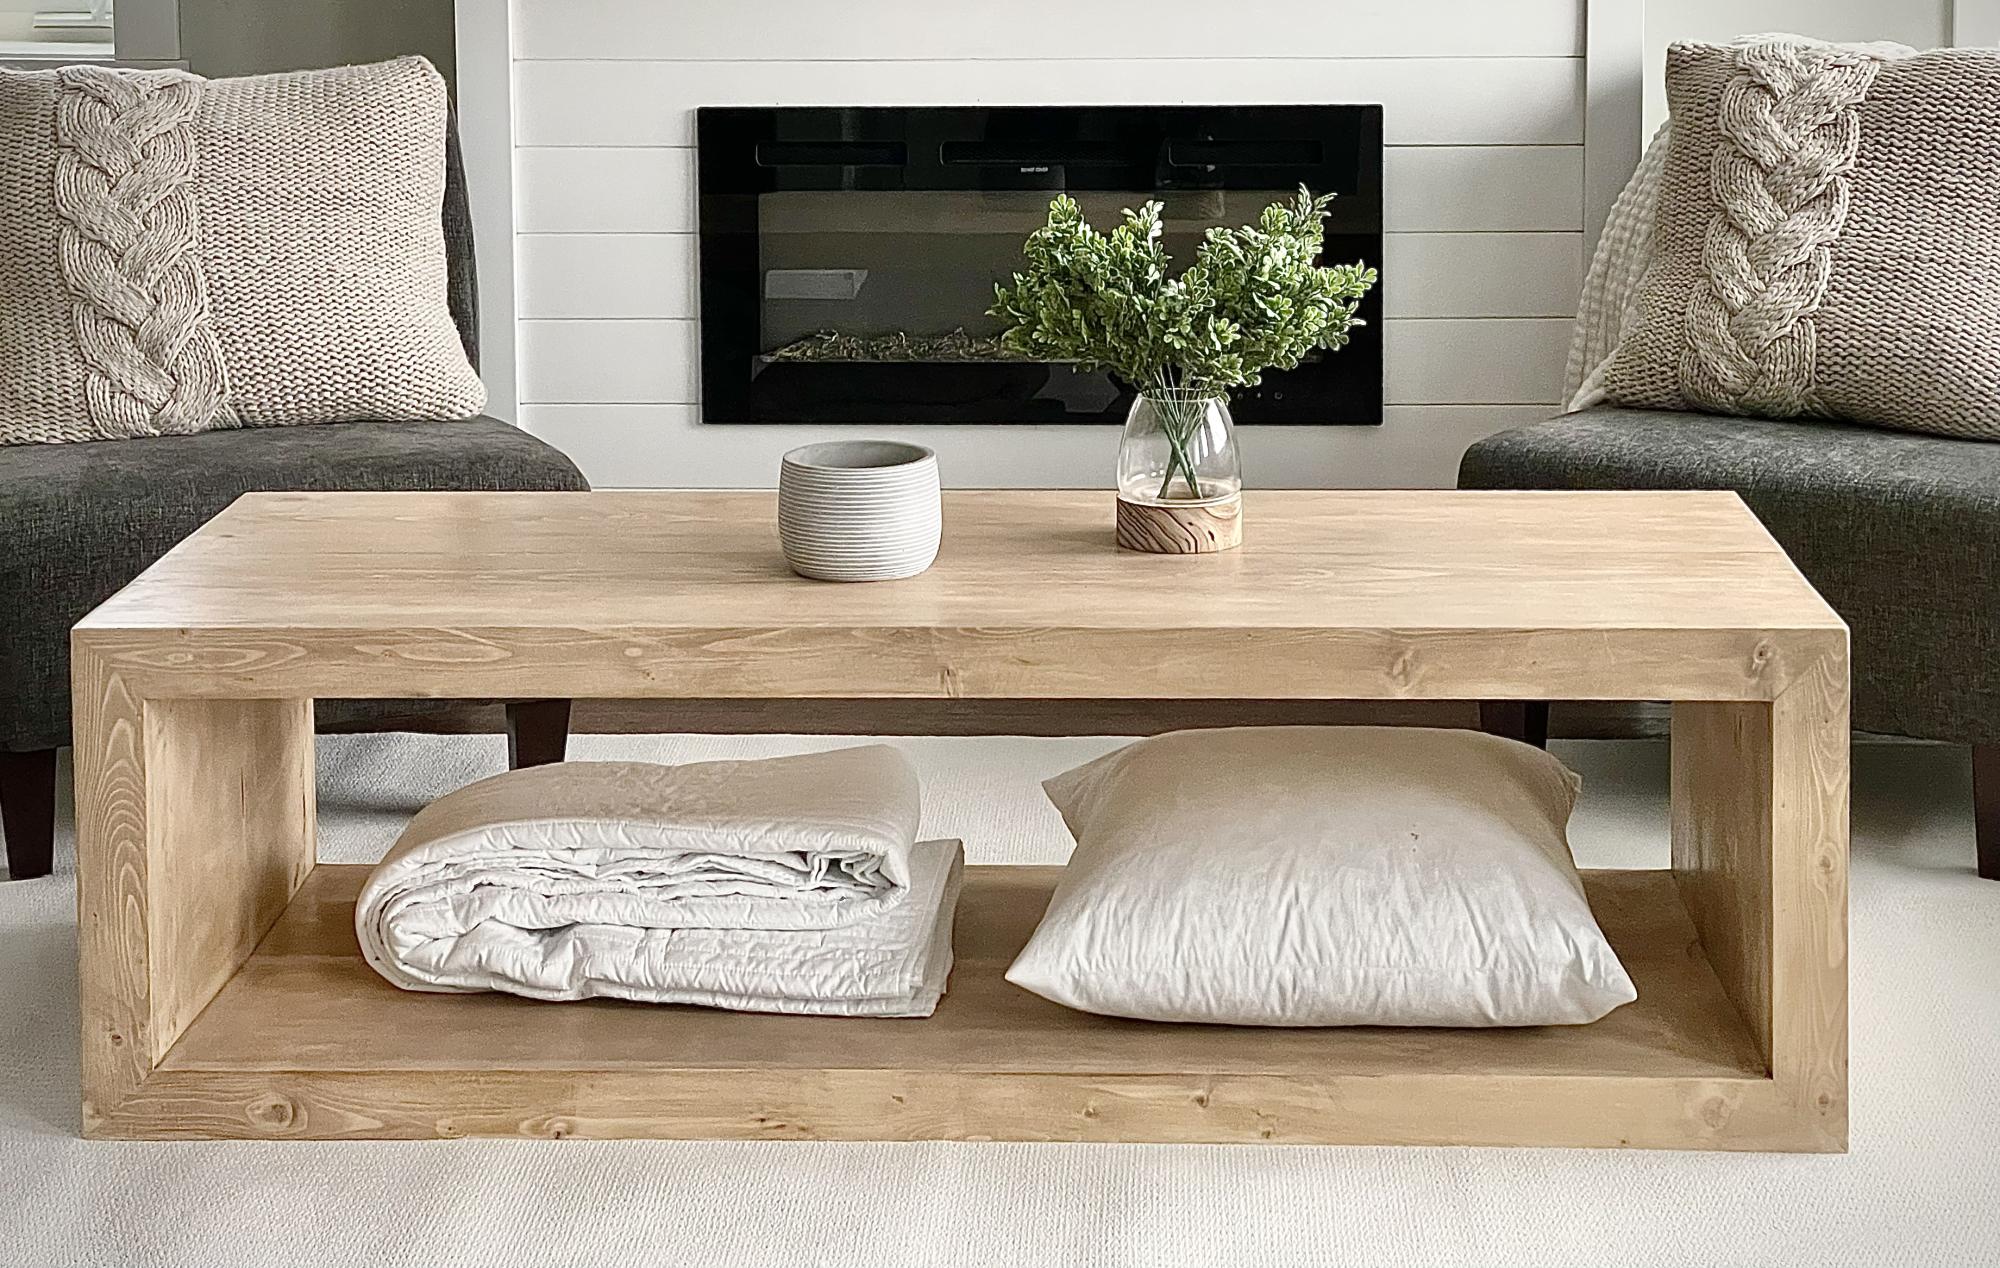
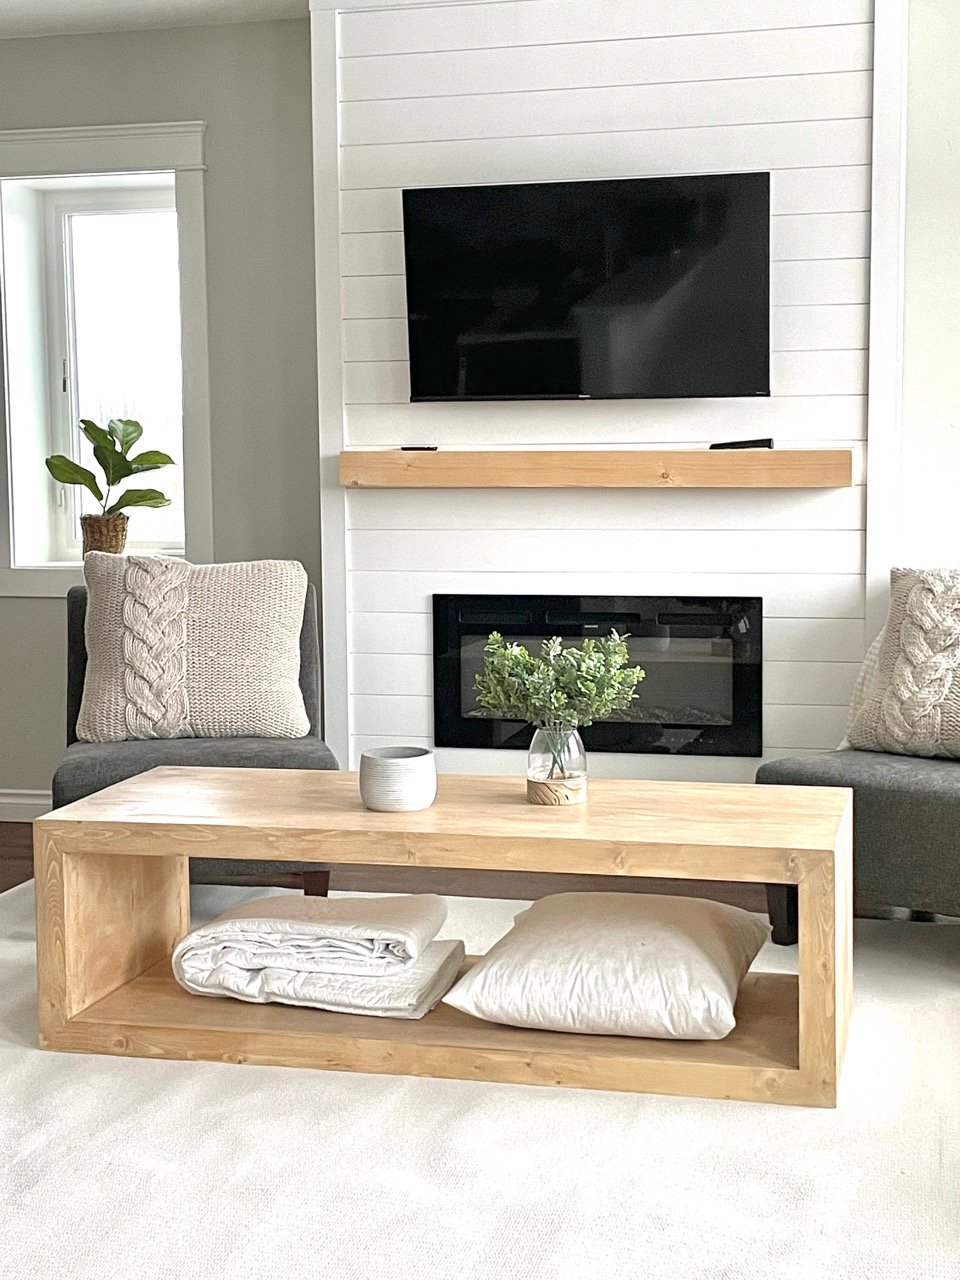
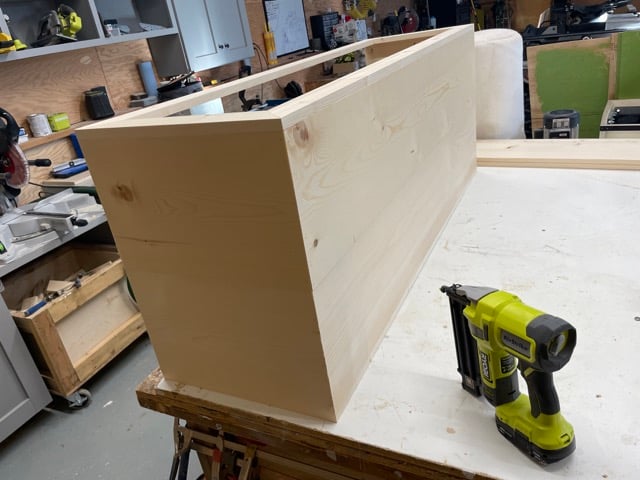
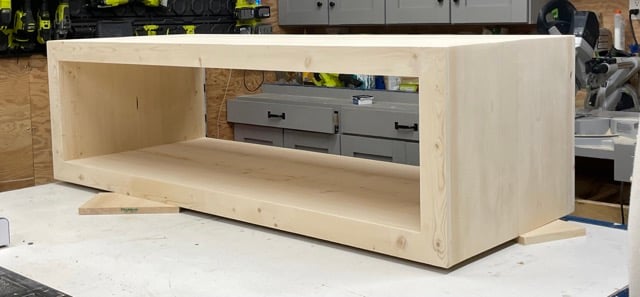
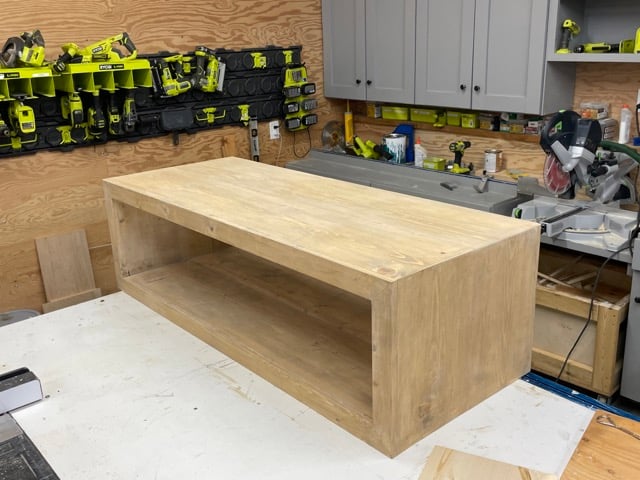
Construction is done!
This took about 3 hours to this point.
I filled the few nail holes with wood filler. I also filled the corners that ended up having small gaps.
Then I sanded with 120 grit sandpaper in the direction of the wood grain.
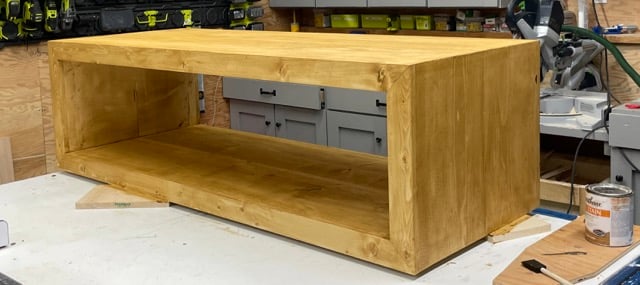
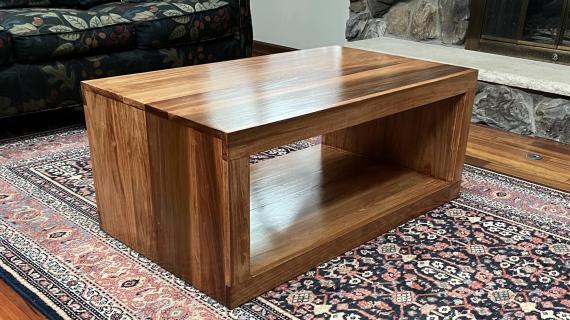
I stained the entire project with "golden oak" by Varathane. It was not right...
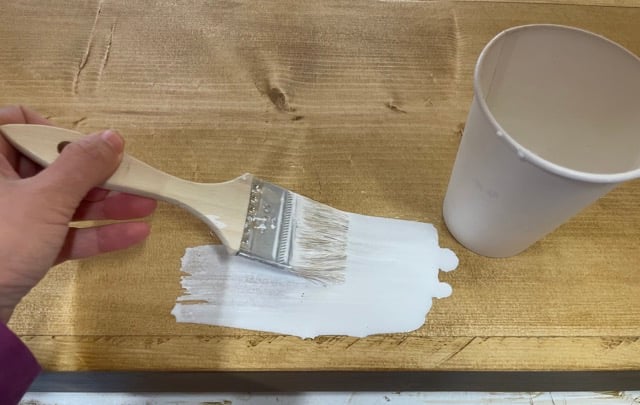
So I added a watered down white paint layer,
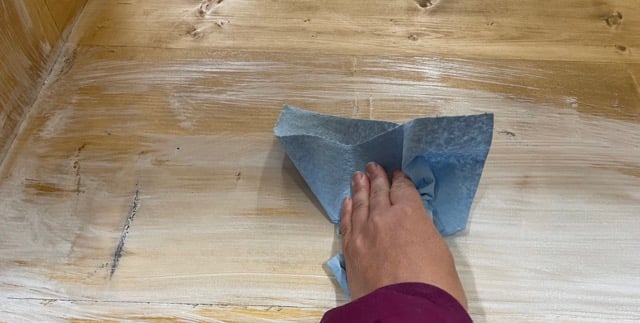
Wiping it in and off in a very light layer. So much better!
To protect the finish and make it wipe clean, I added a layer of clear Polyurethane.
This coffee table was not easy to build, but it was worth it!! I ended up spending about 8 hours on it and $150 in lumber. It is gorgeous, and I'm very proud that I was able to take on such a great project.

Free Plans to Build This Coffee Table
Here's the free plans to build this coffee table. Please send us in a photo if you build, we love seeing your work!
Pin For Later!
Preparation
- 4 - 1x12 @ 8 feet long
- 4 - 1x3 @ 8 feet long
- 1 - 1x2 @ 8 feet long
- 100 - 1-1/4" coarse thread pocket hole screws
- 1-1/4" brad nails
- wood glue
- stain, whitewash and poly (or other finishing materials)
The 1x12 boards need to be very square with no cupping, crowning or warping. Make sure they are dry.
You can rip rounded edges off with a table saw for a more precise edge to edge joint (I did)
- 4 - 1x3 @ 60" - both ends cut at 45 degree ANGLE, ends NOT parallel, long point to long point measurement (face frame)
- 4 - 1x3 @ 18" - both ends cut at 45 degree ANGLE, ends NOT parallel, long point to long point measurement (face frame)
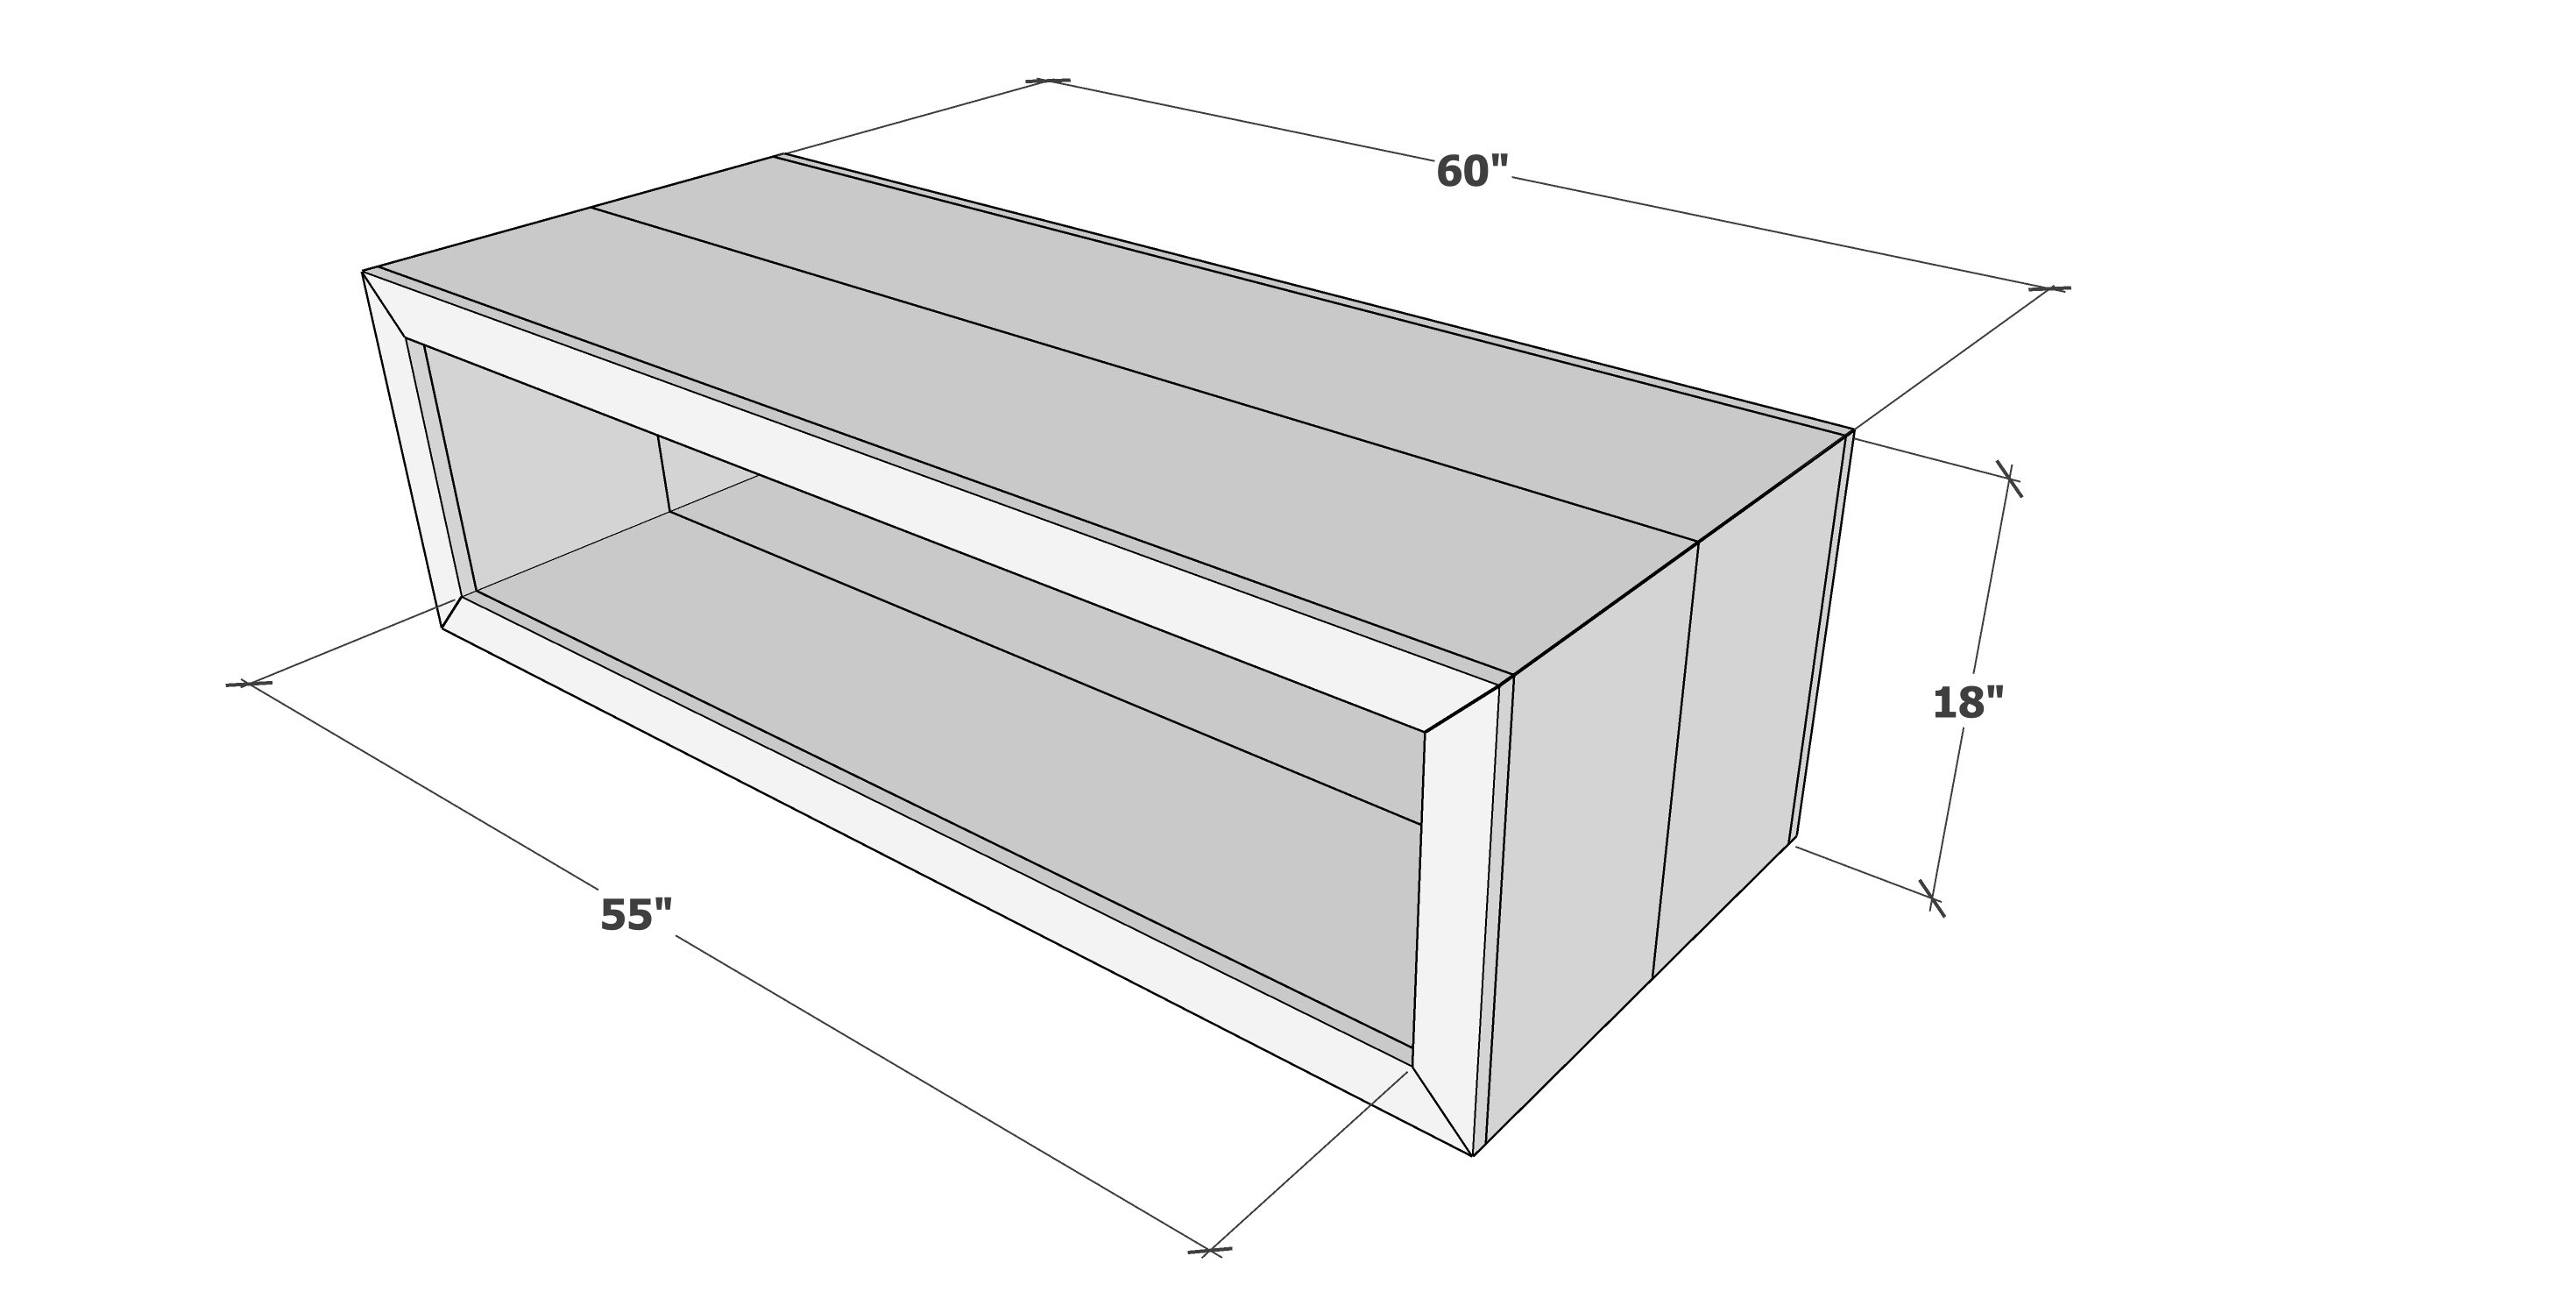
- 2 - 1x12 @ 60" - both ends cut at 45 degree BEVEL, ends NOT parallel, long point to long point measurement (top)
- 4 - 1x12 @ 18" - one end cut at 45 degree BEVEL, long point measurement (outside sides)
- 2 - 1x12 @ 58-1/2" (bottom shelf)
- 4 - 1x12 @ about 14-3/4" (inside sides)
Cut longest boards first
All the 1x12 bevel cuts will fit on two boards, you can use the bevel cut from the previous cut to make the next cut.
It is difficult to cut the 1x12 bevels - practice and measure and make sure the cut is square all the way across
You will need a 10" sliding miter saw (12" preferred) to make these cuts
Test the miter and bevel on your miter saw and make sure cuts are precise using a speed square. Adjust if 45 degree angle and bevel are not dead on.


For long term durability and more professional results, I recommend using a pocket hole joinery system for wood joints. Here is a video with tips for using a pocket hole jig:
Instructions
Step 1
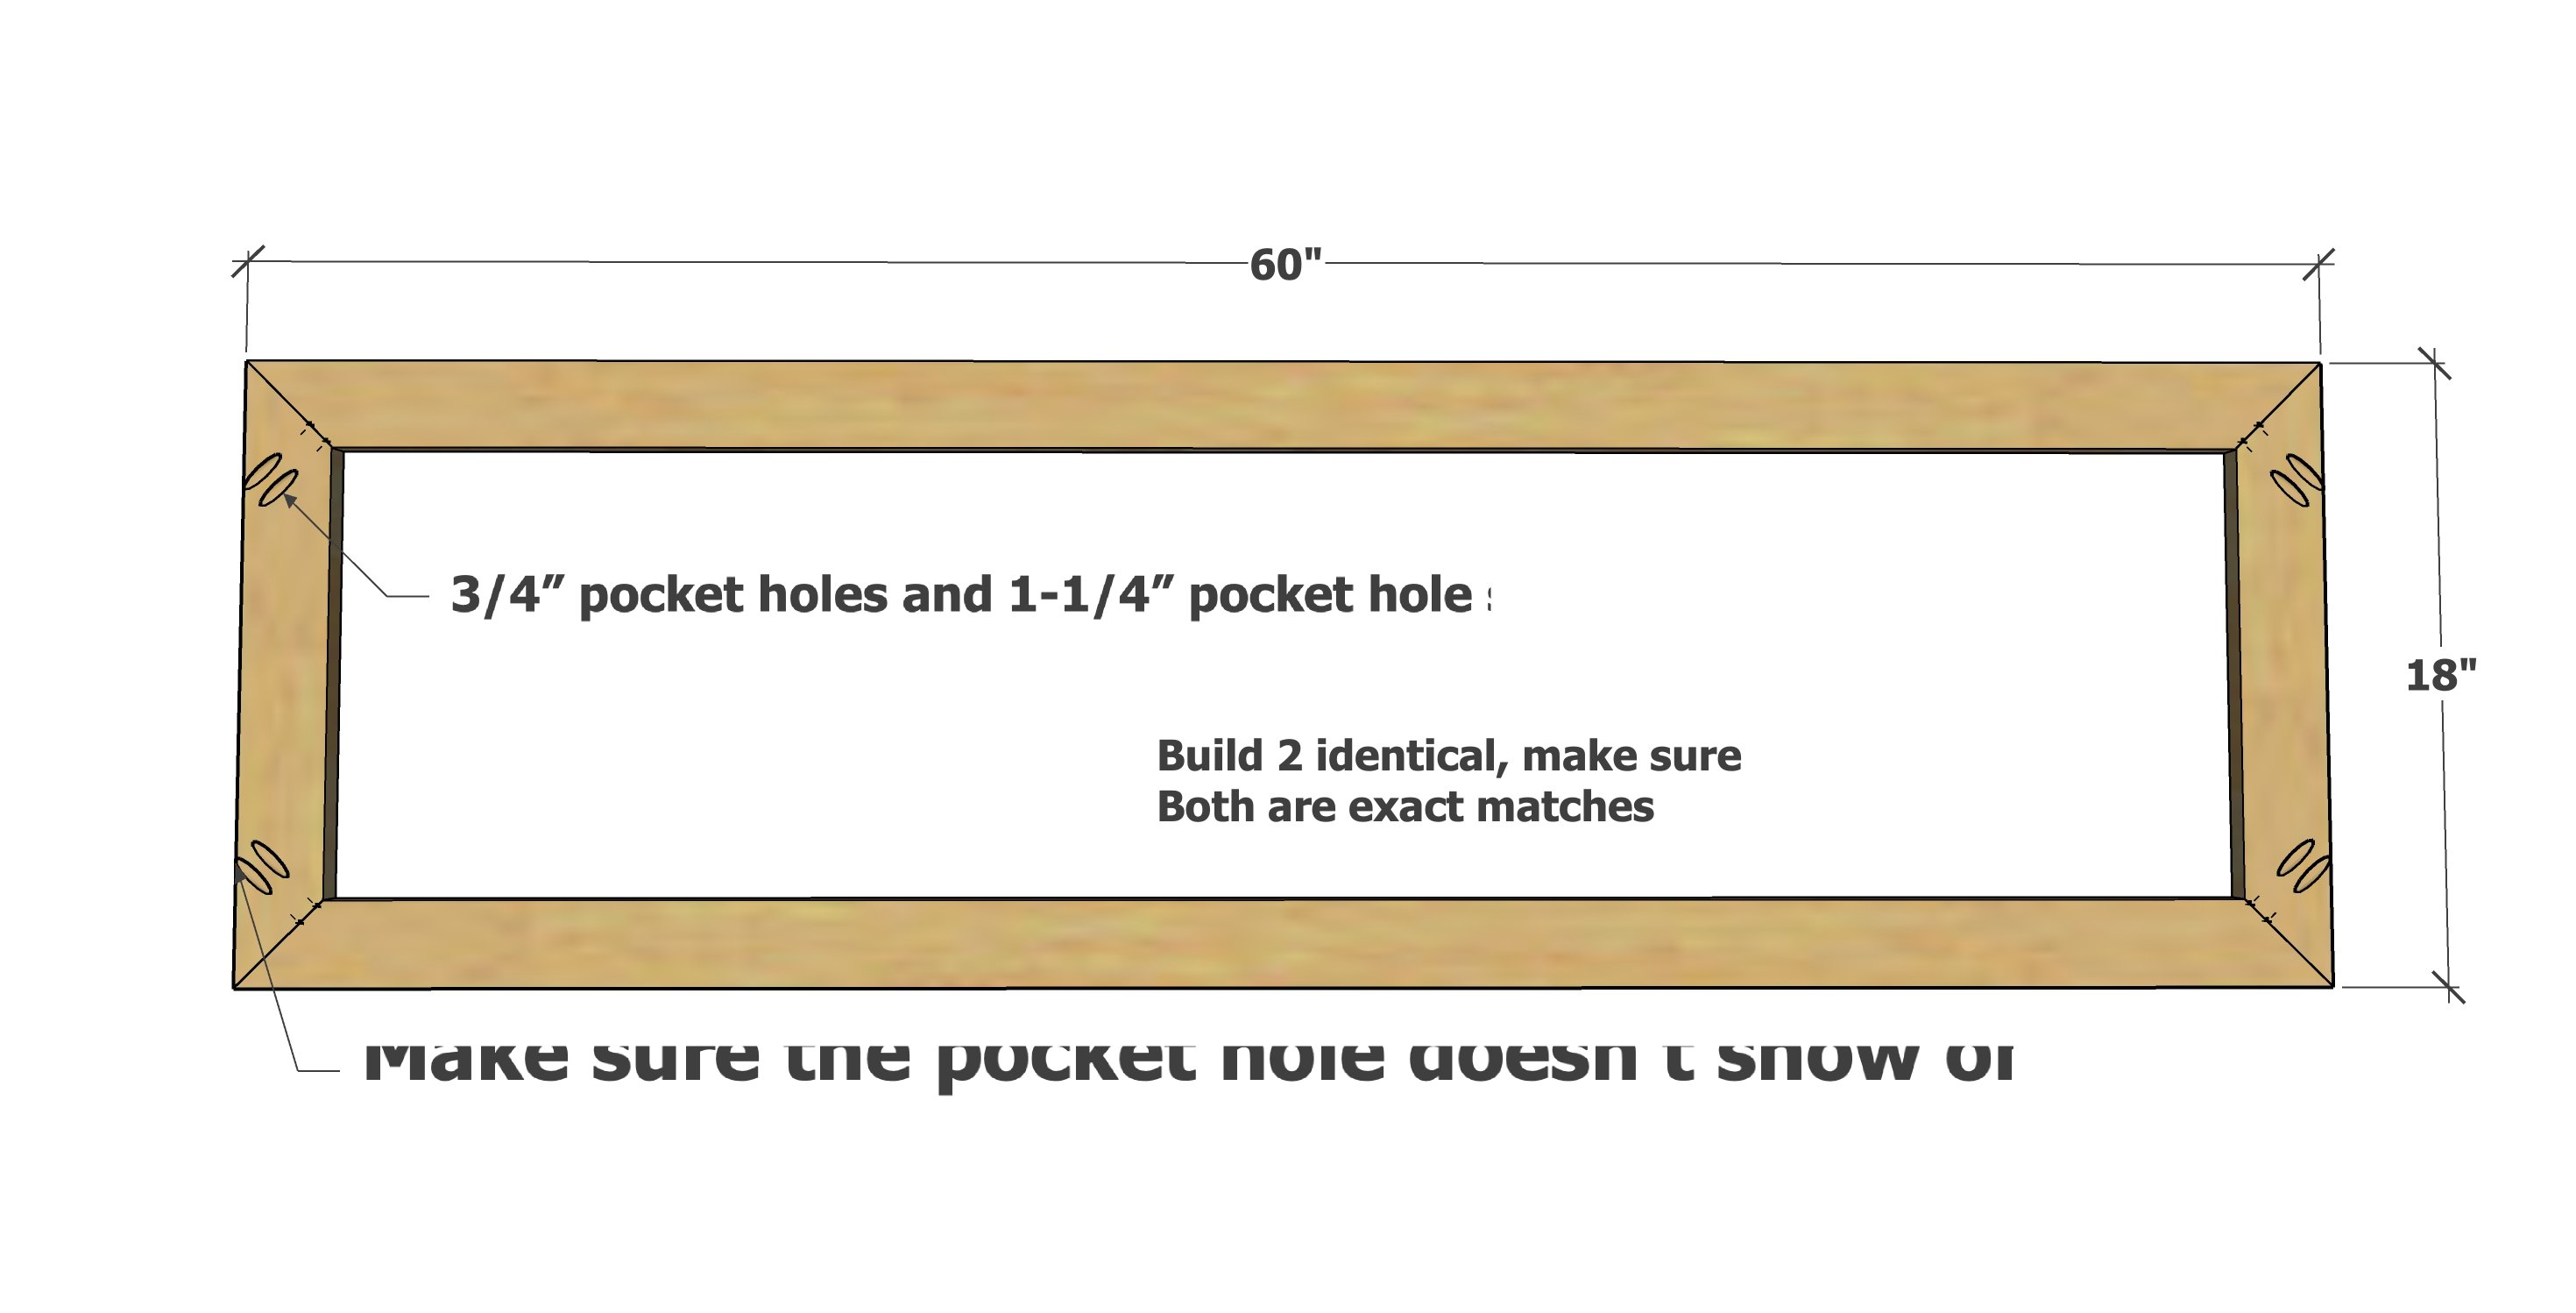
Cut the 1x4 boards for the face frames.
On the smaller face frame boards, drill two 3/4" pocket holes on each end as shown. Make sure the pocket hole is not visible on the outside of the face frame.
Attach together with 1-1/4" pocket hole screws.
Build two frames - make sure the two frames are identical.
Step 2
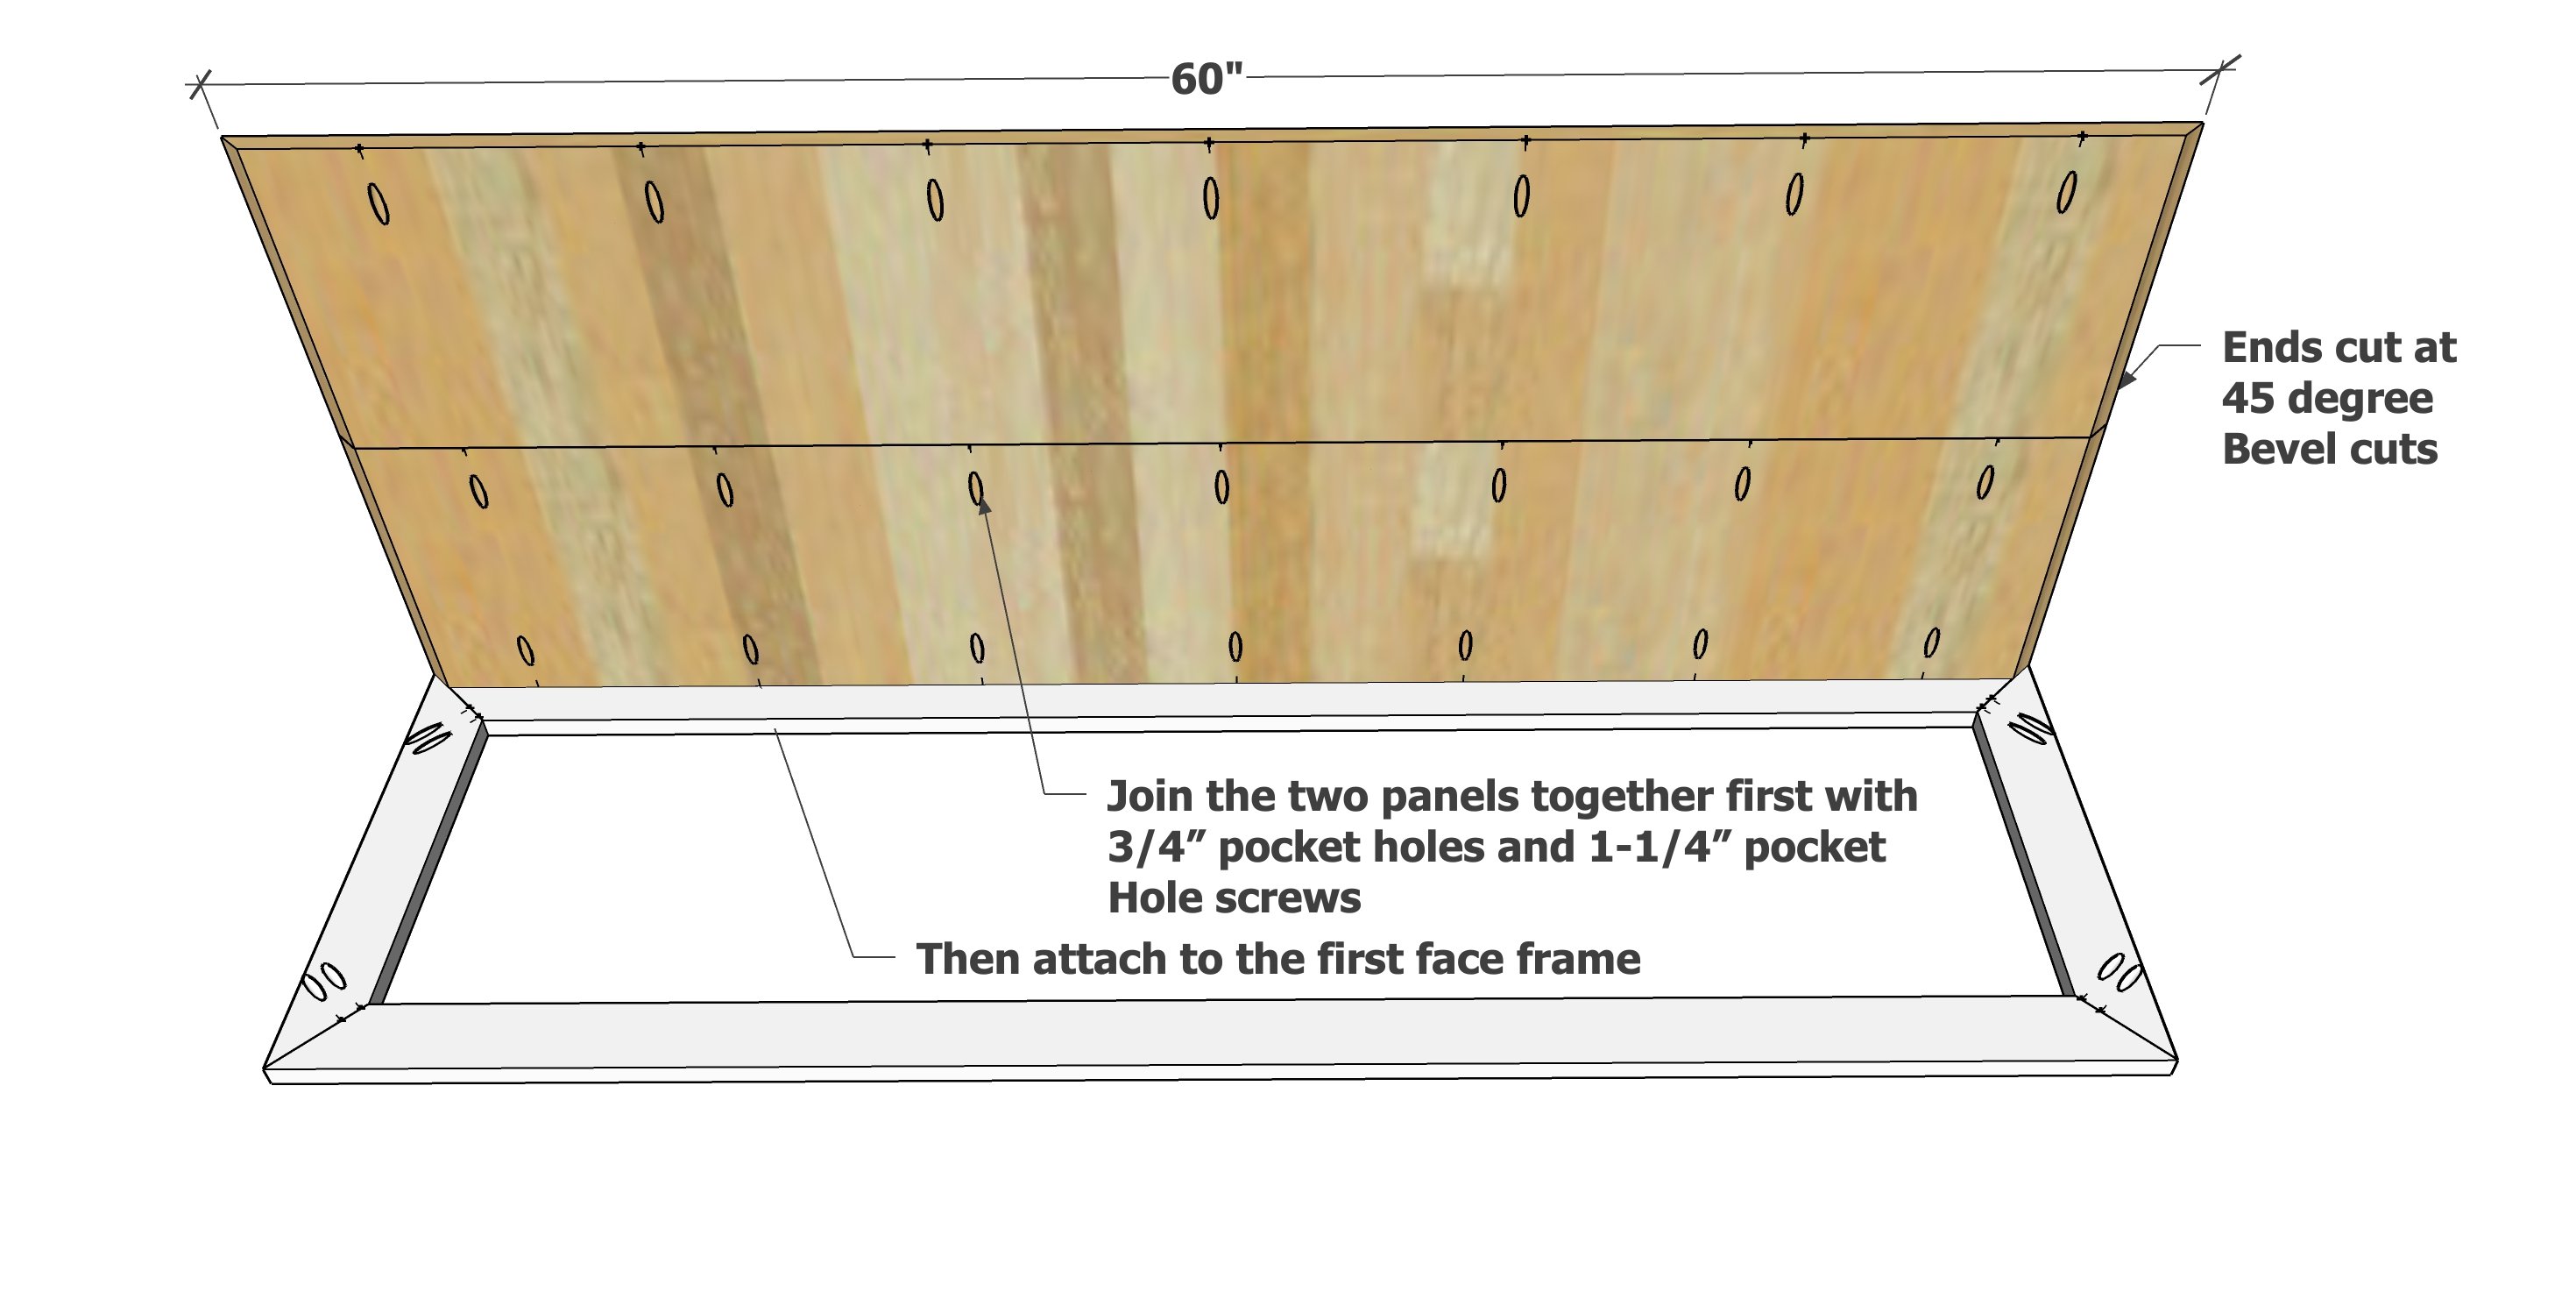
From one 1x12 board, cut the first top piece with ends beveled at 45 degrees. Make sure the cut is straight across - double check with a speed square. Reserve the scrap for cutting the side panels.
Cut the second top piece.
Drill pocket holes as shown to join the two tabletop boards together. Make sure pocket holes are drilled for attaching face frames on both sides.
Use 1-1/4" pocket hole screws and clamp each joint.
Then carefully attach the entire top piece to one of the face frames. The face frame and top should be perfectly smooth.
Step 3
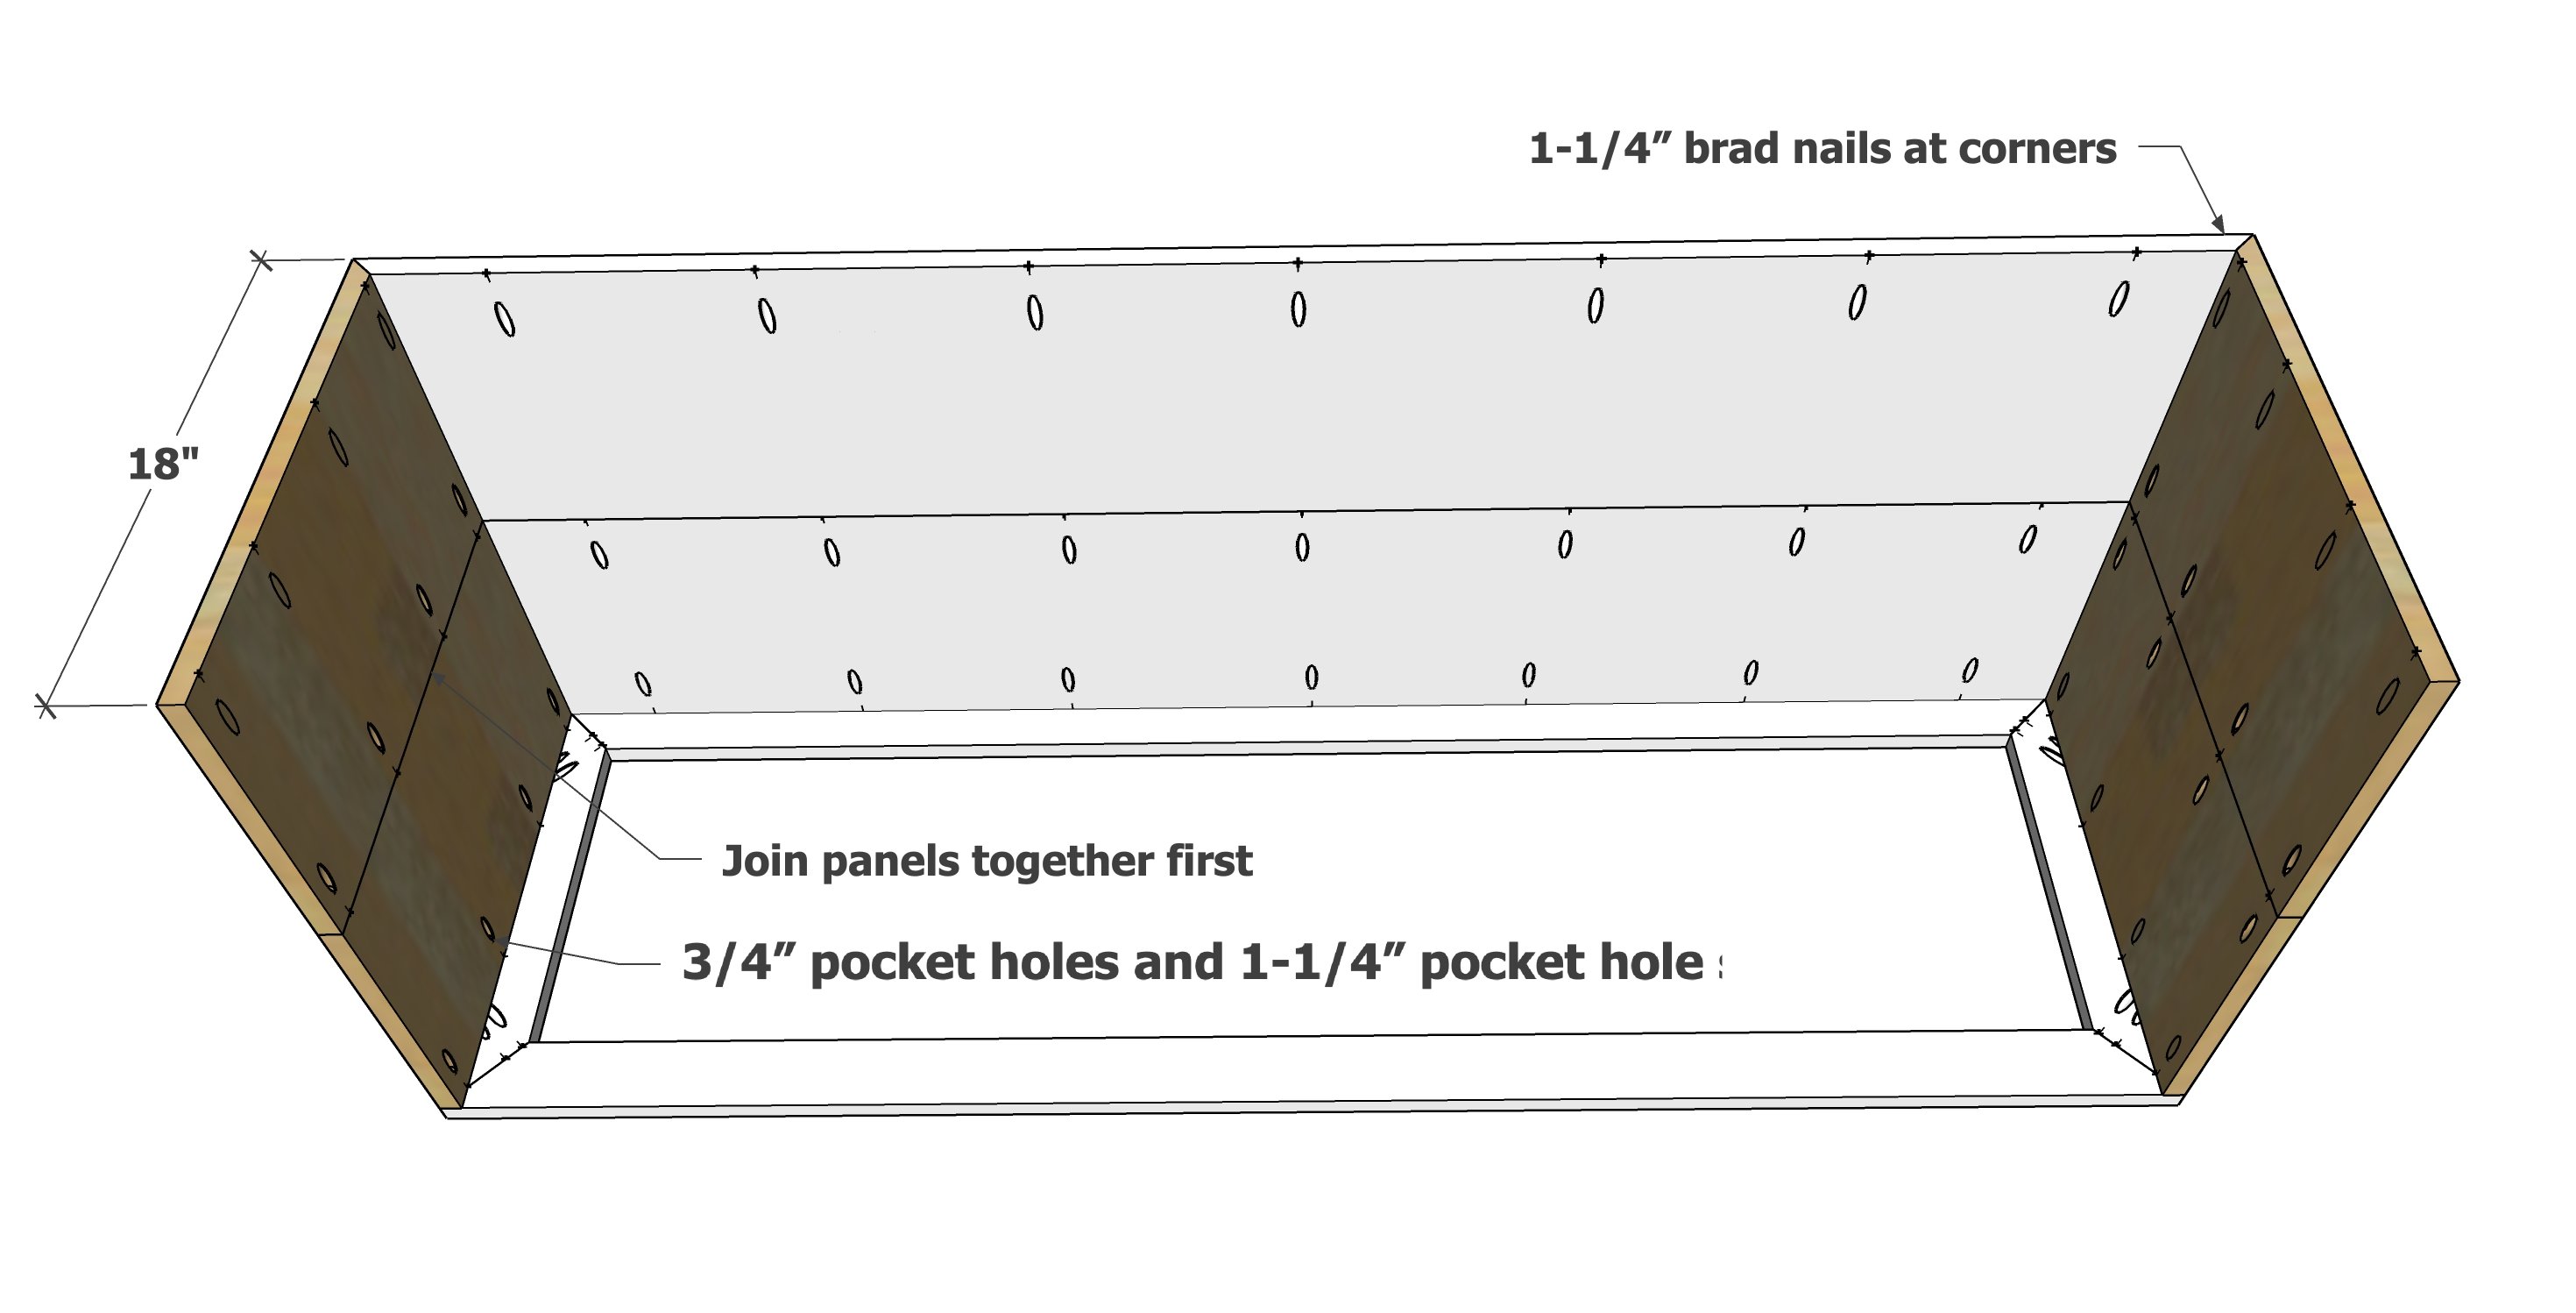
Repeat these steps for the two side panels. Make sure pocket holes are drilled for attaching both face frames.
Attach the two side panels to the top with 1-1/4" brad nails.
Step 4
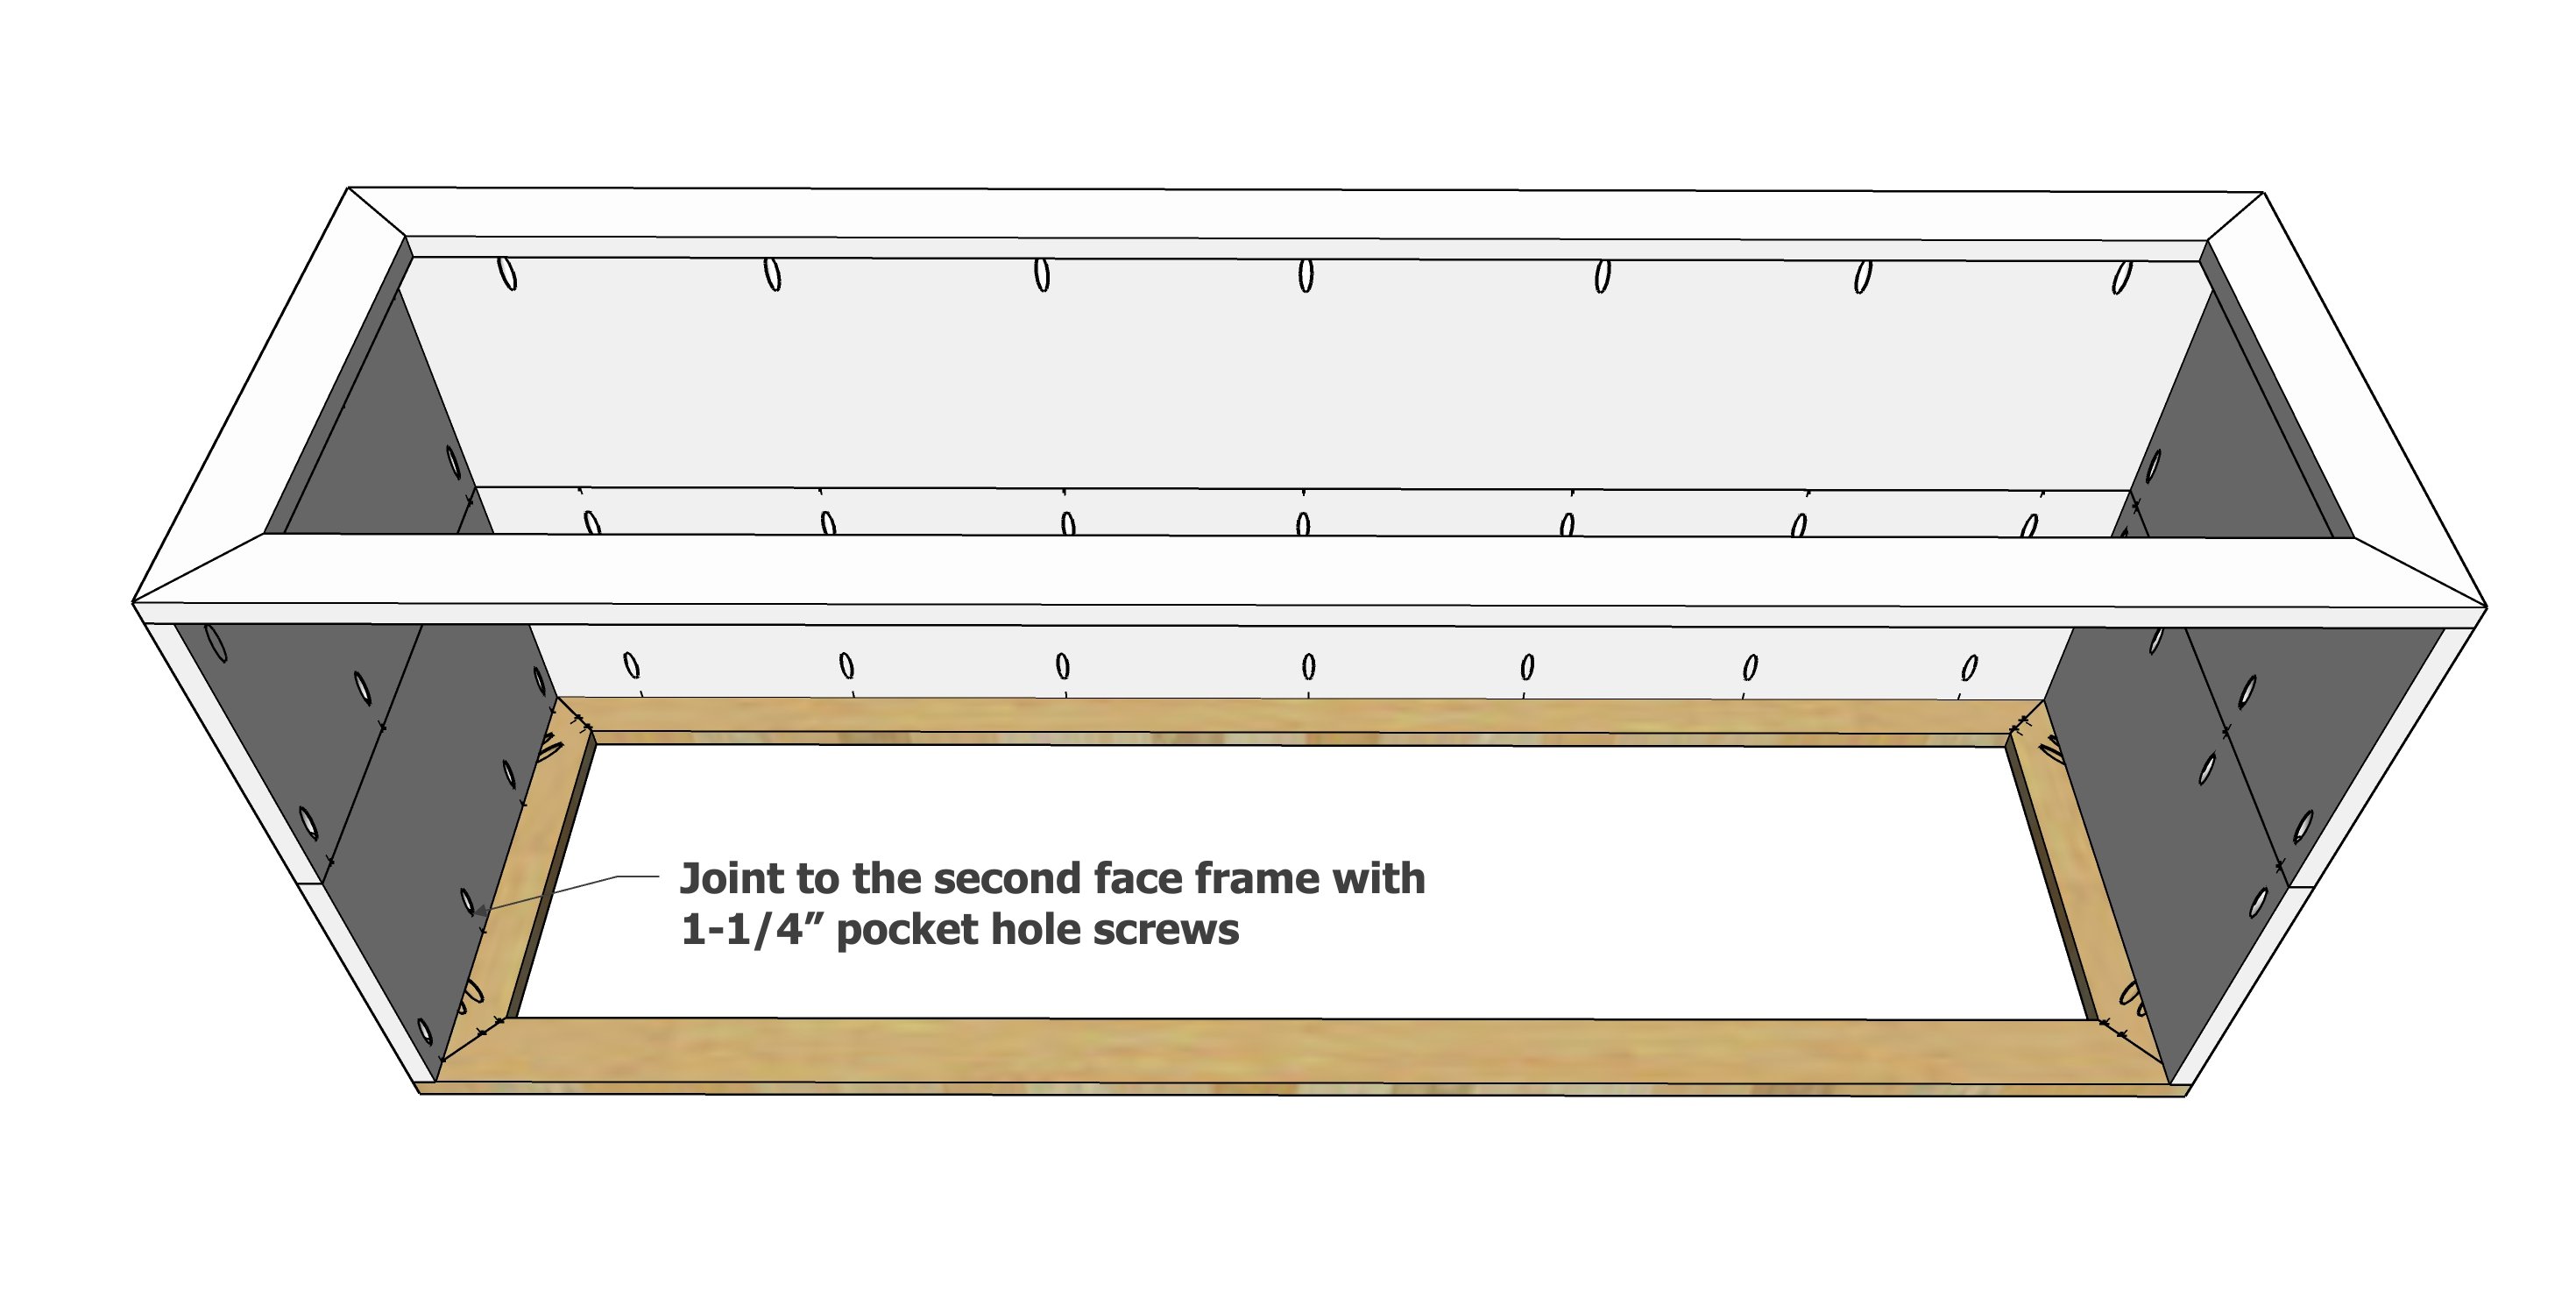
Attach the sides and top to the second face frame.
Step 5
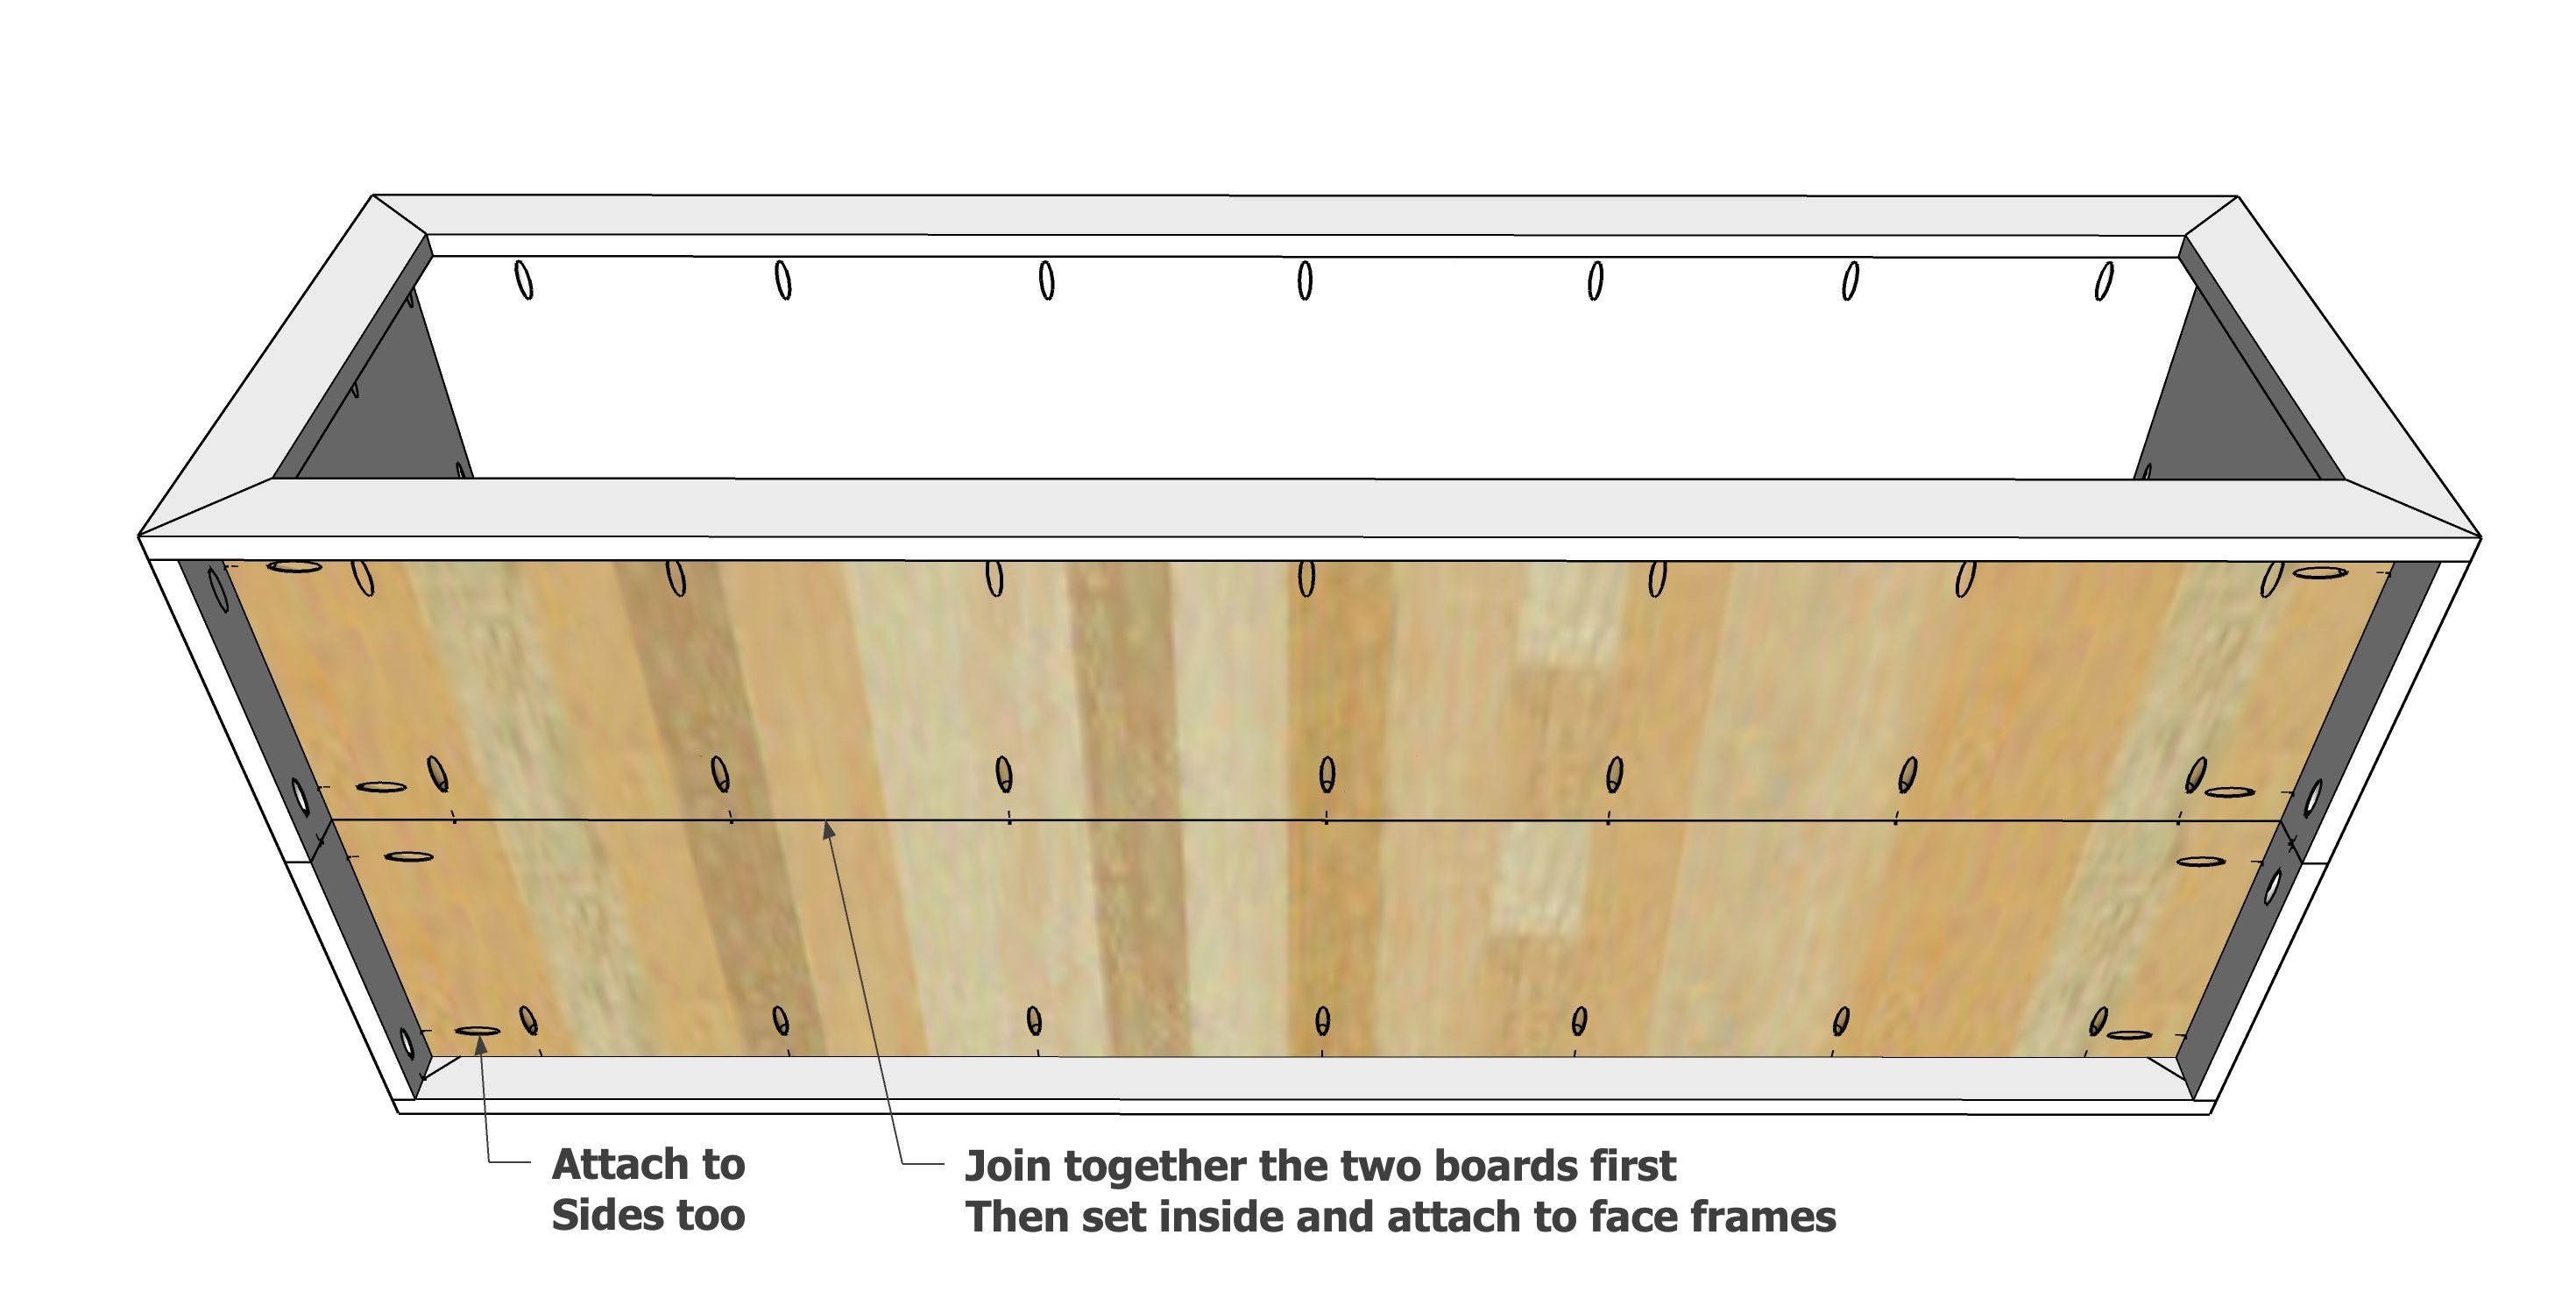
Cut the bottom shelf boards and drill pocket holes to join boards together. Also drill 3/4" pocket holes around all sides for attaching inside the face frame.
Carefully place inside the face frames.
Attach with 1-1/4" pocket hole screws, matching the top of the shelf with the top of the face frame insides as you attach.
Step 6
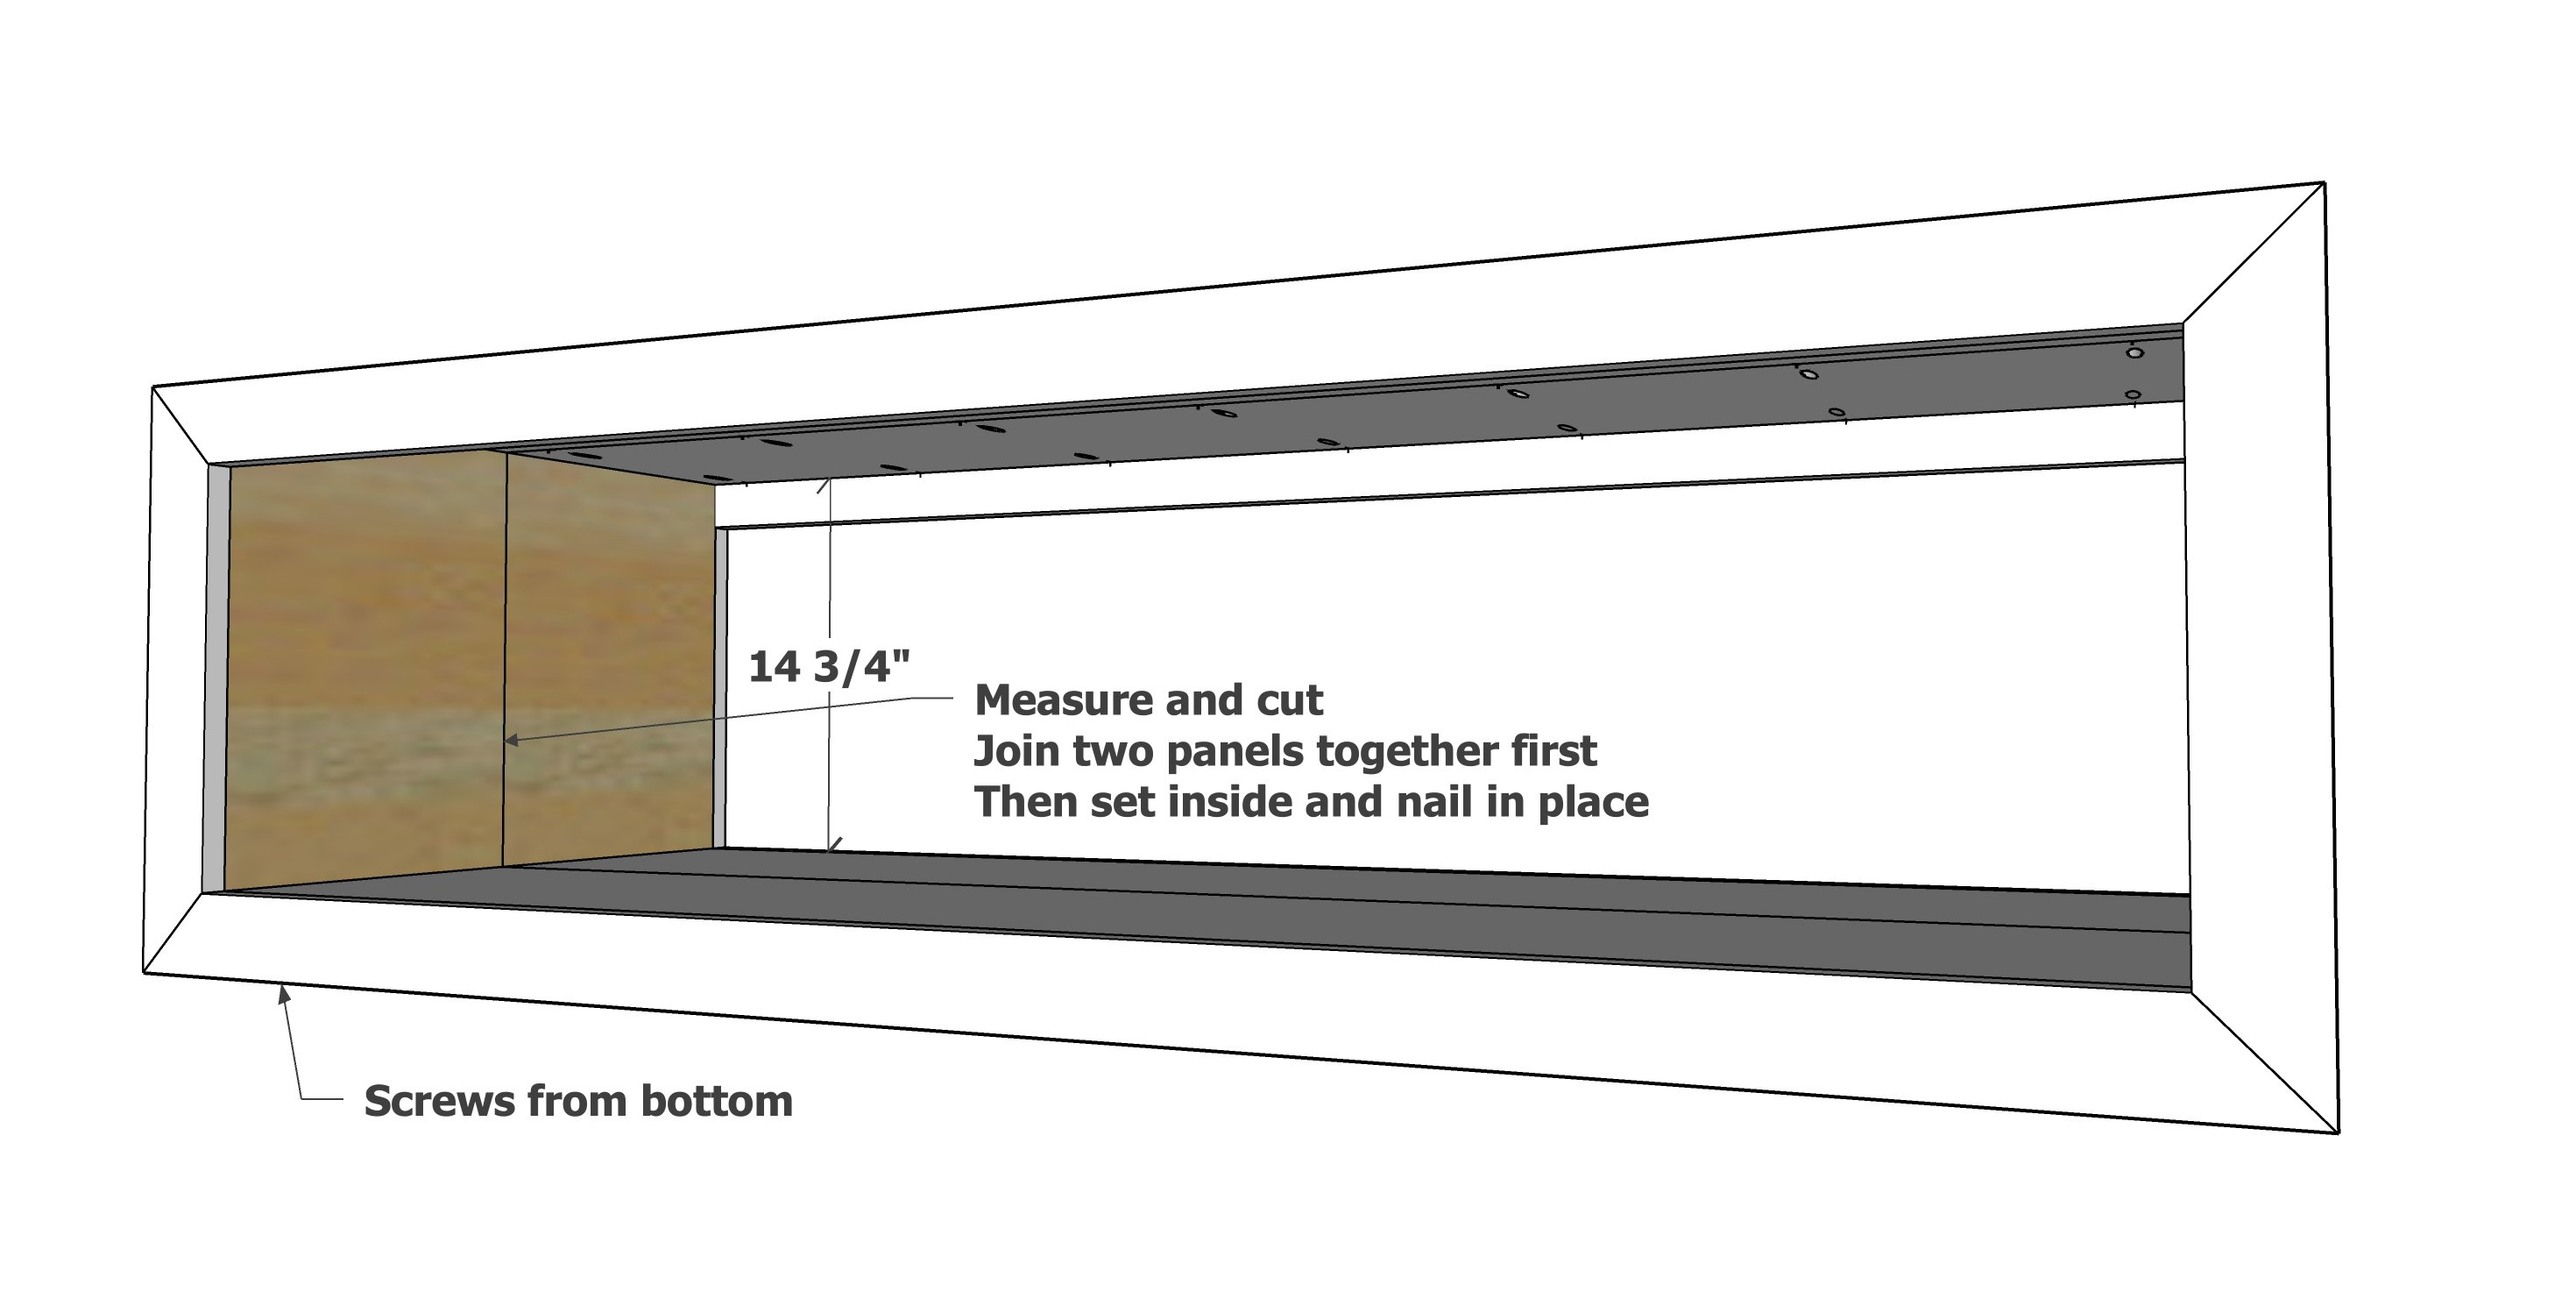
Measure and cut the inside panels.
Attach together at the center with pocket holes.
Then place inside the face frame and nail to the coffee table.
I also added screws from the bottom.
Step 7

Since the coffee table shelf and top have a wide span, 1x2s underneath can help.
But do make sure your 1x12s are fully acclimated to your moisture in your home (may be drier) before measuring and cutting these boards.
Measure and cut to fit the inside width.
Drill a pocket hole on each end, and three along the length.
Attach, about 20" from the sides, on both the top and bottom shelf, with 1-1/4" pocket hole screws.
Sand with 120 grit sandpaper in the direction of the wood grain.
I sanded with 220 grits sandpaper, very lightly.
I then vacuumed off any sanding residue, and wiped with a damp, lint free cloth.
Finally, I added a layer of poly to protect the finish and make it wipe clean.