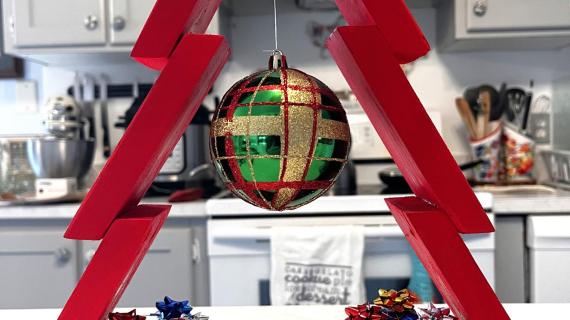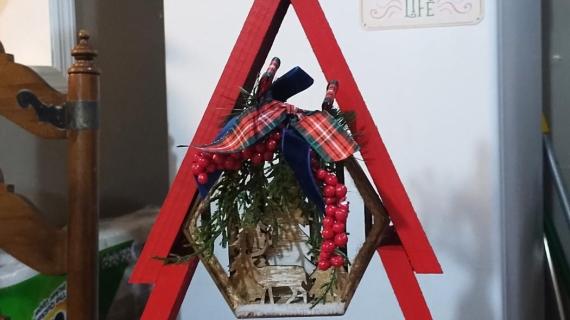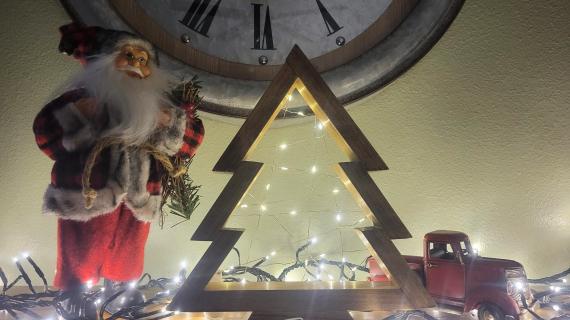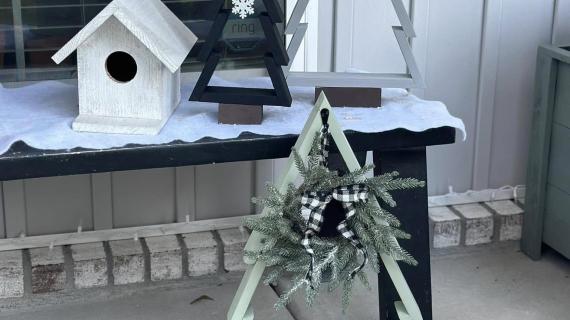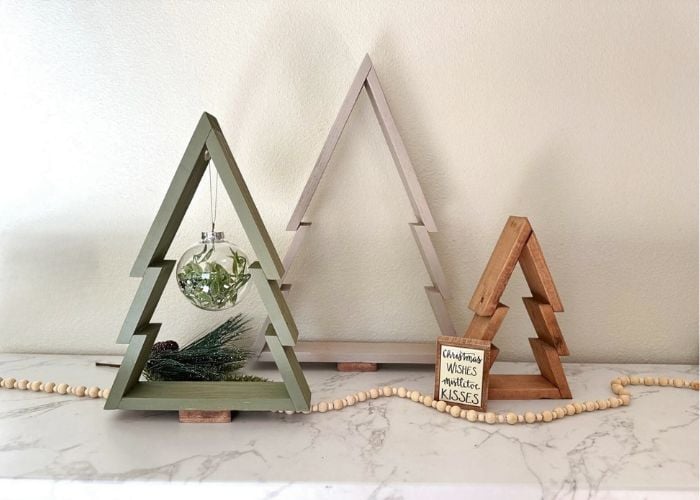

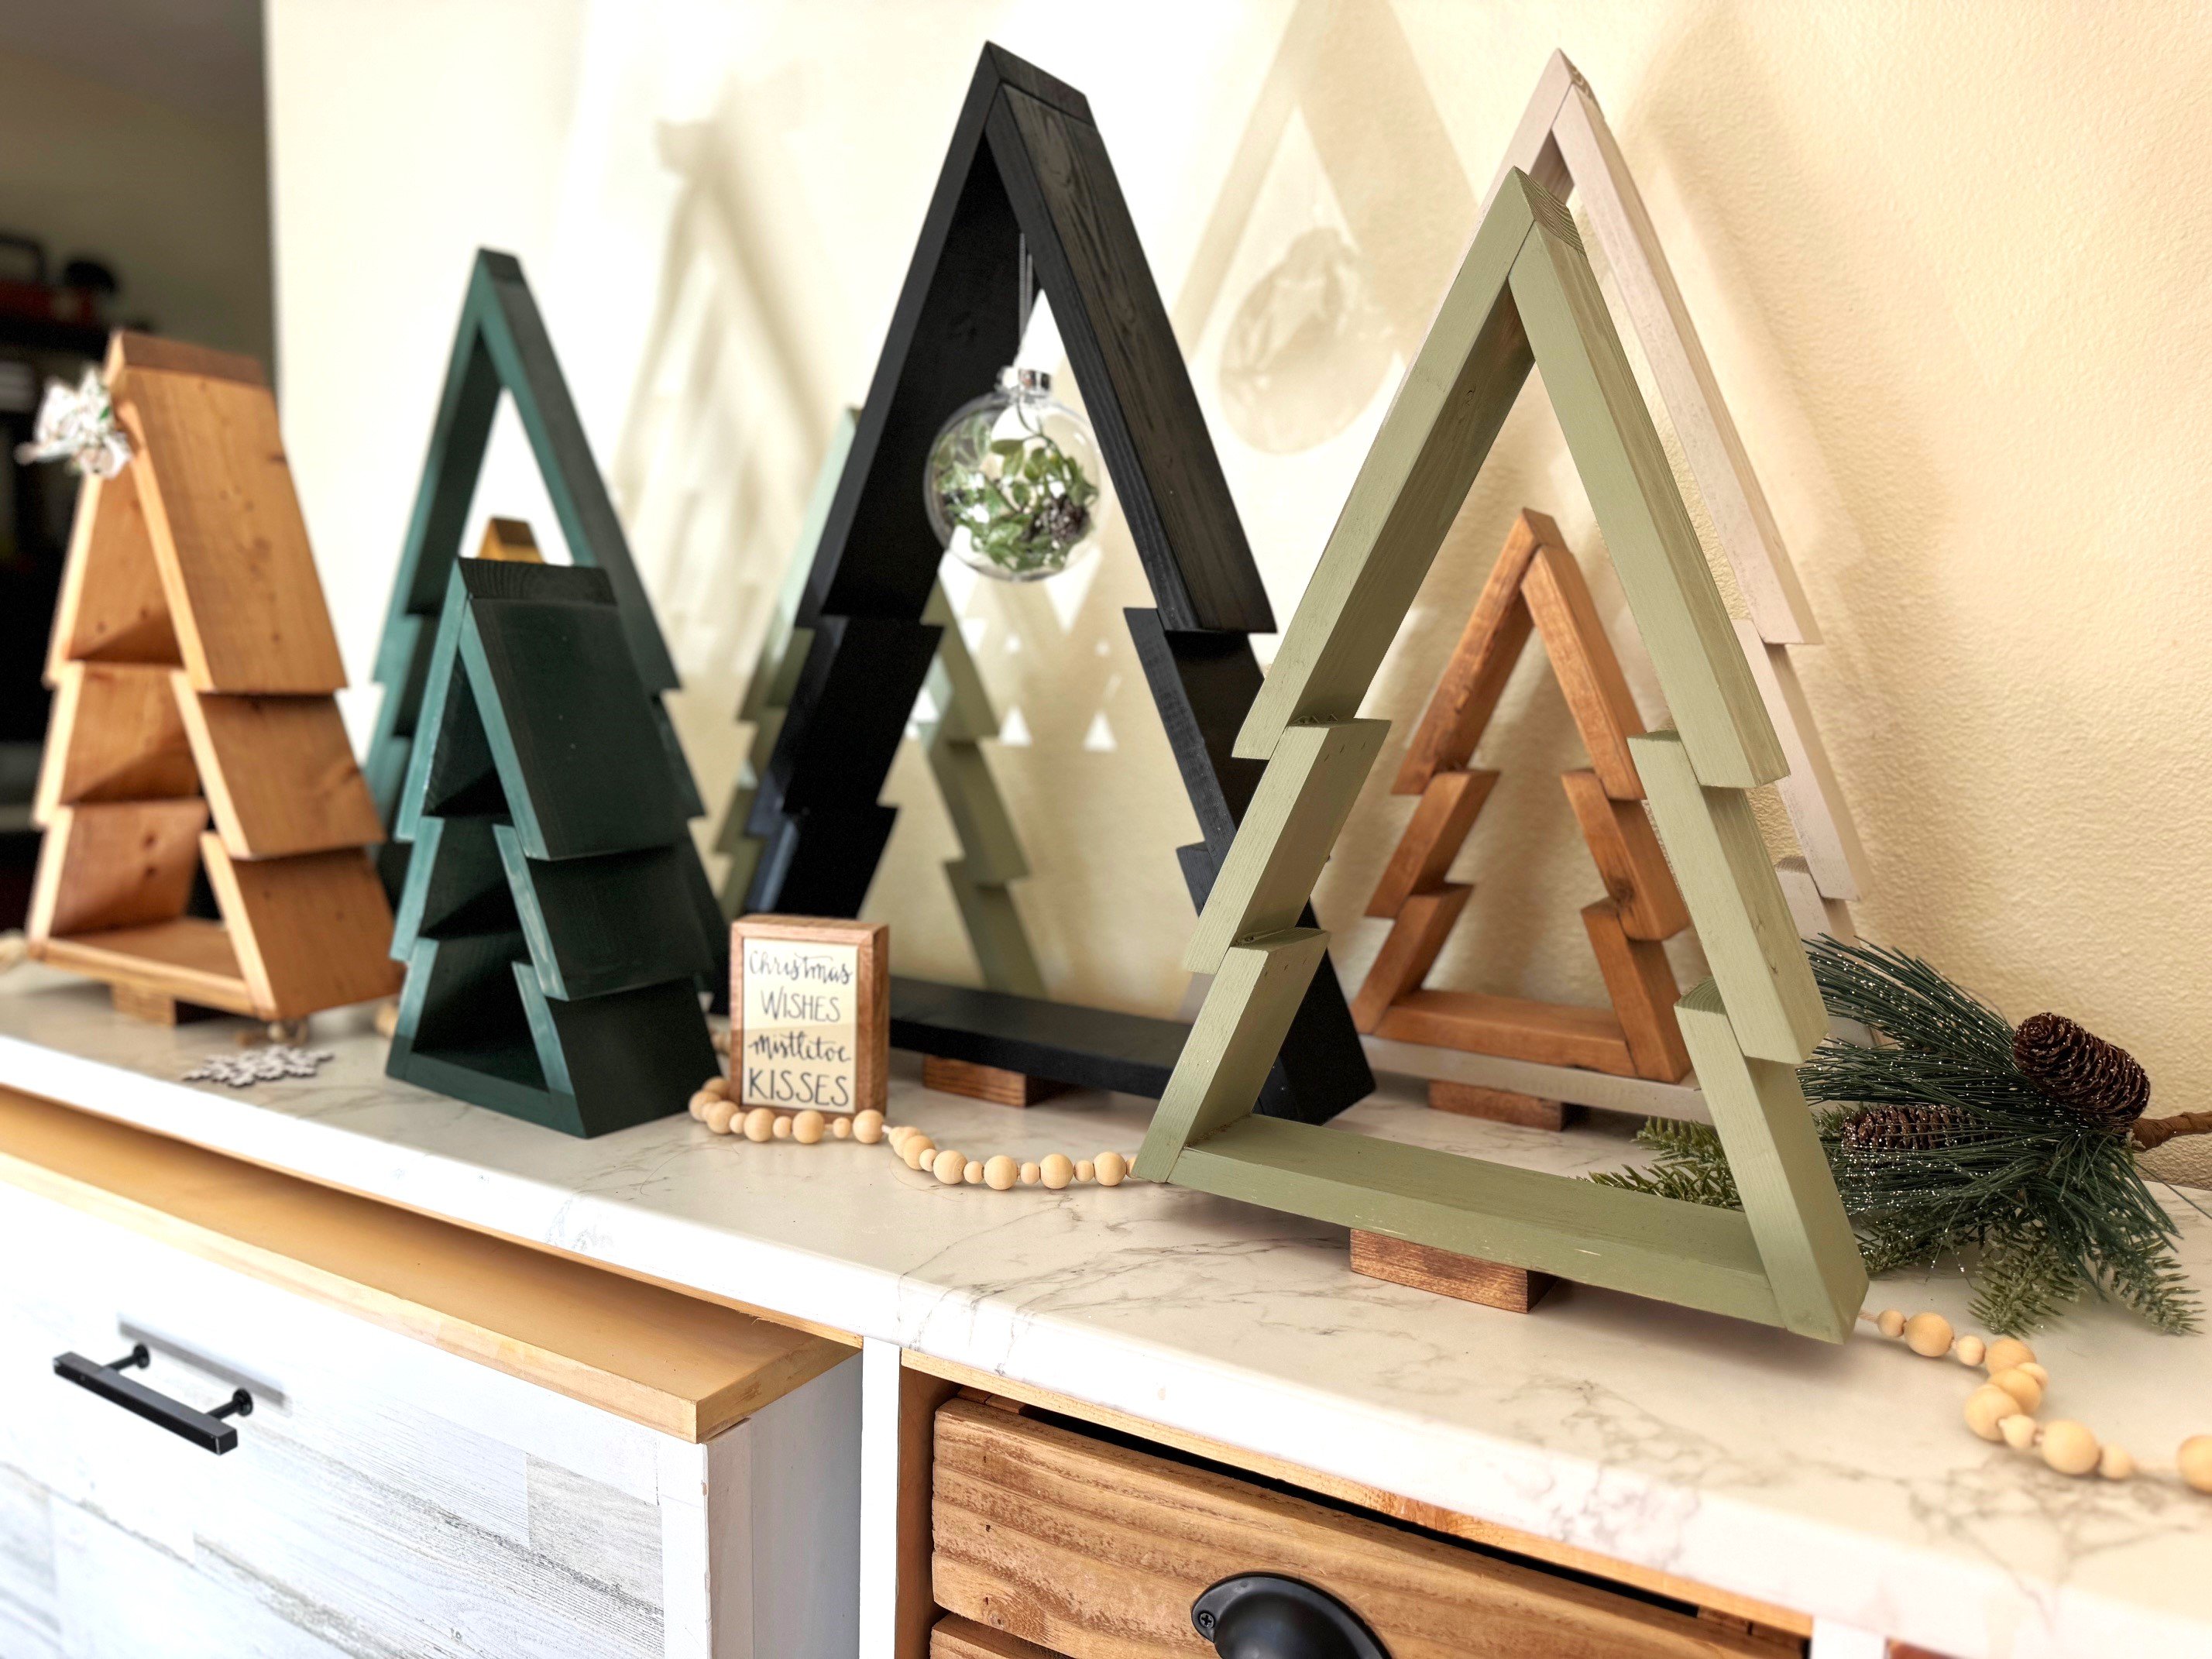
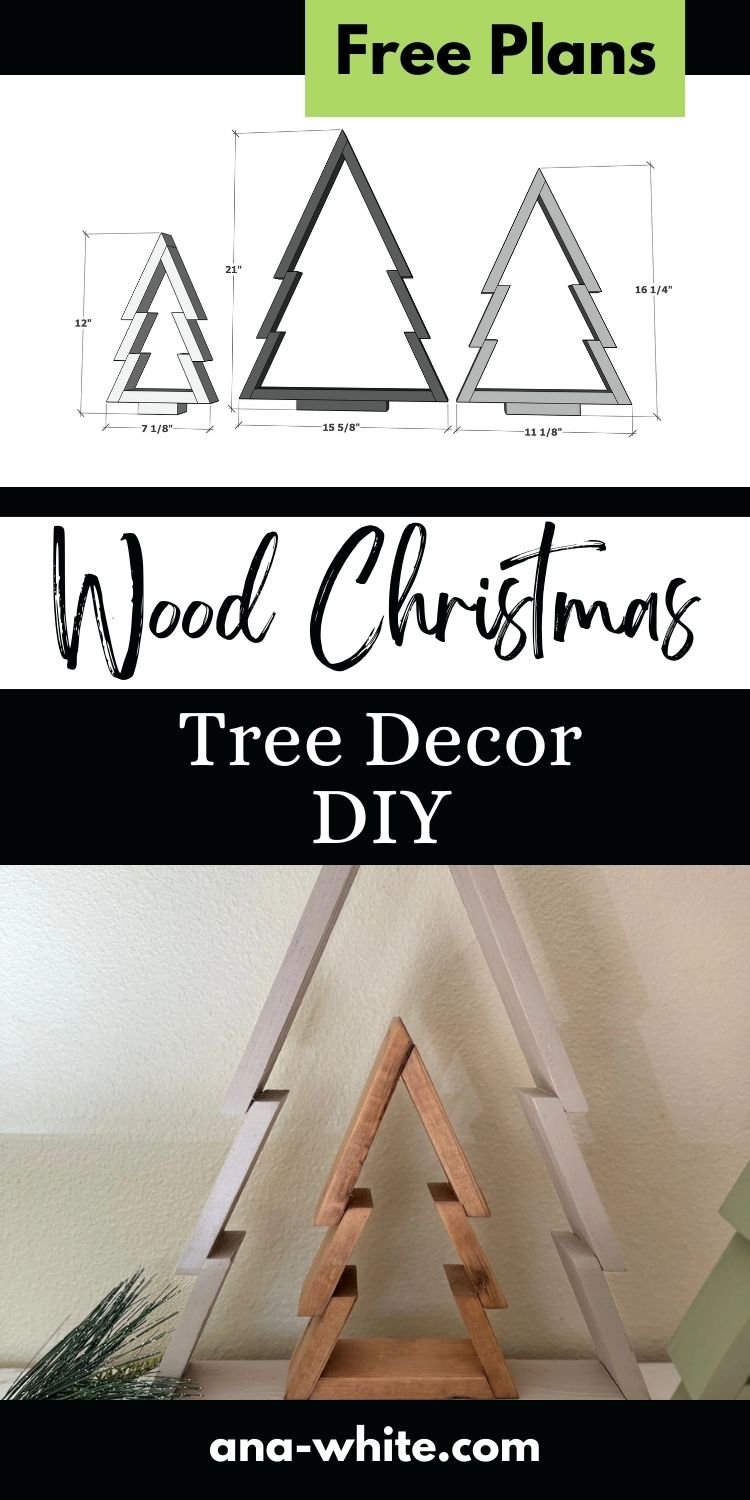
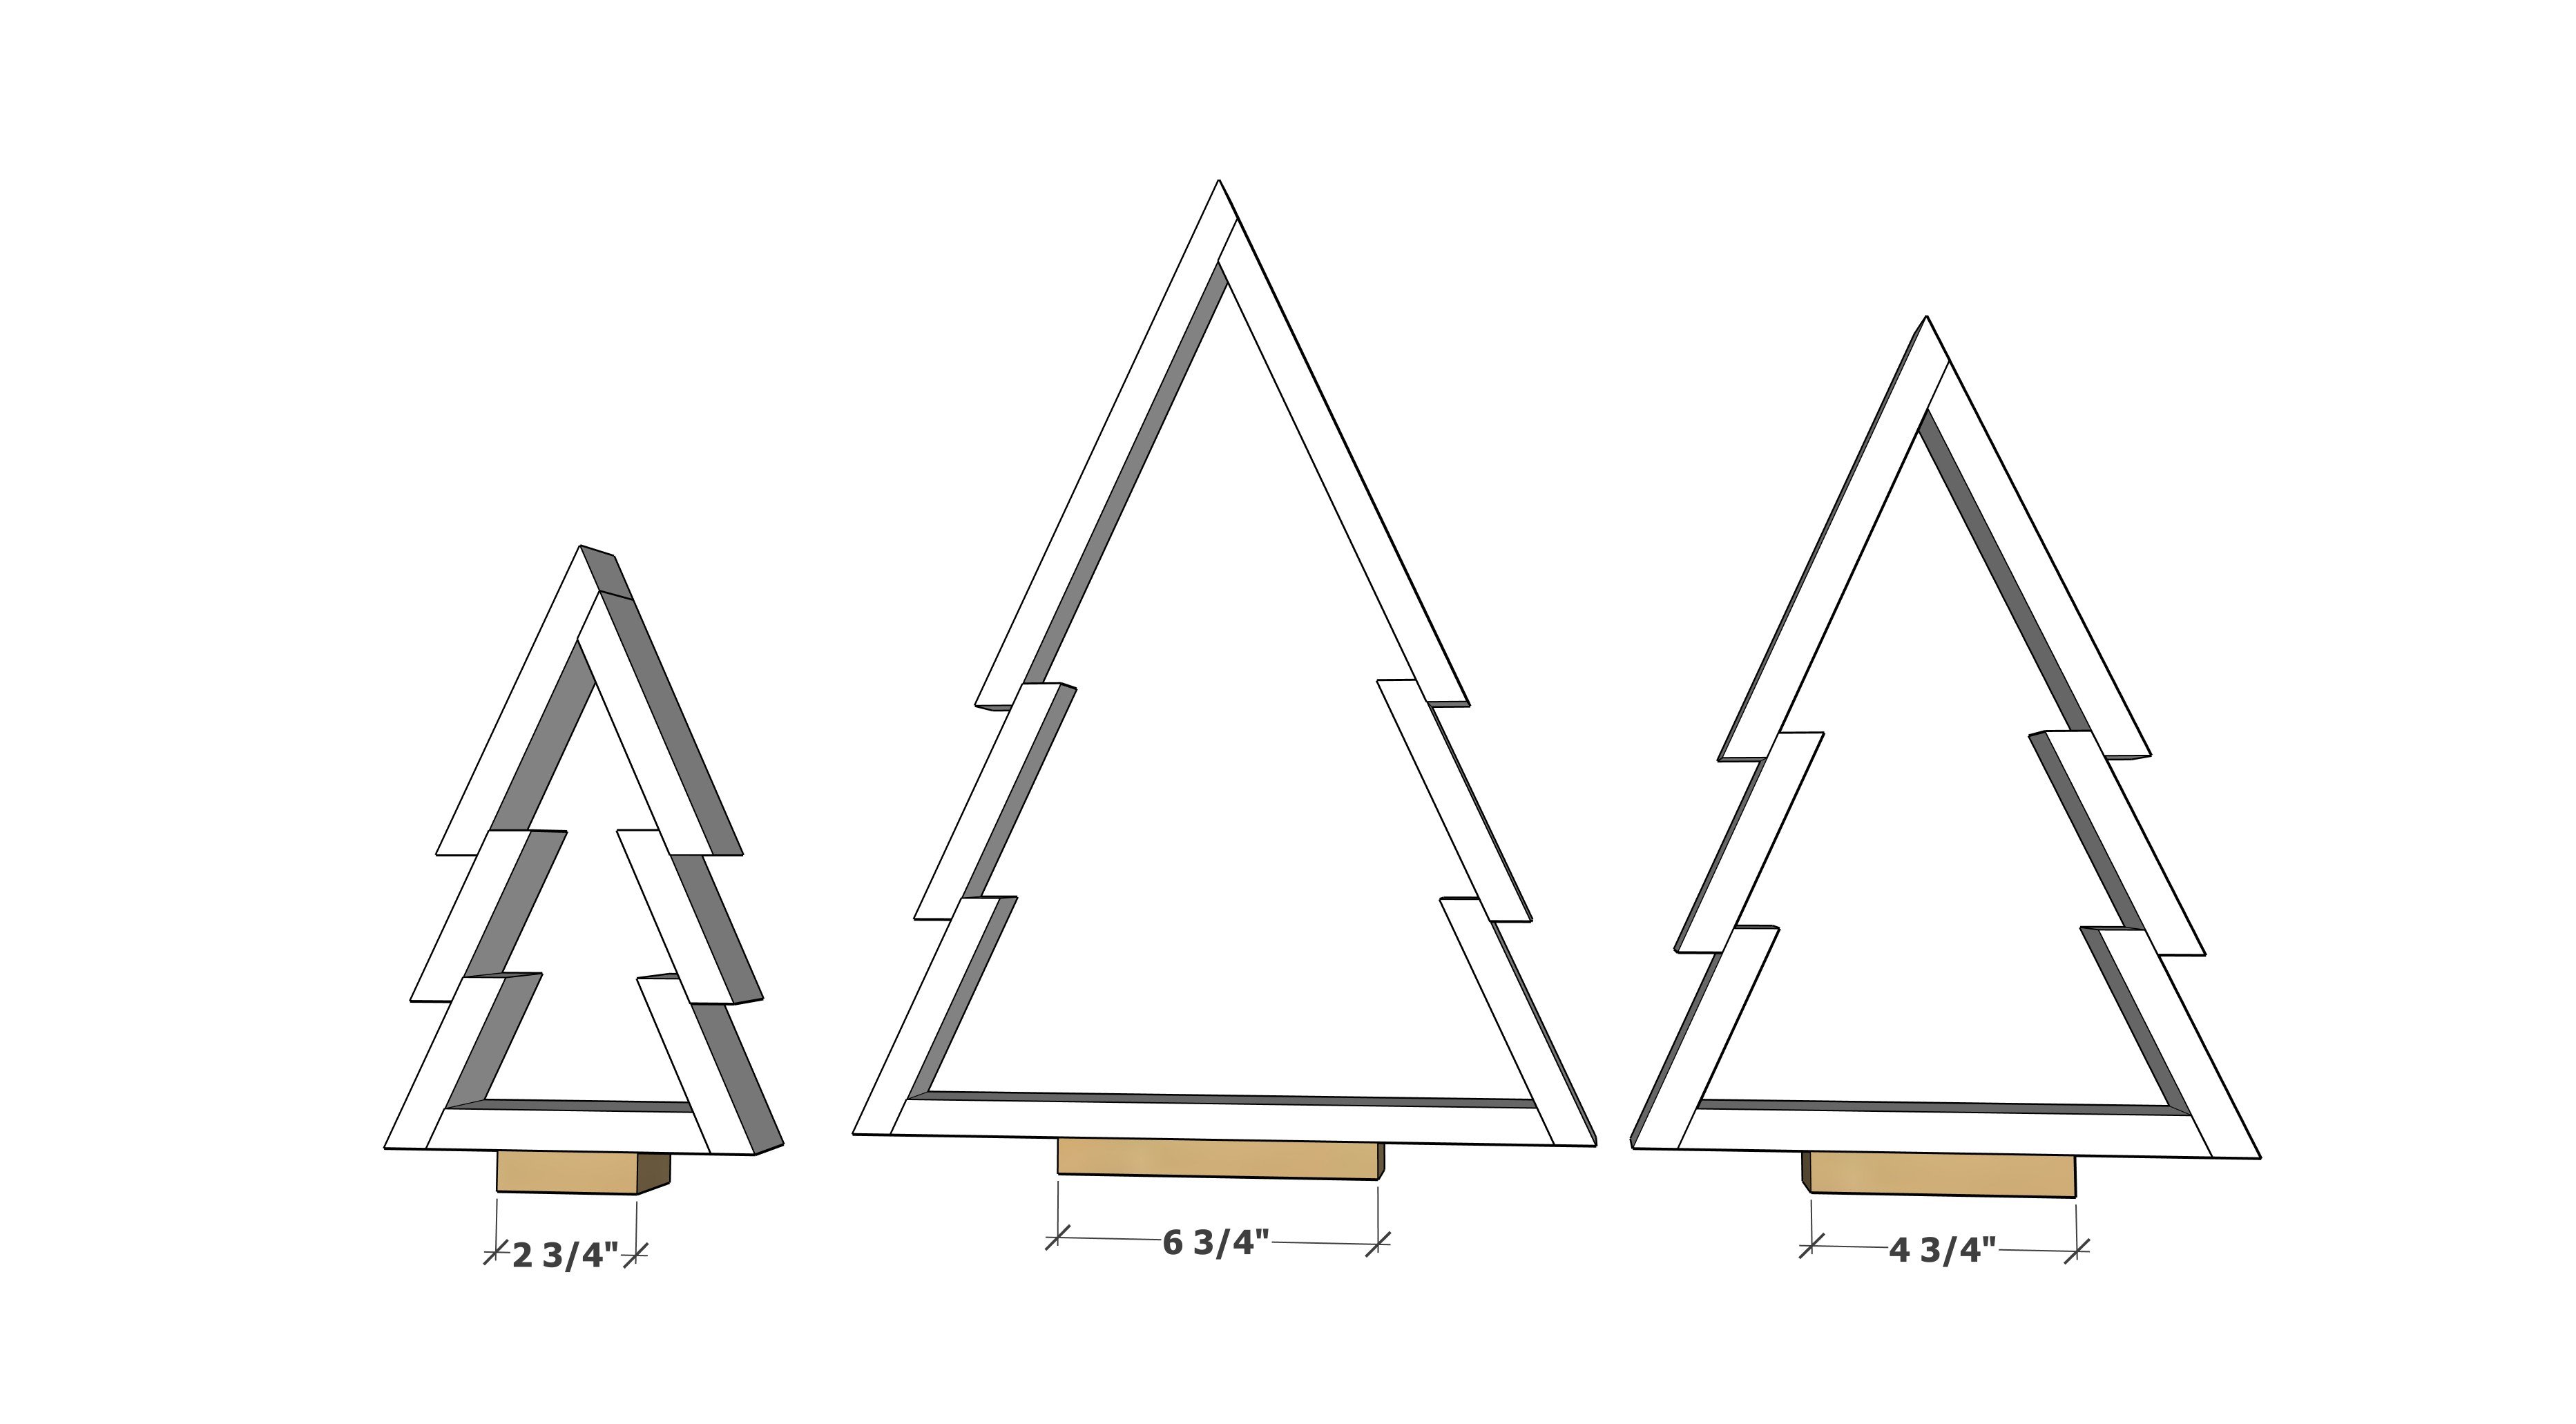
Build wooden Christmas tree decor using 1x material. This plan is available in 3 sizes. Build each tree for about $2 in materials!
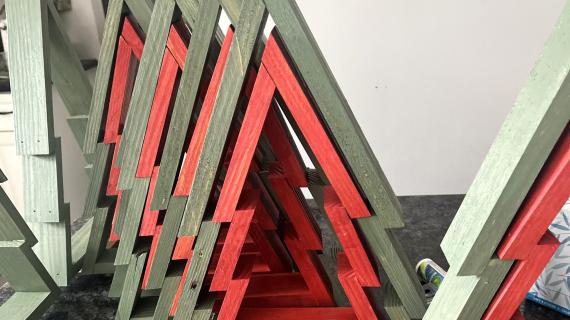
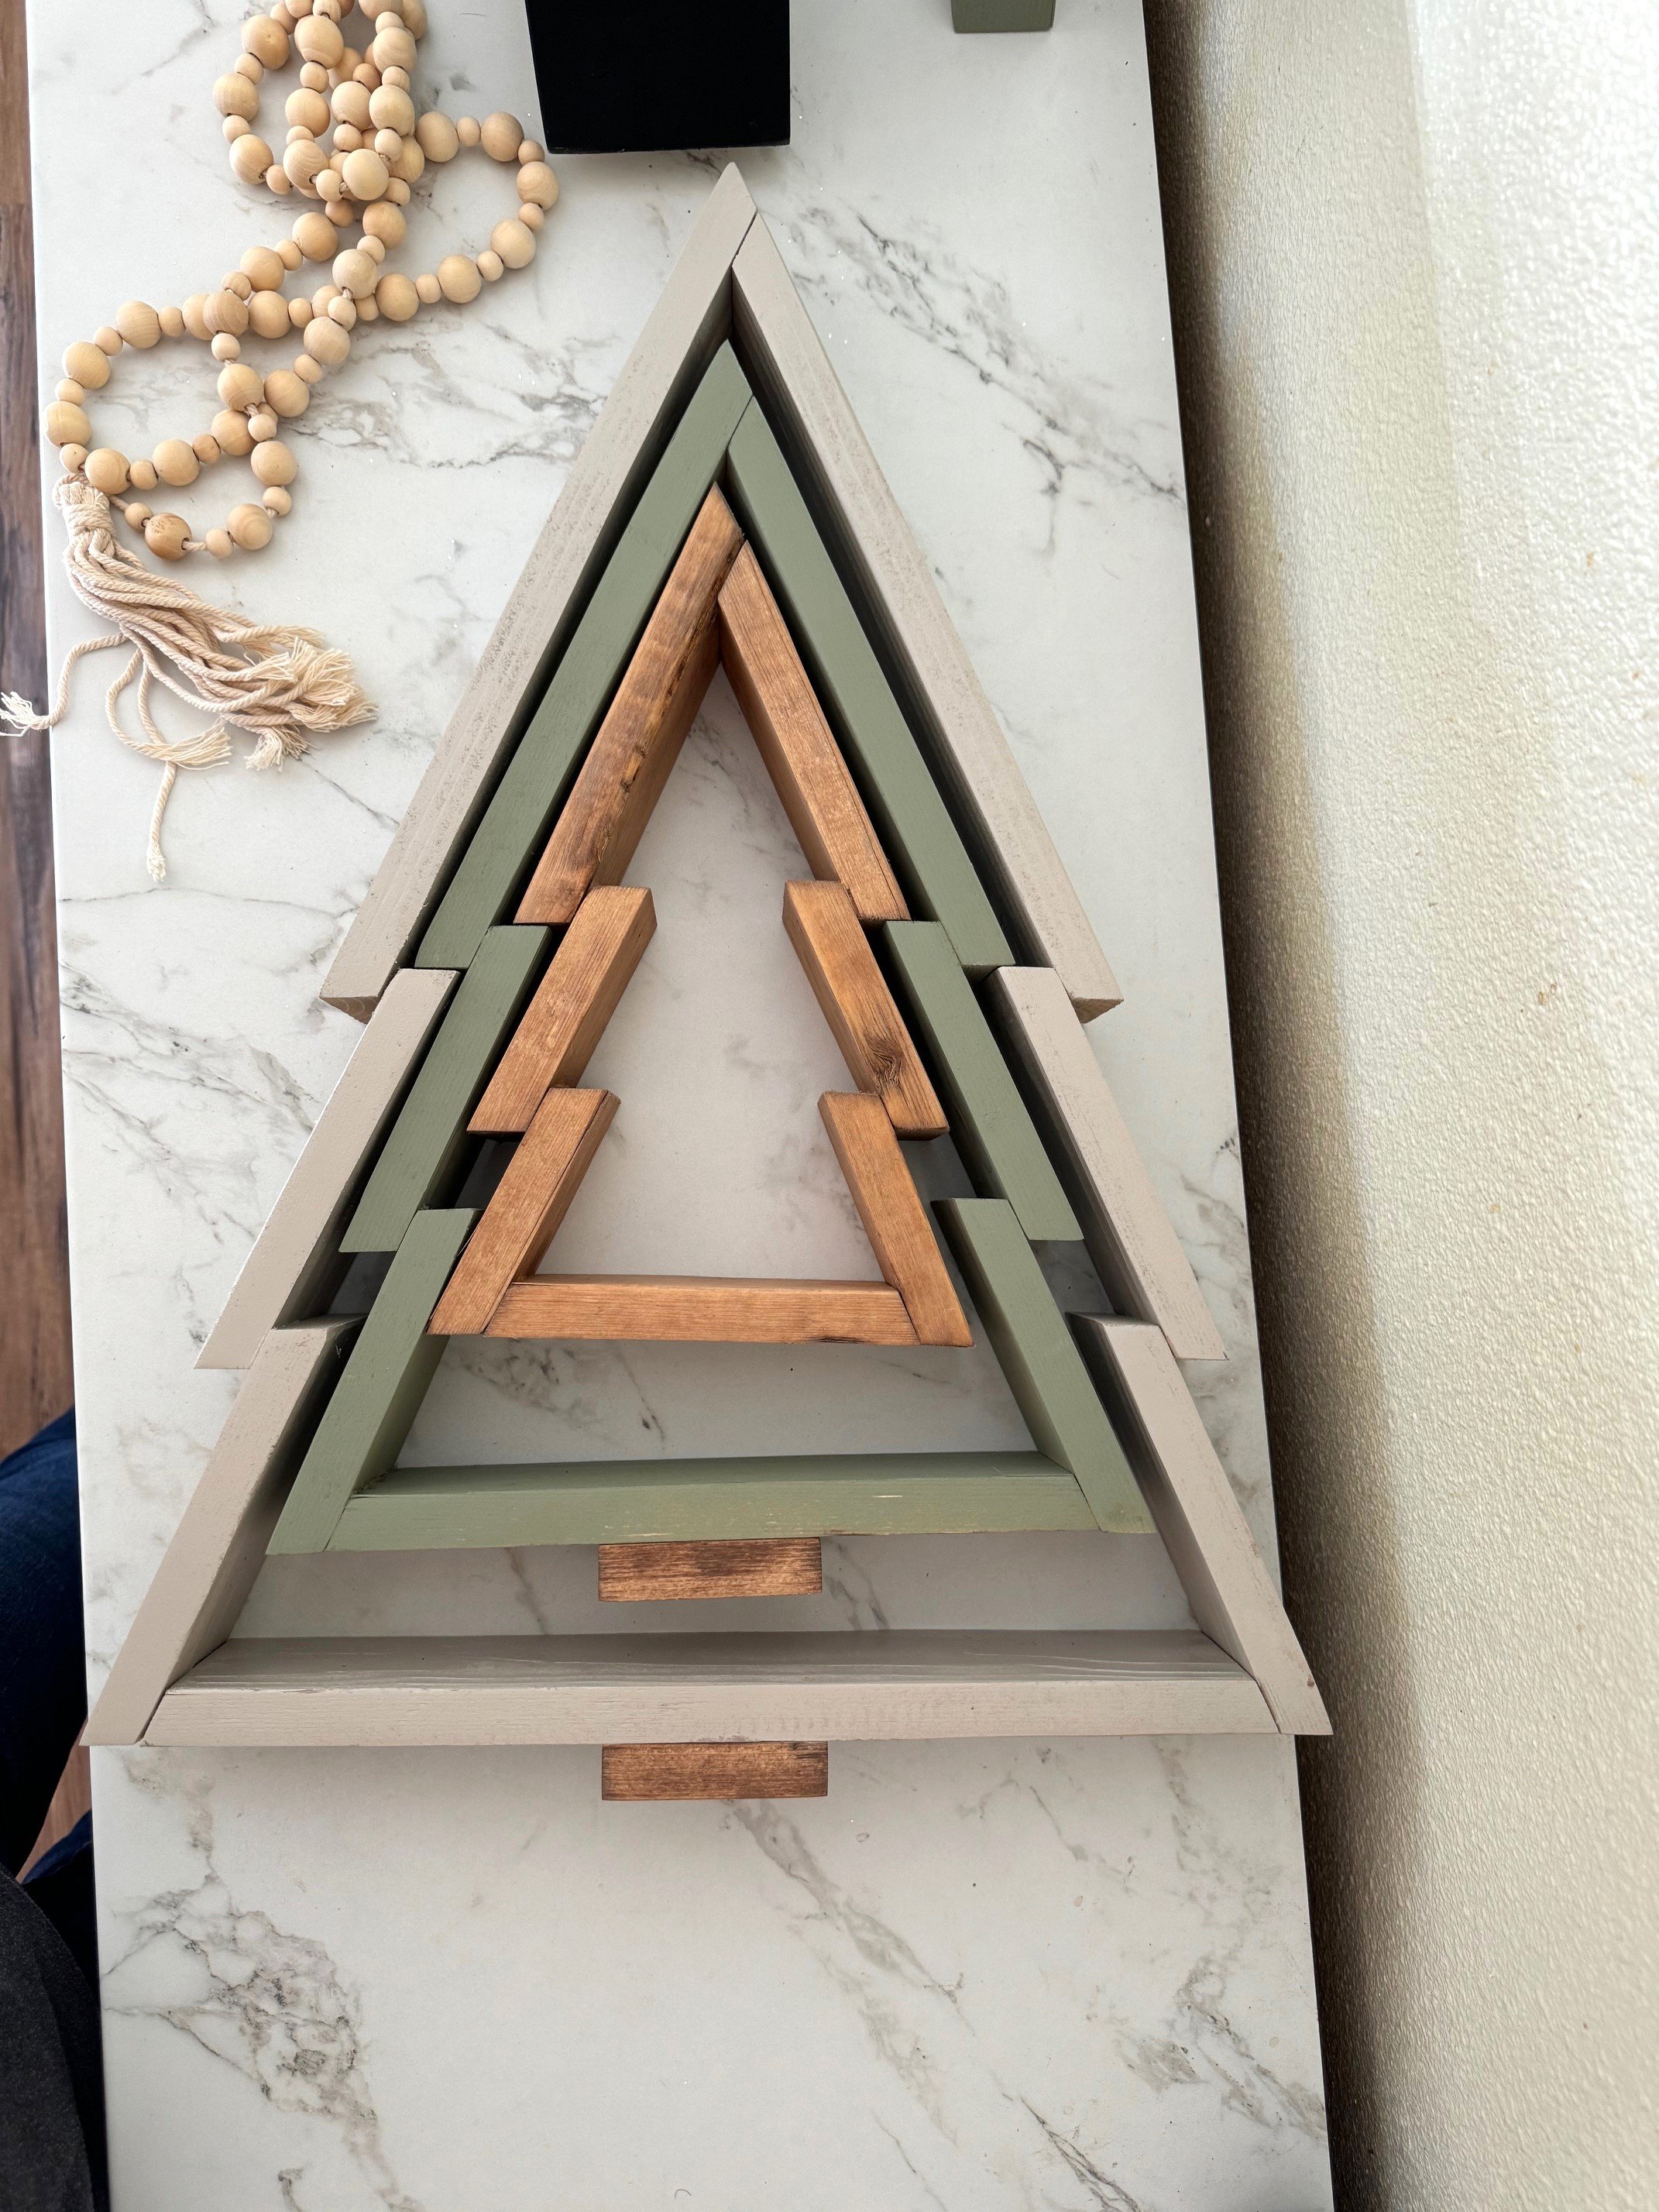
This design also allows you to stack and store away! Time to get festive with free plans by ana-white.com
Why I Built these Amazing Wooden Christmas Trees!
I love building holiday decor to make my home more festive. These Christmas trees are so fun and easy to build and add that fun holiday element for my home during the holidays!

Why We Love this Wooden Christmas Tree Decor DIY
- Easy to store away between holiday seasons
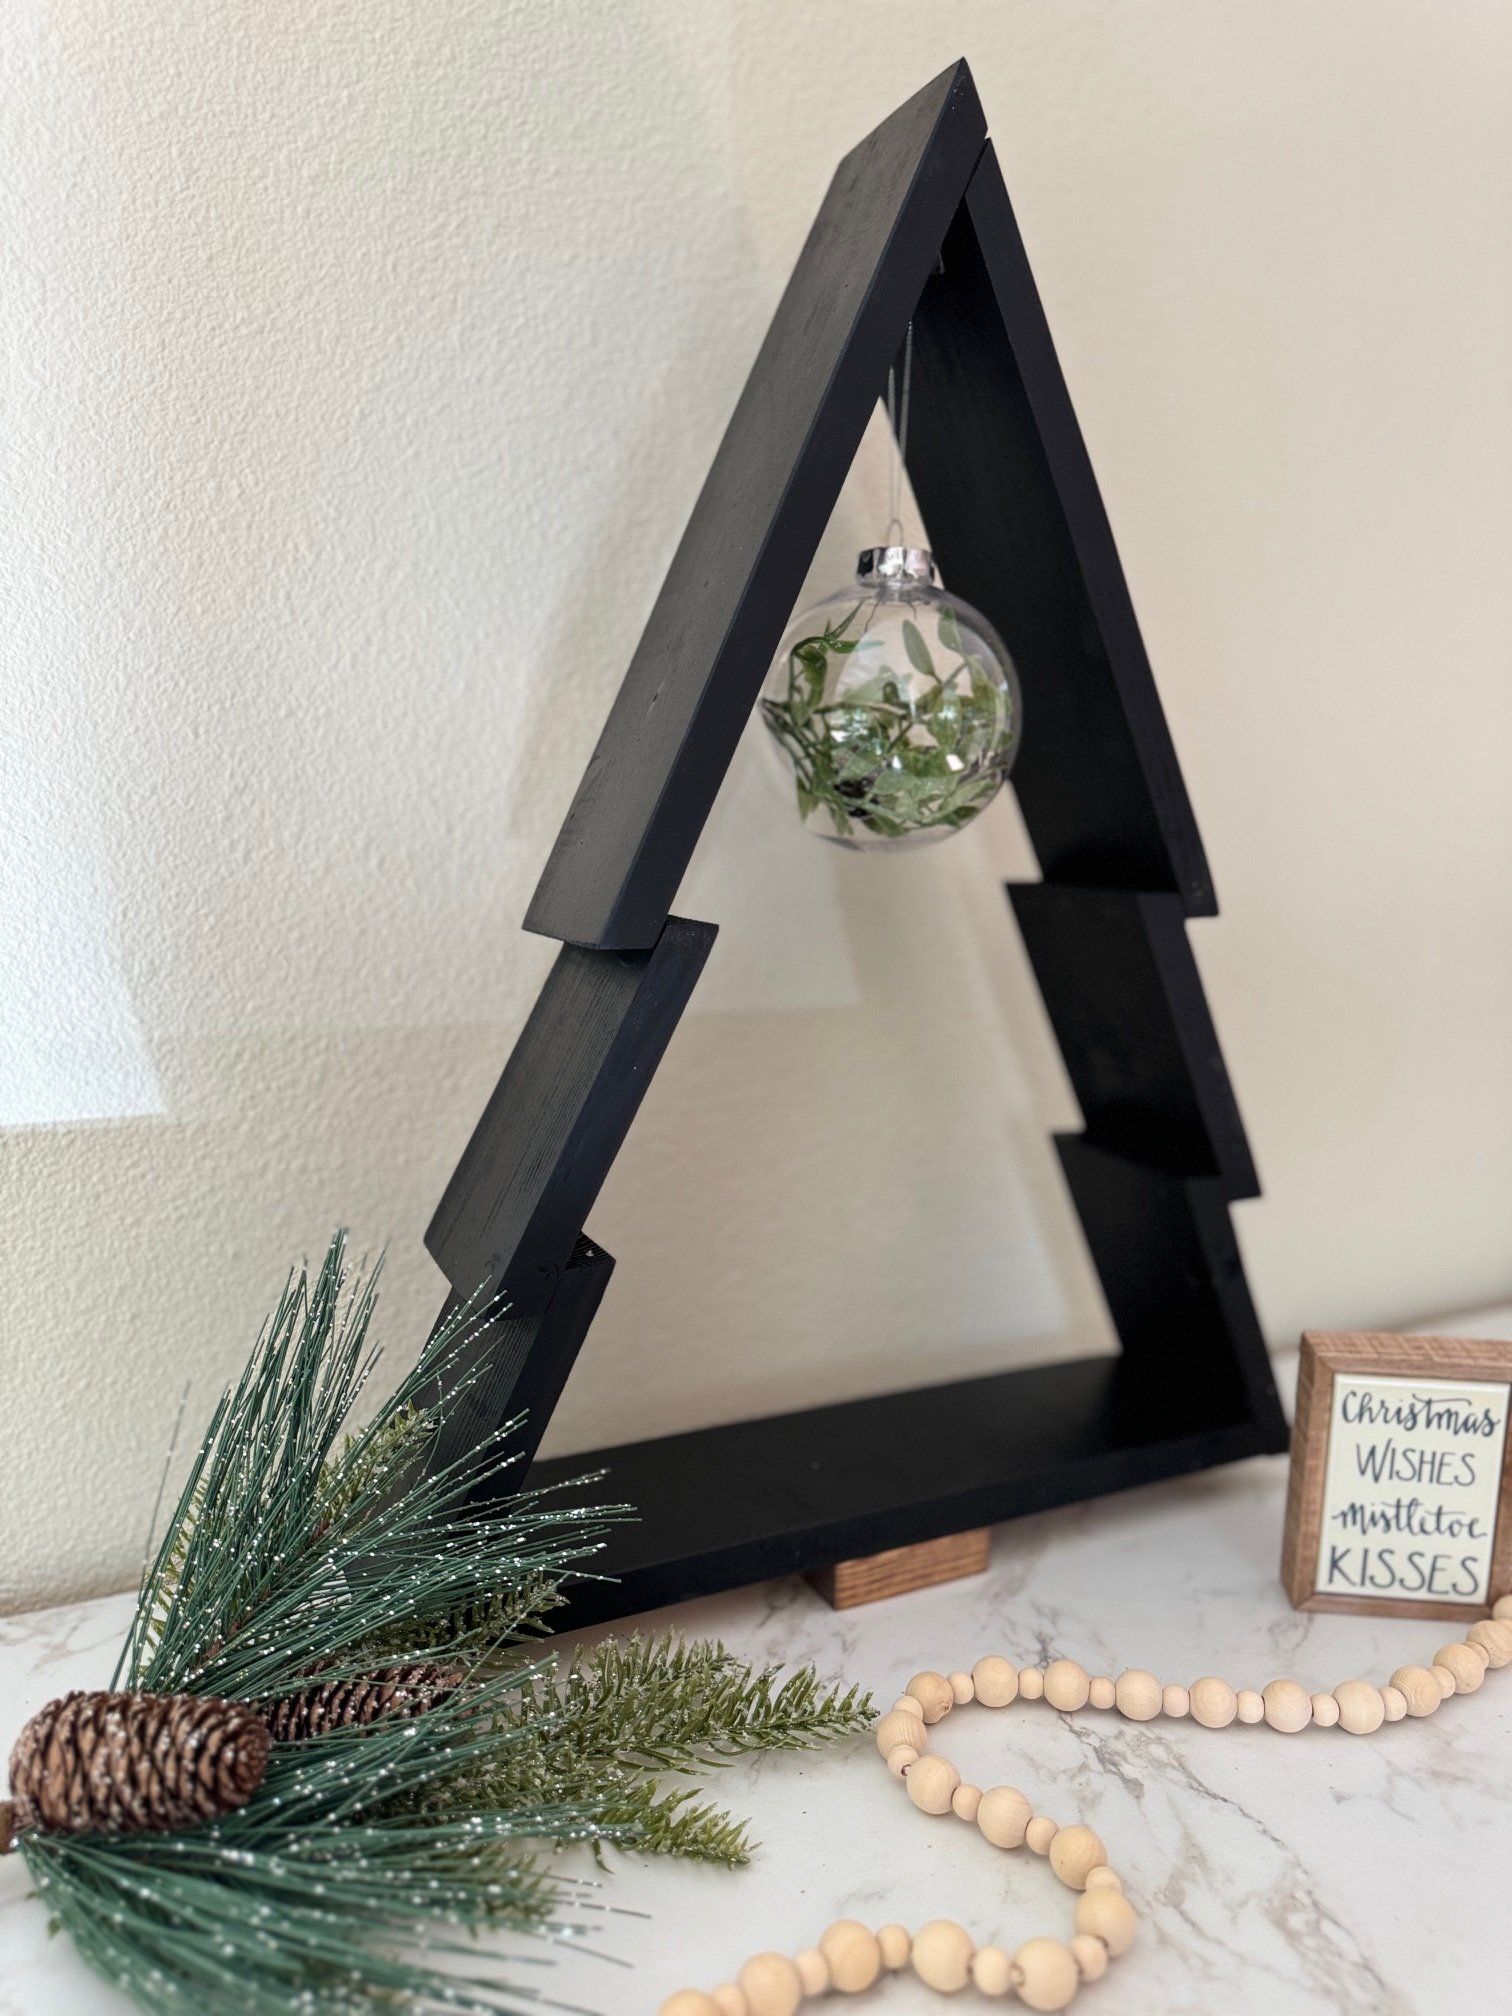
- Get the custom finish desired
- Inexpensive, quick and easy to build
- Great plan to build for friends, family or craft fair
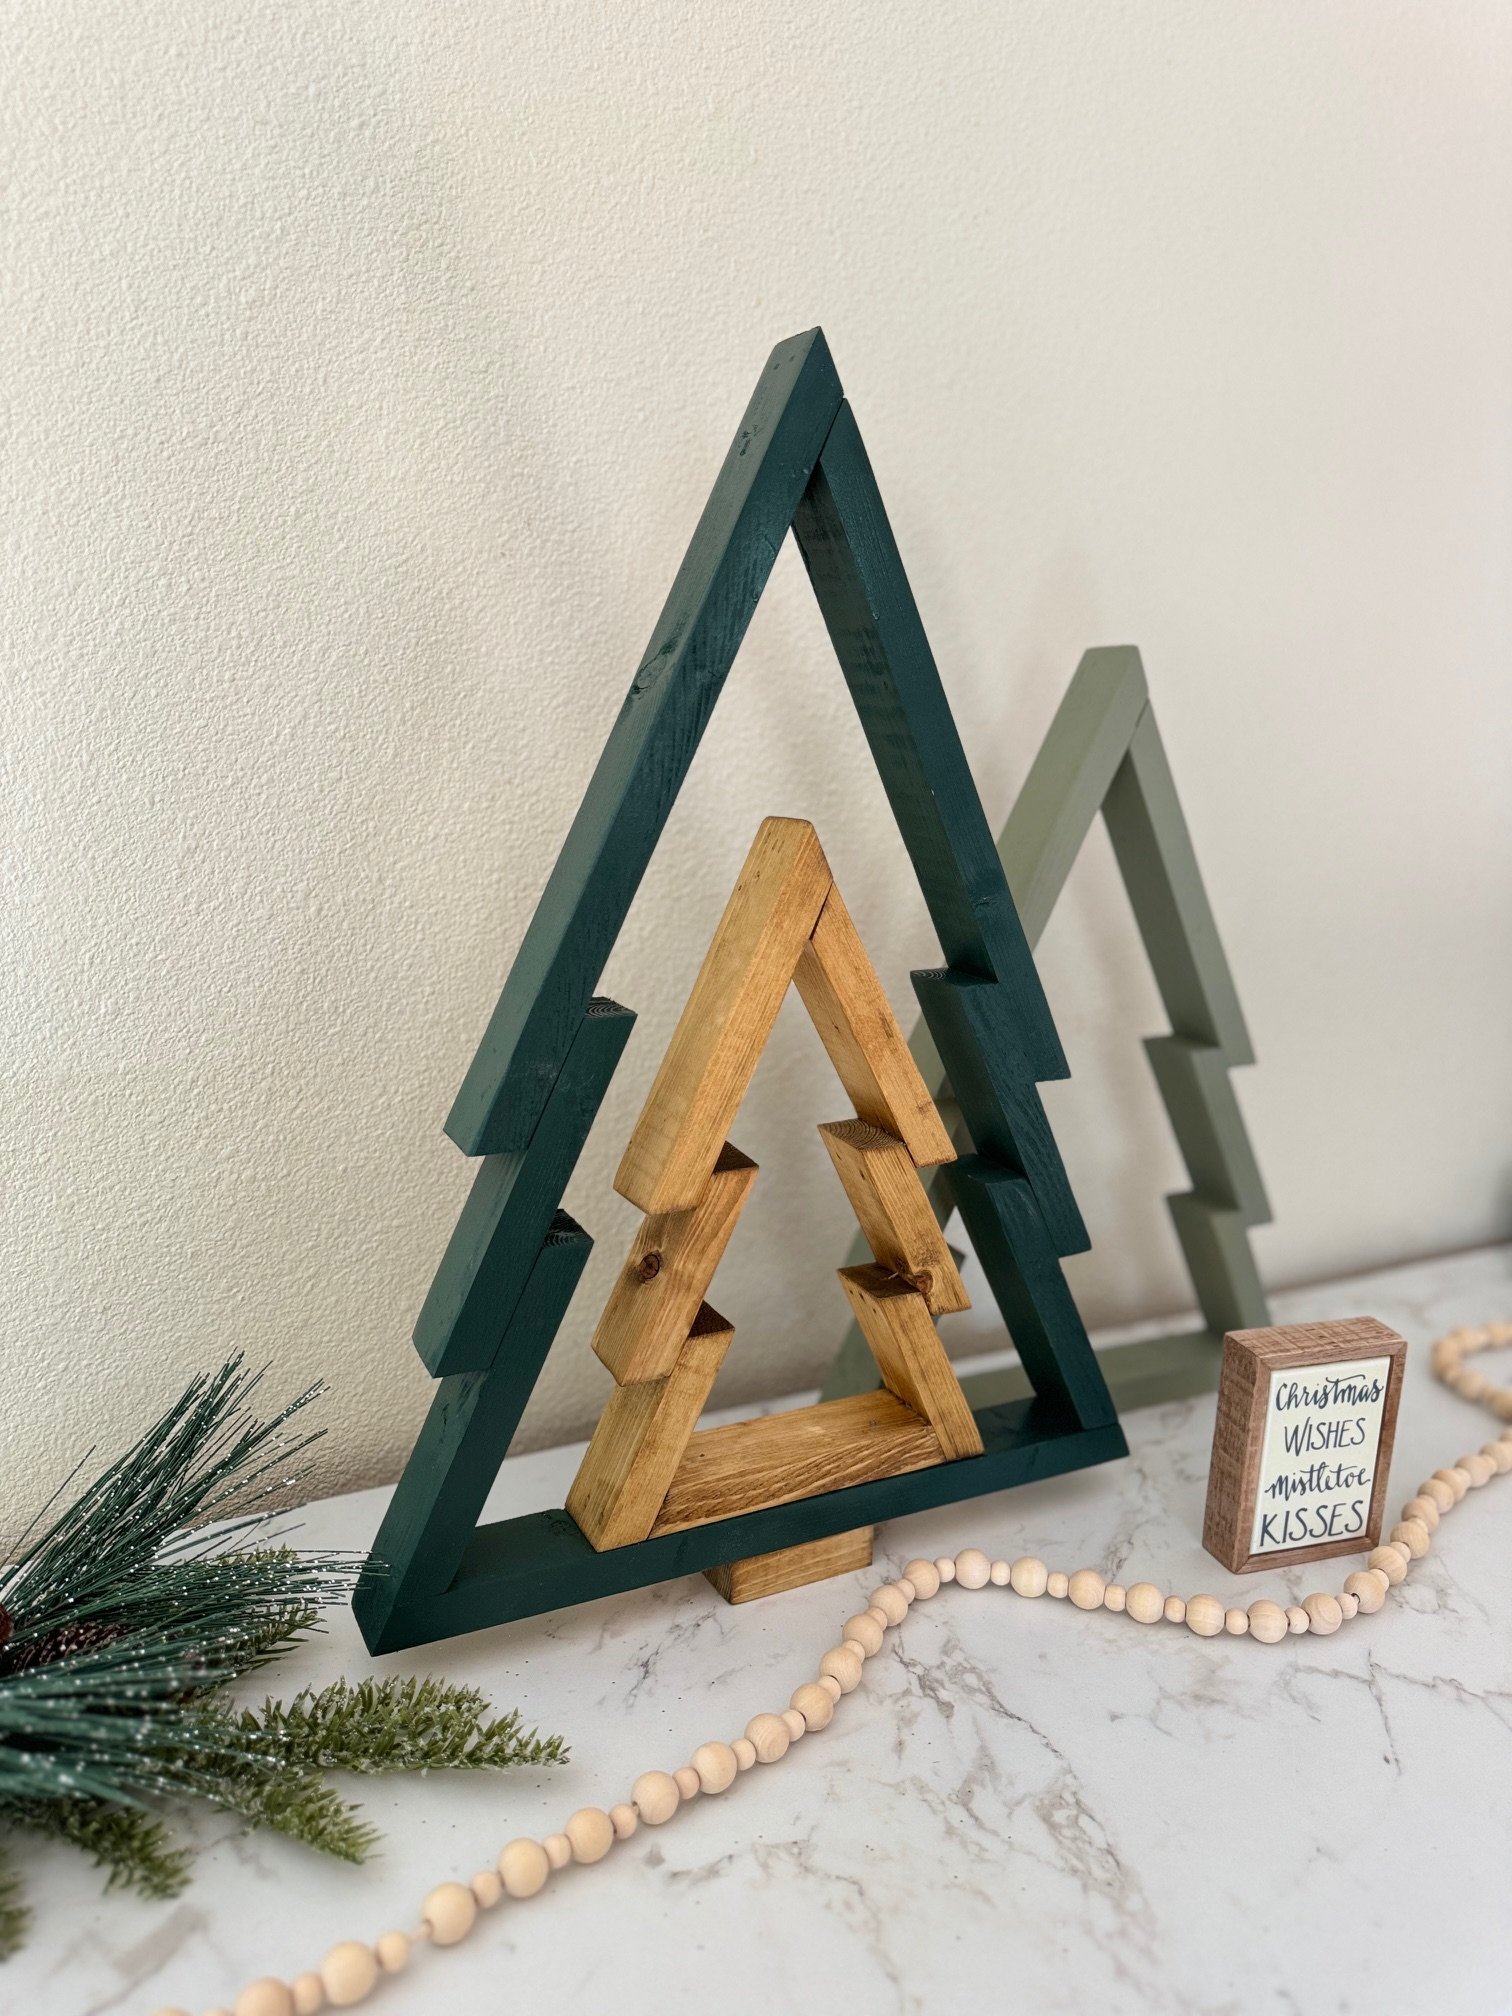
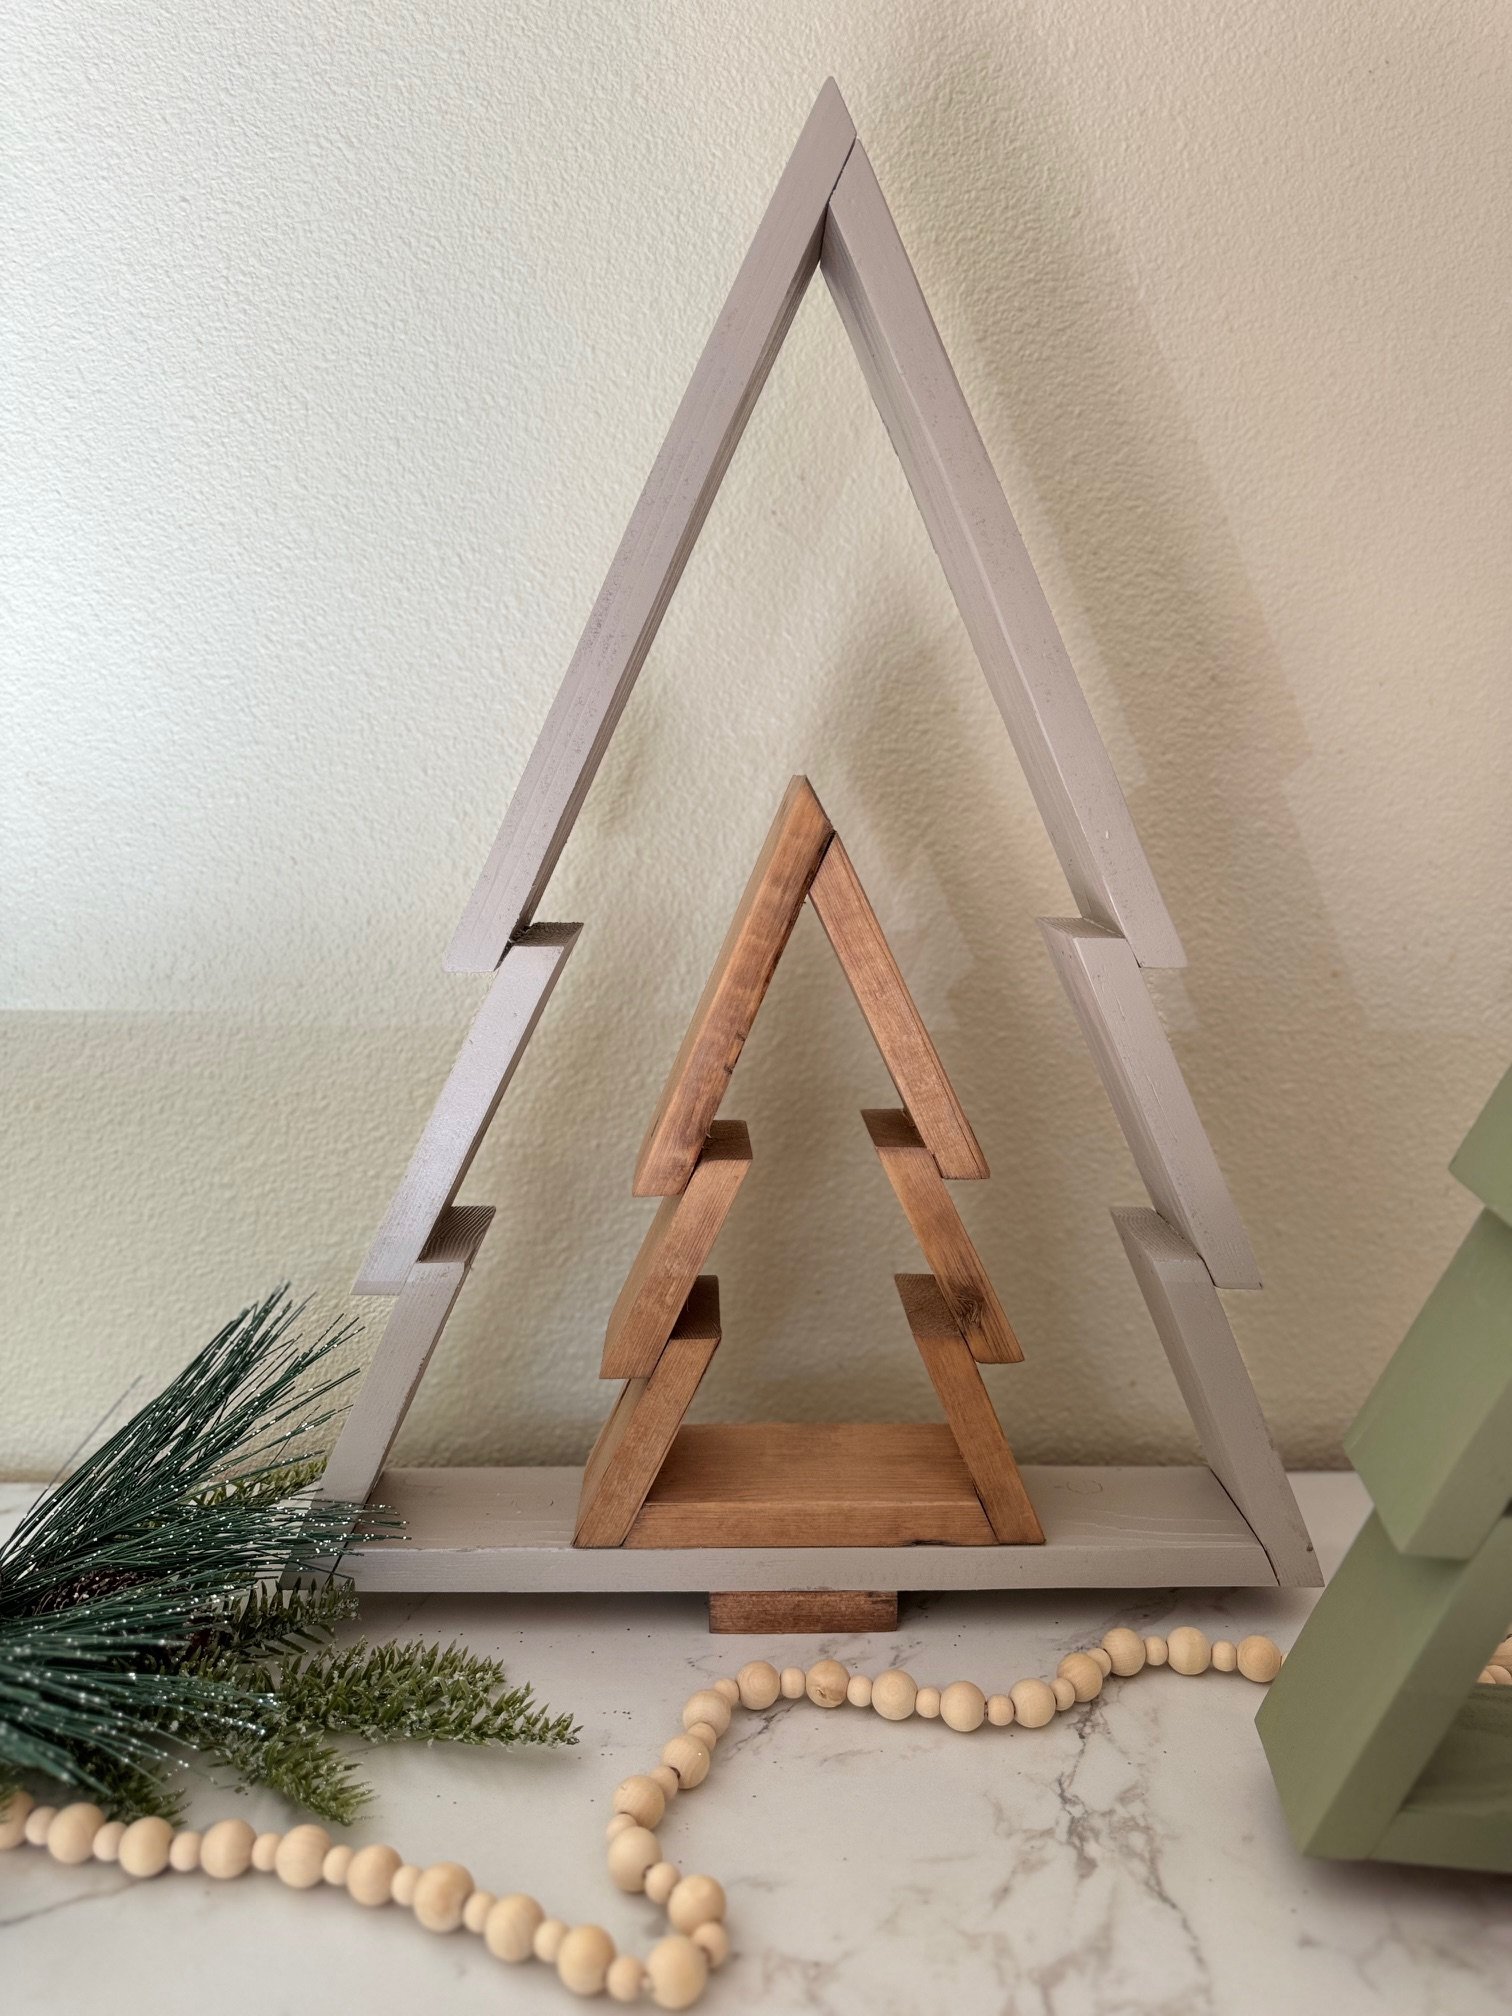
- Multiple sizes to create a "forest"
- Easy to add decor items to dress up
- Built using minimal tools
How I Built these DIY Wooden Christmas Trees
Here is a quick video tutorial of how I built these wooden Christmas tree decorations -
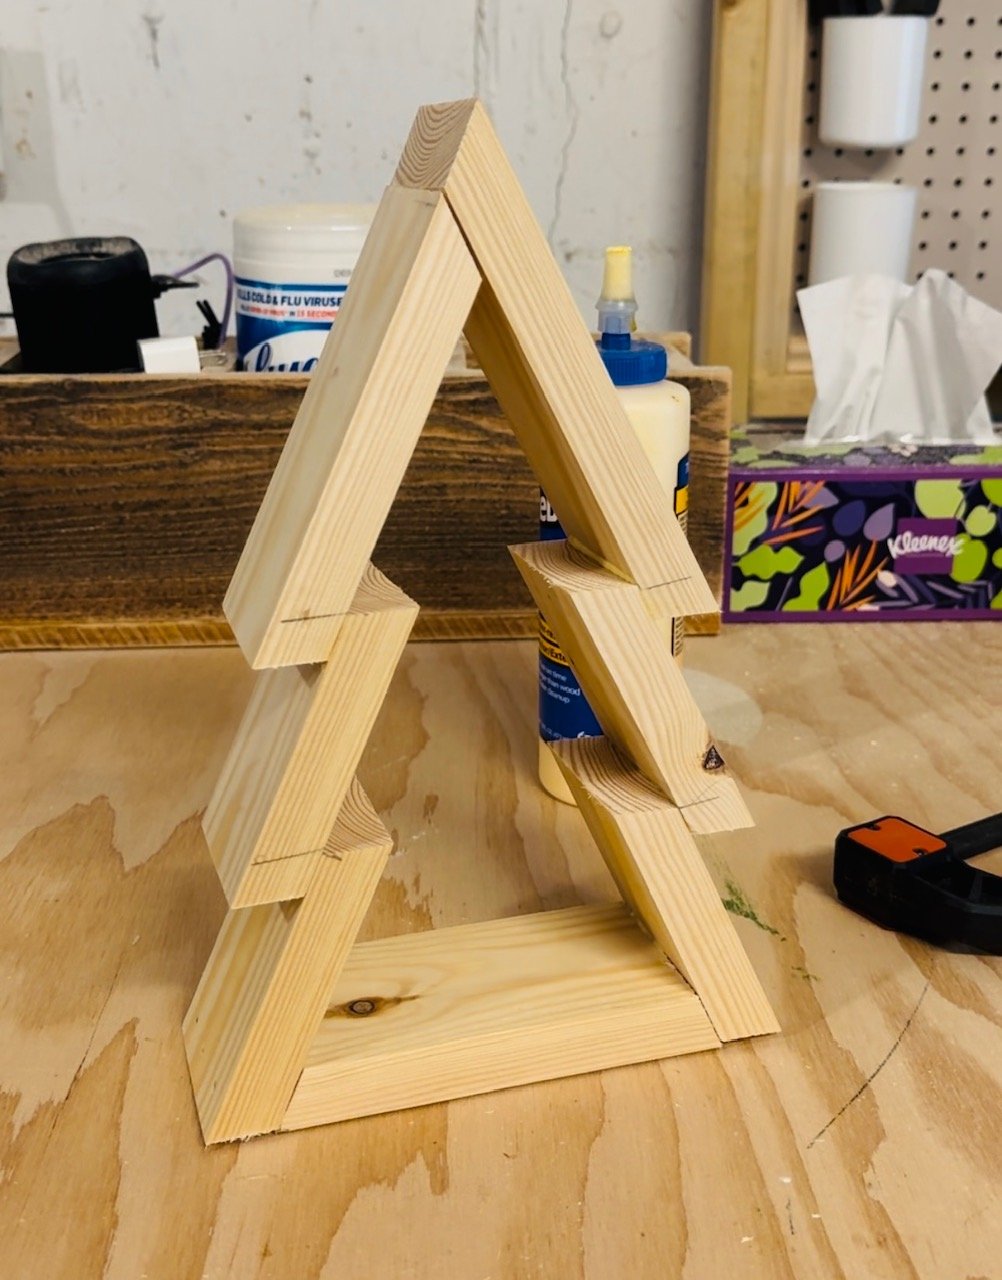
I cut all of my pieces according to the cut list and then sanded each piece before assembly.
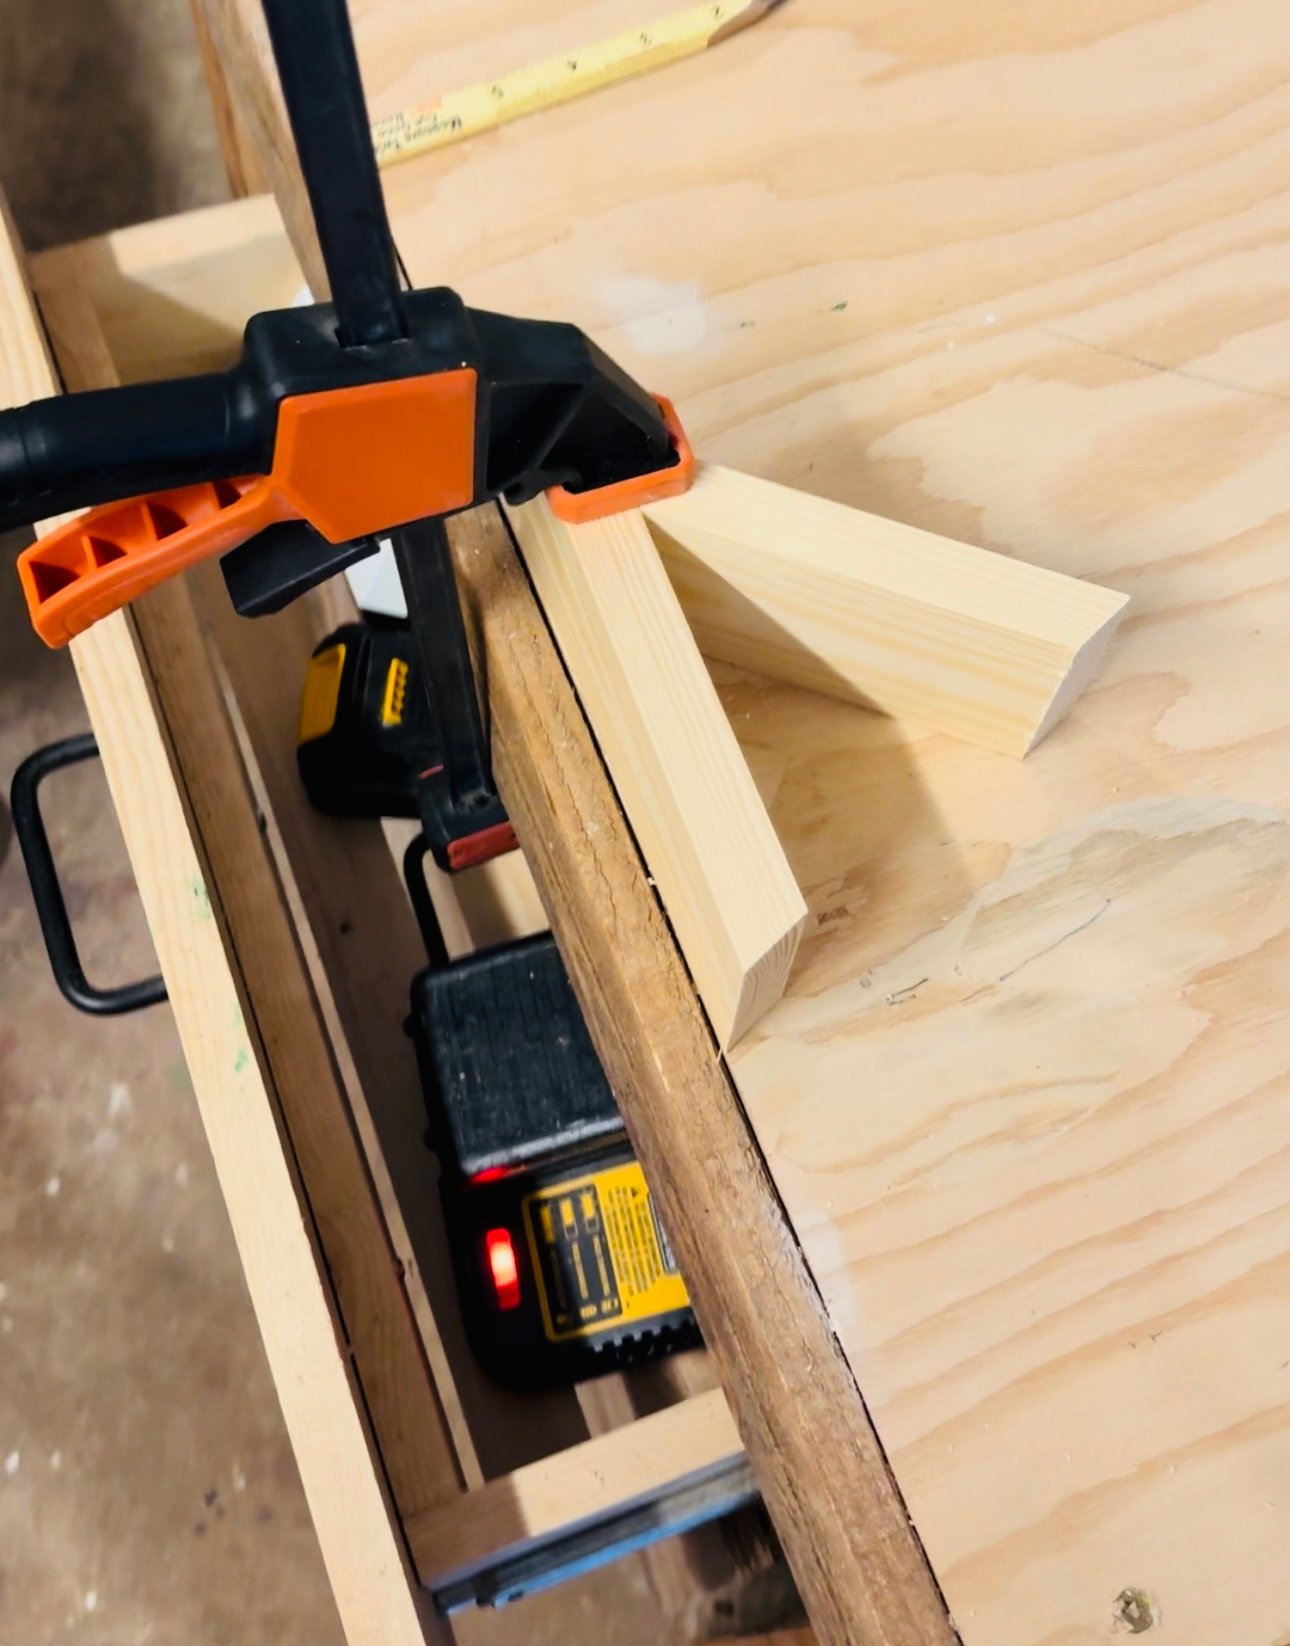
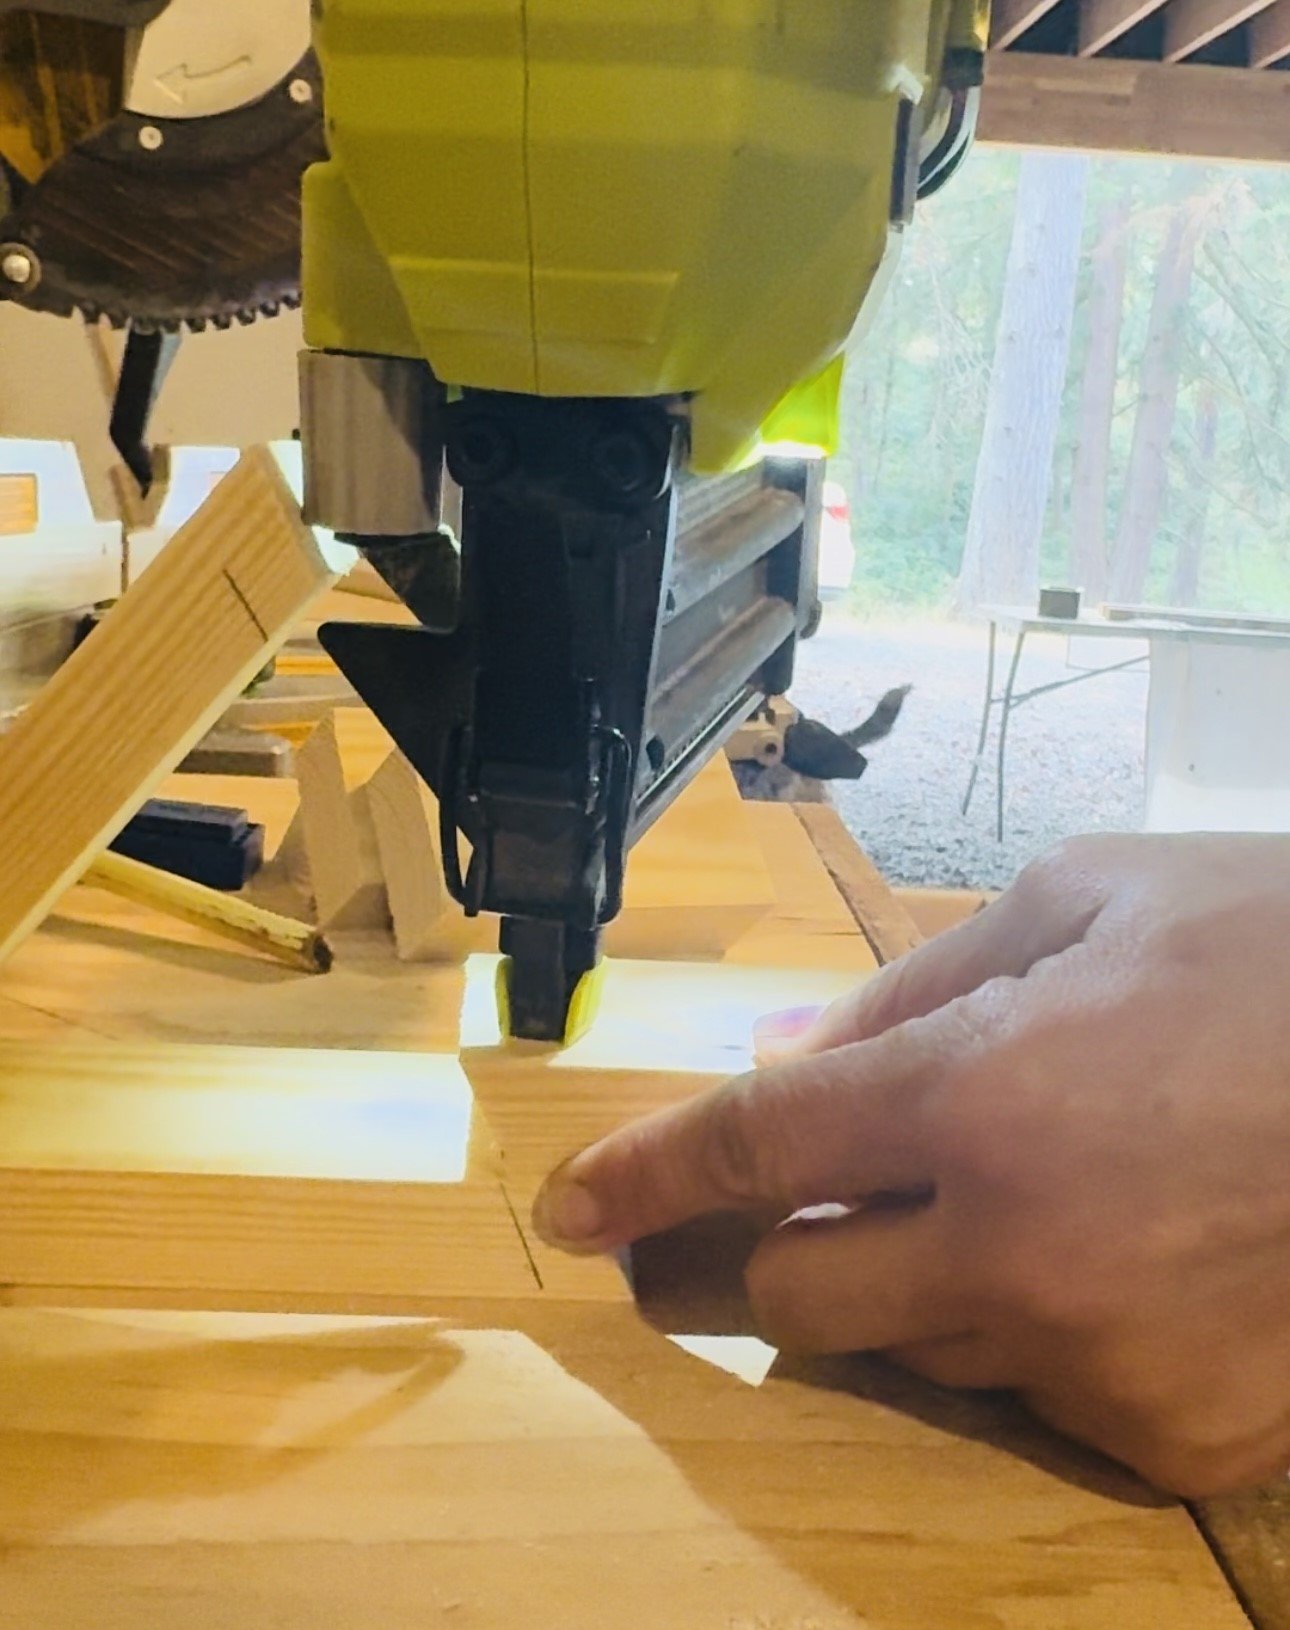
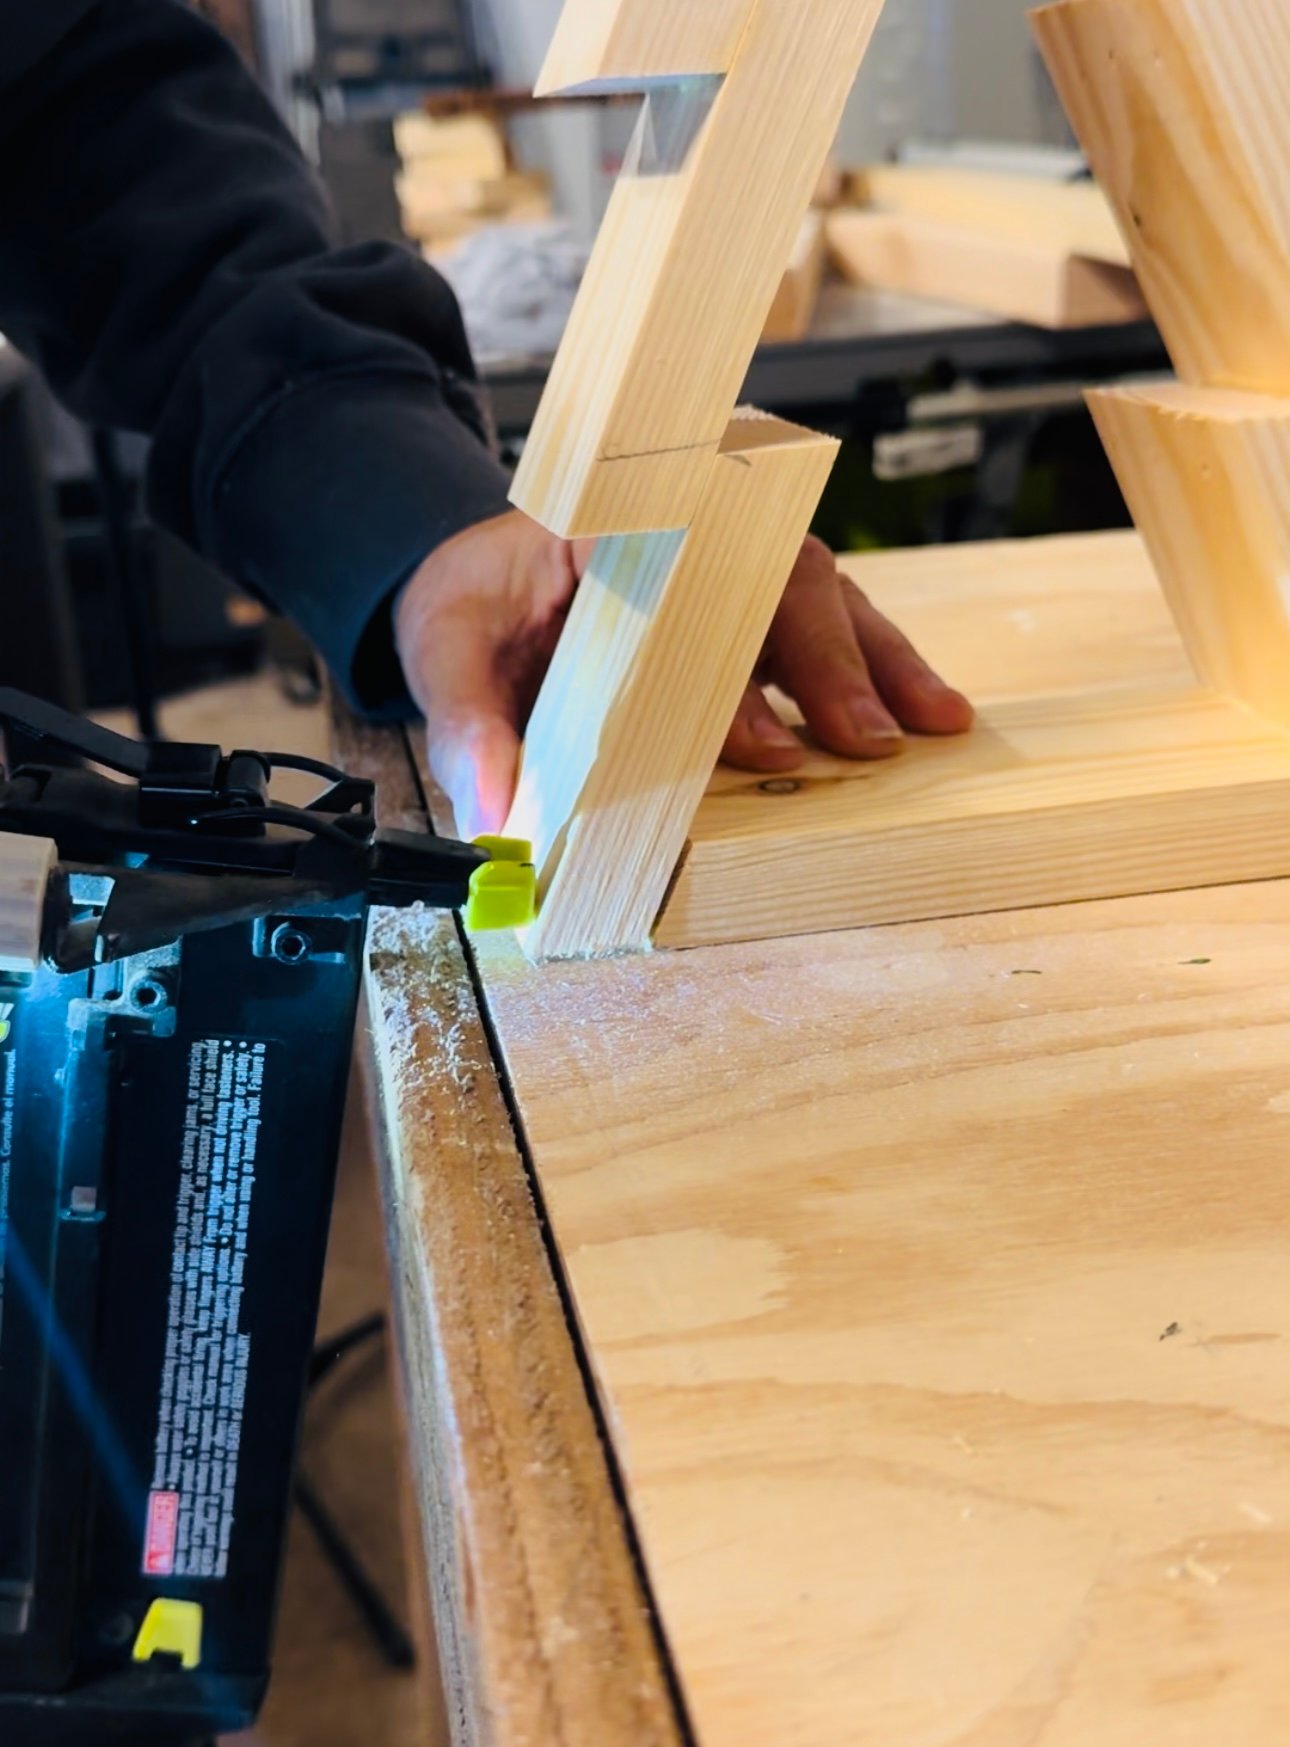
You will want to clamp the top of the tree and make sure you are shooting the nails in at the correct angle.
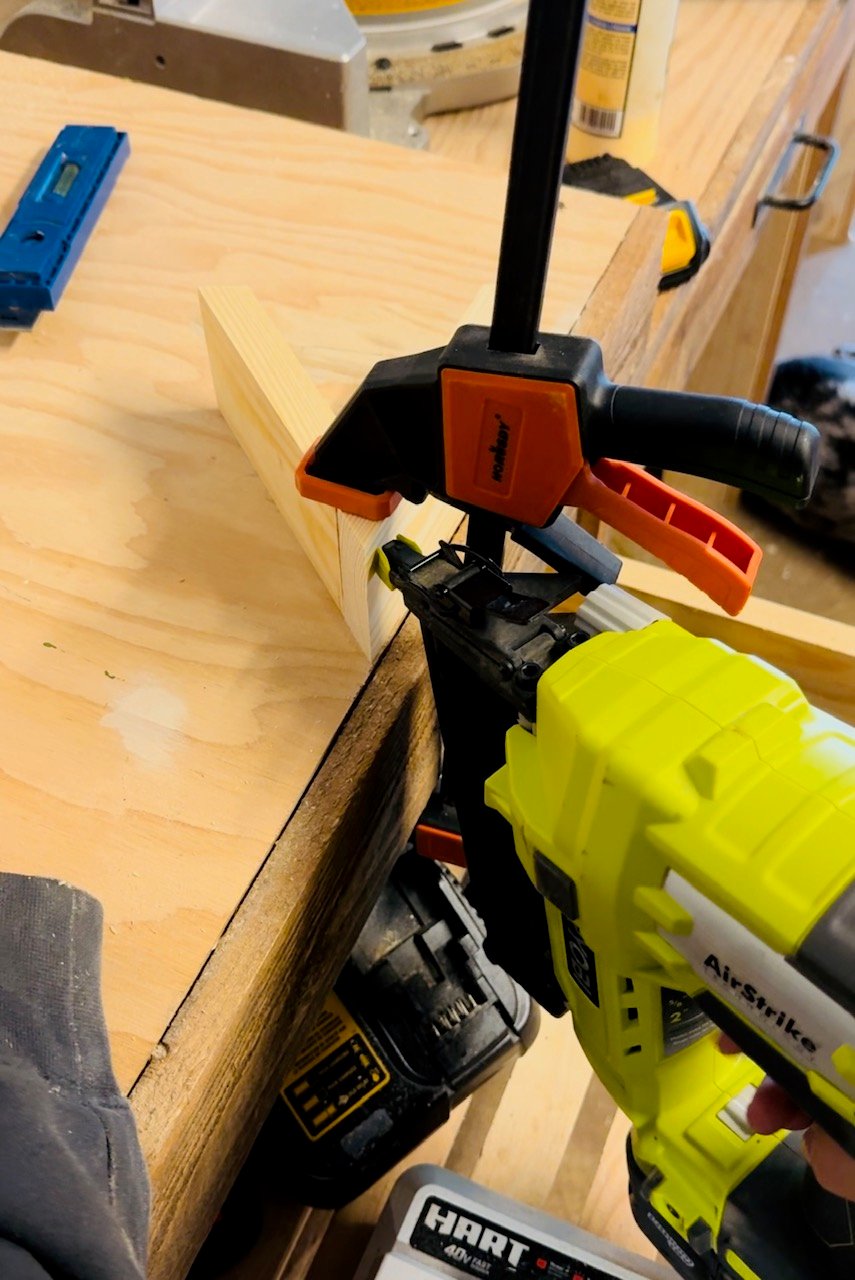
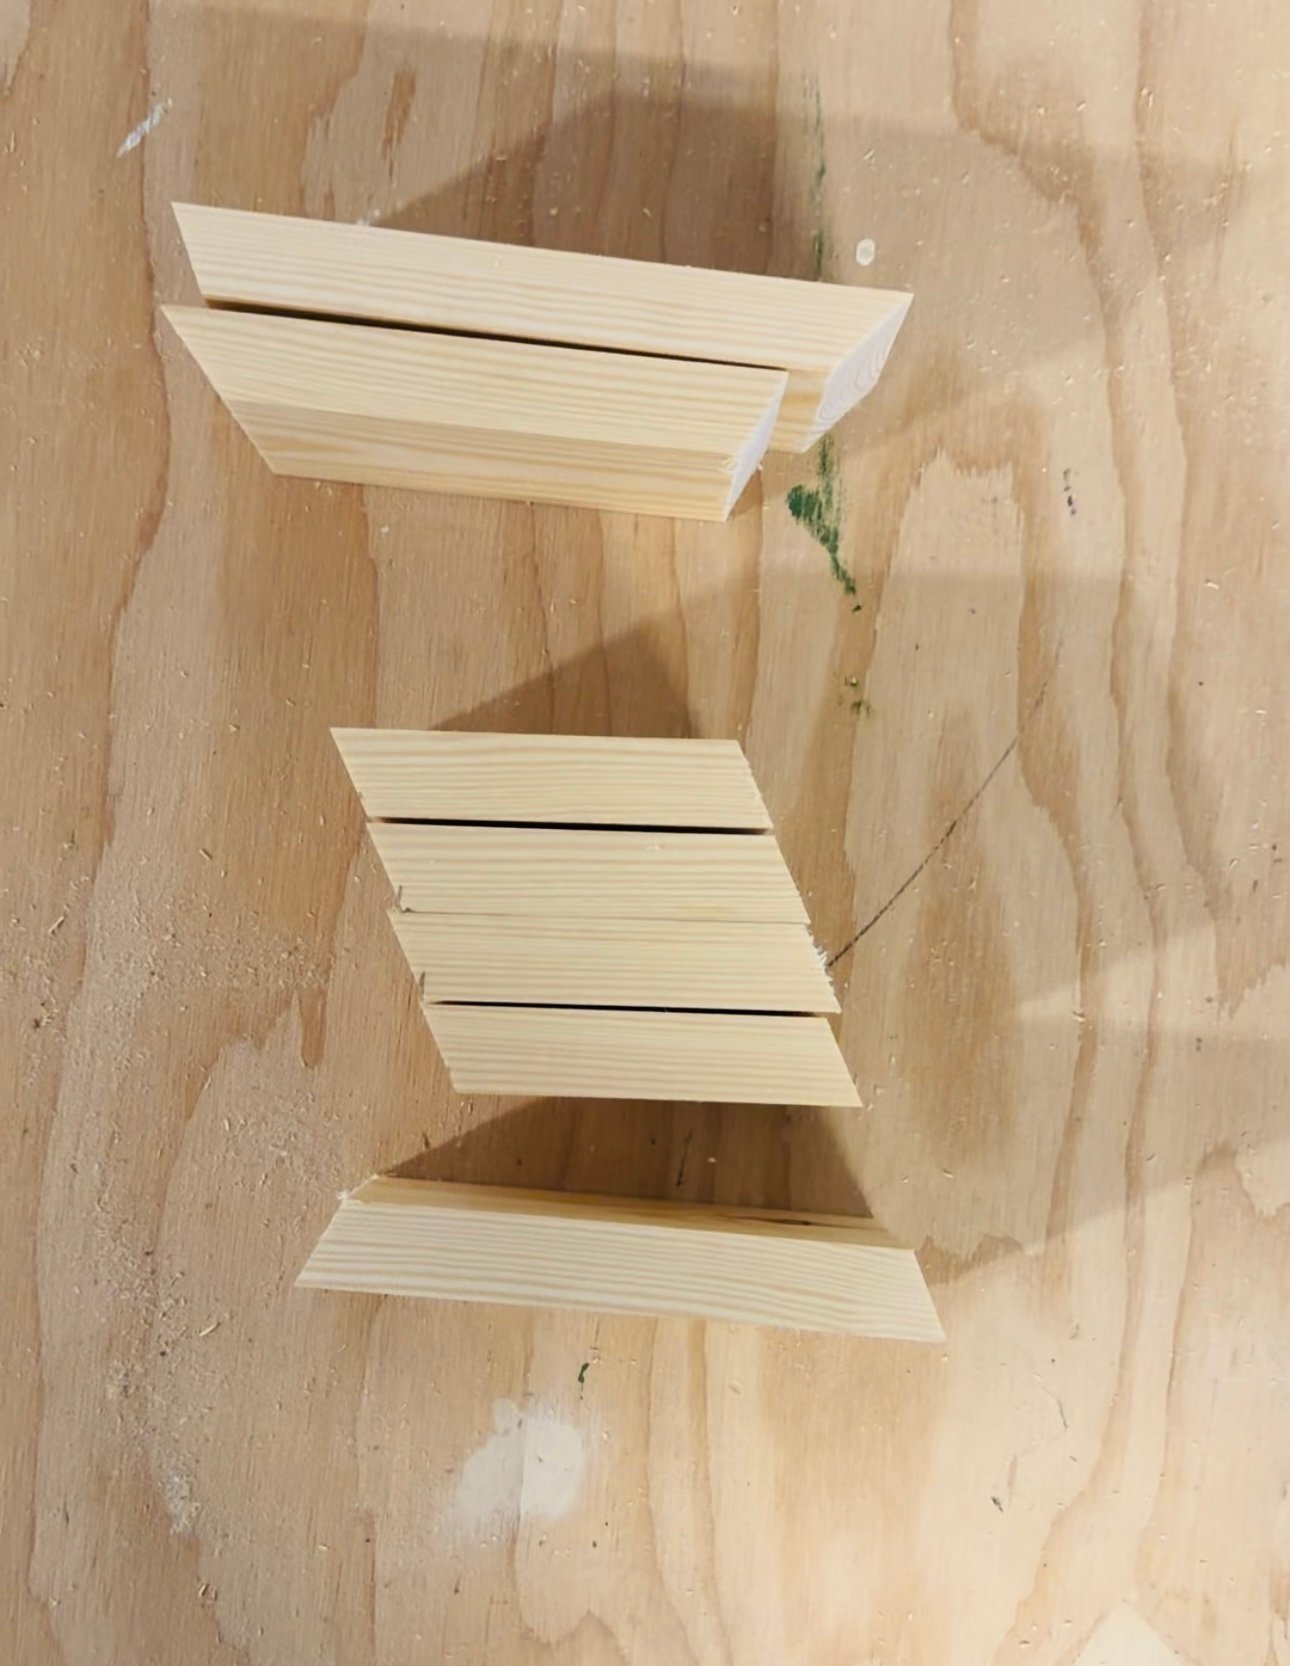
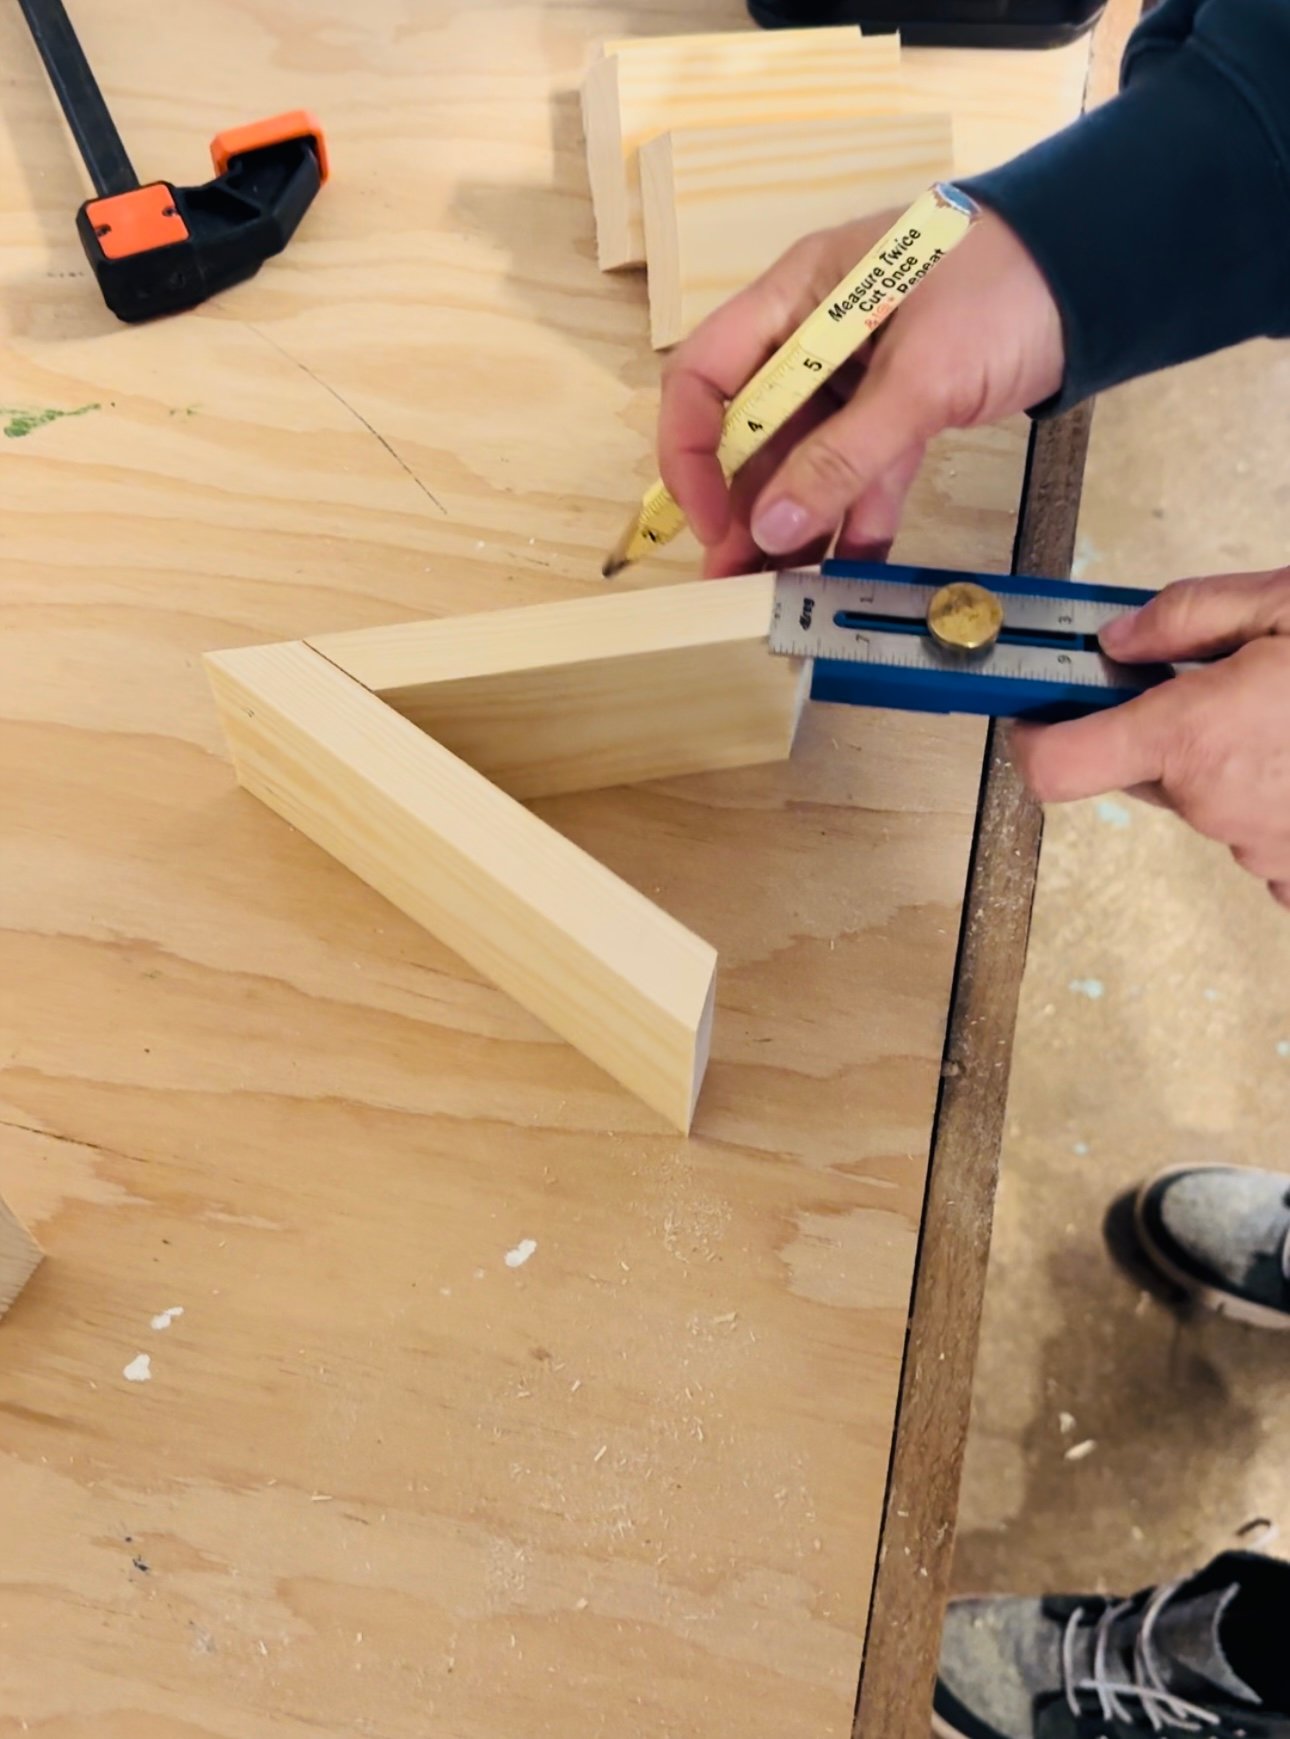
For each section added to the top there is a 1/2" overlap, so I used my multi marking tool and set it to a half inch.
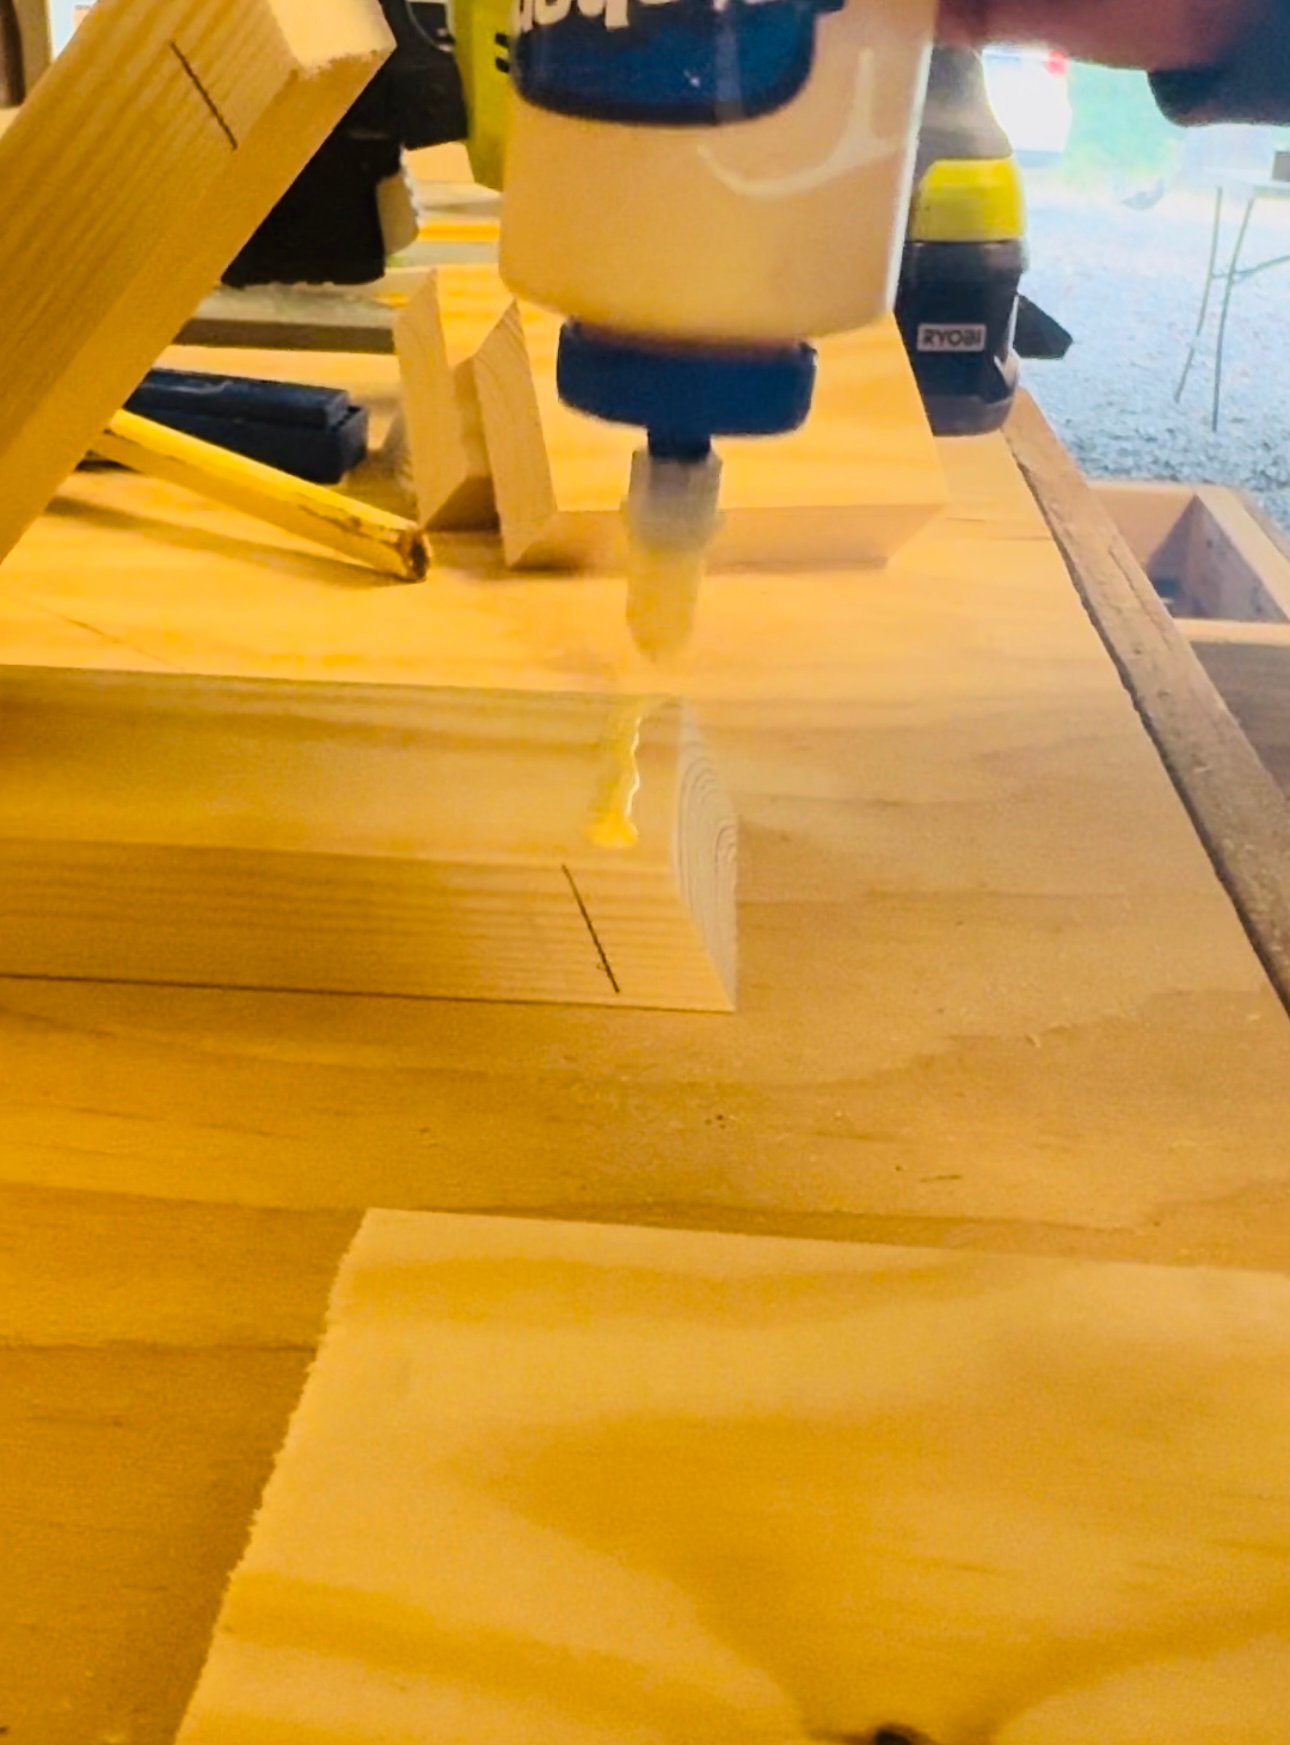
I lined up the next piece with my mark, added glue and attached using brad nails.
Flip and repeat. For the bottom tree section, I used a 1x spacer to hold it up and in place to attach the nails.
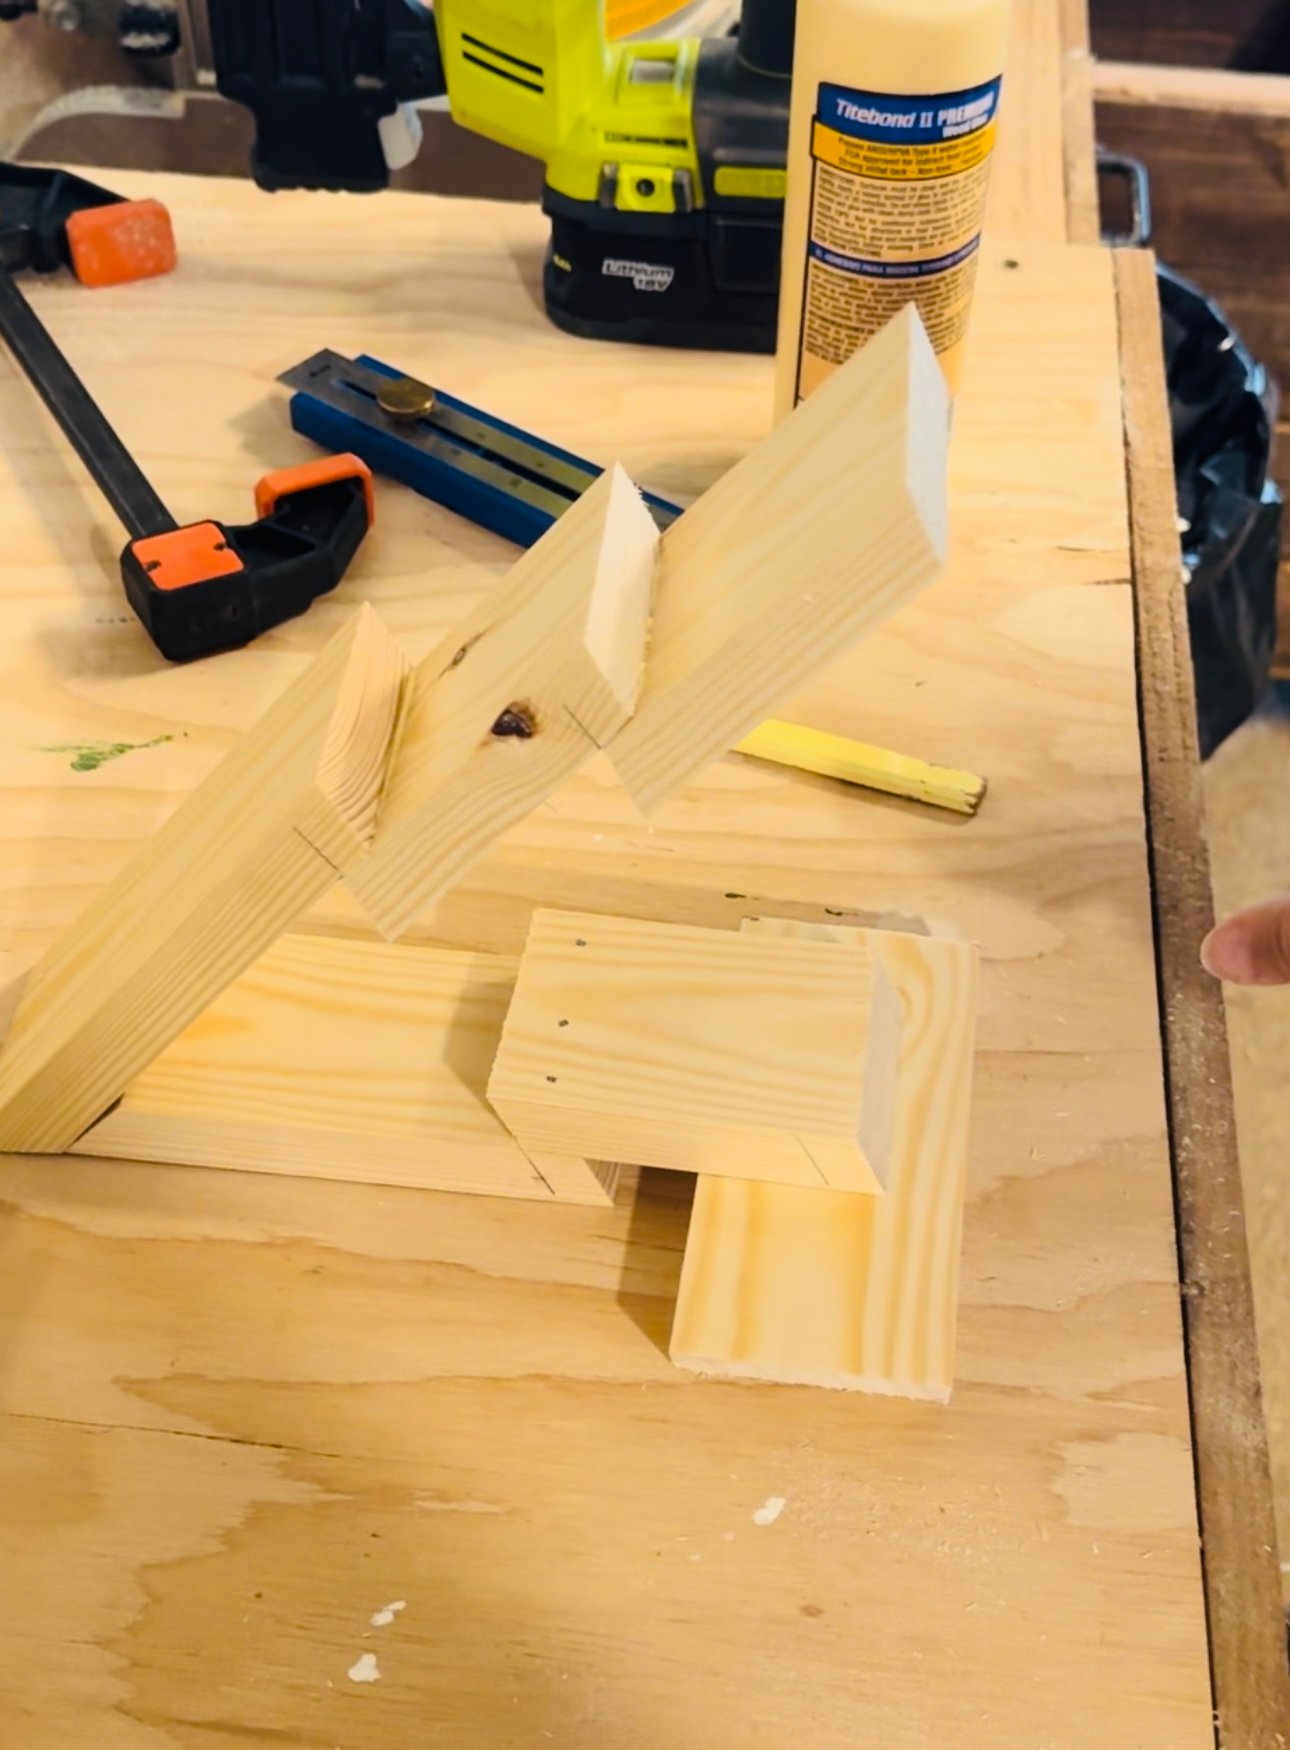
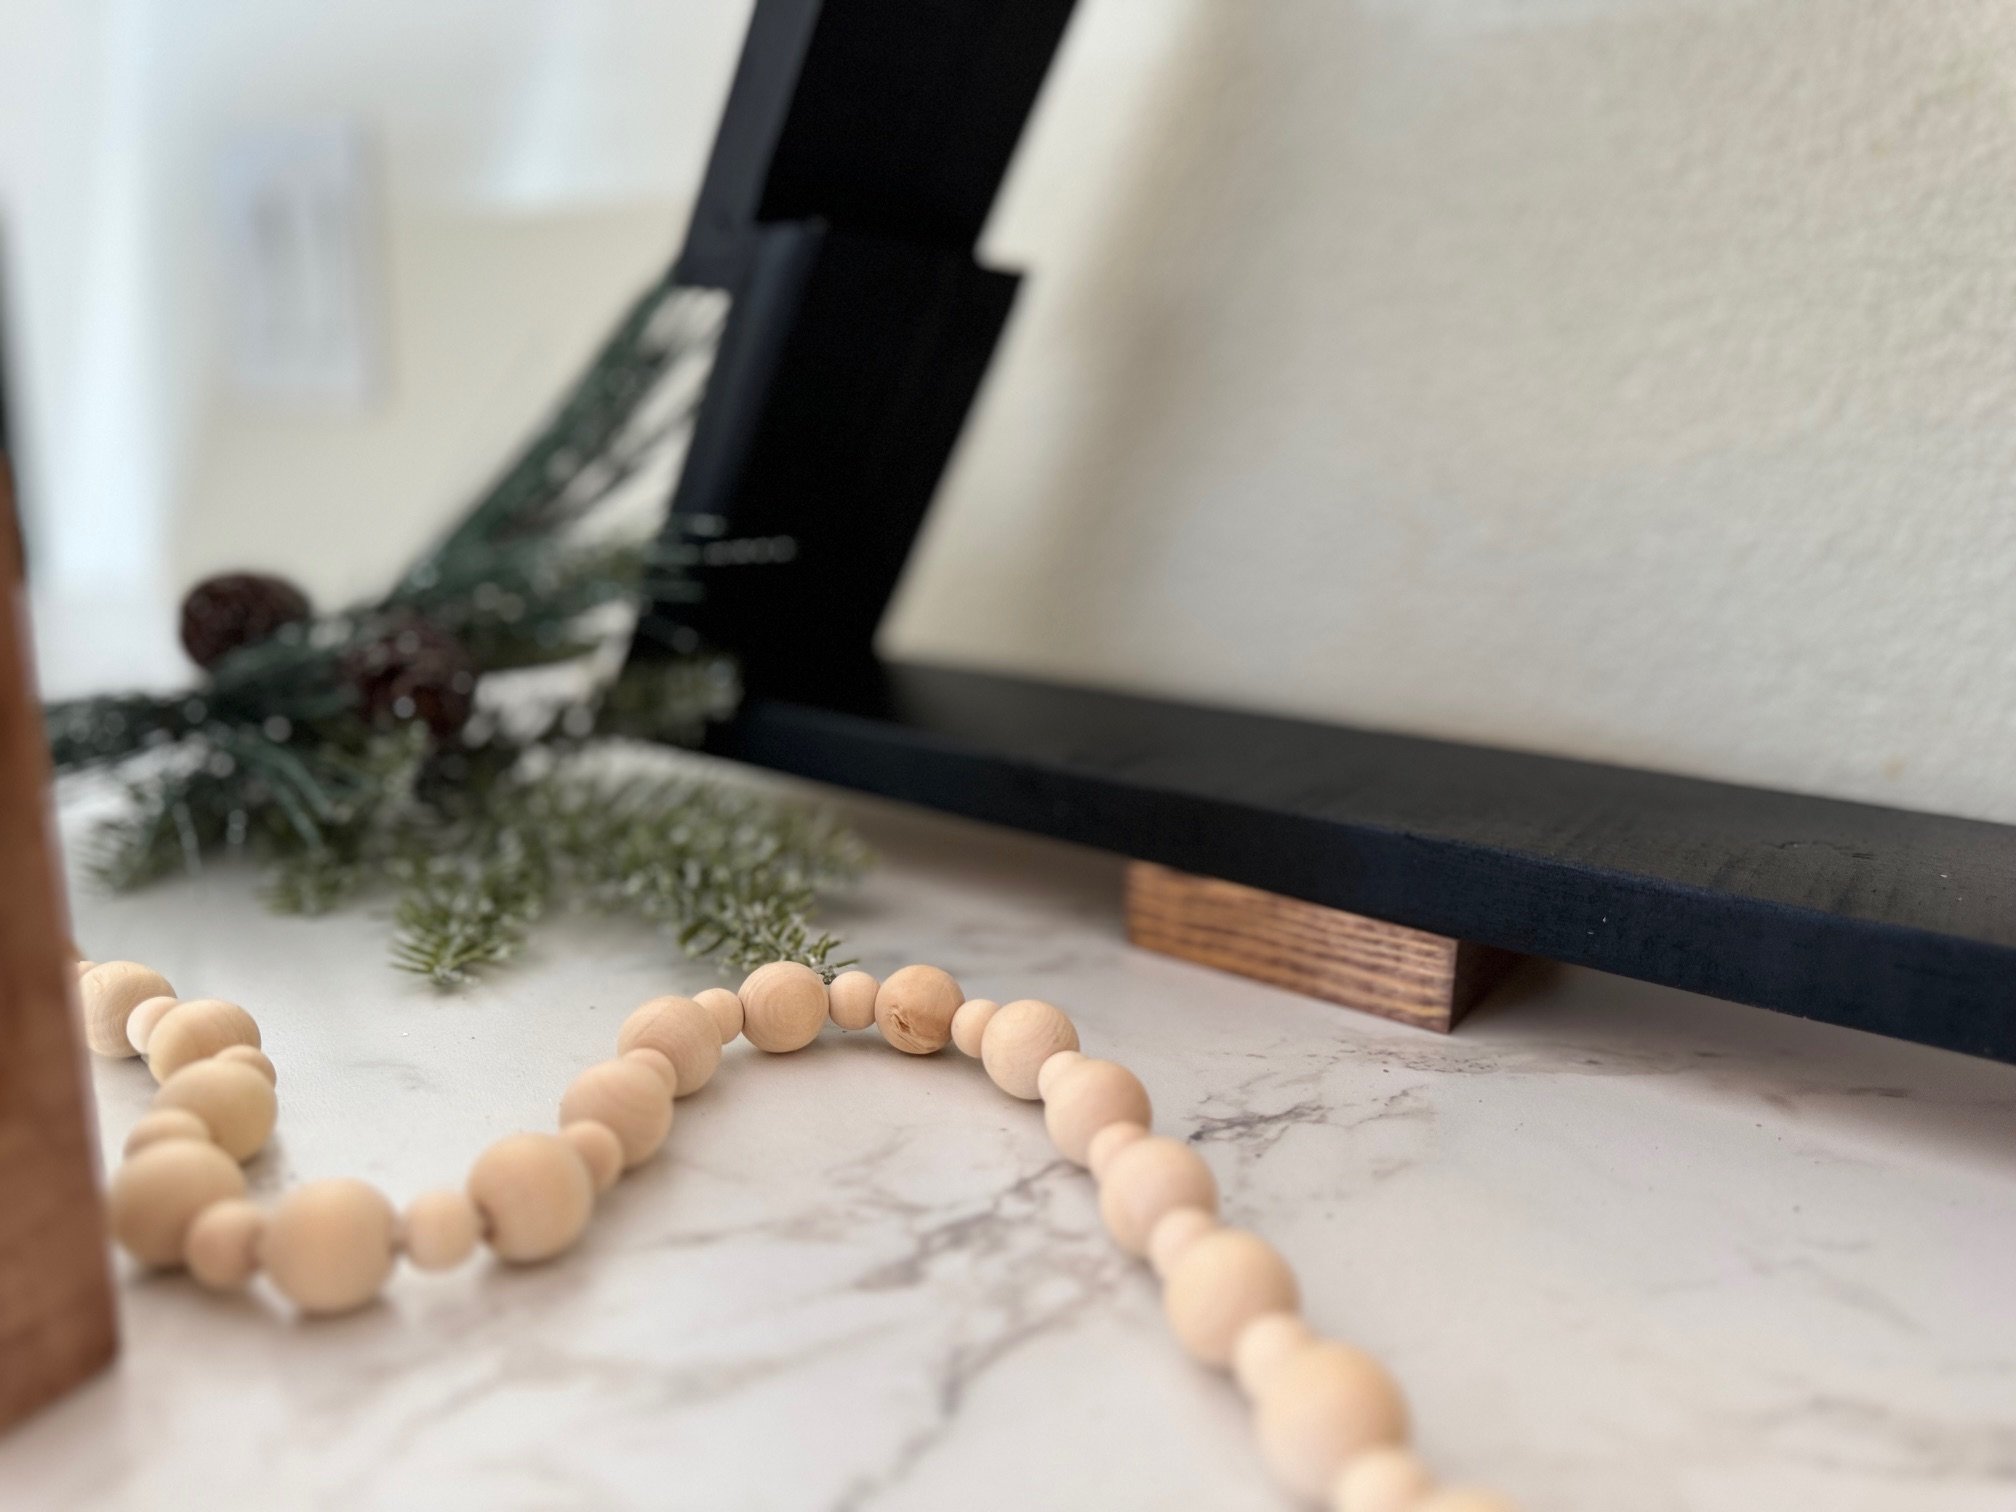
Finally, glue and nail the bottom section and it's time to finish! I decided to use spray paint on some and others I used stain. I love the stained "trunk" as an added accent!
Watch Video of the Build
Free Plans to Build Your Own Wooden Christmas Tree Project
Ready to build this yourself? Here's the free plans, enjoy!
Pin For Later!
Preparation
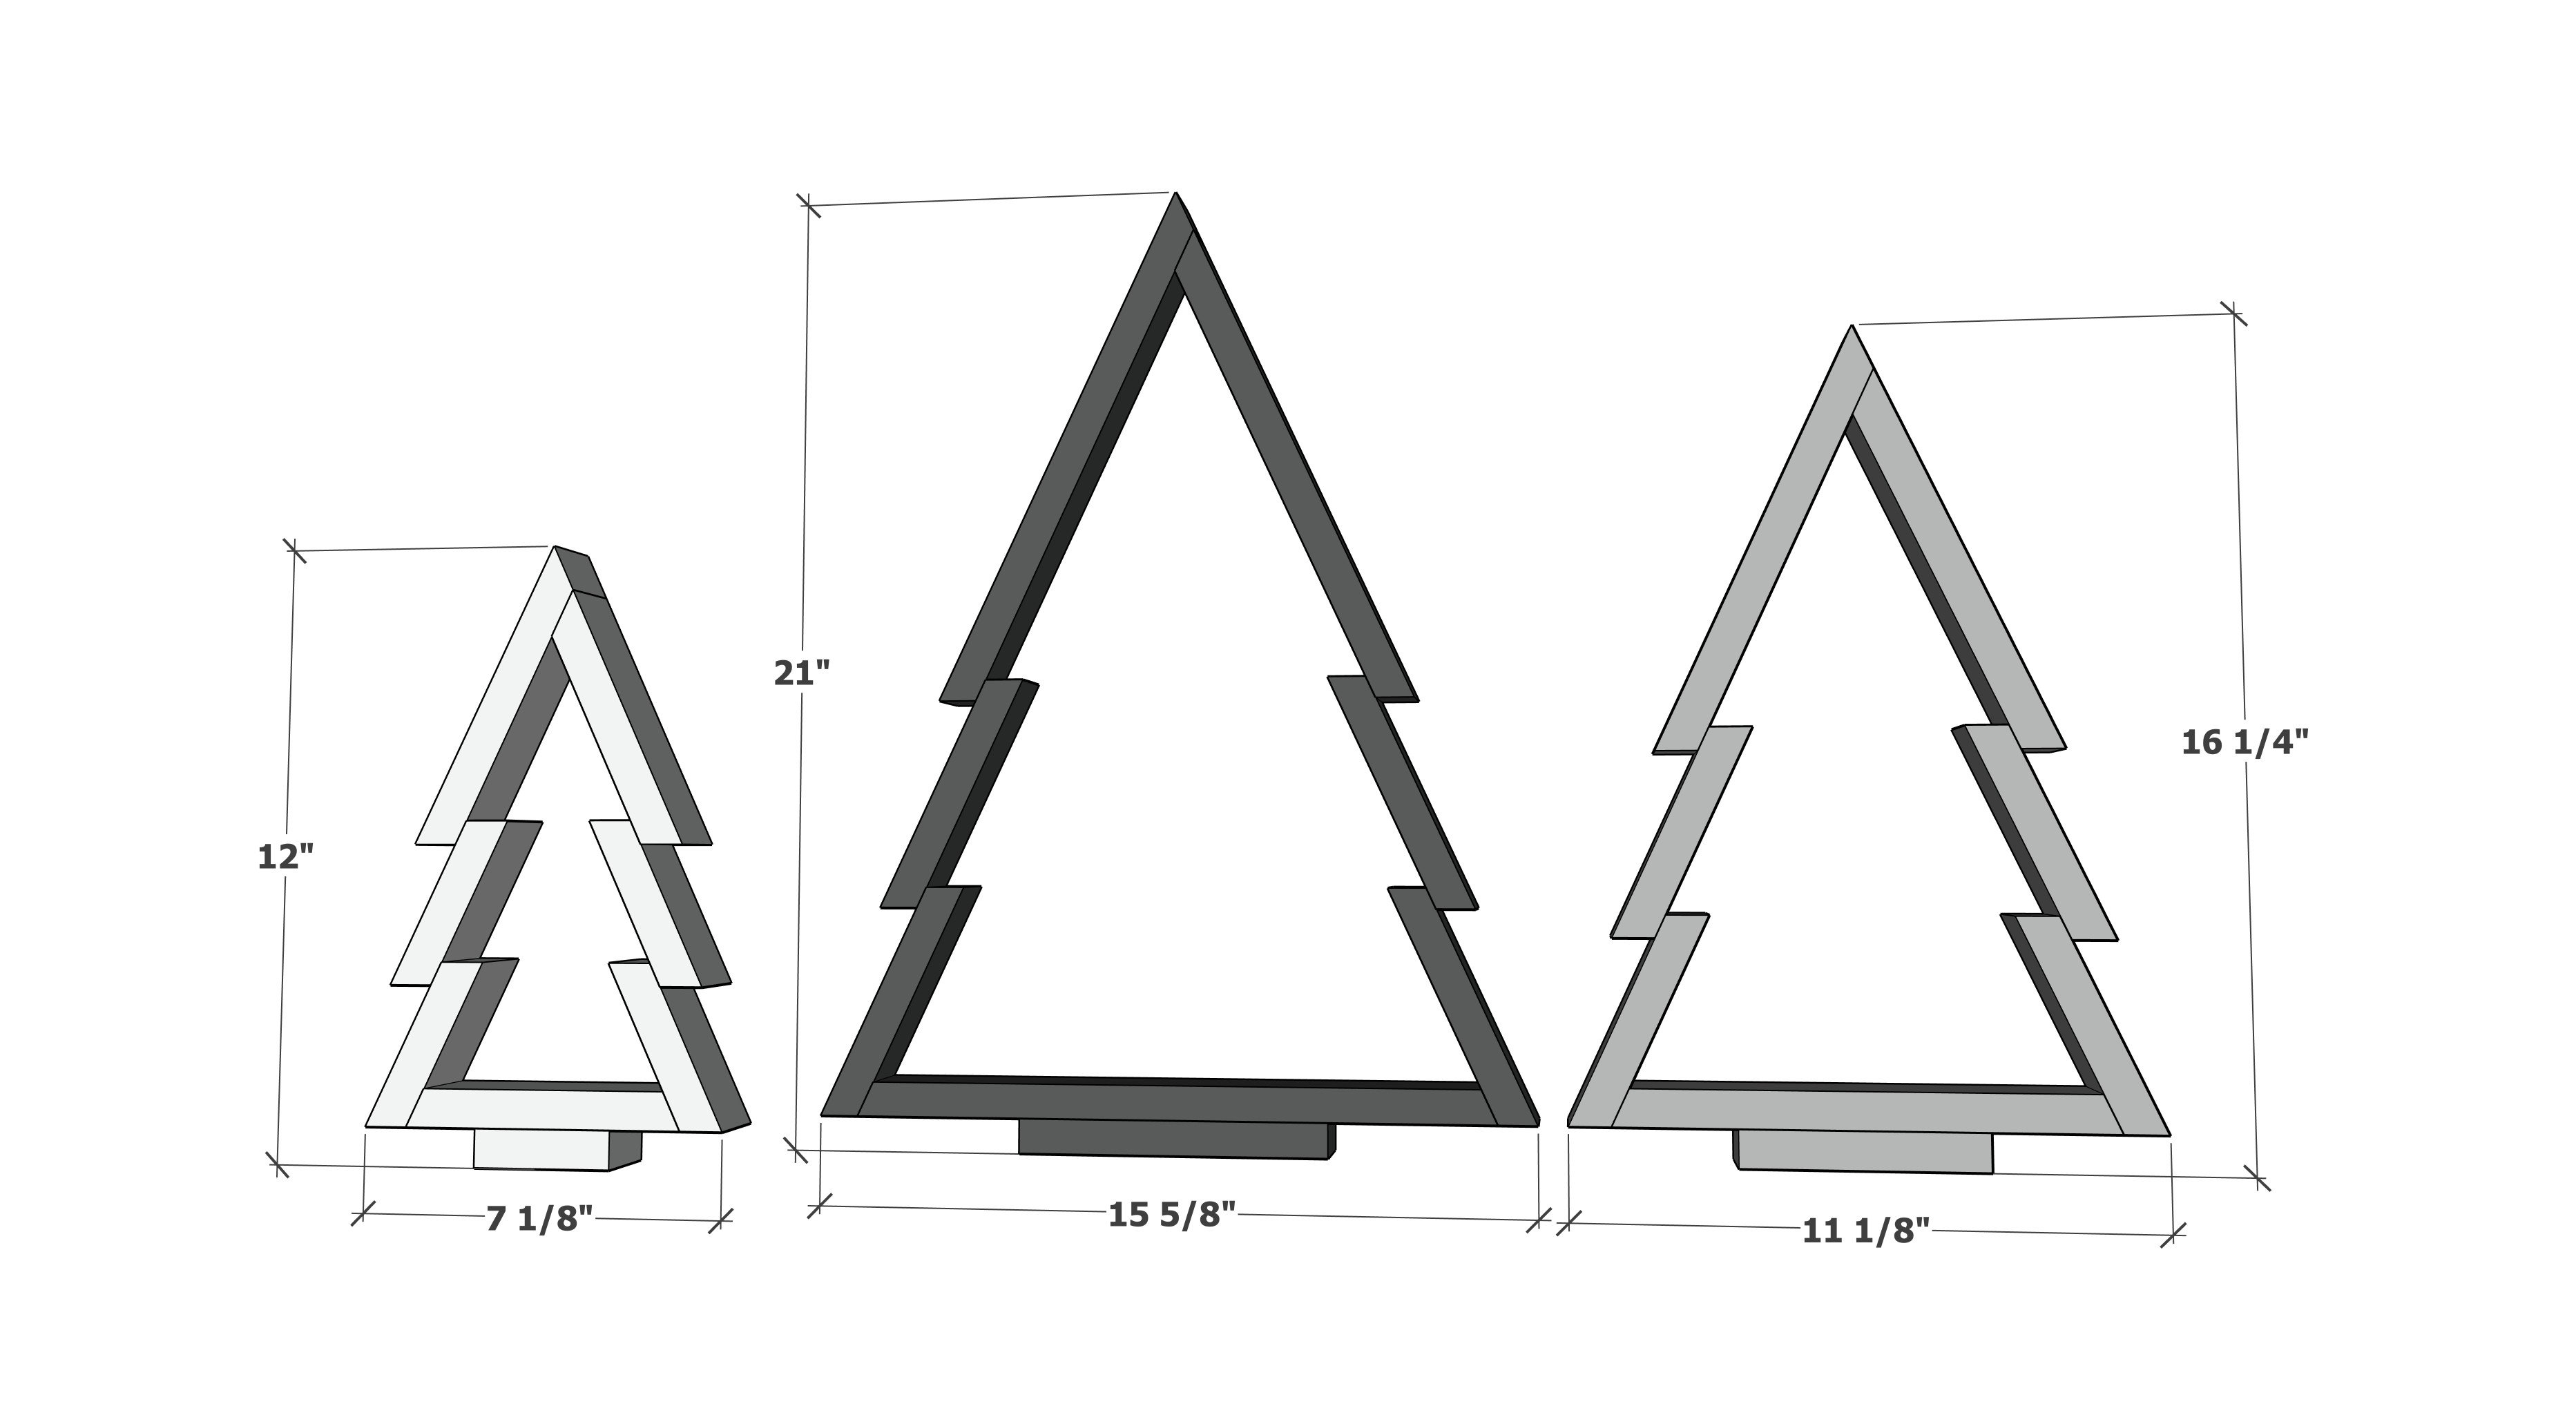
Small Christmas Tree
- 3 feet of 1x boards (can be 1x2, 1x3, 1x4 or even larger)
- wood glue
- 1-1/4" brad nails
Medium Christmas Tree
- 4 feet of 1x boards (can be 1x2, 1x3, 1x4 or even larger)
- wood glue
- 1-1/4" brad nails
Large Christmas Tree
- 6 feet of 1x boards (can be 1x2, 1x3, 1x4 or even larger)
- wood glue
- 1-1/4" brad nails
Small Christmas Tree
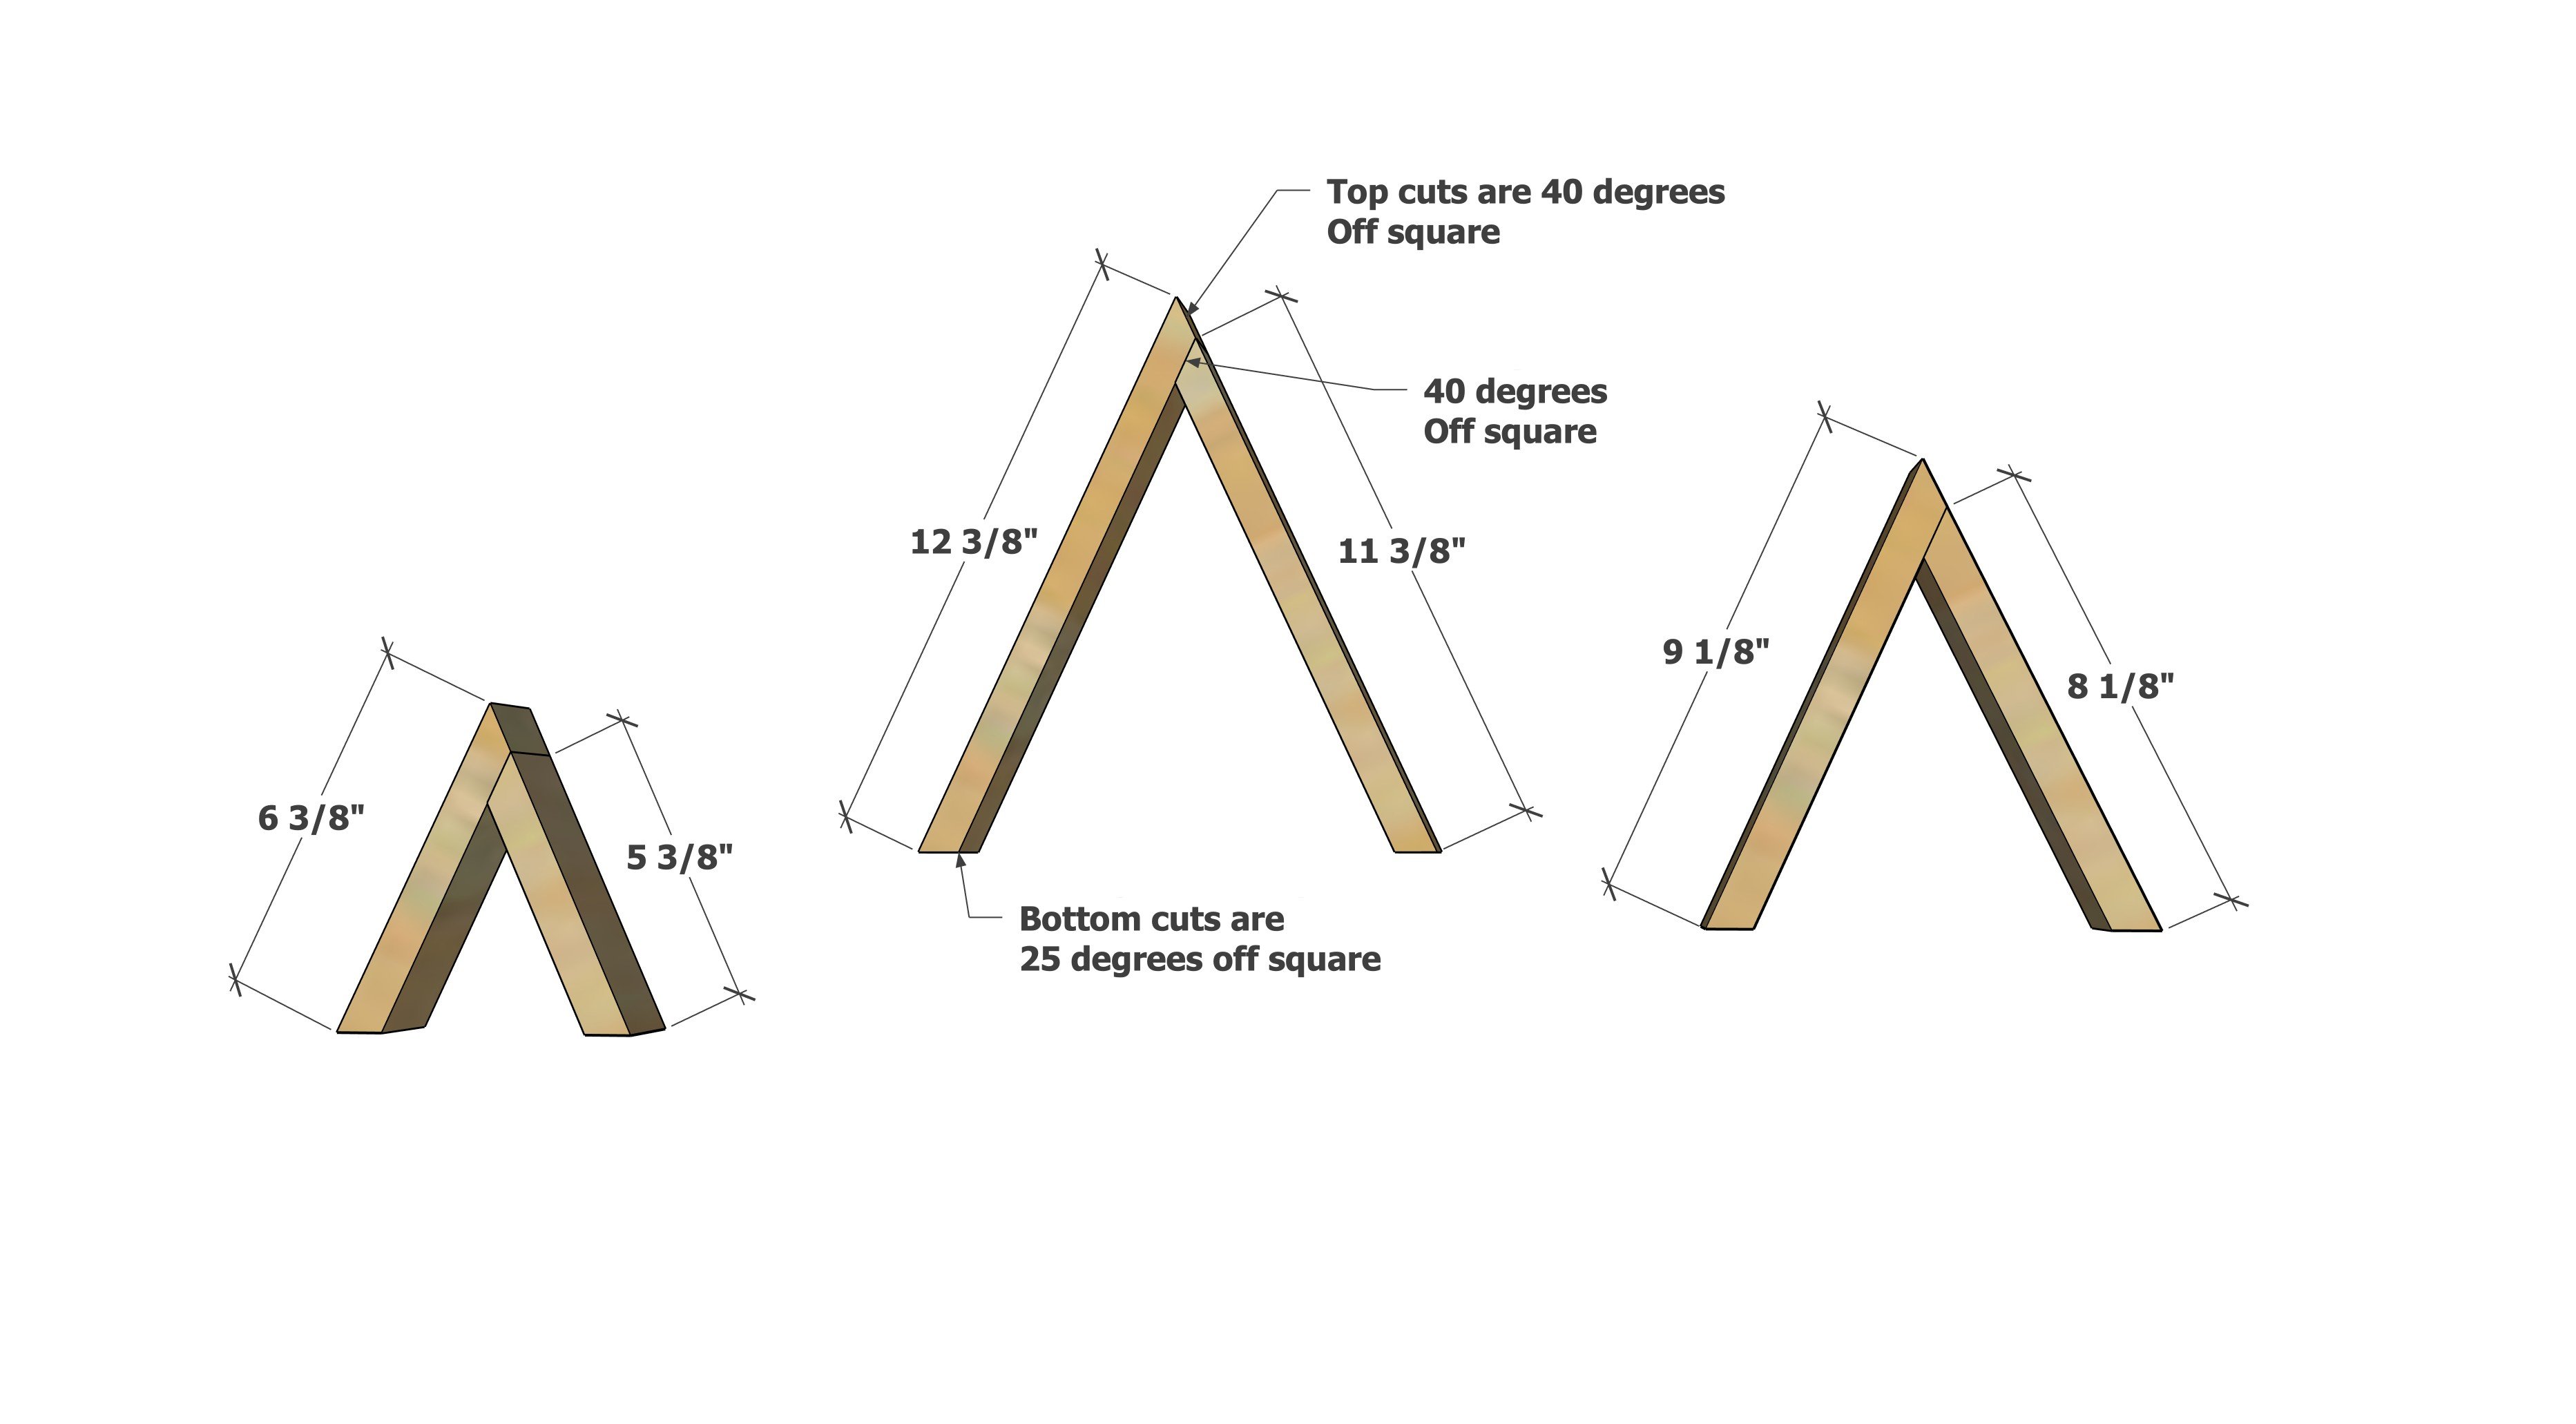
- 1 - 1x board @ 6-3/8" - long point to long point, one end cut at 40 degree off square, the other end cut at 25 degrees off square
- 1 - 1x board @ 5-3/8" - long point to long point, one end cut at 40 degree off square, the other end cut at 25 degrees off square
- 4 - 1x boards @ 3-1/2" - long point to short point measurement, ends are parallel, both ends cut at 25 degrees off square
- 1 - 1x board @ 5-1/2" - long point to long point measurement, ends NOT parallel, both end cut at 25 degree off square
- 1 - 1x @ 2-3/4"
Medium Christmas Tree
- 1 - 1x board @ 9-1/8" - long point to long point, one end cut at 40 degree off square, the other end cut at 25 degrees off square
- 1 - 1x board @ 8-1/8" - long point to long point, one end cut at 40 degree off square, the other end cut at 25 degrees off square
- 4 - 1x boards @ 4-1/2" - long point to short point measurement, ends are parallel, both ends cut at 25 degrees off square
- 1 - 1x board @ 9-1/2" - long point to long point measurement, ends NOT parallel, both end cut at 25 degree off square
- 1 - 1x @ 4-3/4"
Large Christmas Tree
- 1 - 1x board @ 12-3/8" - long point to long point, one end cut at 40 degree off square, the other end cut at 25 degrees off square
- 1 - 1x board @ 11-3/8" - long point to long point, one end cut at 40 degree off square, the other end cut at 25 degrees off square
- 4 - 1x boards @ 5-1/2" - long point to short point measurement, ends are parallel, both ends cut at 25 degrees off square
- 1 - 1x board @ 13-7/8" - long point to long point measurement, ends NOT parallel, both end cut at 25 degree off square
- 1 - 1x @ 6-3/4"


Instructions
Step 1
Cut the pieces for the tree top.
Note that the top angle will be 40 degrees off square and the bottom angle is 25 degrees off square.
Cutting - Cuts are easy to do with a miter saw, just rotate the saw to the correct degrees and then cut the boards vertically. If you have a compound miter saw, you can do bevel cuts.
Different Sizes - If you want to make different sized trees, you can easily do this by starting at the tree top, cutting the two pieces, with one 1" shorter than the other.
Attach the two pieces together with 1-1/4" brad nails and wood glue. Clamping is very helpful here.
Step 2
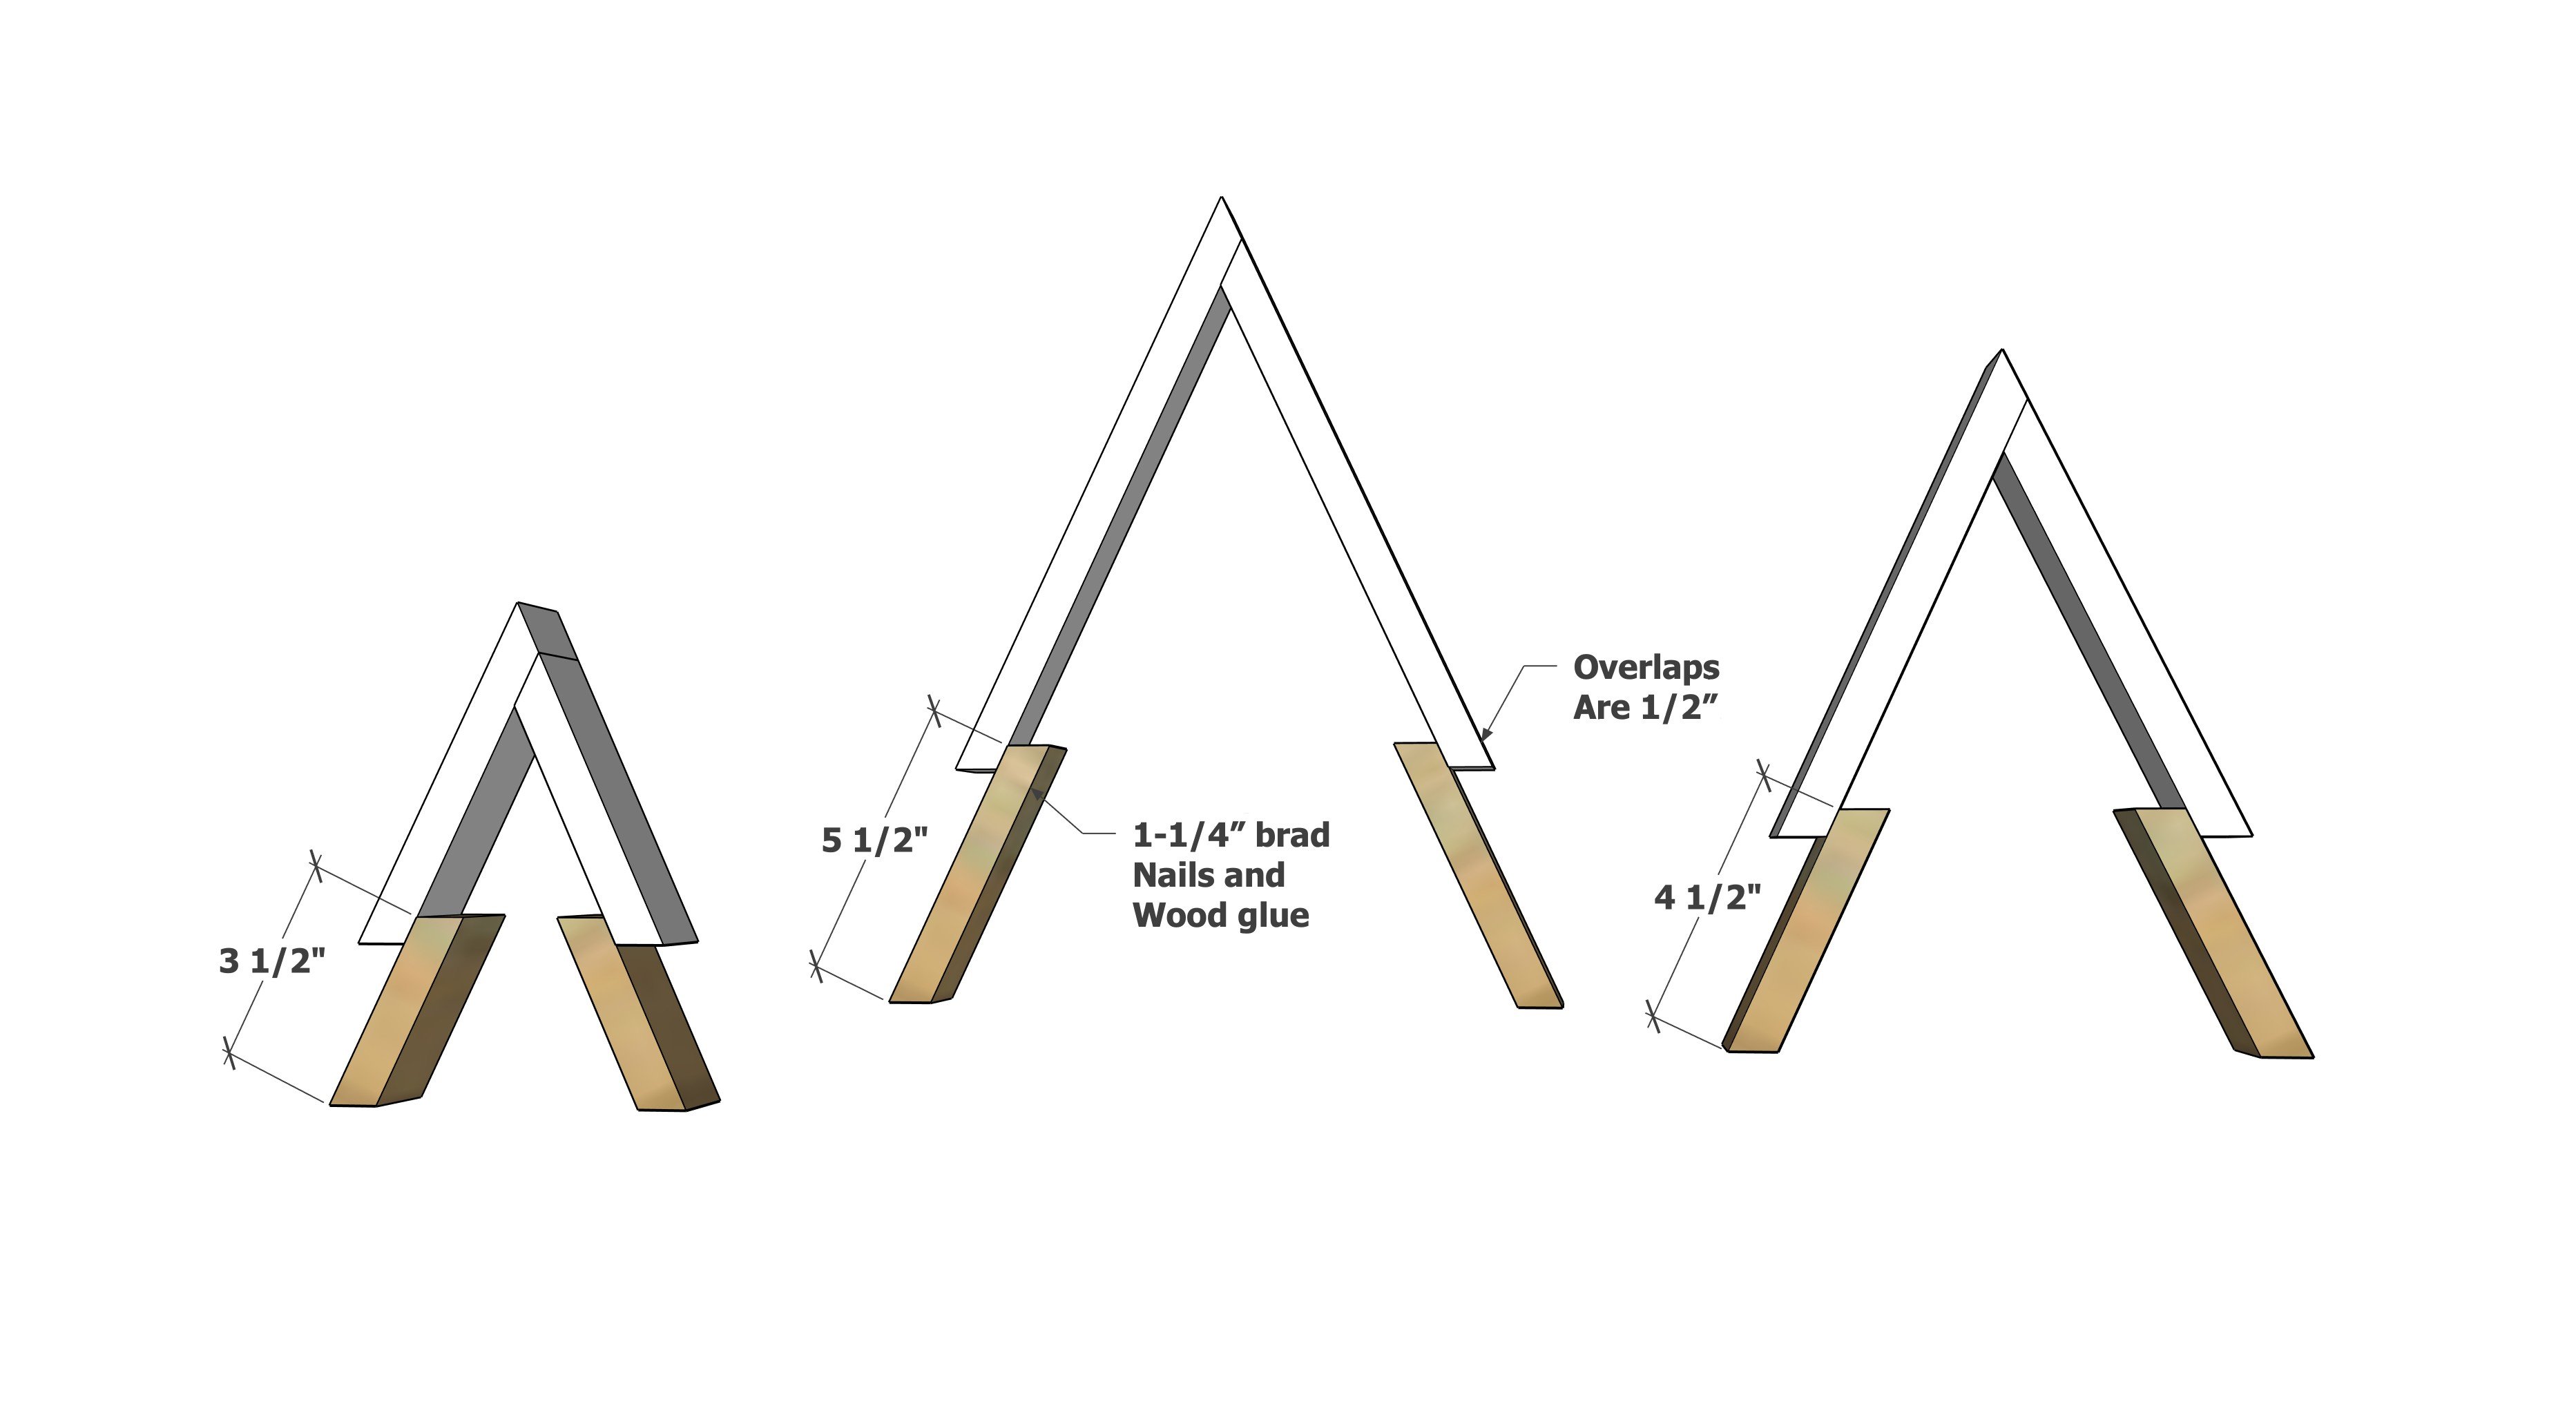
Measure and mark down 1/2" and add the first row of tree branches with glue and brad nails.
Step 3
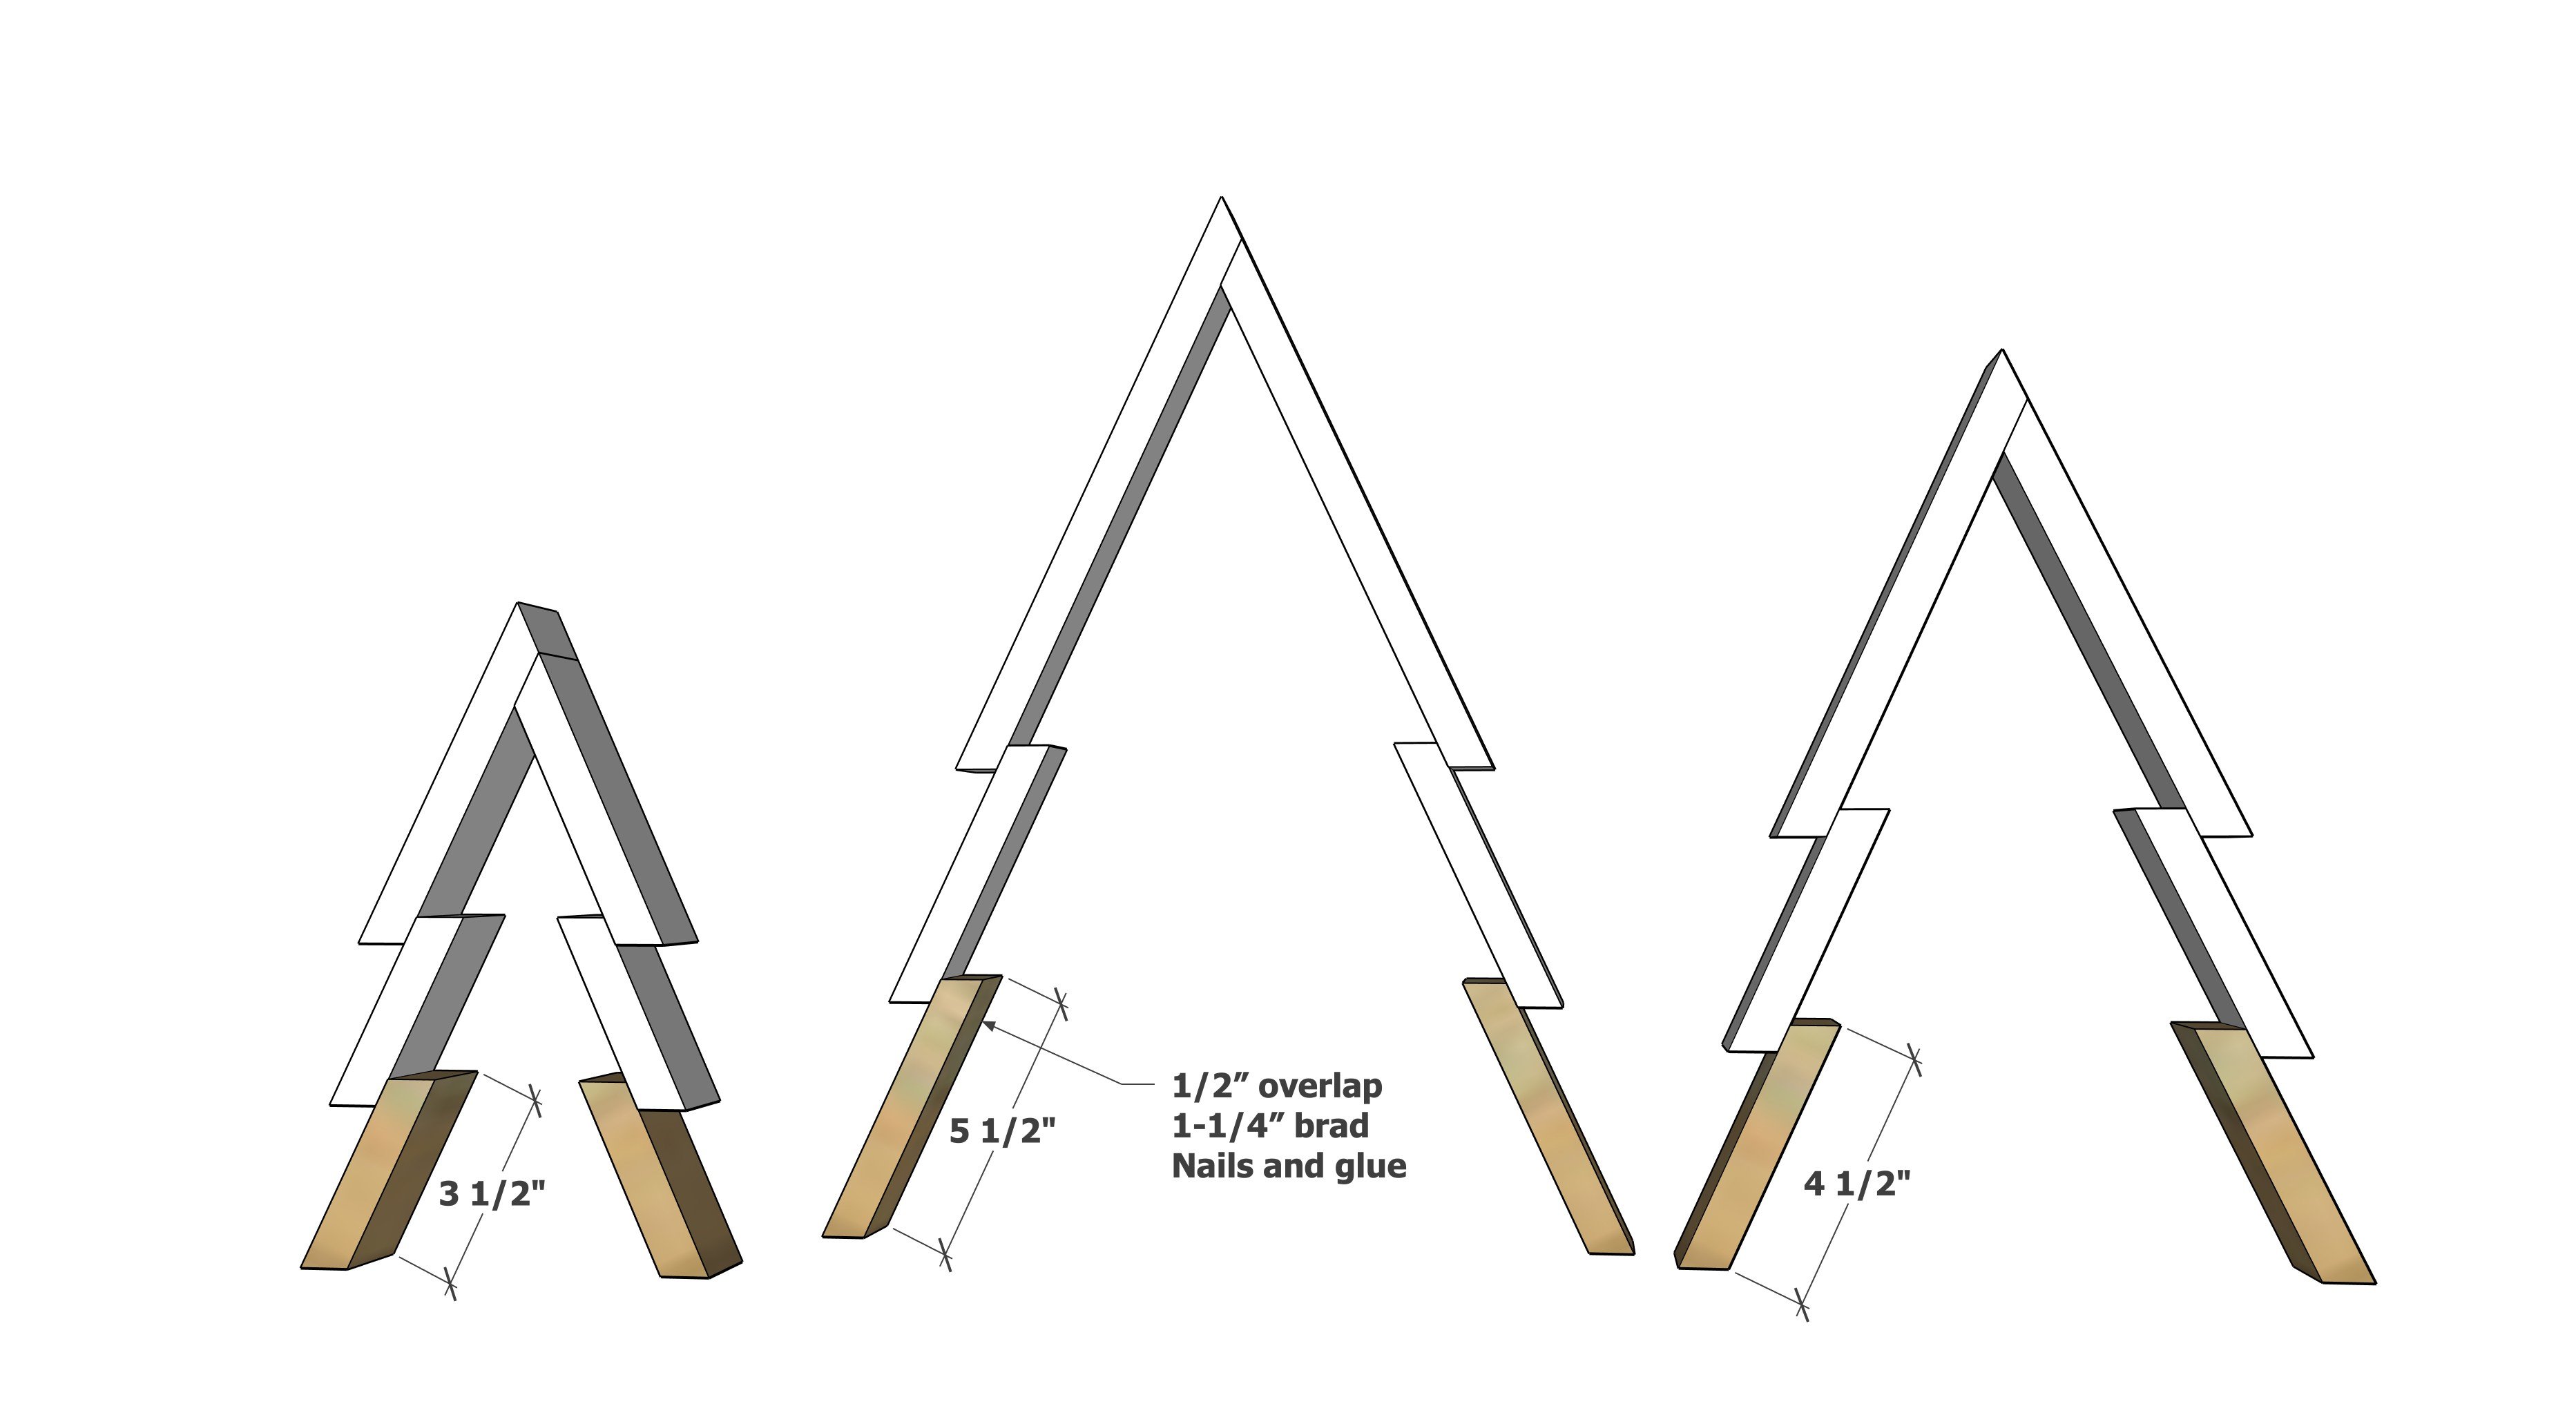
Measure and mark and add the third row.
Step 4
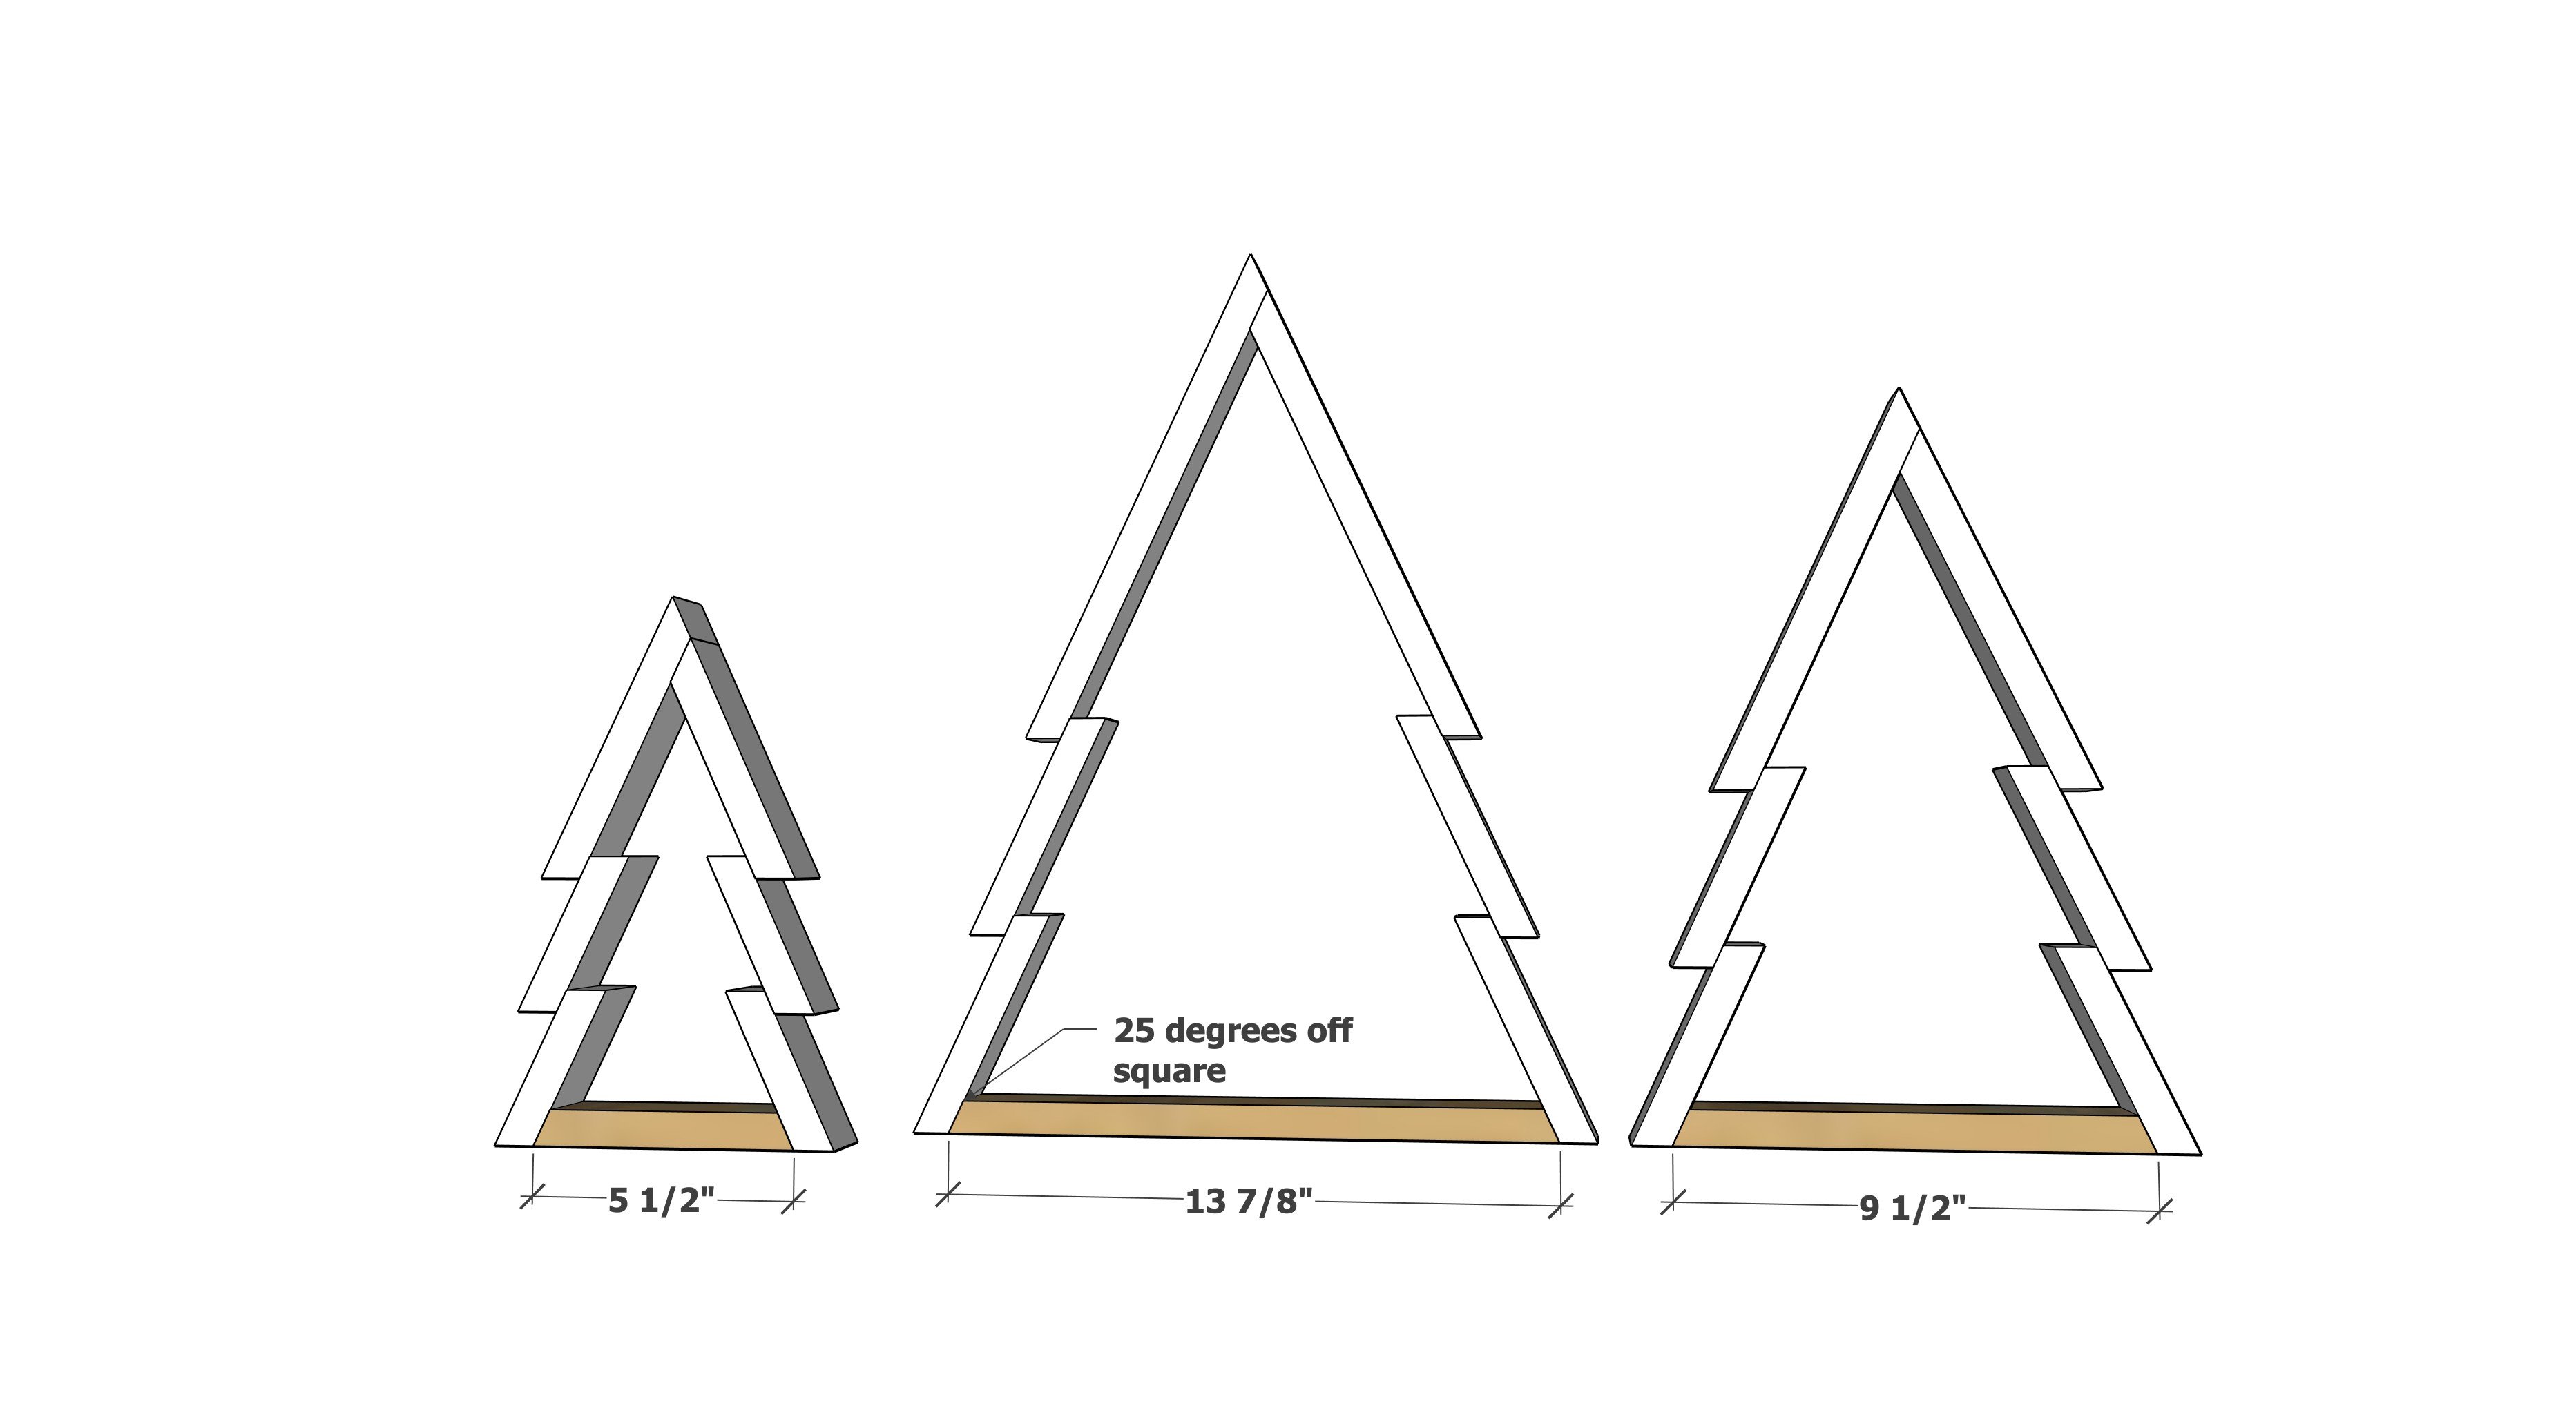
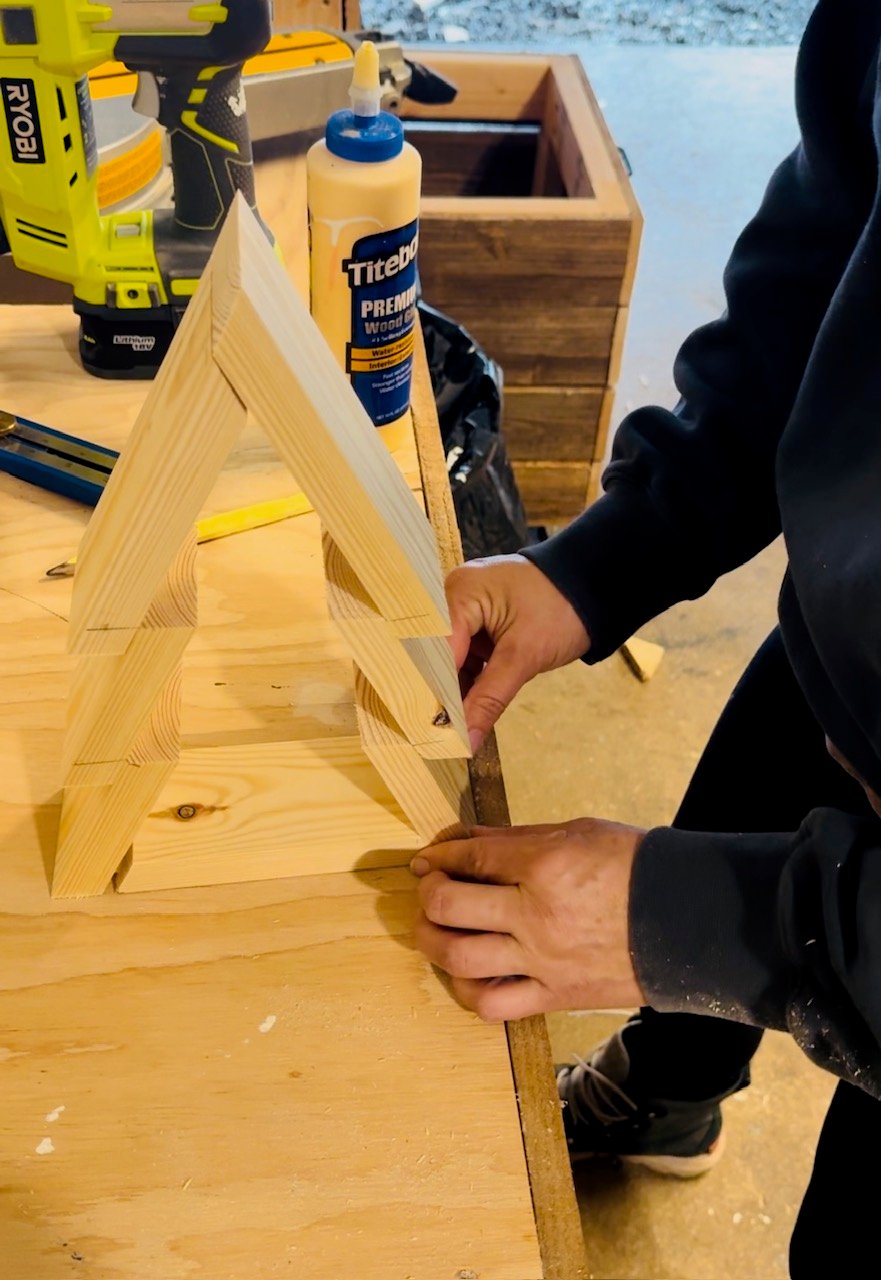
Attach the base to the bottom.
Step 5
Add the tree trunk to the base.
Step 6
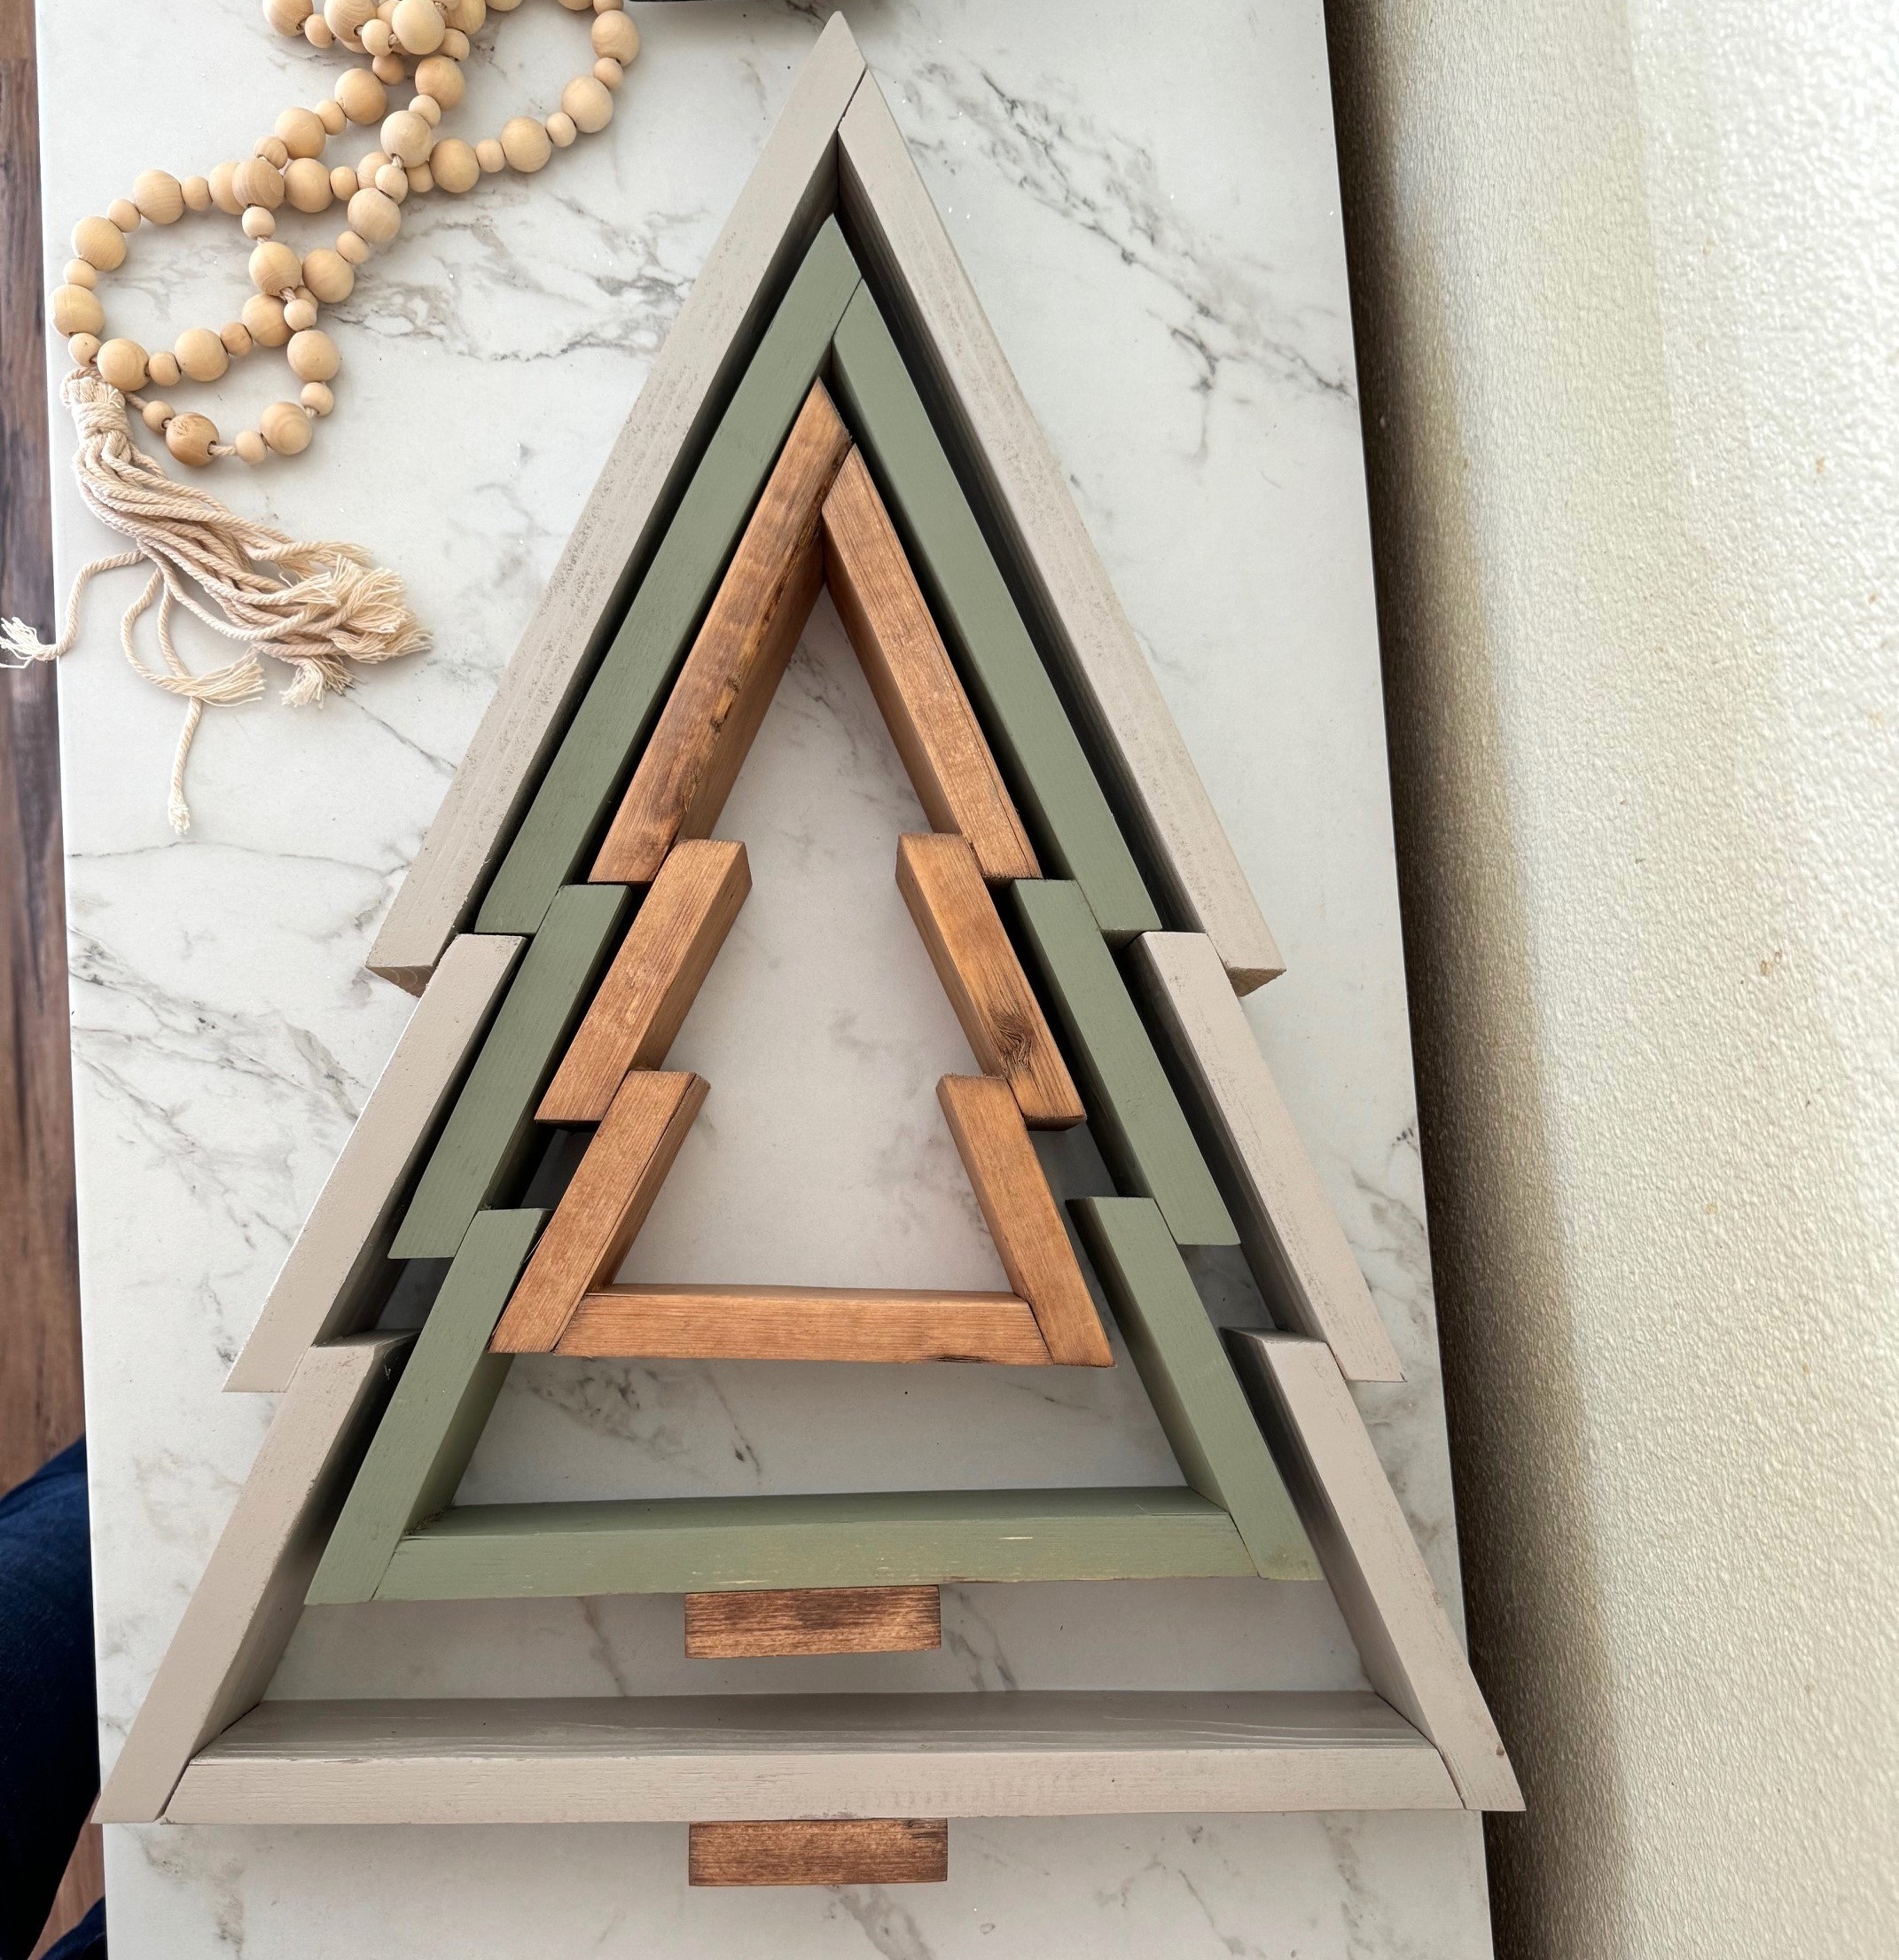
The trees are designed to nest together for easy storage.