


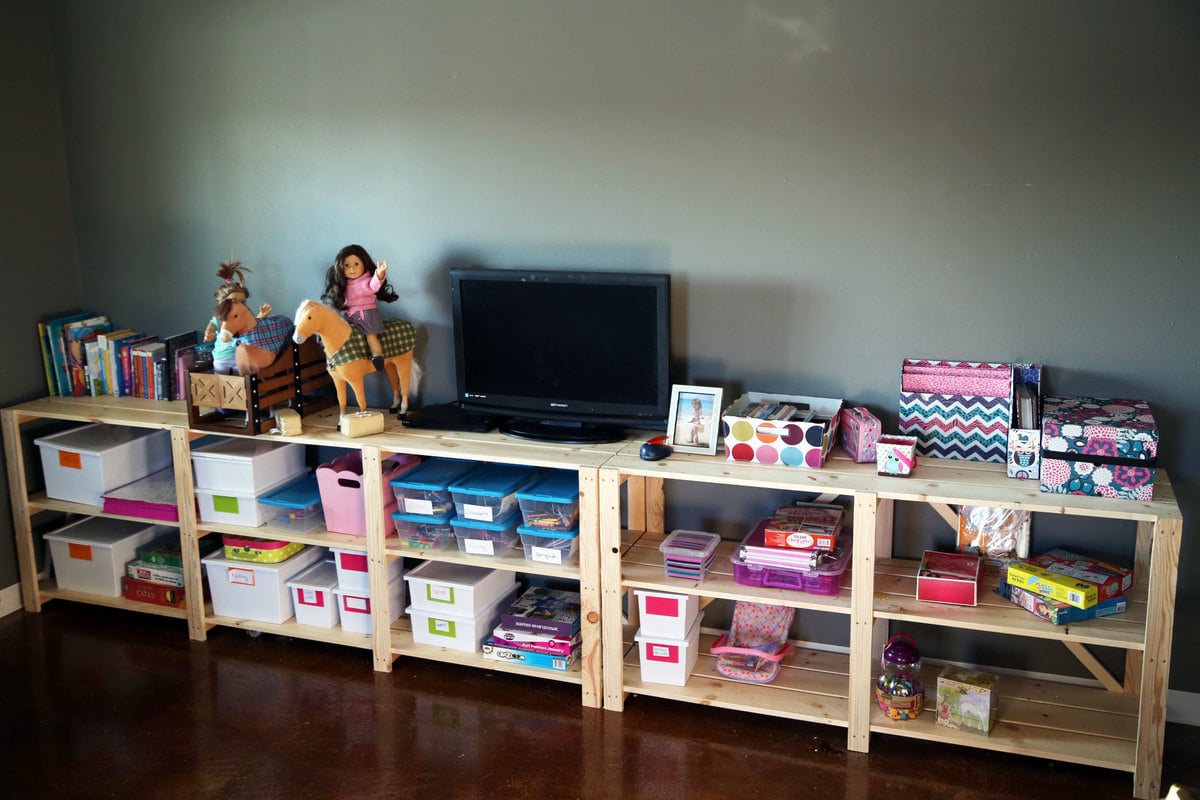
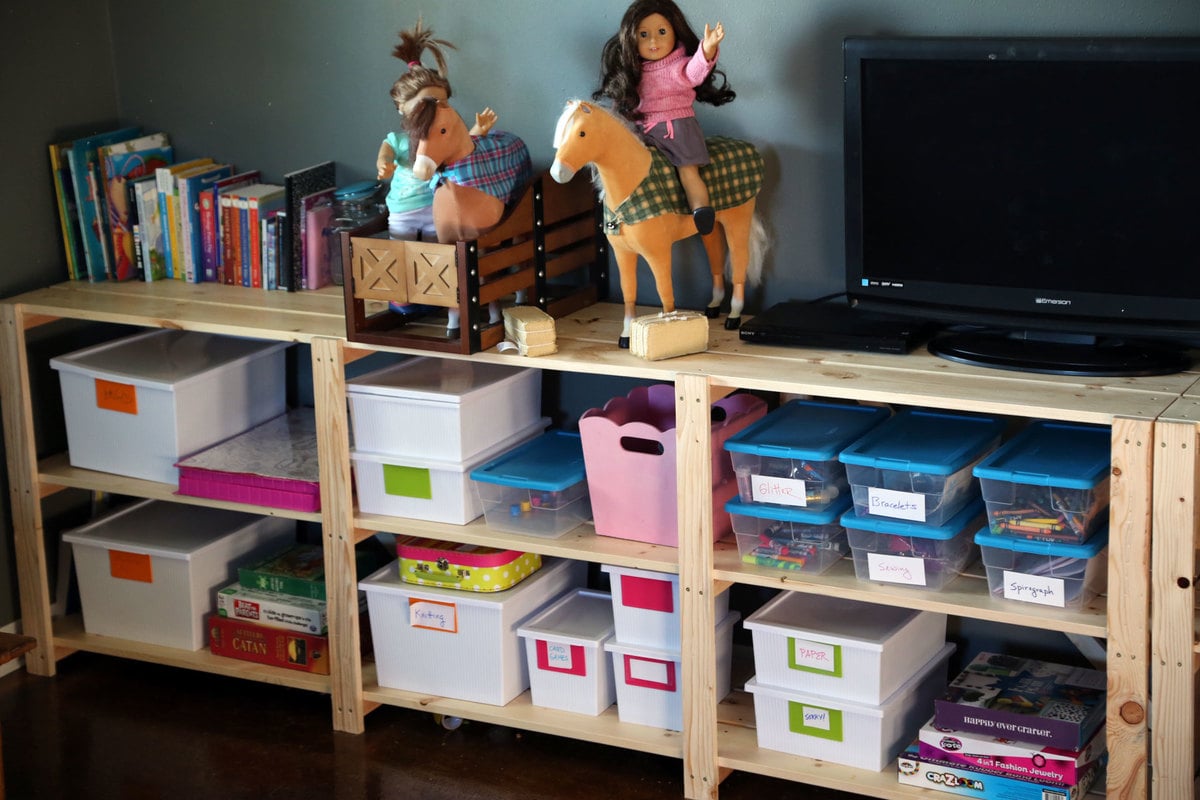
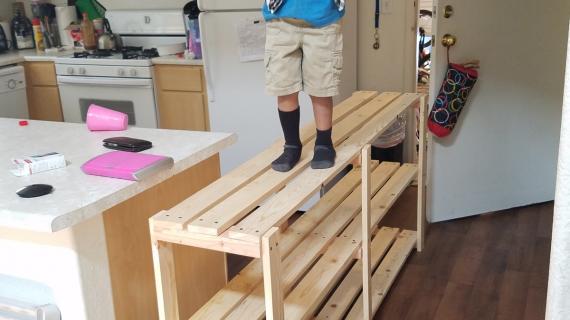
Do you need inexpensive shelving to get things put away and off the floor? Our wood slat low shelving unit is very inexpensive to make and easy to build yourself and save. Fill with off the shelf milk crates, baskets or bins and stain up for a beautiful farmhouse style console table. Free step by step plans from Ana-White.com are easy to modify and build from.
Preparation
- 12 - 1x4 @ 8 feet long
- 3 - 1x3 @ 8 feet long
- 2 - 2x4 @ 8 feet long
- 2 - 1x2 @ 8 feet long (optional cross supports, can also use 1x3s)
- 2" wood screws (you can also use a shorter wood screw like 1-1/4" for screwing down the shelving)
I used all self tapping construction screws (try the SPAX or similar) so I didn't have to predrill any holes and no wood split out on me.
- 8 - 1x3 @ 31-3/4"
- 12 - 2x4 @ 12-1/2"
- 9 - 1x4 @ 8 feet long
- Optional cross supports are cut to fit


Please read through the entire plan and all comments before beginning this project. It is also advisable to review the Getting Started Section. Take all necessary precautions to build safely and smartly. Work on a clean level surface, free of imperfections or debris. Always use straight boards. Check for square after each step. Always predrill holes before attaching with screws. Use glue with finish nails for a stronger hold. Wipe excess glue off bare wood for stained projects, as dried glue will not take stain. Be safe, have fun, and ask for help if you need it. Good luck!
Instructions
Step 1
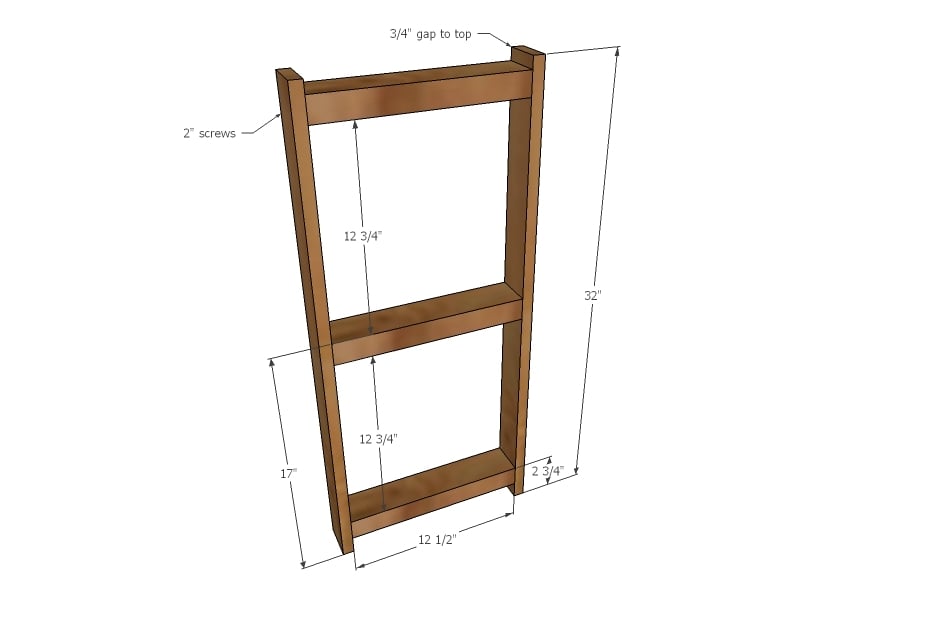
Build the leg sets by attaching the 1x3 legs to the 2x4 supports with 2" wood screws and glue, two screws per joint.
Step 2

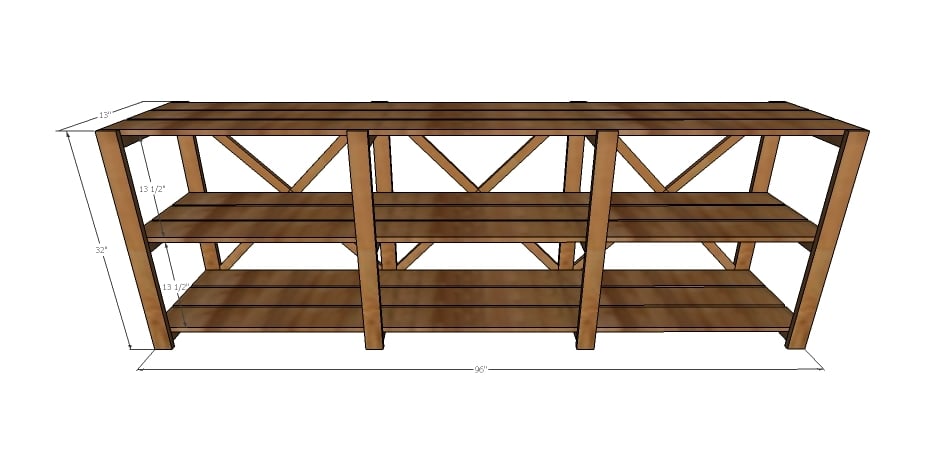
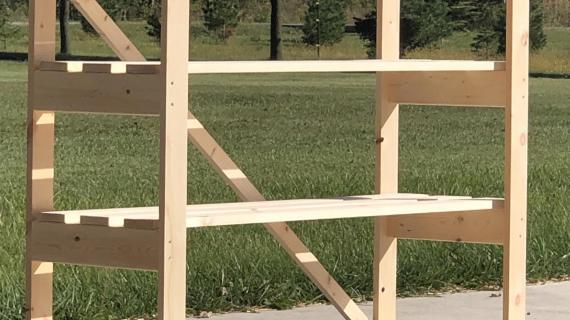
Attach the shelving boards on the outsides first, to the outside legs. Use a level to make sure your legs are level as you attach shelving.
Step 3

Attach center boards last, leaving an even gap between the center board and the side board.
Step 4
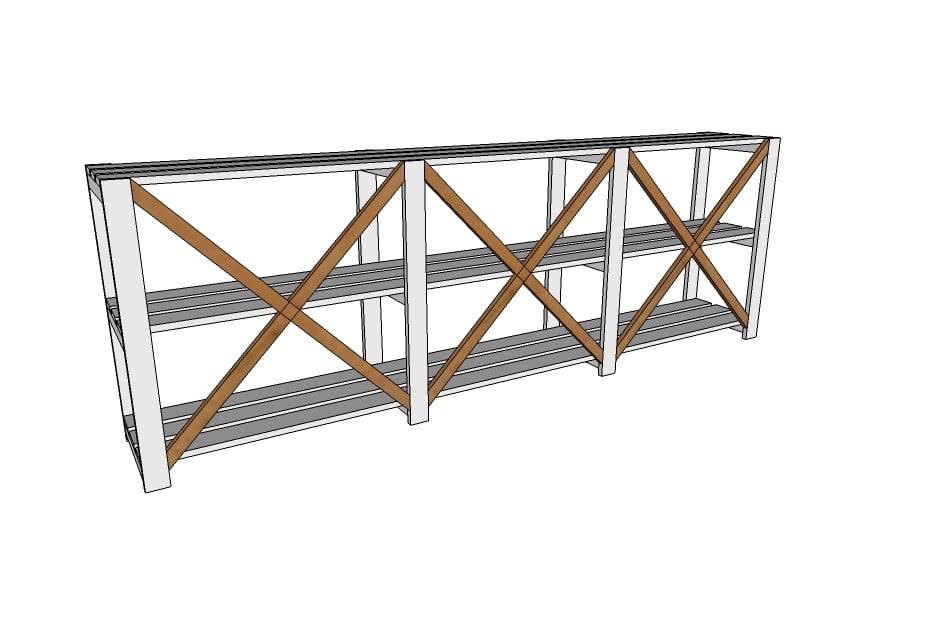
Place 1x2s across back and mark. Cut angles (can adjust a miter saw or use a handheld saw to cut) and attach to back. We found we only needed one cross support.
It is always recommended to apply a test coat on a hidden area or scrap piece to ensure color evenness and adhesion. Use primer or wood conditioner as needed.
Comments
kirsten0117
Wed, 04/01/2015 - 12:41
Am I missing something?
The plans call for the 2x4 supports to be attached to the 1x3 legs, but the 2x4 will stick out on either side as it is wider than the 1x3. Is this a mistake in the plans or am I just missing something?
jojabis
Wed, 04/01/2015 - 14:24
it sure looks like they are
it sure looks like they are the same size on the video is it possible that they are 2x3's?
Macpug
Thu, 04/09/2015 - 21:12
Color me Frustrated
Yep, I'd already made my cuts before my brain kicked in and I realized it wasn't going to work the way it was written. The 2x4's do stick out, looks crappy. I turned the support 2x4's sideways (so they're 2" wide and 4" tall), then the 1x3's look ok screwed to them for legs. (Looks 'ok' but I'm not thrilled). Obviously, 1x4's would work, and I tried that, too, but it has a really heavy look. It's ok for the garage, shed, etc., but not for the office.
Anyone else run into trouble and come up with a decent fix?
In reply to Color me Frustrated by Macpug
kirsten0117
Sun, 04/12/2015 - 18:09
I also had my cuts already
I also had my cuts already done when I noticed the error. I ripped the 2x4's down to make them 2x3's and it worked out great. I also used two 1x4's for the top with a 1x6 in the middle because otherwise you end up with almost an inch gap between the boards for the shelves. For the bottom two shelves it wasn't bad but I wanted a more finished look to the top.