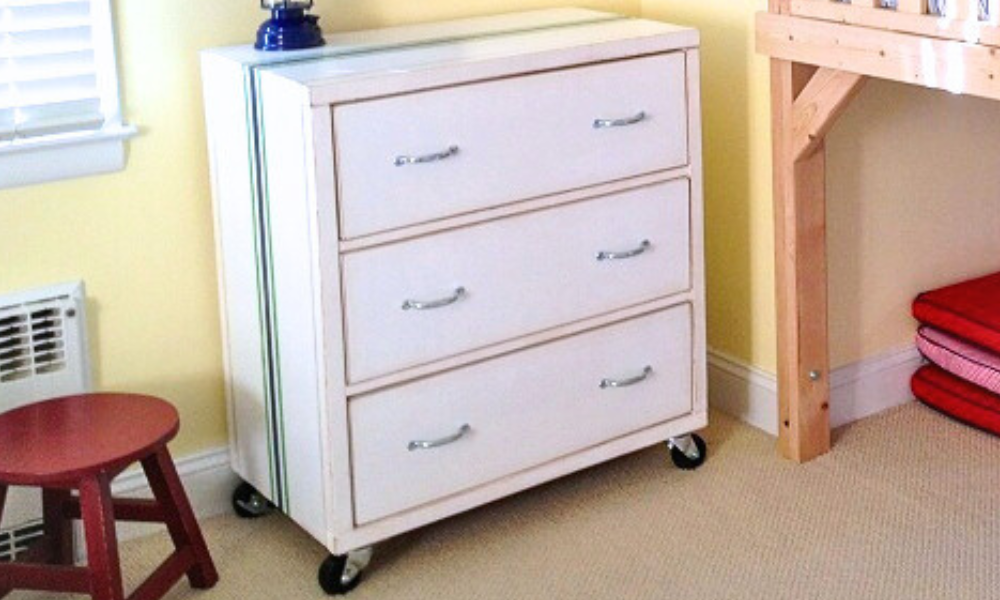


Free plans to build dresser on wheels. This is a small dresser with big drawers, perfect to add extra storage. We love it wheeled in a closet, in entryways, or anywhere you need a little extra storage.
Step by step plans with diagrams, shopping list and cut list and more from Ana-White.com


Why We Built this Small Dresser on Wheels
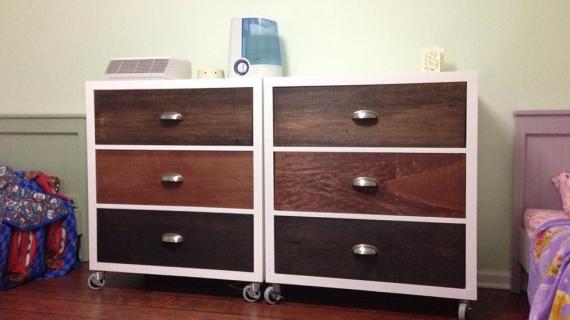
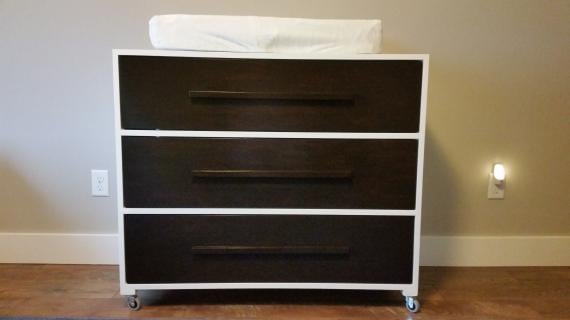
My friend Jaime from That's My Letter loved this dresser too, but she wanted to build a single wide, three drawer dresser for her son's room.

Of course we've got you covered with the plans too (see below) so you can make the single wide dresser too.
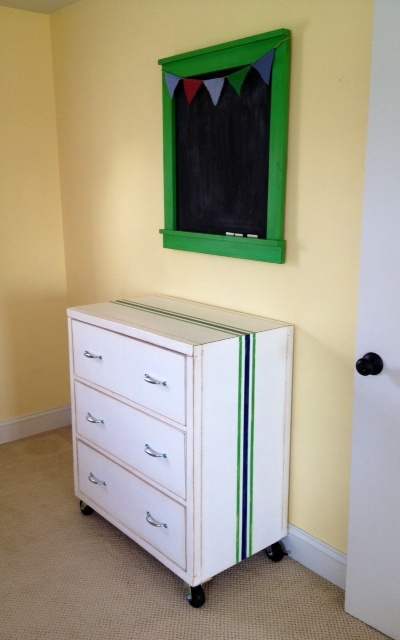
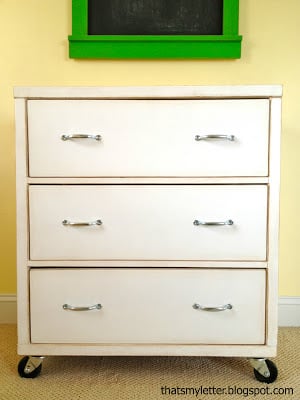
I love the stripe on the dresser! It's such a nice little sporty touch!
And of course Jaime made the chalkboard as well too (see plans here).
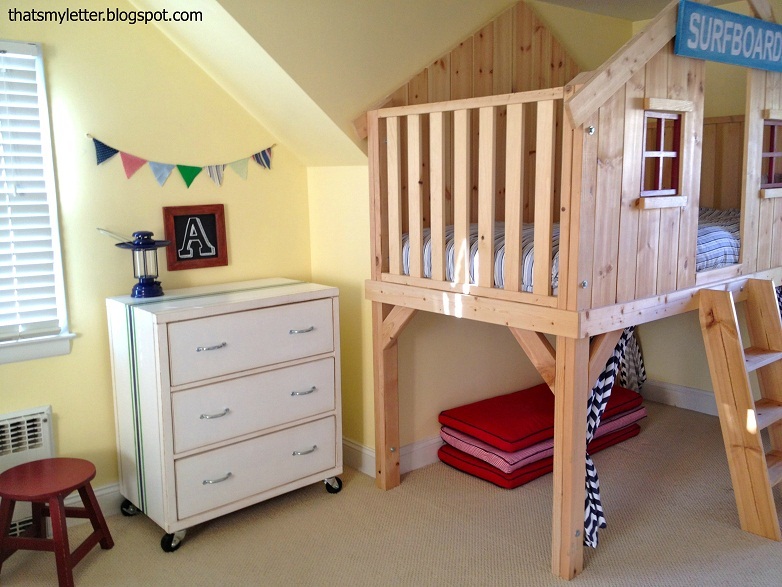
Build the Loft Bed with Free Plans
Love the loft bed? We've got plans for that too!
More Photos and Build Post
What a beautiful DIY space Jaime!!! Before we get to the plans, please take a second to go read the details on Jaime's build here and check out lots more photos.
Thanks again Jaime! Enjoy the single wide rolling dresser plans below.
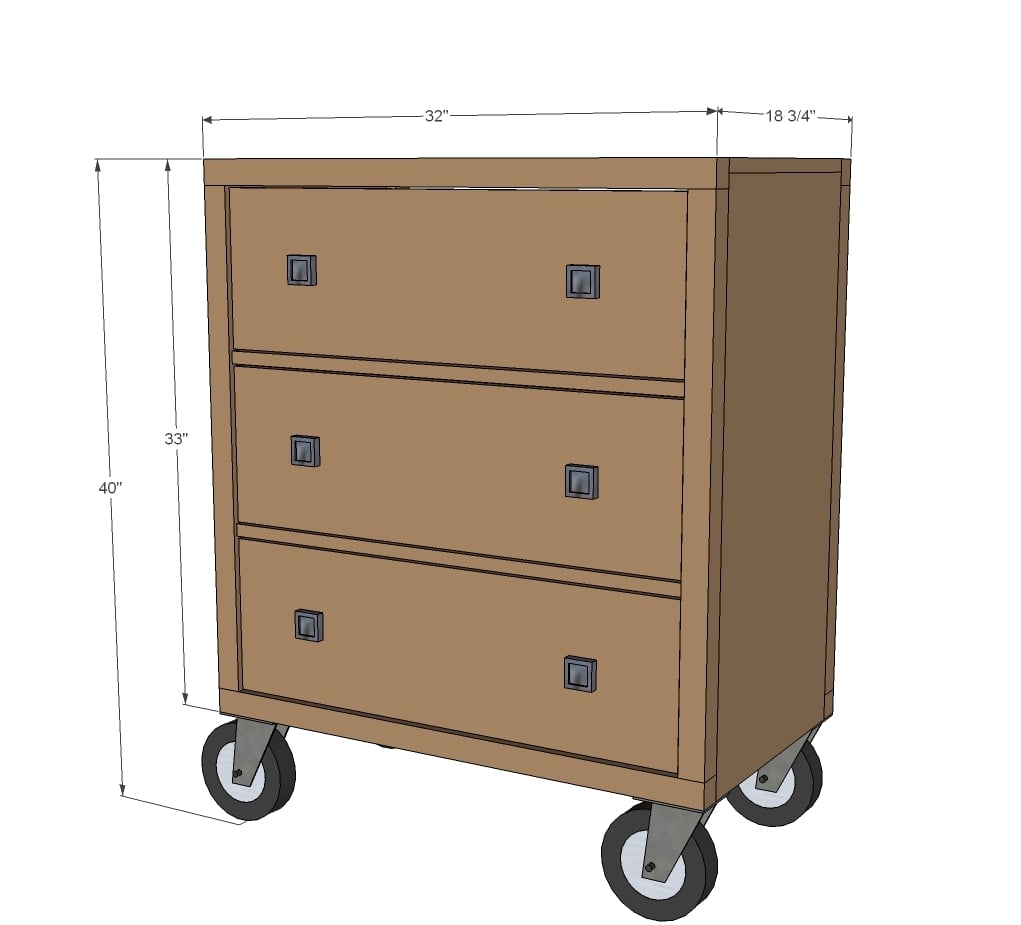
Preparation
- Half sheet of 3/4" plywood ripped into 15 3/4" widths referred to as 1x16s in this plan
- 2 - 1x2 @ 8 feet long
- 3 - 2x2 @ 8 feet long
- 3 - 1x8 @ 8 feet long
- 1 - 1x10 @ 8 feet long (drawer faces)
- 1/2 sheet - 1/4" plywood
- 3 - 15" euro style bottom corner mount drawer slide sets (the white euor ones are easiest and will support the bottom plywood being attached to the bottom of the drawer)
- 1 1/4" and 2 1/2" pocket hole screws or 2" and 3" self tapping counter sink screws 4- caster wheels
Cut List:
- 2 - 1x16 @ 32 1/4”
- 6 - 1x2 @ 15 3/4”
- 1 - 1x16 @ 32”
- 4 - 2x2 @ 32”
- 4 - 2x2 @ 30”
- 2 - 1x2 @ 29”
DRAWERS (cut to fit drawer slides!!!)
- 6 - 1x8 @ 26 1/2”
- 6 - 1x8 @ 16”
- 3 - 1/4” plywood 28” x 16” (tip: have 1/4” plywood ripped into 16” widths at hardware store)
- 3 - 1x10 @ 28 3/4” (Expected width is 9 1/4" - if your 1x10s differ in width, you may need to alter the plan to ensure even gaps around your drawer faces)
- Back is optional


Please read through the entire plan and all comments before beginning this project. It is also advisable to review the Getting Started Section. Take all necessary precautions to build safely and smartly. Work on a clean level surface, free of imperfections or debris. Always use straight boards. Check for square after each step. Always predrill holes before attaching with screws. Use glue with finish nails for a stronger hold. Wipe excess glue off bare wood for stained projects, as dried glue will not take stain. Be safe, have fun, and ask for help if you need it. Good luck!
Instructions
Step 1

Please take a second to review the double wide plans as there is a ton of information in that plan as well.
These cleats are for supporting the drawer slides later on. Attach with 1 1/4" finish nails and glue to insides of both sides.
TIP: Pocket hole users may wish to drill 3/4" pocket holes facing upward on insides and facing outward on front/back sides for attaching top and face frames in later steps.
Step 2

Attach top to sides with cleats on insides.
Step 3

Build face frames first with either 1 1/2" pocket holes and 2 1/2" pocket hole screws or countersunk 2 1/2" or 3" screws. Then attach to face of dresser either through pocket holes drilled in step 1 and 1 1/4" pocket hole screws or with 2"+ finish nails and glue.
Step 4

Now add these guys to the face. Recommended is 3/4" pocket holes and 1 1/4" pocket hole screws on underside.
Step 5

Drawers - The drawers should be built to match the opening widths of the dresser.
Here is a great video on building and installing drawers:
Step 6

Install drawers in openings, attach cabinet members to 1x2 cleats and drawer members to bottom corner of drawers.
Step 7

Now add the drawer faces to the drawer boxes, keeping an even gap around all sides. Glue and nail from outside with 1 1/4" finish nails, and then you can add a few screws from the inside to keep the face in place. TIP: Depending on your hardware, it may be easier to add hardware before attaching drawer face to drawer.
Step 8

Just add wheels!
It is always recommended to apply a test coat on a hidden area or scrap piece to ensure color evenness and adhesion. Use primer or wood conditioner as needed.

Comments
Amy C (not verified)
Mon, 01/21/2013 - 13:36
hanging storage above
Love this plan - I'm wondering if it'd maybe be deep enough to build hanging storage above it? We really need a wardrobe of some sort but can't seem to find a plan for one and are thinking about trying to alter a dresser plan we like instead. Thanks!
JennyLee (not verified)
Tue, 01/22/2013 - 18:28
Request a flowers shelf plan
Ana, I like your plan very much. Thank you so much. Could you please make a plan for this flowers shelf?
http://www.walmart.com/ip/Holland-Outdoor-Flower-Shelf/19525091
Mrs. McGee
Fri, 02/08/2013 - 05:40
question
We want to build a single wide dresser as well, but need more drawers. Would it be hard to add 2 or 3 drawers to the top of this?
sjaustin
Wed, 10/22/2014 - 12:59
If I wanted the top to be one
If I wanted the top to be one solid piece, could I just make each side panel 3/4" taller and make the top 1.5" wider and install it on top of the face frames instead of in between them?