Whether you buy kitchen cabinets or you DIY them yourself (I'm totally on team DIY here!) I think the biggest difference maker in how professional looking your kitchen cabinet ends up appearing is in the tiny little details. In other words, after you hang your cabinets, you aren't done quite yet.
After installing all the kitchen cabinets for the Momplex Vanilla Kitchen, there's a few little things that will make a big difference to take care of.
The most obvious one is finish installing the flooring.
We opted not to install flooring under the cabinets for two reason. 1 - the flooring we are using is a floating floor, and needs room to expand and contract, and is not recommended to be installed under cabinets and 2 - if we ever wanted to change out flooring (I hope not - it's got a lifetime residential warranty!) it would be relatively easy to do.
One reason we might have to at some point replacing flooring in the kitchen is possible water damage from perhaps a flooded dishwasher. It's good to keep options open. You just never know.
We decided to keep the flooring the same throughout the entire upstairs to make it easy to sweep and clean, and also to make the space appear continuous and larger. It just scores and snaps.
There's a few tricky cuts around the dishwasher end panel on the first row, but once we got started,
Things moved pretty fast.
On the other side of the kitchen, we floored inside the fridge cabinet
And then all the way into the range opening.
Since the flooring is to be installed with a small gap around outside edges to allow the flooring to expand and contract, we have to finish out the area between the base kitchen cabinets and the flooring.
This will also dress up the bottoms of the cabinets, and give us an opportunity to finish out the toekick in a material that matches the face frames.
We take measurements,
And then use 1/2" plywood strips (we used birch primed and painted to match the face frames) as toekicks,
Just nailing in place with our most favorite tool ever.
Since there is no toekick around the fridge cabinet, we finished off this seam with discreet quarter round moulding - although base moulding would have looked great too.
And we did the same with the dishwasher end panel.
One thing - when you do your dishwasher end panel, keep the outside edges flush so it's easy to add base trim. If we'd centered the 1x2 on the plywood panel, we'd have had to do some really tiny, annoying miter cuts to get around the 1x2.
So that's the bases finished out (except for doors and drawers - coming soon!)
Now on to the wall cabinets ...
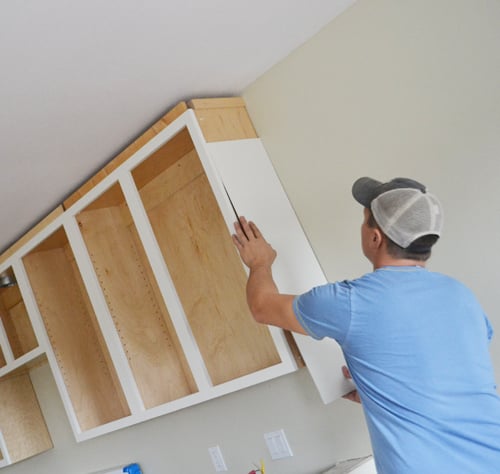
We used prefinished PureBond Plywood (special order about $70 a sheet) for the carcasses. The face frames are painted because that's all you'll see (after we add doors) from the front. But there are a few spots on the ends that we'll need to finish out to match the face frames.
Since the face frames overextend the sides of the cabinets by 1/4" (this is done so the cabinets will line up square at the face frame, regardless of how square the carcass or walls are) we can just take 1/4" birch plywood and prime and paint it to match the face frames,
And glue and tack it on over the ends to finish out the ends.
You'd never know from the outside that we cheated and used prefinished plywood on the inside now!
Forgive my laziness .... I just really dislike reaching inside cabinets and painting them ... especially huge corner lazy susans ...
Since the microhood will no longer sit 6" below the wall cabinets, we also took a second to finish out the cabinets around the microhood with 1/4" painted plywood pieces.
Ready for the microhood now!
Can you see what a big difference the little details make? Someone visiting the Momplex commented that "everything just feels very high quality and well done" in here - I tell you, it's the little things!
And that's the great thing about DIY - you don't have to special order matching toekick, crown moulding, or end panels to match a proprietary finish - you really have all the power in your own hands to finish out your project as you like!
Next up, we'll be DIYing a countertop!
Thanks for reading and following along!
XO Ana + Fam
PS - There's a party going on tonight - hope to see you there!

Comments
leigha_elise
Wed, 01/22/2014 - 15:51
Hi Ana! I have spent the last
Matty3481
Wed, 01/22/2014 - 16:39
Great!