Community Brag Posts

Barn Dollhouse

Submitted by Lynne M on Tue, 12/18/2012 - 17:29

Very easy and fun first dollhouse project. Opted not to go with traditional "barn" colors and made it a mod Barbie house. My 5 year old niece loves it. Thanks Ana!

Estimated Time Investment
Weekend Project (10-20 Hours)
Finish Used
paint and contact paper
Recommended Skill Level
Beginner

Mini Coffin

Submitted by mtairymd on Sun, 09/28/2014 - 04:03

I scaled this 1 foot long coffin from a full size version I saw online.  I built two versions – see drawing links.  The first one (documented below) is from purchased craft wood which was clean and straight.  The second version was built from scrap pallets.   I’ve also included a quick video of the build along with PDF versions of the plans.

Build Instructions:

http://www.instructables.com/id/Mini-Coffin/

Video:

http://youtu.be/Rnwt6G7evgA

Estimated Time Investment
Afternoon Project (3-6 Hours)
Finish Used
Paint or stain
Recommended Skill Level
Beginner

Toy Storage + Cubbies

Submitted by Anonymous (not verified) on Fri, 01/13/2017 - 13:47

We LOVE how functional this toy bin is!! My husband built it in 3 hours, and then the stain took me 2 days (typical the finishing stain takes the most time! Ha ha) I did a 4 step process after looking at dozens of websites of how to stain- since we used pine board I didn't want the grain to stand out as much. 1: homemade vinegar solution stain 2: rustoleum weathered grain stain 3: minwax special walnut 4: 3 coats of poly 

I found the label holders at houseofantiquehardware.com 

Built from Plan(s)
Estimated Cost
$120
Estimated Time Investment
Afternoon Project (3-6 Hours)
Recommended Skill Level
Beginner

Junior loft camp bed

Submitted by lyds6382 on Fri, 09/25/2020 - 20:36

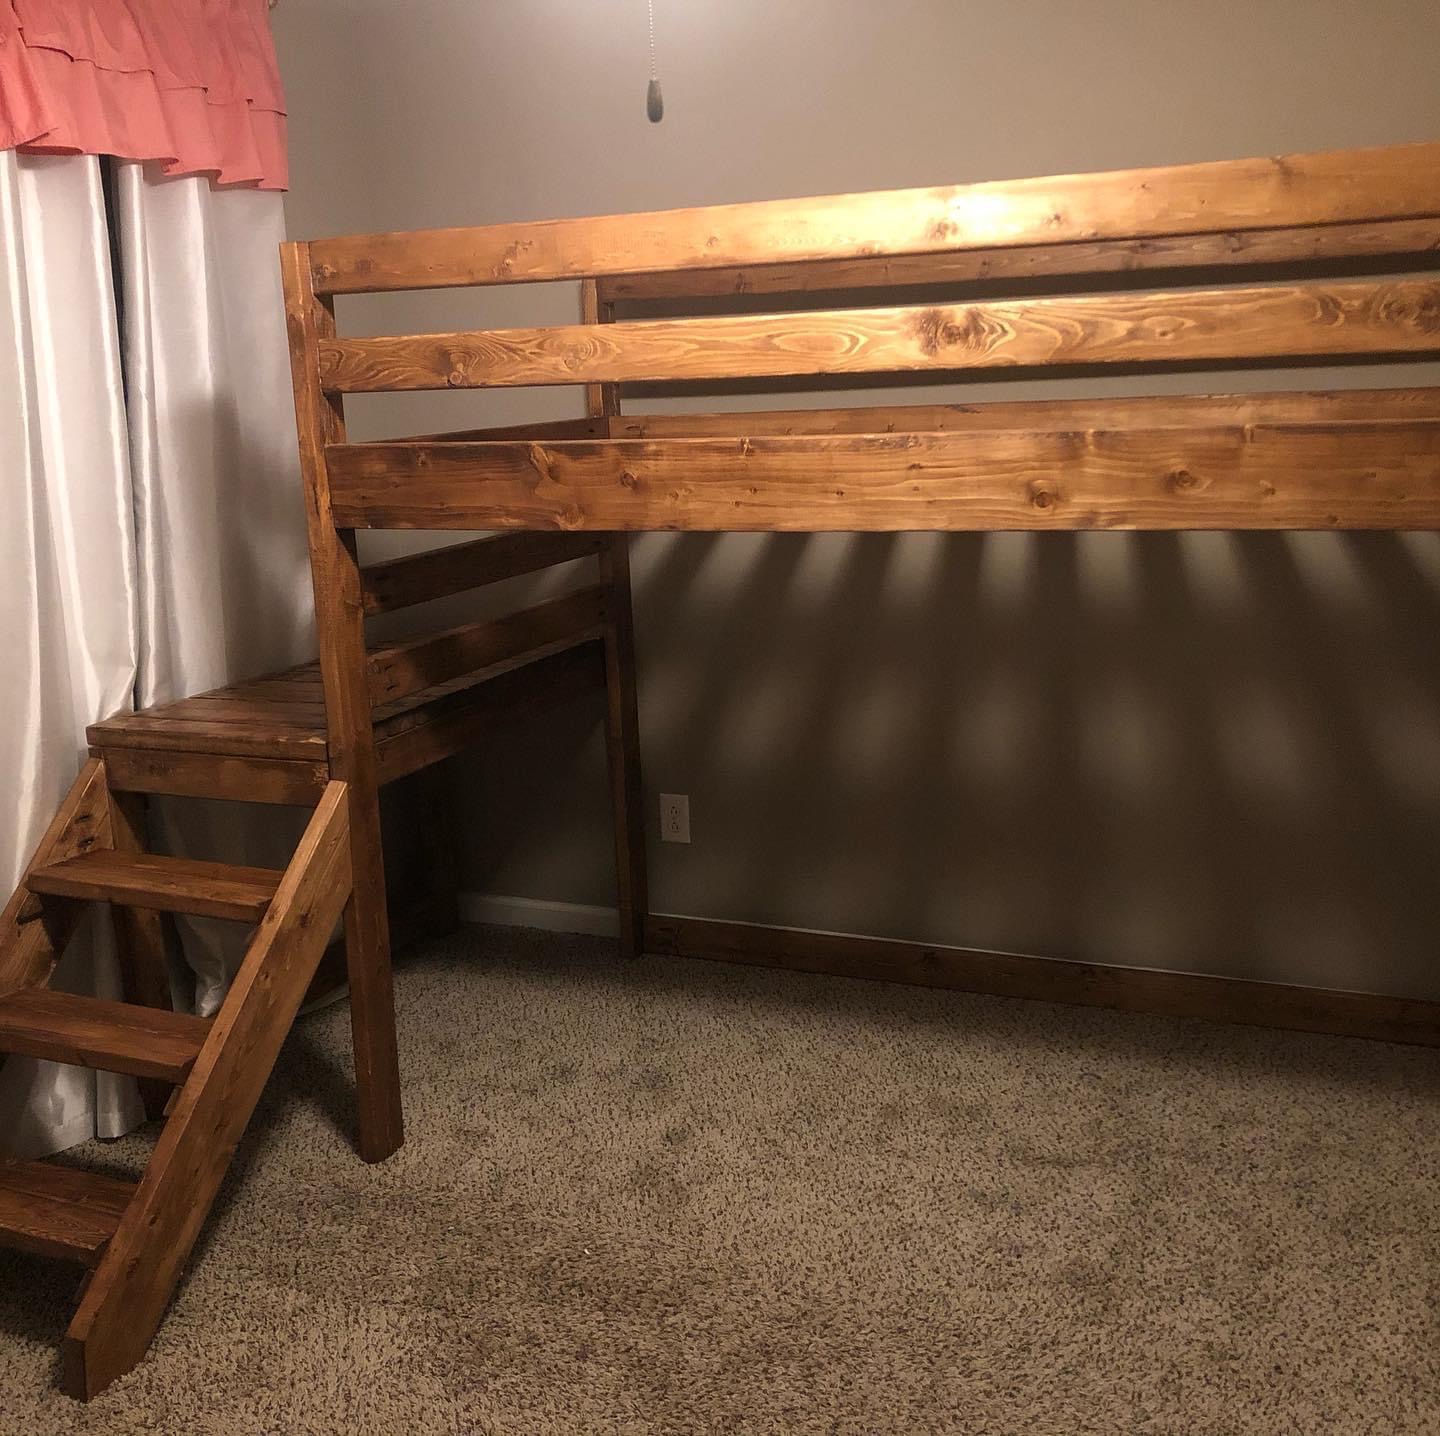
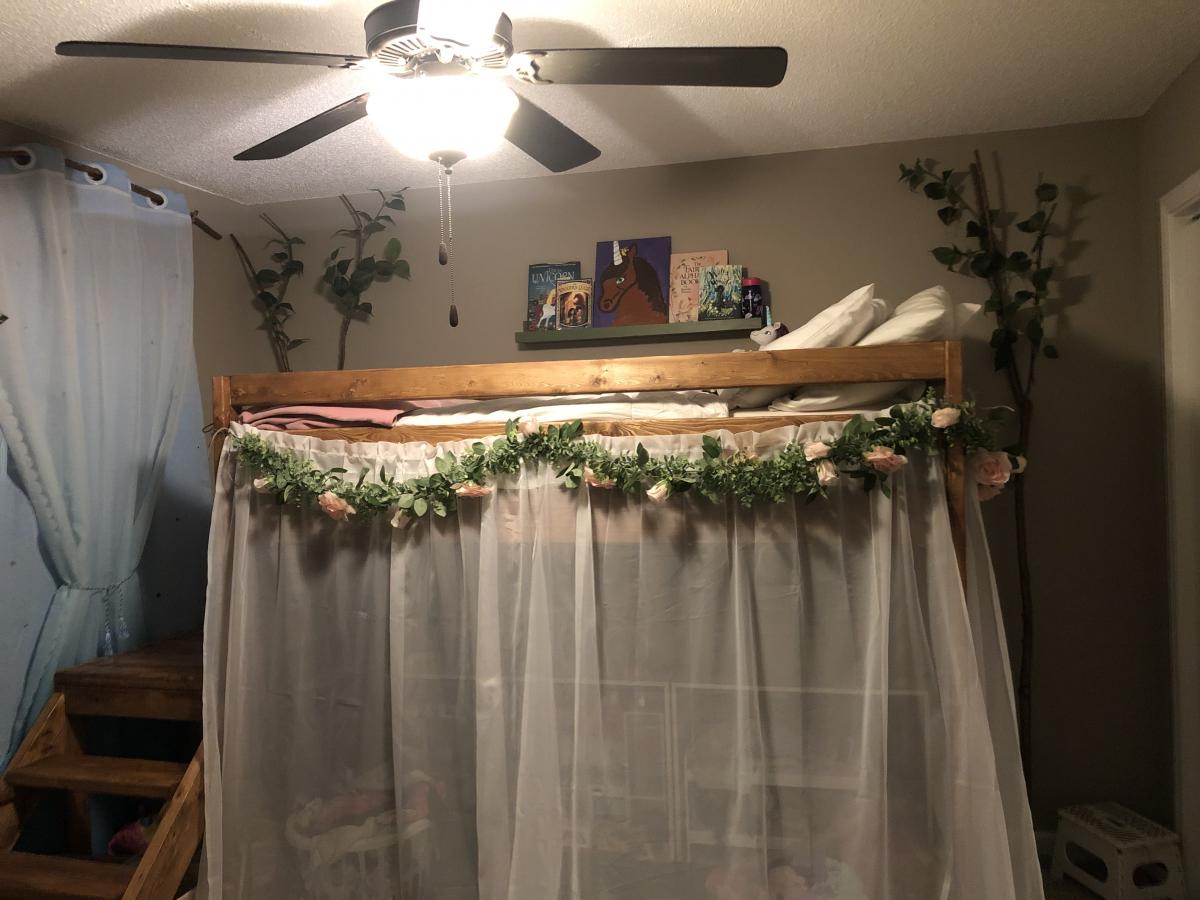
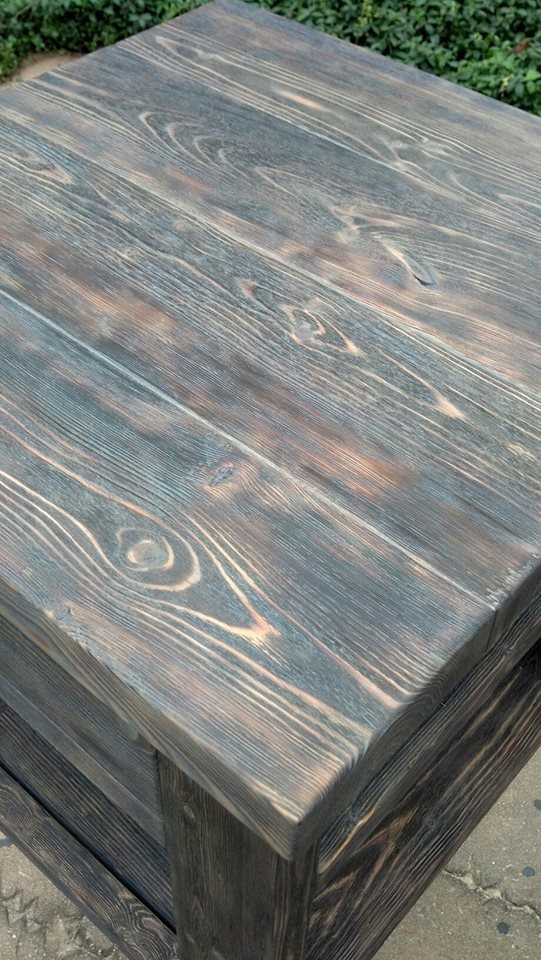
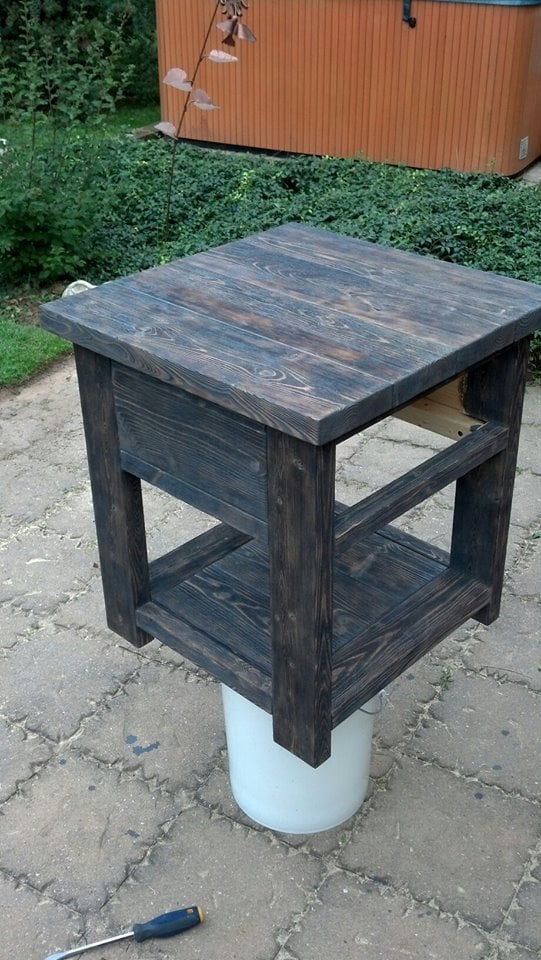
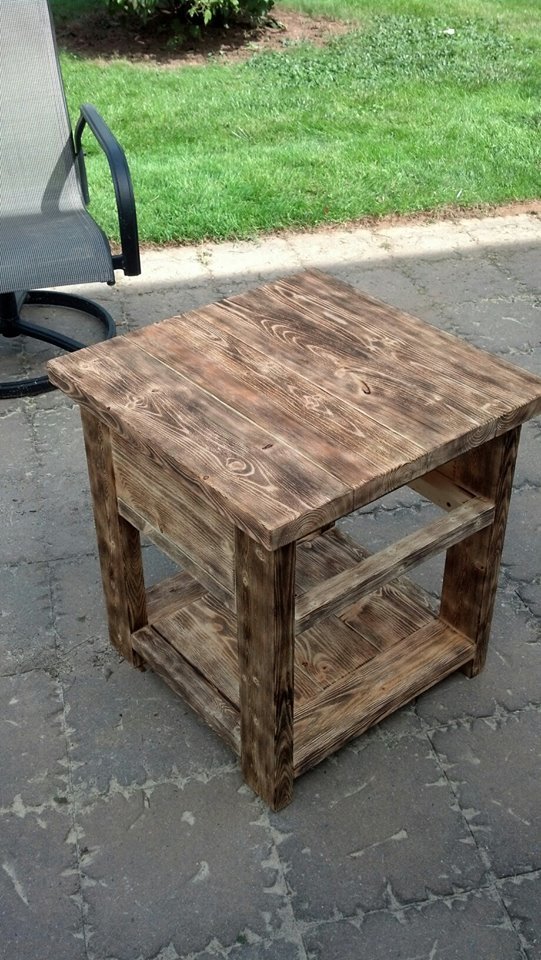
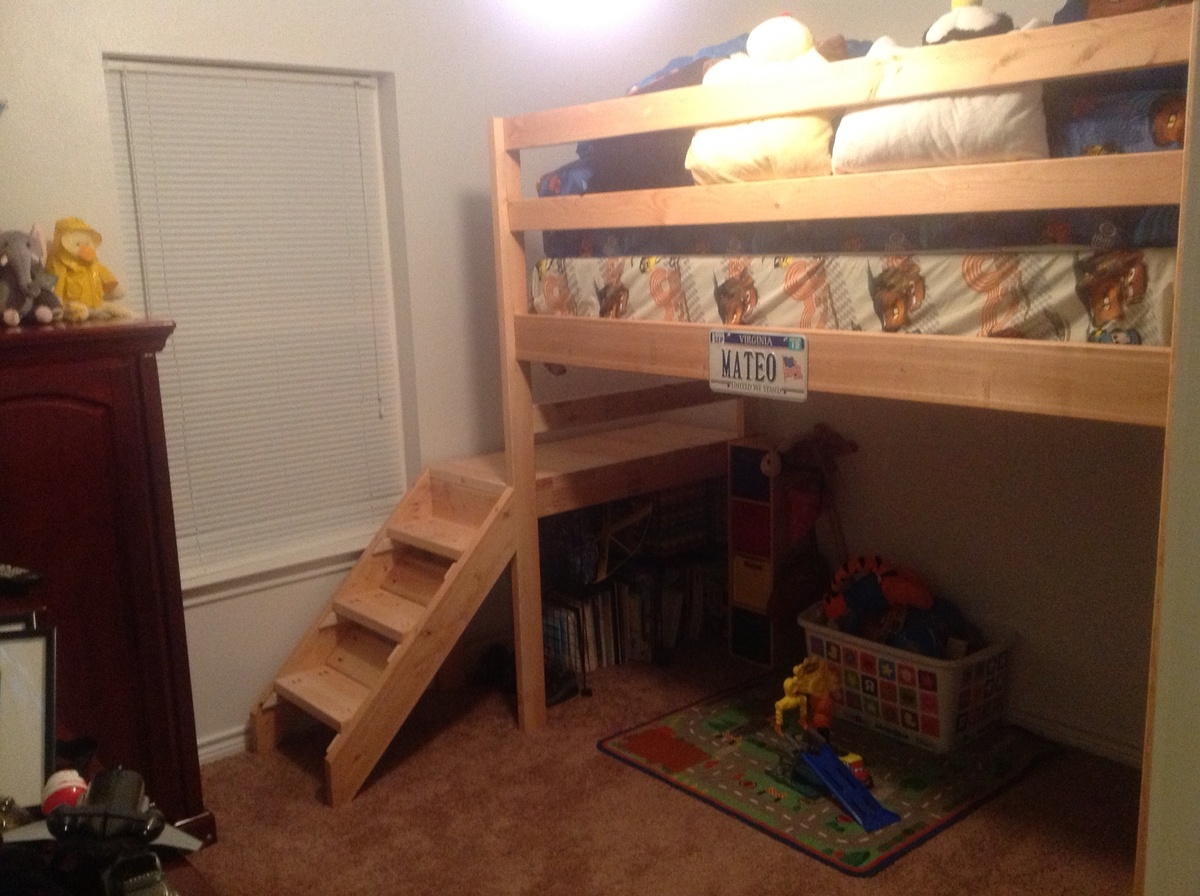
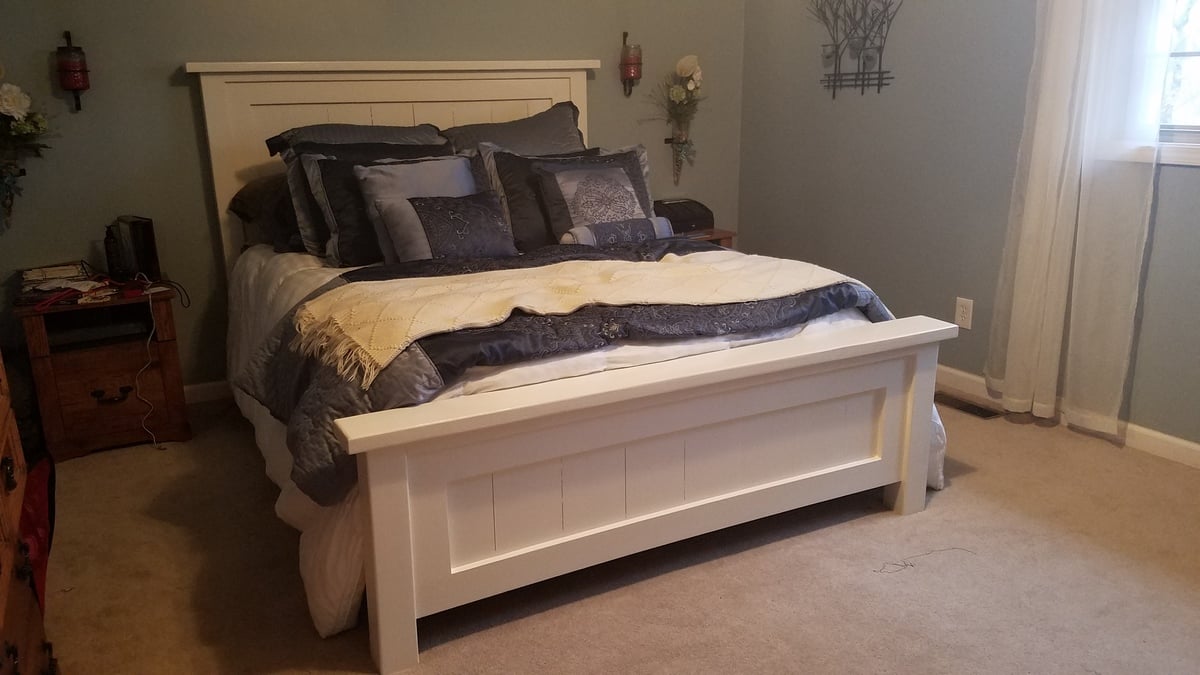
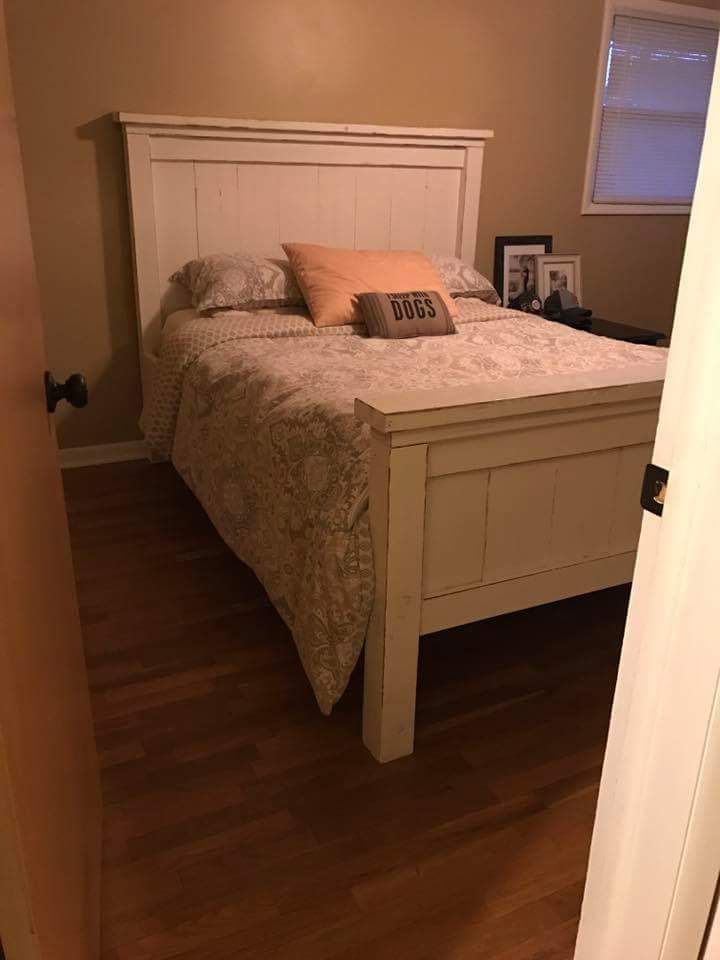
This was my first big build, previously I had only made the $10 ledges. It mostly went as expected! The hardest part, as many have said, is keeping the pieces still while drilling the pocket screws into place. The bed itself did not take much time to build, my time estimate is so high due to the finishing, and really it could’ve used a great deal more sanding and sealing. I was OK with a somewhat rough/rustic finish because it is for my daughter’s “forest” themed room.

I considered using bed hanging hardware, but all I could find used hooks or something similar, which does not seem wise for a bunk or loft bed, since someone could be underneath and accidentally lift it out of place! In the end I just use pocket hole screws to attach everything like the plans dictate.

Estimated Cost
about $120 for lumber and screws, maybe $30 more for stain and poly
Estimated Time Investment
Weekend Project (10-20 Hours)
Finish Used
Minwax Early American
Recommended Skill Level
Beginner

Comments

Rustic X Coffee Table

Submitted by bashir007 on Sun, 12/23/2012 - 07:52

Used cedar wood so I applied a few costs of oil based polyurethane to compensate for the softness of the wood.

Estimated Cost
75
Estimated Time Investment
Day Project (6-9 Hours)
Finish Used
Steel wool and vinegar solution with an oil based polyurethane finish.
Recommended Skill Level
Beginner

Comments

Living Wall

Submitted by Rantzay on Thu, 10/02/2014 - 16:16

Found the plans for the little 3 tiered planter really interesting.  I built a few of the boxes when my wife says "You know...." She has wanted a "living wall" for years, so I modified some of the sizes to make the boxes 18 inches long to accommodate my 37" inch wall.  I added a french cleat to the back of each box, cut down a couple furring strips that I anchored to the wall and added the other half of the french cleat to the frame.  Woot! Together in moments.  The individual planters can be easily removed and rearranged.  I added LED's to the bottoms of the planters for additional lighting and it's really a cool affect.

Estimated Cost
$25 using cedar pickets
Estimated Time Investment
Afternoon Project (3-6 Hours)
Finish Used
sanded smooth and treated with linseed oil
Recommended Skill Level
Beginner

Comments

Lap desk for daughter

It came out really good my daughter loves pokadots so I filled the thing with hundreds and hundreds of pokadots. This was a lot of fun and very rewarding.

Built from Plan(s)
Estimated Cost
About ten dollars in wood and eight dollars for wood glue, screws, caulking, and hinges. Twenty dollars in Paint, paint pens, and clear coat glossy.
The time it took me cost was priceless.
Estimated Time Investment
Afternoon Project (3-6 Hours)
Finish Used
All made from scrap wood that I had laying around.
Ceder, press board, and plywood. I used discounted paint for the solid color and spray gloss clear for that shine. I used a huge assortment of paint pens for all the pika dots. Two standard hinges for the top. Lots of wood glue through out the whole thing and lots of caulking for all the cracks.
Recommended Skill Level
Starter Project

First Woodworking Project!

My sweet son completed his first woodworking project over the weekend! He chose the board game lazy susan as his first project and it turned out beautifully! He used a circular saw for this but thanks to one of Miss Ana’s videos we are looking at purchasing a compound sliding miter saw in the near future. He genuinely enjoyed this project and has received great feedback from loved ones! Thank you very much Miss Ana for sharing these plans! Don’t underestimate the impact you are having on families as far away as Ohio :) We appreciate you and your time and effort!

Comments

Ana White Admin

Fri, 10/02/2020 - 21:14

That smile says it all, thank you for sharing! I can see many hours of games being played on that as well as many more hours, building great projects!

Toy Chest!

Submitted by Dunnski on Wed, 12/26/2012 - 06:54

I made this for my 5 year old niece for Christmas...she loved it! Got a big hug without her parents saying a word.

Considering it's only my third woodworking project I was pleased with the results. Her Mom has requested one for London's baby brother; if I learn from my mistakes that one should be even better.

I painted all of the pieces separately before assembly, so the project was spread out over several days. If you're good enough to paint it all at once it's a weekend project.

Built from Plan(s)
Estimated Cost
About $75, much less if you have paint on hand
Estimated Time Investment
Weekend Project (10-20 Hours)
Finish Used
Paint
Recommended Skill Level
Beginner

End table with drawer.

Submitted by dtmagnet on Mon, 10/06/2014 - 17:24

Used the plans for the Rustic X End Table on this site, modified them a bit to fit the space I wanted to fill. Also changed the design a bit to incorporate a drawer. I wire brushed each piece with a wire wheel brush drill bit to give it texture and make the grain come to life, then after assembly I went over the whole thing with a blow torch to add some nice colour and make the grain further stand out. Finally finished it off with minwax classic grey stain. I'm very pleased with how it turned out.

Built from Plan(s)
Estimated Cost
$40
Estimated Time Investment
Weekend Project (10-20 Hours)
Finish Used
Wire brushed and burnt with a blow torch, then stained with minwax classic grey.
Recommended Skill Level
Intermediate

Comments

Wifey

Sun, 11/02/2014 - 20:57

Looks nice. Any notes as to how you incorporated the drawer?

Loft bed

We recently moved to Texas from Virginia and downsized in living space. Our 3 1/2 year old son had his own playroom so unfortunately we don't have an extra room for that any longer. My solution to that problem was building this loft bed. We altered the plans to fit our measurements (smaller bedroom). We also made it taller so we could use it longer. Also we didn't have a keg jig so we invested in that within that $200 cost. My husband and I built this in one evening from start to finish. 6pm to 2 am! This was also our first wood project. Not bad I say!

Estimated Cost
$200
Estimated Time Investment
Day Project (6-9 Hours)
Recommended Skill Level
Beginner

Whale cottage

Submitted by Anonymous (not verified) on Sun, 01/22/2017 - 09:46

 Thanks! I was able to use your plans for all the cabinets. Real easy to follow! 

Estimated Time Investment
Week Long Project (20 Hours or More)
Finish Used
Paint
Recommended Skill Level
Intermediate

Comments

Modified Rustic X Tables

Submitted by SuperTim69 on Fri, 10/09/2020 - 11:24

Used the Rustic X templates. Just modified a little. Thanks Ana White

Comments

Farmhouse Table

My husband and I love entertaining, but our small kitchen table was just not cutting it for both our space and our hosting abilities. We decided that instead of searching for the perfect table and spending a ton of money, we would just build our own table. We found that Ana's Rustic Table plans best matched what we were looking for, but my husband being the detailed person that he is didn’t just want to take her measurements and run with them. So we taped off the floor around our old table to decide how large we wanted our own table to be.

We basically followed Ana White’s plans to a T. Until it got to the legs. Ana White used 2×4′s for her legs, but we decided we liked the look of chunkier 4×4 legs instead. We also did things in a different order, like attaching the legs to the apron before attaching the table top. This did make everything way easier when it came to painting, no tape needed. We also stained the bottoms and sides of the tabletop boards before attaching them to the apron. After the top was attached I stained the top side and applied about 3-4 coats of Matte polyurethane. I like the matte finish because it doesn’t add any sheen and makes things look even more rustic; however, we’ll have to add a regular coat of poly as well because the matte is too soft for something that will see such rough use over the years. And now for what you’re all wondering about, how much did this project cost us?

  • Wood – $86
  • Stain (Dark Walnut) – $7.77
  • Paint (Olympic Snow Storm) – $11.97
  • Polyurethane (Rustoleum Matte finish) – $11.93
  • If that is all we needed to buy then our total would have been: $117.67.
Built from Plan(s)
Estimated Cost
$300
Estimated Time Investment
Weekend Project (10-20 Hours)
Finish Used
Dark Walnut
Recommended Skill Level
Beginner

Comments

mistyclinton

Mon, 12/31/2012 - 09:43

Your table is gorgeous! You did an amazing job.

I am getting ready to attempt my first two projects, bookshelves and a buffet table. I had a couple of questions about how you got such a consistent stain.

1) The Stain - What kind of stain did you use? How many coats did it take? Did you use a conditioner first?

2) Wood filler - How did you get the wood filler to match the stained areas so well? What kind did you use?

Thanks for the advice! I was thinking I would have to paint the buffet but after seeing your table I think I may actually attempt the stain.

European farmhouse table

Submitted by jenzopr on Tue, 10/14/2014 - 06:04

When I first saw the original plan on ana-white.com, I knew that this table and the bench would fit perfectly into my place. Since in europe we measure mostly in meters, I adapted the plan to a table top of 1,0 x 2,10 meters (or for 8 persons) and made the bench fit between the table legs. Luckily, a friend (he is a carpenter) could get me solid beech wood and helped me to get it into the right size (it took a weekend, since we started from raw tree trunks). Assembly was done in two days and I stained it twice afterwards (3 days, with rest ;) ).

Estimated Cost
400 Euros (~500 dollars)
Estimated Time Investment
Week Long Project (20 Hours or More)
Finish Used
Surface was just sanded, treated with hard oil and sanded again on the next day. You should repeat this procedure at least once a year.
Recommended Skill Level
Intermediate

Our.family.morgans

Submitted by Anonymous (not verified) on Tue, 01/24/2017 - 07:18

Thanks ANA for the plans!!

Built from Plan(s)
Estimated Time Investment
Week Long Project (20 Hours or More)
Finish Used
Primer & paint
Recommended Skill Level
Beginner

Rustic X coffee table

Submitted by Hartke22 on Mon, 10/12/2020 - 22:40

Rustic X coffee tables, sofa and end tables. All Ana White plans!!

Estimated Cost
100
Estimated Time Investment
Weekend Project (10-20 Hours)
Finish Used
Minwax Dark Walnut
Minwax Clear Gloss Polly
Recommended Skill Level
Beginner

Comments

Reading Nook

Submitted by bjhoove on Tue, 01/01/2013 - 10:17

From Closet to Reading Nook ... it took me a month from start to finish to complete and worth every minute spent on it! Come by to see the full story ...

http://www.joy2journey.com/2013/01/01/reading-nook-before-and-after/

No plan was needed for this project, just imagination :)

Hugs and Happy 2013!
Bj
http://www.joy2journey.com

Estimated Time Investment
Week Long Project (20 Hours or More)
Finish Used
Jacobean Stain, Calypso Berry 35A-6 paint, and White paint
Recommended Skill Level
Intermediate

Mini Wine bar

Submitted by ericaf on Sat, 10/18/2014 - 10:41

Be aware: some of the measurements and materials needed in the plan are off. For example, you need 1/8" hardboard for the bottom of the drawer but earlier in the plans it shows 1/4". Also, if you have larger wine glasses, you'll want to plane down your stemware holders so the distance between them is 3 1/8" instead of 3". It would have also been a good idea to pre-stain those before adding them in. Regarding stain, it would also look really good with a light stain. Another really nice thing about this project is that people are really impressed with it though it is fairly straightforward. :)

Built from Plan(s)
Recommended Skill Level
Beginner

Comments

ericaf

Fri, 06/10/2016 - 07:09

Thank you. :) I don't remember exactly, I believe it was regular Minwax wood stain, walnut and/or red mahogany. I will try to find what I actually used.

In love with this!

Submitted by Anonymous (not verified) on Thu, 01/26/2017 - 15:12

This is one of my favorite projects I've done! Very easy and fun! 

Estimated Cost
$140
Estimated Time Investment
Afternoon Project (3-6 Hours)
Finish Used
Antique white paint and semigloss
Recommended Skill Level
Beginner