Community Brag Posts

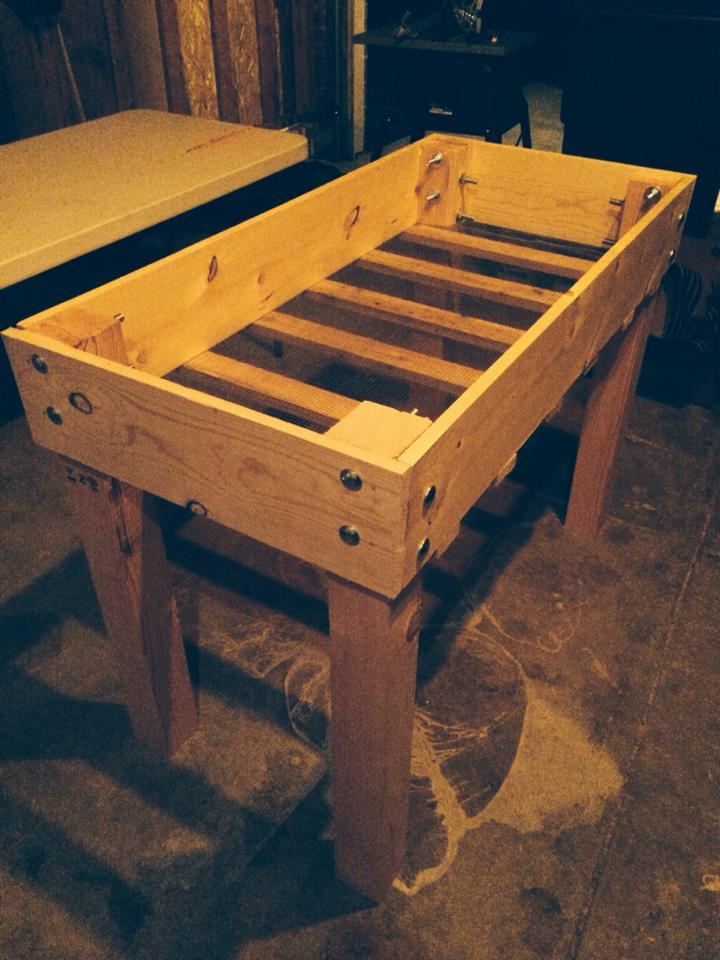
Our twin elevated gardens

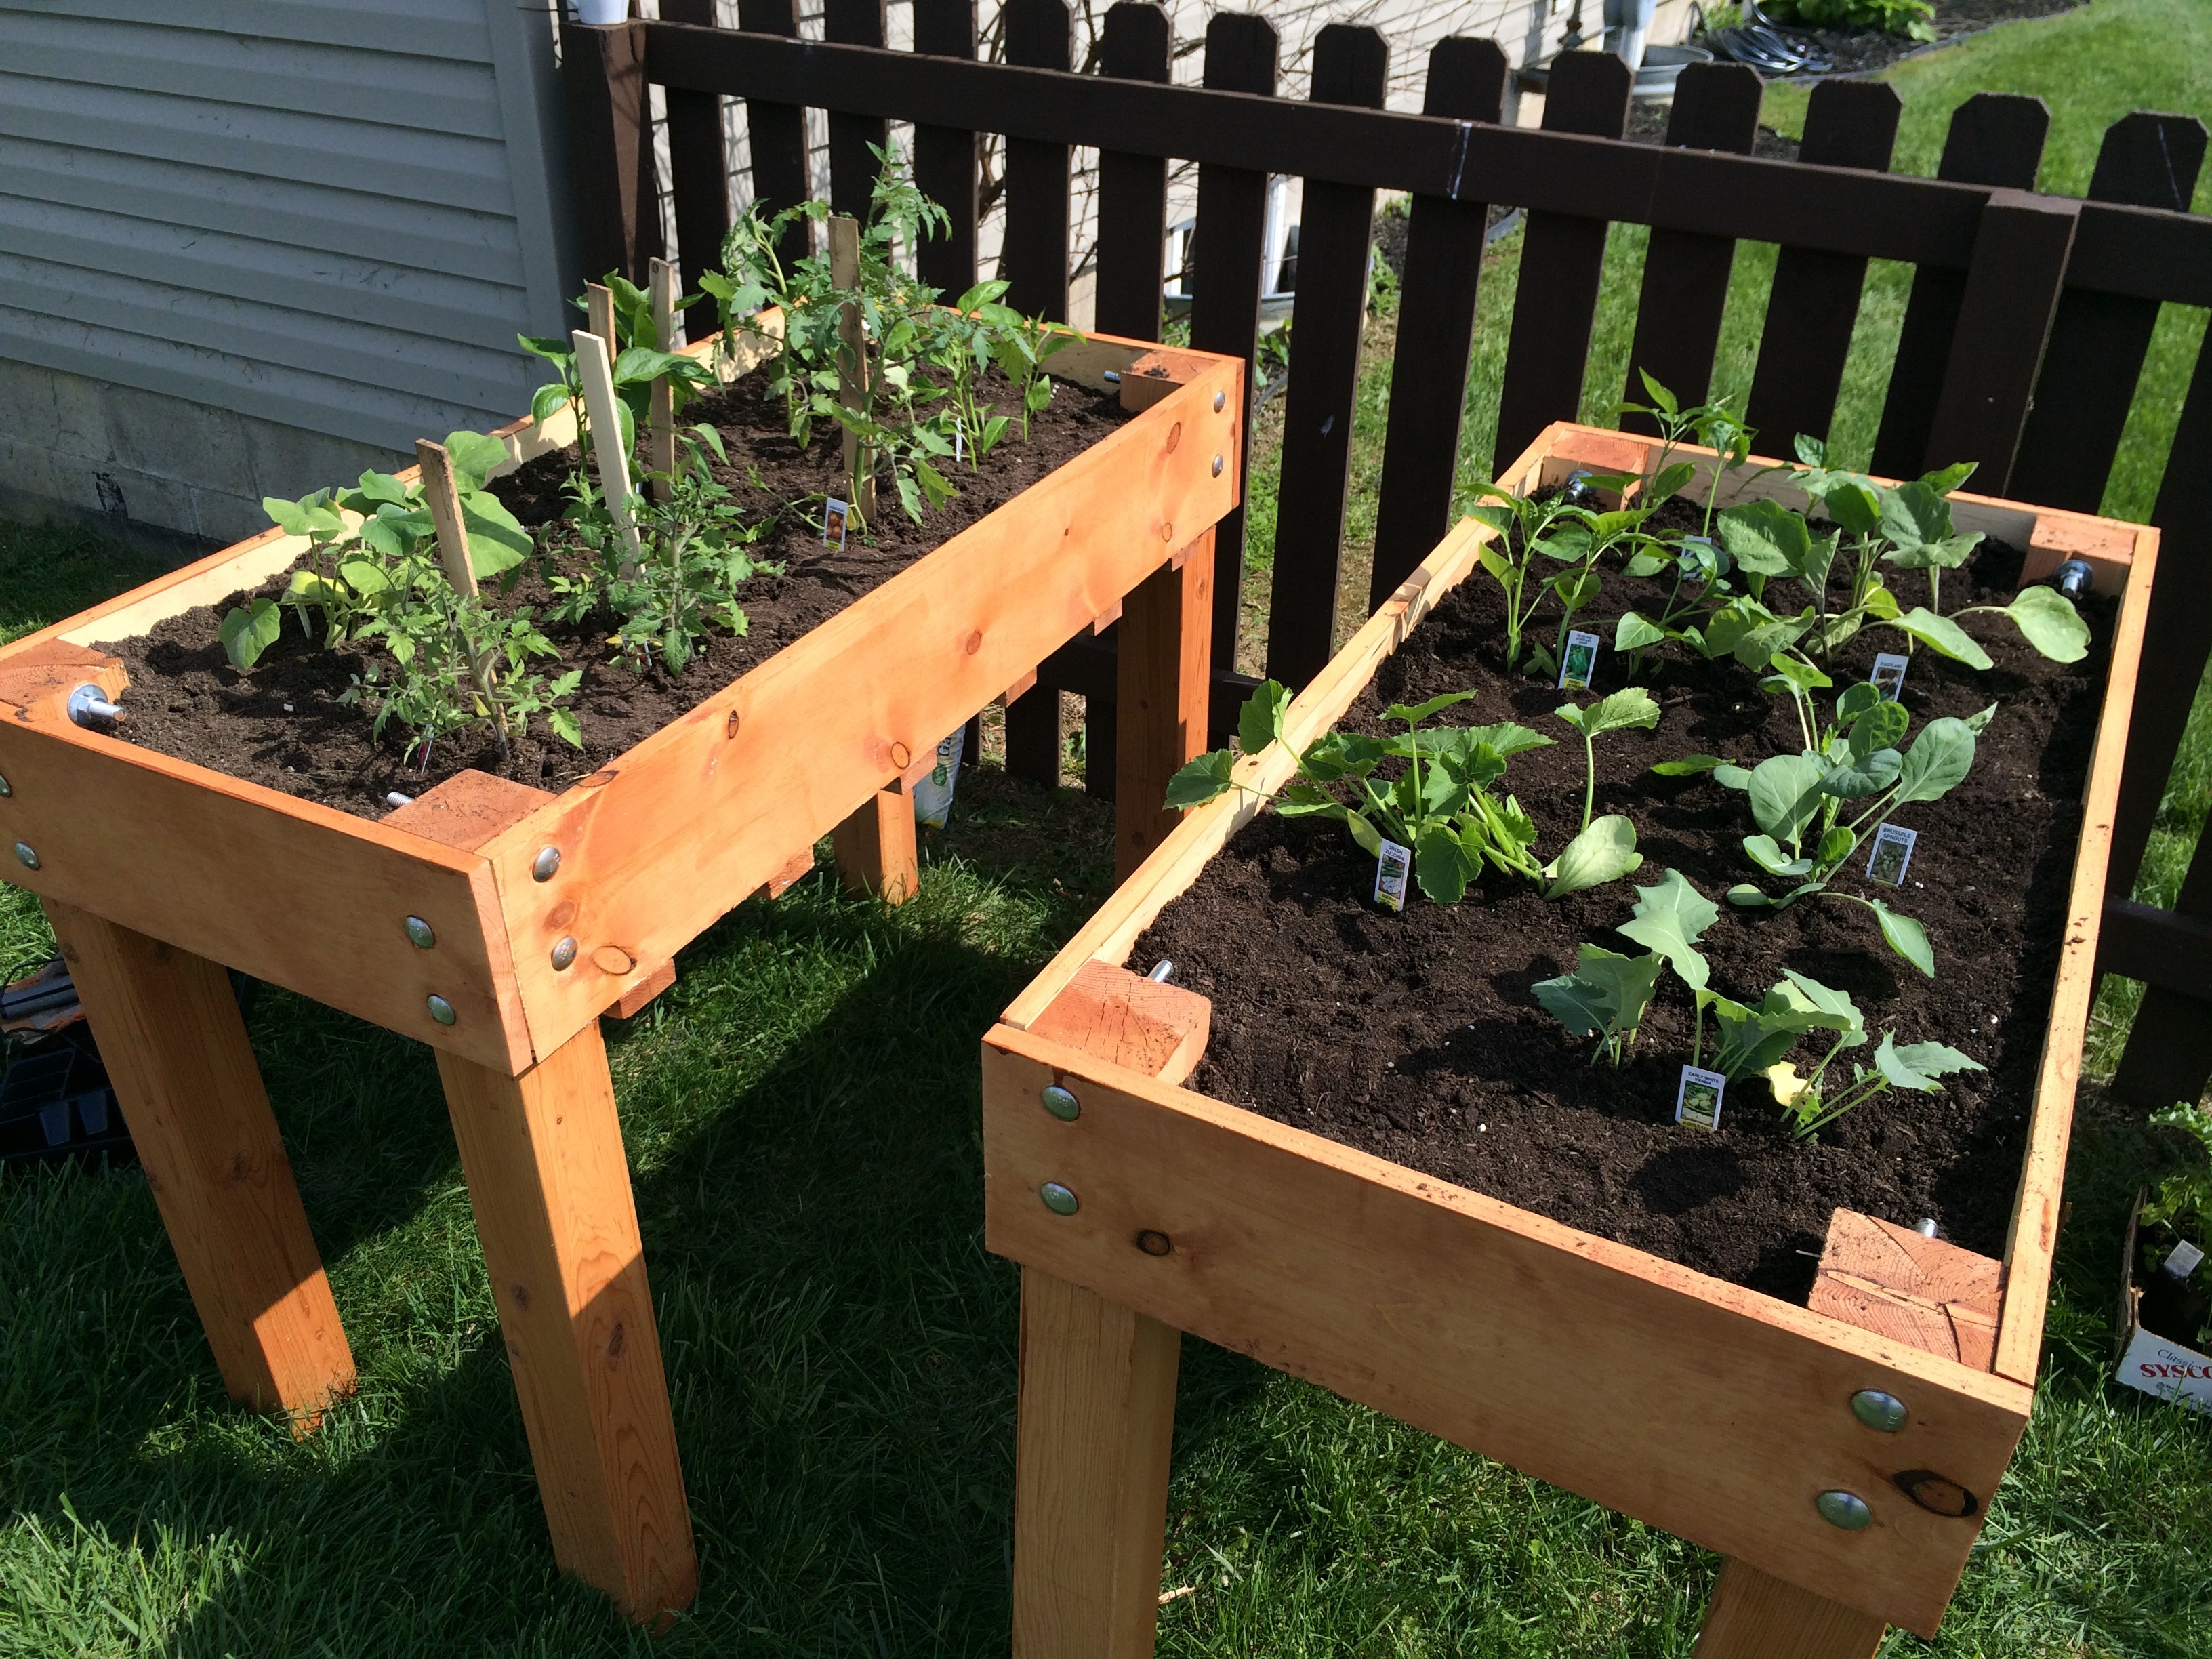
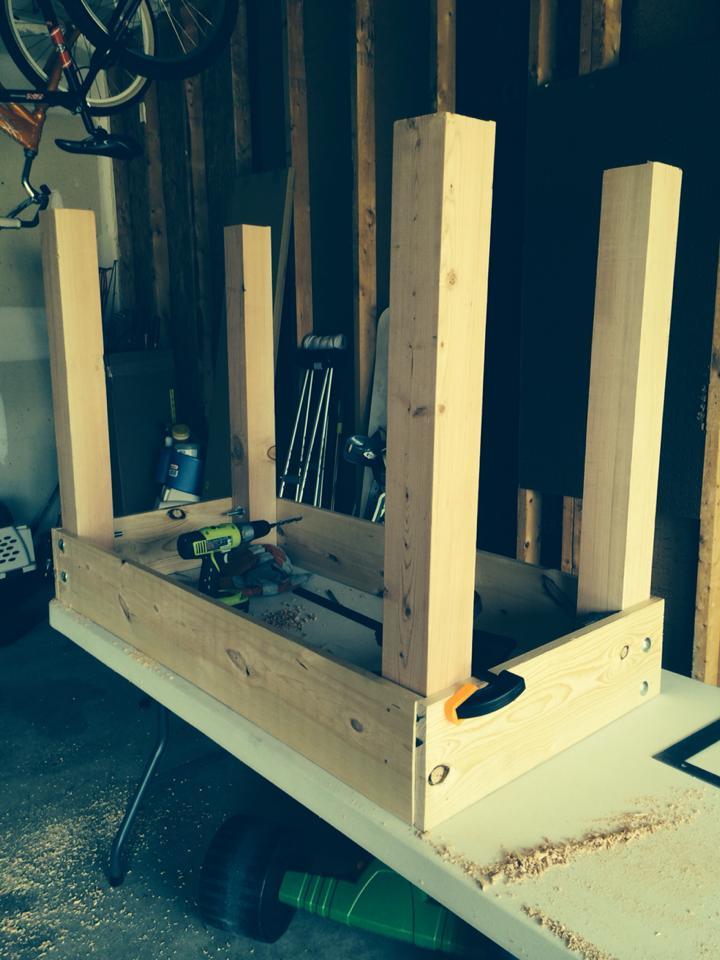
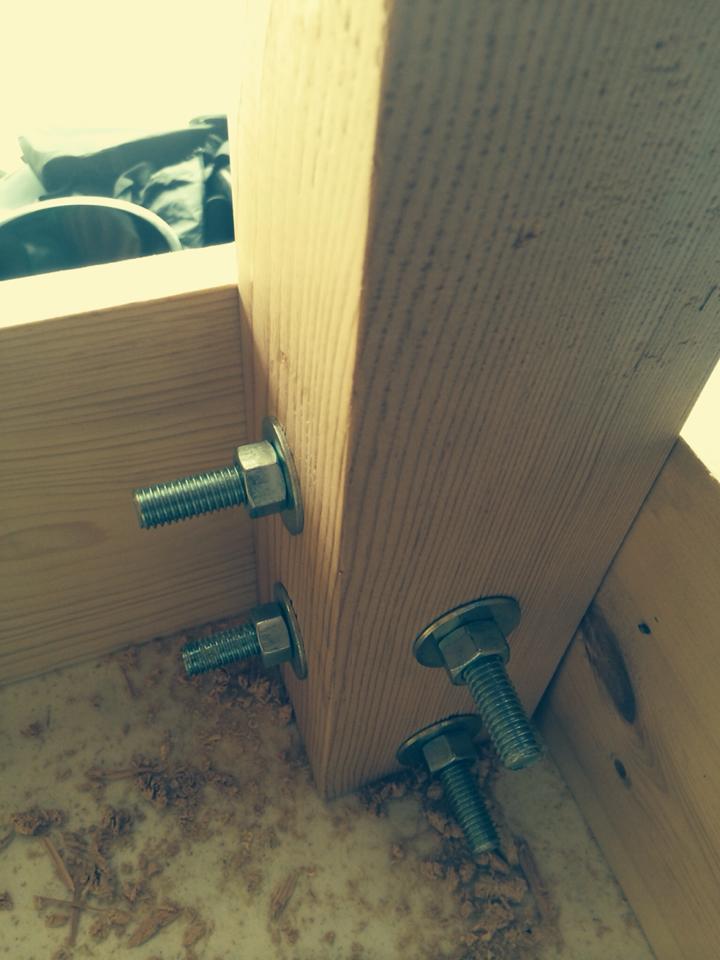
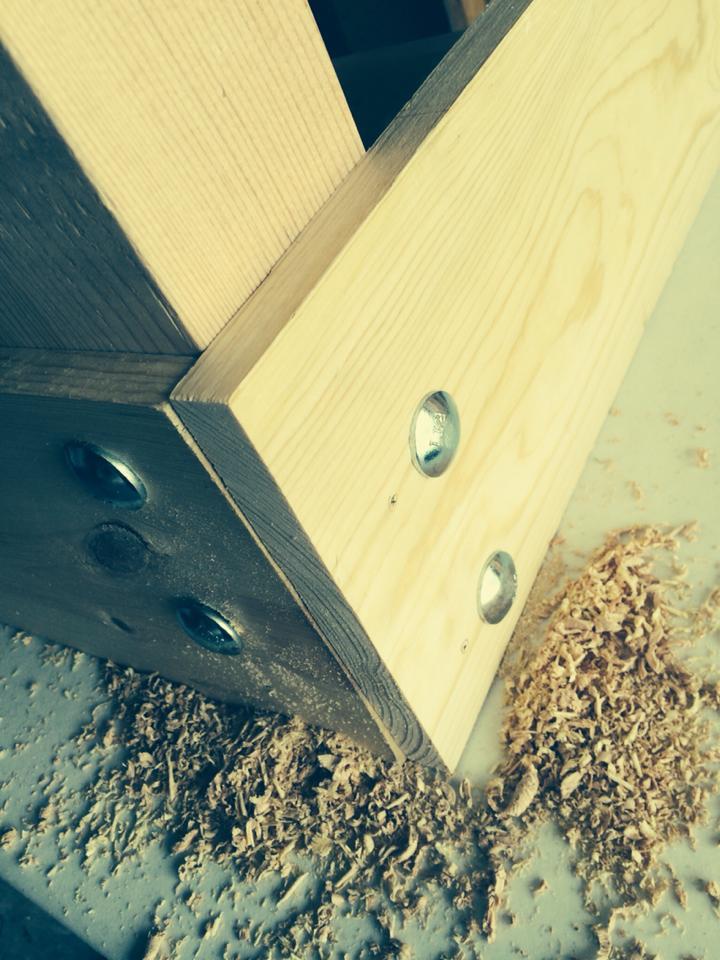
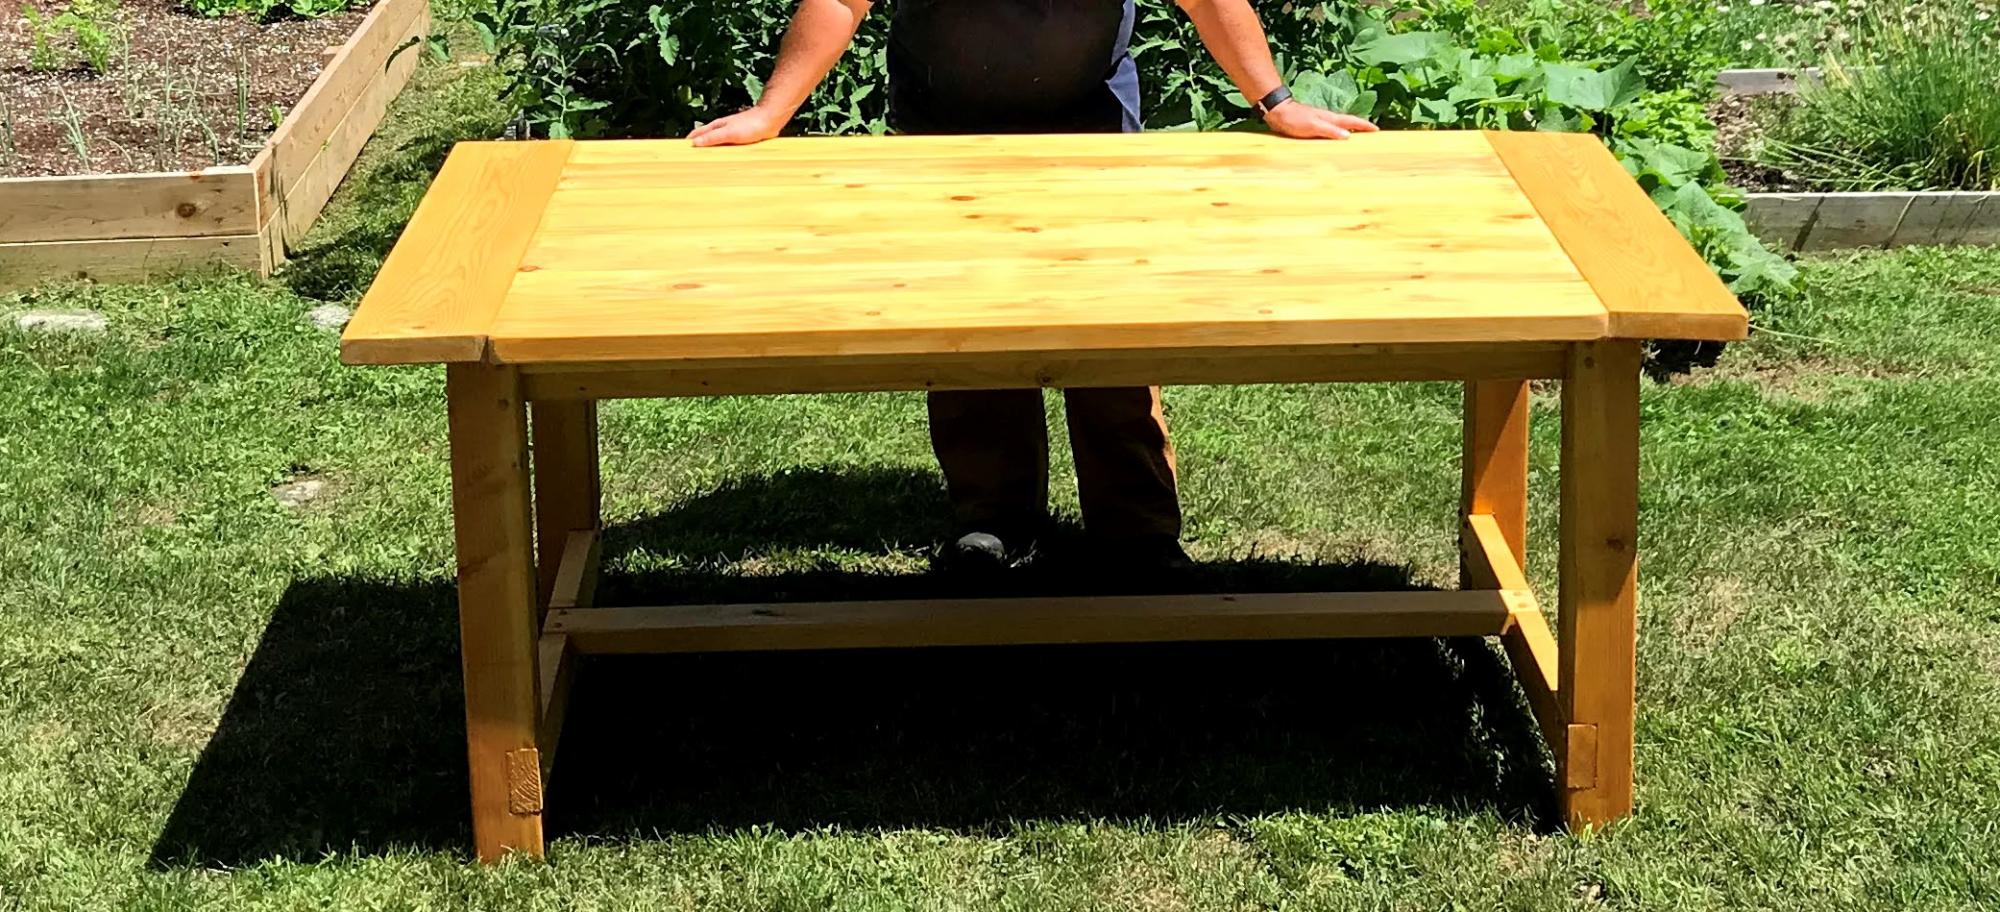
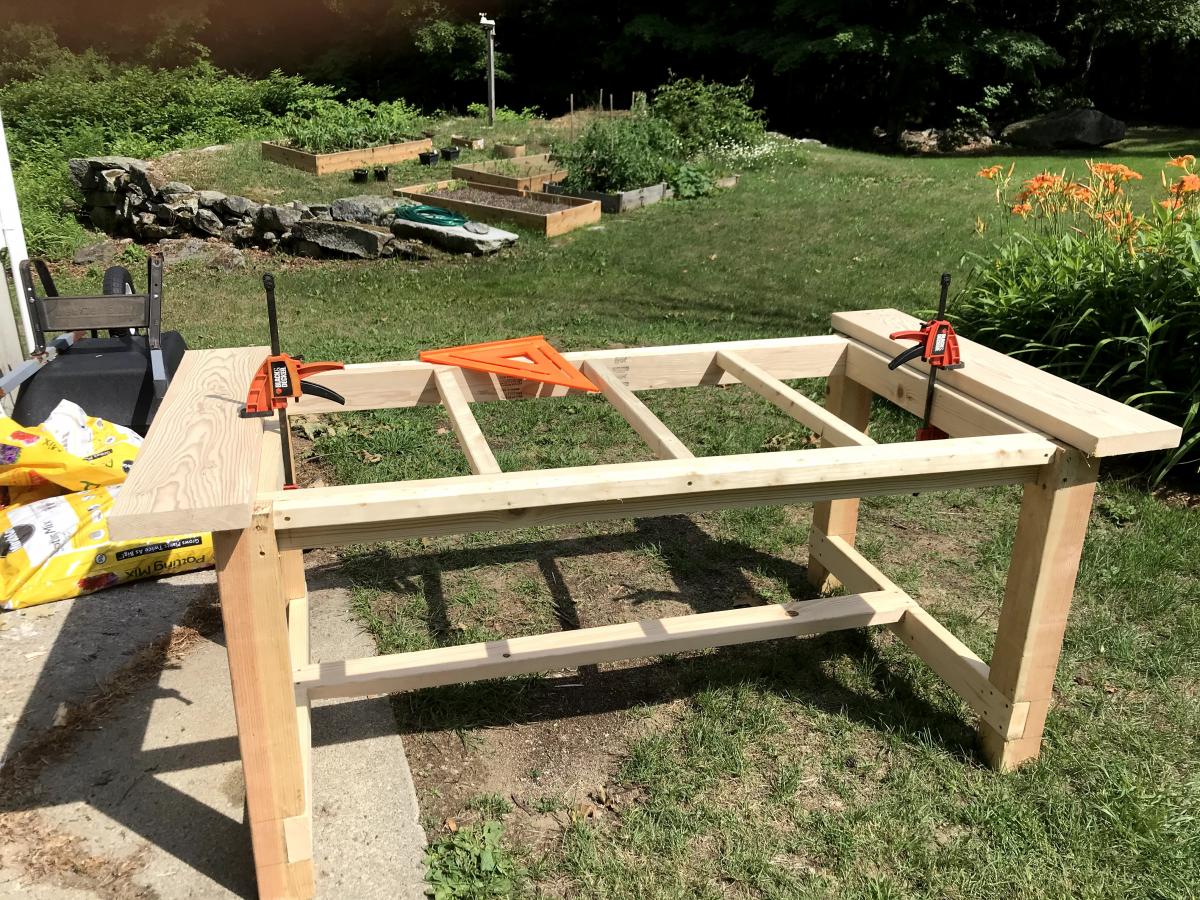
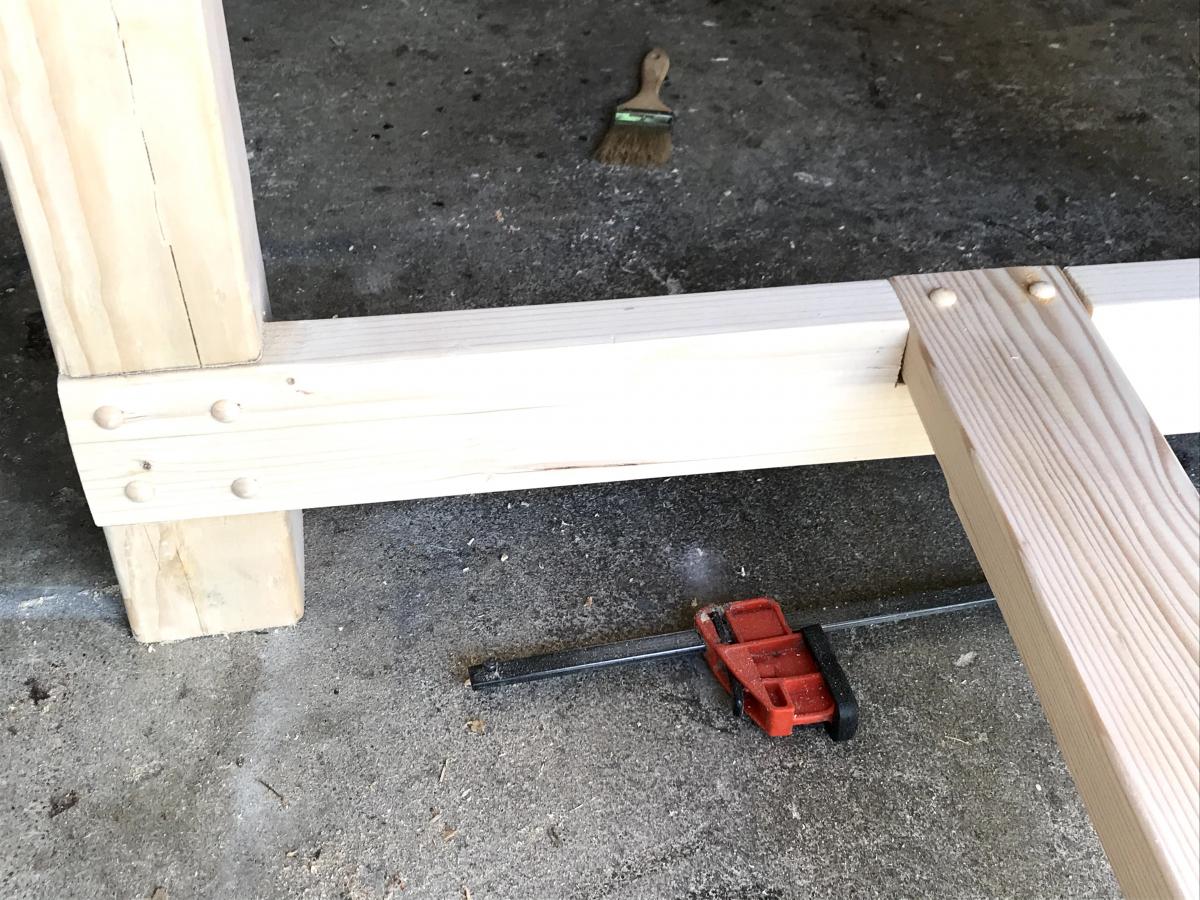
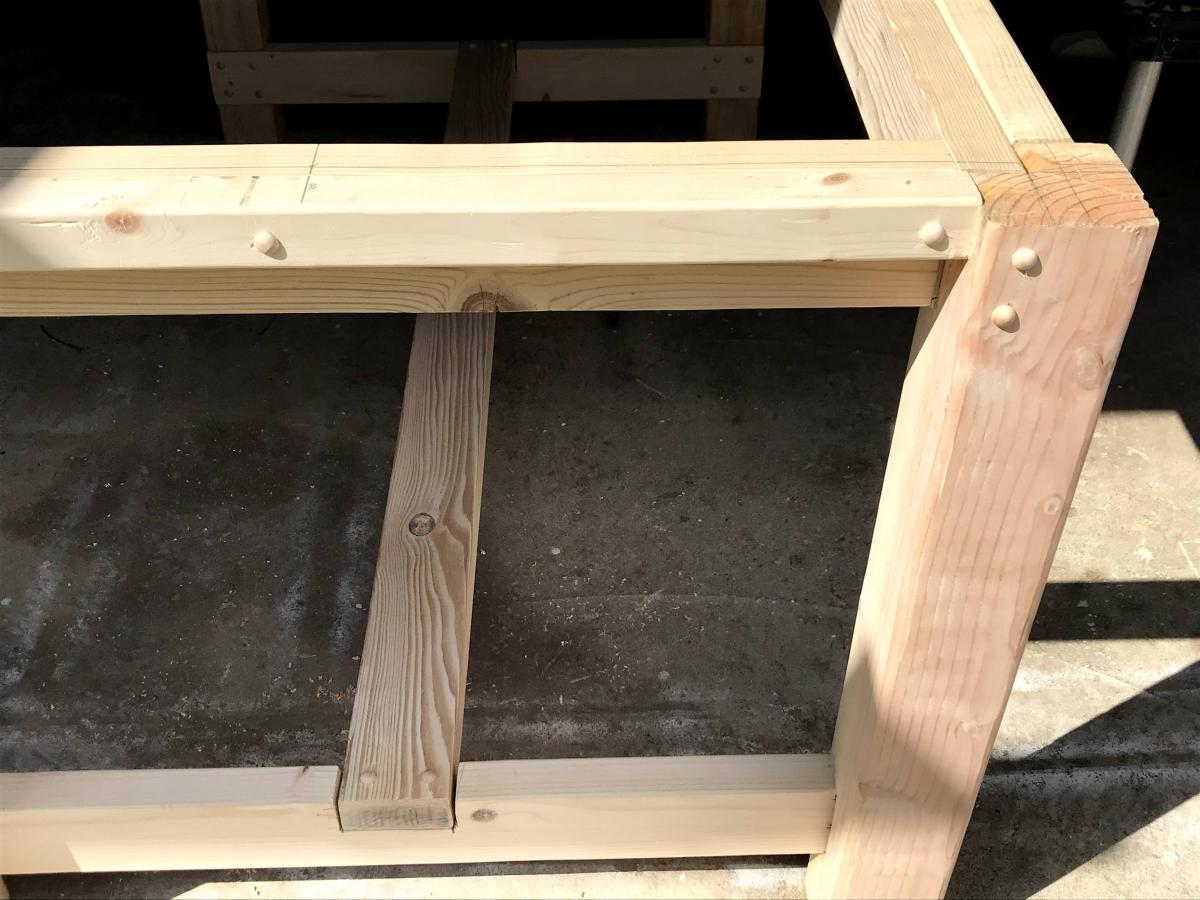
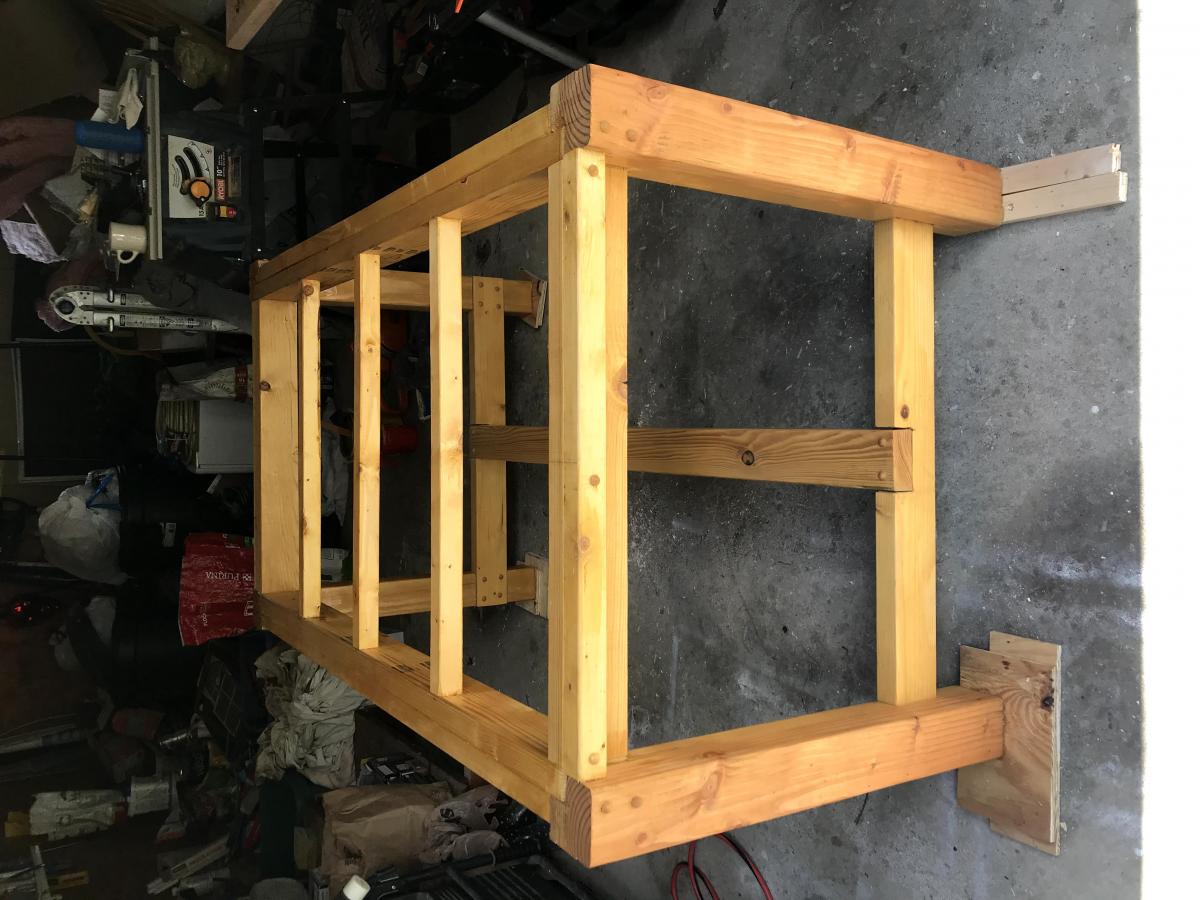
Here's our planters, and they're our first carpentry projects! We found that there were cost efficiencies when building 2 units. We also opted for nut and bolt attachments for the legs instead of making pocket holes…mainly because I don't have the guides for making pocket holes. Seems to work fine, although I do still need to get a saw that I can cut off the excess bolt length on the inside (see pics). Perhaps next time I should trust my measurements and buy the correct bolt length. Ended up costing about $250. Slightly more than the cost of ready-to-build planters at home depot, but those weren't elevated and not nearly as heavy duty or as large. Well worth the investment of both time and money, and a great starter project for beginners. Good luck to you all! -Don and Staci

Built from Plan(s)
Estimated Cost
250
Estimated Time Investment
Weekend Project (10-20 Hours)
Finish Used
Only a light red stain on the exterior as we didn't want the chemicals to invade our vegetables. Ended up with a very nice orange hue when the red stain combined with the pine's natural yellow coloring.
Recommended Skill Level
Starter Project
Seasonal And Holiday

My First Ana Project

Submitted by Anonymous (not verified) on Thu, 06/18/2020 - 09:41

Had some leftover lumber from a friend's deck rebuild and decided to make a love seat for our deck. Modified the 2x4 Outdoor Sofa plans slightly to make it a little smaller but essentially built directly from your plans. My wife loves it! Only downside is we have to fight the dog for room. Thanks! I'll be using your plans again!

Built from Plan(s)
Estimated Cost
$12 for screws, $90 for cushions, lumber was free.
Estimated Time Investment
Afternoon Project (3-6 Hours)
Finish Used
None yet.
Recommended Skill Level
Beginner

Truss Shelves: Cheap Garage Storage

Made of old fence rail (the dark pieces) and cheap 2x4s and 1x12s .

This is not as stable as I hoped, but for an afternoon's project that got all those tools off the workshop floor, it's not bad. I will add a diagonal brace at the back later. Much later.

NOTE: My engineer friend notes that 2 braces at the rear, below the bottom shelf and below the top shelf, would minimize side-to-side wobbling, and 2 braces front to back, both under the bottom shelf, would minimize the front-to-back wobbling, They could be a scrap of plywood, a 1x6 or wider scrap. Just nail them in two or more places on each of the ladders and they make the structure more rigid. Screw them in if you want a shelf unit you can disassemble.

TIPS:
If you are using pockethole screws, start the screws in all the holes before you put the crosspieces on. Stop when you see the tip of the screw come through the first piece.

Clamp scrap 2x4 to the uprights to hold the crosspieces in place as you drill.

To get the shelves in place, lean the ladders against each other and attach the bottom and top boards on one side. Than pull the other ladder out as far as it needs to go and screw that side of the shelves in place.

Don't try this without clamps.

It could have been cheaper if I had used all reclaimed fence 2x4s, and if my errand runner had bought cheaper 1x12s. He bought top-grade when #2 would have worked for half the price,

Estimated Cost
$ 30
Estimated Time Investment
Afternoon Project (3-6 Hours)
Finish Used
None
Recommended Skill Level
Intermediate

Umbrella Stand (in PVC)

Submitted by lewg on Tue, 06/10/2014 - 18:29

Great plans, Ana! I swapped out the wood for PVC trim, and used stainless steel screws to hopefully make this thing weatherproof.

Built from Plan(s)
Estimated Cost
$80
Estimated Time Investment
Day Project (6-9 Hours)
Finish Used
None. The PVC comes white, and I wanted a white table!
Recommended Skill Level
Intermediate
Seasonal And Holiday

DIY Tryde Table

Submitted by Anonymous (not verified) on Wed, 06/24/2020 - 17:31

Thank you Ana for a great design. I was looking for a gift idea for my Dad on Father's Day and your design was perfect for what I wanted to make. My Dad really loved it! My name is Nathan and kinda new at builders with wood. You see, I am a brain tumor survivor of 20 years and I lost most of my vision from it. For the longest time I was told that I couldn't do this or that. Note, I am very careful and take safety seriously. Your ideas and designs have helped me a great deal with developing confidence with my newly learned skills and I wanted to thank you for that. Also, your designs are reaching people out there and they're bringing joy to a lot of people. Keep up the great work and I look forward to your next inspiration.

Estimated Cost
$25
Estimated Time Investment
Weekend Project (10-20 Hours)
Finish Used
Baby Grand Piano and clear gloss polyurethane
Recommended Skill Level
Beginner

Surfboard bench

Modified the sofa design and created a surfboard bench

Estimated Cost
£30
Estimated Time Investment
Afternoon Project (3-6 Hours)
Finish Used
Dark Oak woodstain

Reclaimed Wood Look Headboard

Submitted by JenMash on Mon, 09/03/2012 - 12:49

My husband and I had been looking for a great headboard for a bed in our guest room. We found ones we really liked but didn't like the price tag of 800-1500 dollars (not even including shipping!) We stumbled on this site and absolutely fell in love with the reclaimed wood style headboard. It was exactly what we were looking for. Building it just took a few hours. After we distressed the wood using a chain I found at the hardware store (only $1.60), a drill, a creme brulee torch and a hammer, we prepped the wood (sanded and primed), stained and clear coated. I highly suggest not only vacuuming off the wood but also using a tack cloth (so cheap but it makes such a difference) to make sure all of the dust was off. We bolted the headboard into the bed frame. It will be heavy but it is really sturdy and looks great! A good tip is to decide early what you want the front to be - you can chose the best sides of the wood that way!

Estimated Cost
150.00
Estimated Time Investment
Afternoon Project (3-6 Hours)
Finish Used
We prepped the wood using Minwax pre-stain wood conditioner. We then applied Minwax Provincial stain, waited about 10 minutes and wiped it off with a t-shirt. After we let it dry for the allotted time (we rushed it a bit but were so excited about the new headboard) and then put on a clear-coat finisher.
Recommended Skill Level
Beginner
Seasonal And Holiday

PATIO TABLE WITH BUILT-IN BEER/WINE COOLERS

Submitted by Joagirard on Fri, 07/04/2014 - 21:05

My sister was in love with my 4x4 truss table i made and needed a patio table so we decided to take one day to make 2 tables, one for each. We convinced both daddys to take care of the kids while we made the table by telling them the tables were gonna have beer coolers inside! Attaching the to of the table was a lot a job. If you plan of doing this you really want to have a kreg jig. It works well, we love it. I made a bench to go with it. I made my how plan for it.

Estimated Cost
200$
Estimated Time Investment
Weekend Project (10-20 Hours)
Finish Used
Sico outside wood stain color oak. 3 coats for the top and 3 coat sico chocolate for the bottom. All applied with a brush.
Recommended Skill Level
Intermediate

Toilet step stool

This was my first project at building some sort of furniture. we wanted a stool that really fits out toilet bowl shape, the height, etc. and 2x6's worked perfectly. I could have bought 2x12's for the sides, but it would have cost significantly more and with the inside support board it is plenty sturdy.

I bought 2# 2"x6"x6 foot coarse pine boards from Home Depot (not the expense Select Pine boards. They cost about $6 each. Then I bought a 100 count package of Kreg 1.25" coarse screws.

Cut lengths
2 @ 15 3/4" for lower sides
2 @ 10 1/4" for upper sides
5 @ 14" for steps and fronts
1 @ 12 1/2" for inside support

I used my Kreg Jig and connected all the pieces along with wood glue. I sanded the whole thing down after and tried to round/smooth the corners.

Estimated Cost
$17
Estimated Time Investment
An Hour or Two (0-2 Hours)
Finish Used
none yet.
Recommended Skill Level
Starter Project

Comments

pADDY1957

Tue, 03/01/2016 - 10:29

Does anybody have plans for a potty seat. I would like to build a childs chairs that has a ptty

Farmhouse Table - No Pocket Holes Plan

Submitted by mcronin on Sun, 07/19/2020 - 07:48

The published plans for this were great. This was my first attempt at a project like this. I have always liked the idea of dining at a large table outdoors and the farmer's style is appealing to me. I adjusted the length to fit my deck, but also made a few changes for aesthetic purposes. I notched 4x4s rather than join a pair of 2x4s for the legs. Added caps to the screw holes rather than filler and used pegs to secure the top planks in addition to screws from the bottom. The frame and top were stained/sealed with Cabot Australian Timber Oil.

Estimated Cost
$200.00
Estimated Time Investment
Week Long Project (20 Hours or More)
Finish Used
Cabot Australian Timber Oil, Natural
Recommended Skill Level
Intermediate

Outdoor side table

Keeping budget with wood projects, made side table for outdoor fire pit area.

Estimated Cost
$25
Estimated Time Investment
An Hour or Two (0-2 Hours)
Finish Used
Legs and braces=rosewood stain
Top=honey pine
Recommended Skill Level
Starter Project

Side Street Bunk Beds (with modified ladder)

After building the playhouse loft bed, I found this project to be very easy. I built the bunk beds at 37/38 weeks pregnant, so that should tell you how simple it is to construct. The total cost came in under $300 and I was able to use some of the scrap wood I already had in my garage.

I did run into some trouble with the slanted ladder. Even though the pieces were cut to the exact measurements in the plan, the sides of the ladder were too short for the bed. Being very pregnant and impatient, I just modified the ladder so I wouldn't have to waste the pieces I'd already cut.

You may also notice that I didn't fill and sand my pocket holes on the end pieces yet. That was also me being very pregnant and impatient. I'll go back and do that later when I have more time. Despite the little bit of finishing work remaining, this was pretty much a 2-day project. Cutting and construction was fast (one day) and finishing took another full day.

I used Valspar "Blue Burst" paint from Lowe's to finish the bed. I used bolts to attach the side rails because we move frequently so I wanted the bed to be easy to disassemble. Overall, this was a very easy and fun project!

Built from Plan(s)
Estimated Cost
Just under $300
Estimated Time Investment
Weekend Project (10-20 Hours)
Finish Used
Valspar "Blue Burst" interior paint
Recommended Skill Level
Beginner

Comments

vpihoney

Sun, 11/11/2012 - 21:37

Love how you whipped this together! I stumbled upon your post as I started working on these bunk bed plans today (I can't read the dimensions on the diagrams from a printout, so i open up the plans on the iPad). I had to finish up the ladder and side rail today. I was stumped yesterday evening with the same ladder issue. Why was it coming up short? It was really annoying considering it took me a while to figure out a 60 degree angle on my miter. I decided to try changing my ladder angles to 22.5 and 67.5, as I still wanted a leaning ladder, but I thought a reduced angle would work better. Didn't have to scrap my boards either, whew. Love how quickly you put this together! Coincidentally, I'm 33 weeks pregnant, but moving terribly slow compared to you.

purpleheather79

Mon, 11/19/2012 - 07:25

I'm glad I'm not the only one with the ladder issue! I couldn't figure out what went wrong. I also tried to adjust the angle but my boards were just a tiny bit too short and I was not wanting to run to the store to get more. I do like the leaning ladder better though. Can I just say that I love that you're building this bed while pregnant too? That's awesome! :)

Outdoor Storage Bin

I used Ana Whites plan and modified to fit my our space and outdoor pillows.

Estimated Cost
50
Estimated Time Investment
Weekend Project (10-20 Hours)
Finish Used
Minwax Gunstock 231
Recommended Skill Level
Beginner

Comments

West Elm Knockoff Chevron Queen Bed

Submitted by Anonymous (not verified) on Fri, 01/13/2017 - 21:07

This was my first build and I am so happy with how it turned out! The plans from Jen Woodhouse were extremely easy to follow and I would definitely recommend this project to others!

Estimated Cost
$200
Estimated Time Investment
Week Long Project (20 Hours or More)
Recommended Skill Level
Intermediate

Farmhouse closet

Submitted by Anonymous (not verified) on Mon, 01/16/2017 - 04:56

I had so much trouble deciding what to do with this HUGE closet in my breezeway.  Previously it had just one bar across the top and ugly sliding doors.  I loved Ana's design, but made several changes.  Since my closet was super deep (32") I extended the depth of her design to about 25".  I also staggered the rods for longer coats, and one that my 8 year old can actually reach to hang her stuff up!  I changed the shelf design up a little bit too!  Her instructions are super easy to change to your specifications.  I did end up spending about $350 on this project, but keep in mind I was using 3 - 1x8's for each shelf instead of 1x4s.  

Built from Plan(s)
Estimated Cost
$350
Estimated Time Investment
Weekend Project (10-20 Hours)
Finish Used
Minwax Dark Walnut
Recommended Skill Level
Beginner

100 Sq. Ft. Gable Shabin with Loft

Submitted by Emillie on Thu, 10/01/2020 - 11:45

We built a bunkie-style shabin for our off-grid vacation home. We wanted to keep it under 100 sq ft so we wouldn't have to worry about planning permission. This tiny shabin is 8ft x 12 ft with an 8ft x 7ft loft. It's perfect for our family of 4!

The whole thing (roof and all) cost around $6000 to build and we finished it in about 2 weeks. Phew! It was the perfect project for the summer.

Estimated Cost
6000
Estimated Time Investment
Week Long Project (20 Hours or More)
Finish Used
Sleeping bunkie for a family of four.
Recommended Skill Level
Advanced

Comments

Christmas Tree Shelf

Submitted by Anonymous (not verified) on Wed, 10/21/2020 - 08:50

This is my first time using some of the power tools that this required, however, it came out SO CUTE! I put one together and someone bought it raw. I put one together as the video showed, and then did one out of old fence pickets that were cleaned up and planed by a neighbor. They both came out beautiful. We used knobs that we had in the shop and offset them a little to be whimsical.
Vasiliki

Built from Plan(s)
Estimated Cost
$8-12
Estimated Time Investment
An Hour or Two (0-2 Hours)
Finish Used
Entry way to home, by the front door.
Recommended Skill Level
Intermediate

Comments

Fancy + Mimi's Hall Trees

Submitted by Anonymous (not verified) on Sun, 02/05/2017 - 13:28

Took the fancy hall tree bottom and added Mimi's hutch to the top. Added a little bead board to the bench and top edges to cover up the plywood, and voila! My wife's Christmas gift. 

Estimated Cost
$250-300
Estimated Time Investment
Week Long Project (20 Hours or More)
Finish Used
White paint and polyurethane
Recommended Skill Level
Intermediate
Back