Community Brag Posts

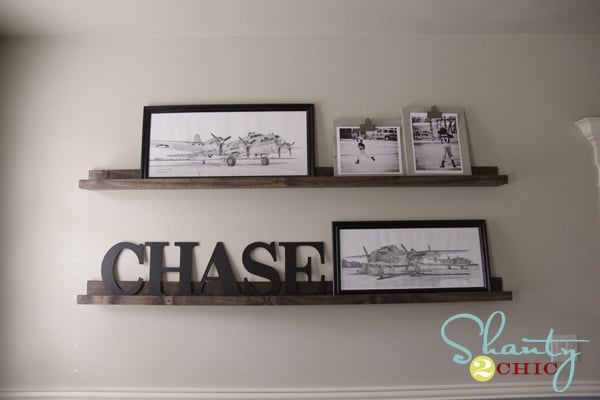
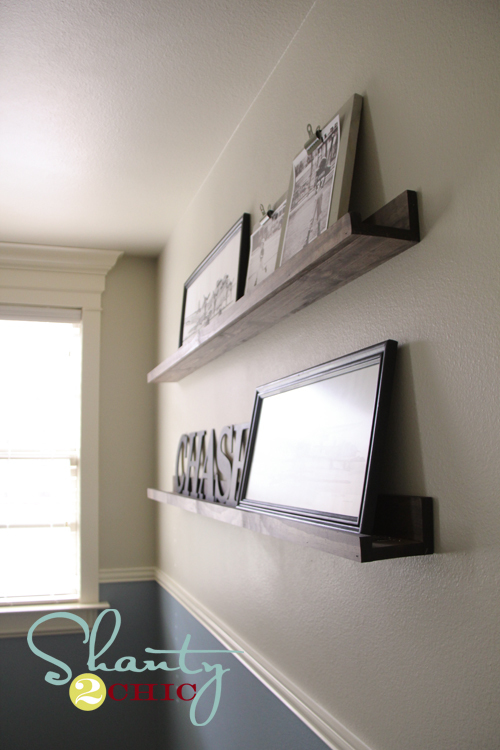
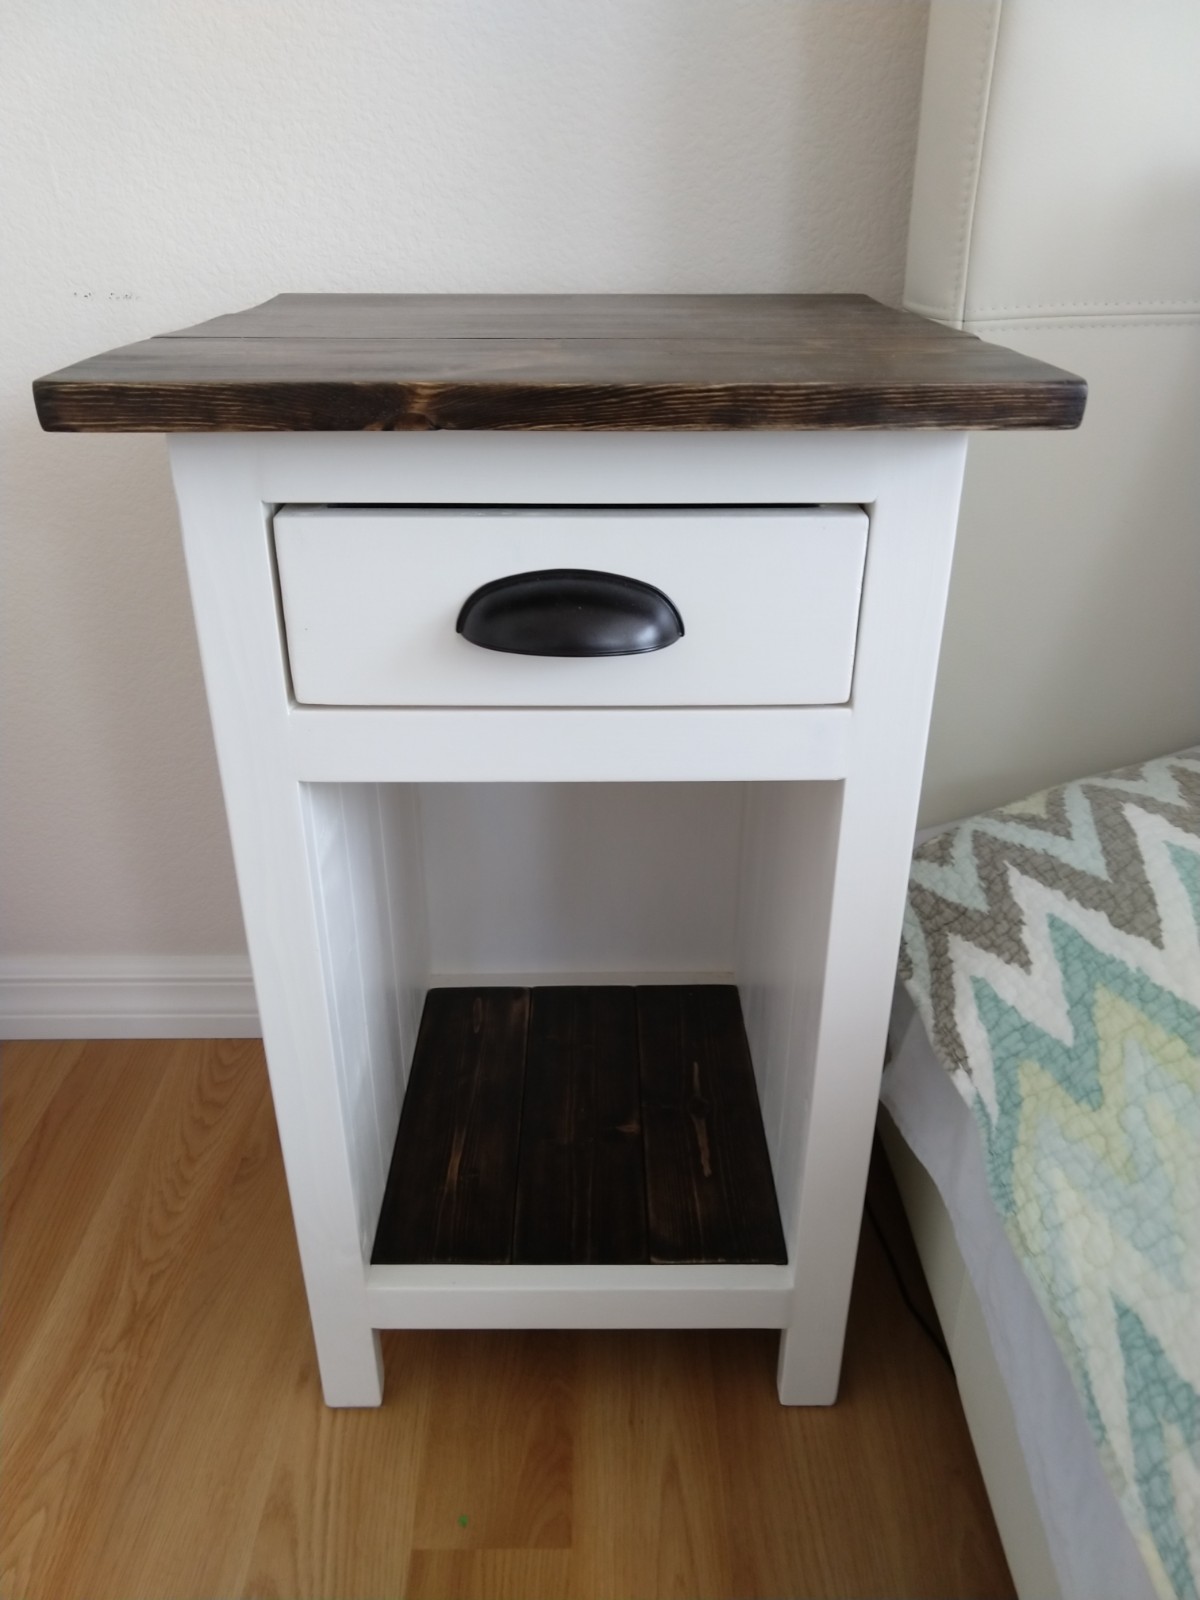
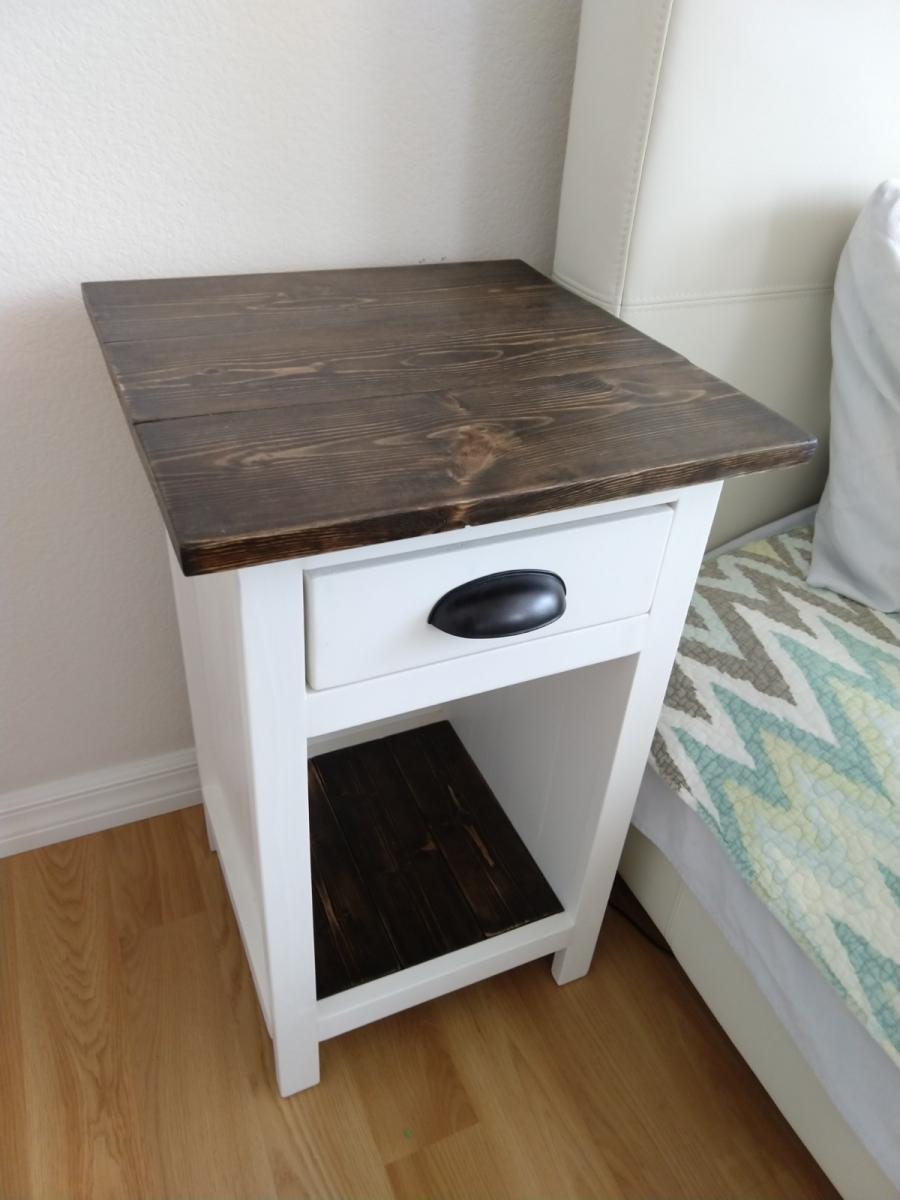
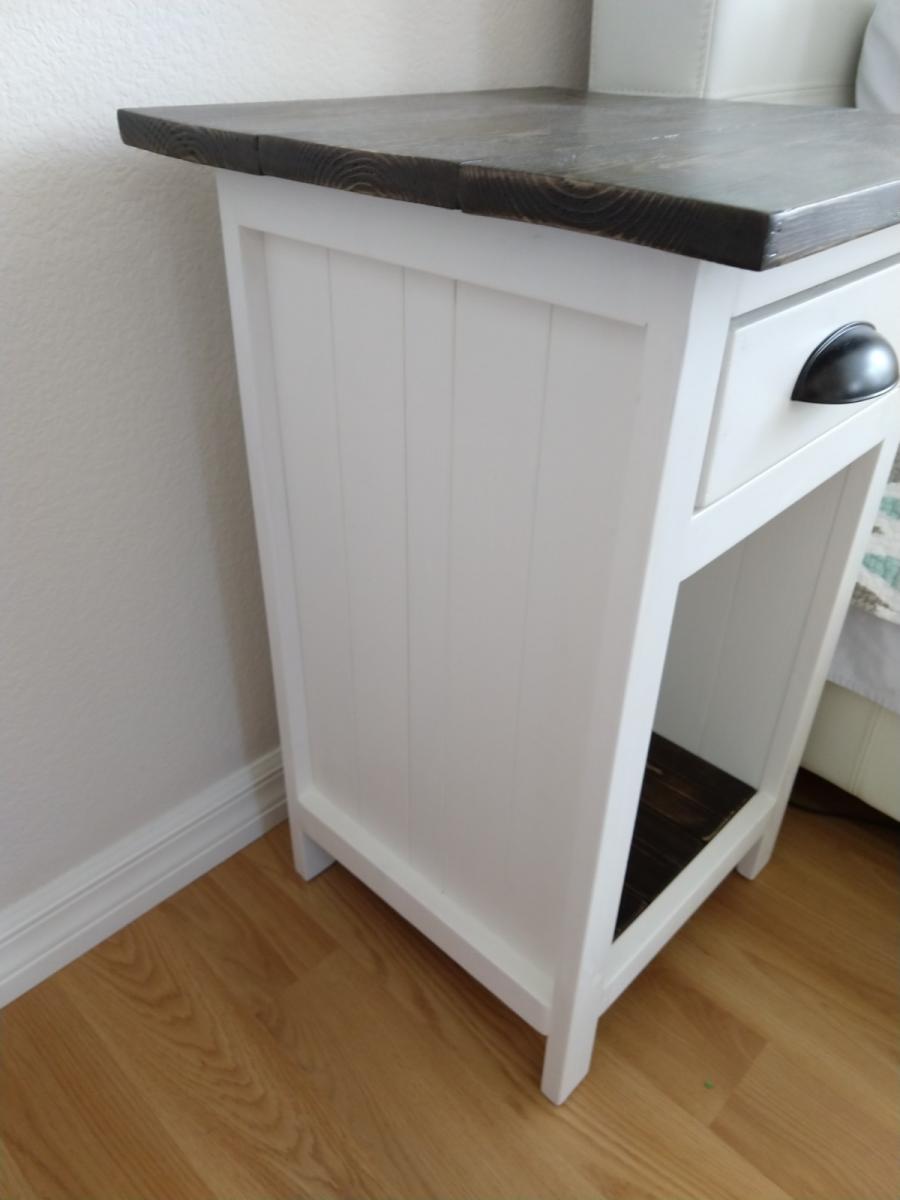
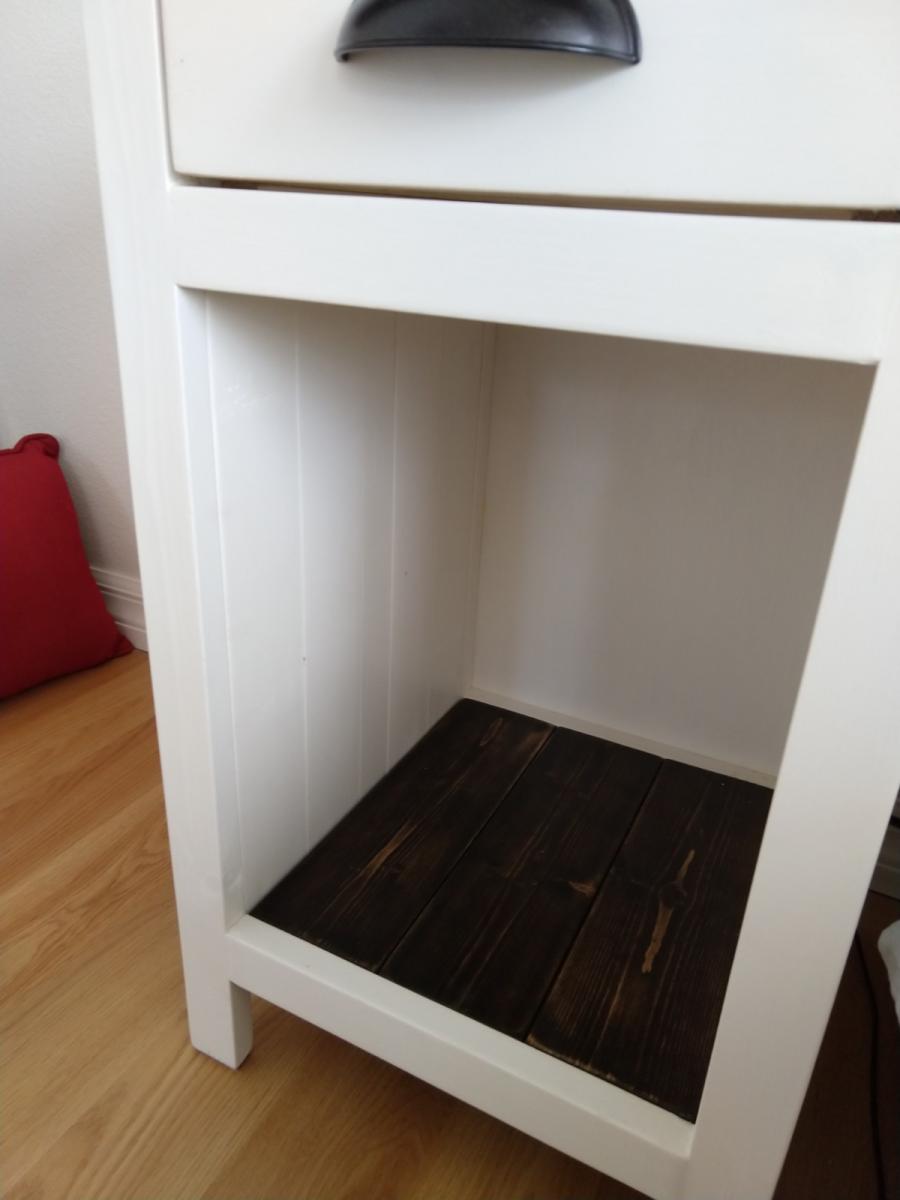
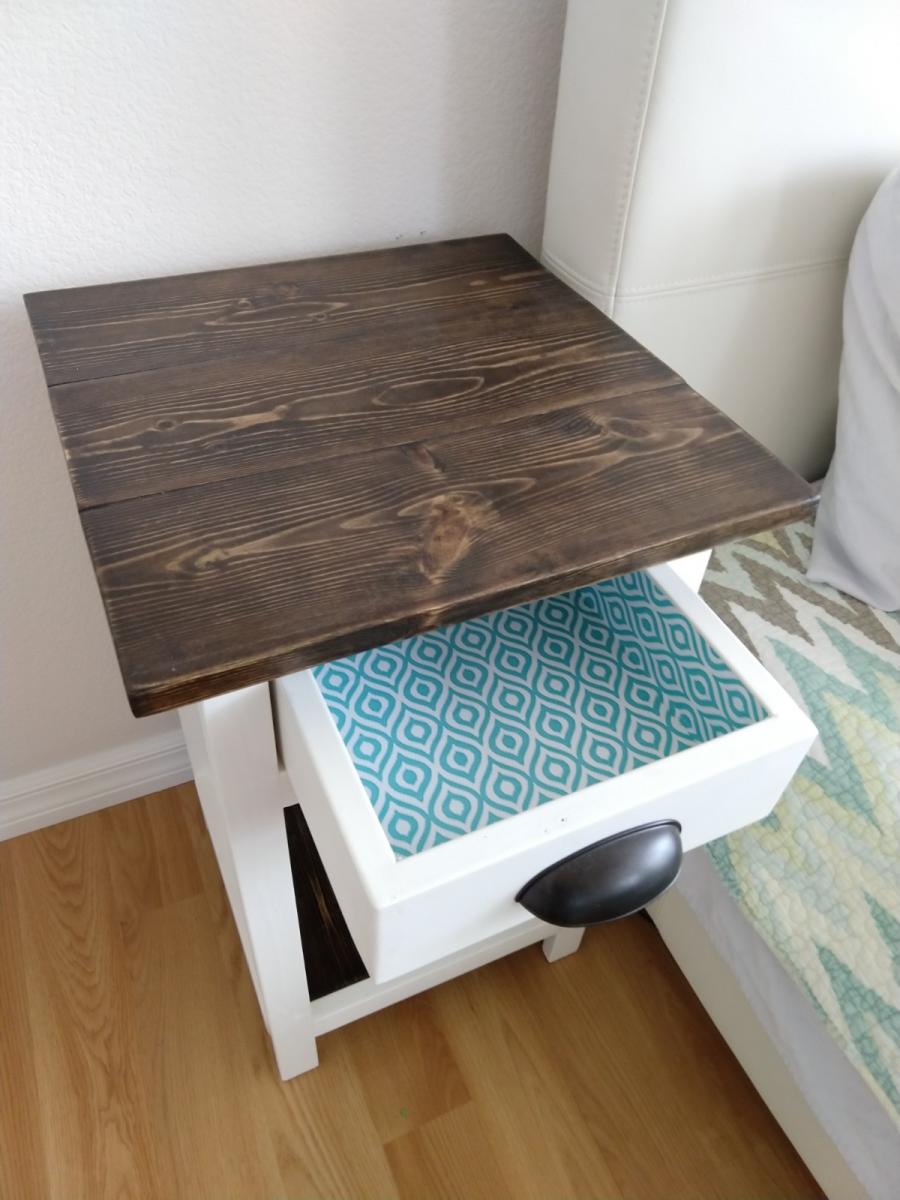
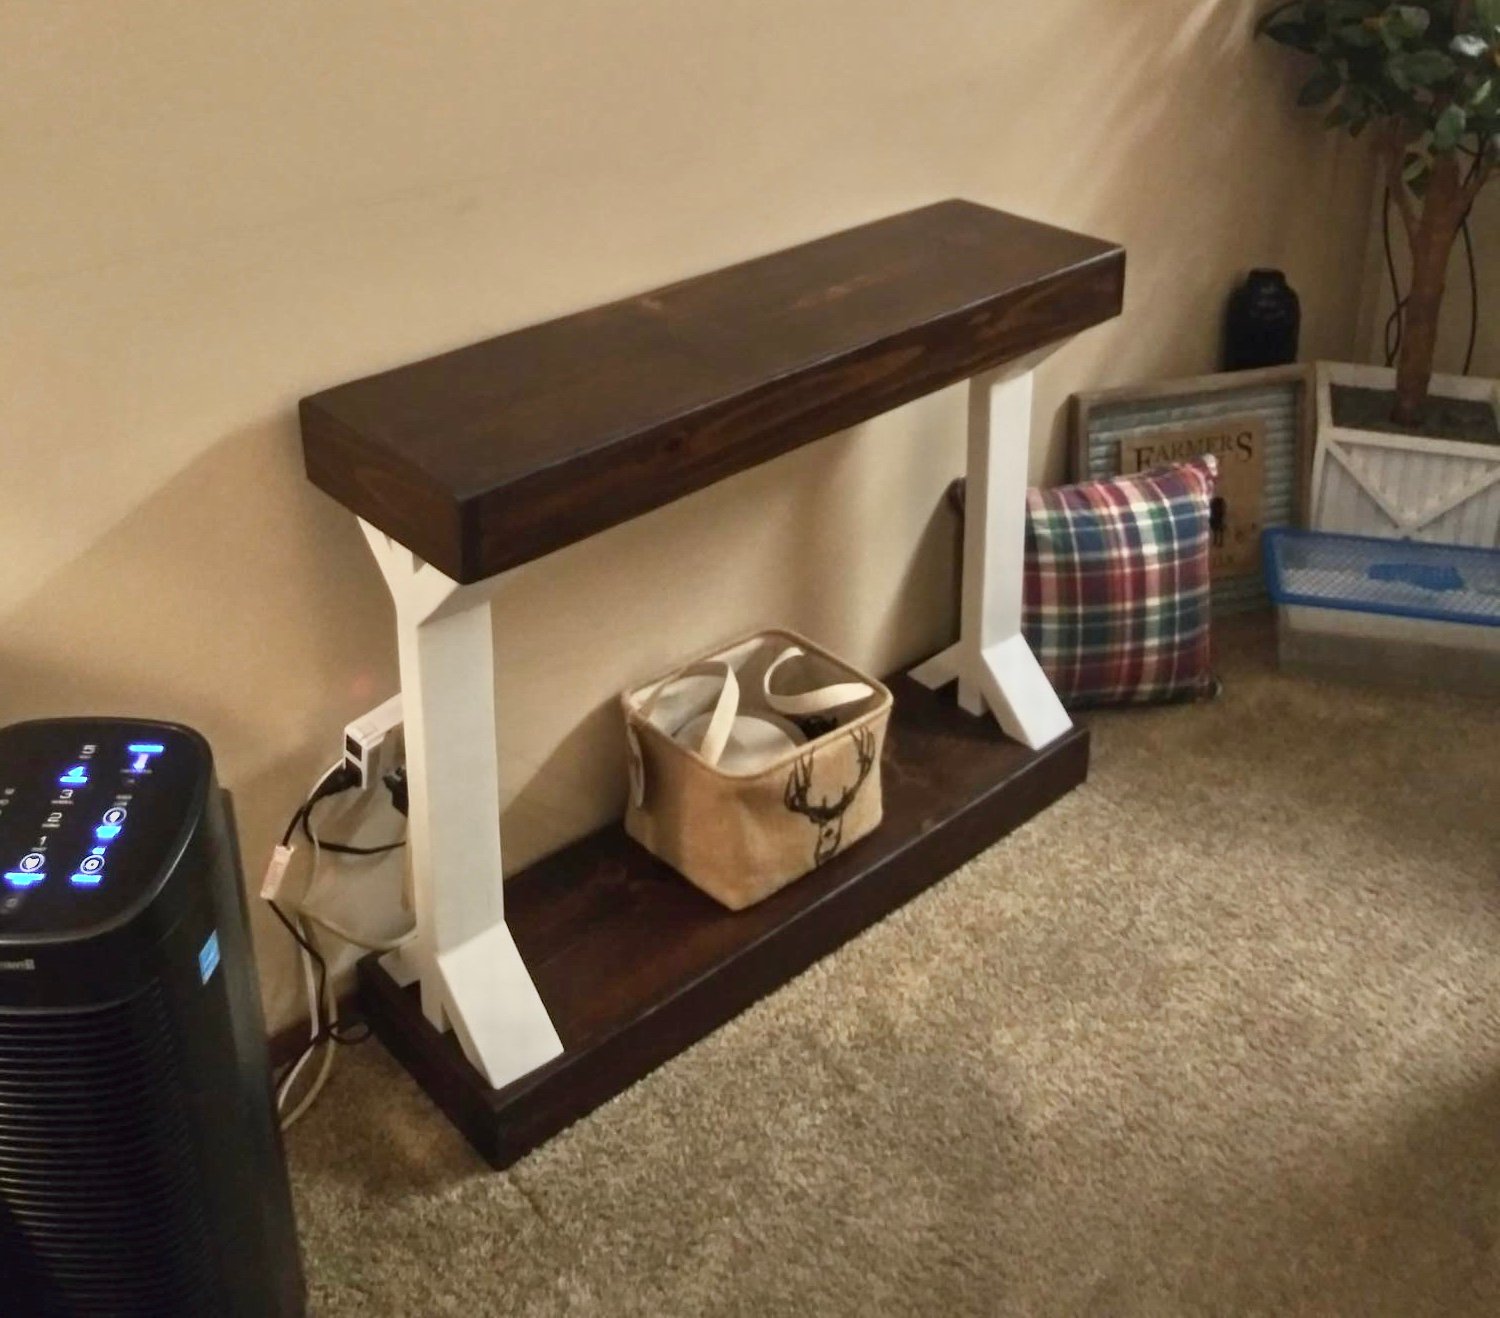
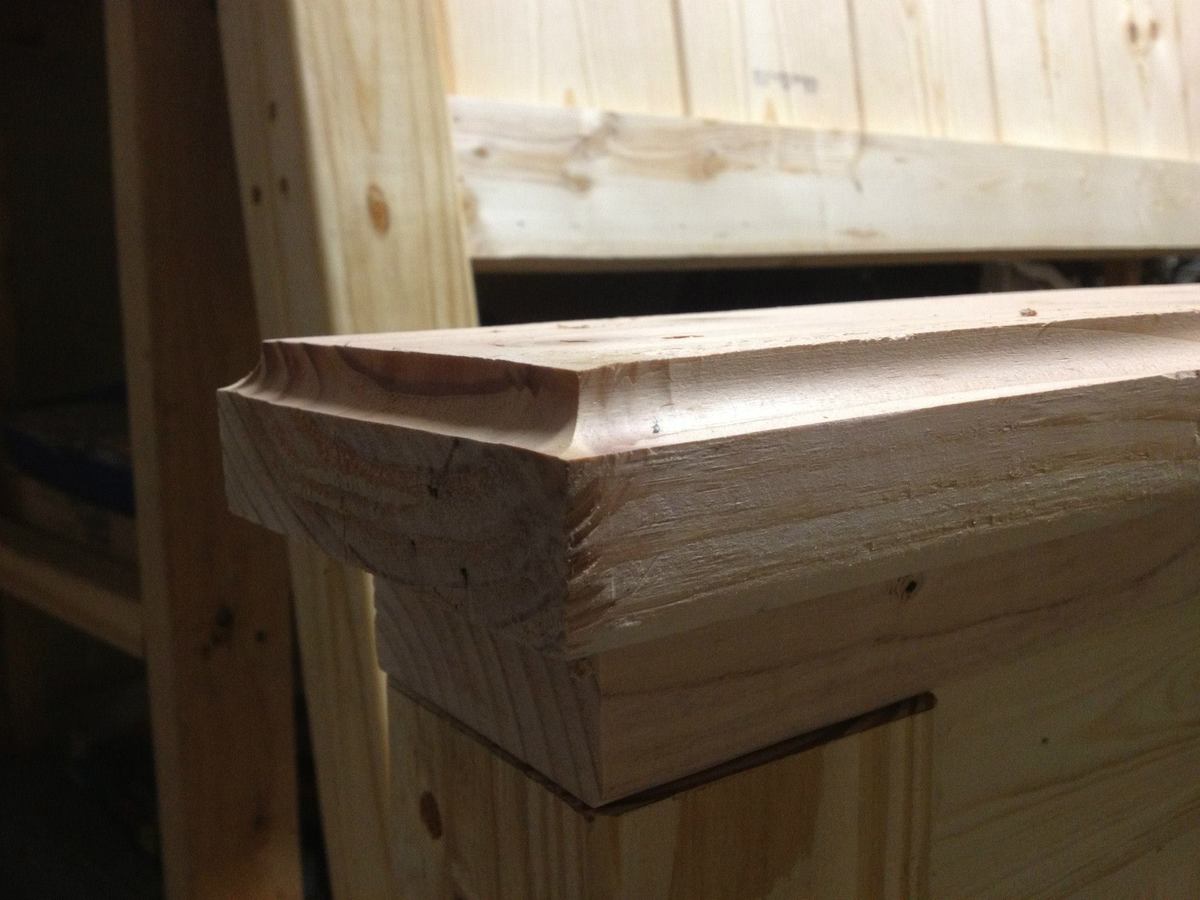
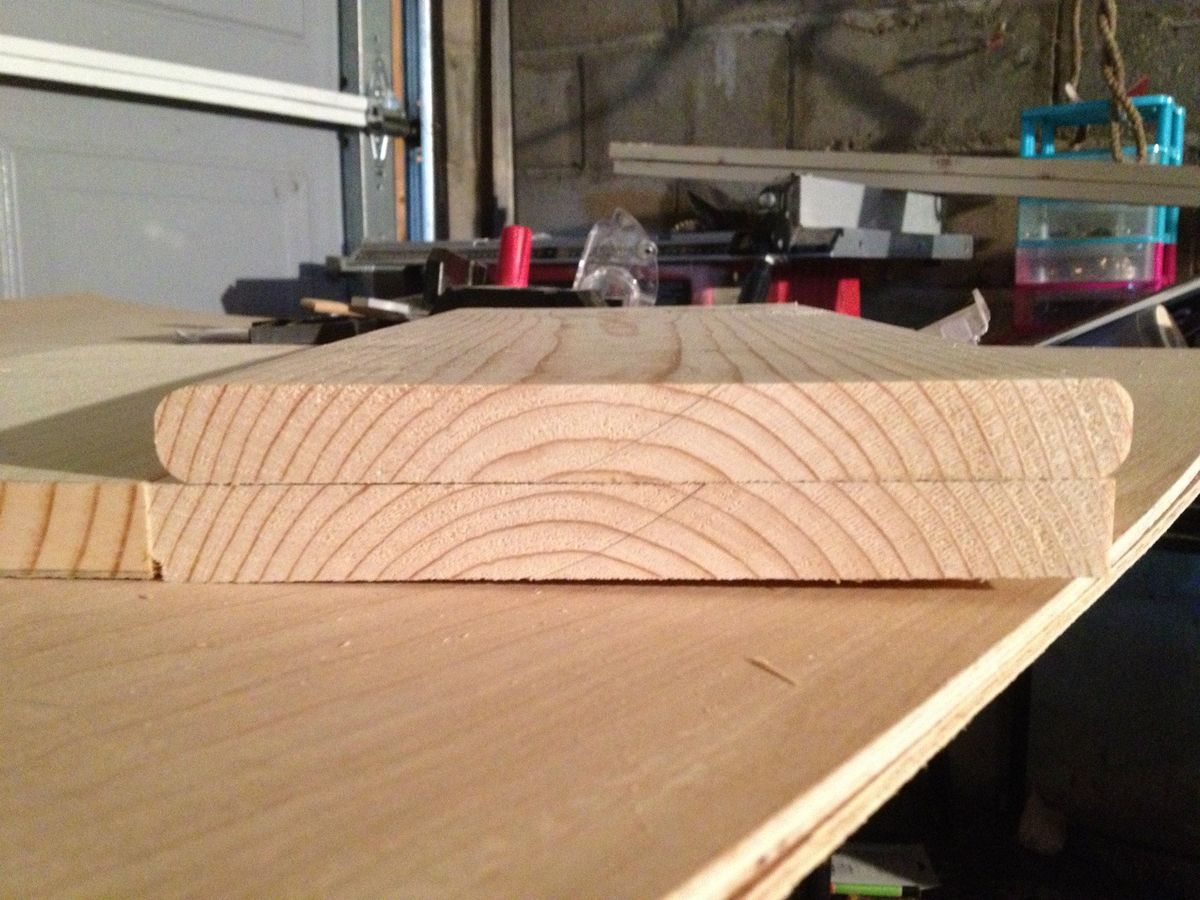
$10 Ledges Shelves... Favorite Project!

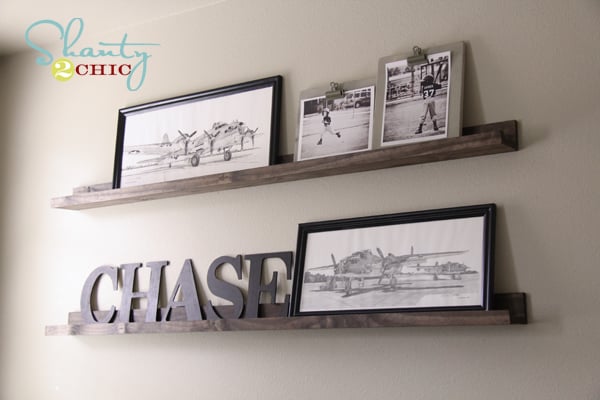
I love how these turned out! I did use my Kreg Jig to attach my back and bottom boards, but you could easily pre-drill and use regular screws. You can see a full tutorial at http://www.shanty-2-chic.com/2012/01/20-shelves-anyone-can-build.html !!

Built from Plan(s)
Estimated Cost
$10
Estimated Time Investment
An Hour or Two (0-2 Hours)
Finish Used
Rust-Oleum Wood Care stain in Dark Walnut
Recommended Skill Level
Starter Project

Comments

Closet Organizer

Submitted by kristen on Sun, 02/05/2012 - 10:26

I needed a closet organizer for my daughter's room that could grow and change with her age. Right now it needed to have lots of shelves at her height to hold the massive amount of stuff an 8 year old can accumulate.

Once she transitions out of the toys, I plan on moving the shelves all to one side or the other for shoes, and adding another rod. Another possibility is shoes in the door organizer and 4 sections of hanging clothes...regardless, the end result has options that will grow with her!

I was able to keep the cost of this down because I used all scrap plywood to make the drawers. I did splurge in S4S pine lumber rather than trying to make rougher cuts nice.

On the left door is Ana's Behind Closet Door Storage plan as well :)

Estimated Time Investment
Week Long Project (20 Hours or More)
Finish Used
Kilz No VOC primer, Olympic No VOC paint in semi-gloss (white off-the-shelf tint)
Recommended Skill Level
Intermediate

Comments

Guest (not verified)

Sun, 02/05/2012 - 11:17

I love the idea of the stuffed animals on the door! Those things multiply so fast and get in the way of making the bed - great closet!

Cindy from Indiana (not verified)

Sun, 02/05/2012 - 18:58

Right now DD's room is a blank canvas. One of the first projects (after getting her window in) is to figure out the closet. I think this will be my inspiration!

Looks great!

kristen

Sun, 02/05/2012 - 19:25

Thank you! I am loving how organized her whole room is because of the closet being in good shape. And everything has a spot now, so it's easy for her to get it back where it needs to go!

Oh, those stuffed animals. I mentioned to her the idea of paring her collection down and she was horrified at the idea!

In reply to by kristen

claydowling

Mon, 02/06/2012 - 06:40

A shocking notion. I think there's a box in our storage area with my wife's stuffed animals somewhere. Keep in mind, my wife isn't a 20-something who just moved out of her parents' house. We have a grand-daughter. Stuffed animals are forever. In fact I think one of my nephews still has my teddy bear.

kristen

Mon, 02/06/2012 - 09:04

...at the bottom of the basket where her stuffed animals used to live, were two of mine from when I was little, lol!

But you bring up a good point about forever. I think I need to put a ban on any new ones joining her stuffed animal family from here on out. Pretty soon I'm going to need to add another closet to her room just for those!

Guest (not verified)

Thu, 02/23/2012 - 17:32

How did you build and incorporate the drawers?

In reply to by Guest (not verified)

kristen

Sat, 06/30/2012 - 20:46

claydowling

Thu, 02/23/2012 - 19:12

The easiest way to do a quick drawer, if you don't know how to do dovetails (and that's a simple skill totally worth learning), is to drill holes through the sides and into the front, and pin it with hardwood dowels. Use a domestic hardwood, you'll be a better dowel and a dimension that matches drills you own. The cheaper white imported dowels don't match any drill diameters that I can find.

hoffer5353

Thu, 06/28/2012 - 13:18

I am wanting to add shelves and drawers on a closet and am afraid it will be too big for the space. How wide is your closet?

In reply to by hoffer5353

kristen

Sat, 06/30/2012 - 20:53

Here is the post with the plan mock-up with dimensions:

http://pinktoesandpowertools.com/2012/01/24/how-to-build-a-closet-organ…

It says 65.5" wide on there, and I don't believe I made any changes, so that should be accurate. I think you could get away with having an approximately 46" wide closet. You could have the drawers in the middle and then 12" wide shelves on either side that would fit sweaters, jeans, shoes. If you made them adjustable like mine, then you could really maximize the space in there. Just make sure you give yourself plenty of room in front of the shelves if there is wall there--you want to be able to easily take things in and out.

Good luck!

mrs.T.La Forme

Mon, 02/04/2013 - 17:49

i just want to say I`m jealous i wish my closet looked like this. cant wait until I`m skilled enough to try it .

kristen

Tue, 02/05/2013 - 15:08

I'm looking forward to doing this to my closet too!! It's a good project to take on once you want to try out drawers for the first time--since it's behind doors, it doesn't have to be perfect. Good luck!

My first Chunky Build

This is my first build and im really proud of it. We needed a new platform bed to fit our new matress! Yeah! a queen size bed! I discovered ana's blog and i got really inspired by all the projects in the blog! For the construction, i used birch for the showing parts, pine for side rails and center support and spruce for the slats. Actually, i haved cut de sides and builded the legs then i oiled evething before assembling. I used my Kreg Jig r3 to join the sides and i used a corner metal bracket to join the legs to the sides! Everything is attached from the inside, so no filler needed! I also decided to use 1x6 for the legs to get a taller bed. If you want your matress lower in the frame use 2x4 instead of 2x6 for the center support. Adjust de side rails to fit with the 2x4. Can't wait to build something new! FYI: I know my english is bad but its not my first language!Im french canadian!

Estimated Cost
250$ finishing oil included
Estimated Time Investment
Weekend Project (10-20 Hours)
Finish Used
Deftoil Danish oil finish color fruitwood
Recommended Skill Level
Beginner

Comments

Square Picnic Table using Deck Boards

Submitted by Anonymous (not verified) on Fri, 07/07/2023 - 11:32

I used deck boards instead of 2x6 for the top and seats; this lightened the table overall while negating the need to sand and finish the boards.

I also used a cedar-tone treated board so staining wasn't necessary.

Kelly S.

Built from Plan(s)
Seasonal And Holiday

Farm House Dining Room Table

So I went off most of the specs on this table except I didn't want the brace on the bottom. Instead we braced it under the table with extra 2/4s. The longest part of this was the staining and poly due to it being cold as heck in Washington.

Built from Plan(s)
Estimated Cost
120.00
Estimated Time Investment
Weekend Project (10-20 Hours)
Finish Used
2 coats Min Wax Red Mahogany 4 coats of Poly
Recommended Skill Level
Intermediate

Comments

Janelle Kay (not verified)

Sat, 04/21/2012 - 21:03

Hello,

I love you table! It is beautiful. I too would like to build this table without the brace at the bottom. could you maybe add some photos of how you did the bracing??

thanks!

Sheryl (not verified)

Mon, 05/14/2012 - 12:32

I have been looking for a table that I like and that won't break my pocket. Haven't found one so I want to build this. Can you tell be the measurements of the wood pieces that I need. Thank you I would really appreciate it.

Sofa and Long Couch

Submitted by Anonymous (not verified) on Sat, 03/12/2016 - 12:18

So, we basically took the pans for the 2x4 outdoor sofa and extended it for one of the sofas because we wanted 4-across seating. We also finished up the look by adding vertical beams in the arms and a second 2x4 across the top (see photos). Because of the really long couch, I added extra bracing foot to make sure it won't sag.


Once complete, we determined the pillows across the back were a bit too tall, so we adjusted the plans by adding a couple beams and then lengthening it to attach to the back of the arms rather then between the arms. We pocket drilled the beams together and then braced it with 1x4 slats across the back. I also used a 1/4 router bit to soften all the edges. Anna we took your advice and pocket drilled all attachments except the seat slats for a real finished store-bought look. Cost of wood was under $100 because we went with pine. Pillows and seats from At Home put us at about $600 total for the project.

Estimated Cost
All in with umbrella and stand, wood for stand, two couches, pillows, and sand to add weight for the umbrella was under $700.
Estimated Time Investment
Weekend Project (10-20 Hours)
Finish Used
Thompson Water Sealer
Recommended Skill Level
Beginner

Mini Planked Farmhouse Bedside Tables

By far my favorite project! It was challenging combining two sets of plans, changing dimensions, and learning new skills all at the same time yet so, so, rewarding.

I loved the look of the Mini Farmhouse Bedside Tables but wanted to create a bookshelf as well so, I used the planks idea from the Planked Wood Bedside table plans to create solid sides, and a plywood backing for support and to hide lamp and phone cables.

I have a very low bed, so I shortened the height and made the top proportionate in size.

I used 1x6s for the top, 1x4s for the bottom shelf, 1x3s and a 1x2 for the side panels, 1x4s for the drawer, and 1x2s for the trim and a piece of 1/4" plywood for the backing.

I found that the drawer fell out when you pulled it too far so I added piece of wood between the drawer and the top to keep it from dropping as you pulled it out. 

Estimated Cost
$120 for 2
Estimated Time Investment
Week Long Project (20 Hours or More)
Finish Used
Minwax Penetrating Stain and Minwax Polyurethane
White cabinet paint from Sherwin Williams
Drawer liner :)
Recommended Skill Level
Intermediate

Double Pedestal Table, Benches and Bar

Submitted by Anonymous (not verified) on Mon, 07/24/2023 - 10:37

I was so inspired by Ana's plans I made two tables, that can be put side by side, alongside each other or used as two separate tables with benches. I also made a bar with granite top...... It was lots of sanding as I did not have a planer at the time, but I love the finished project and get compliments by all that see it. Thank you Ana White.


Cathy B

Dr. Seuss Bookshelf

This was a Baby Gift for my sister and her little boy, Xander who was born just a couple weeks ago. I wanted to do something special that would last for my sweet nephew. She found a bookshelf similar to this on cool-rooms.com and we decided to try to make our own version. I've posted about it on my blog if you're interested in the process.

Estimated Cost
$100 (my costs are higher due to where I live)
Estimated Time Investment
Weekend Project (10-20 Hours)
Finish Used
2 coats of red semi gloss and 2 coats of white on the shelves. Then after I had to make repairs after shipment I sanded it all and had to apply two more coats of red paint in a flat finish and sprayed 2 coats of a clear top coat.
Recommended Skill Level
Intermediate

Comments

Jenny94w

Mon, 02/19/2018 - 06:41

I would like instructions but it will no let me? 

Guest (not verified)

Sun, 03/18/2012 - 19:22

Clever cute creative. Cant stop looking at it. I love it. Thank you so much for posting.

Guest (not verified)

Sun, 03/18/2012 - 19:52

Thank you so much for posting .You did a beautiful job. Your a good sister and a Terrific aunt.

Legomamaof4

Sun, 03/18/2012 - 23:30

I love how you have taken a typical shelf and gave it a spark that is SO ONE of a KIND! WOW! This gives me ideas! There is just not enough time in the day thought.

Thank you for sharing your Awesome creativity. Your Family is SO lucky to have someone as talented as you! Keep up the good JOB!!!

Again AMAZING!!!

LaylasMOM

Thu, 06/07/2012 - 20:38

i love this design and cannot wait to make a pink one for my little girl!

zookeeperjay

Mon, 09/03/2012 - 08:59

I have long thought I wanted cartoon furniture for my kids. Haha. . I'm so inspired! Thanks I have to go get building!

Sheryl (not verified)

Sat, 01/05/2013 - 11:02

Love this ... My son is having his first child and would love to make this . Do you have anymore pics of it . And does anyone have any other patterns ?

Sideboard Companion to 4x4 Truss Table

Submitted by Rasalhague on Fri, 11/29/2019 - 06:17

After the enlarged 4x4 Truss Table, we needed someplace to store the dishes.  The Planked Wood Sideboard was the thing.  Not an easy piece.  This was my first attempt at "Doors & Drawers" and was a steep learning curve, but we are so pleased with the big, sturdy results that match the table.

Estimated Cost
$550 with Kreg hinge and cabinet knob jigs (Will be reused)
Estimated Time Investment
Week Long Project (20 Hours or More)
Finish Used
Minwax Red Mahogany Stain
Recommended Skill Level
Advanced

Wood Star Serving Tray

Submitted by LampAtFeet on Sat, 12/07/2019 - 13:41

I followed the plans for the Wood Star Serving Tray. I thought it was a little tricky cutting all the angles to the correct length. One tip I would suggest is to mark which end has the 24 degree cuts, since you'll be attaching these joints first. Any gaps in the joints can be filled with wood filler, then sanded smooth. I would say this is an Intermediate level project due to the angles and trying to attach them without the nails popping through the other board. Would be fun doing a set of 3 and painting them red, white & blue for the 4th of July. Thanks for the plans, Ana!

Estimated Time Investment
Afternoon Project (3-6 Hours)
Finish Used
Stained with Varathane Briarsmoke, then a light layer of Dark Walnut to help give it an aged look. Sealer on top.
Recommended Skill Level
Intermediate

Comments

DIY Wood Outdoor Chair with Deep Seat Cushion

Submitted by Anonymous (not verified) on Thu, 08/10/2023 - 12:27

Using just basic tools, I was able to build this super comfy outdoor chair for the fraction of the cost. With a couple of modifications, Ana White's design plan made for a perfect fit for the new deep seat cushions I had found on fb marketplace.
 

Seasonal And Holiday

My version of the Triple Pedestal Farmhouse Table

You can read about my project here...
love2dreamdoyou.blogspot.com/2014/01/hello-again-id-like-you-to-meet-my-table.html
This was my first building project--Ana's plans were great!

Built from Plan(s)
Estimated Cost
$200
Estimated Time Investment
Week Long Project (20 Hours or More)
Finish Used
Minwax Honey 272 applied with t-shirt rag. Minwax Fast Drying Polyurethane Superior Durability Clear Semi-Gloss several coats applied with foam brush
Recommended Skill Level
Starter Project

Combo of Farmhouse Bed with Farmhouse Storage Bed

Submitted by jeniroosen on Mon, 01/27/2014 - 21:39

I meshed the Farmhouse Bed with the Farmhouse Storage Bed with Storage Drawers and this is the final product. Let me know if you have any questions. I learned along the way.

A few things I modified -

I knocked off the corners of the 1x8's used in the footboard and headboard as I wasn't a fan with how they butted up straight. I liked the rounded edges of the routered boards instead.

I cove routered the tops of 2x6's and loved how they turned out

When I handed my cutlist to the kid at the big orange store, he pulled OSB instead of plywood for the storage cabinets. I realized it halfway through the cutting as I was shopping for other things and didn't have the heart to tell him halfway through the job. I had to edge band (first time) the edges and the OSB soaked up a lot of primer.

Estimated Cost
$400
Estimated Time Investment
Week Long Project (20 Hours or More)
Finish Used
Glidden Antique White
Recommended Skill Level
Beginner

Comments

Rough Sawn Spruce Dining Table!

Submitted by Anonymous (not verified) on Mon, 09/18/2023 - 09:01

This was really fun! Actually used Spruce from a tree on my property that I had cut down and taken to a Saw Mill 6 Years ago. Been in the barn drying. The rough sawn boards were only 1.25 thick after the planer I could only maintain 1.00”. Extended the length of the table to 10’. Decided to reverse the underneath support angled boards to add support to the center of the table due to the added length and only 1” thick boards. Used biscuit joints to add strength and alignment. We love it at the lake home!


Matt Menges

Built from Plan(s)

Cedar Top Modification

Submitted by Anonymous (not verified) on Sun, 05/01/2016 - 16:45

We needed a compost bin to replace the pile forming in a corner of the yard. We referred to it as "The Buffet" to reflect how much our new puppy enjoyed digging through the scraps. 


I I substituted cedar fencing to top the bin instead of the plastic sheeting. I just liked the way it looked and it was more cost effective. The most difficult part of the project really is wrangling the chicken wire. It's sharp!

Estimated Cost
I spent about $75 on materials for the project. I spent about another $75 on things like screws, a new staple gun, some waterproofing stain, etc all of which I have left overs and can use again.

I used treated lumber and a waterproofing deck stain. This is not for an edibles garden. I'm just using the soil to fill in low spots around the yard. If I was building it for a veggie garden I would have used all cedar wood with no stain or a natural shellac.
Estimated Time Investment
Day Project (6-9 Hours)
Finish Used
Thompson waterproofing deck stain. Brushed on.
Recommended Skill Level
Intermediate

Wood Outdoor DIY Furniture

Submitted by Anonymous (not verified) on Sat, 09/23/2023 - 14:23

Sofa, loveseat and chair based on the same design. Incredibly simple plan to follow. Love the plans on this site!

Mike & Sarah Semrow

Built from Plan(s)

Comments

Back