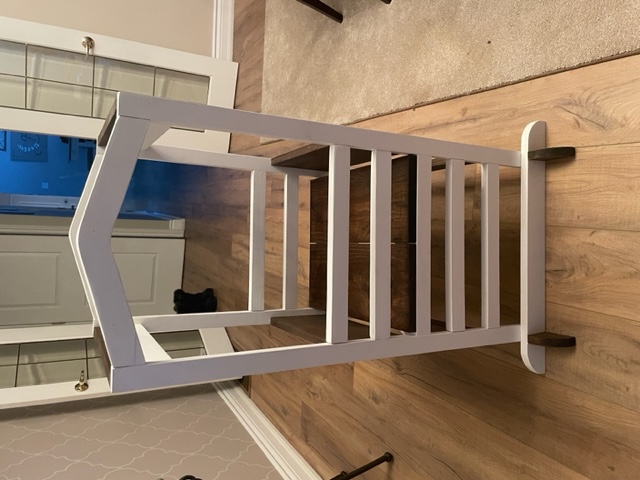
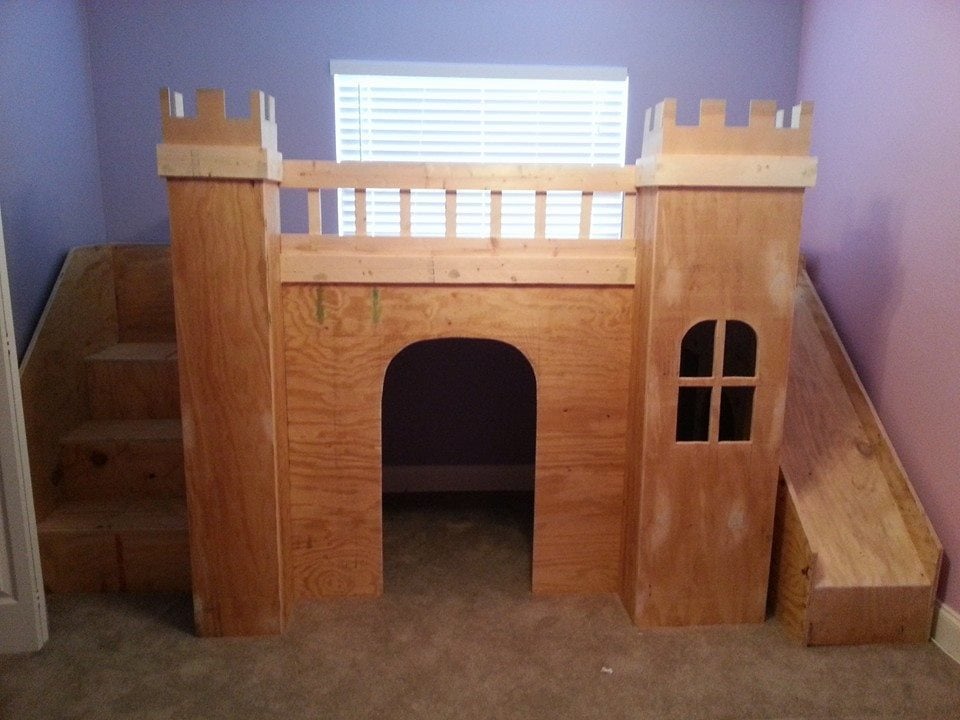
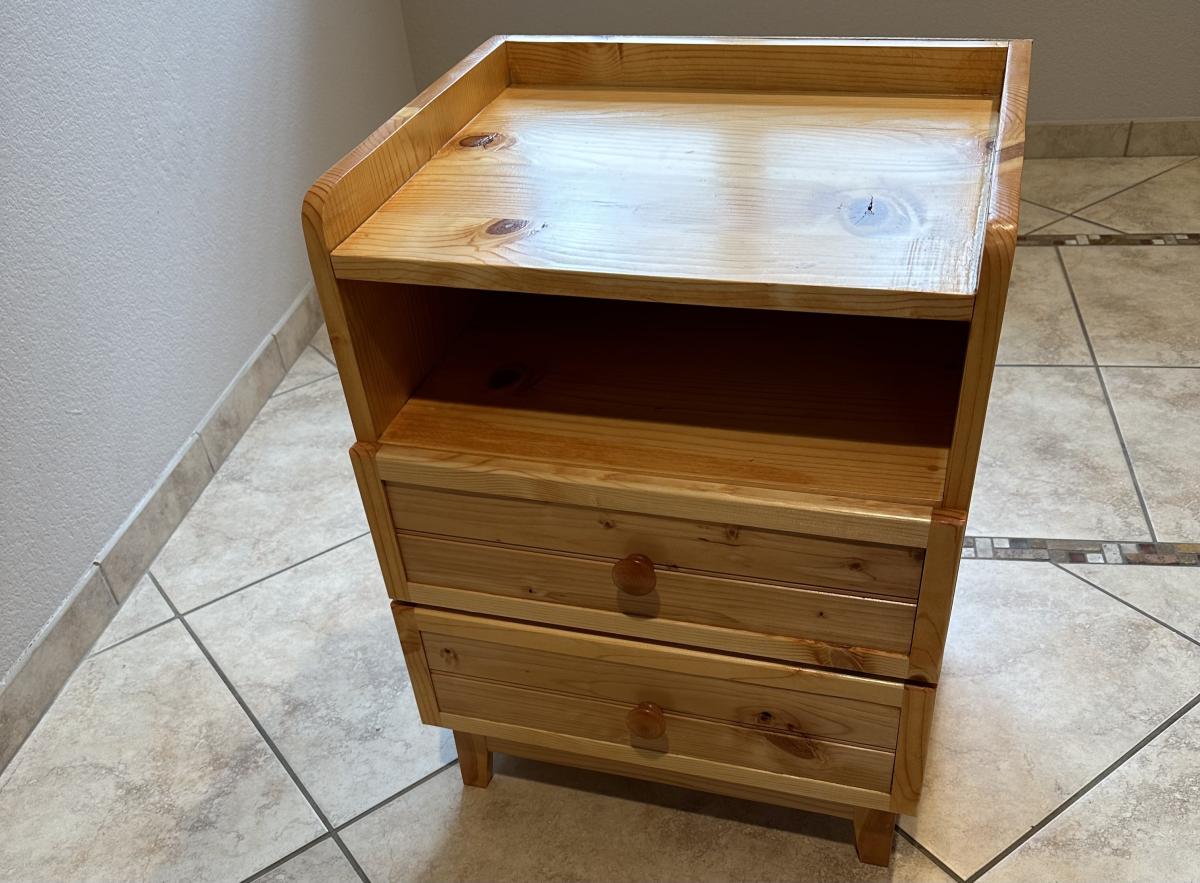
The littlest Helper Tower
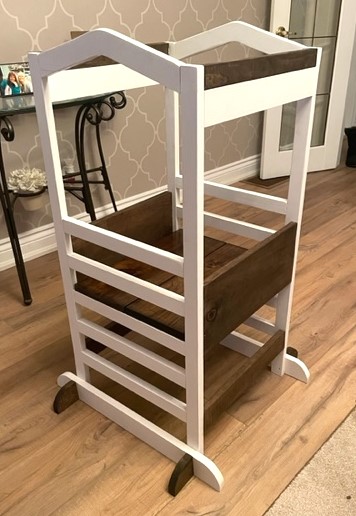
I built this Tower from plans found on Ana's site.
Decided to do with a two tone colour.
I'm very happy how it turned out.
All three Grand Kids fit in there and love it.
Thanks Ana

Built from Plan(s)
I built this Tower from plans found on Ana's site.
Decided to do with a two tone colour.
I'm very happy how it turned out.
All three Grand Kids fit in there and love it.
Thanks Ana
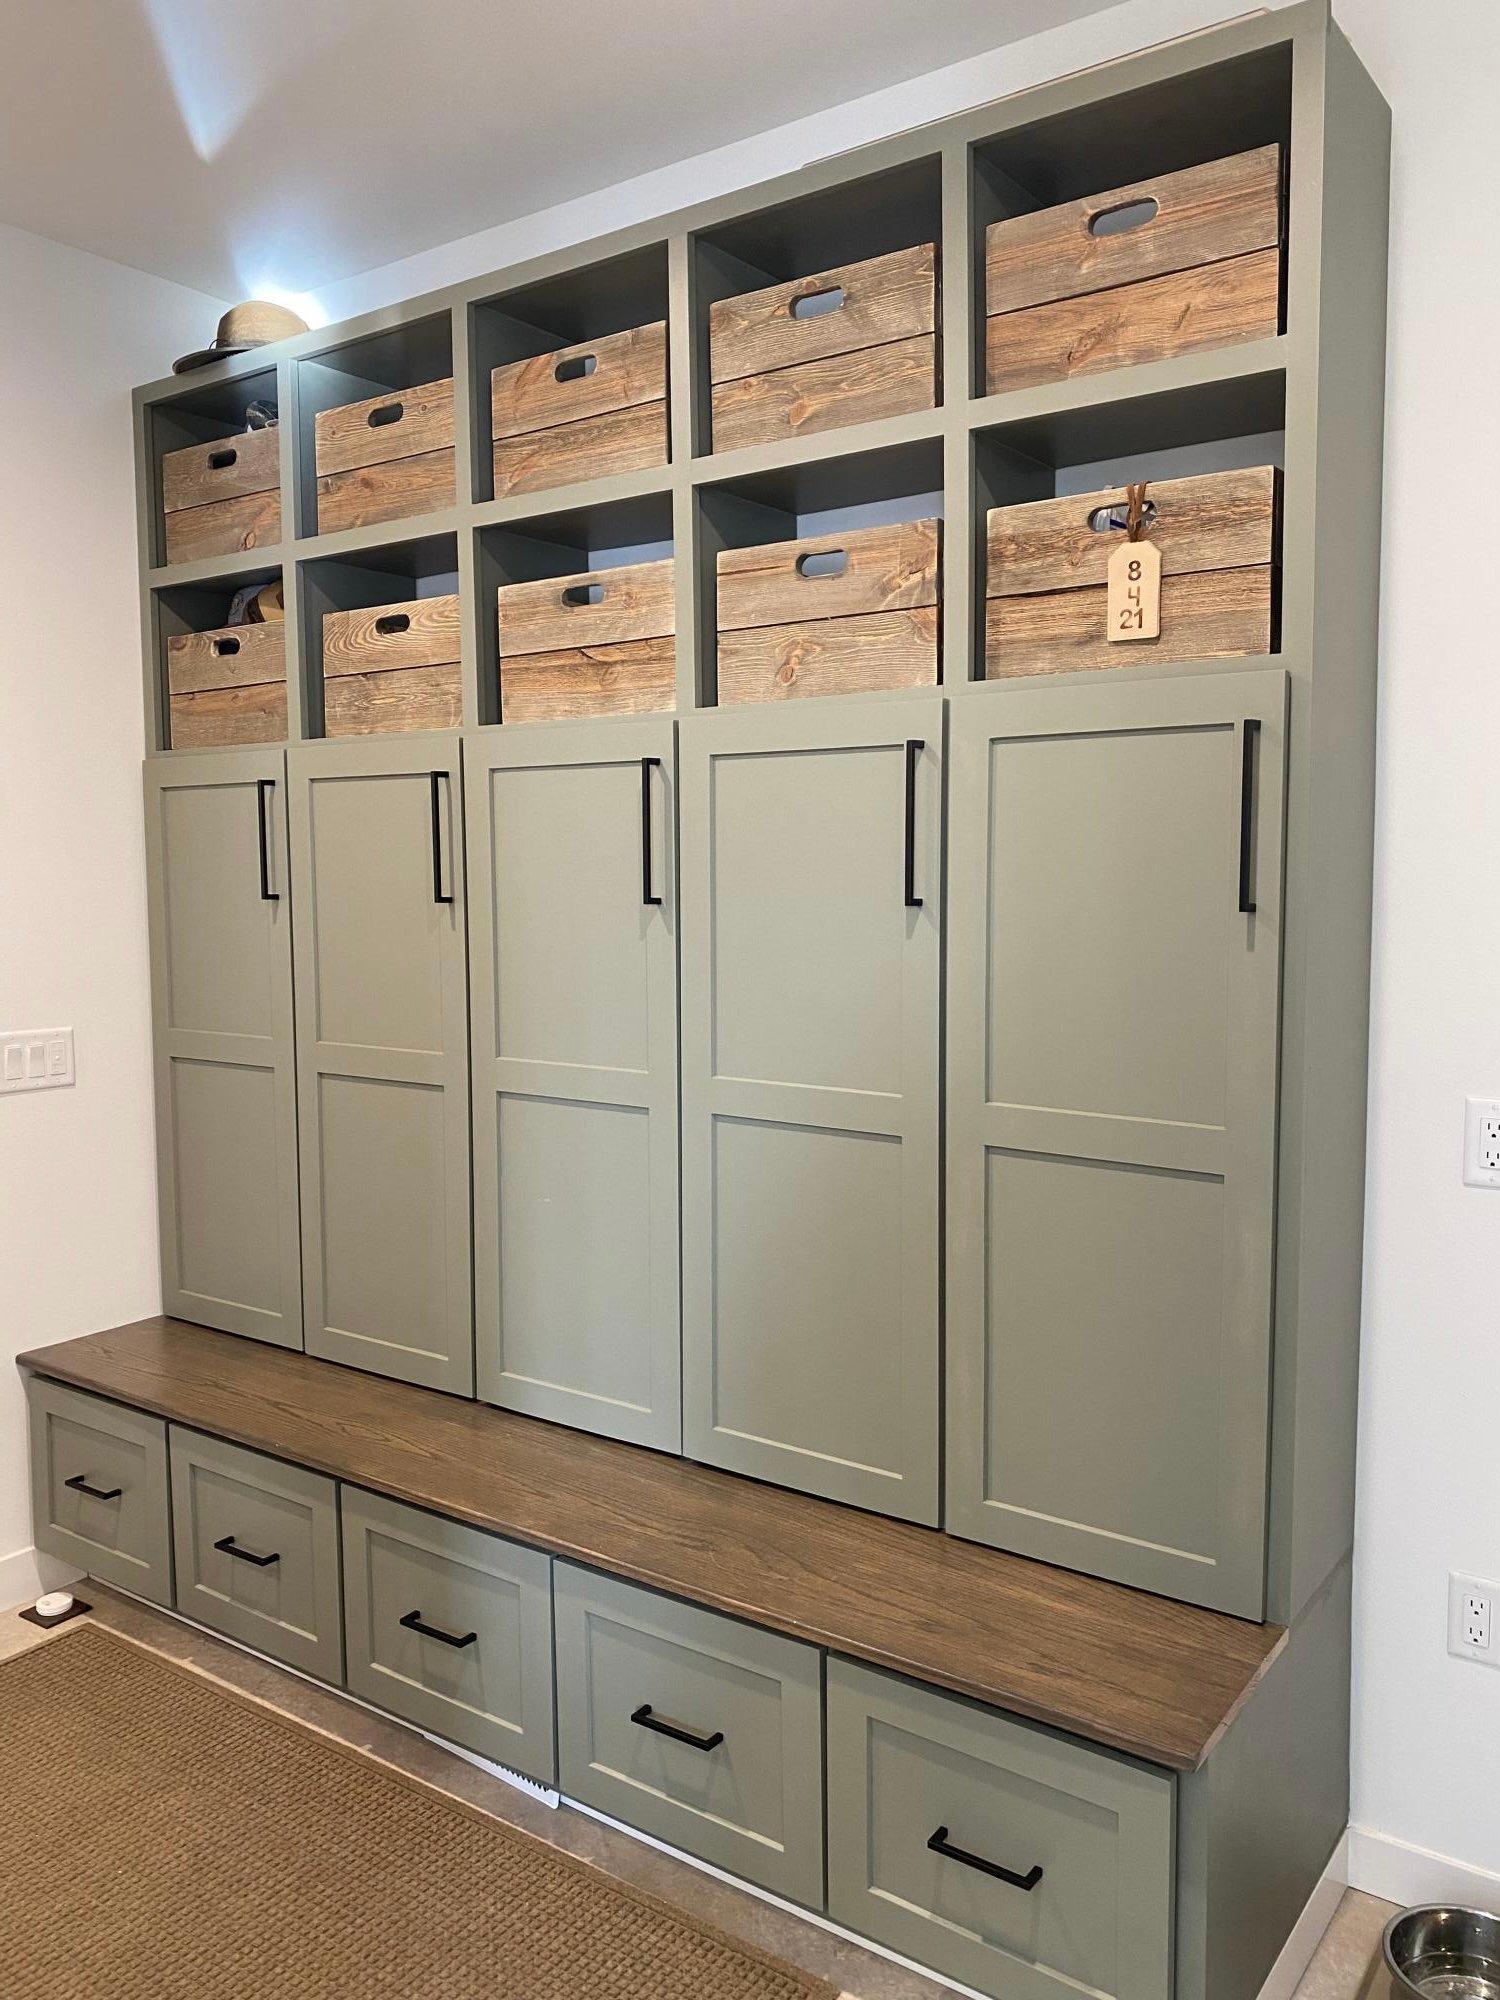
Thanks to Ana White we learned how to make these cubbies. The wood for the stained bench is from trees milled from my husband’s family farm.
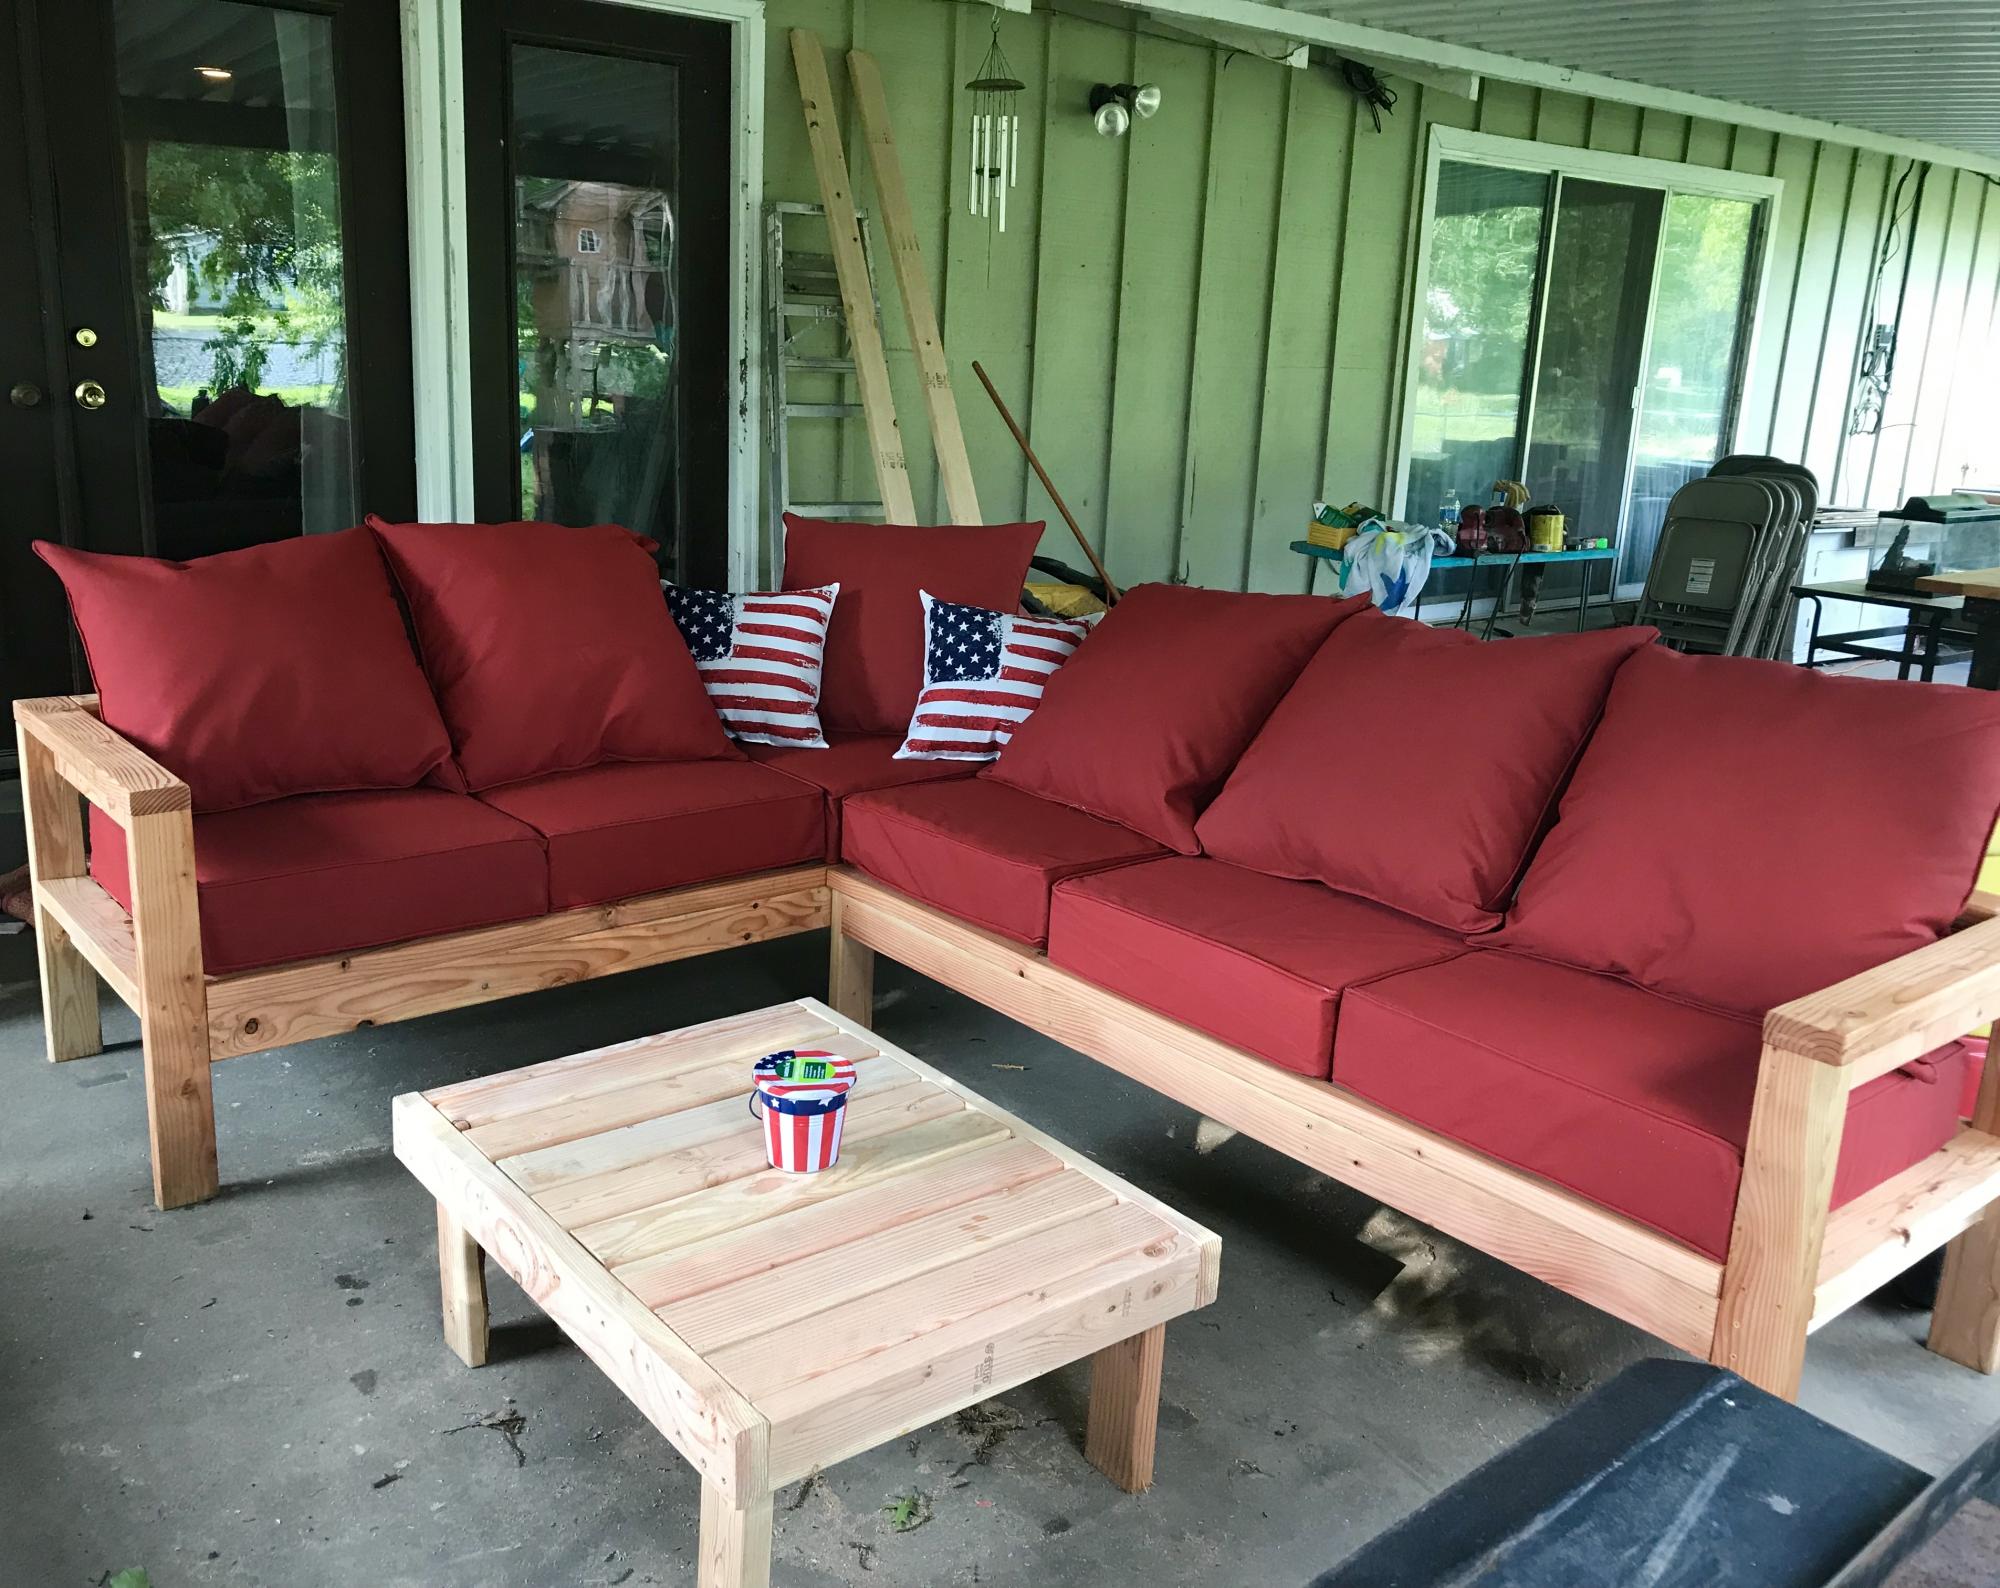
I followed the plans as written, It took me about 6 hours and that includes sanding and staining. Very simple yet offers a very wow finish. I think in total we spent about $300 for all supplies including cushions which was the most expensive part. I just finished it off with Teak Oil and an Americana theme for our covered patio. We love it.
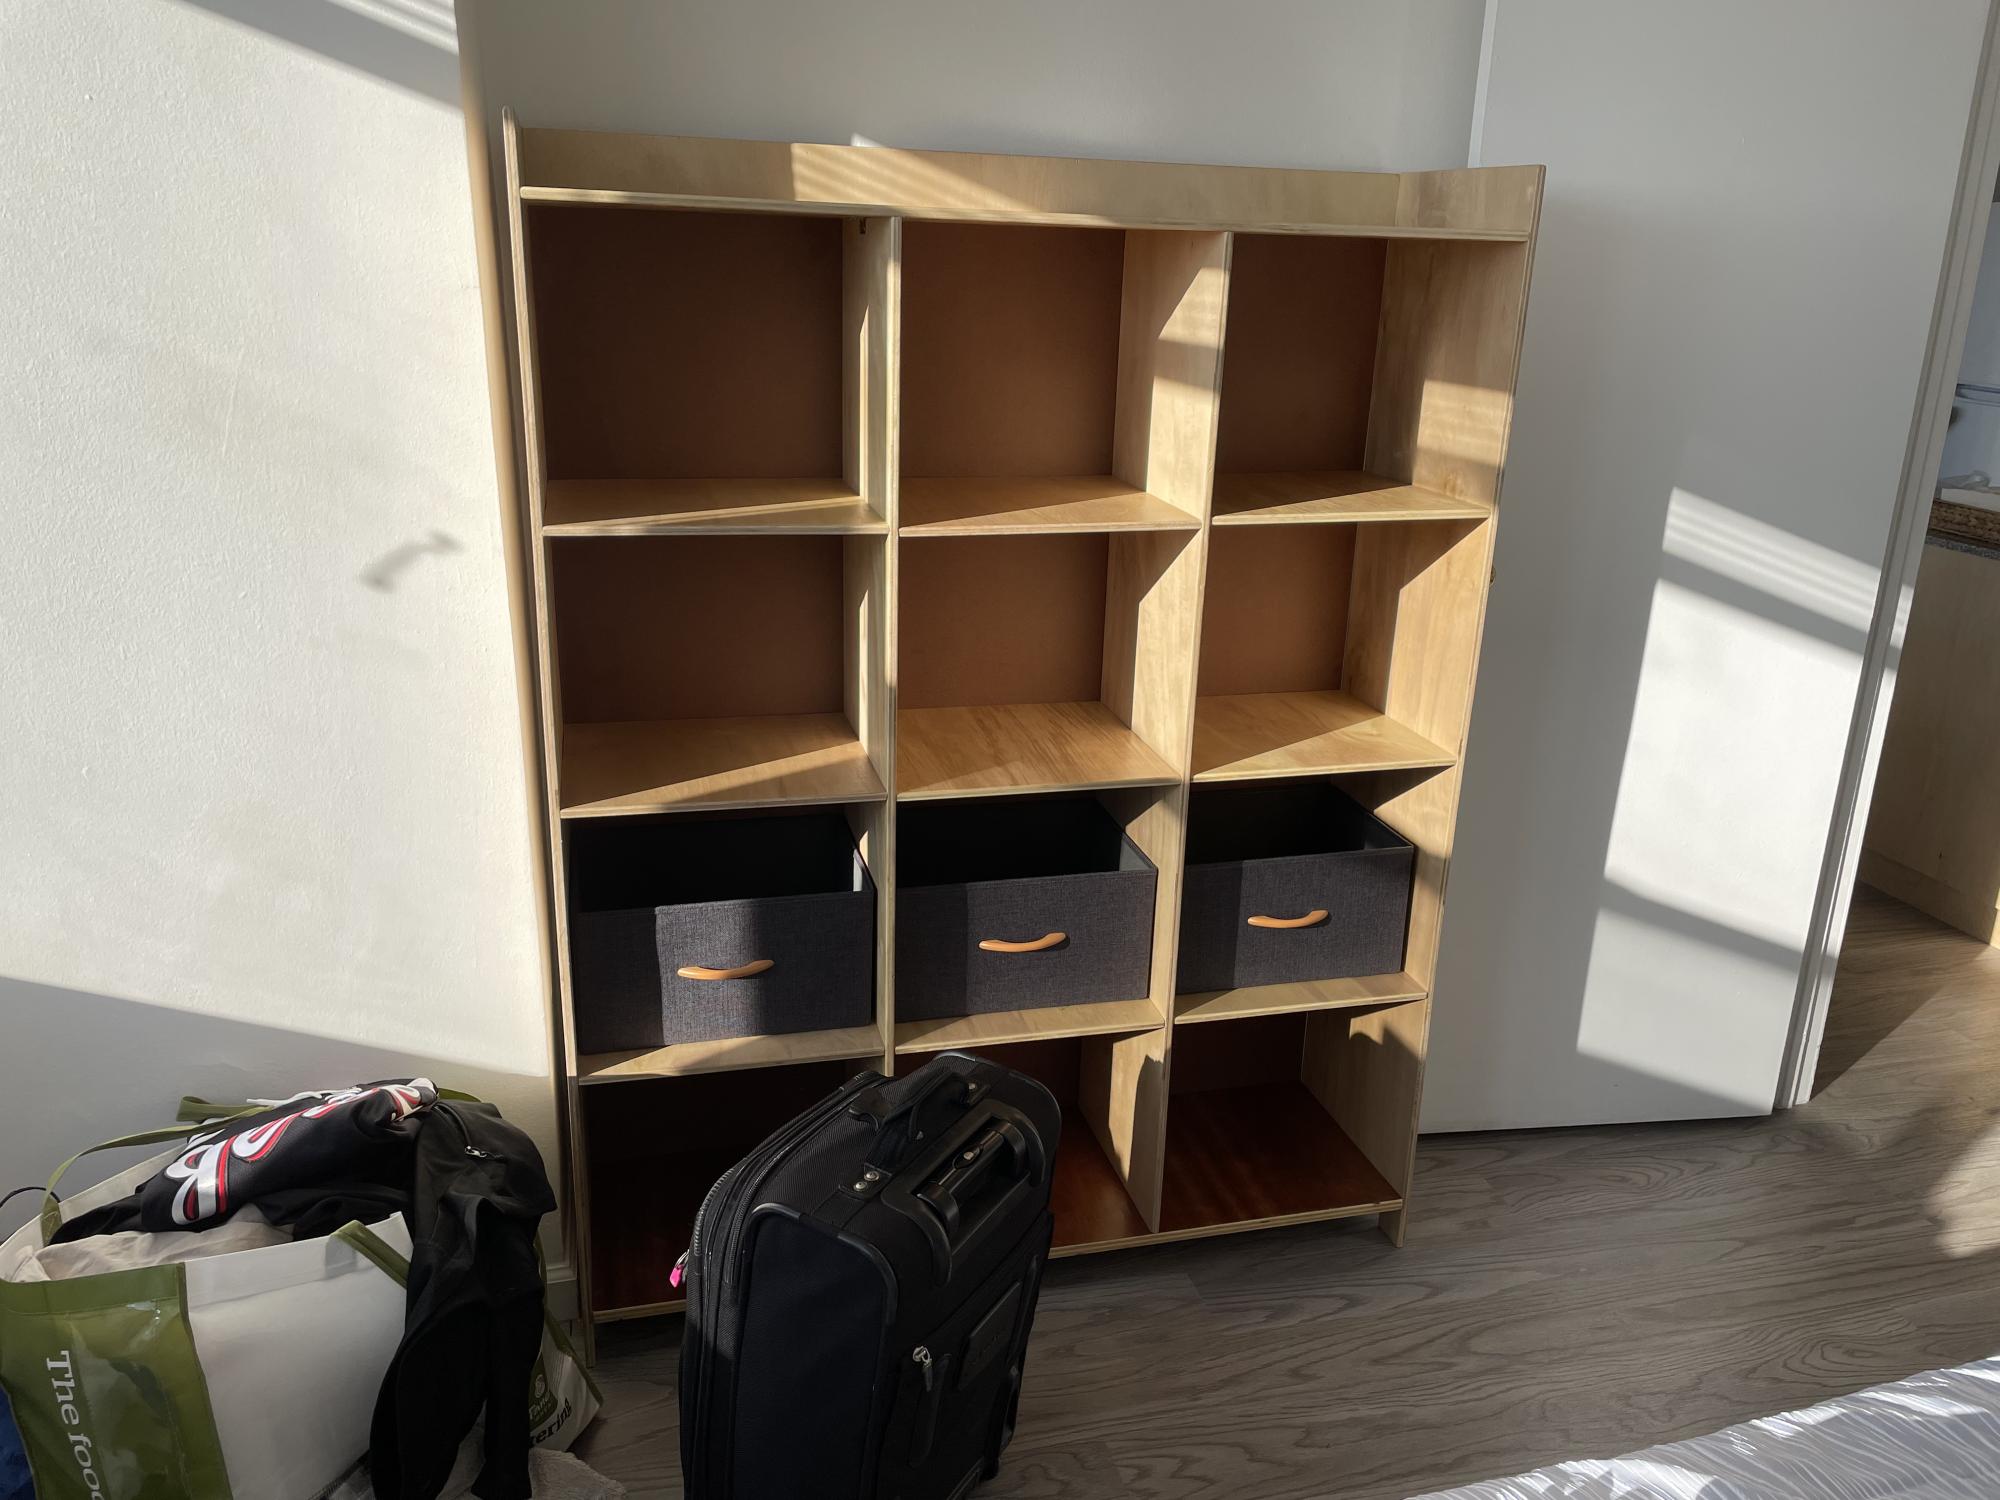
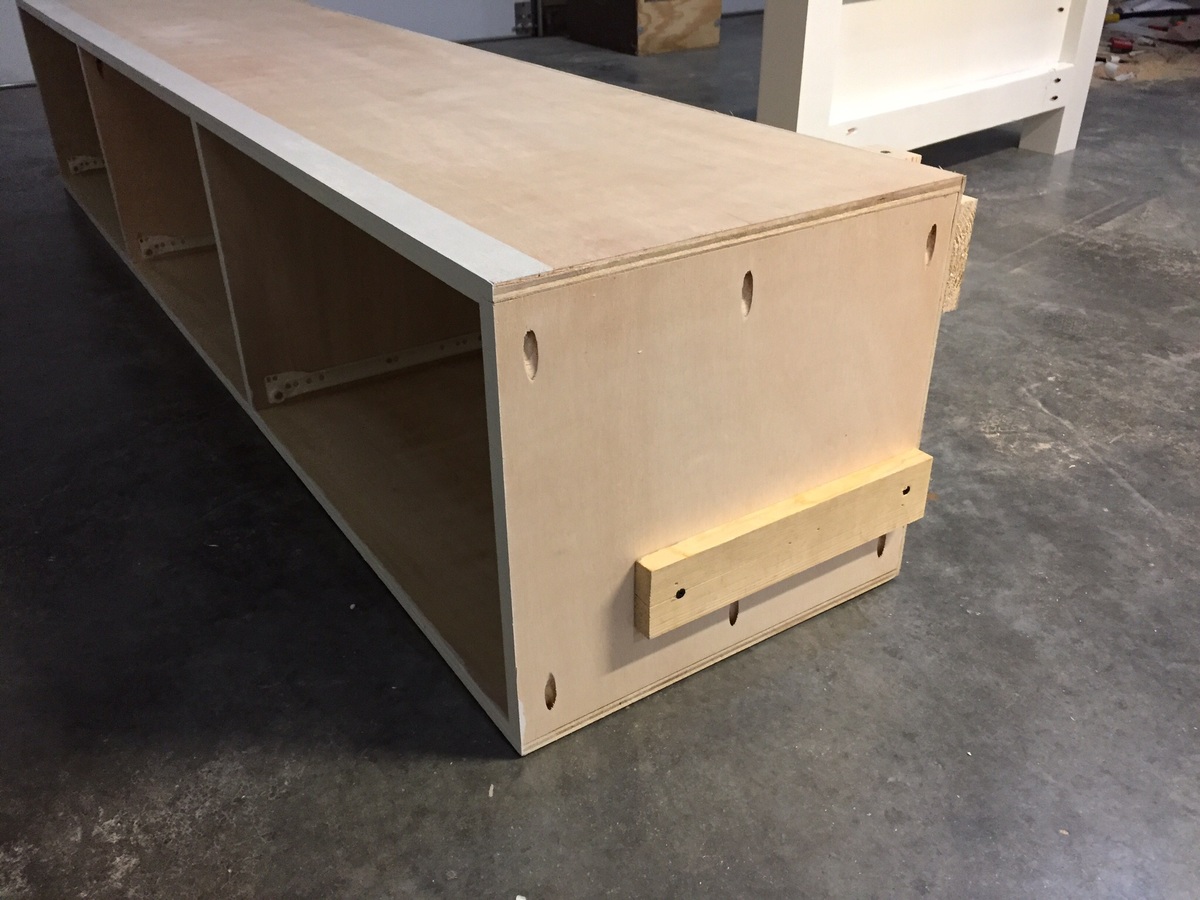
My son moved into his first very small apartment and wanted a cubby array rather than a dresser. I made this following your plans and it came out great! It’s 4x4 cubbies as you can see. I used 1/2” plywood to keep the weight down. It was a little flimsy, so I put 1/8” tempered sheet on the back, which made it completely stable. He loves it! Thanks Ana!
Sat, 03/25/2023 - 09:21
Very exciting for your son and this is a great addition! Thanks for sharing.
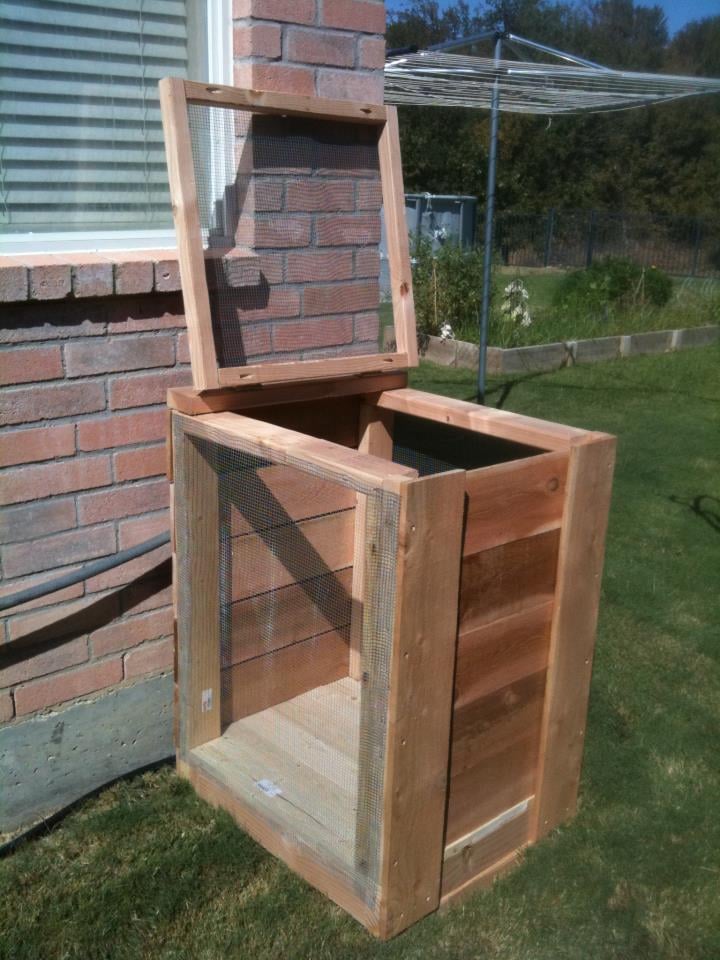
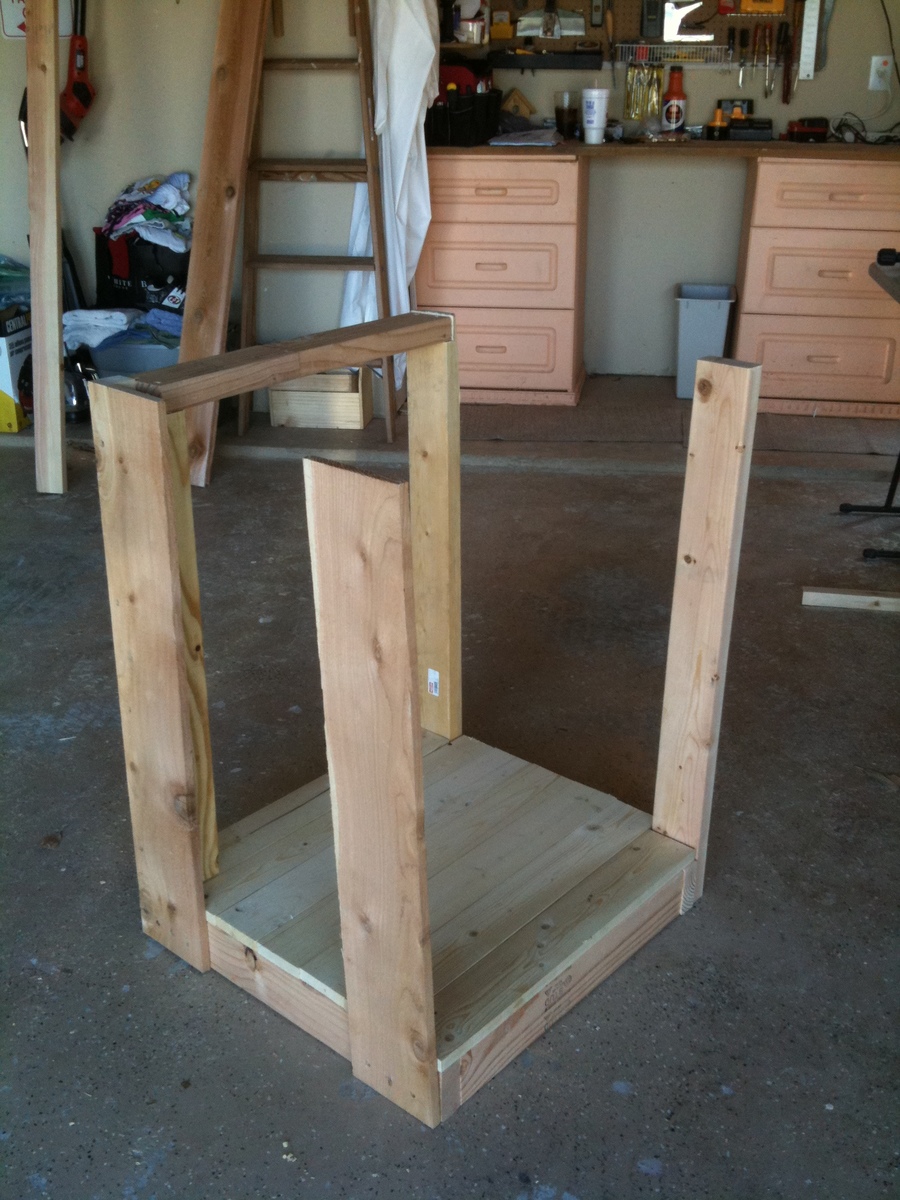
In my endeavor to be more green and self-providing, I started a backyard garden this past Spring. Thanks to the Texas heat, it was not as fruitful as I would have liked. I won't just blame the weather, but my novice status. I kept thinking I should have done more to amend the soil. So, I have been tossing around idea of composting to make my own nutrient rich soil and have a better experience with my garden next year. So, I found these plans online and I modified them down to a single 2'x2' sized bin. It also had to be mobile in that I could move it around my yard if I need to find a better place for it.
From Plan: Build A Compost Bin www.lowescreativeideas.com
http://lowescreativeideas.com/idea-library/projects/Building-a-Compost-…
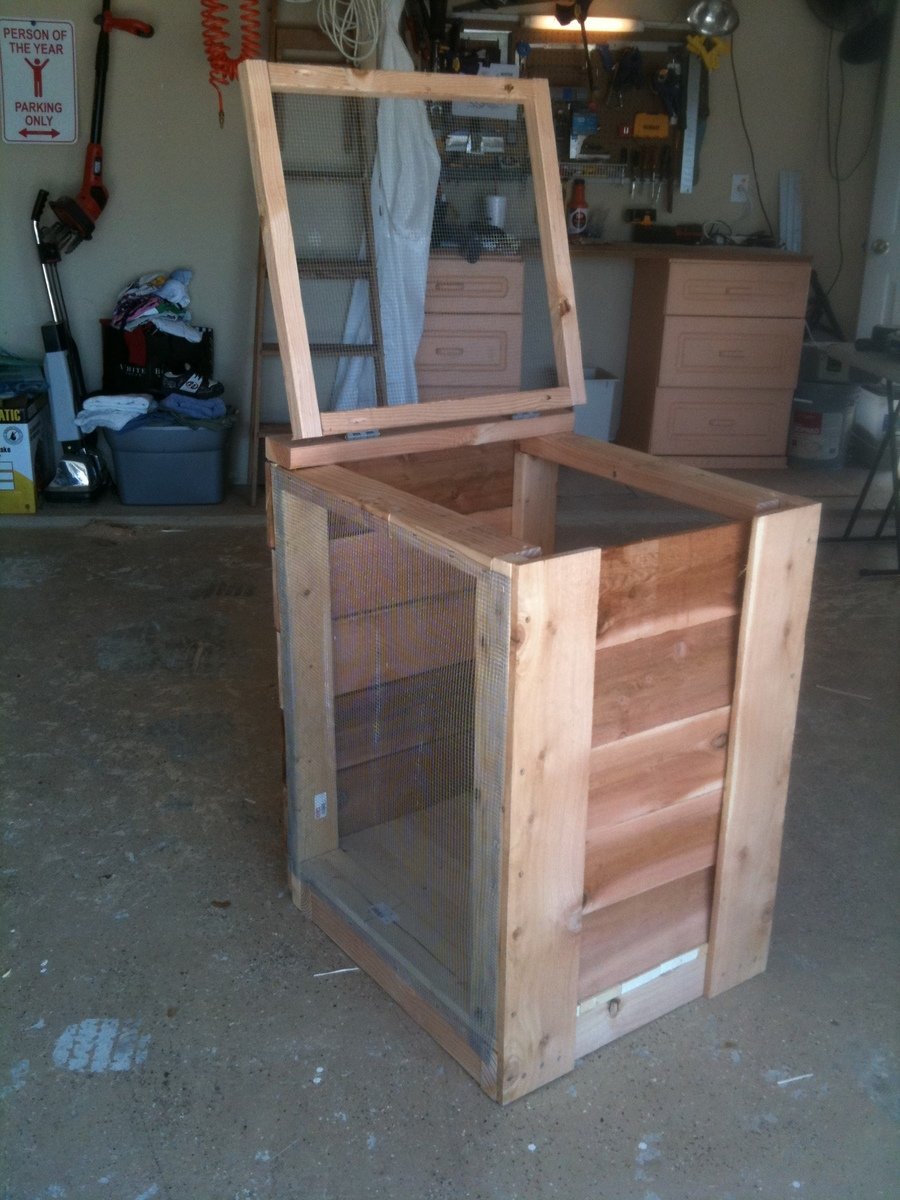
Estimated Cost: $20 for Lumber $13 for Hardware Cloth $14 for Galvanized Hinges
Estimated Time Investment: 3 hours
Required Skill Level: Intermediate
Type of Wood: Cedar and Pine
Finish Used: Natural/Matt Finish
I was able to use some left over wood for my project, but the estimate above would represent all wood being purchased. I was not really happy on the price of the galvanized hinges and I used two of them at $7 each.
The plans also called for 2x6's for the bottom, but that sized plank would have made it very very heavy and to me the whole point of having a bottom to your compost is so that you can move it if need be... so I use 1x4's
Since I didn't want my compost to come into contact with pre-treating chemicals, I did not use pretreated wood. Instead, I put a light coating of a matte finish on only the wood that would stay in contact with moisture. Otherwise, I want the cedar to mellow and age.
My final cost was about $40 using some left over wood. In one case, I actually used my Kreg Jig to create a 2x4 of appropriate length with some of my scraps. Worked beautifully. Also used it on the lid, as you can see in the picture.
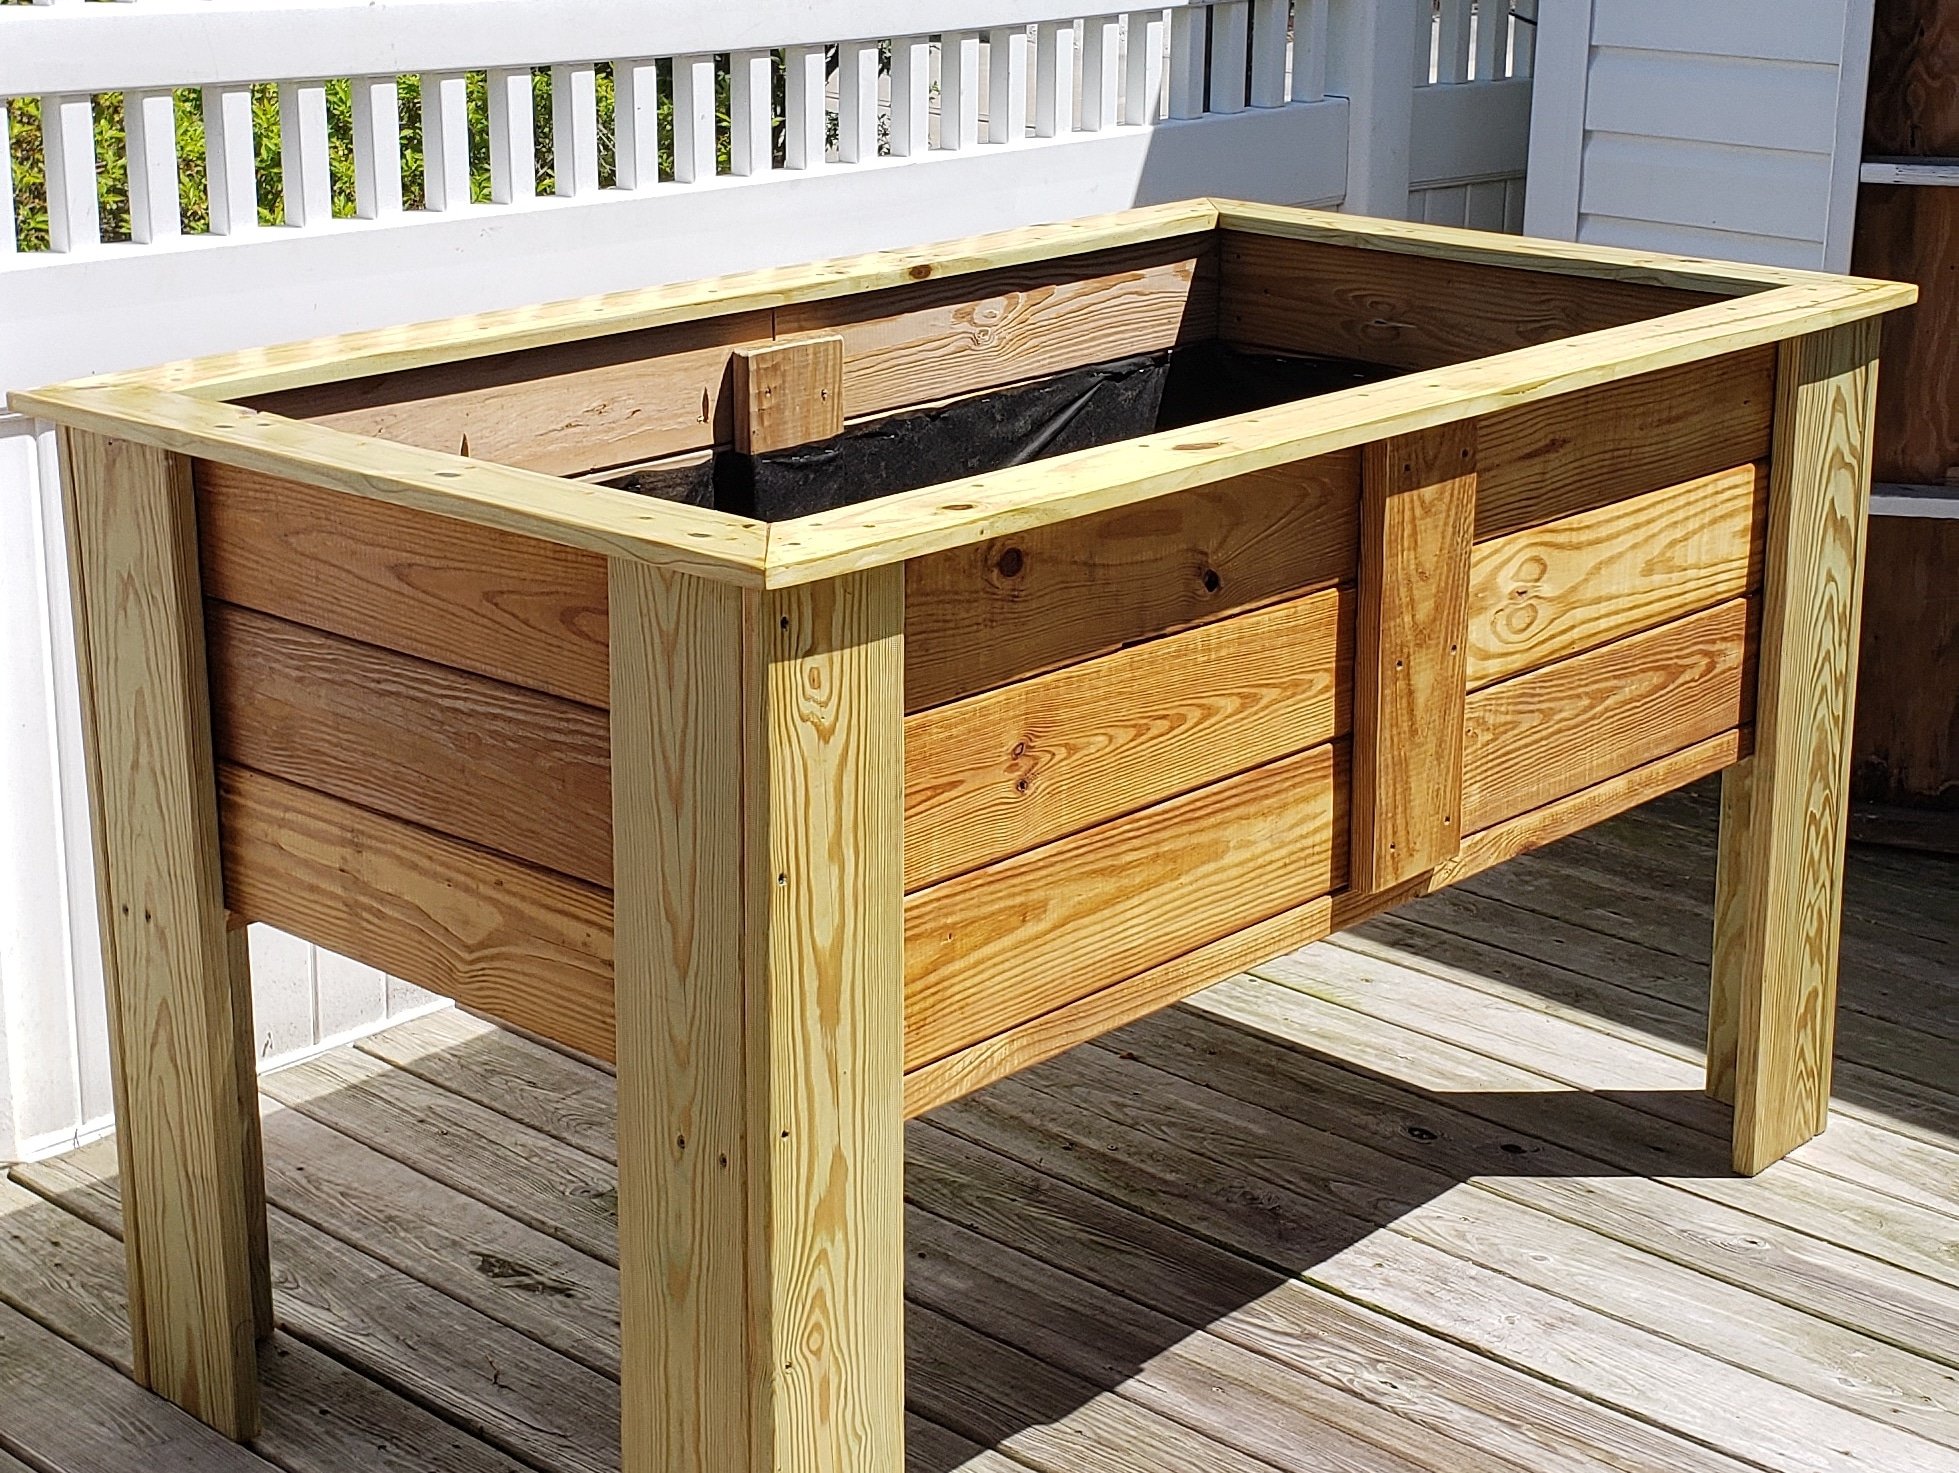
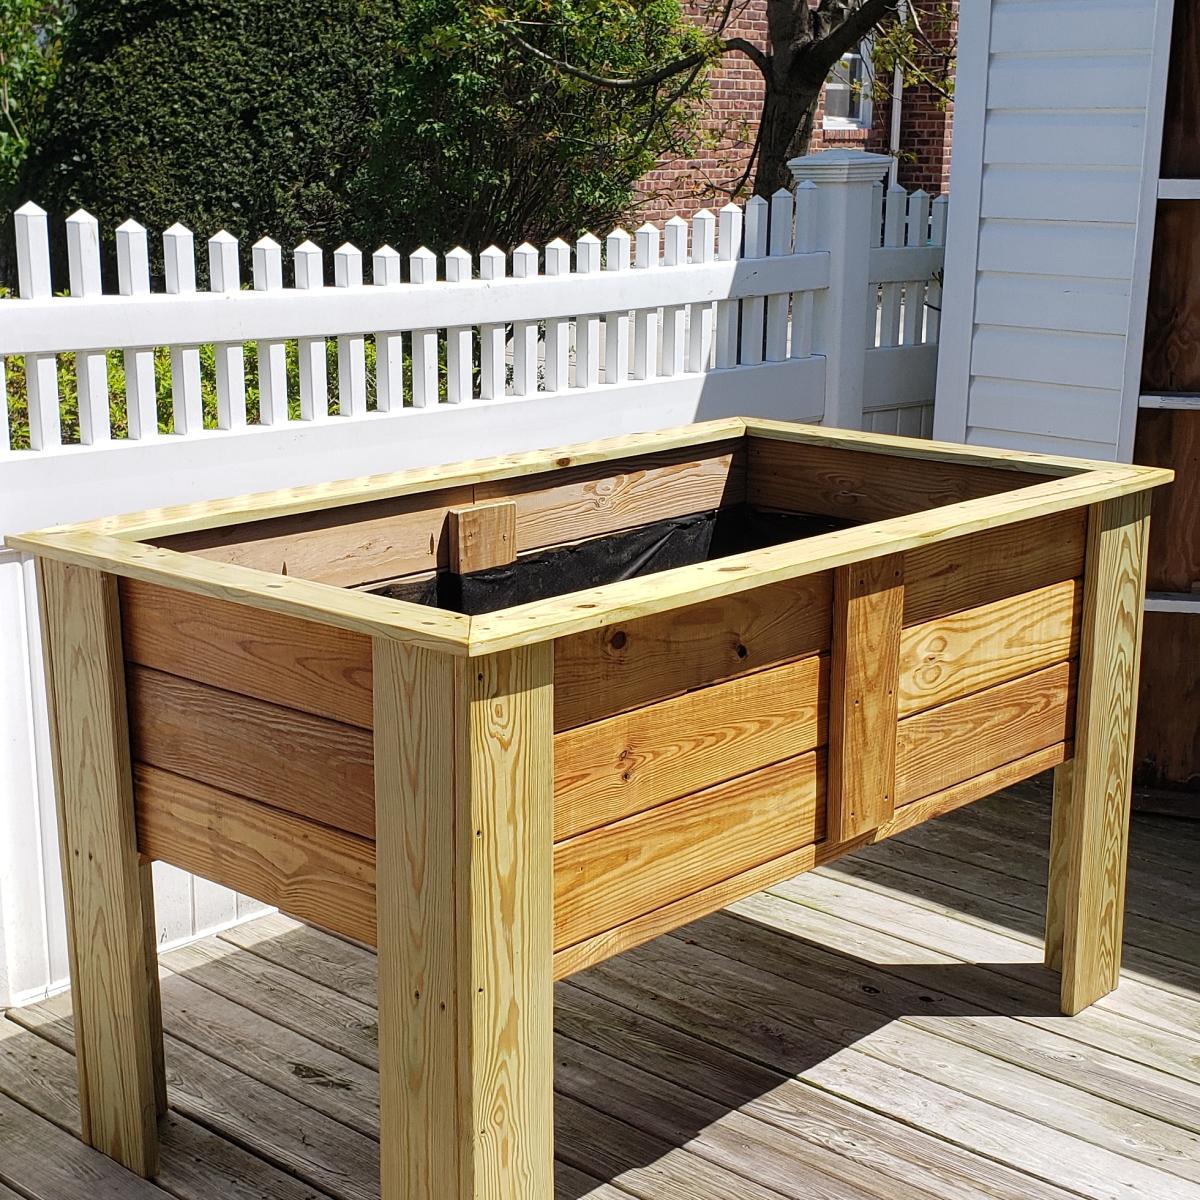
A friend of mine has issues with her knees but loves gardening so I built this to allow her to continue gardening. She loved it.
I didnt follow any particular set of plans I watched several you tube videos and combined different ideas from the videos to develop my own plan.
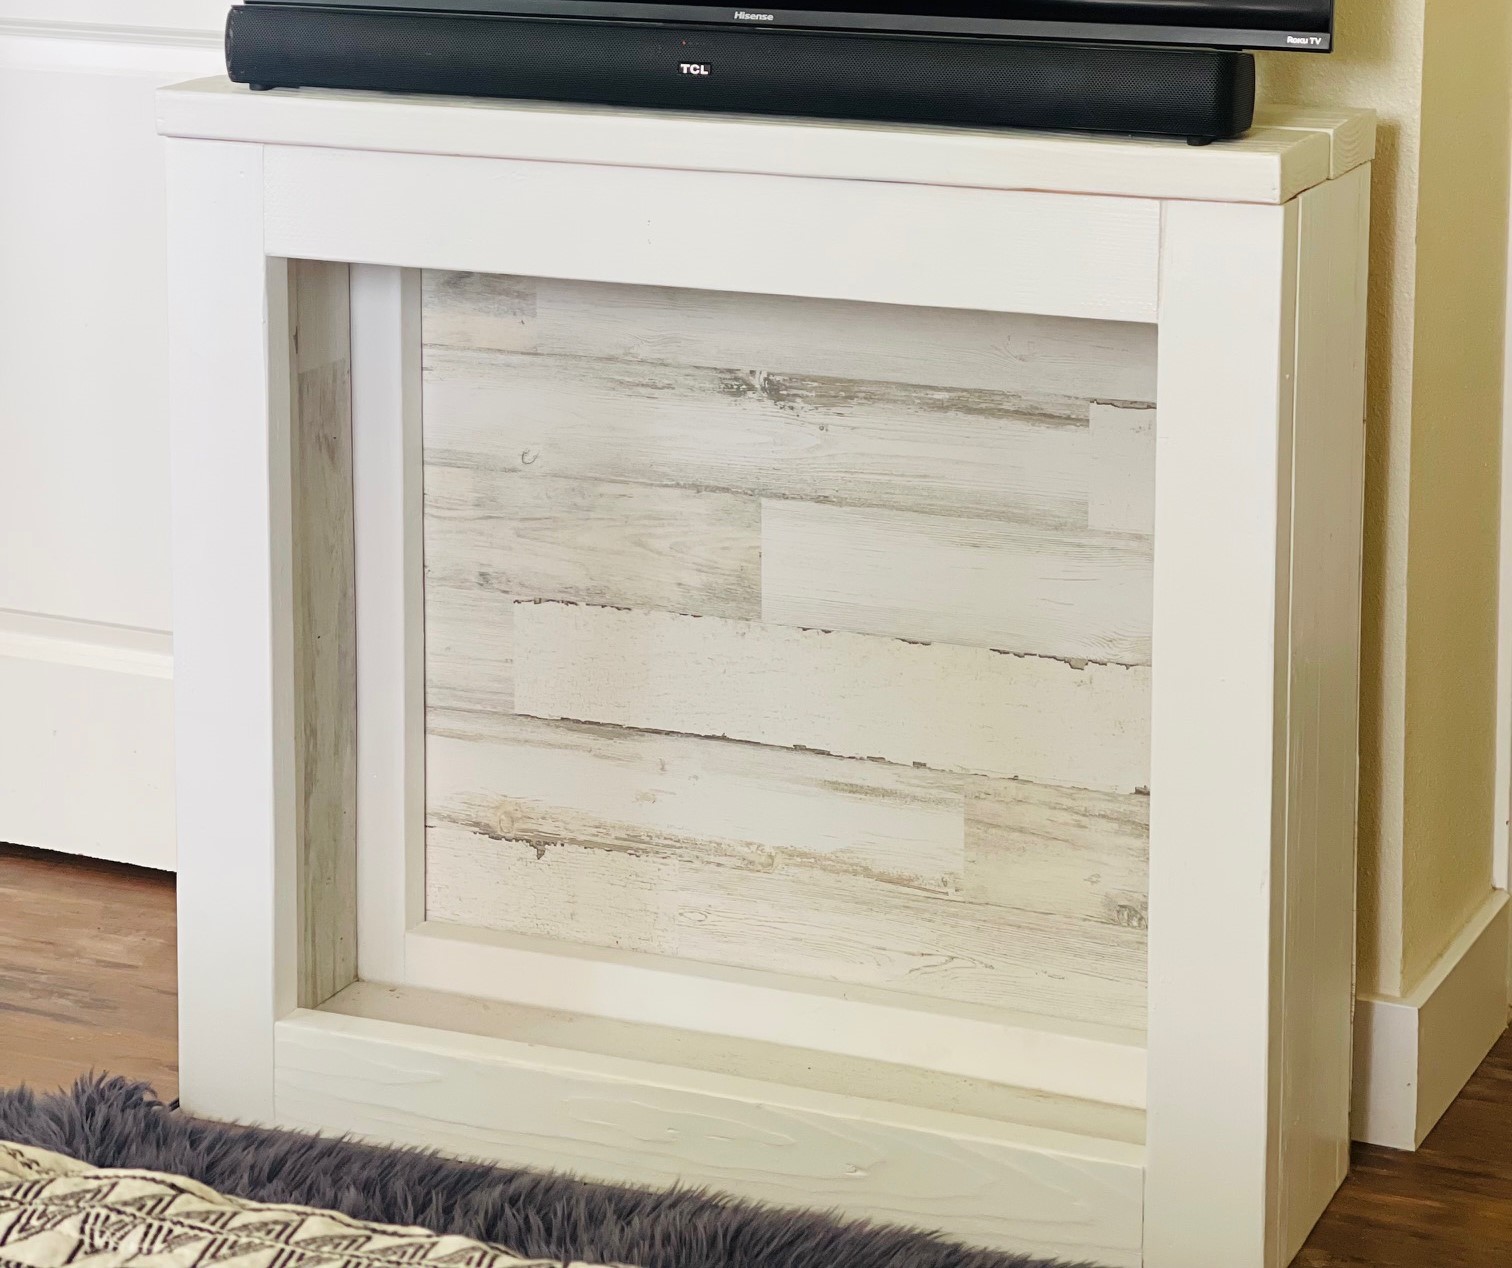
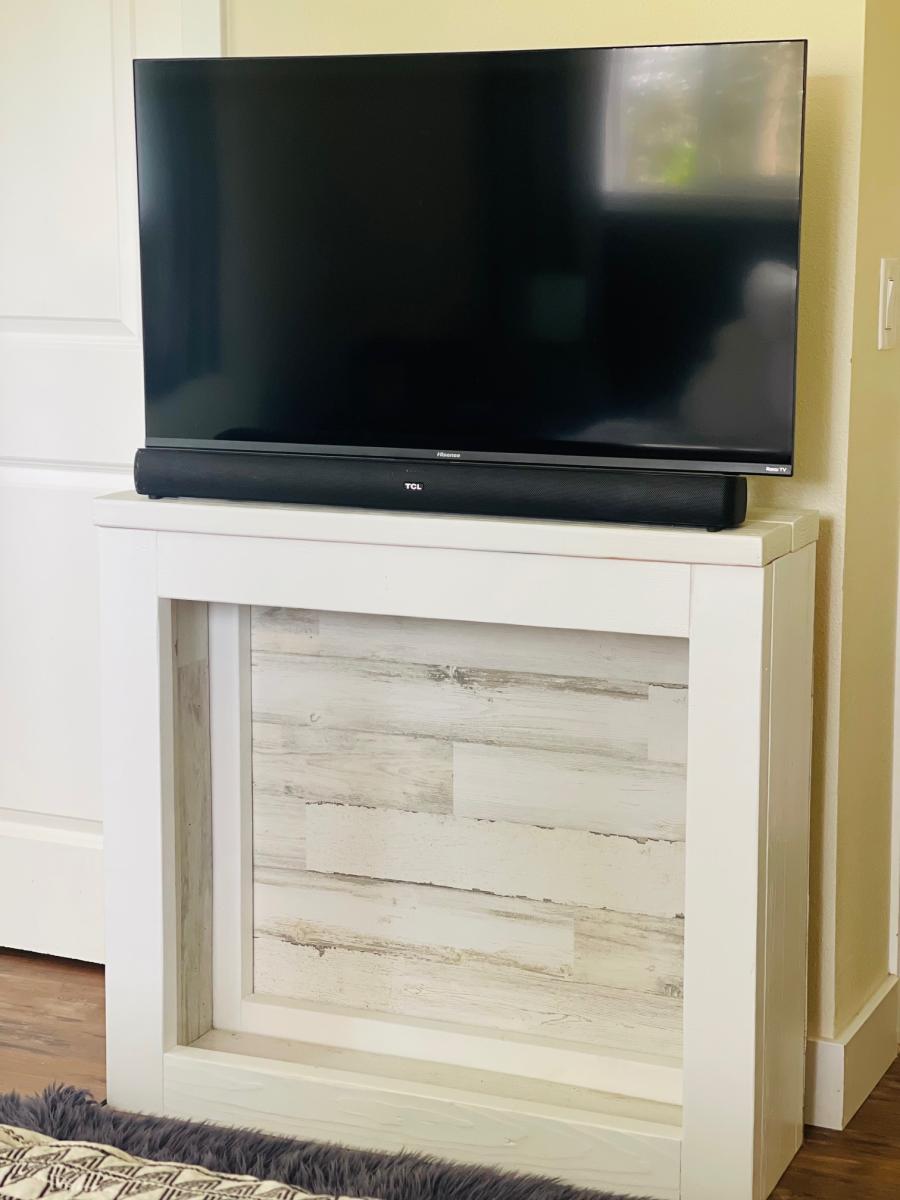
I had an idea to stack 2x4's for the main frame and then just use a piece of decorative paneling for the back and inside. I needed a place to set my tv against the wall in my room, so I built it to fit. Simple project that got the job done - more projects at Family_DIYnamic.
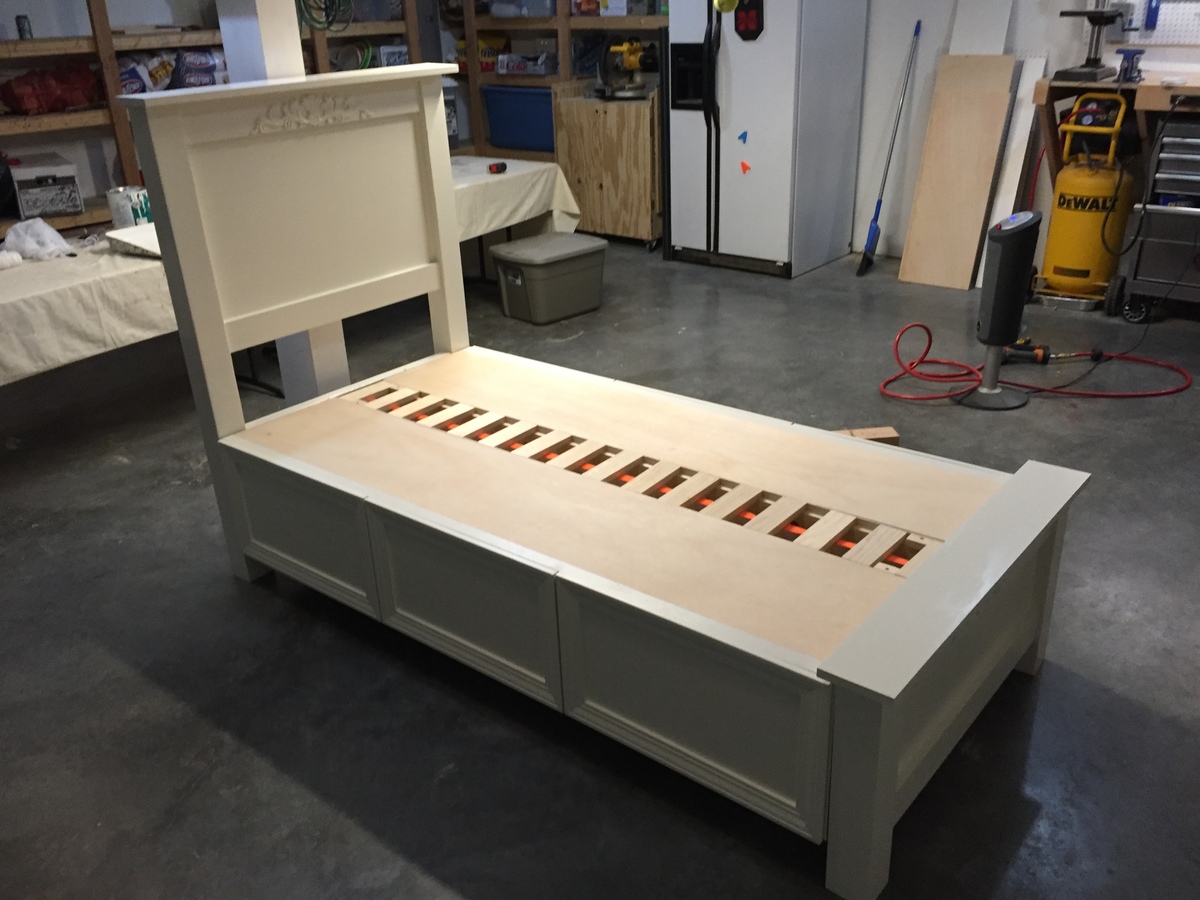
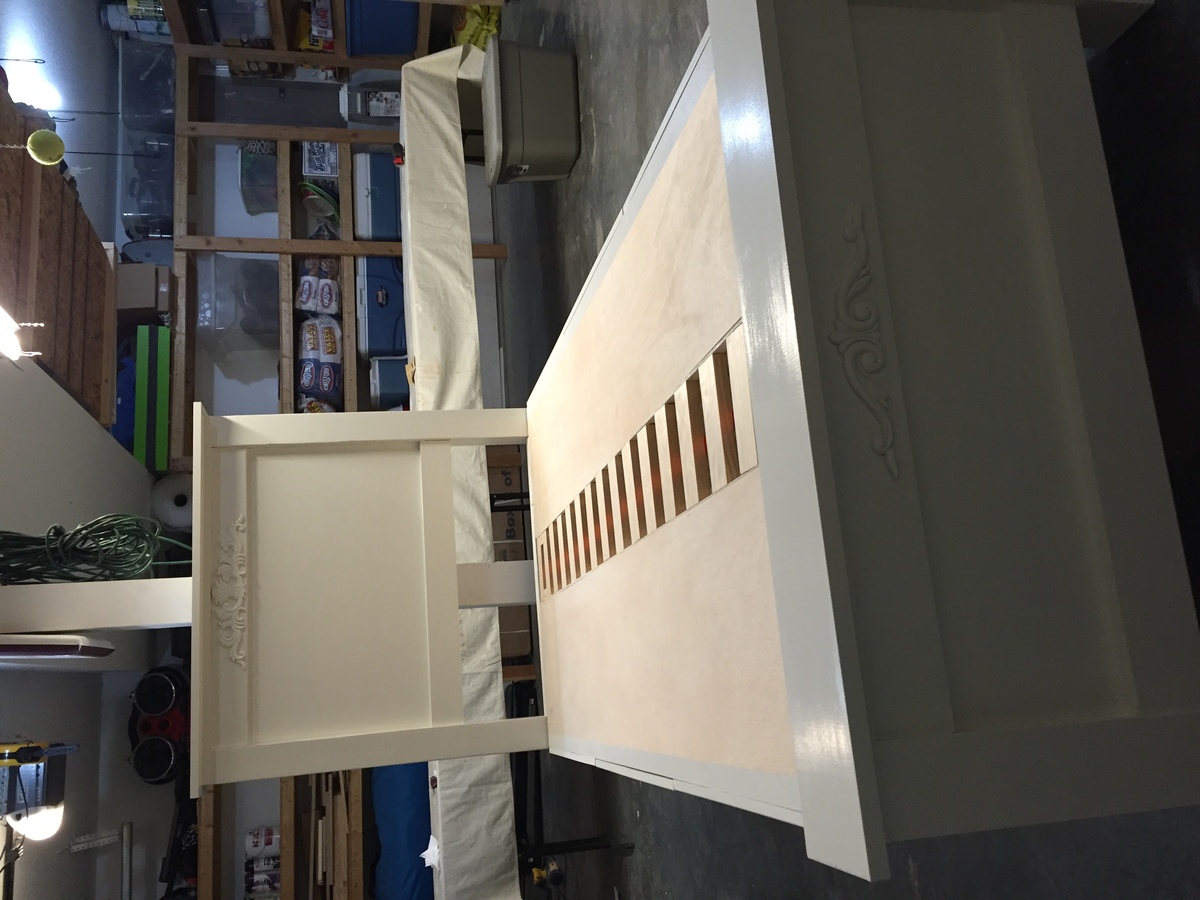
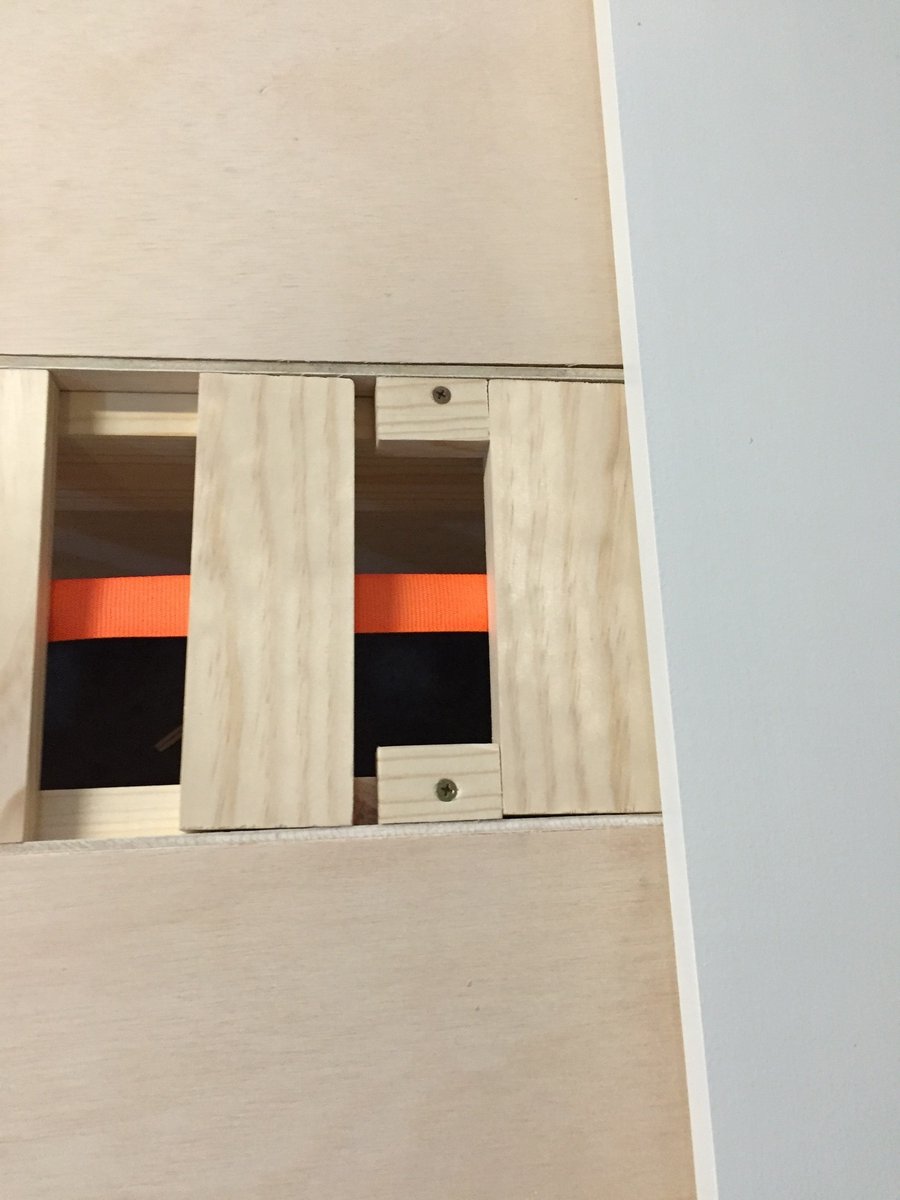
First time posting on here, made several items from this site. Thanks for all the plans. I modified this to a twin size for my daughters first bed and added a few features so I wanted to share. Twin is 39x75 so I just made it 21 inches narrower and almost 5 inches shorter. I say almost because I made the storage boxes 75 3/4 so that the drawer boxes would divide evenly into 3 to be the same size. The height of the bed is the same as Ana's plans. A few other small additions I made were webbing stapled to the slats and a small peice of scrap wood at each end to keep them taught so I didn't have to screw them all in. This makes it easier to move later as well. I also attached scrap wood 3 1/2 inches from the bottoms of the boxes so that they can easily rest on the 2x4s from the head and foot board. This makes it easier to assemble, especially if you plan on moving the bed in the future. just rest them on those 2x4's and screw together. My daughter loves her new bed.

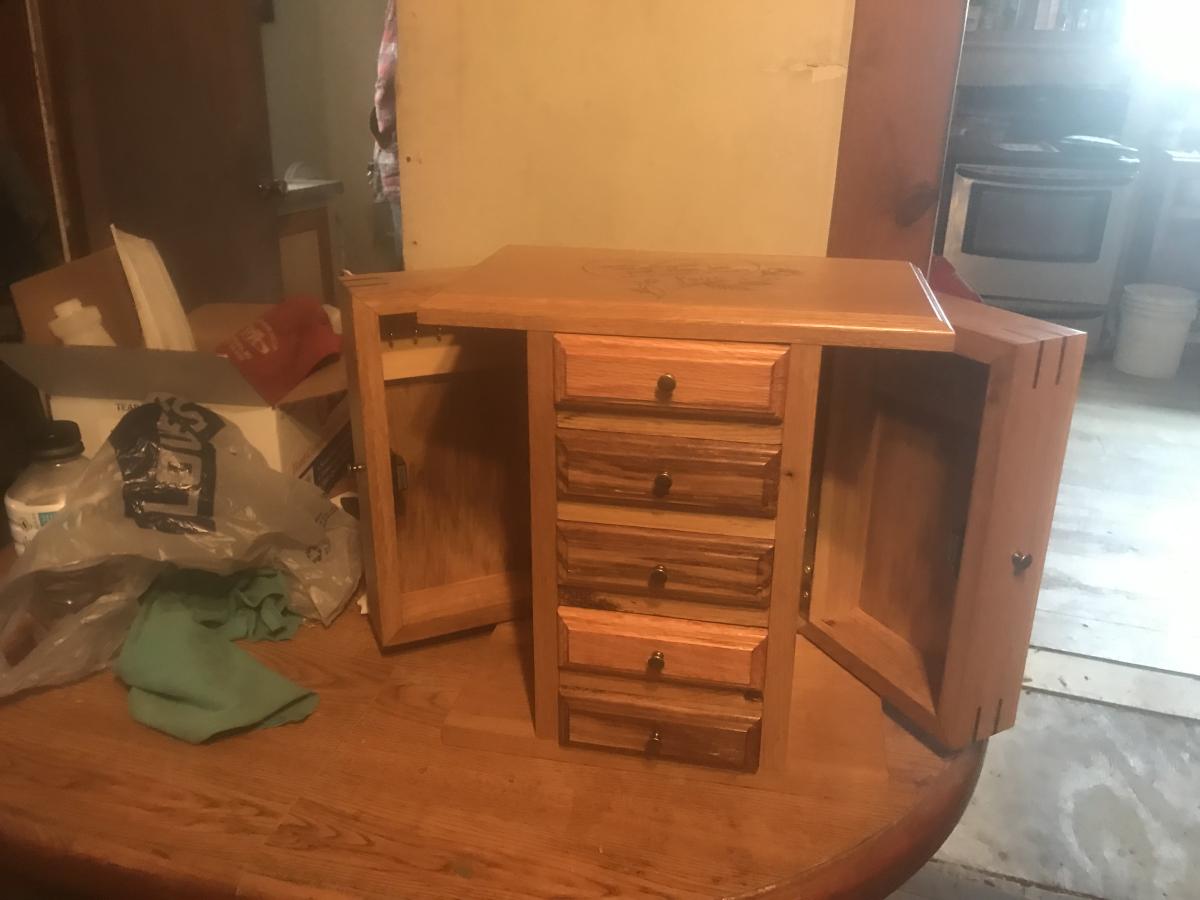
Fancy Jewelry Box it came out very nice. Made with white oak.
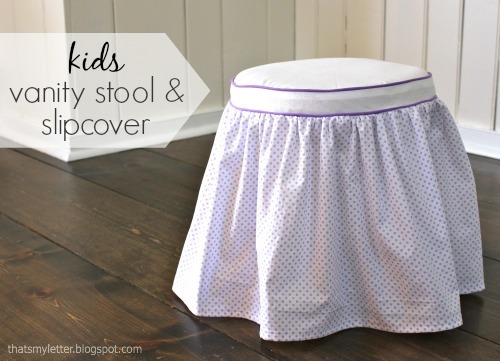
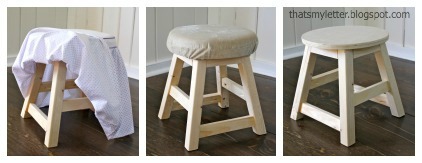
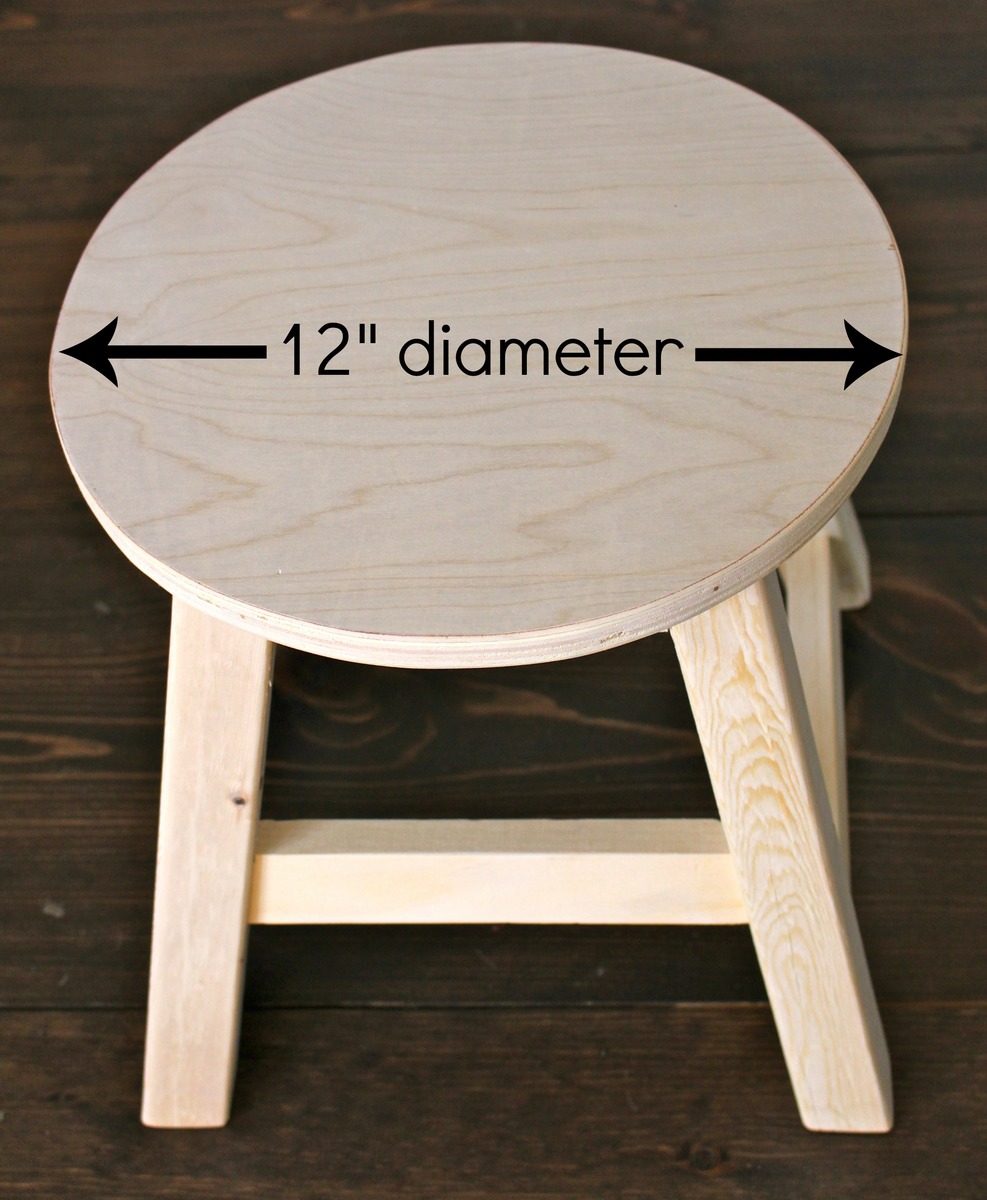
I used all scraps to construct the stool modifying the leg height to 12 1/2" and the seat to a 12" diameter to fit properly at the kids vanity. See the complete details on the slipcover in my blog post link.

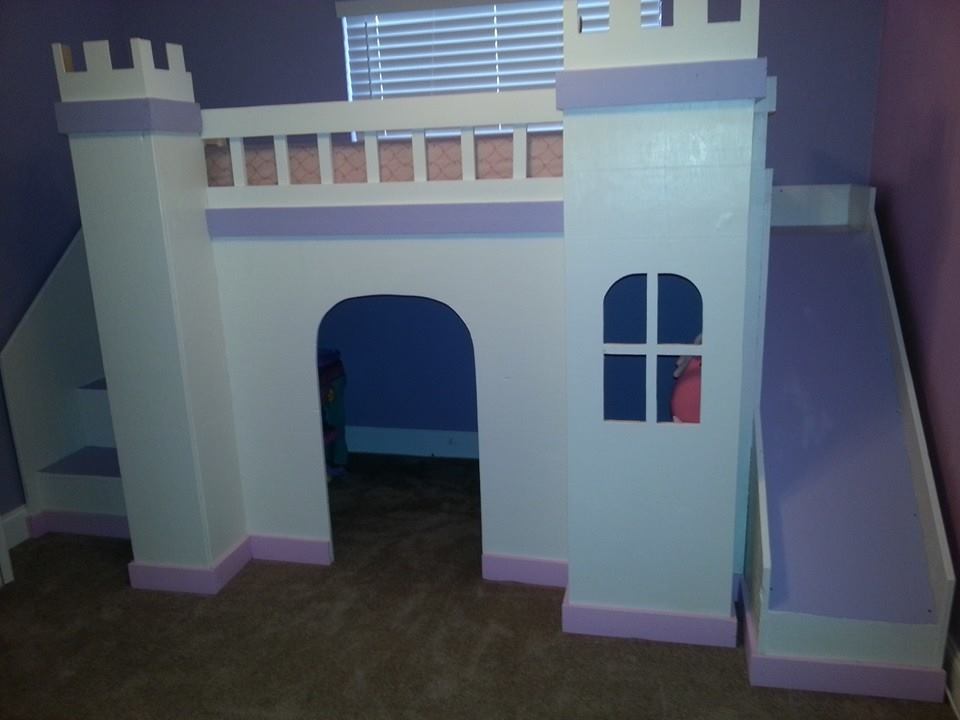
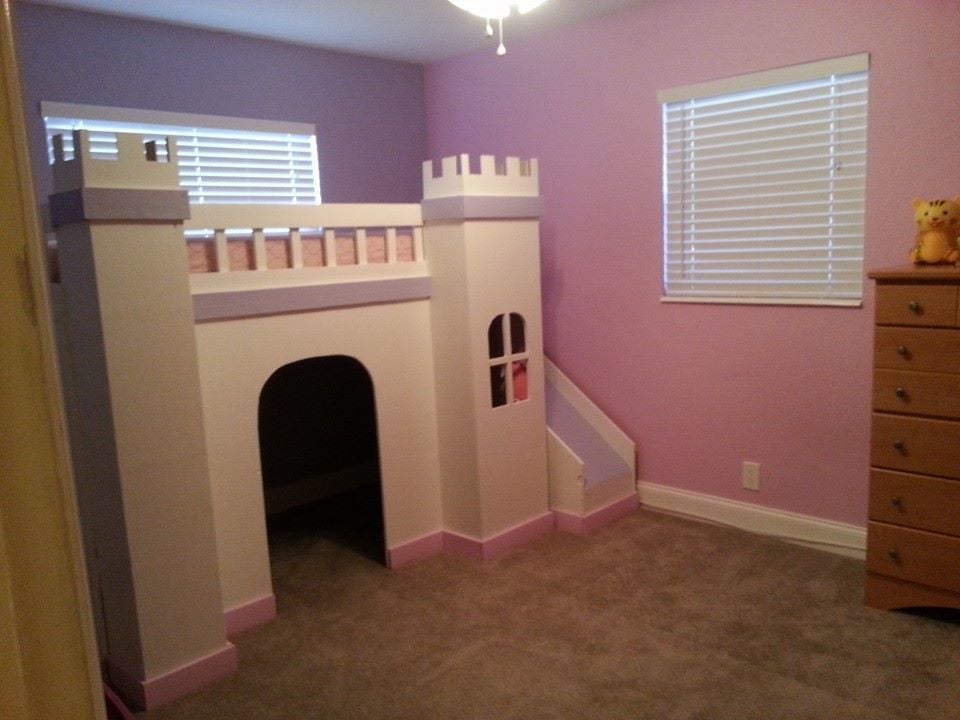
We used the plans from this site to build this for our daughter. We did however make the bed part a bit more sturdy to ensure that no one would get hurt and to make sure it could support any weight. We added 4 2x4s across the bed like rafters and screwed the slats on top of them.
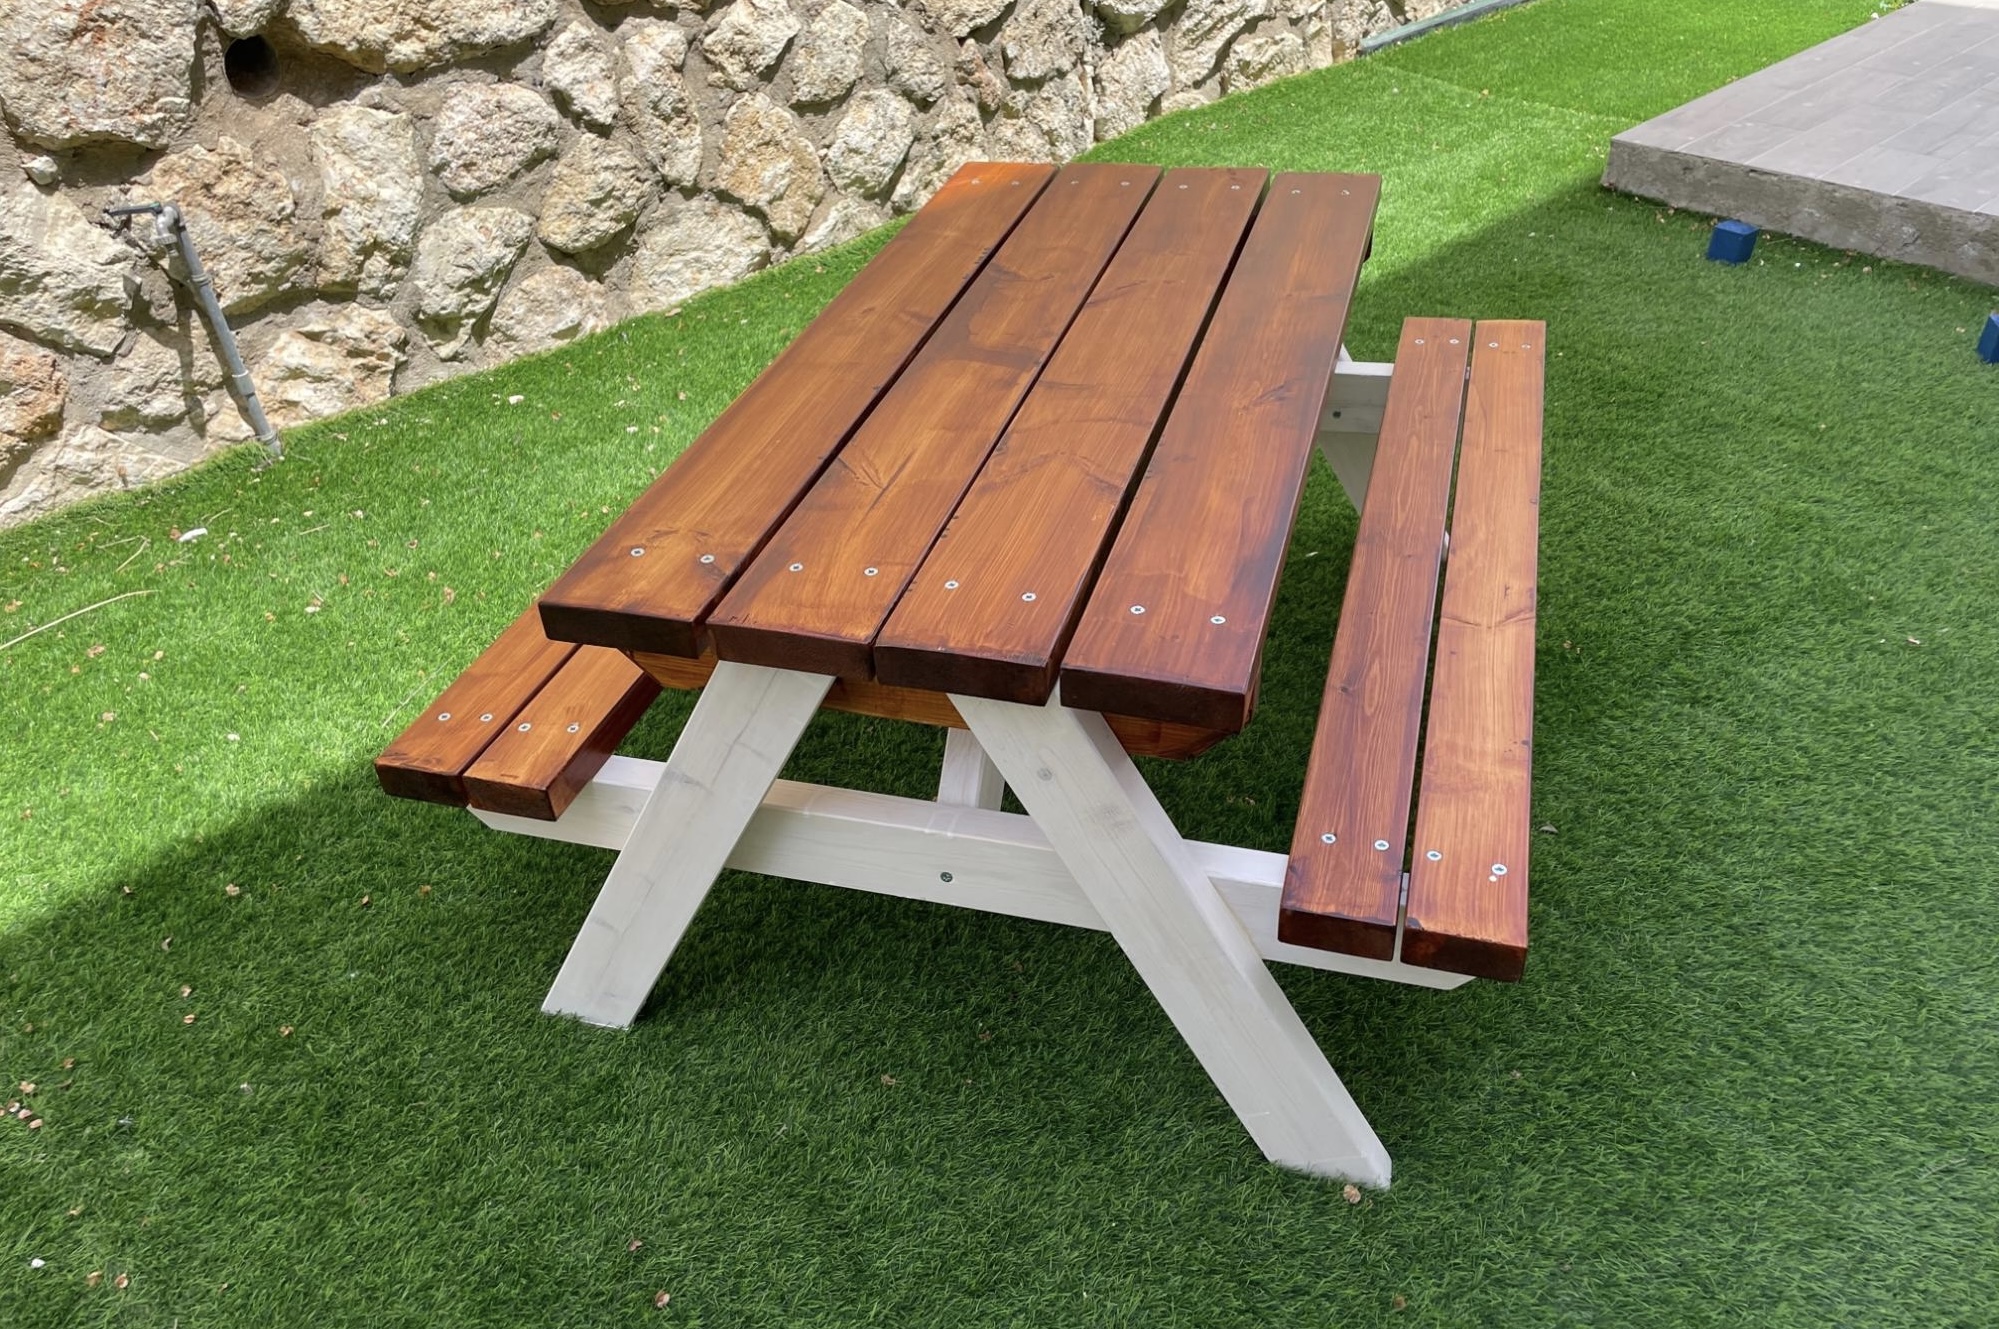
I made the picnic table for my grandchildren. The plans were great and so easy to follow. The cuts, measurement are perfect. Table is sturdy and came out balanced! I used water based paint. Thanks for the plans!
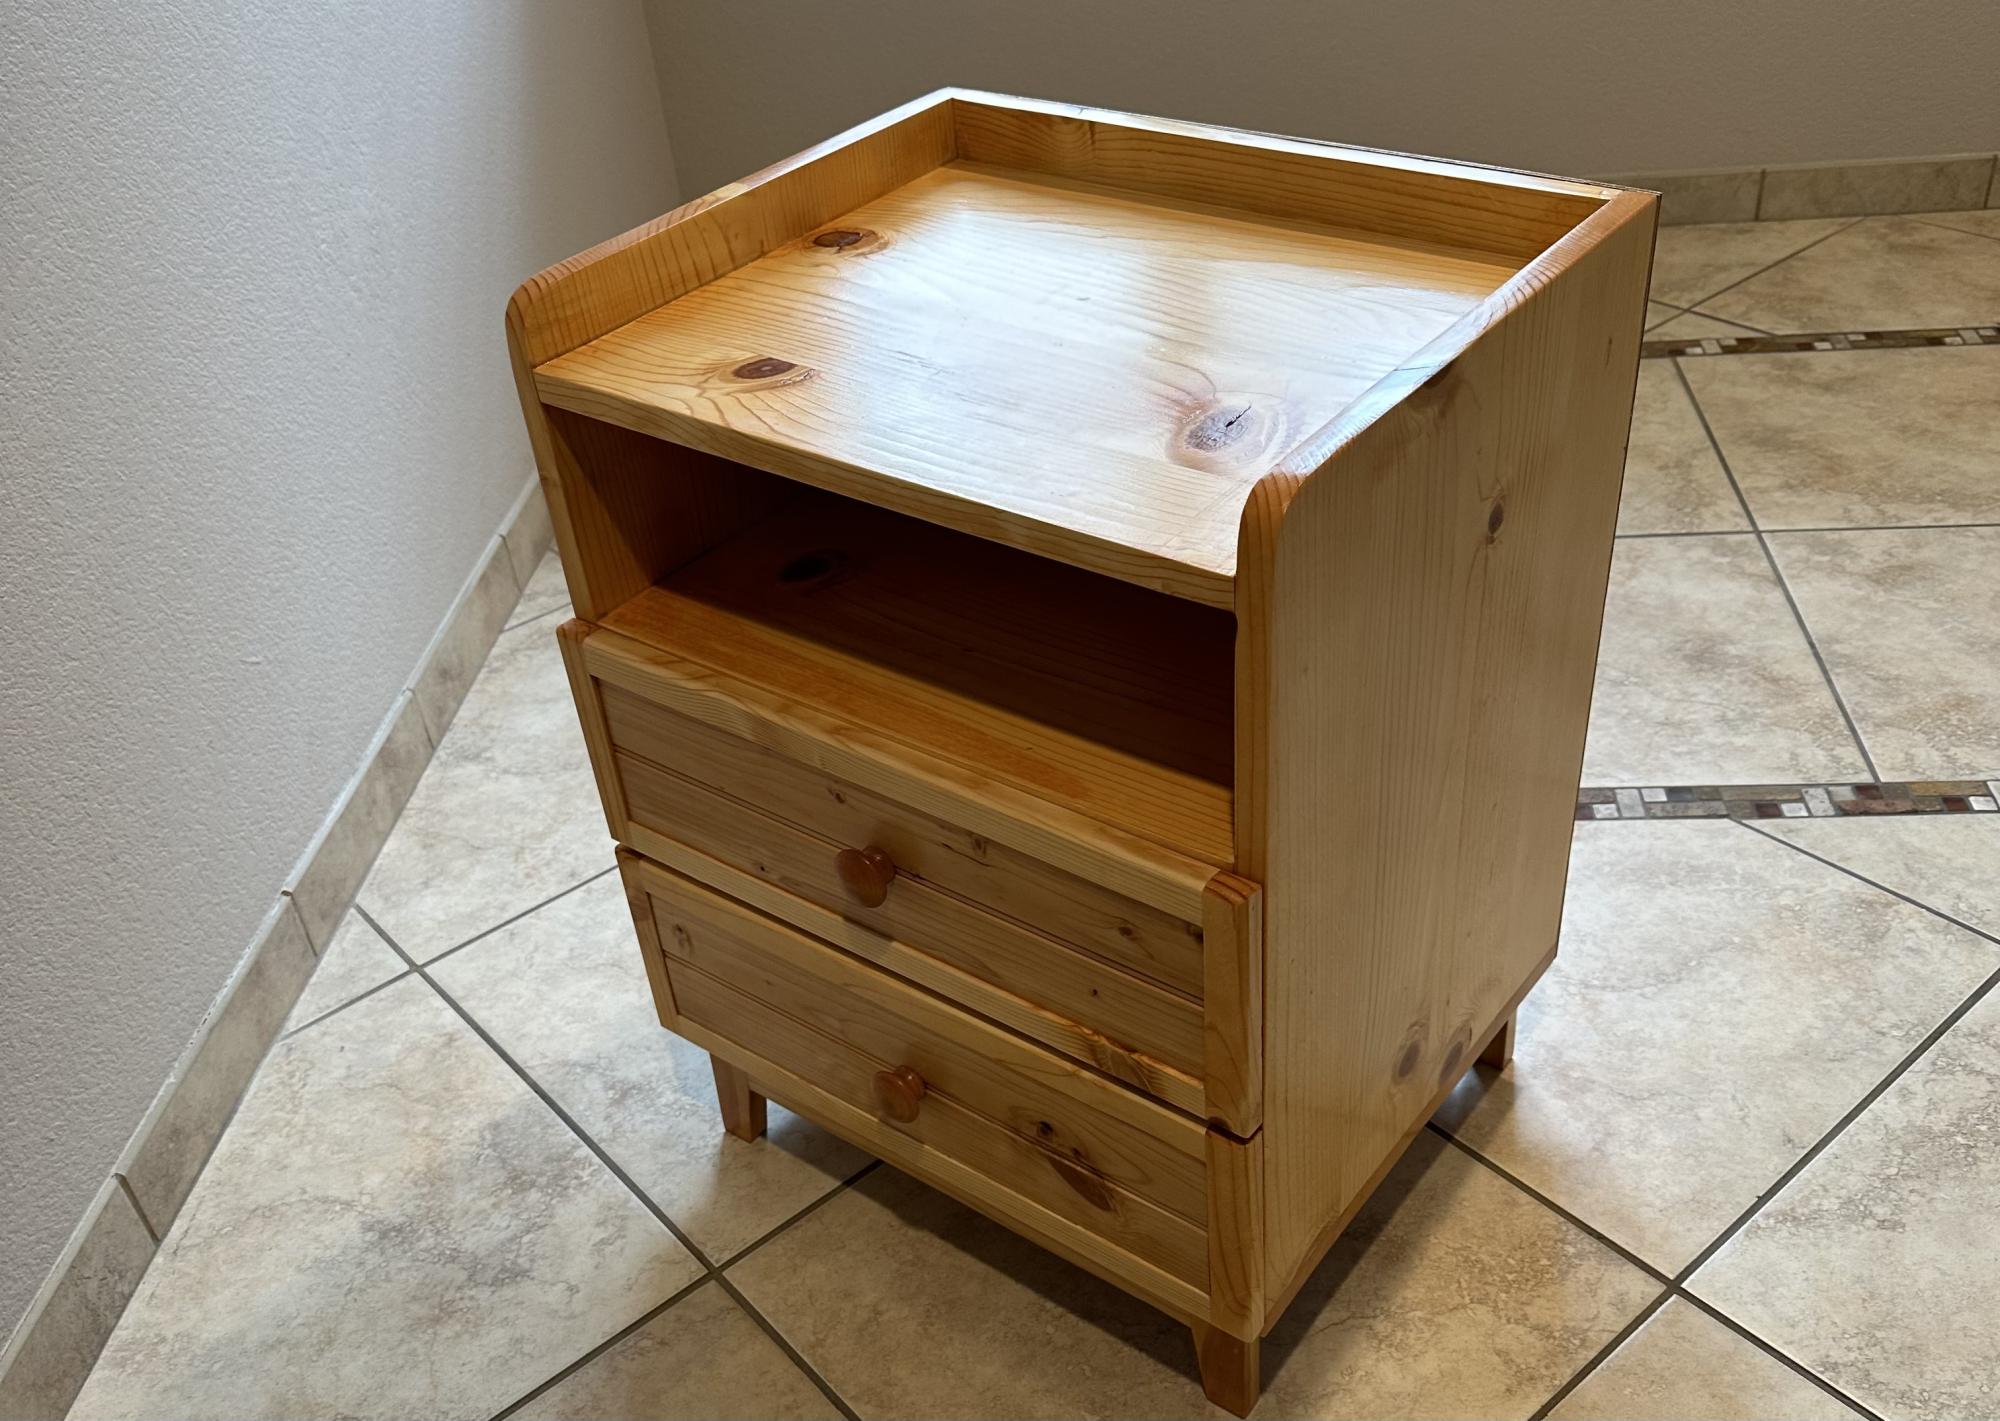
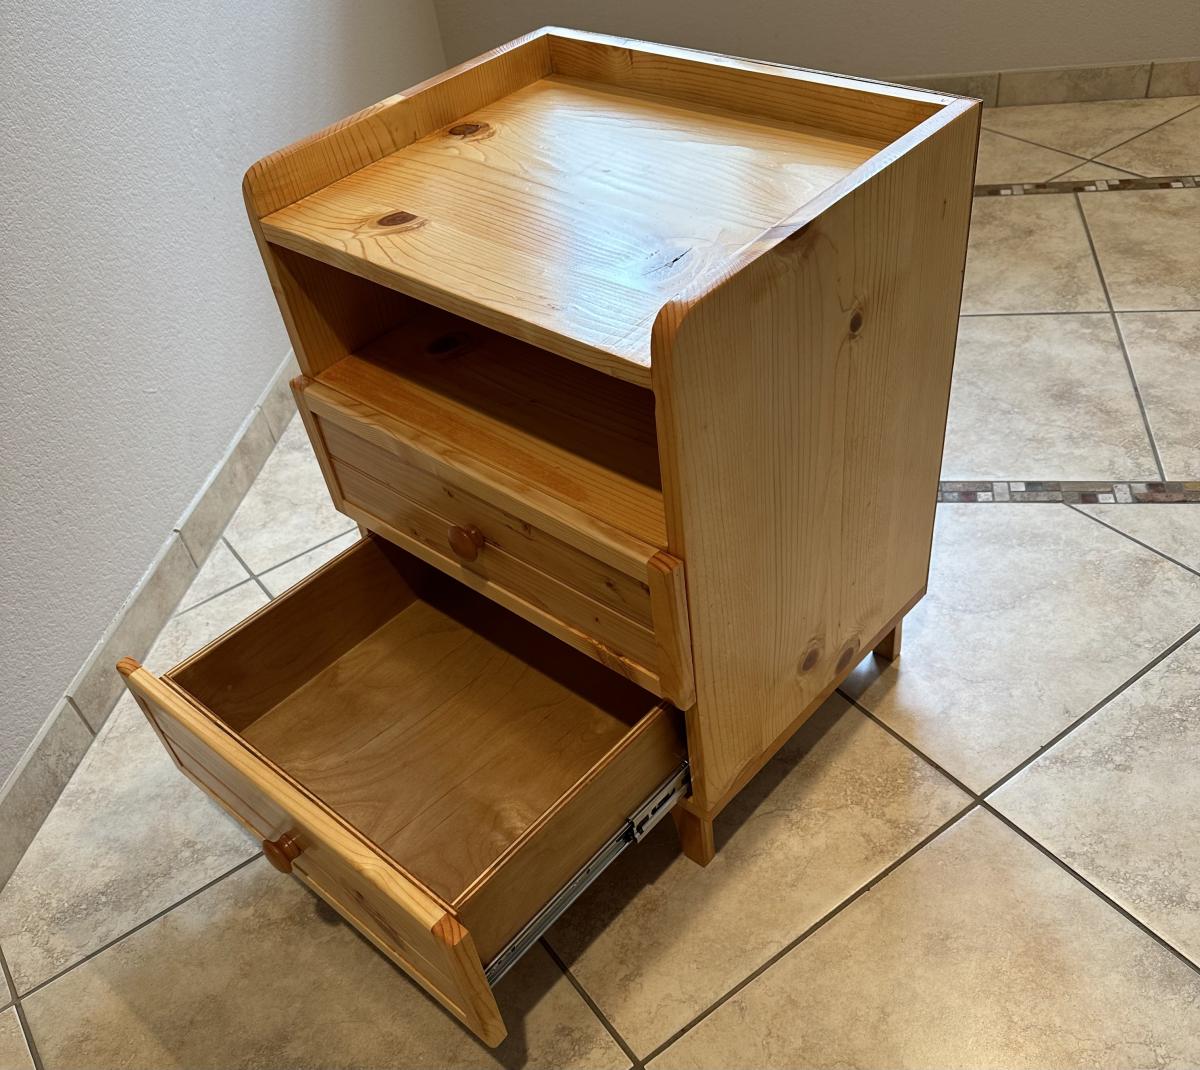
Thank you so much for your plan. I made some small changes. I used pine wood for the box sides and dividers, I moved the drawer faces to the outside and used 1/2 inch plywood for the drawer boxes to add some more space. The drawer faces have an inlaid to match my farmhouse bedroom I am currently building. The final product was stained with Minwax Golden Pecan and clear coated with warm semi-gloss.
Thu, 06/01/2023 - 09:15
Great job on this build, love the finish choice! Thank you for sharing.
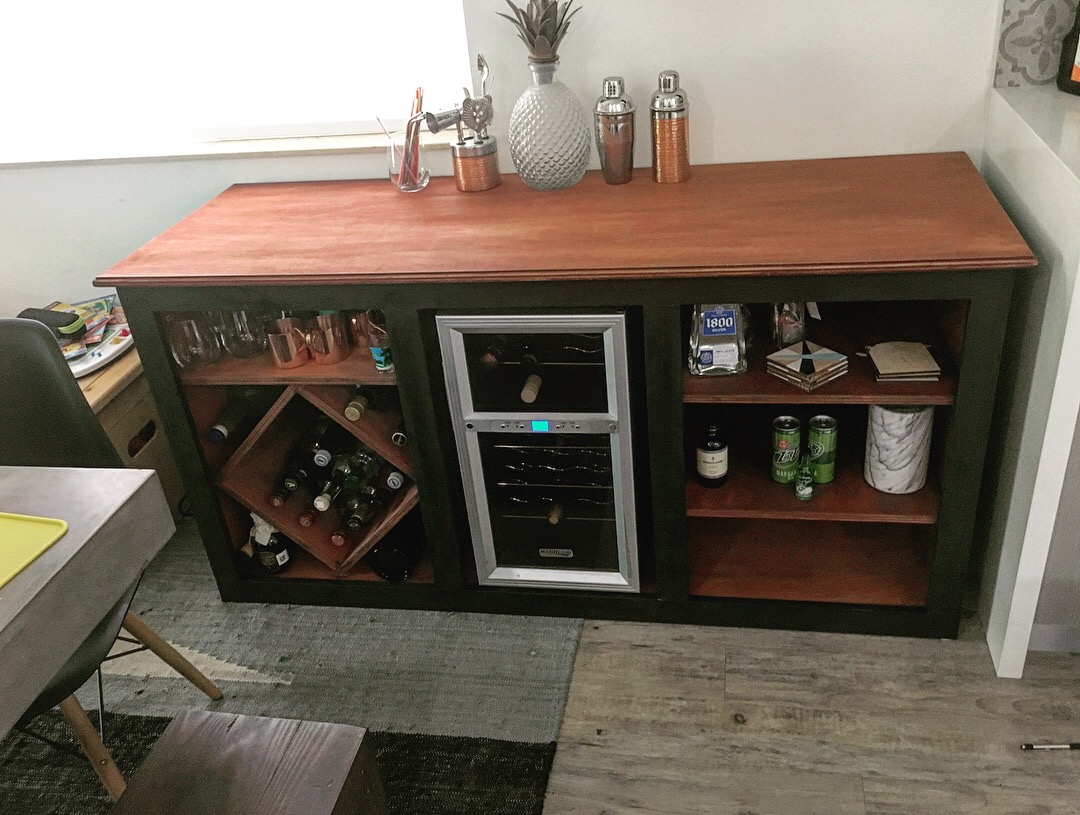
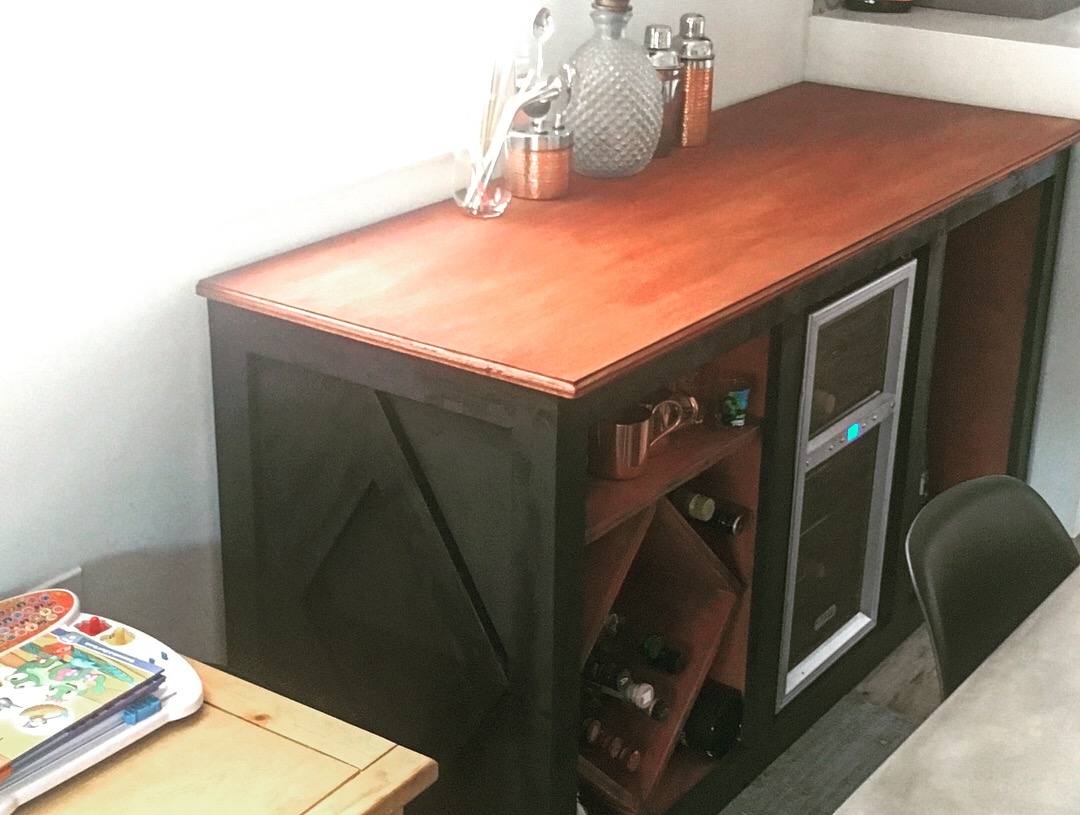
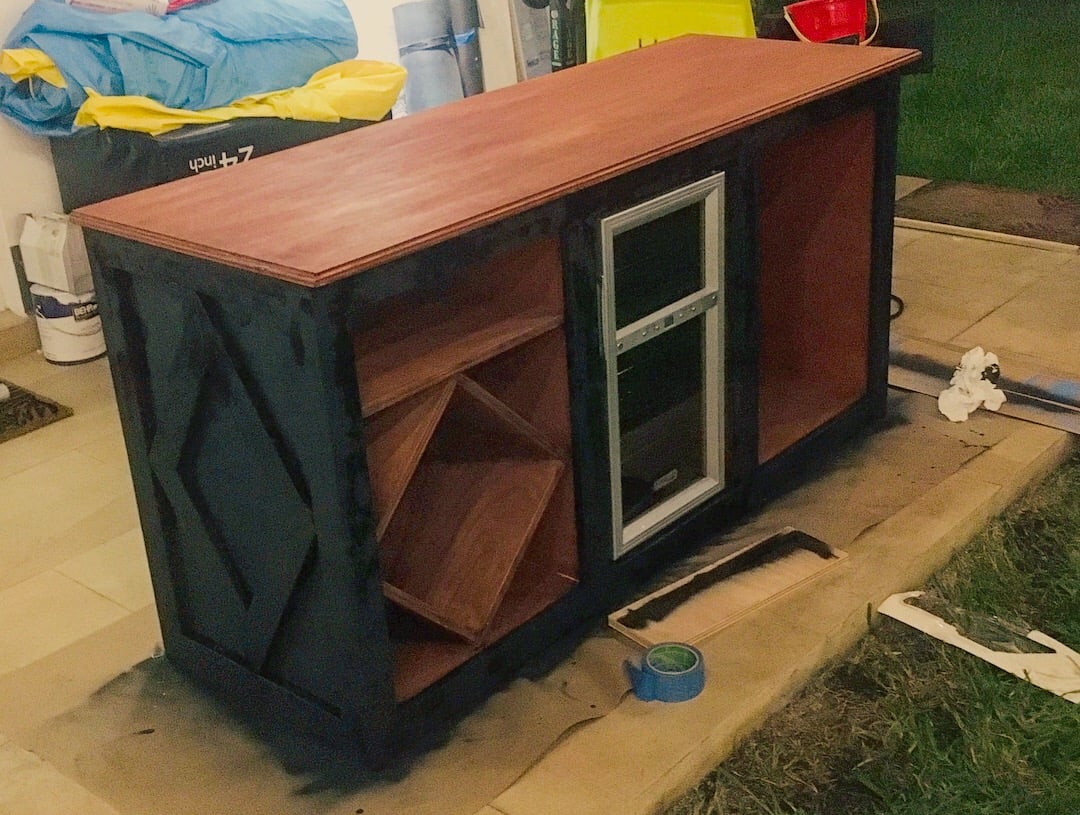
We had a wine fridge sitting around that we didnt know what to do with, we were hardly using it. We also had a cheap metal bar cart that was holding all of our wine glasses and liquor bottles, very much not user friendly. So, I decided to build this bar cabinet. I am big into diamonds on my projects, so their are diamonds on both ends of the cabinet with diamond on the inside of the left side of the cabinet to hold liquor bottles. The shelves in the right cabinet space are adjustable in height. All in all, I was very pleased with the finished product, and of course, I was able to finally get some use out of the wine fridge.
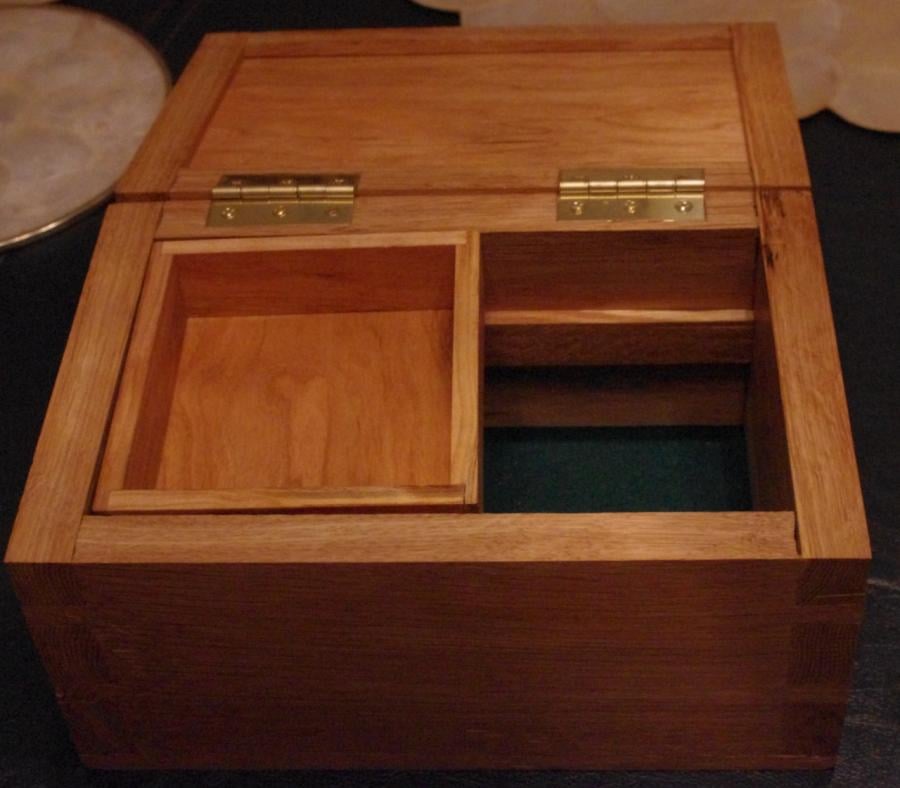
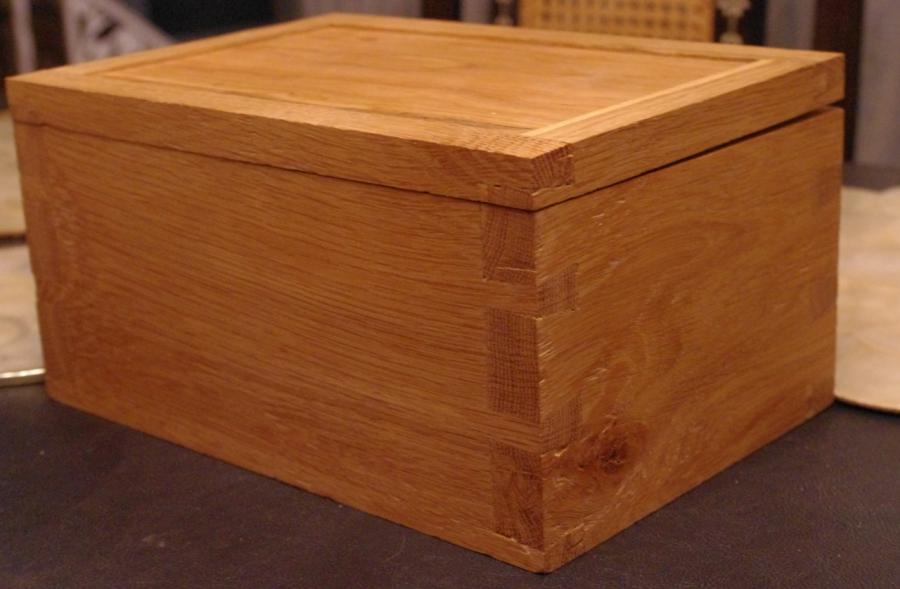
This is a gentleman's valet that I build for my sister in law's boyfriend as a Christmas present. It was also a good opportunity to try out my hand tool skills, since I cut all of the joinery by hand.

Sun, 02/05/2012 - 09:20
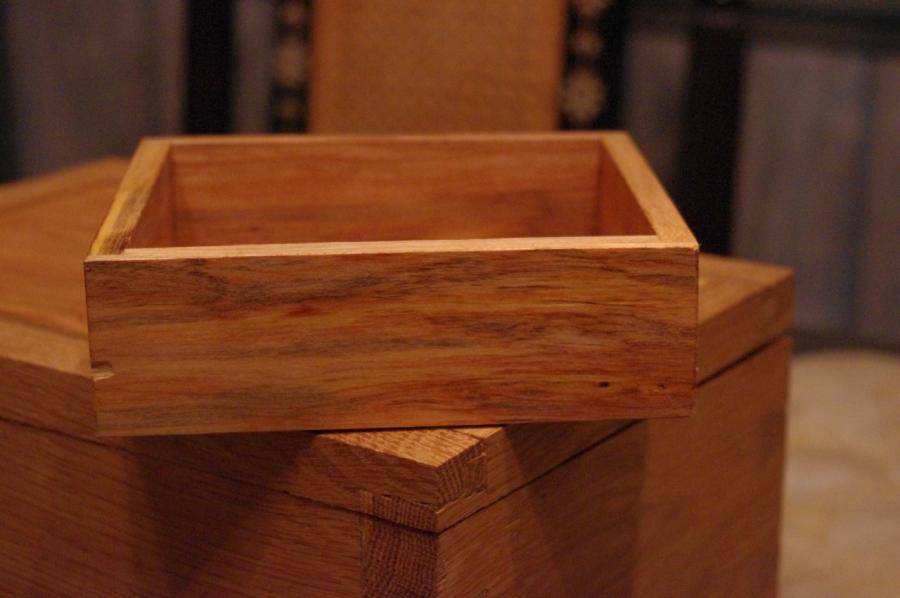
Wow, this is gorgeous! Love the rich finish and the dove tail details, and the sliding top tray is so neat. Everyone in the family is going to want one! :) Joanne
Sun, 02/05/2012 - 12:25
This would make a great gift for my husband and all the men in my family...

Sun, 02/05/2012 - 19:12
Kristen you should try it yourself. You'd need to buy a joinery saw, but I just picked up a decent dovetail saw for $13, and a set of good chisels, but for $26 you can get a good set of 4.
My joinery isn't brilliant, but it's functional and doesn't look terrible. I'm pretty sure you could start knocking out some strong joints pretty quickly.
The upside is that it's faster than setting up power tools to make these joints. Hand cut dovetails will always be faster than machine cut, unless you're building a dozen boxes.
In reply to Hand Tool Joinery by claydowling
Mon, 02/06/2012 - 10:48
From here, your dovetail joints look great! I've always just skimmed past instructions for dovetails thinking I'd never put the time into constructing them. Perhaps I will investigate for future projects. The glue and nail option just goes quicker right now, with the list that looks like it just might take forever in this house!

Mon, 02/06/2012 - 07:29
You may not think your joinery is brilliant, but those are some tight joints. Looks beautiful. I love the top!
Mon, 02/06/2012 - 08:35
Those are very tight joints. Slightly too tight in fact. There was a small amount of hairline splitting on the side I didn't show, that I had to fill with glue and sawdust to keep from spreading.
My dovetails aren't bad, just slow for me to cut right now, especially cleaning out the waste. I bought parts for a small bow saw that should make that easier, once I get the thing built.
Tue, 02/07/2012 - 07:49
This Gentlemen's Valet looks amazing! How did you do it? This would be a great Valentine's present for my husband!
Tue, 02/07/2012 - 08:35
The short answer is that I built a box, then built another box to go inside of it. A plan with dimensions wouldn't be a very good idea, because I sized this to match the $7 board I'd found at the hardwood dealer. Your lumber dealer almost certainly carries differently sized boards.
I'll think about a tutorial or video though. Box making is fun, rewarding, and can be profitable. Especially since most cabinets are just different variations on the box.
Tue, 02/07/2012 - 09:21
Alright, I will give it a try this weekend. Will let you know how it went! Thank you so much
Thu, 02/09/2012 - 19:17
Your work is gorgeous! I'm definitely stealing this idea for my husband's birthday as well as all the men in my family, who all have birthdays this spring. :) Only thing is, I'm using tools, my hand tool skills are no where near as good as yours.
Also, I appreciate the tips you've posted on other project plans, they really help clarify some of the smaller details overlooked by the designers for beginners like me.
Hope to see some more projects from you soon!
Thu, 02/09/2012 - 20:06
Hand tool skills actually develop pretty quickly, and one of the reasons it's gaining popularity. You can use scrap wood to learn how to make joints. The first ones will be rough but with even a little bit of practice they'll improve.
The tools are also getting cheaper. I just bought a decent dovetail saw for $13 from Tools For Working Wood, and $26 will buy you a decent set of chisels from Narex.
Christopher Schwarz and Logan Cabinet Shoppe are two good sources for hand tools articles, including videos. There are also good books on the subject. My first text was Hand Tool Essentials, but I'm told there are others worth looking into for first books.
In reply to Hand Tool Skills by claydowling
Fri, 02/10/2012 - 07:30
The Essential Woodworker is the alternate starting text I was thinking of. I haven't read it yet, but heard it recommended by a few sources as a good place to learn about hand tool woodworking. I just ordered a copy for myself. Amazon sells it too, but for considerably more, and I've heard unpleasant things about the binding on the copies available on Amazon.
If the book turns out to be any good I'll post a review on my blog.
Fri, 04/20/2012 - 21:48
Please do!
Thank you for the tips and information, I'll definitely be starting on hand woodworking soon. I love the results of hand vs. machine woodworking, it's just sleeker and has more of a homemade quality.
In reply to The Book I was thinking of by claydowling
Sat, 04/21/2012 - 04:56
I did finally buy the book, and I've reviewed it at http://claydowling.com/articles/02242012-1350/getting-started-woodworki…
There's also a new video coming out (or maybe it is out), that I wrote about: http://claydowling.com/articles/04022012-0947/learning-use-hand-tools I've ordered my copy, but I won't have it in hand until next month. I grabbed is specifically for the information on block planes. I own them, but I've had the least consistent results from them of all my tools.
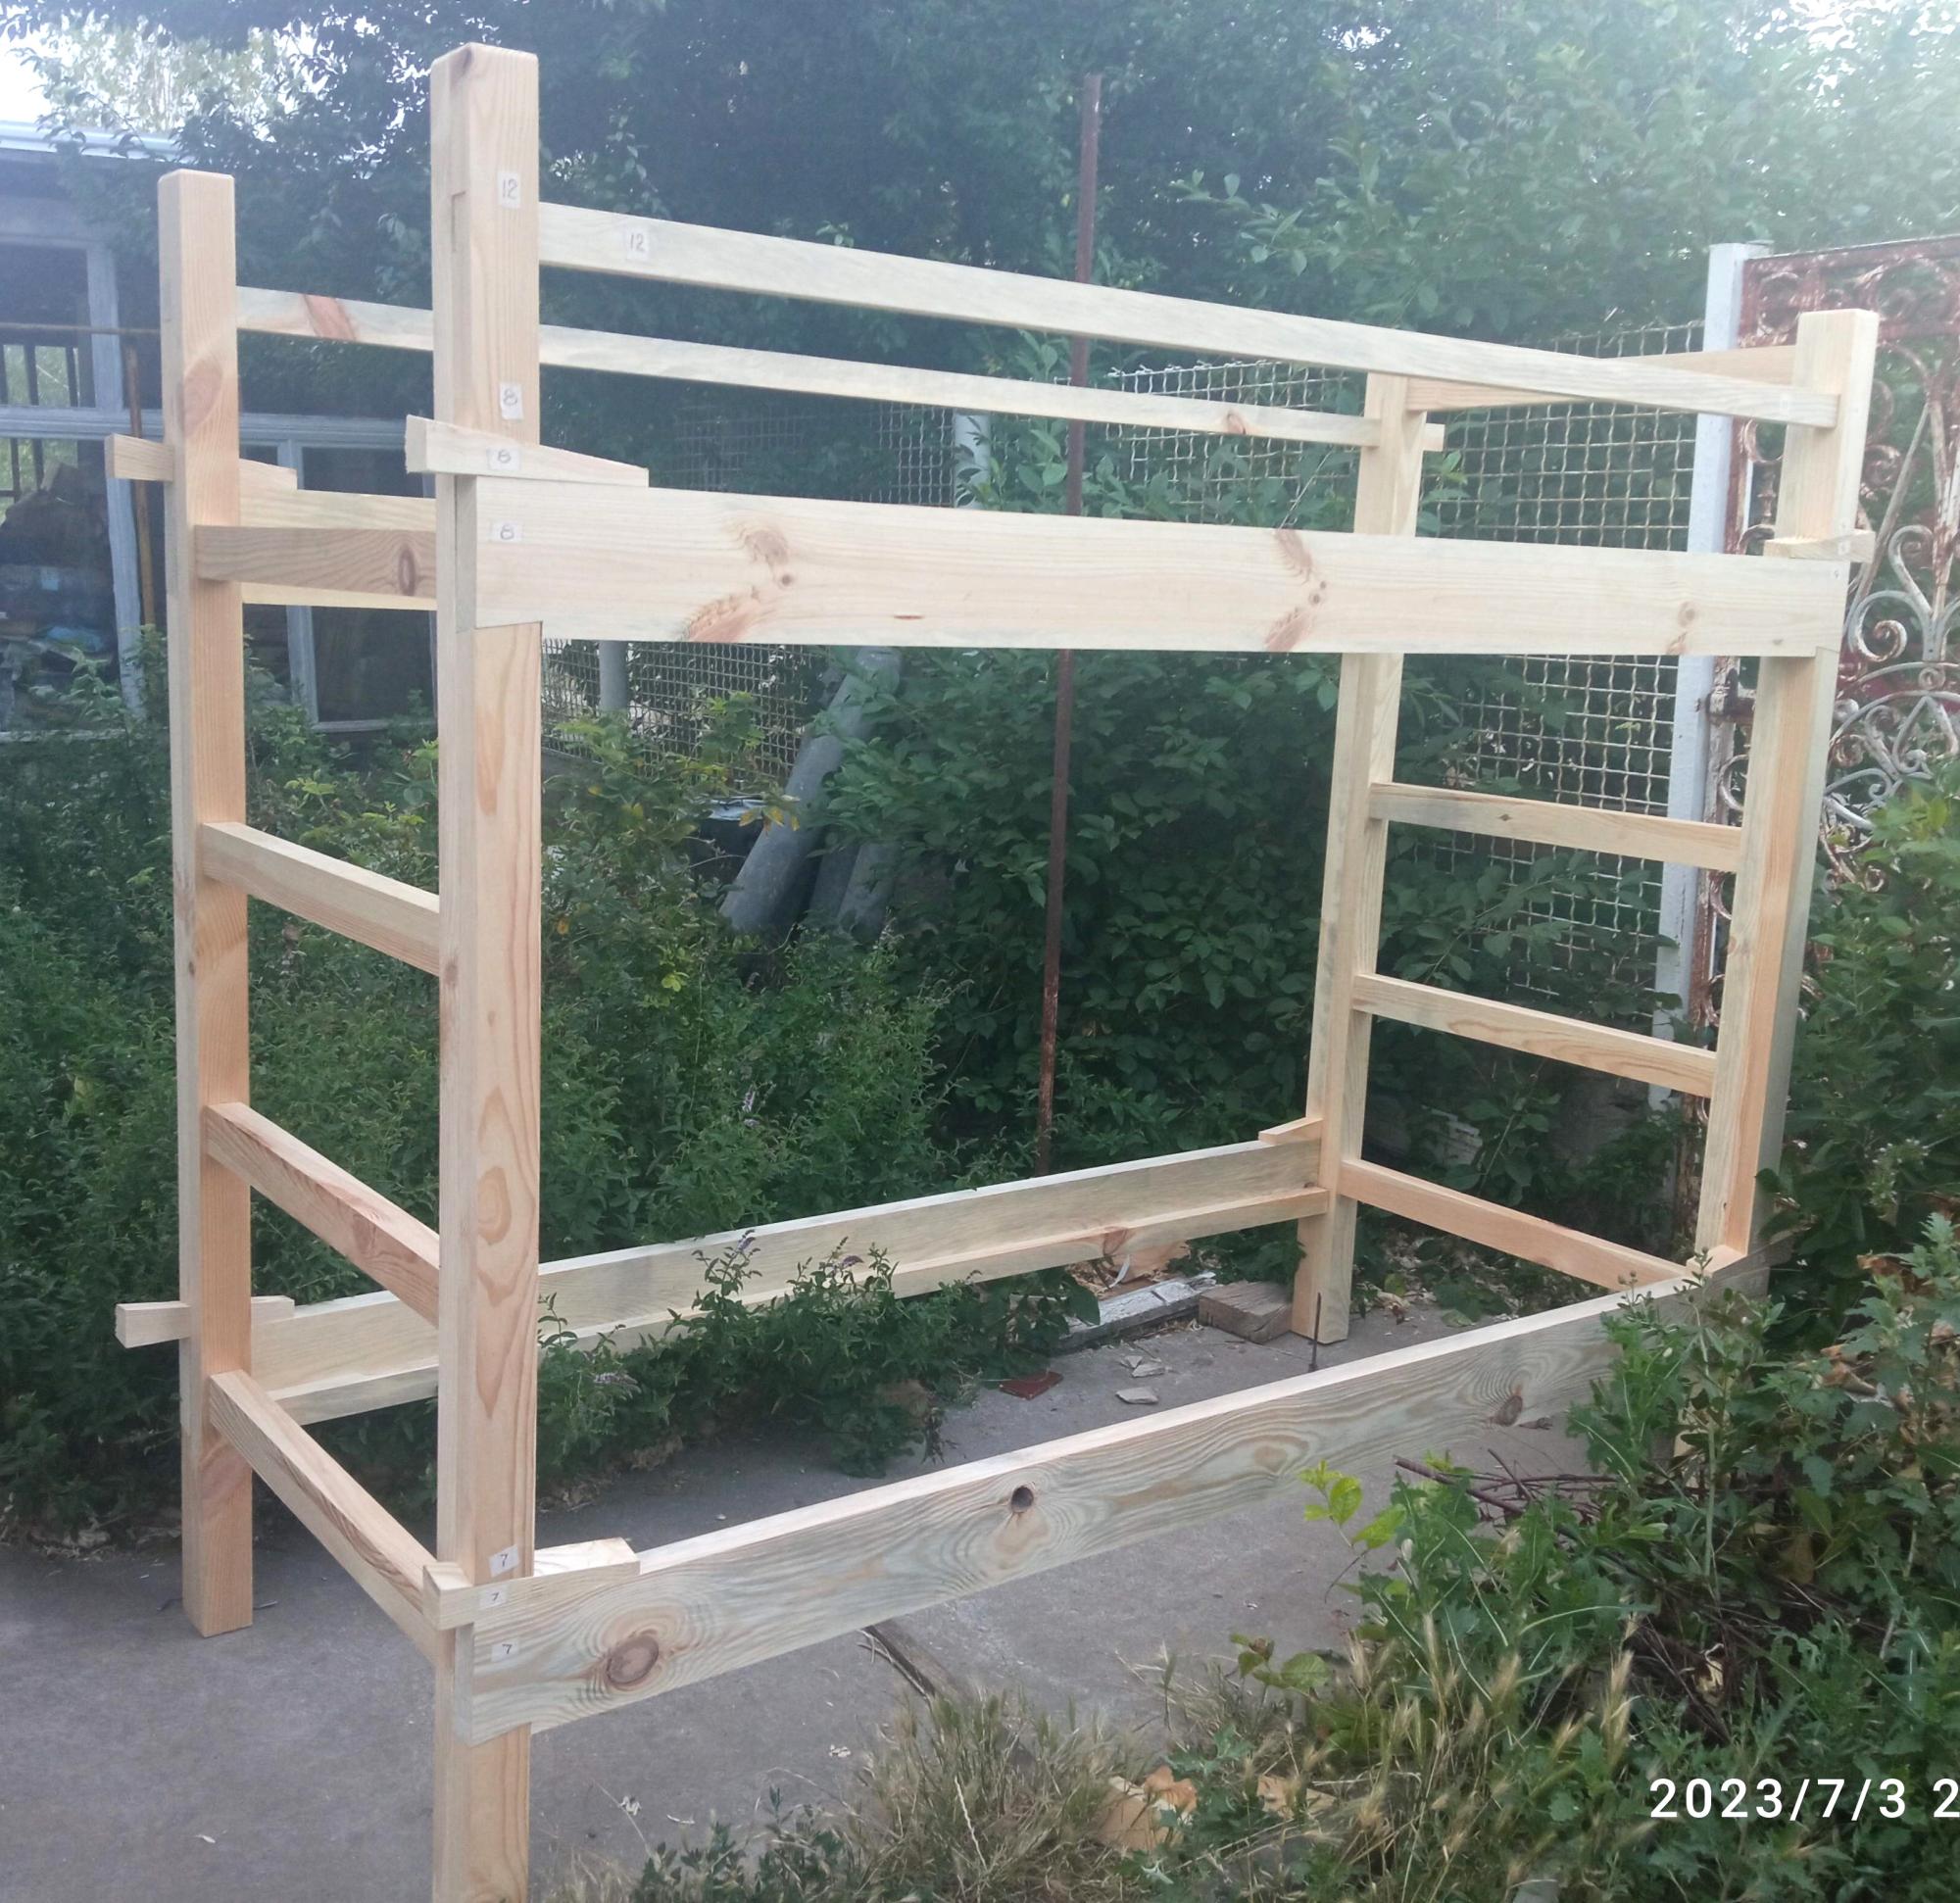
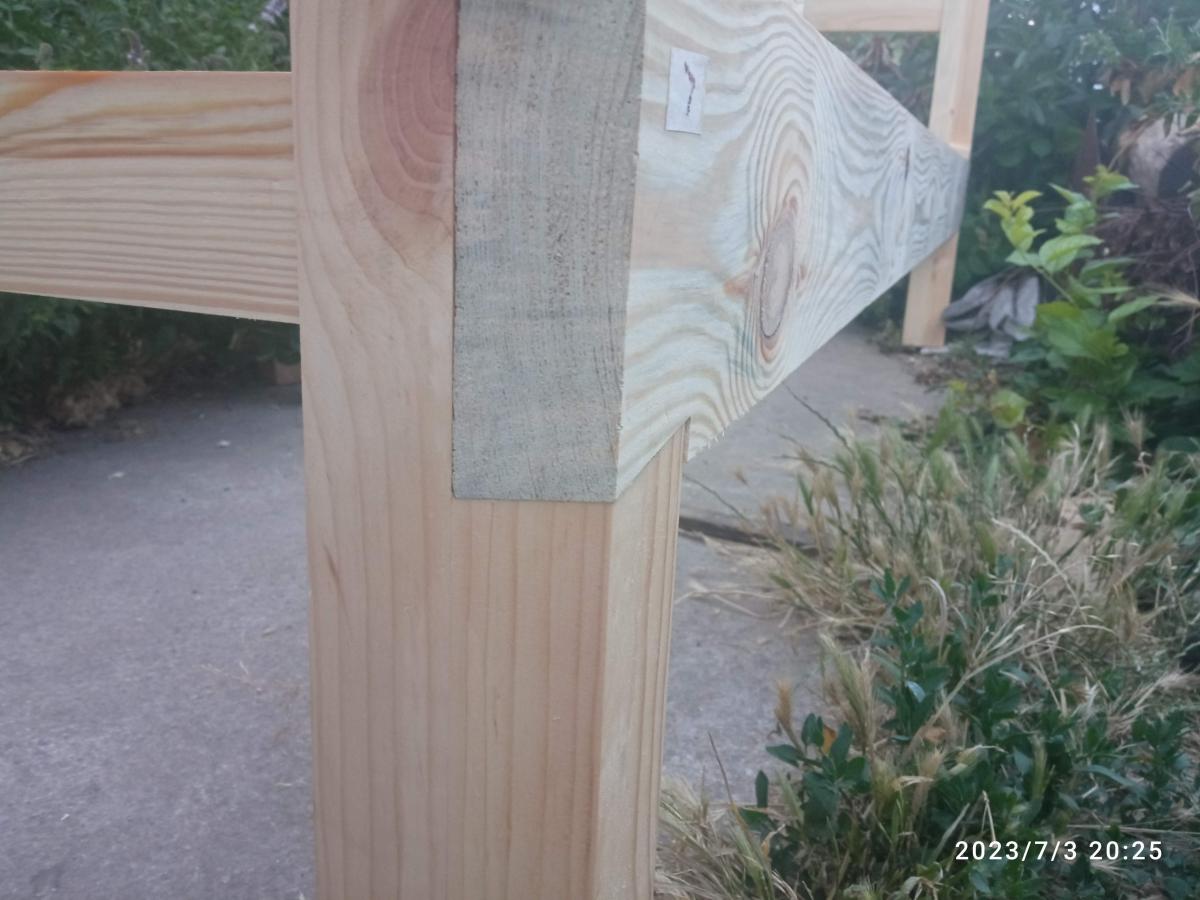
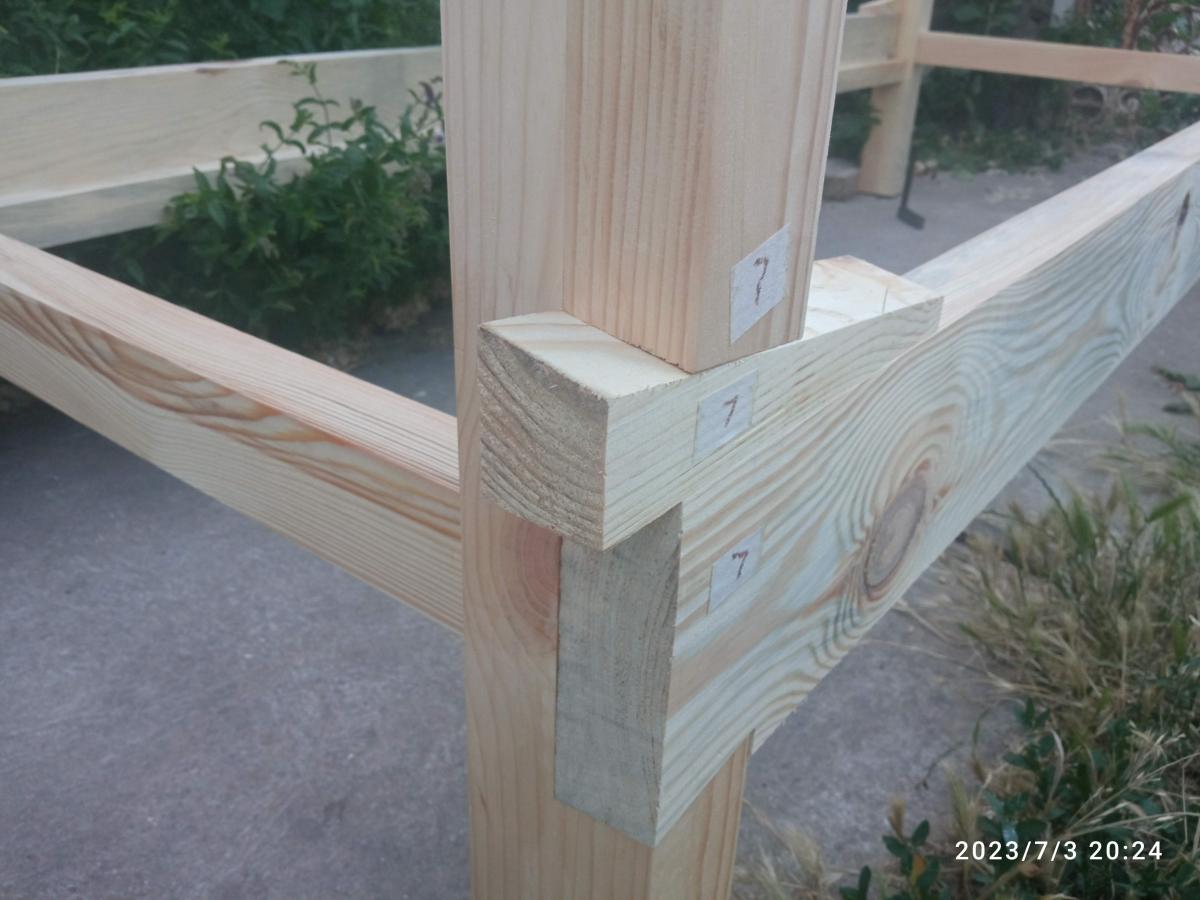
This double bunk bed has been inspired by Your plans for modern bunk bed - Side Street. To facilitate quick assembling - disassembling of beds for relocation dovetails joints with double inclined tails and wedges have been made. Because the beds has been made for orphanage/"kids in difficult life situations" I changed spacing between headboard and footboard rails to let footboard serve as ladder and in this manner reduce costs and time of construction, save place for installation, avoid tripping hasard. Thank You very much for detailed and simple plans.
Andriy Pronin, Ukraine

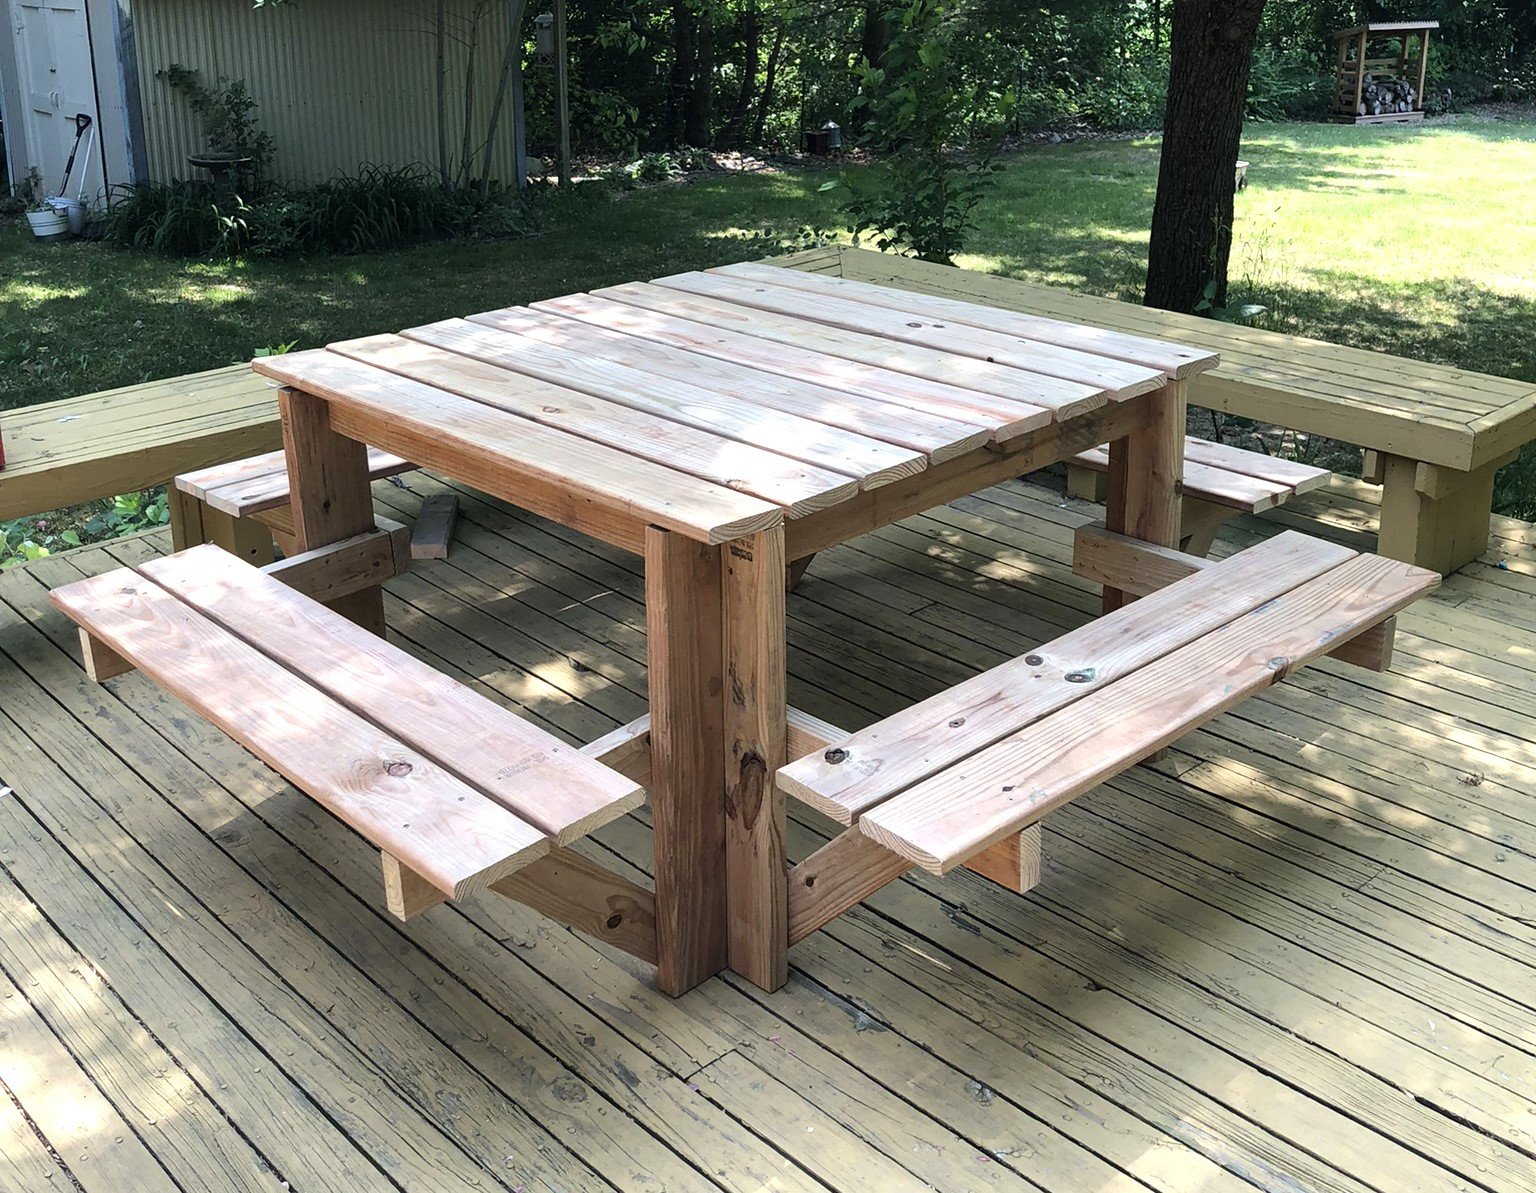
I used deck boards instead of 2x6 for the top and seats; this lightened the table overall while negating the need to sand and finish the boards.
I also used a cedar-tone treated board so staining wasn't necessary.
Kelly S.
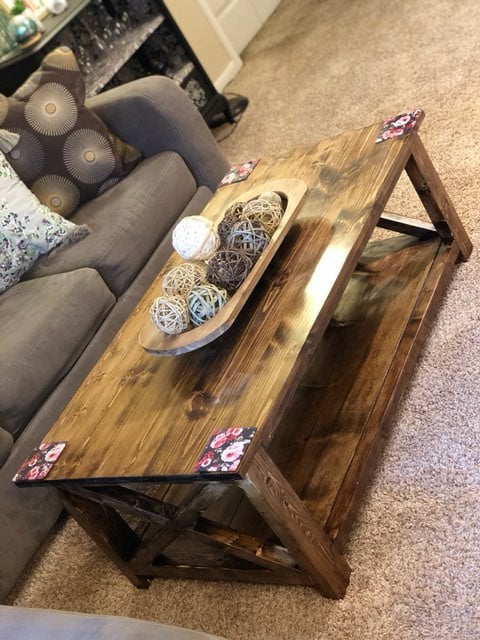
Love this coffee table. I built it for my daughter and she was very happy.
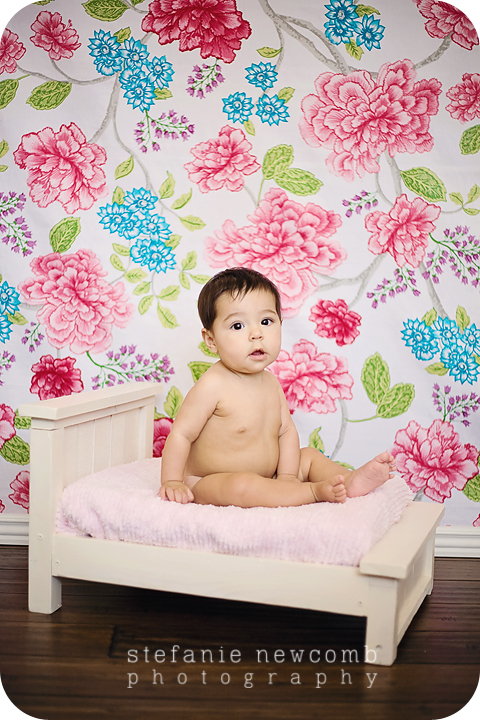
I'm so glad I found Ana's website, especially the plans for the doll beds. I have been wanting to build some photo prop beds for my tiniest models and the Farmhouse doll bed got me hooked. I want to make one in every color
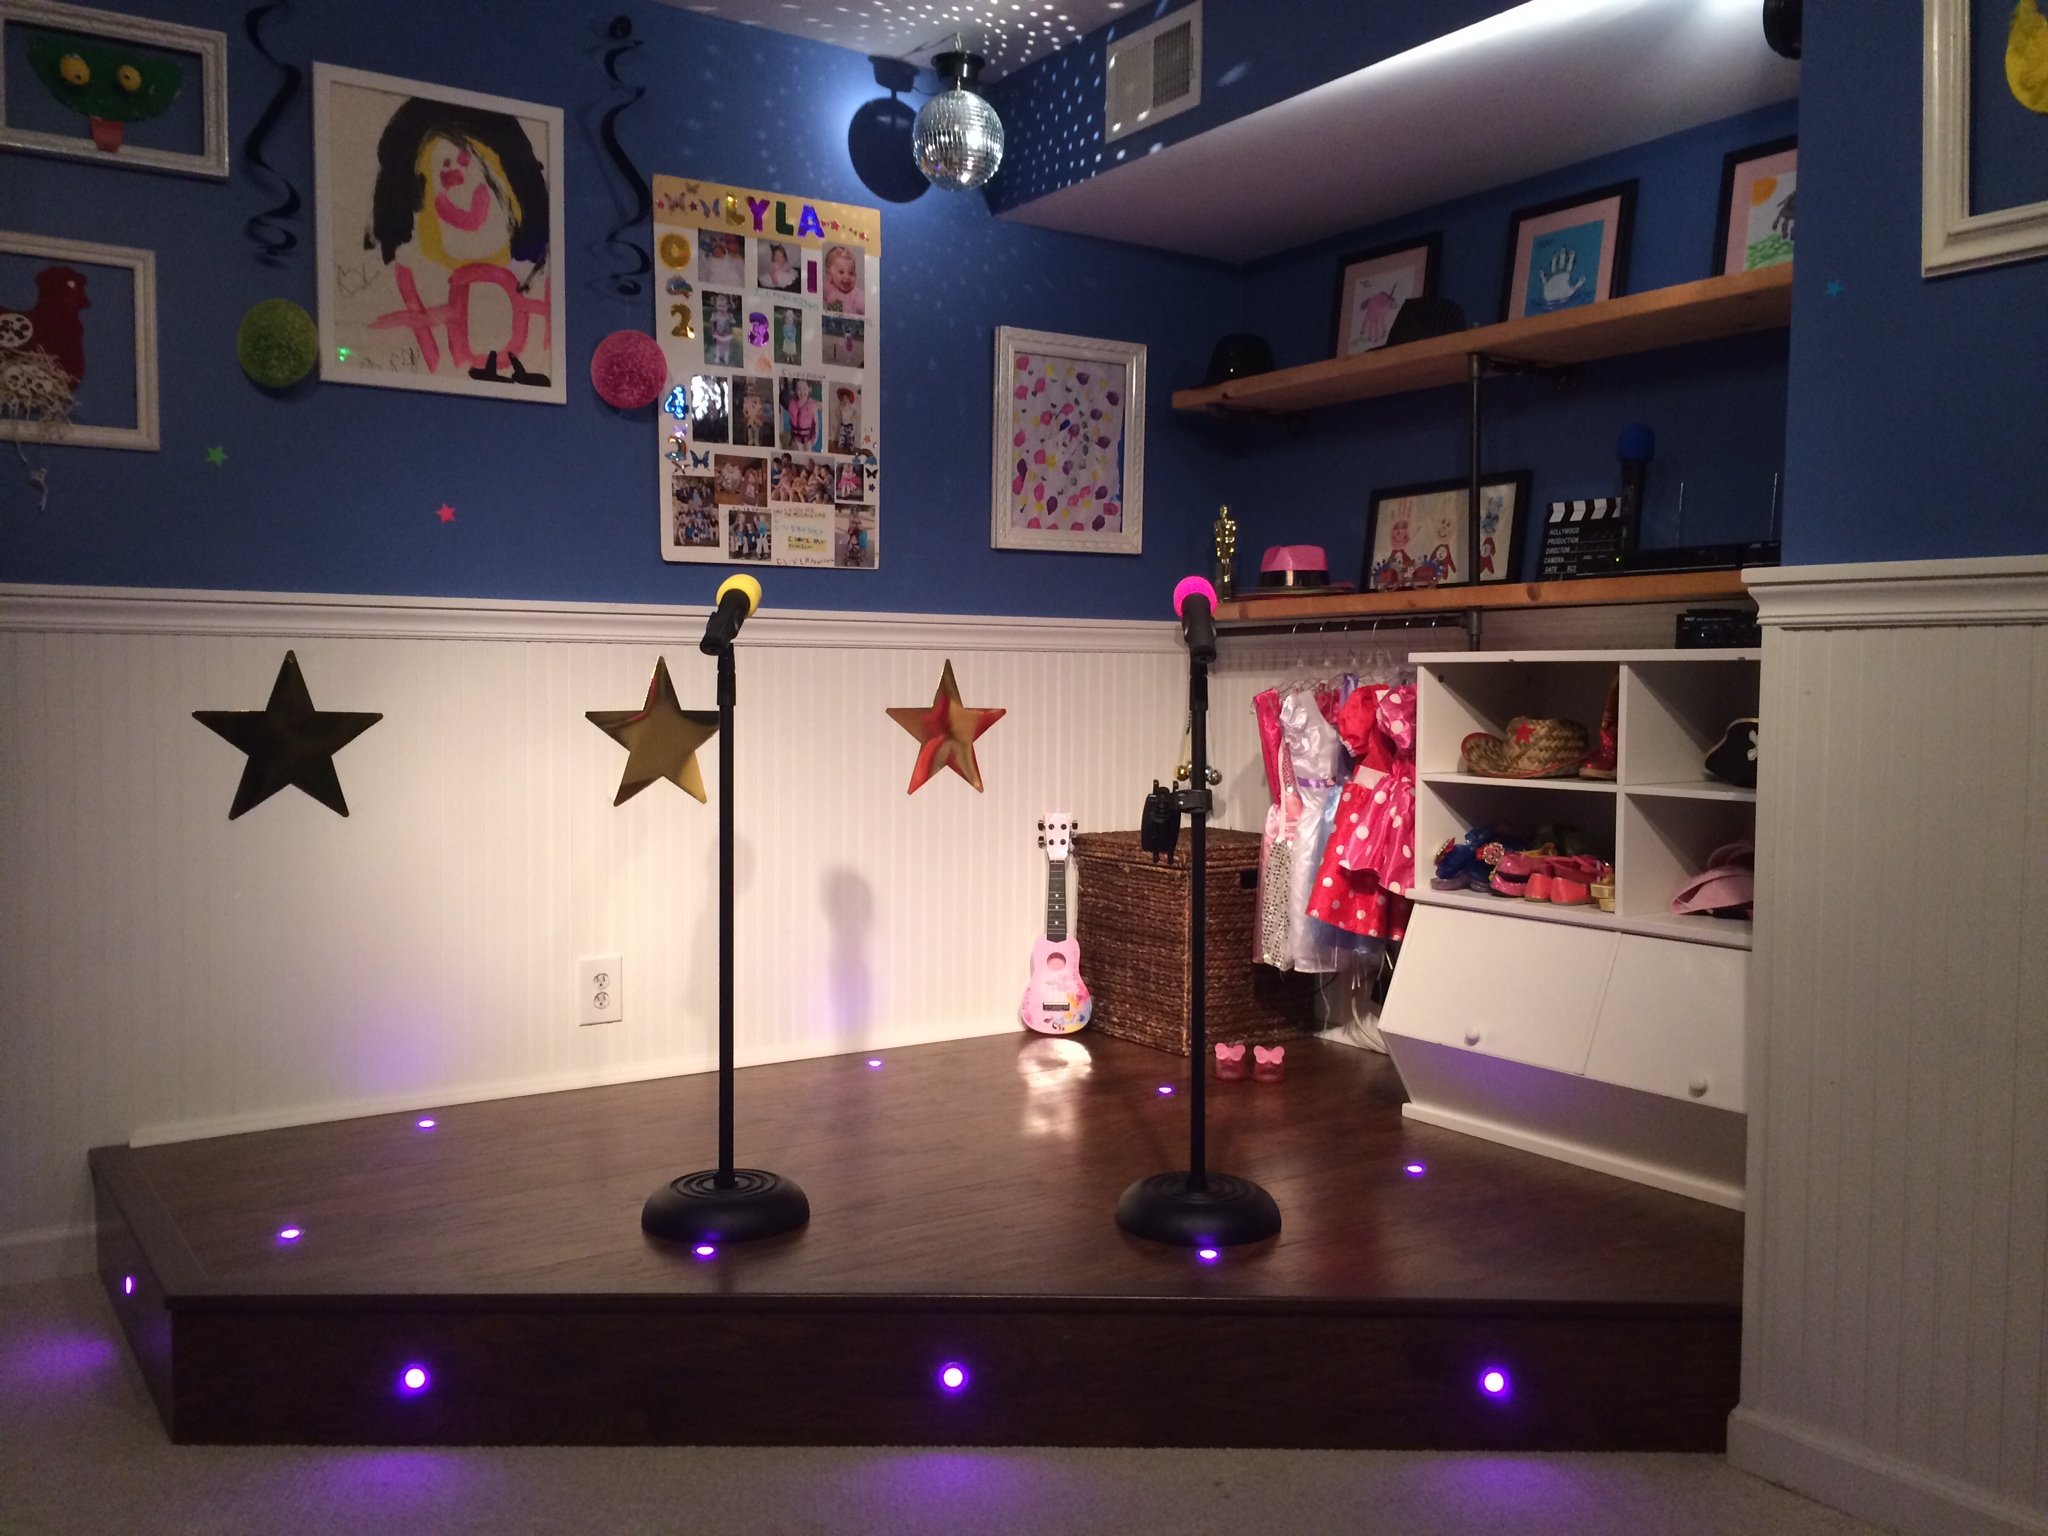
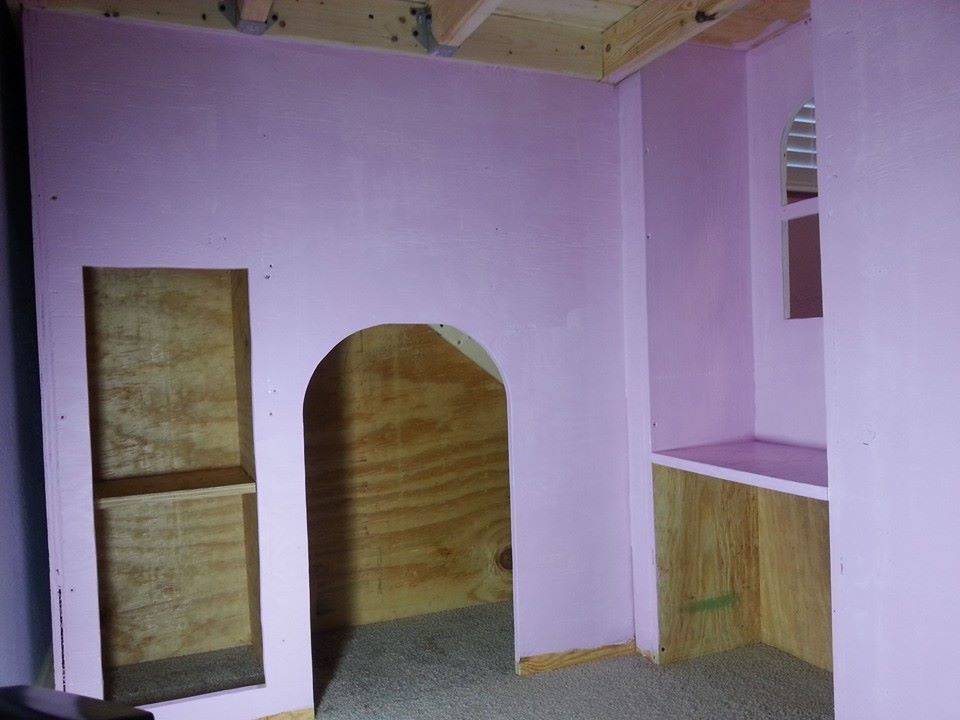
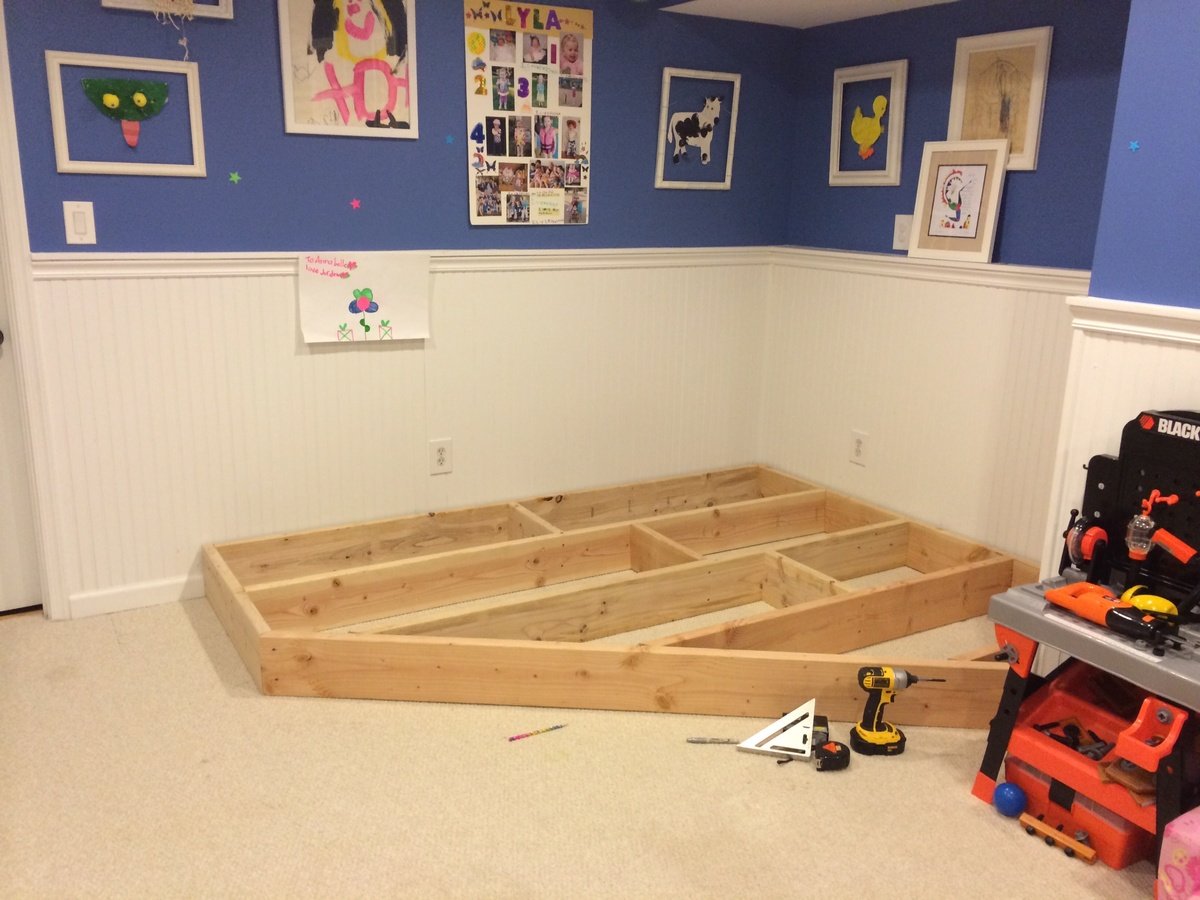
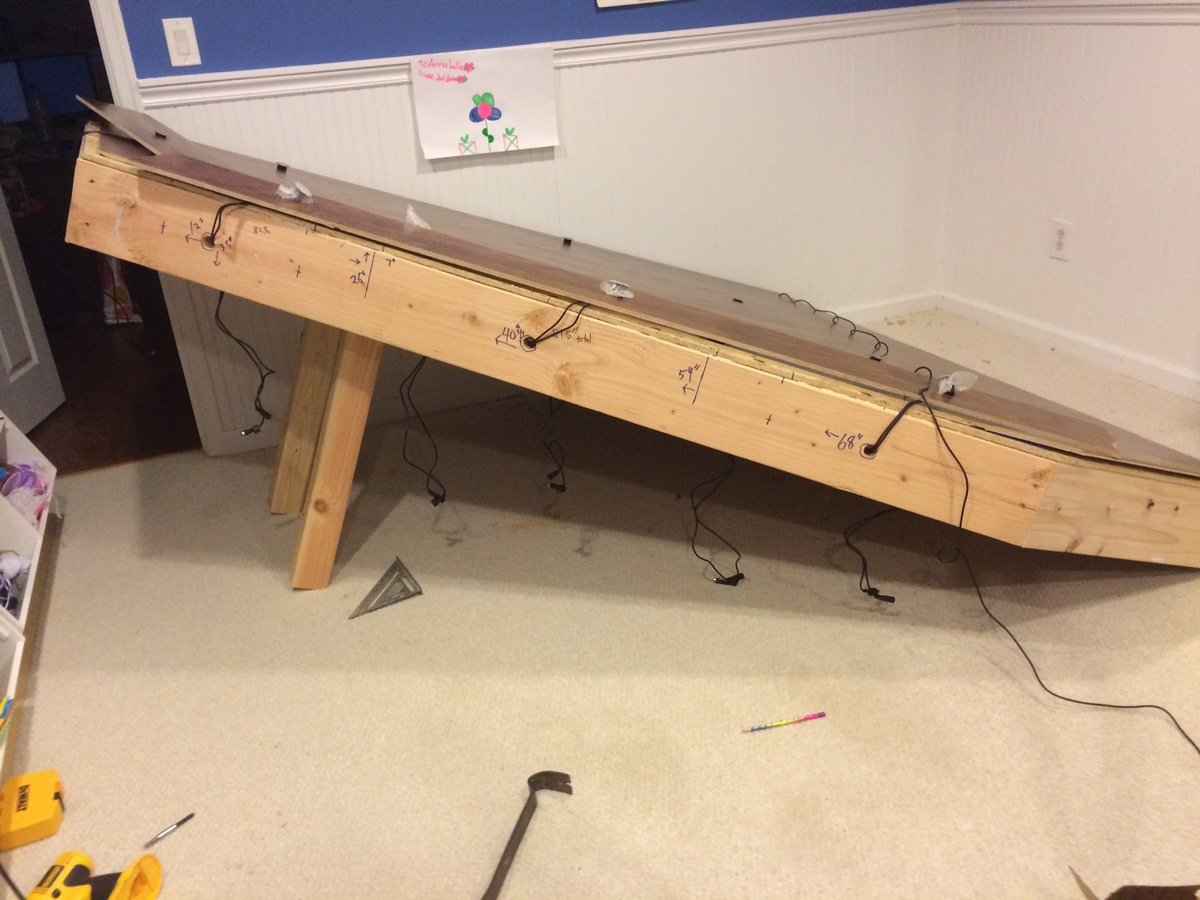
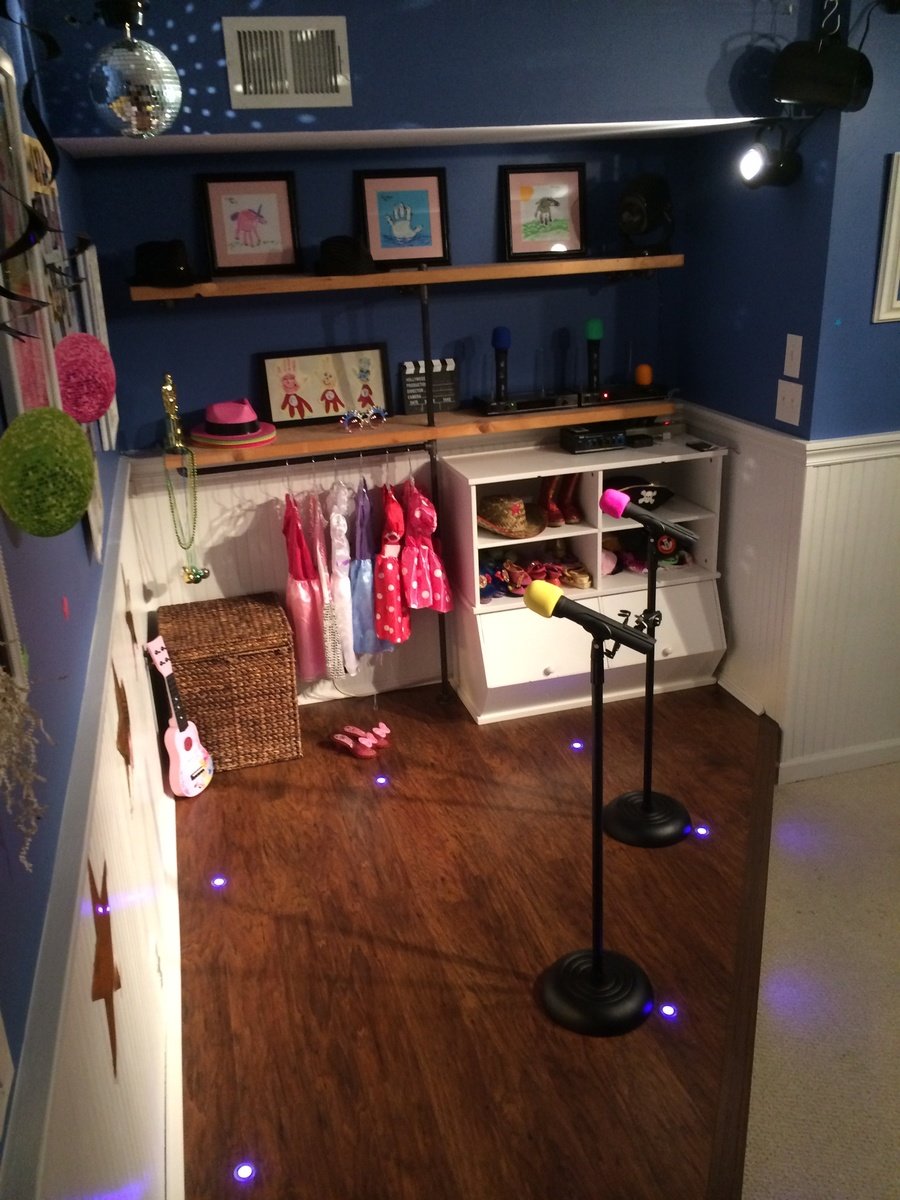
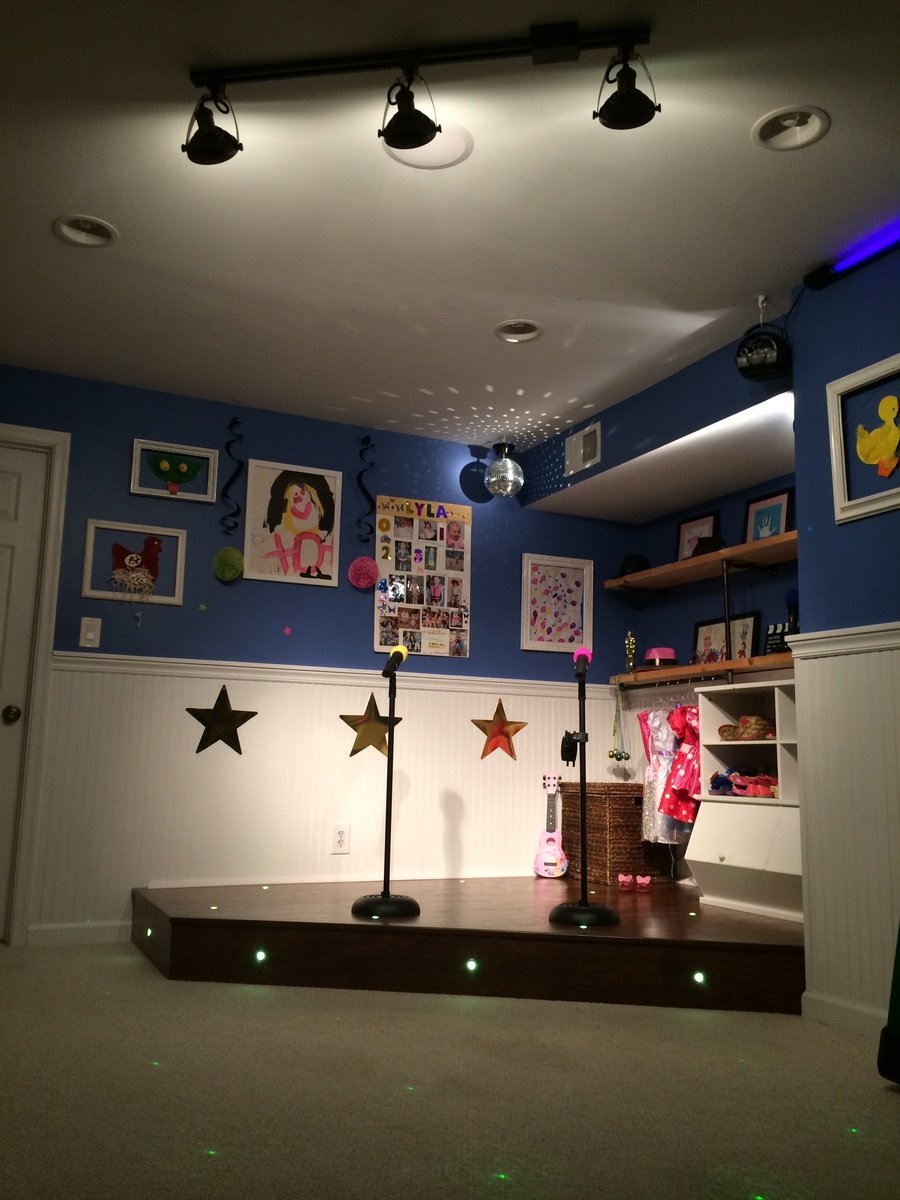
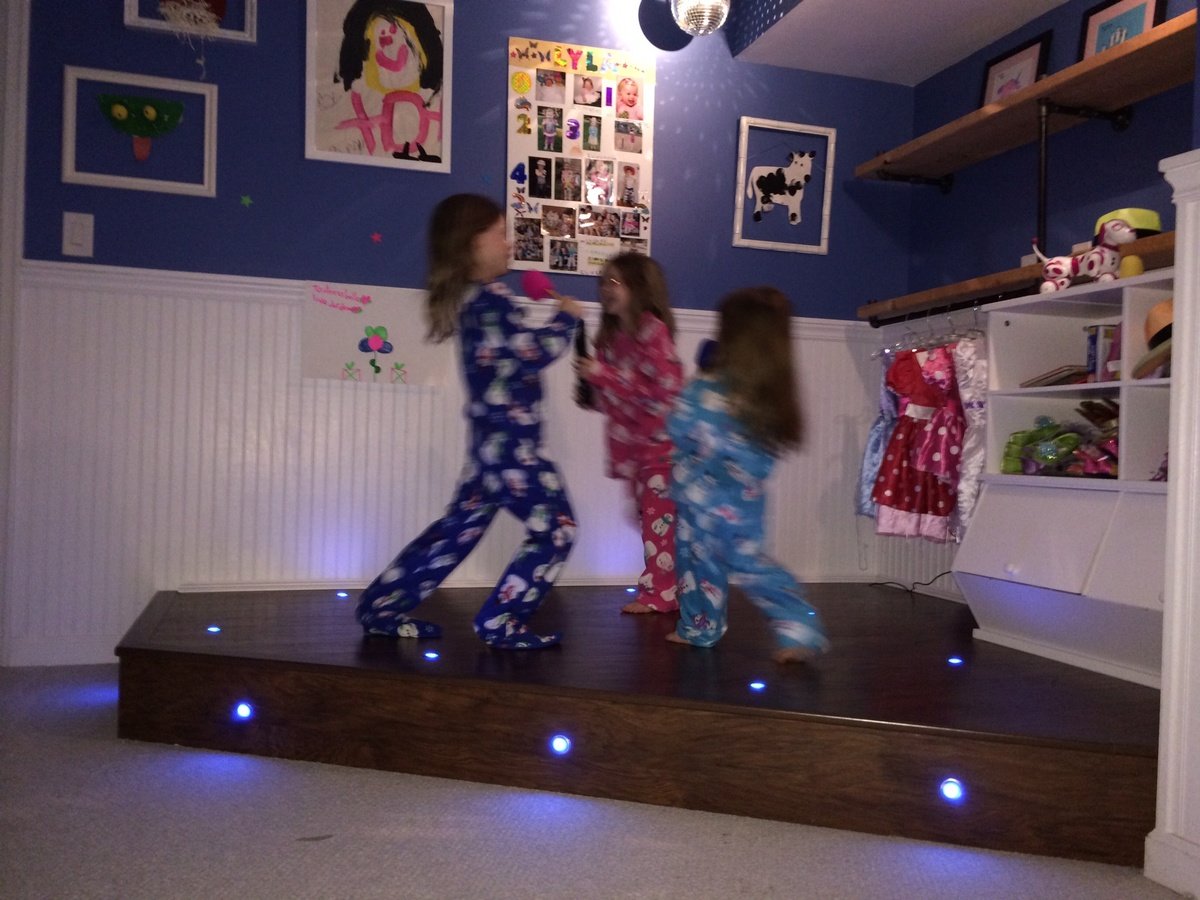
I had a perfect corner in our playroom that was reserved mostly for clutter and always wanted to do something fun with it. The base is made with 2x8"s topped with Handscraped Hickory laminate flooring. Bored holes into the floor and installed 1" diameter color-changing LED decklights. Added theatre-style tracklights, disco ball and other dance floor lighting for extra effect. Of course the stage wouldn't be complete without wireless microphones for karaoke and mic stands hooked up to a small amp and speakers in the ceiling. I made the shelving on the right side with 1/2" black pipe and used leftover 2x12" shelves from an old garage shelving install from 7 years ago! The kids were ecstatic on Christmas morning for the reveal!
Sun, 07/27/2014 - 15:52
This is great! I was just wondering what your dimensions were? I've been looking for something like this to do for my niece but have been struggling to find a plan and figure it out myself LOL.
Tue, 08/05/2014 - 05:58
Hello, the back wall is 8' and side wall is 6.5'. The stage comes out about 2.5' on each side then the front is around 7'.
Hope that helps, good luck!
Sun, 04/10/2016 - 14:44
Actually, I was wondering ,what lights did you use? I'm working on a very similar project and was curious to the lights your used please.
Sun, 12/08/2019 - 17:11
Can I ask about the lights you used or would recommend? Getting started tomorrow. A stage from Santa. Please help! 😬
Sat, 12/18/2021 - 14:09
Hello! Also wondering which lights you used. Thank you!
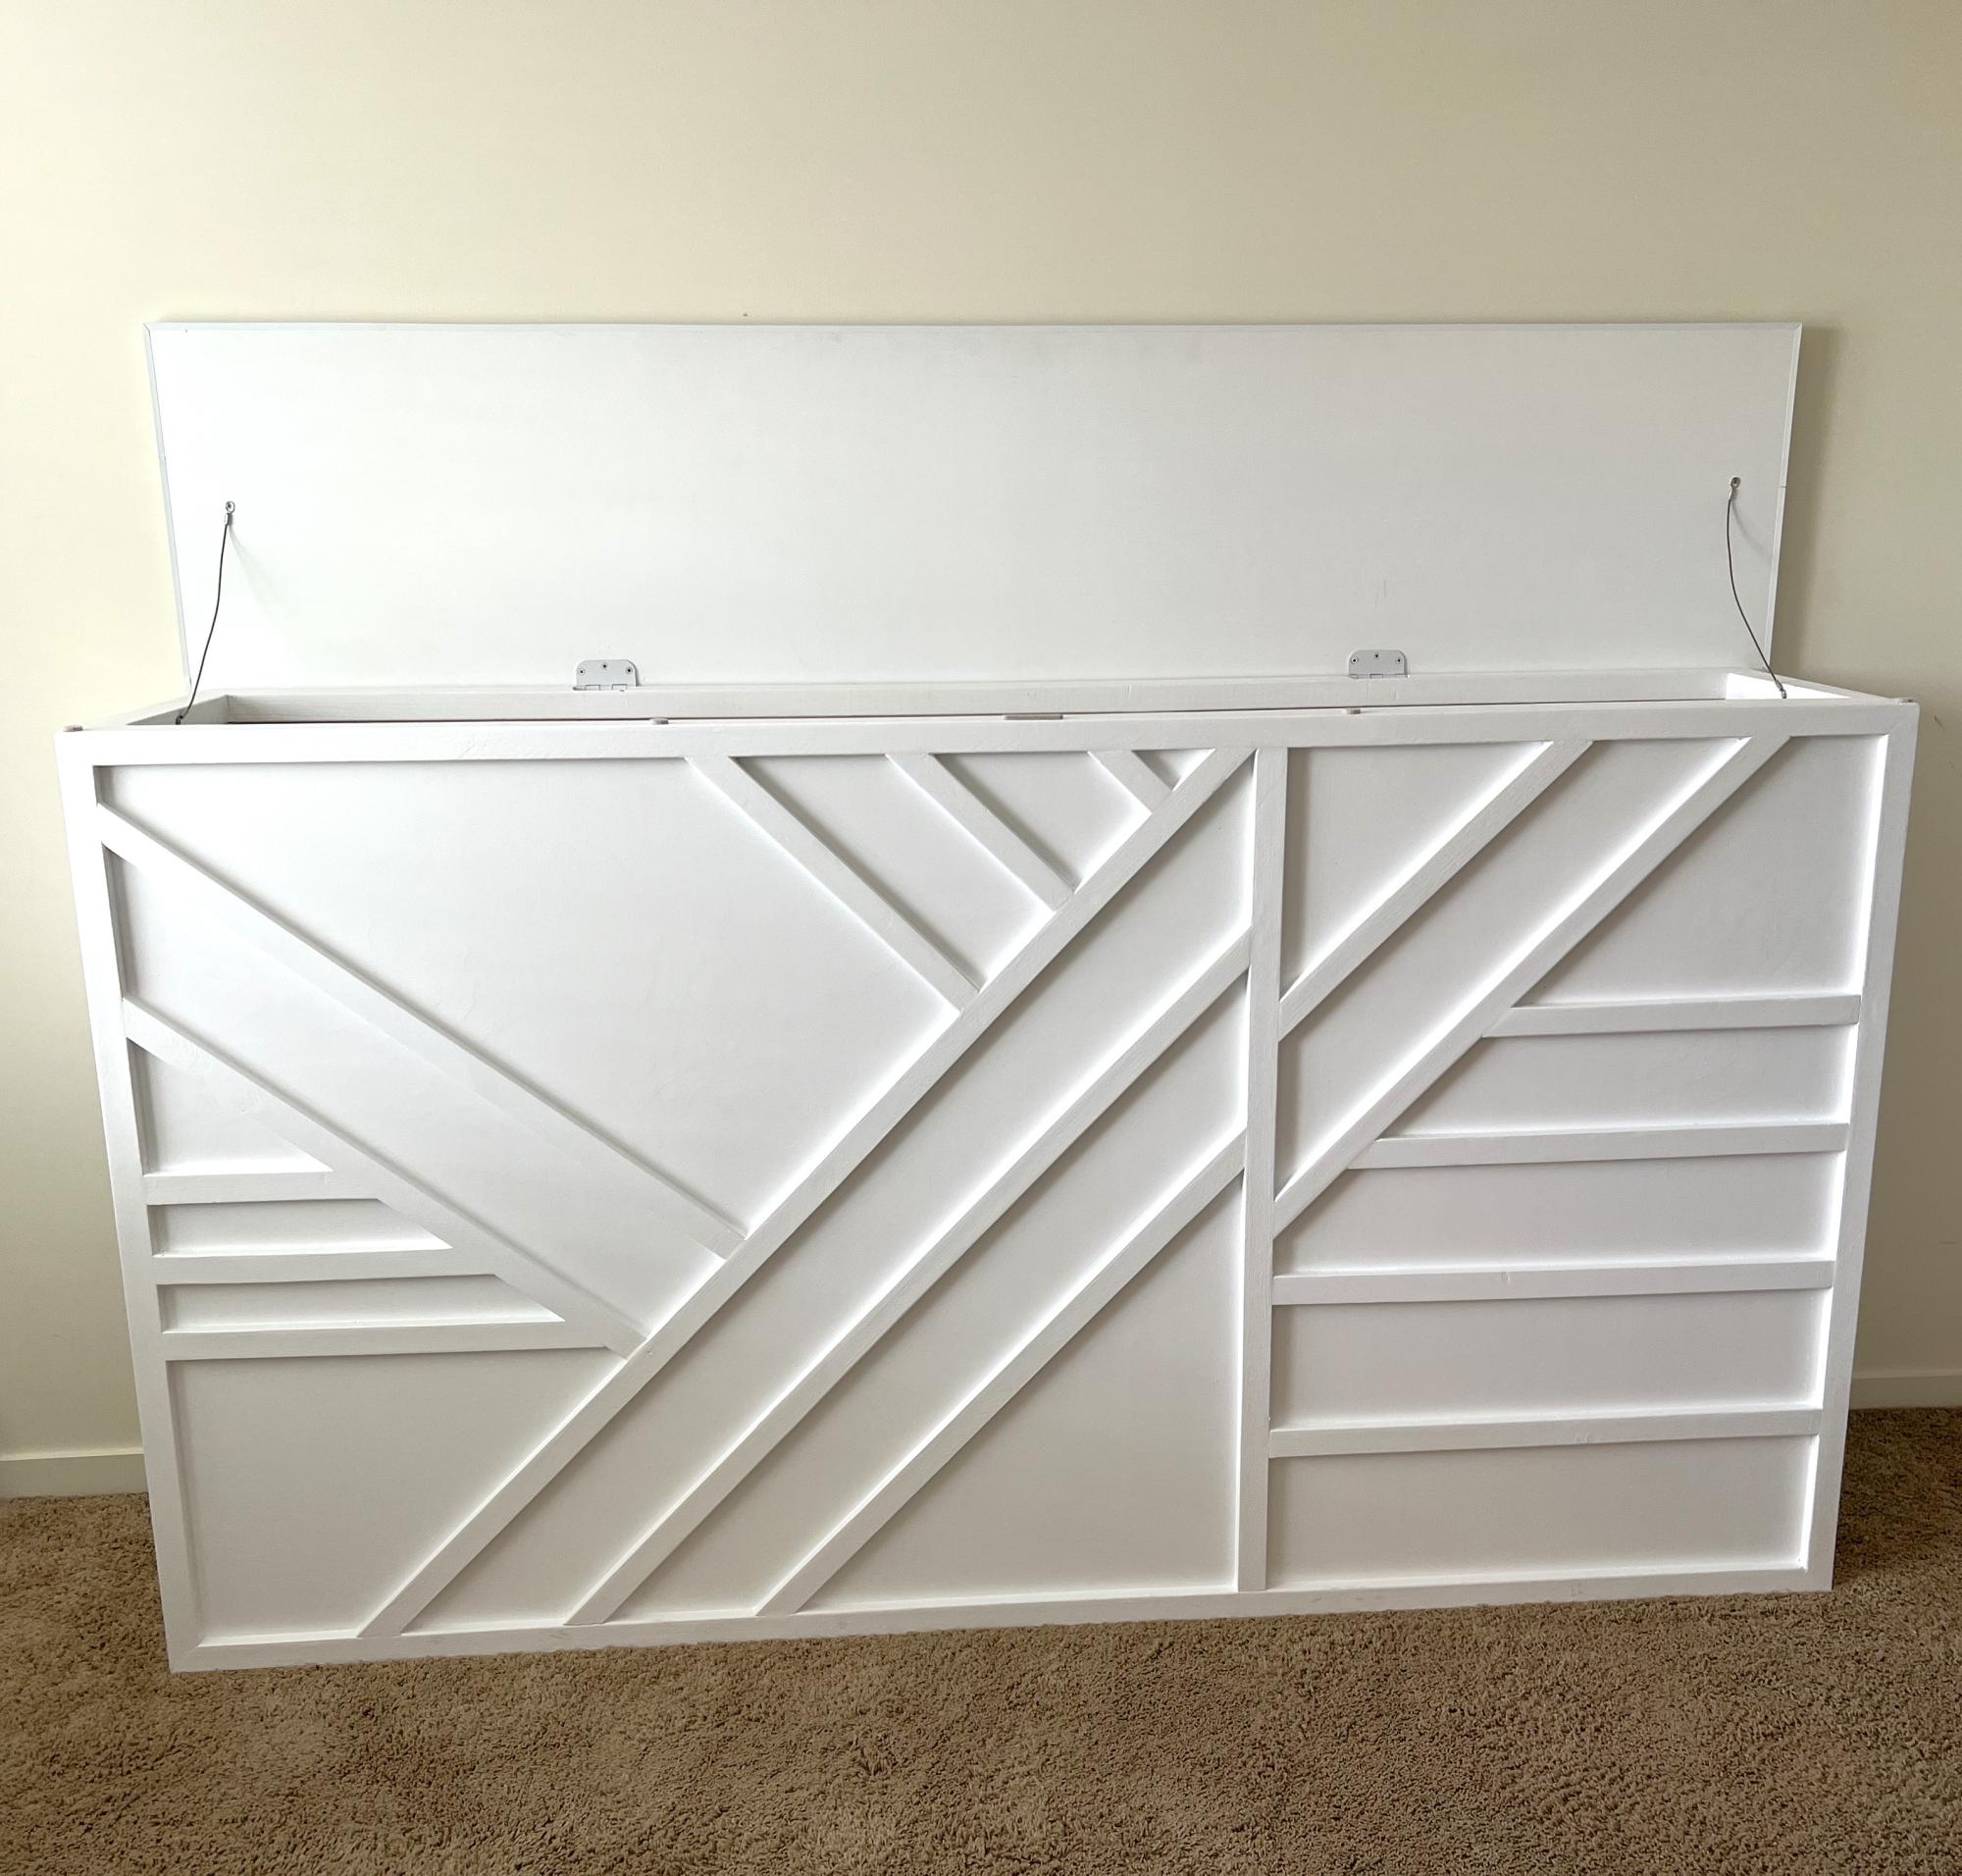
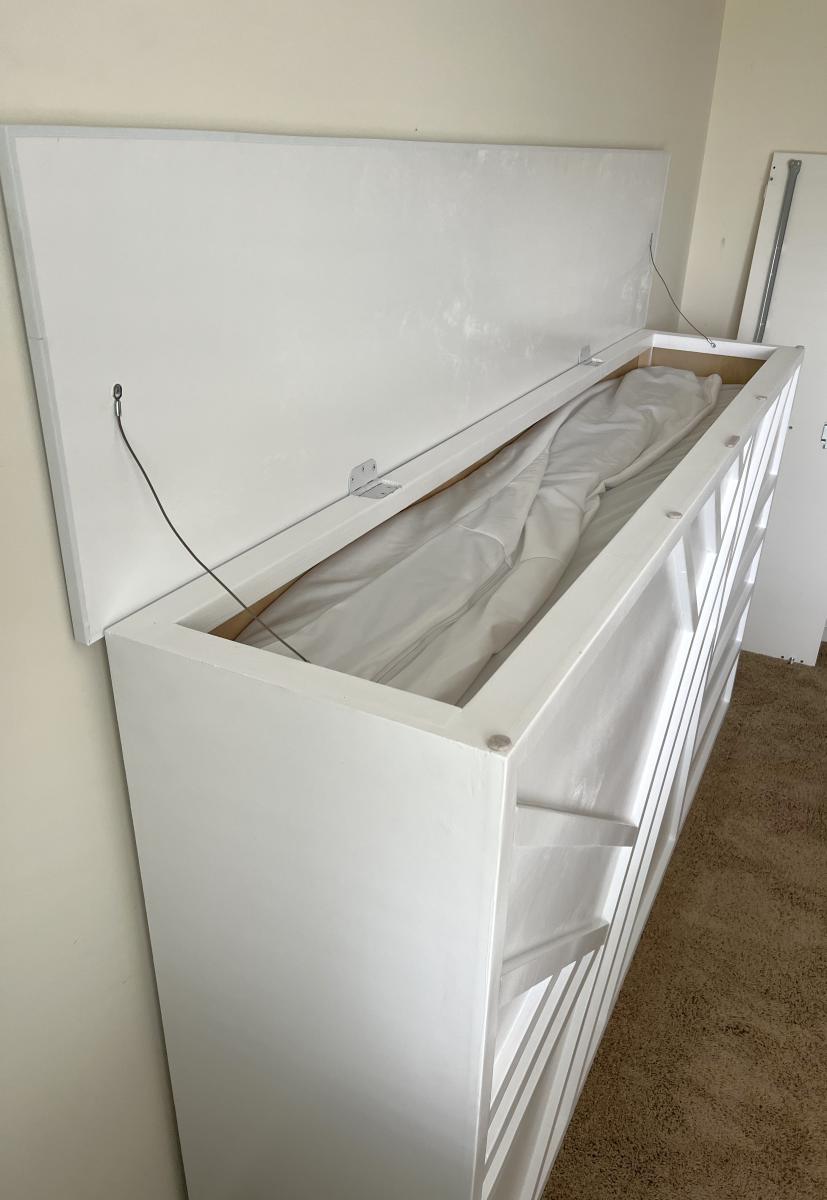
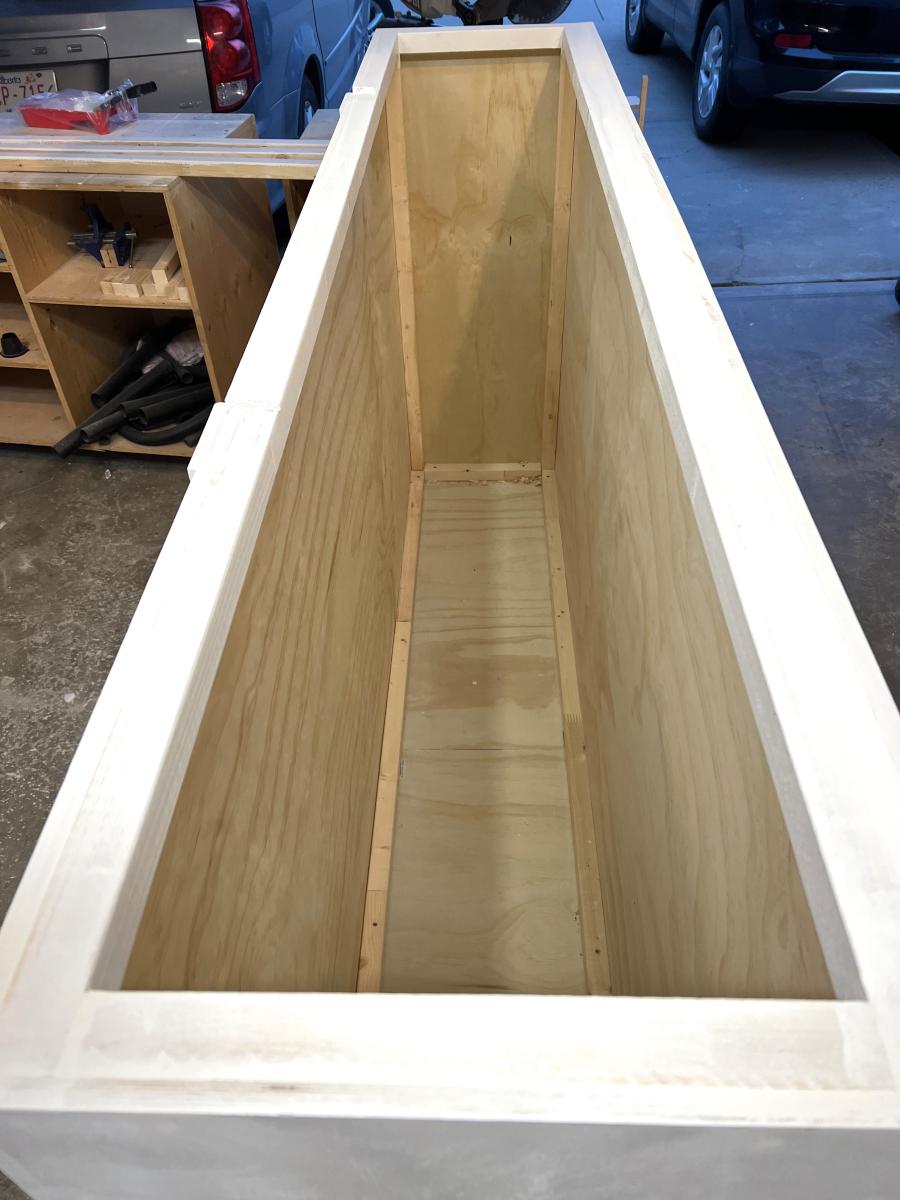
This project changed 3 times from the day i started.
It was supposed to be a simple vertical box to hide 2 twin mattresses
Then she decided to do a horizontal box (chest).
Then she decided to put it behind her be.
By the end it became a headboard storage and the design is Modern Geo Headboard
by Ana White