
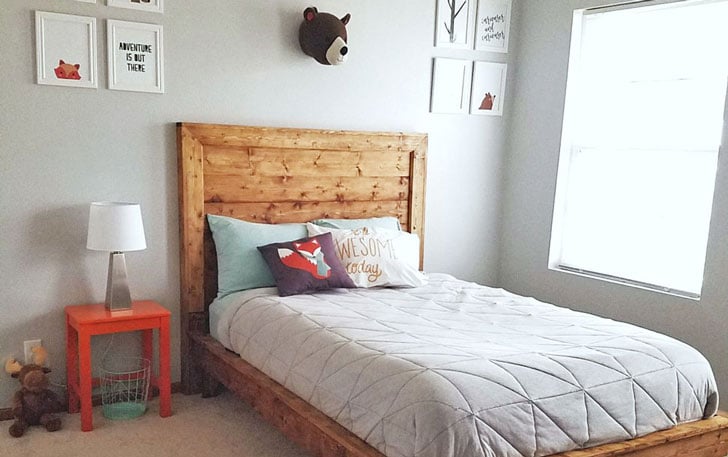

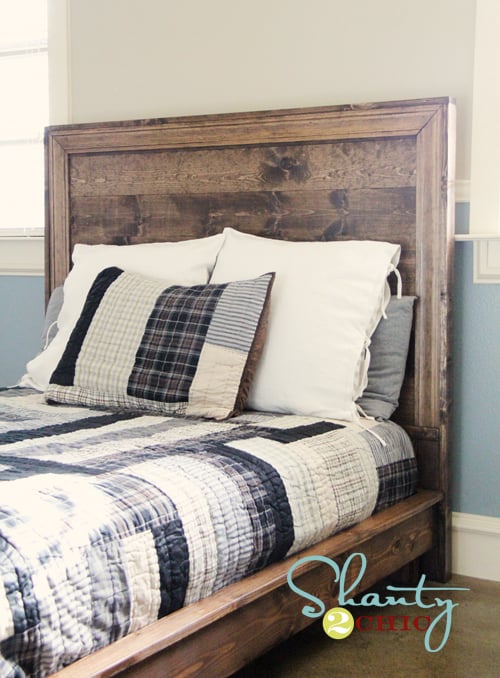
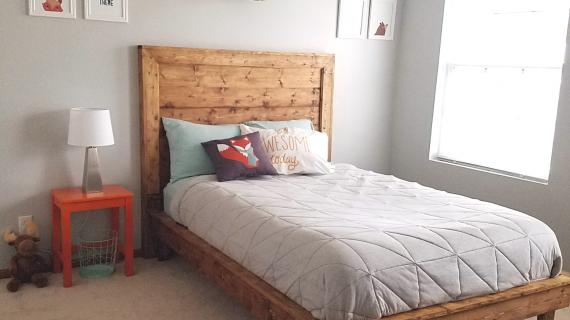
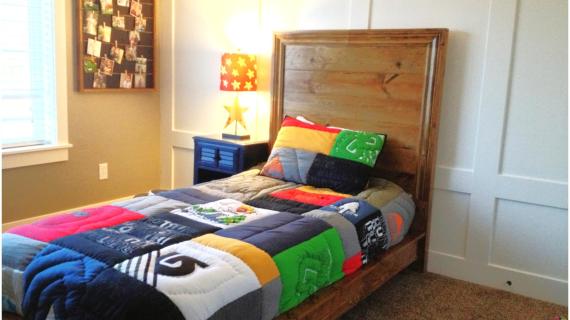
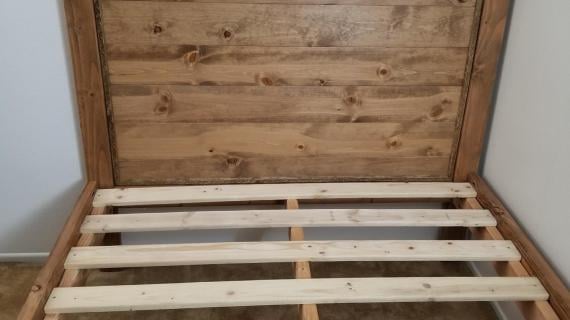
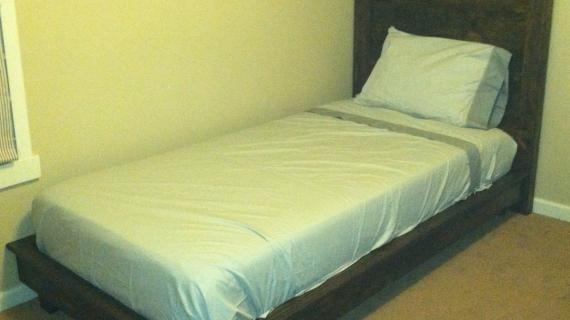
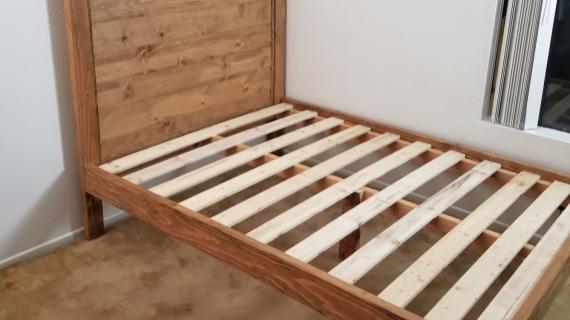
Build your own planked wood headboard with just a saw and nails! This simple to build headboard is made of off the shelf lumber, and is just glued and nailed together. Our step by step plans are perfect for the beginner.
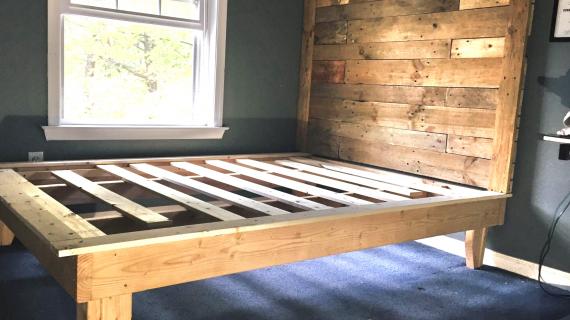
We love it paired with our matching Hailey Platform Bed Frame.

Preparation
- 2 sticks 7 feet long, 3 ¼” wide casing or other moulding
- 3 – 1x6 @ 10 feet long
- 1 – 2x2 @ 8 feet long
- 3 – 1x3 @ 6 feet long
- 1 – 2x4 @ 4 feet long
- 2 – 1x4 @ 8 feet long
- ¾” brad nails (For nailing moulding on)
- 1 ¼” brad nails
- 2” brad nails
- 1 – 1x4 @ 57 ½”
- 6 – 1x6 @ 57 ½”
- 2 – 1x4 @ 54”
- 1 – 2x2 @ 57 ½”
- 2 – 2x4 @ 16”
- 2 – 1x3 @ 54”
- 1 – 1x3 @ 59”
- Cut moulding to fit
Please read through the entire plan and all comments before beginning this project. It is also advisable to review the Getting Started Section. Take all necessary precautions to build safely and smartly. Work on a clean level surface, free of imperfections or debris. Always use straight boards. Check for square after each step. Always predrill holes before attaching with screws. Use glue with finish nails for a stronger hold. Wipe excess glue off bare wood for stained projects, as dried glue will not take stain. Be safe, have fun, and ask for help if you need it. Good luck!
Instructions
Step 1

Nail the panel boards to 1x4 boards on back. Nail holes will be covered by trim. Also, if you have a pocket hole jig, attach panel boards to each other down the center. If your boards are not lining up well in centers without a pocket hole jig, you can add a scrap board to back down the center.
TIP: For a painted finish, consider painting planked boards first, then distressing joints before assembly. You can also run a flat bladed screw driver down joints to enhance.
Step 2

Now add the bottom board. Nail from back for the biggest bite or you can use screws and glue. Kreg Jig users - consider attaching with 3/4" pocket holes from bottom planked board as well.
Step 3

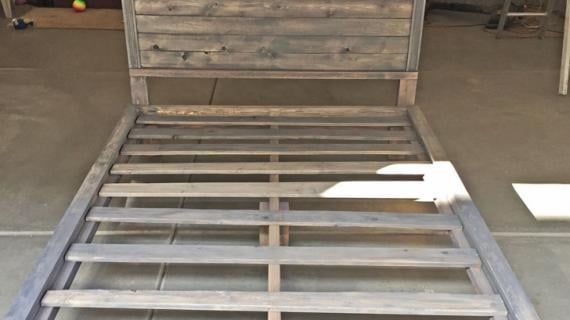
Now we'll beef up the legs a little, giving you something to bolt a bed frame too if you are doing that. Nails or screws from back to hide.
Step 4

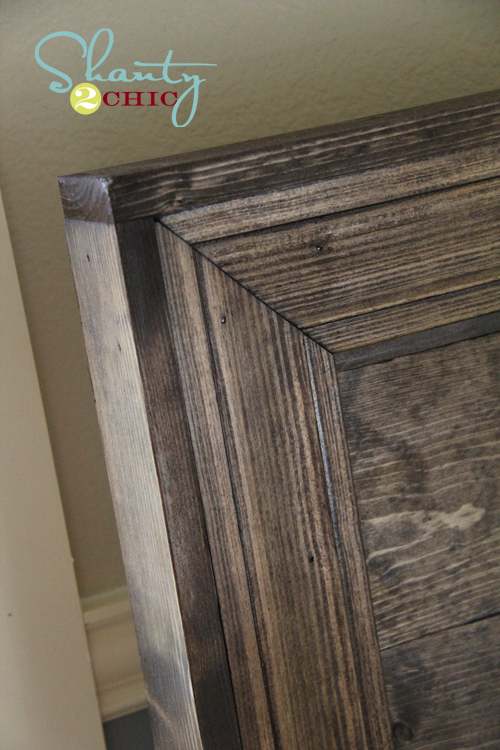
Cut your moulding to fit, mitering corners at 45 degrees off square. Nail on with short finish nails and glue.
TIP: You can just glue and clamp to hide all nail holes, but make sure you glue and let dry for a good bond.
Step 5

Step 6

Finally, add top, with outsides flush with legs.
It is always recommended to apply a test coat on a hidden area or scrap piece to ensure color evenness and adhesion. Use primer or wood conditioner as needed.


Comments
debandtom25
Thu, 01/26/2012 - 03:54
Gorgeous
I don't have enough beds for all the fabulous headboards I see on this site. Whitney, you did an amazing job. I love the stain and how it makes the grains pop. Love, LOVE!
Guest (not verified)
Sun, 01/29/2012 - 15:07
my first project
Thanks for another inspiring plan. This is the one my wife picked for our bedroom, so I built it this weekend as my first project. It was very simple to follow and a very forgiving plan, since most of the screws are concealed by the trim. My total cost was about $70, including a quart of stain.
FYI, the plan should read 3 1x4x8's to have enough for a queen (and probably a full, too, if my math is correct).
In reply to my first project by Guest (not verified)
kpouls18
Sat, 02/28/2015 - 16:18
Yep.
This is right. I found this out too and had to run back to the hardware store.
Guest (not verified)
Wed, 02/01/2012 - 12:01
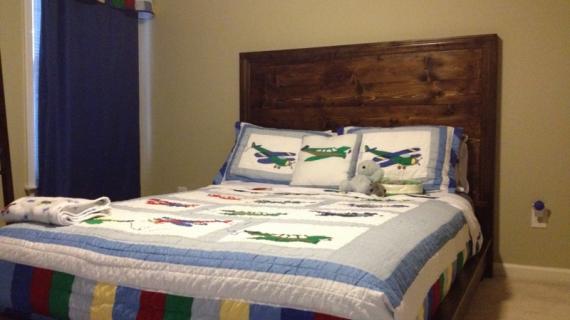
I made this headboard this
I made this headboard this weekend in the full size for my son. Super easy! Thanks for the plans!
I'll post brag pics as soon as I get it in his room.
Guest (not verified)
Wed, 02/01/2012 - 21:01
Question??
I am so in love with this bed that I am going to make it for my son! I would like to make the entire bed so could you post how to build the frame and parts list please? Thank you so much for sharing this!!!!
Guest (not verified)
Tue, 02/07/2012 - 12:19
What would the measurements be for a king?
I love this headboard so much that I am going to get all the supplies right away! I have been searching forever for the perfect head board for our king size bed! I am not a math wiz so I was curious if you could help me out on the dimensions for a King! Thank you so much for your help!!! Beautiful work!!
Guest (not verified)
Tue, 02/07/2012 - 12:21
What would the measurements be for a king?
I love this headboard so much that I am going to get all the supplies right away! I have been searching forever for the perfect head board for our king size bed! I am not a math wiz so I was curious if you could help me out on the dimensions for a King! Thank you so much for your help!!! Beautiful work!!
Guest (not verified)
Sun, 02/19/2012 - 13:19
This is such a beautiful head
This is such a beautiful head board and I am going to make it my first project. I love the color of the stain you use...do you know what color it is? Also did you do any distressing for a more rustic look? Love it!!!
Guest (not verified)
Tue, 04/03/2012 - 07:42
Attaching Head Board
No details on attaching head board to frame???
Heidi M (not verified)
Tue, 04/17/2012 - 20:15
attaching head board
How would you suggest attaching the head board to the platform bed?
In reply to attaching head board by Heidi M (not verified)
smfeltner
Wed, 05/03/2017 - 04:55
Attaching headboard
Several people have asked about attaching the headboard to the bed; on Shanty 2 Chic's post about this bed (which is the site Ana made the plans for) she states she attached her headboard with 3" drywall screws.
HeatherM (not verified)
Sat, 07/07/2012 - 05:44
king size?
Hi, I just love this headboard!!! Can you help me with the dimensions and cut sizes for a standard king size bed? This will be my first DIY project...I am so excited!
Thanks so much!
Turkswill
Sat, 01/11/2014 - 17:06
Attaching the Headboard
How do you attach the headboard to the bed frame? What type of screws or bolts do you use? Please explain.
mattmasulis
Fri, 10/24/2014 - 23:11
One 1x4x8 short
The shopping list has 2 but the cut list has 3. It is 3. One short there. :-)
mattmasulis
Wed, 11/05/2014 - 18:51
One 1x4x8 short
It wouldn't allow me to edit my comment but I wanted to be more specific. It is one 1x4x8 short if you are building a king sized headboard. That is the only board I had to add to the shopping list. :-)
mattmasulis
Thu, 11/06/2014 - 20:57
California King
I really wish I could edit comments here, then I would have just one. Another update. The headboard is built. What we added to the shopping list for a California King was 3 1x6x8's (bought 6 total instead of 1x6x10's) and 1 1x4x8. To build it in a king or California King just take a measurement of the top or bottom of the bed frame to find the length to all of the horizontal boards. I hope these comments help someone with a King or California King. I saw there were many people wondering. :-)
crollings
Mon, 08/03/2015 - 13:24
Queen
What would be the cuts for a queen???? Thanks! Love the plan btw
In reply to Queen by crollings
Ana White
Wed, 08/05/2015 - 11:00
Just above "cut list" it
Just above "cut list" it states "For full size bed. To convert to twin,
subtract 15" from width. To convert to queen add 6". For king, depending on
the type of king, add to width"
Hope this helps
flashnburn
Mon, 04/25/2016 - 08:03
Problems with separating.
I have built about 8 of these from full to king size. The problem I'm having with each headboard is that the 1x6's are separating apart. I am gluing and then using the Kreg pocket hole system and cant figure out why it keeps coming apart. I also have asked a couple other people and they have no clue on why its coming apart. Hopefully, someone has an answer so I could fix this issue.