Simple Bench with Hidden Boot Storage

The free plans on this website are made possible with advertising and affiliate links.  Thank you for helping us keep plans free.


Difficulty
Intermediate
| Print this plan

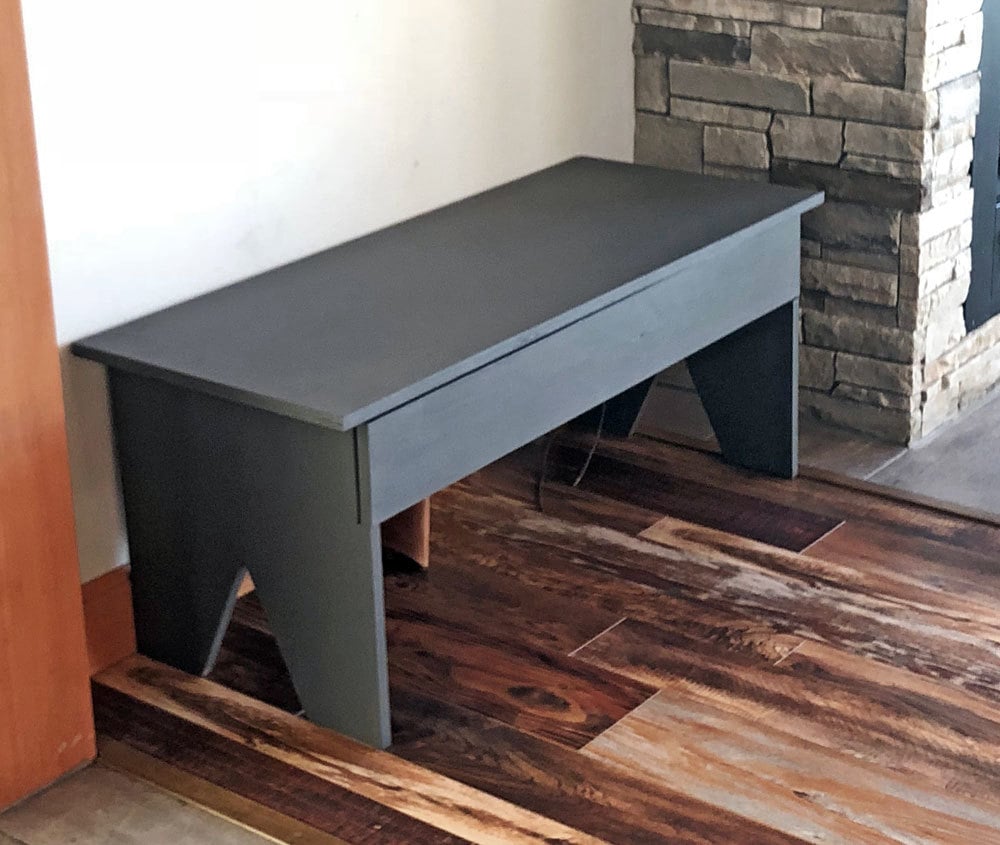
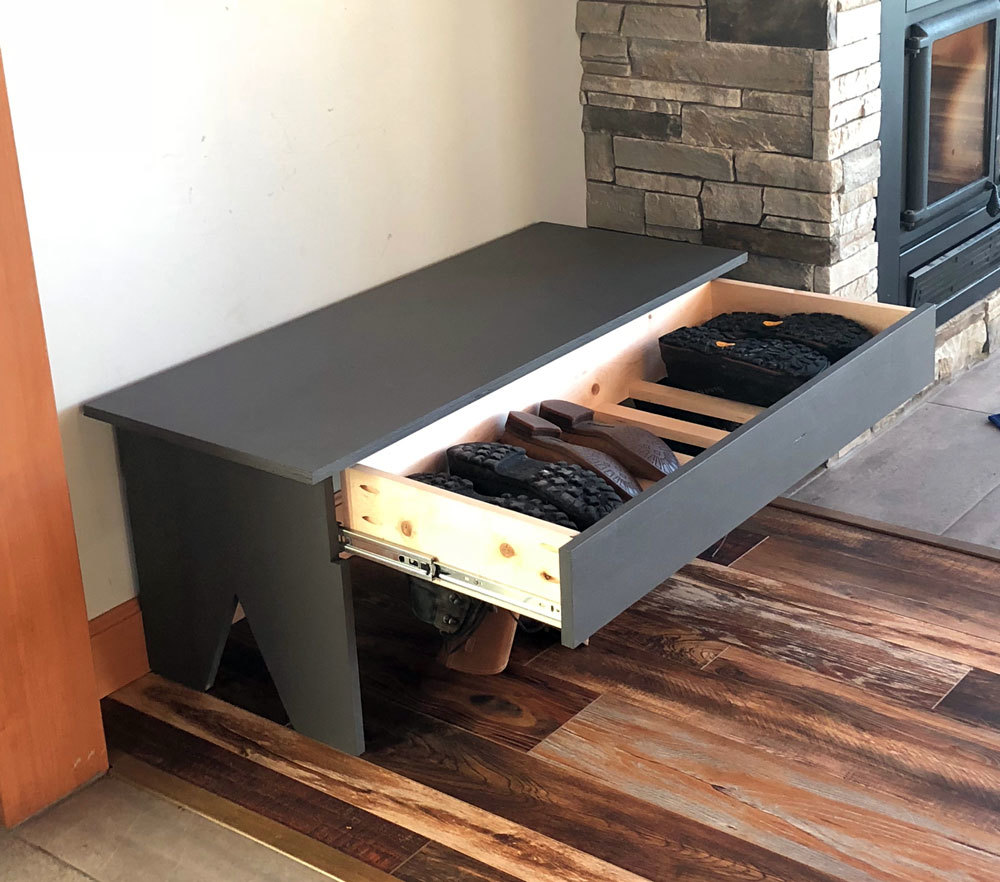
This simple bench has a secret!  Store boots inside it!  Free plans by ANA-WHITE.com

Boot storage is always tricky.  Boots can take up alot of space, and often need to be laid flat or upside down to protect the leather uppers.

For our hall, we needed some extra shoe storage - but since the space is in the hall, I wanted the storage to blend, and look more like a basic bench than a workhorse storage piece.  

So I designed and we built this simple looking bench.  But of course, there's more!

The front apron is really a drawer face, and inside, you can store up to four pairs of full size boots!  You can also use the drawer for storing shoes, scarves, gloves - you name it!  Or you can use the project as a coffee table and store remote controls, magazines and board games (of course without the slatted drawer bottom).  

We loved this project so much we even devoted a video to making it -

Since we know you'll be wanting to build it to, the free plans are below.  

Please share a finished photo when you are done - we love seeing your projects!

XO Ana


Dimensions
Dimensions shown above

Preparation

Shopping List

1 - 3/4" x 18" project panel, 7 feet long OR 48" x 48" 3/4" plywood panel, cut into two pieces, 18" x 48" (will have a scrap leftover about 12" wide)

1 - 1x6 @ 8 feet long

1 - 1x4 @ 6 feet long

2 - 1x2 @ 8 feet long

16" full extension side mount drawer slides (usually the silver ones)

Common Materials
Cut List

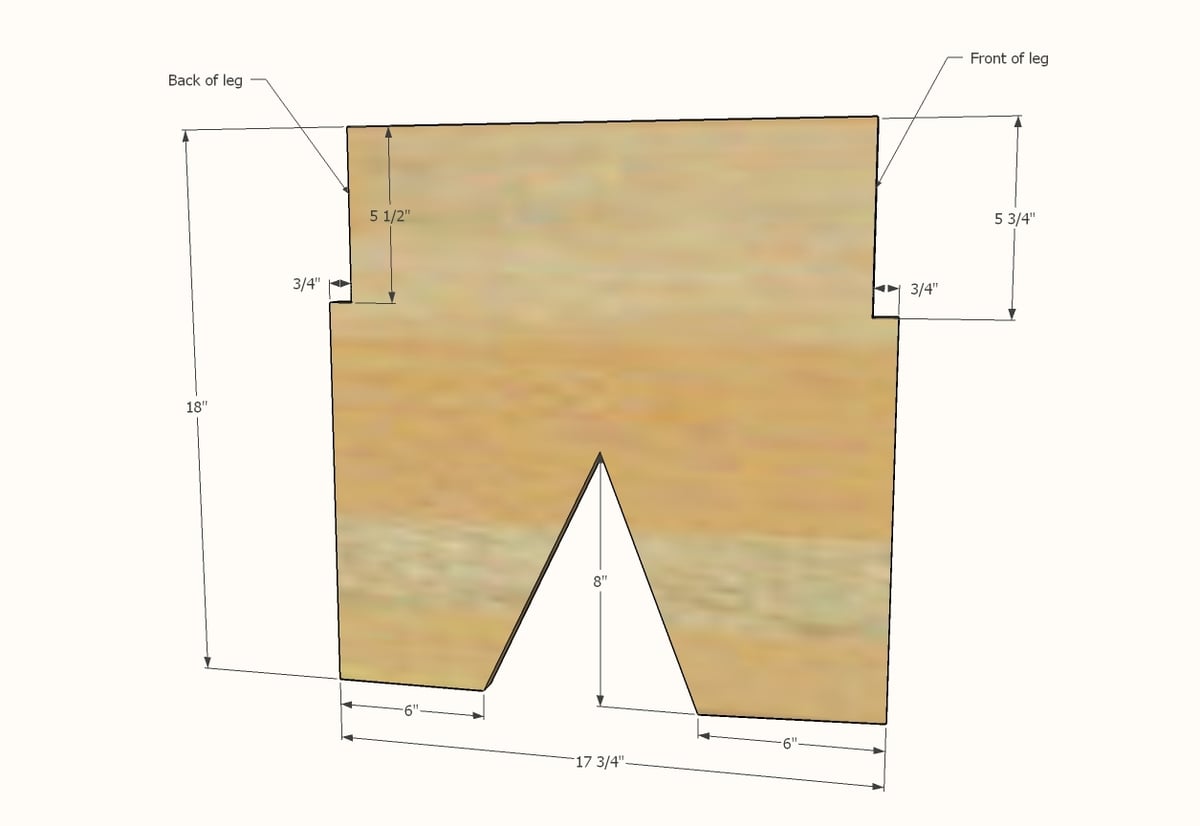
2 - 3/4" plywood @ 18" x 17-3/4" - legs

1 - 1x6 @ 41-1/2" - back support

1 - 1x2 or similar (can be 1x3 or 1x4 or 3/4" plywood strip) @ 40" - front support

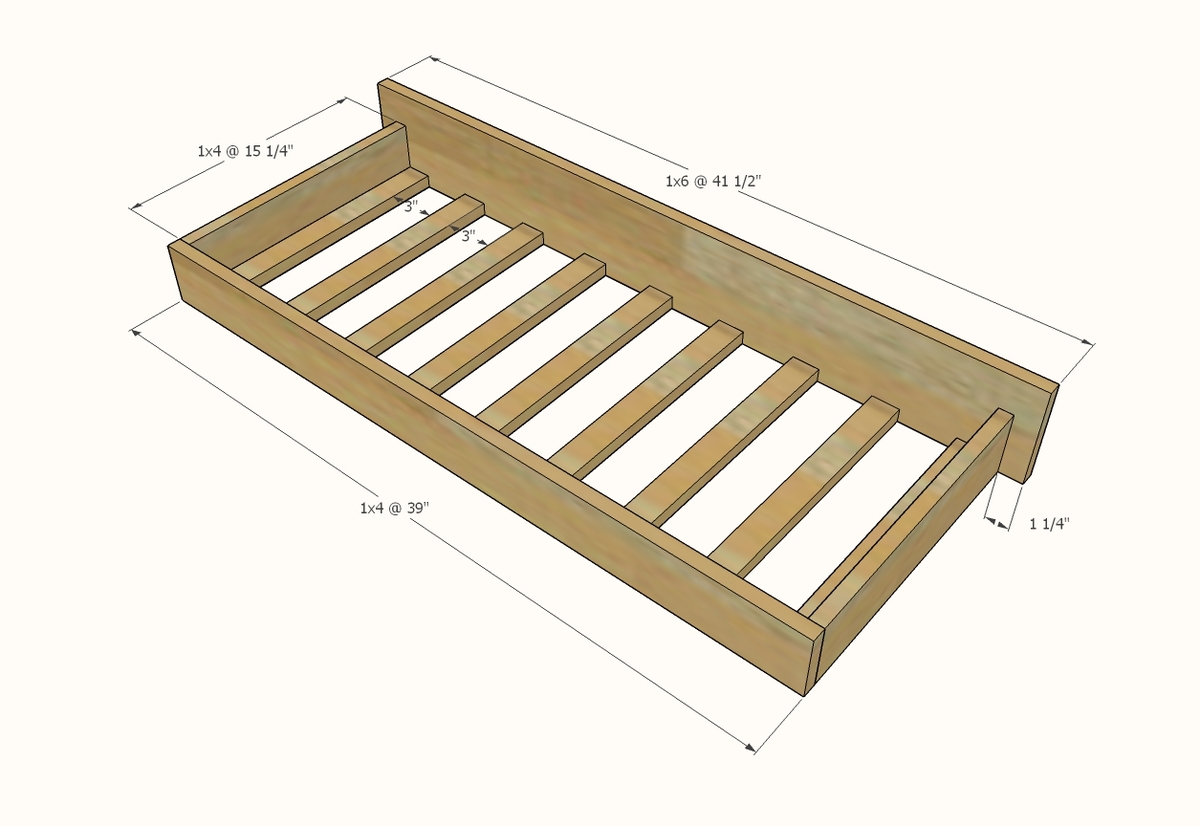
1 - 1x6 @ 41-1/2" - drawer front

1 - 1x4 @ 39" - drawer back

2 - 1x4 @ 15-1/4" - drawer sides

9 - 1x2 @ 15-1/4" - drawer bottom slats

1 - 3/4" plywood @ 18" x 45-1/2" - top


Tools
Tape Measure
Speed Square
Pencil
Safety Glasses
Hearing Protection
Kreg Jig
Drill
Circular Saw
Jigsaw
Power Sander

Instructions

Step 1

Cut the plywood pieces with a circular saw or table saw.  Mark out detail cuts and cut with a jigsaw.  Sand any rough edges.  Mark front edge and inside/outside edges of pieces.

Drill 3/4" pocket holes facing up along upper inside edge (make sure you are drilling pocket holes on insides of the two legs in mirror) and along the notched out back edge (see next steps).

Step 2

Attach back support with 1-1/4" pocket hole screws and glue.  

Drill two 3/4" pocket holes on each end of front support.  Attach to front edge of bench.

Step 3

Build the drawer as shown.  I used pocket holes for strength.

Step 4

Mark lines of drawer and bench interior as shown.

Install drawer slide so the lines marked are centered on the holes in the drawer slide parts.  Attach with drawer slide screws.  The video shows how we install the drawer slide if this doesn't make sense.

Step 5