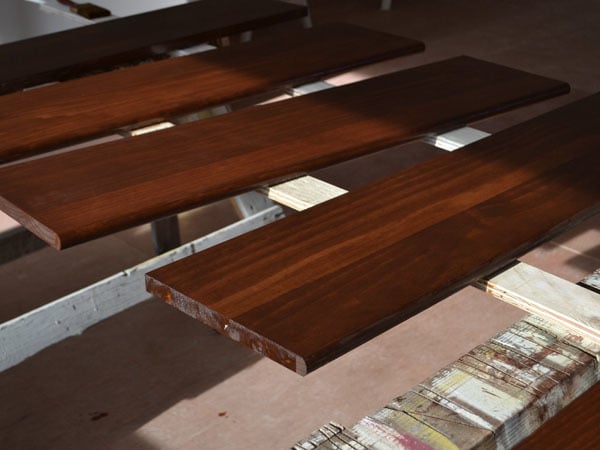
Preparation
We started with store-bought stair treads, that are pre-sanded. We’ve got trust issues, so we went ahead and sanded each tread anyway, with fine sandpaper, and then removed all sanding dust with a vacuum with a soft bristled brush attachment.
Pre-Stain Application
Pre-Stain helps prevent blotchiness, and just takes a second to apply. It’s cheap insurance.
We use those inexpensive foam brushes, and just apply it in the direction of the wood grain. After the pre-stain penetrates for about 5-15 mintues, excess is wiped off. Then within 2 hours, the stain is applied.
By the time we got done with pre-staining all of our stair treads, we just moved on to staining.
By we, of course, I mean the Ram - although my midwife has approved me doing some staining in a well-ventilated area, I have been taking a break from finishing throughout this pregnancy.
Stain Application
After testing several different stain colors, we choose Minwax Wood Finish in English Chestnut. It has a warm, rich reddish undertone that we just loved, and it also complimented the existing flooring.
Using a natural bristled brush, the stain is applied in the direction of the wood grain.
Isn’t it a beautiful color?
After each tread was stained, we allowed the stain to penetrate for about 15 minutes (the longer you allow the stain to penetrate, the darker and richer the stain, but no longer than 15 minutes),
And then wiped off excess.
And then just moved on to the next tread.
After the first coat of stain dried (about 4-6 hours), we went back over it with a second coat to deepen the color.
Now the stair treads are the right color, but we need to protect them.
Top Coat Application
To seal and protect the treads, we choose Minwax Polyurethane for Floors. The treads are on the floor, and will get used like a floor, so we need to protect them like a hardwood floor. This is the perfect product for the job.
We just finished staining and there is no sanding residue on the treads, but if you have any sanding residue, you’ll want to remove it and then wipe down your surface with mineral spirits and allow it to dry.
It’s an oil based product, so we used a natural bristle brush. You can also use lambswool or a synthetic pad applicator.
And then just carefully applied the Minwax Polyurethane for Floors, working in the direction of the wood grain. To prevent lap marks, keep a wet leading edge on the brush.
After the first coat was applied, we waited about 4 hours (depending on humidity and temperature) until the treads were no longer tacky.
Then a second coat of Minwax Polyurethane for Floors was applied. Since we stained the treads first, that’s all we needed - but without stain, you’d want to apply a third coat.
NOTE: If you allow more than 12 hours of dry time between coats of Minwax Polyurethane for Floors, you will need to lightly sand between coats with 220 grit sandpaper, and then wipe down with mineral spirits to removed sanding residue.
Once the finish was complete, we allowed the treads to fully dry for three days.
Next up, we'll be installing the treads!!!
Thanks Minwax, for sponsoring this tutorial, and helping us get a beautiful - and durable - staircase!
PS - It's Knocktoberfest Week in Blogland!!!

I'll be sharing my Knocktoberfest Project on Wednesday, but be sure to check out lots more great knock-off tutorials all week!
Be sure to stop over and see my friend Beth at Home Stories A to Z – she’s next up at Knocktoberfest 2013.
You also must visit Shabby Creek Cottage, Infarrantly Creative,Decorchick! and The Shabby Nest today for more great knock-off tutorials fresh up today!!!


Comments
caritasvillage2013
Wed, 10/23/2013 - 06:58
I really find it very
caritasvillage2013
Wed, 10/23/2013 - 06:58
I really find it very
Kadiya
Wed, 03/14/2018 - 16:45
Installation portion of tutorial?
I can’t seem to find the installation part of this project?
ms.janabanana
Sun, 11/14/2021 - 22:09
Interesting
Interesting