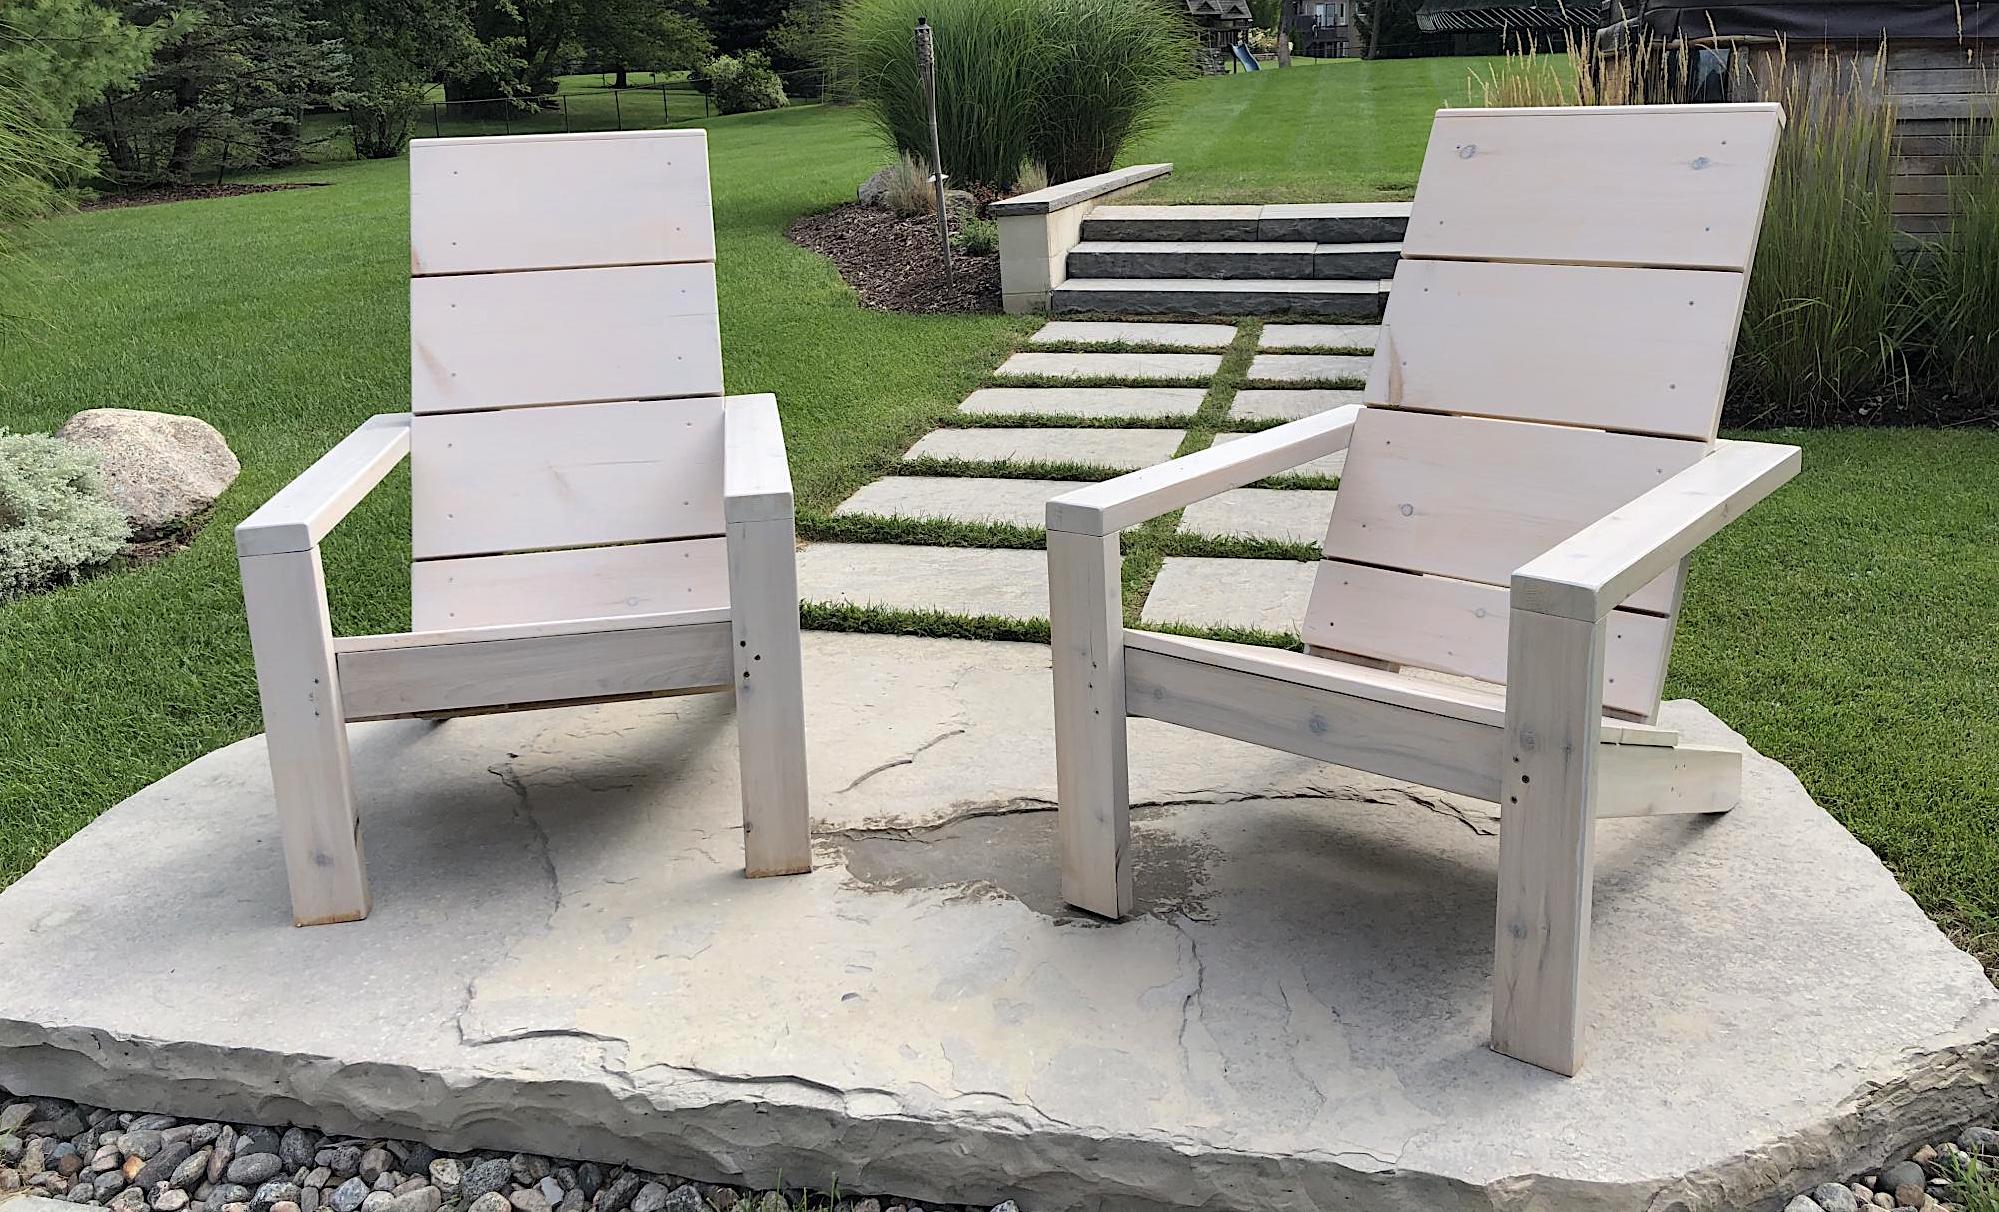


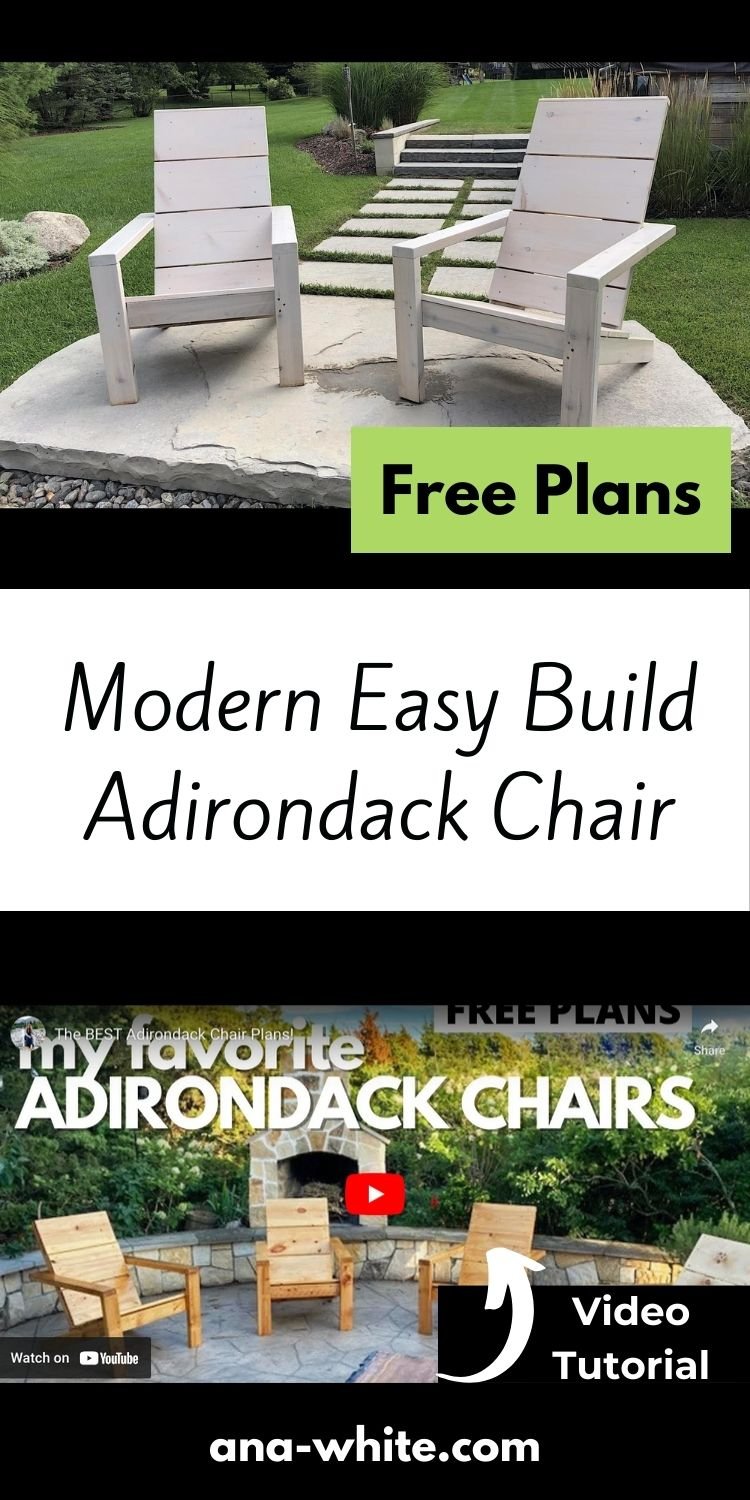
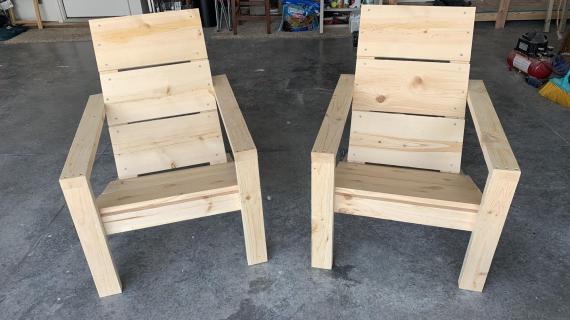
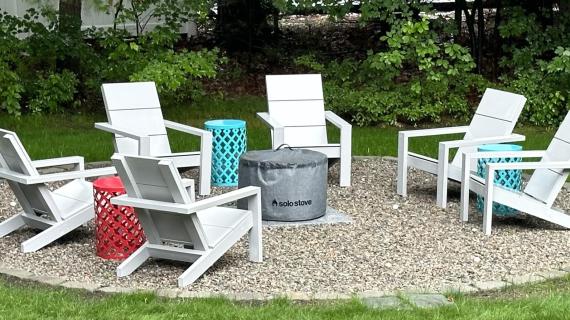
The MOST POPULAR Adirondack Chairs plans! This is an easy build that shouldn't take too long, and the chair is super comfortable and sturdy! Free plans by Ana-White.com

More Free Adirondack Chair Plans from Ana White

Why I Built These Chairs
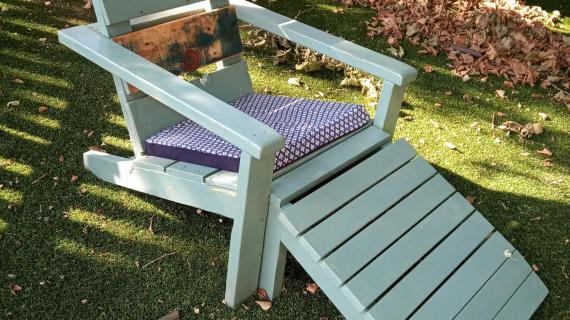
I've been wanting to add some comfortable outdoor seating to our yard in uncovered areas, but it gets to be alot to manage cushions and pillows, trying to keep everything dry, bringing the cushions in when it snows, finding somewhere to store it all ...
I didn't want to go with plastic chairs, as they blow away in the wind, and I'm forever chasing them down and eventually, picking up pieces of plastic and throwing them away.
So I thought, what if I could build the most comfortable Adirondack chairs ever, that don't need a cushion, that are too heavy to blow away in the wind?
2x4 Essential Adirondack Chair Features
- 2x4 frame is sturdy and solid
- Building plans are easy to follow and assemble (about an hour a chair)
- About $30 in lumber per chair
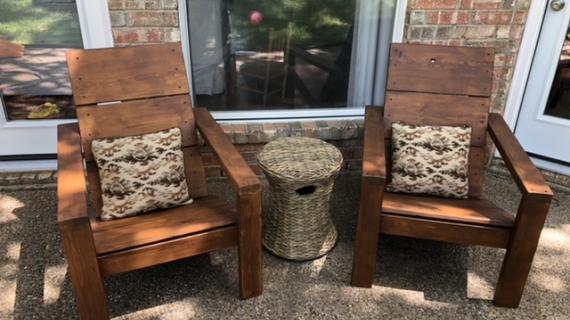
- Very comfortable without a cushion or pillow
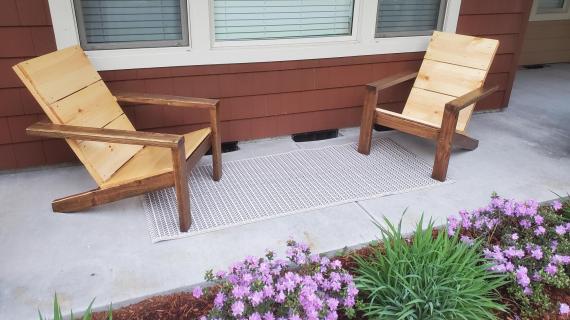
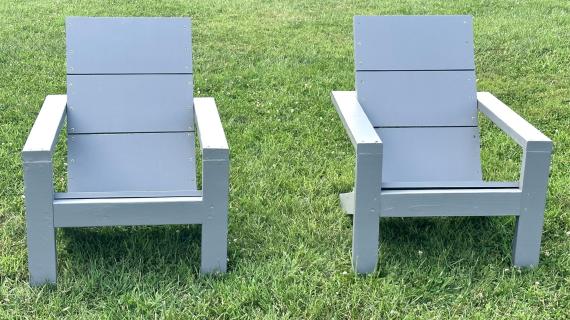
- Modern styling still has the "Adirondack" look and feel, but with clean lines
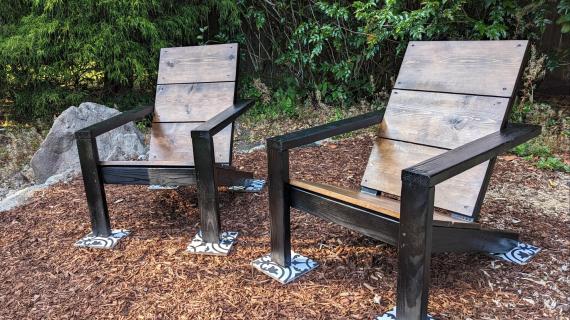
- Can be painted or stained any color
How I Built My Chairs
In this video I go through all the steps to build my 2x4 Modern Adirondack Chairs
Free Adirondack Chair Plans
The free plans for this chair follow. Please share a photo when you are done so we can see how your project turned out!
Here's Some Tips to Build Better Outdoor Furniture
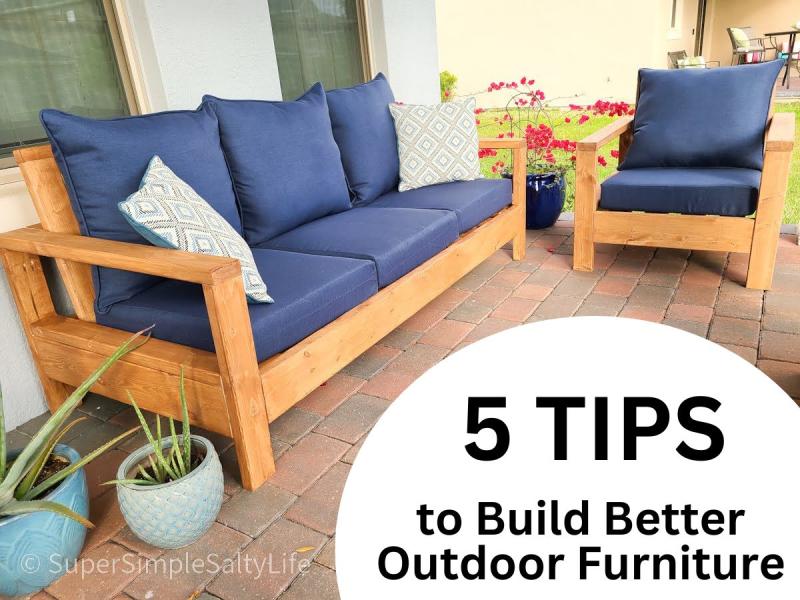
Want to build better outdoor furniture? Over the twenty years I've been building, maintaining, and enjoying my own outdoor furniture, I've learned a few tips that can help build longer lasting furniture.
Pin For Later!
Preparation
- 3 - 2x4 @ 104-5/8" long (OR 4 - 2x4 @ 8 feet long or 92-5/9" long)
- 1 - 1x10 @ 10 feet long*
- 4 - 2-1/2" Kreg Pocket Hole Screws
- 24 - 2-1/2" long self tapping exterior screws (look for the screws with the star bit heads, can be up to 3" long)
- 30 - 1-1/2" long self tapping exterior screws (same type as the longer screws, can be slightly shorter or longer (up to 2"), these screws are just used to attach the seat boards to the frame)
*If building more than one chair, you only need 9 feet of 1x10 boards per chair. So for two chairs, you could purchase one 8' long 1x10 and one 10' long 1x10.
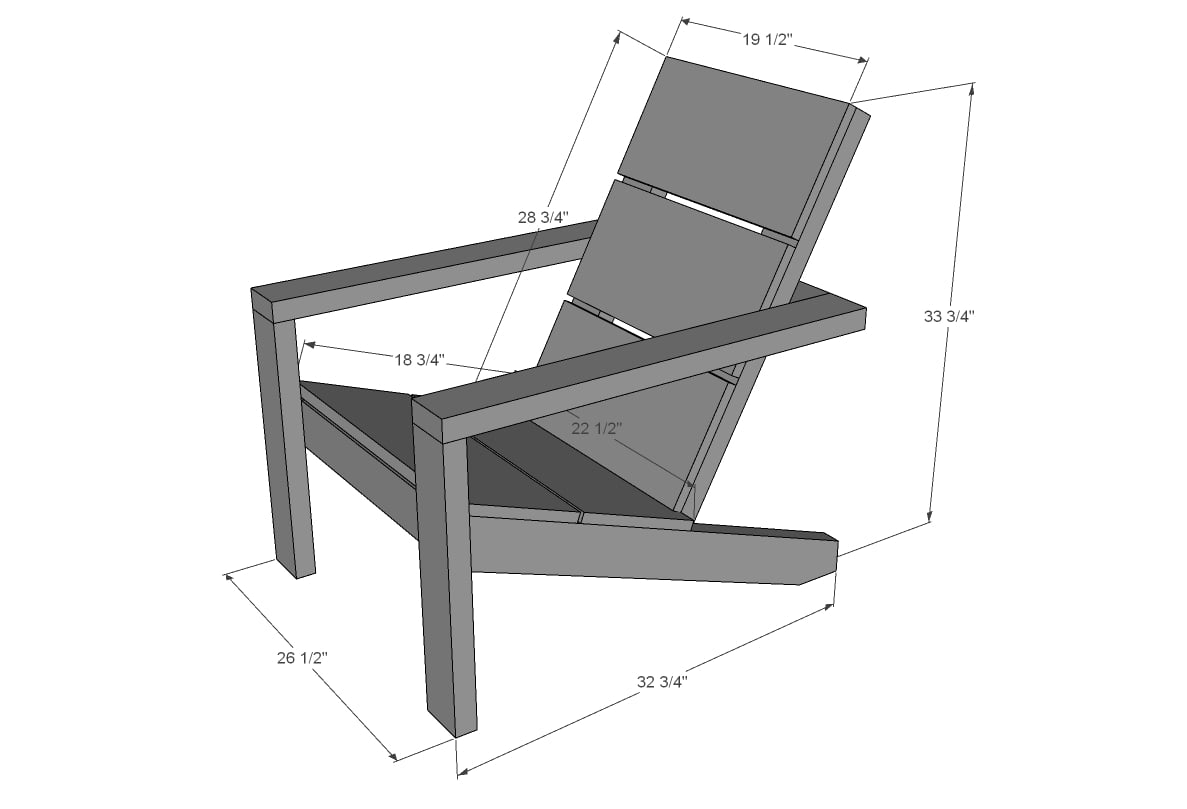
- 5 - 2x4 @ 19-1/2" - legs and horizontal supports
- 2 - 2x4 @ 31-3/4" - arms
- 2 - 2x4 @ 33-1/4" - both ends cut at 20 degrees off square, ends ARE parallel, long point to short point measurement
- 2 - 2x4 @ 32-3/4" - back supports
- 2 - 1x10 @ 22-1/2" - seat
- 3 - 1x10 @ 19-1/2" - back
It may be easier to pre-finish your boards before cutting.


Work on a flat level surface.
Instructions
Step 1
As shown in the video, cut the chair stringers at a 90 degree angle at the foot of the stringer with a circular saw.
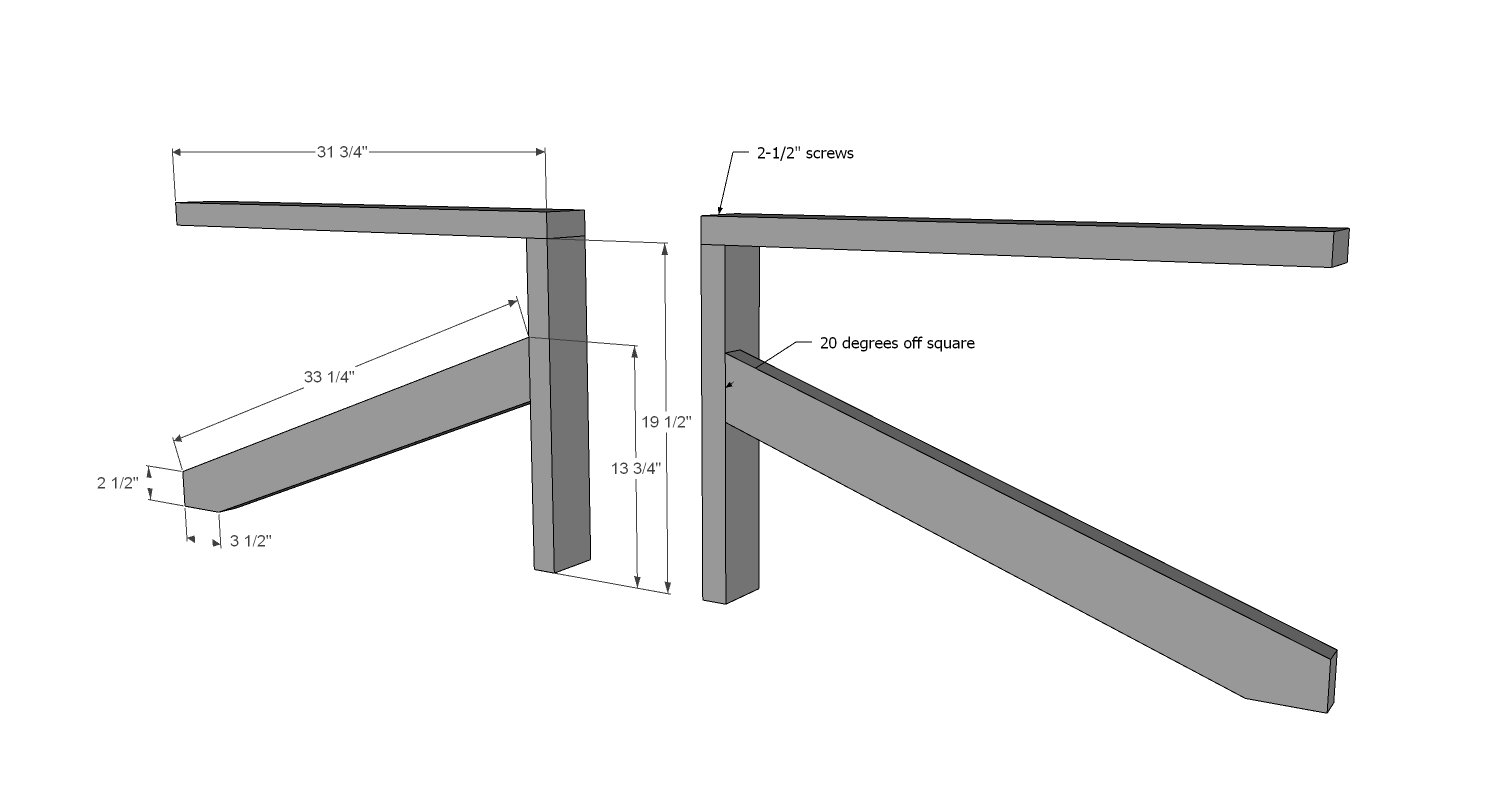
Build the arms with the 2-1/2" long screws and exterior wood glue.
Make sure the two arms are built the same but in mirror as shown in the diagram.
Step 2
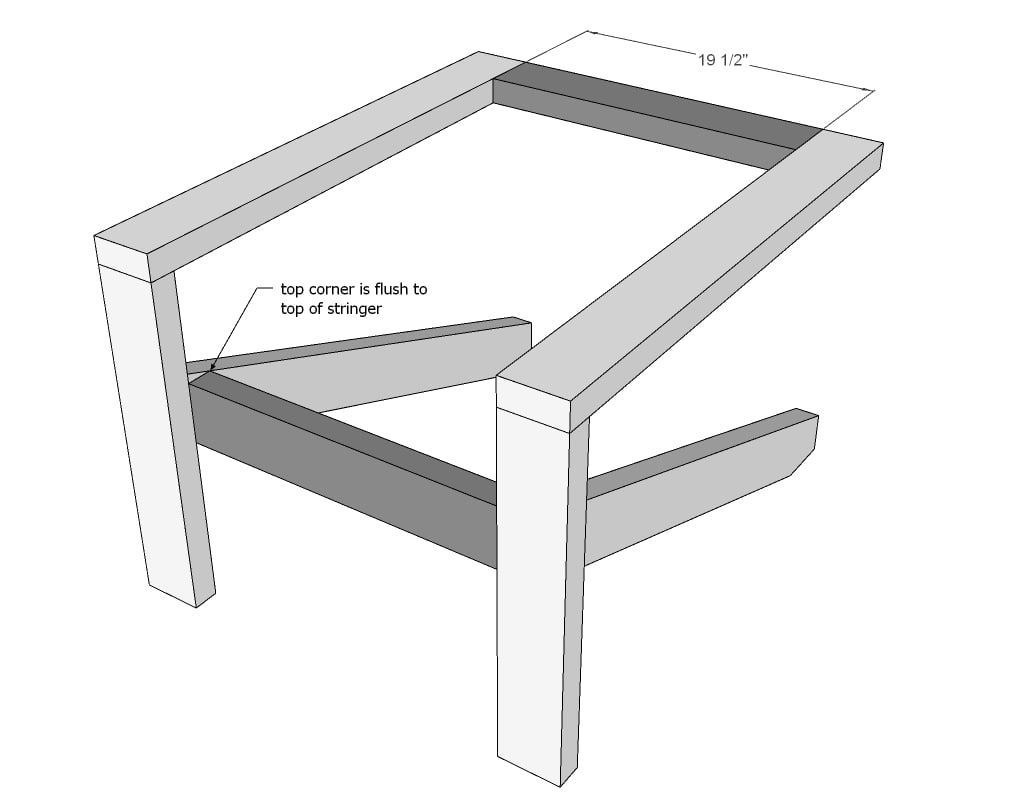
Drill two 1-1/2" pocket holes on both ends of two of the 19-1/2" long 2x4s. Attach with 2-1/2" screws to the Adirondack chair frame.
Step 3
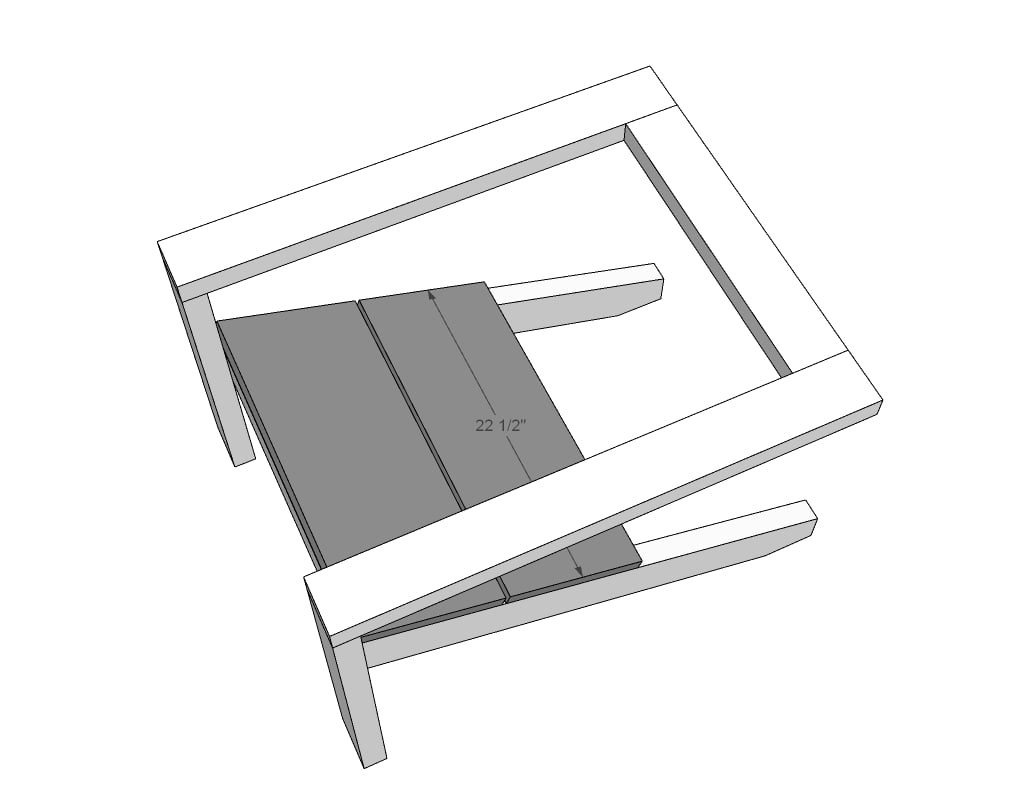
Lay the seat boards on the 2x4 frame and attach with three 1-1/2" long screws per end of each 1x10 to the seat frame. Leave about 1/4" gap in between the seat frame for water drainage.
Step 4
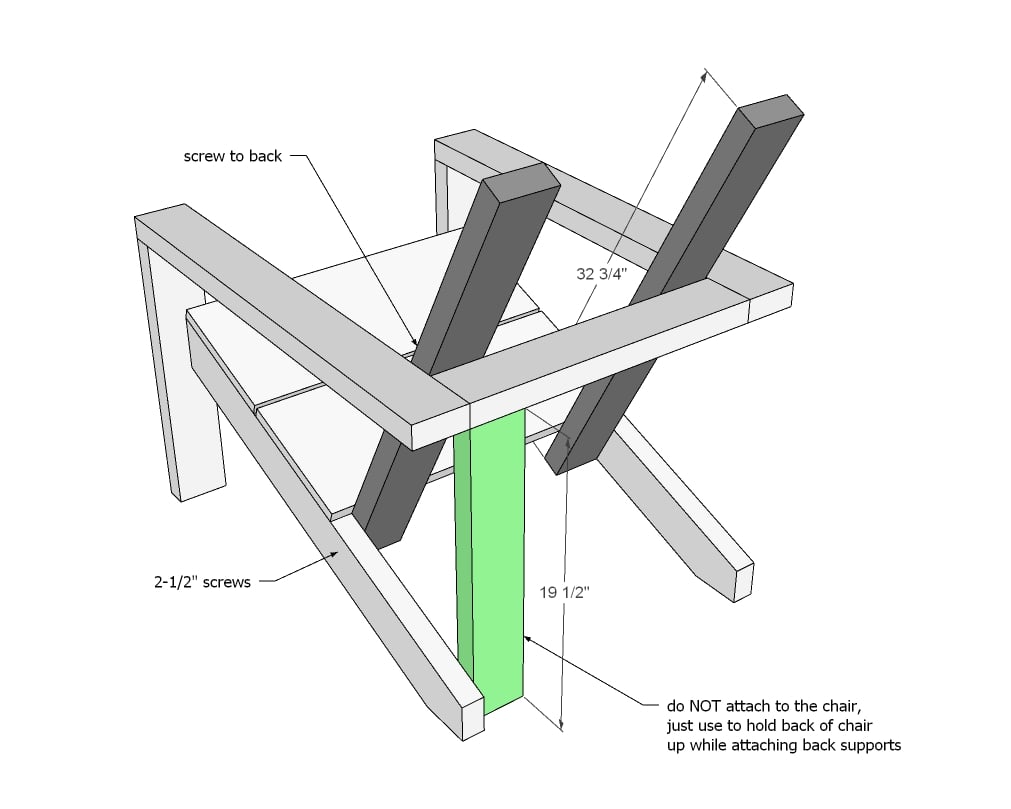
Place the remaining 2x4 @ 19-1/2" long under the back of the chair as shown in the diagram.
Place one seat support in the chair and hold flush to the bottom of the stringer.
Attach with screws to the stringer and to the back support.
Move to the other side of the chair and repeat with the second back support.
Remove the 2x4 @ 19-1/2" long.
Step 5
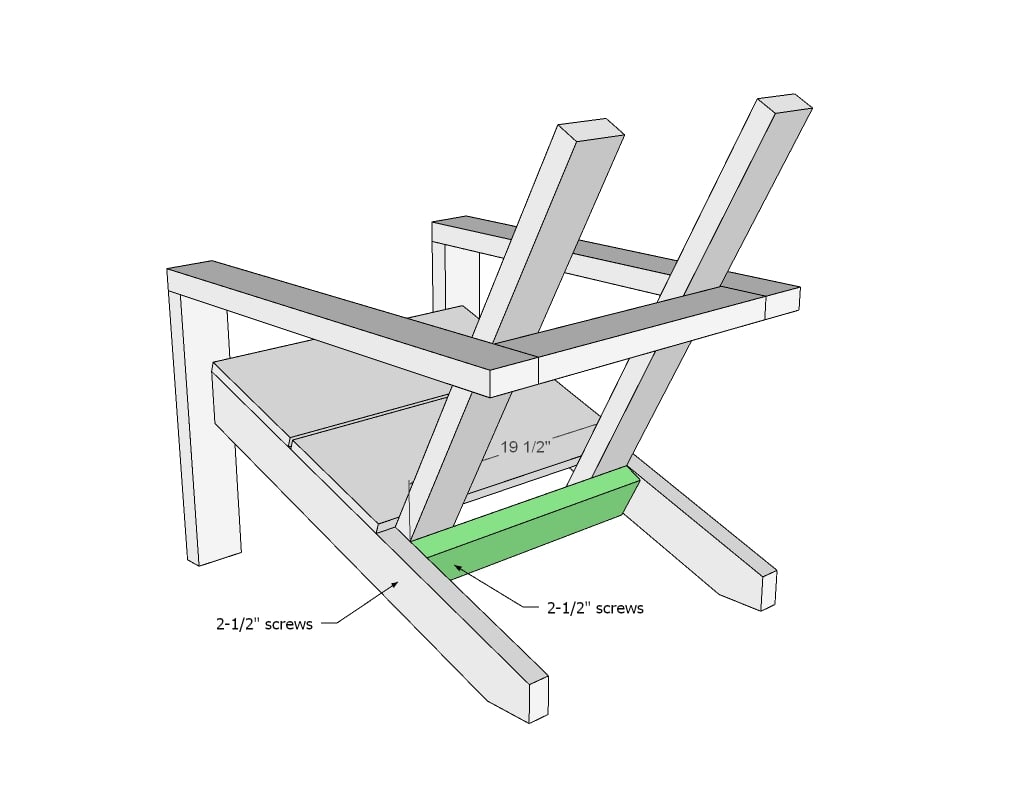
Attach the 2x4 @ 19-1/2" to the base of the chair with screws.
Step 6

Starting at the top and working downward, attach the seat back boards to the back of the chair. Make sure you leave a gap at the base of the back to allow for good water drainage. Evenly split the gaps for best visual presentation.


Comments
tp_clough
Sat, 07/04/2020 - 16:10
I used pressure treated pine…
I used pressure treated pine to build this chair , wasn’t to hard for me, a beginner . Did you use regular pine ? Seems to cost more then what you said . I couldn’t find 1x10s so used 1x4s. , going to try to build another but make the back a bit longer , would like something to rest my head on. Thx for sharing T.
trentonstanley
Mon, 07/13/2020 - 19:00
I built these using 1x6s for…
I built these using 1x6s for the seat and back because that's all the lumberyard had in cedar. The seat ends up being 1 inch shorter so the angle on the back is just a little shallower but they still work and look great. And because I used cedar mine cost a little more than double Ana's estimate, but it was worth it. They're beautiful and comfortable and way more solid than I expected. Thanks for a great plan, Ana!
rajasaab
Thu, 07/16/2020 - 07:56
Need a suggestion
So i built these and they are awesome. The only problem i have is that the arms are not staying stable as you sit on it and rest your arms and lean back the back support slides. Any thoughts on shoring up that back support piece?
zaremba111
Thu, 07/16/2020 - 14:45
Drive 2 3" Screws through…
Drive 2 3" Screws through the front side of each back support. Drive them parallel to and lined up in the middle of the armrests stright into the back support. It should add additional strength and prevent the sliding you are getting. I would suggest you use another board under the back support to make sure you are level. See step 4 again. You most likely missed the screw to the back step.
Adiban
Sun, 07/19/2020 - 16:58
Awesome
Wonderful plan. Made 4 chairs this weekend.
gajakannan
Tue, 09/22/2020 - 21:40
Help
Hello,
I'm new to wood working. I can't seem to follow the cut ana made using circular saw and speed square. Can you please explain?
Thanks
Chris_PerthWA
Tue, 07/21/2020 - 05:52
Love it
This chair is perfect. Check out mine at https://www.ana-white.com/community-projects/thanks-ana-adirondack-chai…
gajakannan
Wed, 09/23/2020 - 14:43
Hello, I'm new to wood…
Hello,
I'm new to wood working. I can't seem to follow the cut ana made using circular saw and speed square. Can you please explain?
Thanks
BPJacobs
Mon, 07/27/2020 - 06:30
Very comfortable
These chairs are awesome! I have built 6 so far with 2 as gifts. I modified them slightly because I did not have a pocket hole jig so I added another 2x4 to attach those pieces. The plans were very good and the chairs were simple to build. Very Happy!
brendacloer
Fri, 08/14/2020 - 05:45
Modified Plan
Is there a plan for vertical slats on the back instead of horizontal?
1john3
Mon, 08/31/2020 - 08:41
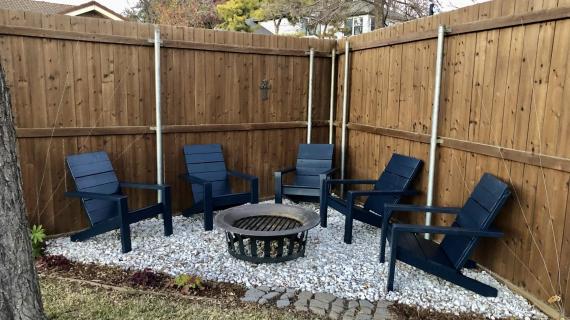
Your helpers made that video…
Your helpers made that video!! Oh yeah, awesome chair. I need to add some seating spaces for my new fire pit. These will work. Thanks for sharing.
gajakannan
Sun, 09/20/2020 - 19:03
The seat and back is 1x10…
The seat and back is 1x10 lumber? i cant seem to find 1x10 in any of the big box store in my area... is there a modified plan for 1x6 or 1x8?
gajakannan
Sun, 09/20/2020 - 19:10
clarification, since this is…
clarification, since this is gonna be outdoor i am looking for a pressure treated outdoor lumber not a regular pine wood, unless someone tells me i can use the regular pinewood and put oil based coat?
davidcschneider
Sun, 11/15/2020 - 18:34
Advice on changing the width size of the main leg support
Hi Ana,
I love this website. I feel like there is nothing I can't make.
I just built this chair. Really easy and I want to make more. But I wanted to change the main support legs to a 2X6 and I was wondering if I had to make any adjustments to the 20 degree cuts that need to be made. My gut says no but I thought I would ask just in case.
I am going to fire them so that the groves in the wood show. I sand the groves smooth and then stain it. It comes out really cool. I don't think I can post a photo but I you look at my photo, I posted some shelving I made.
Anyway, thanks for this awesome website and if You have that information thanks in advance.
David
GooseUK
Sun, 02/28/2021 - 10:38
Amazing post.
Thank you so much for sharing this amazing project, video and instructions.
Me and my wife did a double sized one.
Hagrid
Sat, 06/12/2021 - 17:32
Great idea. I’m going to try…
Great idea. I’m going to try that as well.
Pargie
Thu, 03/04/2021 - 12:35
Folding Options
Love the design, only thing that would make this look better is if it was foldable for winter storage in the garage. Anyone have any ideas on small tweaks or hardware (door hinges?) to make this compact?
Greg T.
Tue, 03/23/2021 - 05:48
Scaled Down Plans For Toddler
Great project. I wanted to make two for my 3 and 4 year old kids so i halved all the measurements and the chair came out tiny. Any suggestions on adjusting plans to smaller scale would be great. thanks.
sdmspringer
Mon, 04/26/2021 - 13:34
In love!!!
This was my second ever building project, and I so much enjoyed the process and the end product! The chairs are also sooooo comfortable!
karenpine
Thu, 05/13/2021 - 08:28
Wood Recommendations
What type of wood, would you recommend for this project? Pine, Whitewood, or cedar?
npselvan84
Fri, 05/28/2021 - 23:38
Love the plan
I like the plan and I was looking for such a plan for a long time. But one quick question, I see the lumber price 1x10 10 feet as $28. Where do you get the lumber cheaper than Lowes or HomeDepot?
Hagrid
Sat, 06/12/2021 - 17:13
Awesomeness
This was fun. Took 1hr 30 minutes to build using only 2x4’s. It’s heavy but that’s ok with me. I may add wheels to either front or back legs for mobility. I tweaked it for another hour and 30 minutes from feedback from my wife and daughter. I ended up increasing the recline but then cut 3” off front legs ( and bottom of back support ) to get it where we all liked it. Now we just need to decide on paint, stain, etc. thanks for sharing this plan. Keep Crushing!
jendon
Tue, 07/06/2021 - 08:31
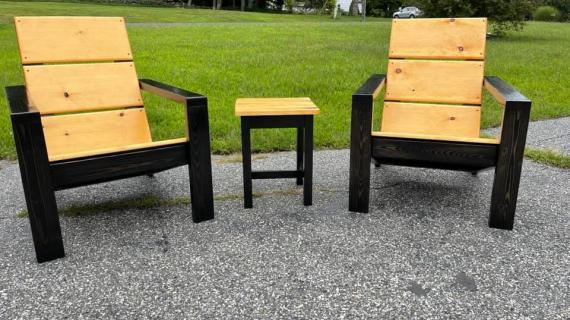
Amazing chairs!
I built two of them and they are so comfortable. I am now going to add the 2x4 outdoor side table to go between them or as a foot rest. My parents even enjoyed them and you can get out of them very easily do to the strength. I did study the video and plans for those angle cuts, just to make sure I was doing them correctly. Thank you, Ana for those helpful tools for is beginners.
Carrie8020
Mon, 07/19/2021 - 05:21
Modifying Adirondack chair plans.
The back supports are 32-3/4" - back supports and the seat is 22-1/2" - seat, how can I modify these to fit my son Inlaw who is 6’4 and 280. He love the design I actually made a set following the plans, but the chair was not wide enough for him. Suggestions
Carrie8020@hotmail.com
WesleyY
Tue, 10/19/2021 - 07:27
Recommendation
Just built these last weekend. I'd recommend that when attaching the 2 boards to the seat in step 3, take the 19.5" board and put it between the two back legs to maintain the distance. This will ensure that the spacing is correct when attaching that board in step 5.
michael.shima
Thu, 04/07/2022 - 08:27
Nice plans. I was looking…
Nice plans. I was looking for something to do with treated lumber I had from tearing out an old deck. This was perfect. I used the decking boards instead of 1x10s for the seat and the back. For the 2x4s I had several 2x10s that I ripped in half then down to 4". It worked out great. For finish, I used fire. Fire is good! Then several coats of clear.