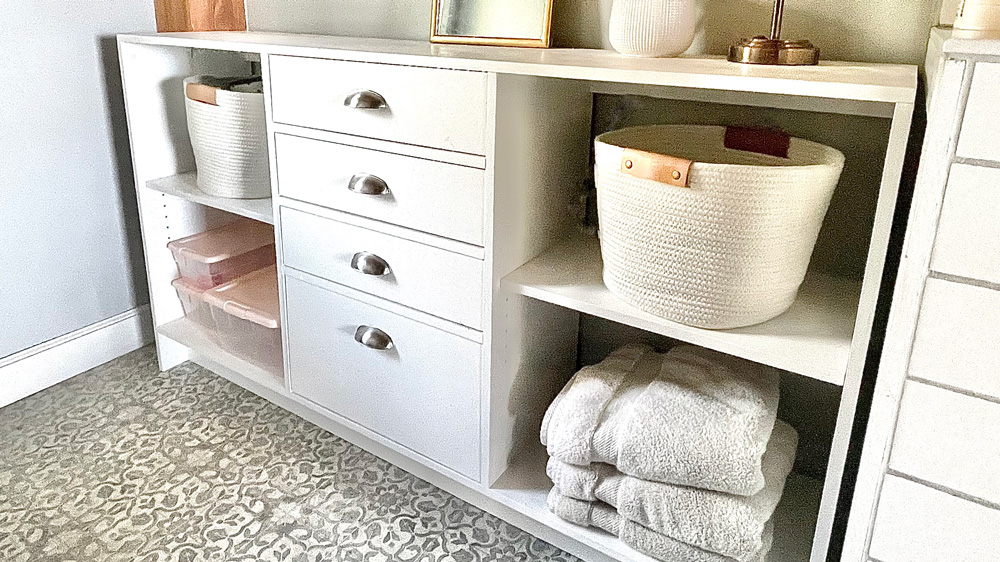
Free plans to build your own simple sideboard from Ana-White.com Features adjustable shelves and four drawers, detailed plans with diagrams, shopping and cut list.
Pin for Later!
Preparation
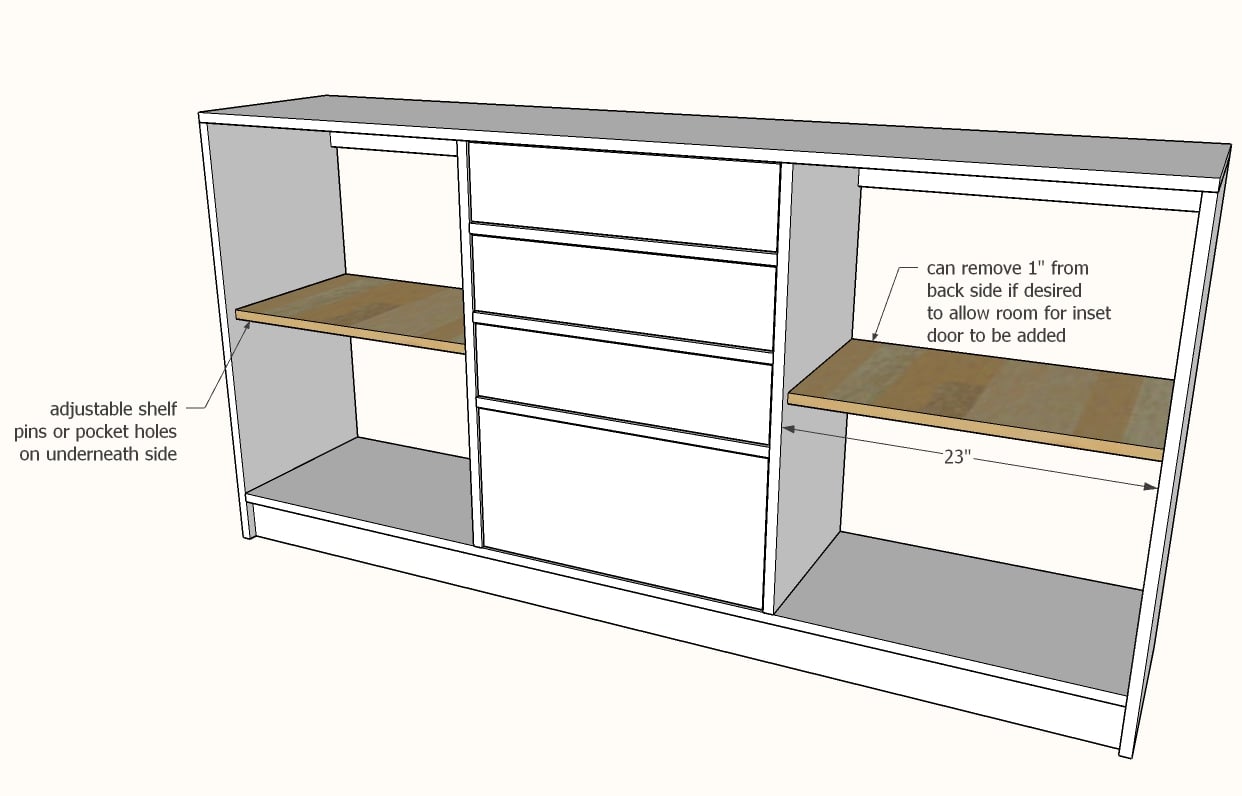
- 2 Sheets of 3/4" thick plywood and edge banding OR Shelf Help Carcass Kit
- 1 sheet of 1/4" plywood for back and drawer bottoms
- 5 - 1x4 @ 8 feet long
- 1 - 1x2 @ 6 feet long
- 1 - 1x8 @ 6 feet long
- 1 - 1x6 @ 6 feet long
- 1 - 1x12 @ 2 feet long
- 4 sets of 14" full extension drawer slides (affiliate link to Amazon)
- About 100 - 1-1/4" Pocket Hole Screws
- 1-1/4" and 3/4" brad nails
- wood glue
- 4 knobs or pulls
- primer and paint or desired wood finishing supplies
Shelf Help Carcass Kit or 3/4" plywood panels, cut into pieces as noted below, front edge finished with edge banding
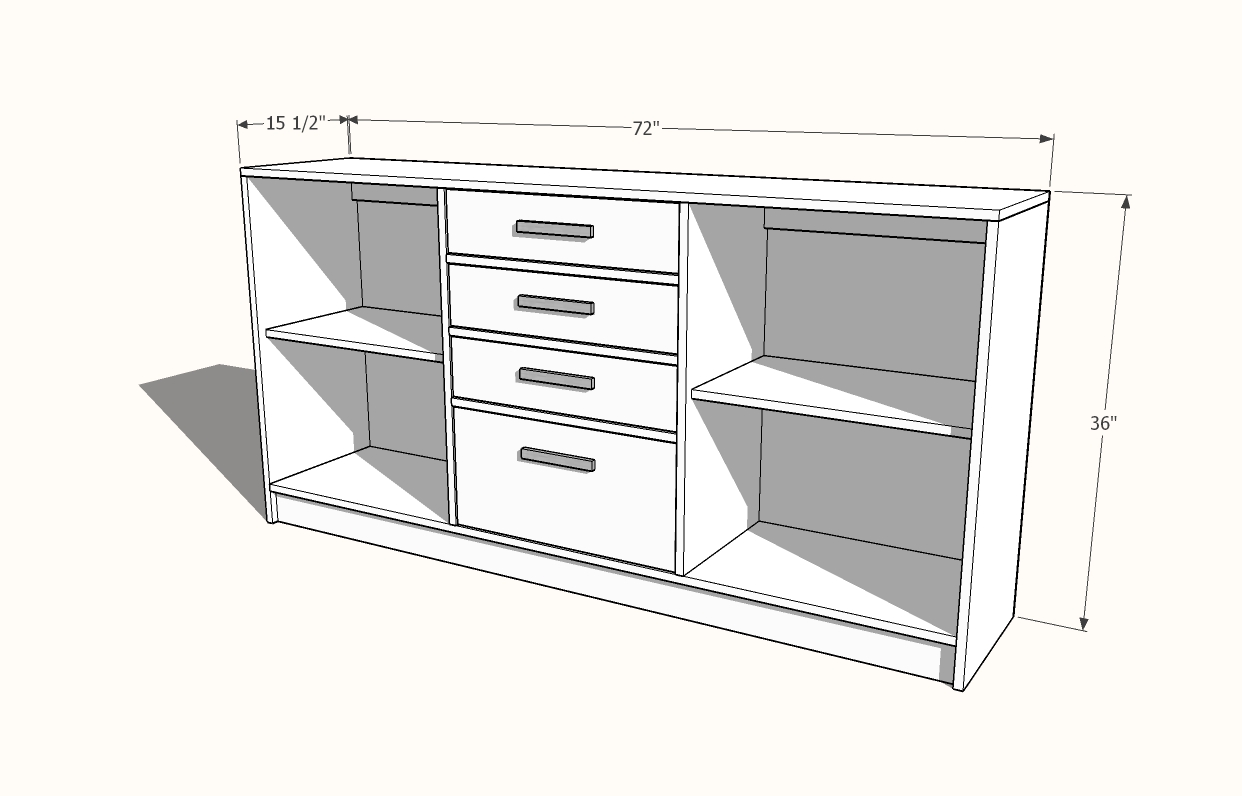
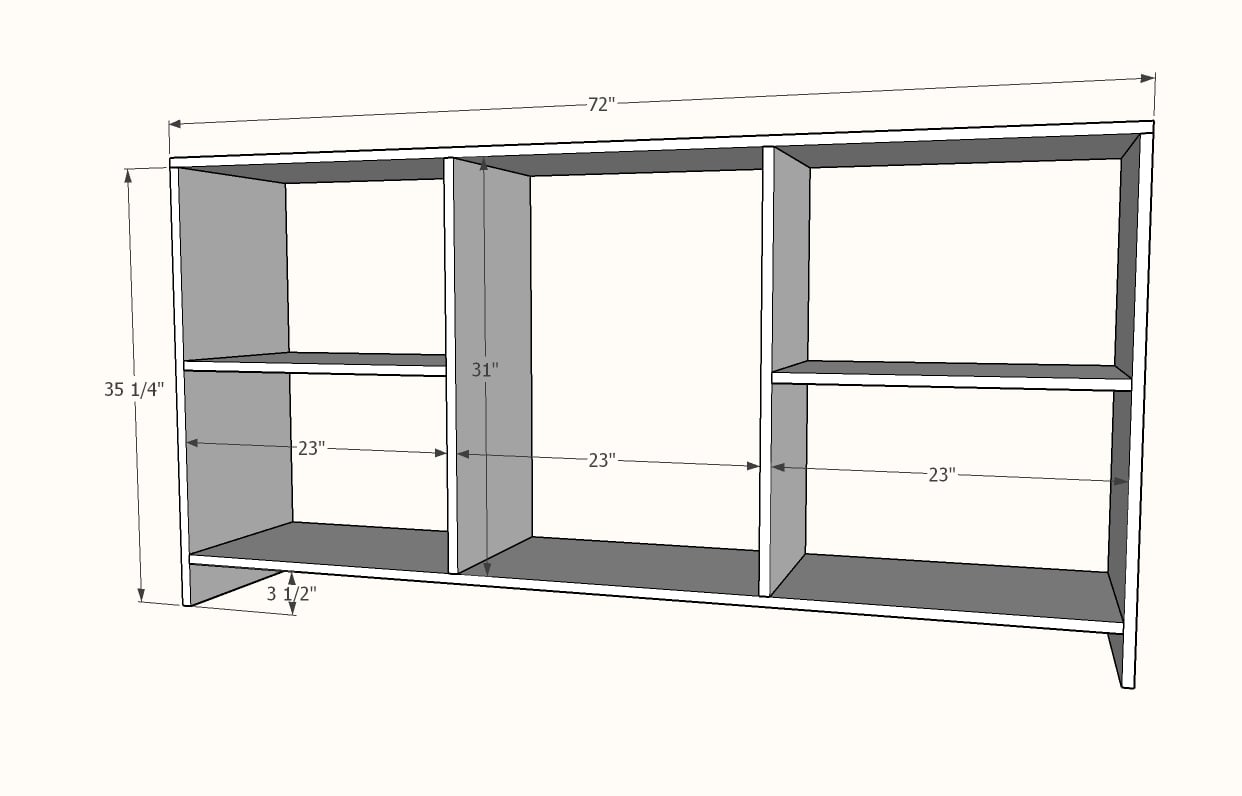
- 1 - 3/4" plywood @ 15-1/4" x 72"
- 2 - 3/4" plywood @ 15-1/4" x 35-1/4"
- 1 - 3/4" plywood @ 15-1/4" x 70-1/2"
- 2 - 3/4" plywood @ 15-1/4" x 31"
Carcass Trim
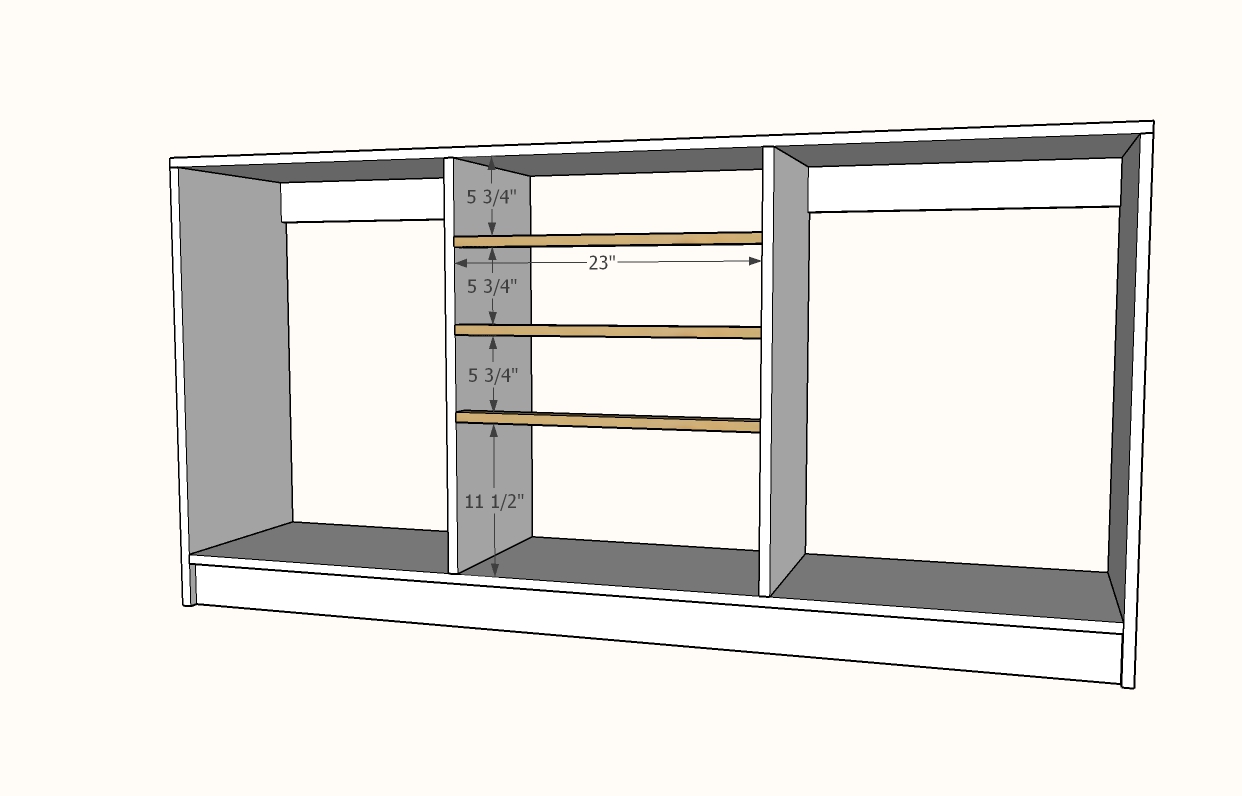
- 2 - 1x4 @ 23" (bay supports, upper)
- 2 - 1x4 @ 70-1/2" (bay supports, lower)
- 3 - 1x2 @ 23" (drawer seperators)
- 1 - 1/4" plywood @ 34" x 72" (cut 34" instead of 36" so you can get the drawer bottoms out of the scrap wood)
Drawers
- 6 - 1x4 @ 14" (drawer sides)
- 2 - 1x8 @ 14" (drawer sides)
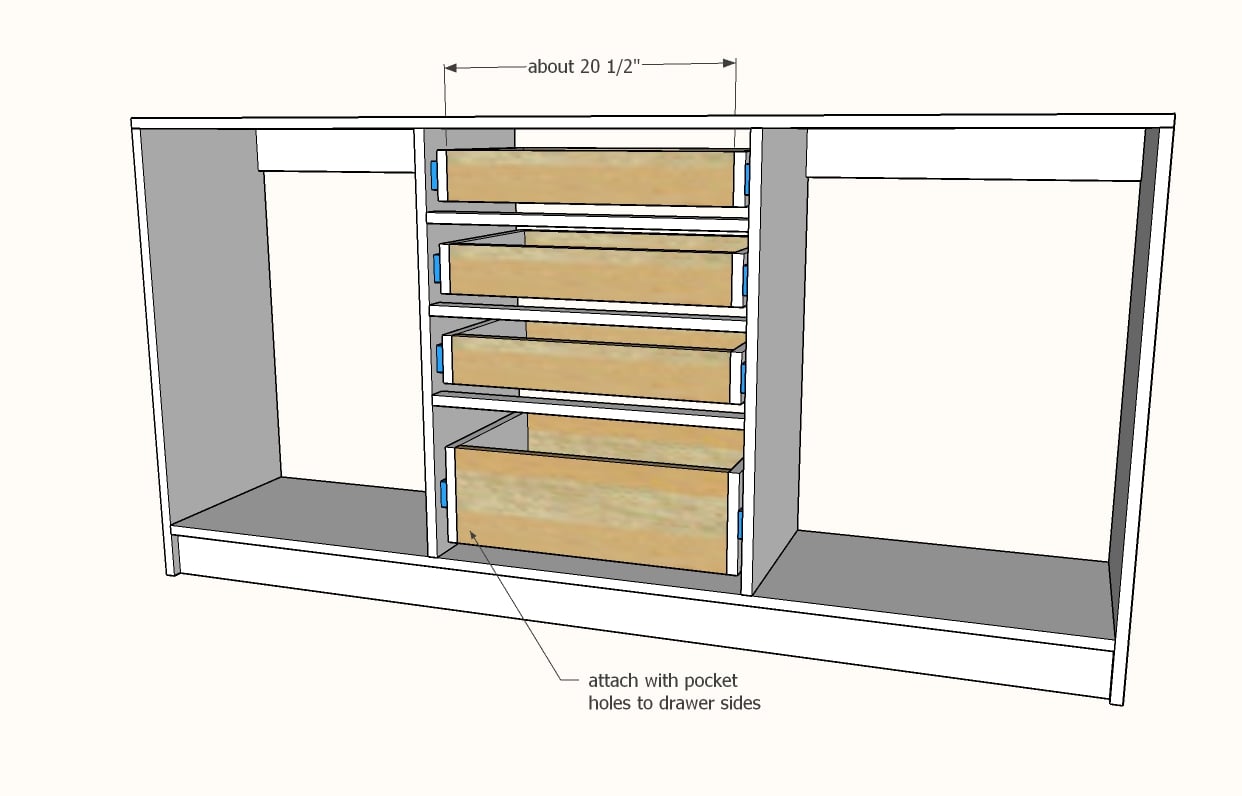
- 6 - 1x4 @ about 20-1/2" - measure and cut to fit (drawer front and back)
- 2 - 1x8 @ about 20-1/2" - measure and cut to fit (drawer front and back)
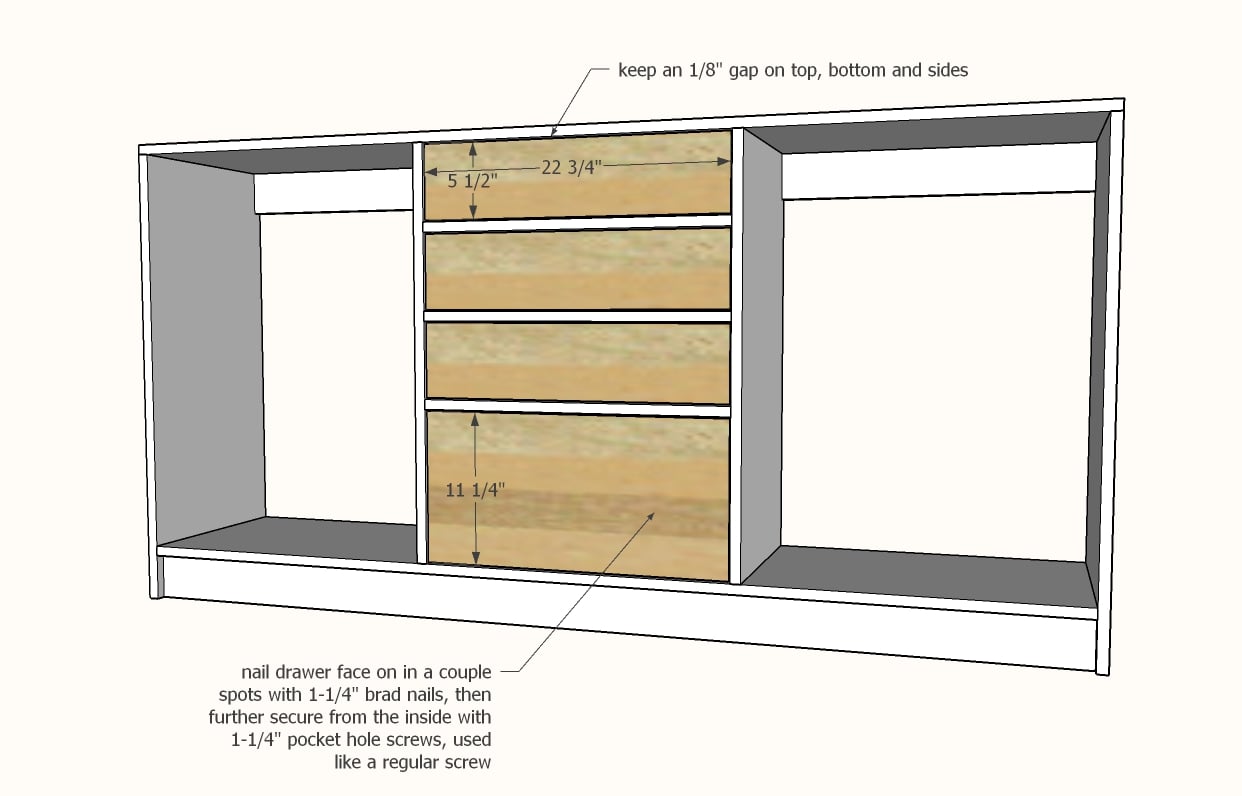
- 3 - 1x6 @ 22-3/4" - (drawer faces)
- 1 - 1x12 @ 22-3/4" (drawer face)
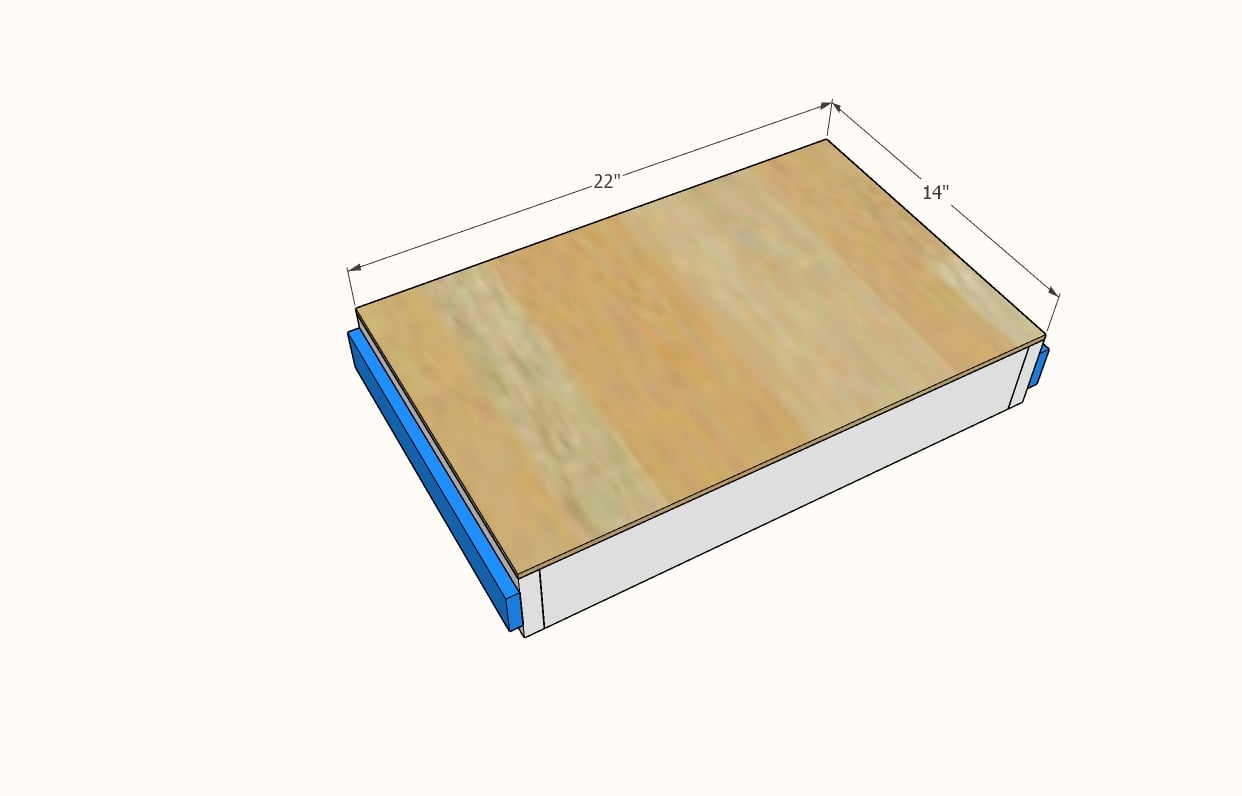
- 4 - 1/4" plywood @ 14" x 22" (drawer bottoms) - cut the back for the project first, and then cut the drawer bottoms from the leftover plywood
Instructions
Step 1
Step 2
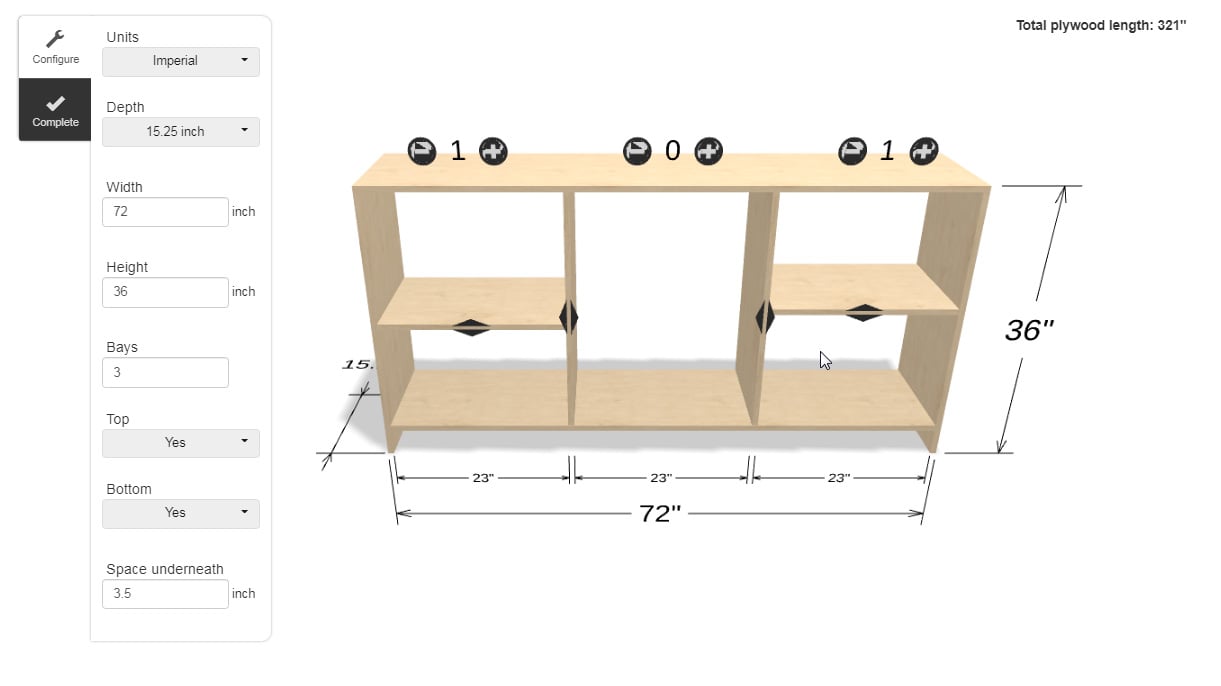
Add bay supports along the top, and at the front and back of the bottom, with pocket holes hidden on the back side. Use two 3/4" pocket holes on each end, and then pocket holes facing upward to further secure.
For the top bay supports, I found they made the space too small for the 14" drawer slides, so did not put a bay support in the center bay. If you want drawers all across the top, use 12" drawer slides, and keep the bay supports all across the top.
Step 4
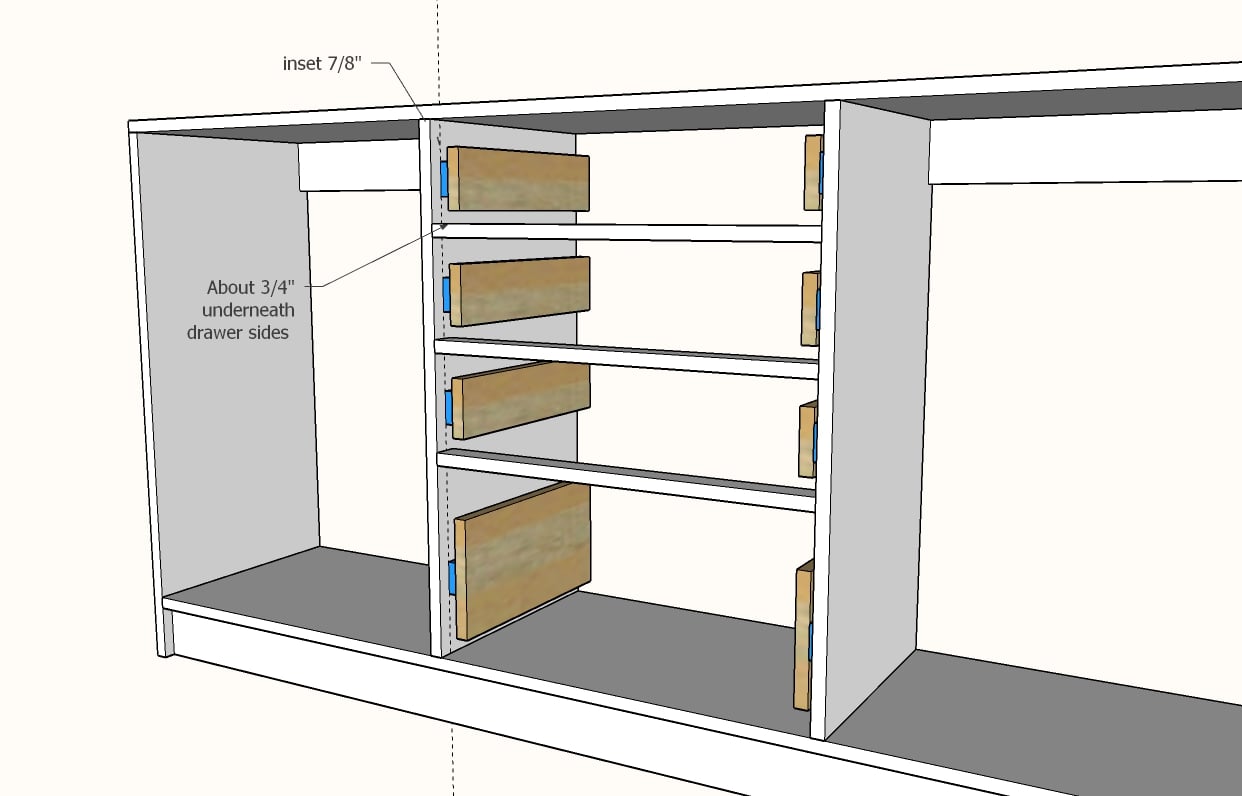
Install the drawer members of the drawer slides on the 14" drawer side pieces, so the drawer slide is centered of the drawer side.
Position the drawer side in the opening and mark approximately where the center of the drawer slide should be mounted inside the cabinet. Also mark 7/8" in from the front.
Install the cabinet member of the drawer slide inside the cabinet.
Step 5
Step 6
Step 7
Cut the back piece for the cabinet. If cutting at 34" to fit all the pieces on a single sheet, hold the back up from the floor. Attach with glue and 3/4" brad nails.
TIP: Before attaching the back, mark with a pencil on the outside sides of the cabinet the location of the dividers. Then you can pencil between your marks on the back when it is in place to know where to nail to.







Comments
rc5woods
Thu, 12/16/2021 - 10:43
Paint sprayer
What kind of paint sprayer do you use?