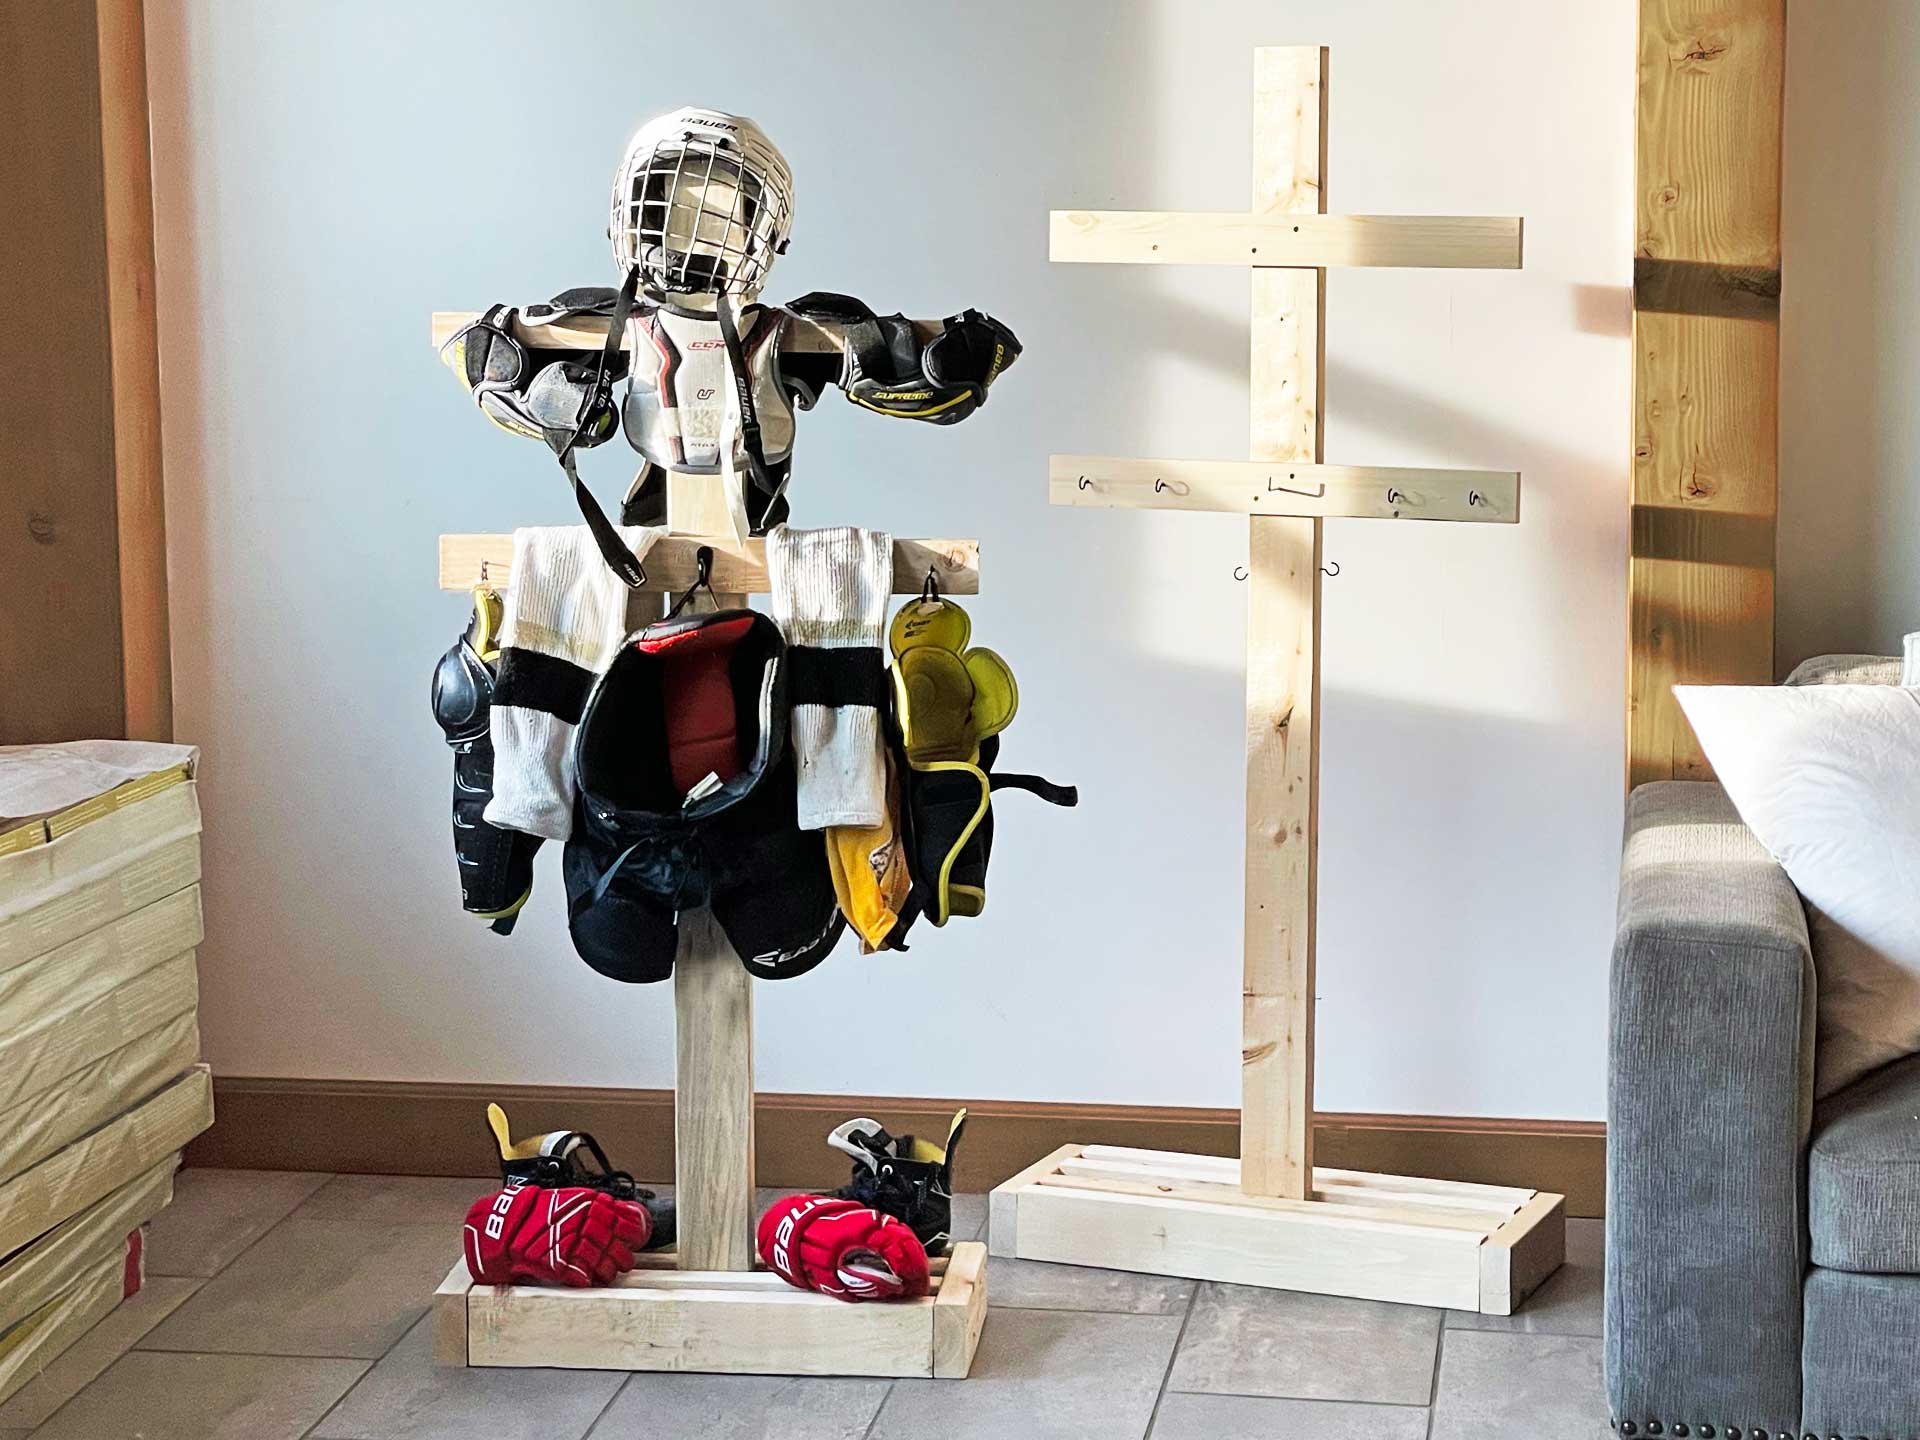
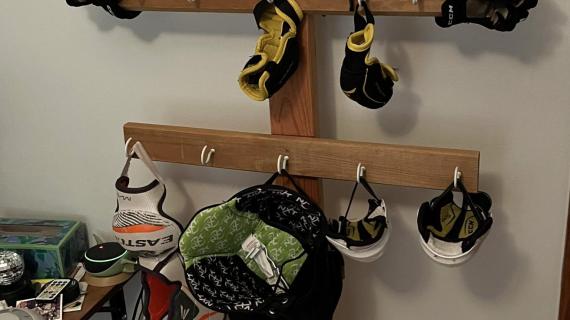
Build your own hockey drying rack with free plans! You'll just need two 2x4s and some leftover wood hockey sticks or 1x3s and some screws. This is a quick and easy project perfect for beginners.
Pin for Later!

Preparation
- 2 - 2x4 @ 8 feet long
- 1 - 1x3 @ 4 feet long or wood hockey sticks
- Cup hooks or other hooks or clips
- 20 - 3" self tapping star bit wood construction screws
- 4 - 2" self tapping star bit wood construction screws
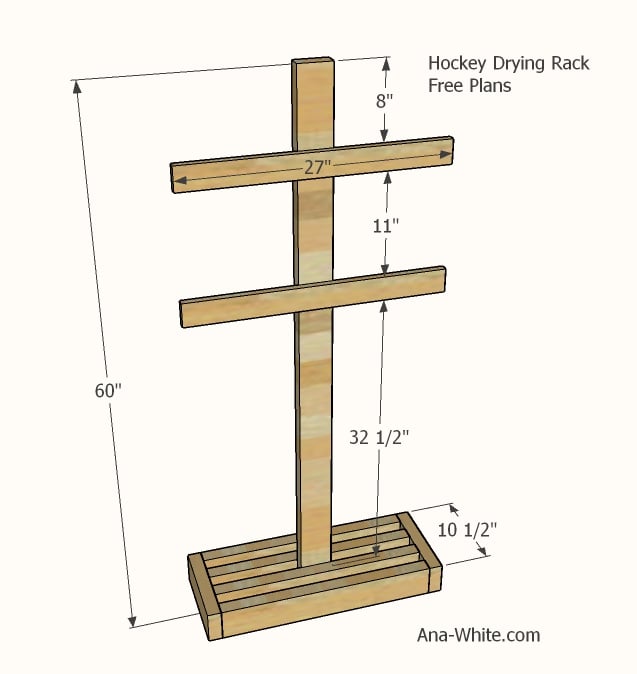
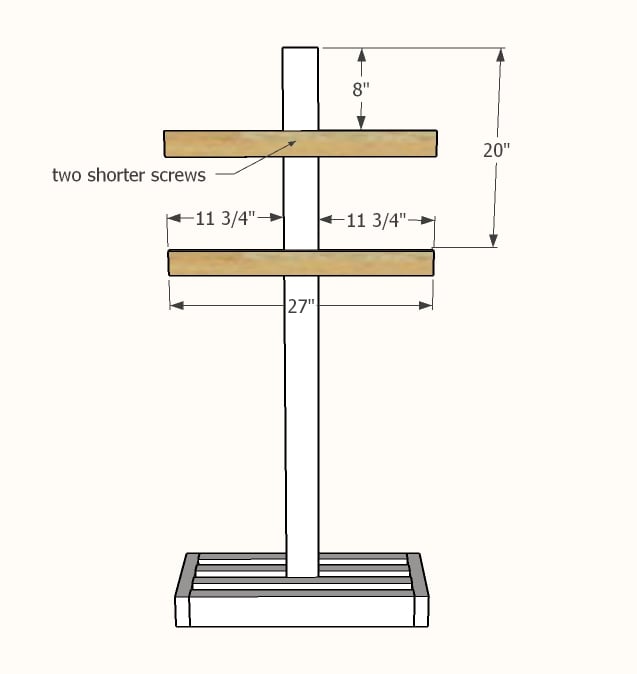
4 - 2x4 @ 24"
2 - 2x4 @ 10-1/2"
1 - 2x4 @ 60" (main post, should be cut to about the height of the user)
2 - 1x3 @ 27" or use hockey sticks here
Instructions
Step 1
Cut the main post to desired height.
The smaller youth size is about 56" - this gives room to grow into.
For my daughter, I cut the post to 60" - this gave her a little more room to hang jerseys on the back.
For a taller adult with longer gear, 66" is recommended.
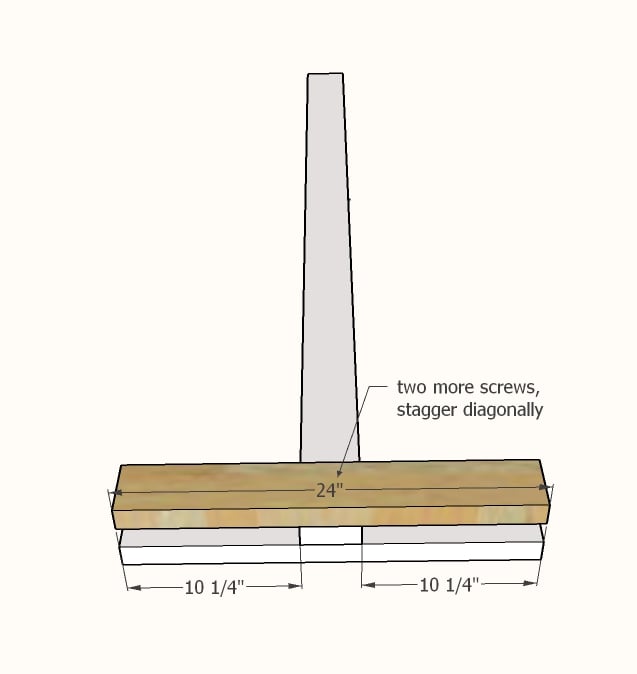
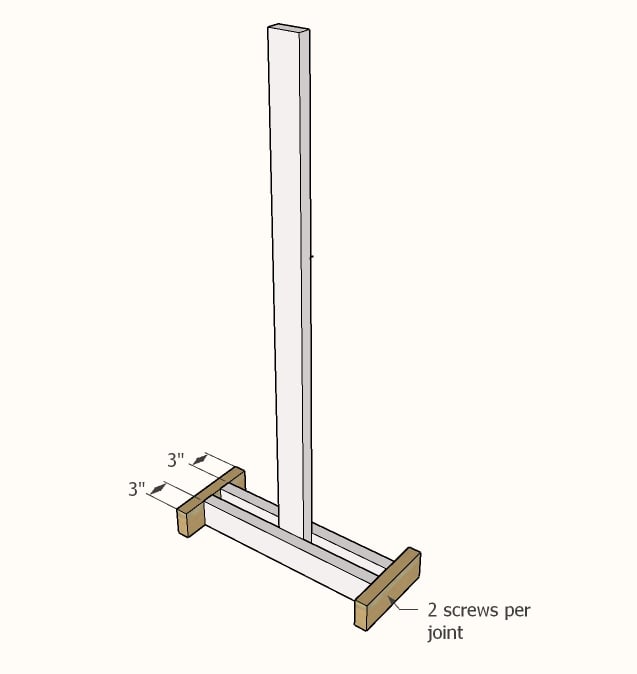
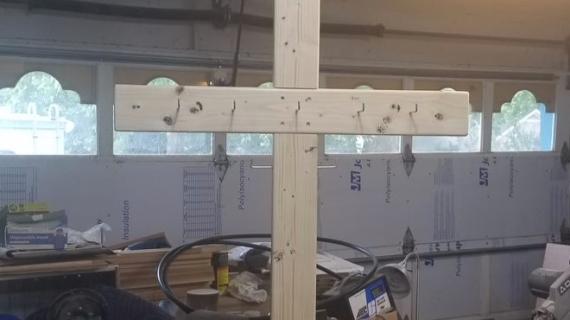
Carefully attach the main post to one of the 24" long 2x4s with two screws. Make sure the post the square (90 degrees) to the base, and is flush to the bottom.





Comments
Mary6G
Thu, 02/03/2022 - 10:28
Long past the time when my…
Long past the time when my kids fenced. This is brilliant. I like that it is not a fixed structure and can be moved from dorm room back home or abodes. Just the gift for my Christmas list for nephews and nieces. Maybe sports moms might want build a few as a fund raiser? Thanks for the post. 7th generation woodworker
cdewan
Thu, 02/03/2022 - 11:14
Also a great Byzantine cross!
Also a great Byzantine cross!