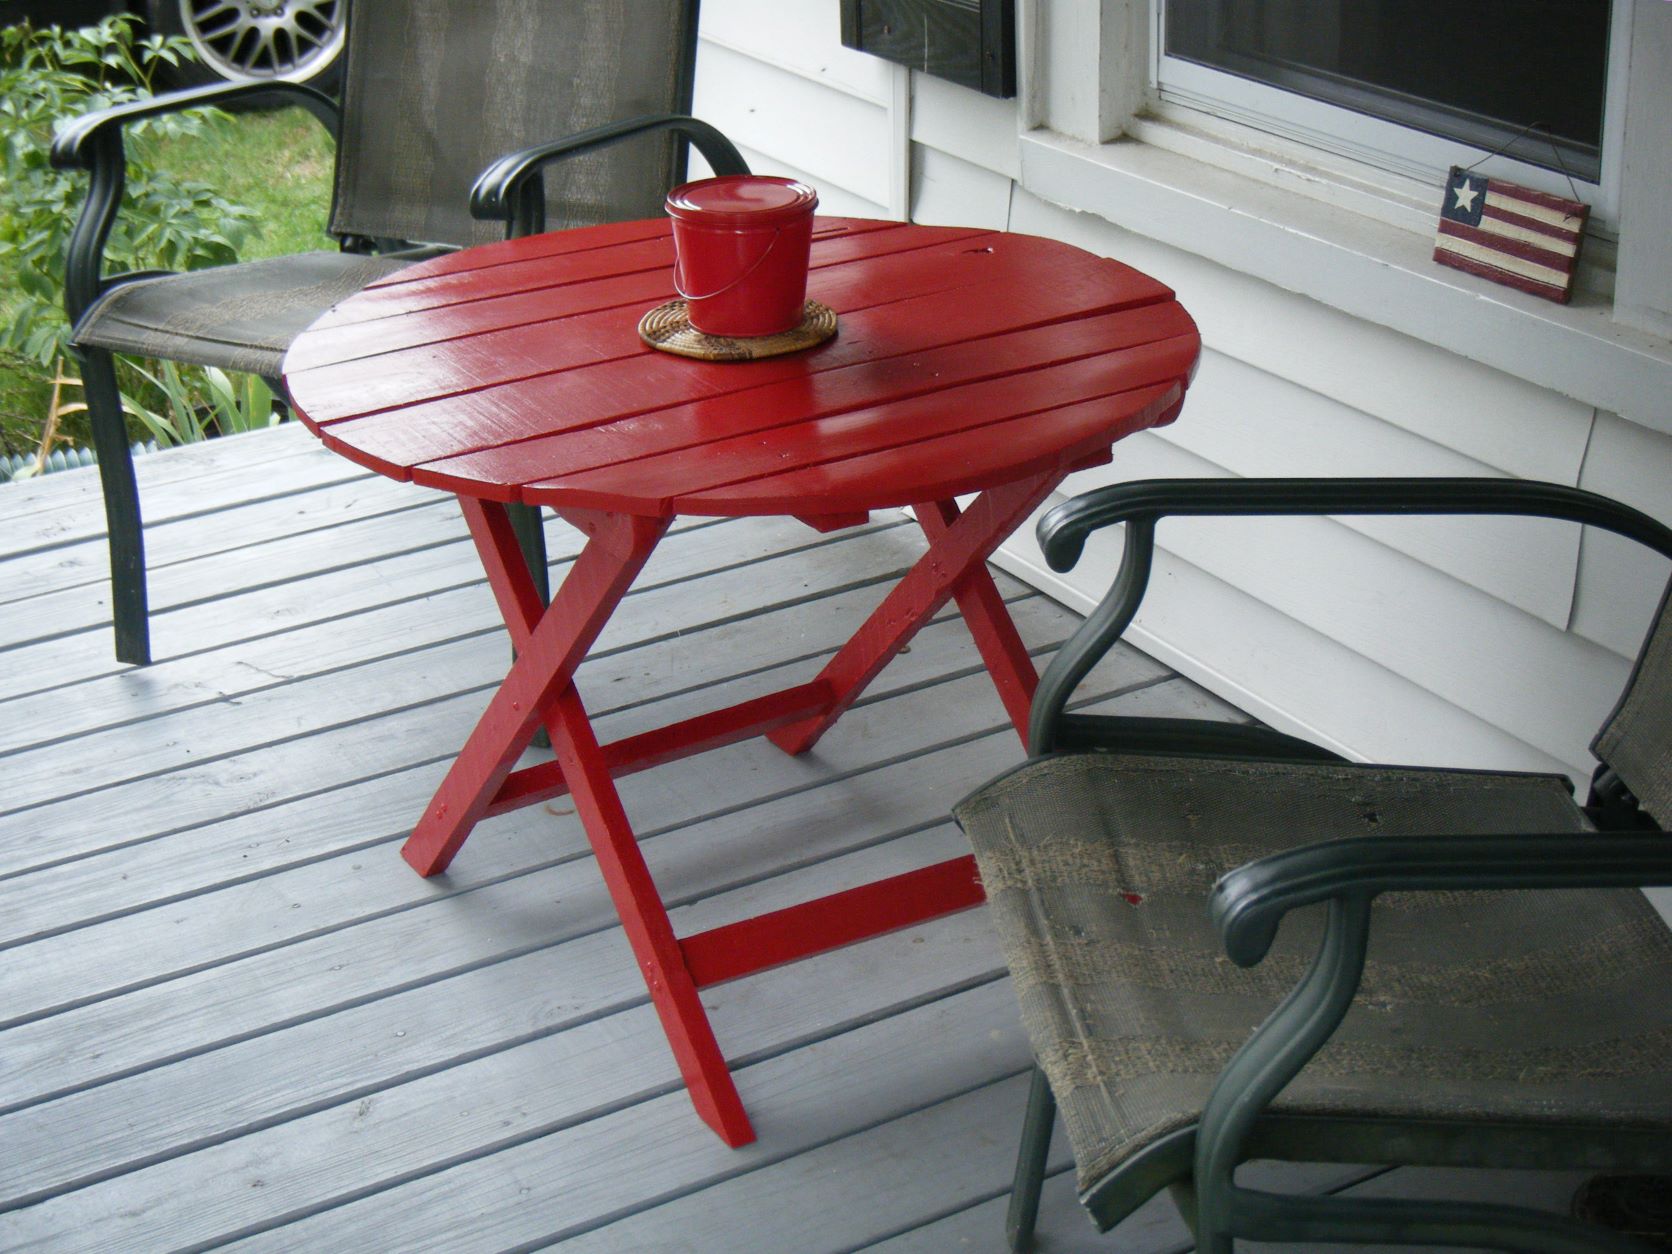
Free plans to build a lightweight, simple round Adirondack side table. Good tutorial with lots of diagrams, images, and reader photos from Ana-White.com
Pin For Later!

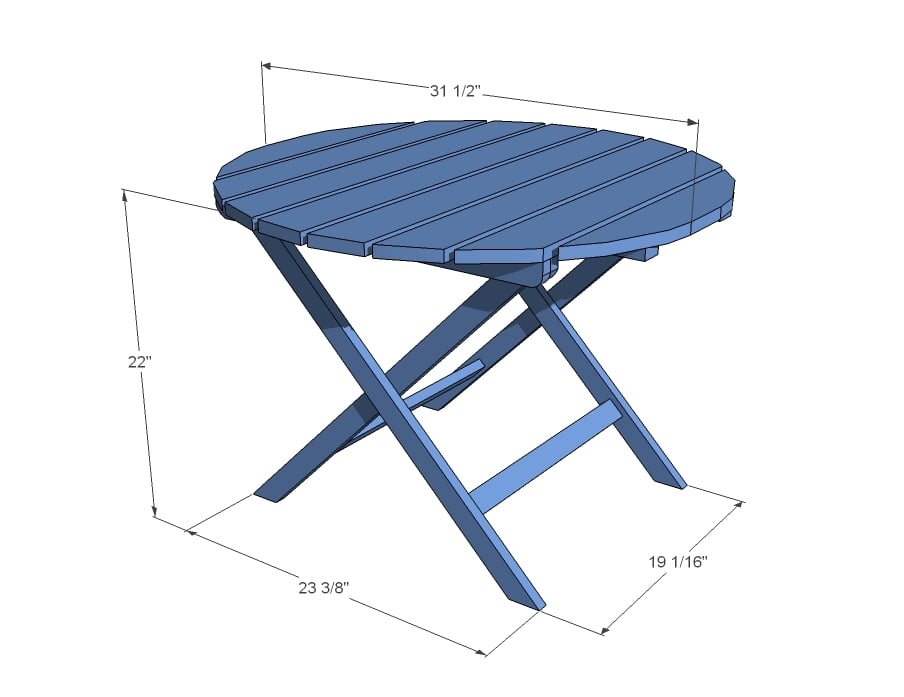
Preparation
- 2 - 1x4 Boards, 10 feet long (cedar or other weather resistant species recommended) - can also use pallets
- 3 - 1x2 Boards, 8 feet long (cedar or other weather resistant species recommended)
- Use 1-1/2" to 2" long self tapping exterior wood screws (star bit don't strip...)
- 2 - 1x4 @ 31 1/2"
- 2 - 1x4 @ 30 7/16"
- 2 - 1x4 @ 27 1/16"
- 2 - 1x4 @ 20"
- 2 - 1x2 @ 29 3/4"
- 2 - 1x2 @ 23 1/2"
- 2 - 1x2 @ 3 1/2"
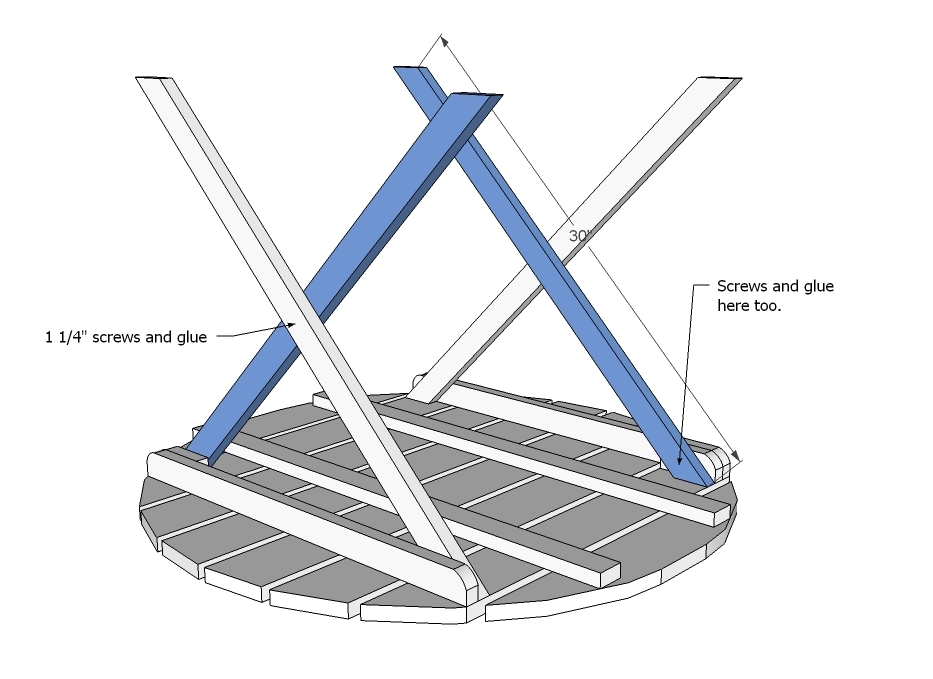
- 4 - 1x2 @ 30" (Both ends cut at 45 degrees off square, parallel ends)
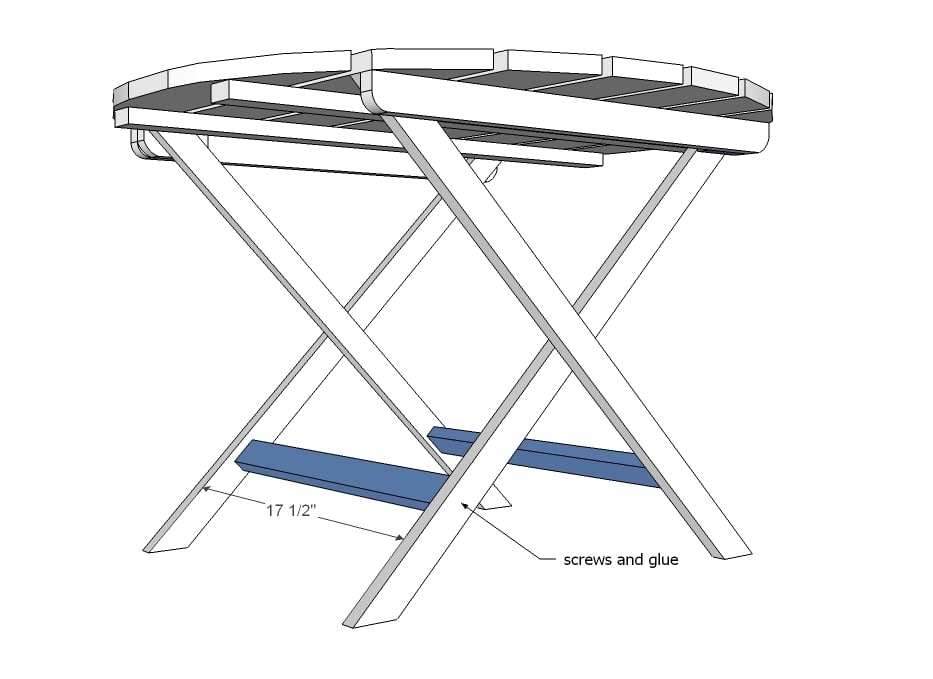
- 2 - 1x2 @ 17 1/2"
Please read through the entire plan and all comments before beginning this project. It is also advisable to review the Getting Started Section. Take all necessary precautions to build safely and smartly. Work on a clean level surface, free of imperfections or debris. Always use straight boards. Check for square after each step. Always predrill holes before attaching with screws. Use glue with finish nails for a stronger hold. Wipe excess glue off bare wood for stained projects, as dried glue will not take stain. Be safe, have fun, and ask for help if you need it. Good luck!
Instructions
Step 1
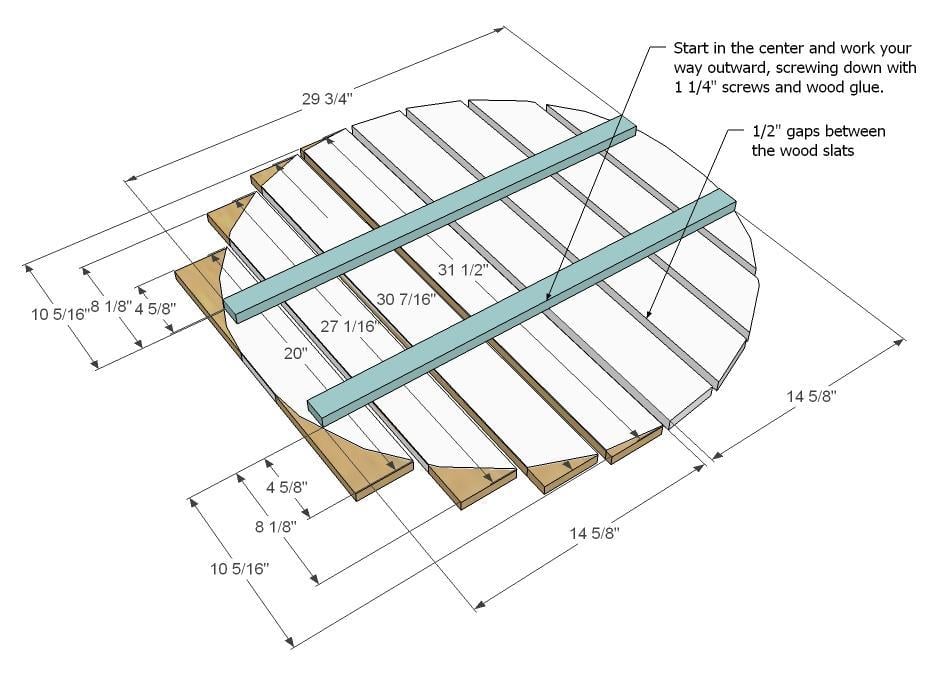
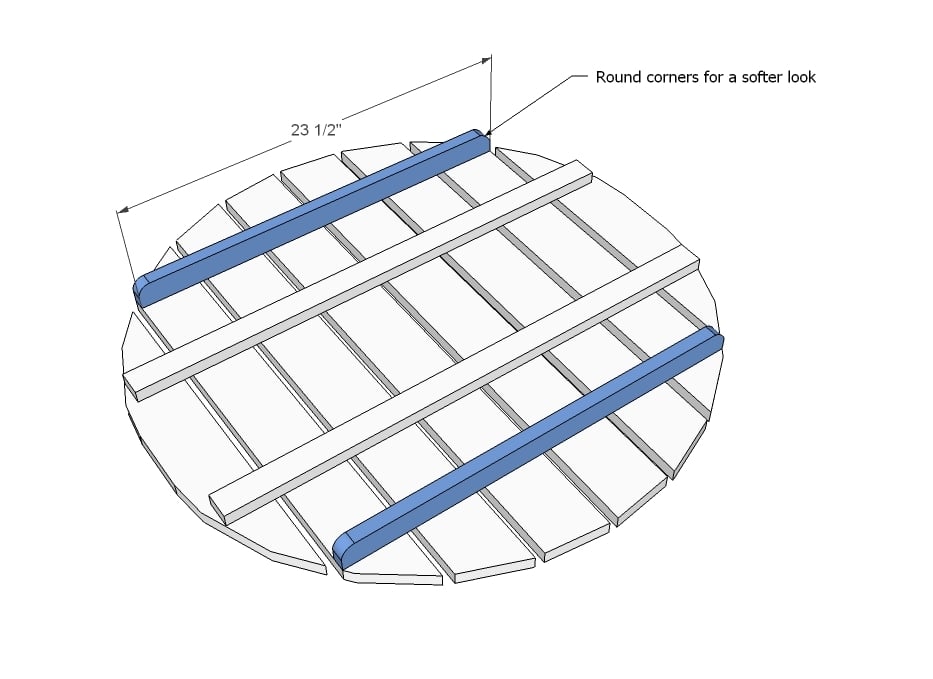
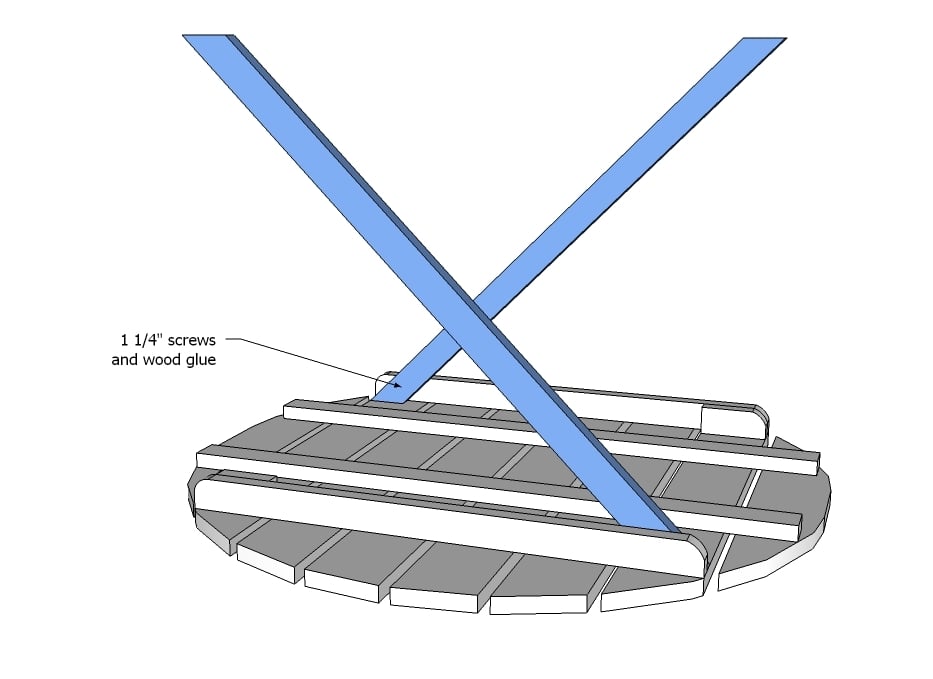
Start in the center and attach the tabletop supports to the underside of tabletop with 1 1/4" screws and glue. Use the diagram above to help you find the centers of the supports and tabletop boards. Then work you way outwards, leaving a 1/2" gap between tabletop boards. When all boards are screw to supports, use a string held in the center of the table and to a pencil to draw circle shape as shown above. Cut out circle shape with jigsaw. Sand edges until smooth and even.
Step 2
Step 3
Step 4
Step 5
It is always recommended to apply a test coat on a hidden area or scrap piece to ensure color evenness and adhesion. Use primer or wood conditioner as needed.



Comments
angie b (not verified)
Wed, 05/25/2011 - 04:08
Anna, WONDERFUL SITE!!!! i've
Anna, WONDERFUL SITE!!!!
i've just found you, I'm just finishing the outdoor bench, thank you so much. Any shot of a BBQ helper, something that can store all the tongs, etc, with a top to prepare, i was looking at the red cart. As soon as my hubby saw that i was interested in building, he went right out and got my the master kreg tool....and requested a BBQ cart.
thanks so much for your time, it is much appreciated,
angie
southern Ca
Guest (not verified)
Wed, 05/25/2011 - 12:35
adirondack side table
Thanks so much for sharing this. My husband made me adirondack chairs many years ago. I love them, but I have been bugging him to make a table to go with them. thanks to you, now maybe he will make one for me.
bluebird
Wed, 05/25/2011 - 15:29
You must have been reading my mind!
Thank You! I was looking for outdoor table plans last week!
Vivila (not verified)
Tue, 05/31/2011 - 20:10
Um is it just me or does the
Um is it just me or does the .pdf not work?? Love this, am think of making an Adirondack set for mum for xmas :) I think she would love sitting out in the garden on these. Love it!
Sharon L (not verified)
Fri, 06/24/2011 - 11:28
I just went out and got a
I just went out and got a couple pallets to use for this project. We just moved and I don't have half my tools, but I will make it work! This is going on the porch at the new house, photos will follow of course!
Sharon L (not verified)
Sun, 06/26/2011 - 09:46
I finished!
I still need to paint, but here is the table made entirely from pallet wood.
Sharon L (not verified)
Sun, 06/26/2011 - 10:01
http://thirdhousefromthecorne
http://thirdhousefromthecornerprojects.blogspot.com/2011/06/table-for-p…
dolson3287 (not verified)
Sun, 07/08/2012 - 19:16
Love the color blue of the
Love the color blue of the adirondeck side table. Can anyone tell me what shade blue it is?
jenlem20
Tue, 10/01/2013 - 07:03
PDF
The PDF file is not showing the steps. There is only 3 pages.