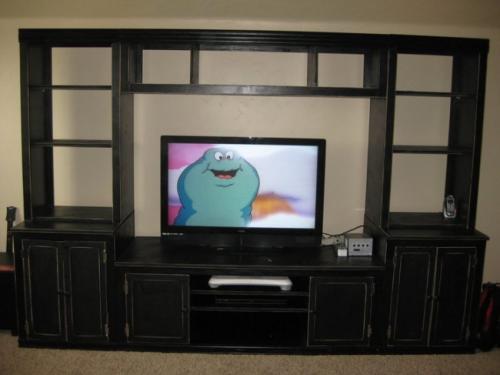
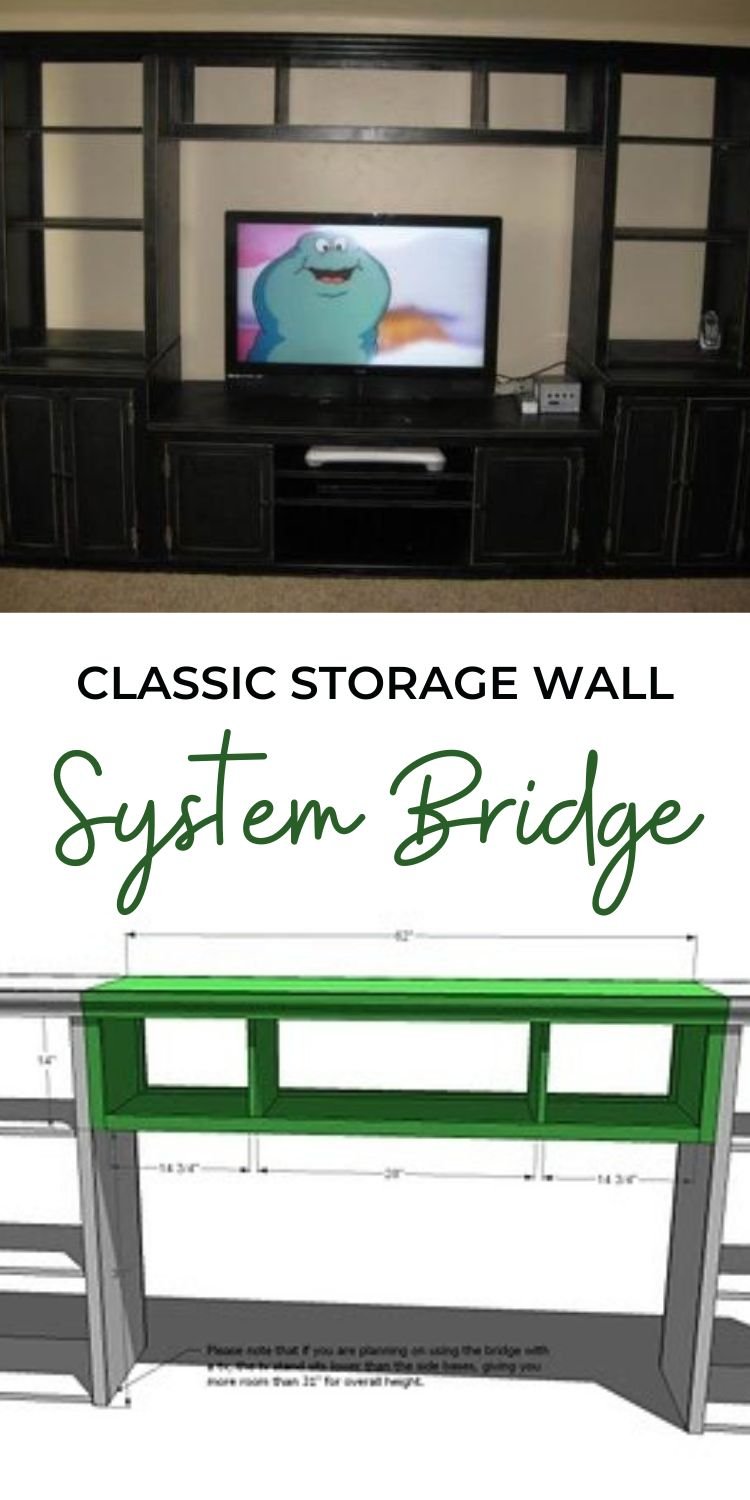
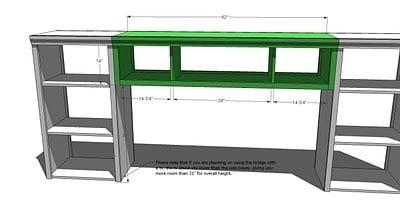
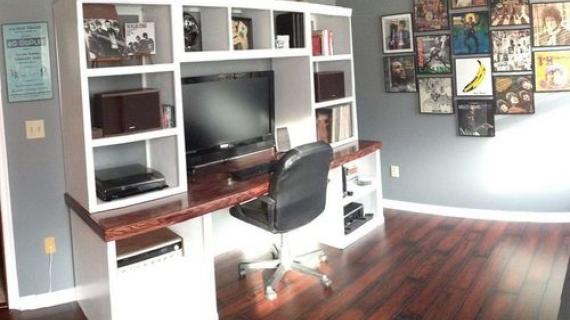
A bridge over your media station can give your storage a built in look and quality. But bridges can often be very expensive and not fit just right. With this simple plan that works with the rest of the Classic Media Storage Collection, you can build your own bridge, fit just perfect for your own tv, without spending a bundle.
Pin For Later!
Preparation
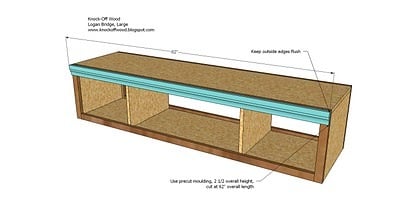
1/2 Sheet of 3/4″ MDF or Plywood, cut into 16 1/2″ Strips, 8′ long 3 – 1×2 1- 1×3 (you will only need 60″) at least 62″ of 2 1/2″ high moulding
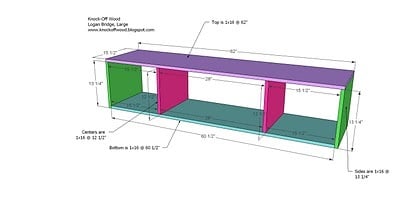
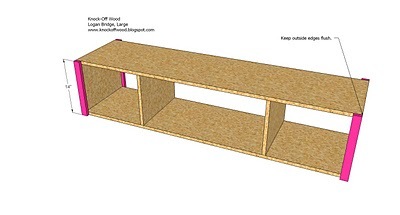
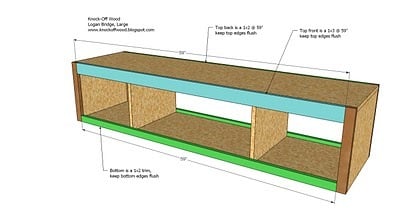
A) 2 – 1×16 @ 13 1/4” (Sides) B) 1- 1×16 @ 62” (Top) C) 1 – 1×16 @ 60 1/2″ (Bottom) D) 1 – 1×16 @ 12 1/2″ (Centers) E) 4 – 1×2 @ 14″ (Side Trim) E) 1 – 1×3 @ 59″ (Front Top Trim) F) 3 – 1×2 @ 59″ (Back Top and Bottom Trim) Crown Moulding, 2 1/2″ overall height, 62″ Long
Cut your 3/4″ Plywood or MDF into strips 15 1/2″ wide by 8′ long. These strips become 1×16 boards. Make your longer cuts first, and then your shorter cuts from the scraps. Work on a clean level surface. You can fasten with nails or screws, depending on your tools and the use of this piece. Screws will hold better, nails are easier. My general rule is screw anything that will be “used” like chairs and benches, and nail sedentary pieces like bookcases and hutches. I will leave this up to you. If you are screwing, make sure you predrill and countersink your screws. If you are using MDF, avoid fastening within 1″ of the edge of the MDF. Do not use wood screws on MDF. Wood screws do not have a straight shaft and will split your MDF. I have had luck with drywall screws (after all, drywall is very similar to MDF). Make sure you predrill the entire distance of the screws. It’s going to screeech, so wear hearing protection. And glue, glue, glue. My favorite option is to screw the “box” together, and then use finish nails to add the frame. That way the frame does not have blemishes, but the piece is built sturdy. Make sure you take a square of the project after each step. Measure and mark out any joints before fastening. Be safe, have fun.
Instructions
Step 1
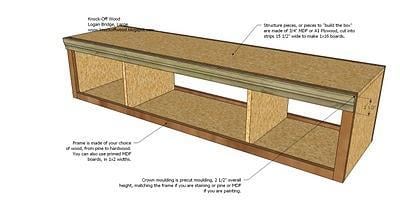
Wood Composition. The above diagram shows the composition of the different pieces. The “box” is made of 3/4″ plywood or MDF, the trim is mostly 1x2s and a 1×3 boards (pine or MDF for paint grade, hardwood to match A1 plywood for staining). The crown moulding can also be MDF or pine for painting, but should match the A1 plywood for staining.


Comments
beth (not verified)
Wed, 01/27/2010 - 08:21
Hi Ana. I can't wait to build
Hi Ana. I can't wait to build a media center for ours daughter's room! That will be our next building project. We're installing hardwood throughout our house this spring, though, and my husband says we should wait to build a big heavy entertainment center until we're done with the floor. Boo hoo. :( Can't wait to build again!!
At the beach?!! You lucky girl! We grew up on the Oregon coast, and I never knew just how much I loved the Ocean until we moved away. Have fun and enjoy! :)
Caroline (not verified)
Wed, 01/27/2010 - 09:15
Have fun at the beach! I'm
Have fun at the beach! I'm super jealous! This is an awesome plan!
Kayleen (not verified)
Wed, 01/27/2010 - 10:12
Ana, your blog is so great!
Ana, your blog is so great! I told my hubby he could splurge on his big screen tv next year if he would help me build the Logan media center. Thanks for sharing your brilliant plans. Hey, I'm looking for plans for a corner hutch for my tiny dining room? Have any ideas?
6p00d8341c158953ef (not verified)
Wed, 01/27/2010 - 10:54
I hope you're having a great
I hope you're having a great vacation, Ana - you sure do deserve it! I've been trying not to stalk your blog since your on vacation, but it's so addictive. My husband and I have 2 projects in the works and we're starting the 3rd this weekend - we just can't build fast enough :)
Kharndt (not verified)
Wed, 01/27/2010 - 19:01
Thumbs up on an office
Thumbs up on an office system!!!
ANDY, JEN & KIDDIES (not verified)
Thu, 01/28/2010 - 08:51
Thanks for the plans but you
Thanks for the plans but you are crazy! Enjoy your vacation...we can wait! Have fun on the beach...I'm jealous sitting here in cold Boise, Idaho!
Twiddle Thumbs (not verified)
Thu, 01/28/2010 - 11:13
Ooh, nice! Have a great
Ooh, nice! Have a great swim!
I'm excited about this next project.
Kristy Evans P… (not verified)
Thu, 01/28/2010 - 14:58
I'm glad your having fun on
I'm glad your having fun on the warm sandy beaches of Hawaii. I'm in Alabama freezing my rear off making 2 of the Pottery Barn knock-off bookcases for my son's room. The plans are working great! Stay tuned for pictures. I'm both proud and excited to show them to you.
Anonymous (not verified)
Sun, 01/31/2010 - 12:21
Good brief and this mail
Good brief and this mail helped me alot in my college assignement. Gratefulness you as your information.
Erin (not verified)
Sun, 01/31/2010 - 16:02
I was so excited to see this
I was so excited to see this so now I can have this entertainment center for my living room. One question though...how is the best way to attach the bridge? Also do you have the plans for the doors to close off the tv anywhere? Thanks again.
Anonymous (not verified)
Tue, 02/02/2010 - 04:38
I love this!! In one image
I love this!! In one image it shows the unit with doors to cover the TV. Any chance you have the plans for that as well? Thanks so much! I just found your blog through a friend and have way too many ideas swirling through my head right now!!!