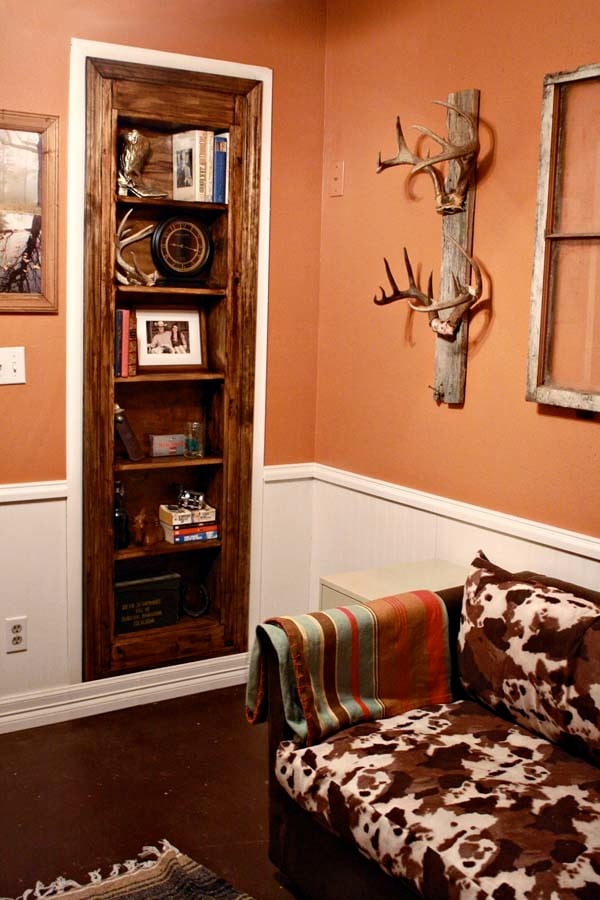
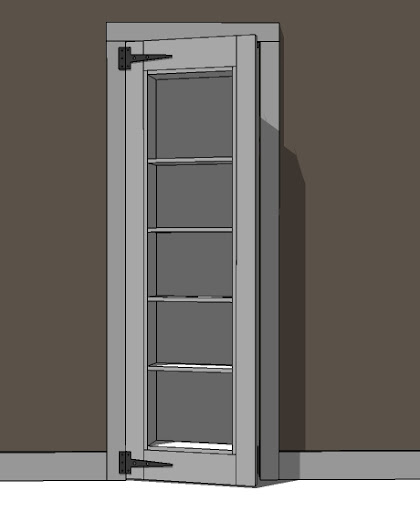
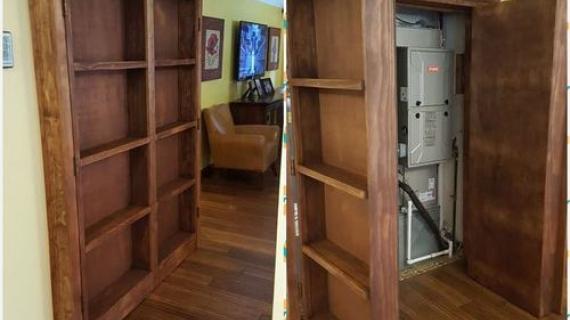
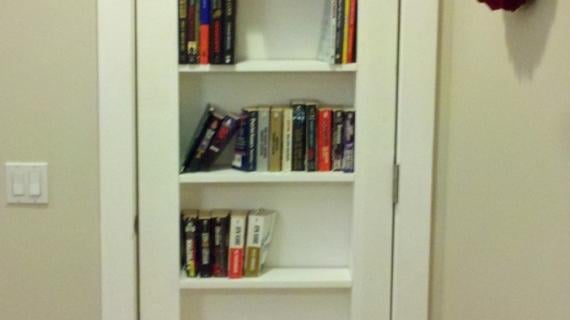
Build your own bookshelf doorway - like a secret passage behind a door!
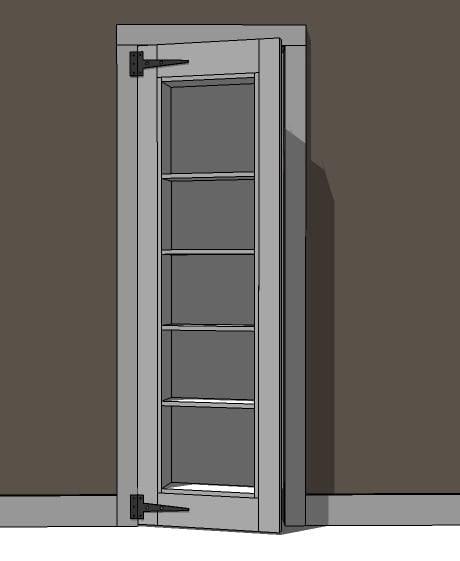
Preparation
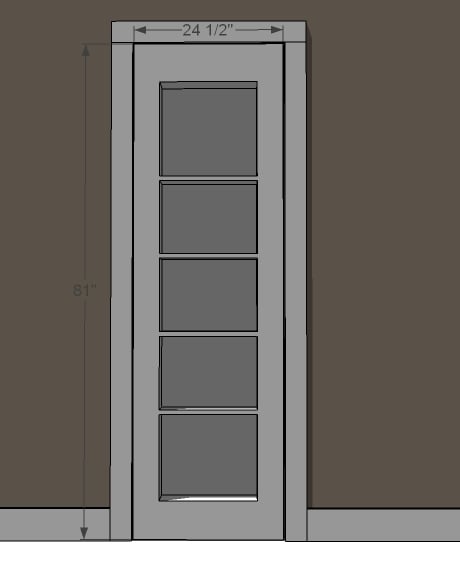
Standard width doors up to 36" Max - you may need stronger hinges or caster wheels to support wider width doors with heavy weight loads.
2- 2x4 @ 8 feet or stud length
1 - 2x6 @ 8 feet or stud length
At least 3 - 1x6 8 feet long - more for shelves as desired and depending on the width of your bookshelf
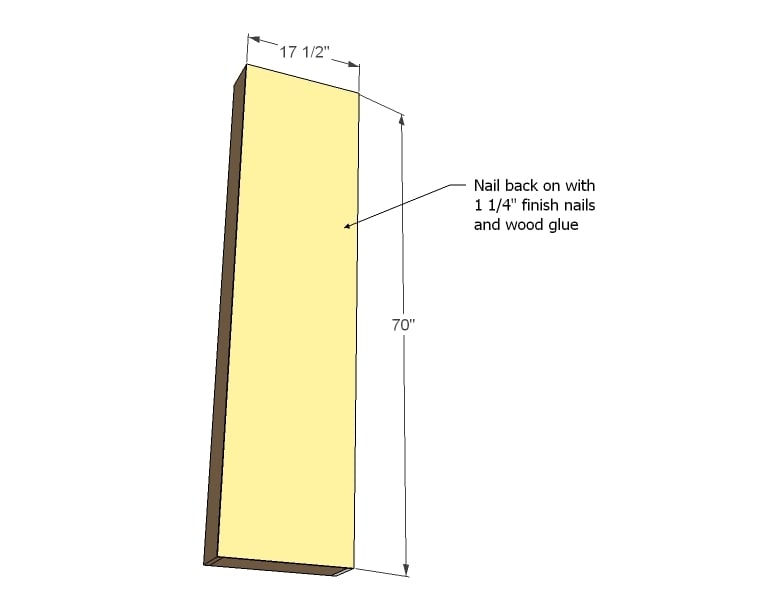
1/4" plywood for back
Hardware including heavy duty hinges, locks, clasps, and optionally caster wheel for added support
Cut boards to fit your doorway.
Please read through the entire plan and all comments before beginning this project. It is also advisable to review the Getting Started Section. Take all necessary precautions to build safely and smartly. Work on a clean level surface, free of imperfections or debris. Always use straight boards. Check for square after each step. Always predrill holes before attaching with screws. Use glue with finish nails for a stronger hold. Wipe excess glue off bare wood for stained projects, as dried glue will not take stain. Be safe, have fun, and ask for help if you need it. Good luck!
Instructions
Step 1
Step 2
Step 3
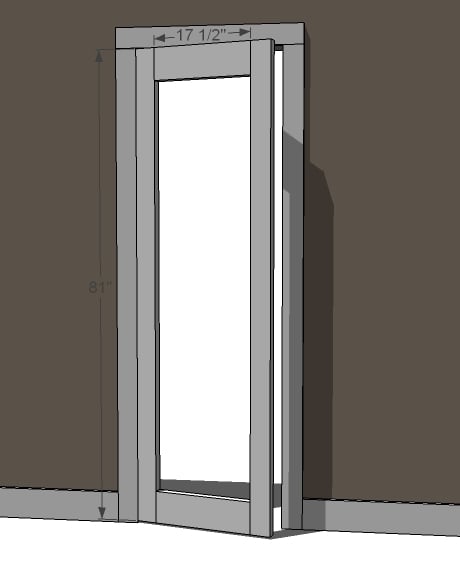
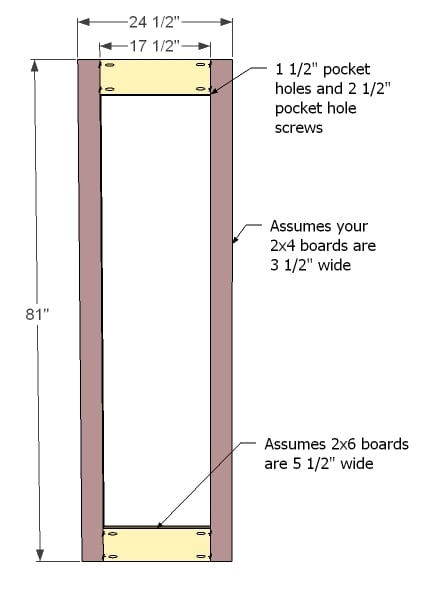
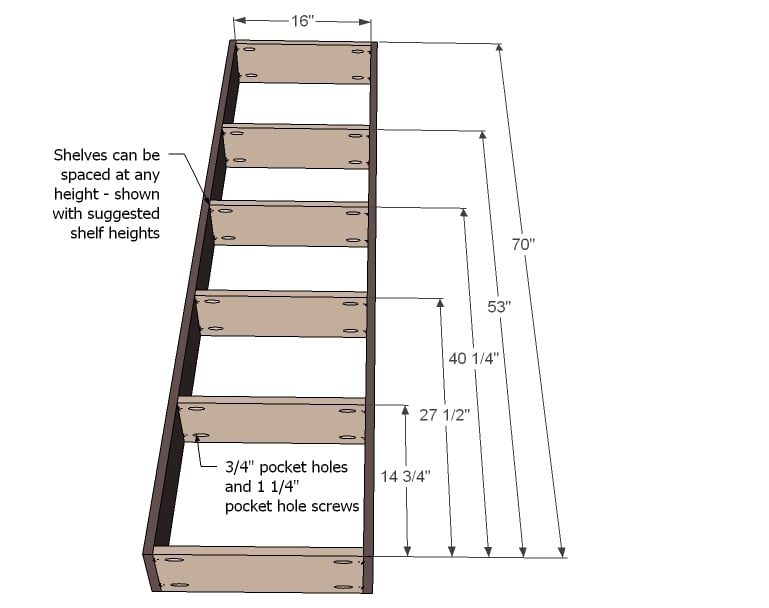
Now build the doorway out of 2x4s and 2x6s as shown above. Use 1 1/2" pocket holes and 2 1/2" pocket hole screws. Do not use glue at this step because it is very likely you will need to adjust the door.
Take the door frame and fit inside the door, making sure it opens and closes easily and the gap is enough. Adjust as fit. If you are satisfied, see step 4 for drilling pocket holes before you reassemble the door frame.
Step 4
Step 7
It is always recommended to apply a test coat on a hidden area or scrap piece to ensure color evenness and adhesion. Use primer or wood conditioner as needed.









Comments
1916home.net (not verified)
Thu, 12/15/2011 - 13:05
Clever!
Now that is clever. Perfect for our tiny Craftsman bungalow house.
loniwolfe
Thu, 12/15/2011 - 18:11
I want it!
I've been trying to figure out what to do with all my books since we got rid of the bookshelves in our living room. This will be great! I'll turn the hall closet door, that's visible to the living room, into this!
Thank you!!!
Guest (not verified)
Thu, 12/15/2011 - 19:38
What a Smart Idea
I wish I had a door to use this on. Nice Job.
Guest (not verified)
Fri, 12/16/2011 - 07:38
I wish I needed a secret passage!
Great idea, and it looks pretty simple! Thanks for putting up new plans to keep us all inspired :) (now if only I had time to get to the wood waiting for me in the garage!)
Jessica Loftus (not verified)
Fri, 12/16/2011 - 08:58
Awesome!
Way to go Brookie! Looks great!
khteague
Fri, 12/16/2011 - 12:58
Cute idea!
But, how do you keep the items on the shelf as the door opens and closes? Some of them look like breakables. Personally, I would have put a dowel rail about 2 inches above each shelf. But, then again, I'm a klutz. :)
I have to agree with Brooke about Polyshades. I used it on an unfinished cabinet and it streaked, pooled, and blotched. Never again.
thecraftyford (not verified)
Wed, 12/21/2011 - 11:28
The best solution to keep
The best solution to keep things on the shelf is called "museum gel". It is a clear gel like substance that you put on the bottom of the breakables and it holds like rubber cement - but does NO damage to the item or the shelf! I use it everywhere because of a curious/clumsy cat - keeps everything on the mantle no matter what the cat is up to! LOL!
Here is a link:
http://www.containerstore.com/shop/collections/display/cubesCases?produ…
:)
storchinsky
Fri, 12/16/2011 - 18:33
Polyshades
Cool hidden door! I wish I had a spot for one!
It's funny that Brooke and khteague both disliked Polyshades (I'm assuming this is the Minwax All in One Stain and Varnish). I actually just used it to smooth out the finish on my Ana White Benchmark TV Stand (hoping to post pictures soon!) and it worked quite well. I had used a water-based stain and found it very hard to get a nice even finish with it. It dried so quickly that on such a big piece, I couldn't apply and then wipe quickly enough to make it smooth. After 2 coats of that, I topcoated it with the Polyshades and it evened the colour out nicely. I also picked a darker colour which gave it a richness it hadn't had. My guess is that this stuff works better on wood that has already had some kind of finish applied than on unfinished wood.
And Brooke, it still turned out great!.
Sherry
In reply to Polyshades by storchinsky
brookifer86
Sat, 12/31/2011 - 11:56
Polyshades
Thanks Sherry! I think the problem was that I live about 15 minutes from the coast, so the humidity made it a nightmare. It was so blotchy and impossible to smooth out. I think you're right about using it as a "finisher" though. I had stained our Farmhouse Bed with a water based stain, and didn't like the color. I used the polyshades over it, and it turned out pretty well. It was just on the raw wood that it messed up so much
Jessica H (not verified)
Mon, 12/19/2011 - 08:13
Polyshades and the dead bolt
I laughed out loud when you mentioned Polyshades, Brooke! I hate that stuff. I tried it on more than one project and then asked the guy at Lowe's about it. He said there wasn't anything I could do to make it work, that it just "sucks" (his words!). Sherry, you might be onto something about using it on a piece that it already finished.
Brooke, can you explain a little better the deadbolt? It looks like it latches sideways. I love the idea of it being a gun closet and being locked! You did an amazing job!!! I was so excited to see this, I almost screamed! We have been wanting to use this idea to hide some doors in our hallway.
Thanks Ana and Brooke!
Jessica
lkuchinskas
Mon, 12/19/2011 - 13:34
Great bookshelf, but...
I love the old window frames you have hanging up on your wall. I'm hoping Ana will come up with some plans to make those. Hint, hint ;)
claydowling
Wed, 12/21/2011 - 13:44
Polyshades and other stains
Most commercial stains stink on ice. You might have some luck with the stains from General Finishes, but you either have to find a woodworking store or mail order it.
My dad and I gave up on commercial stains and switched to embedding pigments directly into a finish. We got better open time to work with the stain and a lot more control over color.
kasey_g
Thu, 12/29/2011 - 08:31
finaly :D
ive been looking for something like this for a while now. just need to persuade hubby to help as im new to all of this
ChantelleJ (not verified)
Fri, 12/30/2011 - 13:21
Wood Conditioner before stain!
In regards to the stain used, did you use a wood conditioner before you applied the stain? Wood conditioner conditions bare wood to accept the stain without blotches or streaking or smearing - it creates a uniform surface for the stain to penetrate. Might be why the stain turned out the way it did?
claydowling
Sat, 12/31/2011 - 16:55
Sealed wood
Even on sealed wood I've not been happy with any commercial stains. You can improve the open time by diluting with a thinner. Mineral spirits for an oil based finish, water for a water borne finish. Recent experience with water based polyurethane suggests that you probably never want to use it without some thinning.
I did get some good results today by using water based poly with some paint and water, and applying it to a desk top with a wide knife, like venetian plaster. Smoothest desktop I've ever made, and nice even color.
Laura/Readerwoman (not verified)
Wed, 01/11/2012 - 18:45
Can this bookshelf door be used on a frequently used door?
We live in a tiny house - and the bathroom door is in the middle of the living room wall! Would love to do this, mostly for books but uncertain how it would hold up to frequent use - our closet and our washer and dryer are also behind this door! Any thoughts on this?
claydowling
Thu, 01/12/2012 - 06:46
Heavy hinges
Use a bigger, more durable hinge, make sure the frame is solid (less screws, more traditional joinery) and load the shelves lightly.
Astrid Cisneros
Wed, 02/22/2012 - 17:30
Thi is great
Great use of space, I will have to add this project to my list.
Happy Preppers (not verified)
Thu, 08/02/2012 - 14:46
Great idea for Preppers!
I got wind of your site from Facebook discussions on prepping. We were discussing what a wonderful door this would be to a saferoom!
Happy day!
Kandis (not verified)
Sun, 08/12/2012 - 10:56
This looks perfect for
This looks perfect for replacing the door to the water heater with in my kitchen. I would add a lip to shelves edges to keep thing from falling off when the door is opened though. I finally have a bit of extra storage in my tiny kitchen XD
arctickari
Wed, 03/27/2013 - 20:45
pocket doors
I would love to do this on a closet that has a pocket door. Could I attach it to a pocket door frame?
Mindalins
Mon, 03/02/2015 - 19:06
Bookshelf doorway
How can this plan be changed to make it to swing in instead of out?
maggiekat
Sun, 11/06/2016 - 14:17
bookshelf door
Casters: where and how many?