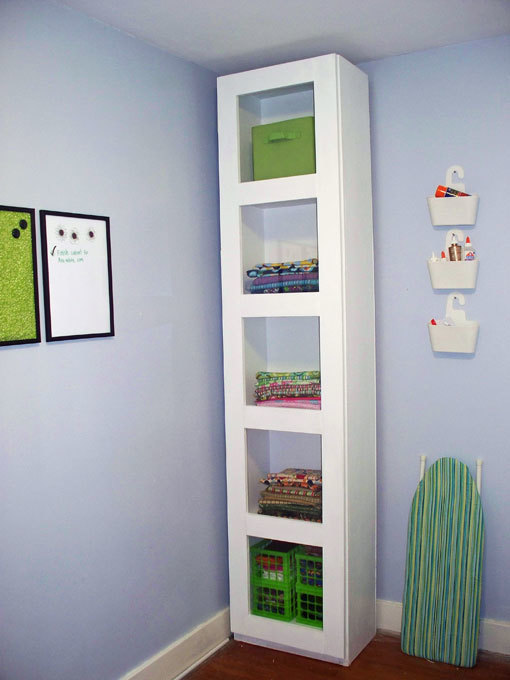


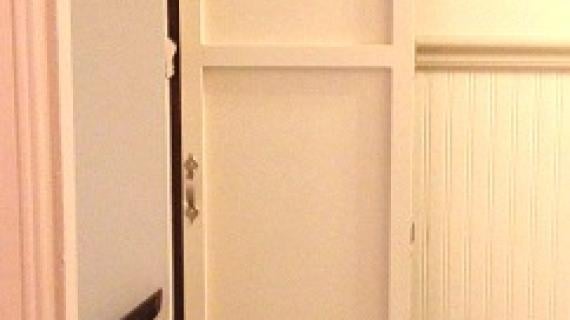
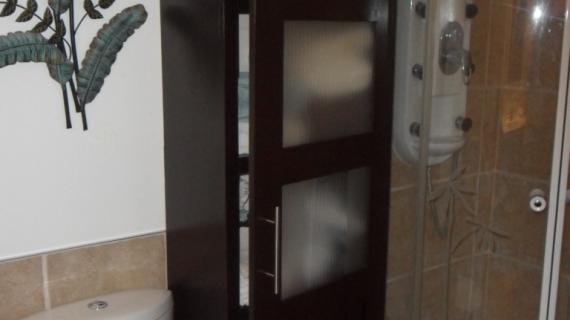
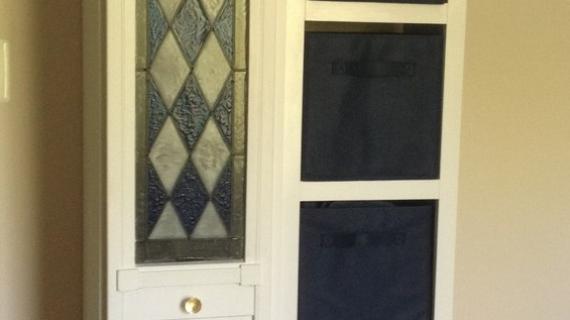
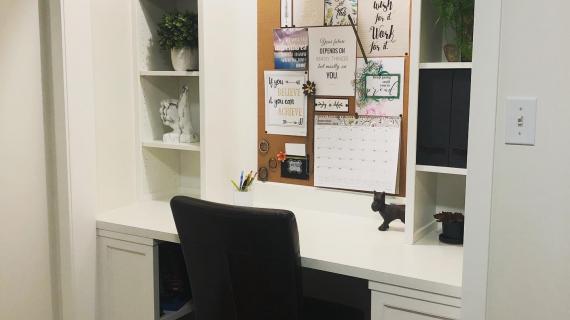
Make a very tall and extra room storage tower complete with modern style doors! These DIY plans will add lots of storage to your space. Can be made with glass doors too! Full free plans you can follow to make your own.

Special thanks to Leanne for building this project today! I just love how this project turned out. And check out how tall it is - so much storage! Thank you Leanne!


Don't Forget!
Preparation
2 – 1x12 @ 8 feet long
1 – 1x12 @ 10 feet long (cut shelves from this board)
3 – 1x2 @ 8 feet long
3 – 1x4 @ 8 feet long
Hinges – either euro face frame mount or standard side mount to be mounted on exterior of cabinet.
Acrylic glass
Mirror clips
1 ¼” pocket hole screws
2” and 1 ¼” finish nails
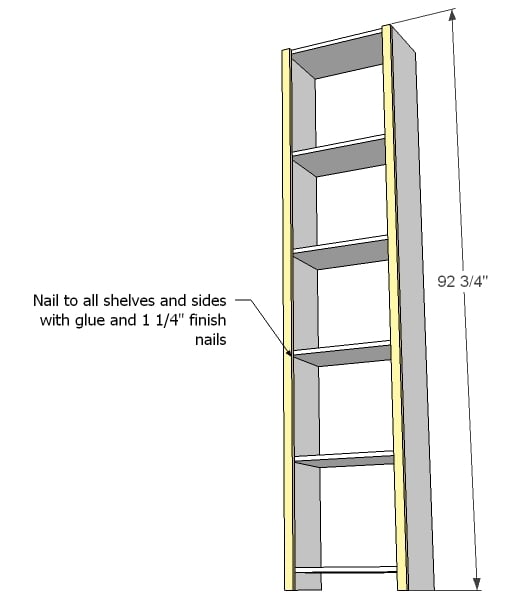
2 – 1x12 @ 92 ¾”
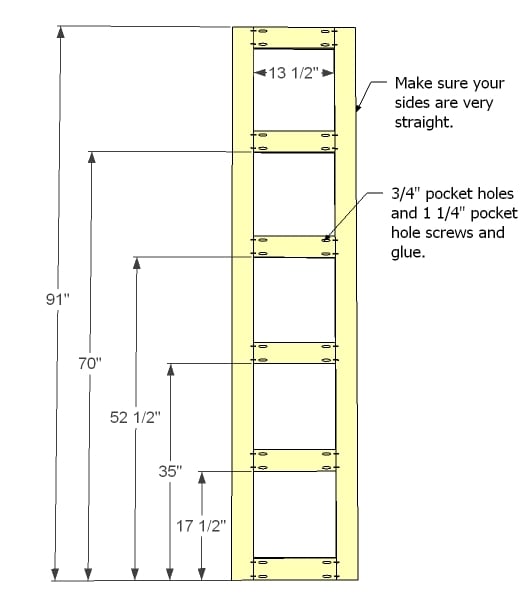
6 – 1x12 @ 19”
2 – 1x2 @ 92 ¾”
1 – 1x2 @ 17 1/2”
1 – 1x4 @ 17 ½”
1 – ¼” plywood @ 92 ¾” x 20 ½” OR Double face frame
2 – 1x4 @ 91”
6 – 1x4 @13 ½”
5 – ¼” acrylic glass @ 15” x 15”


Please read through the entire plan and all comments before beginning this project. It is also advisable to review the Getting Started Section. Take all necessary precautions to build safely and smartly. Work on a clean level surface, free of imperfections or debris. Always use straight boards. Check for square after each step. Always predrill holes before attaching with screws. Use glue with finish nails for a stronger hold. Wipe excess glue off bare wood for stained projects, as dried glue will not take stain. Be safe, have fun, and ask for help if you need it. Good luck!
Instructions
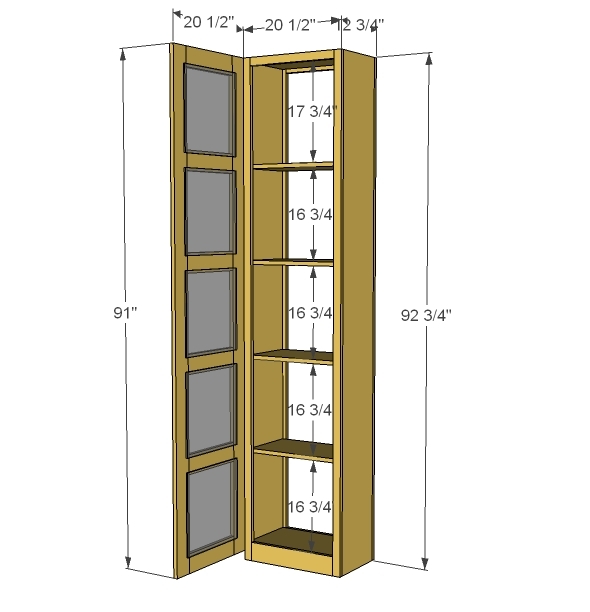
Step 1
Build the box as show in the diagram. You can use either pocket holes or 2" screws or even finish nails, as this project is fully face framed for extra support on front and has a back.
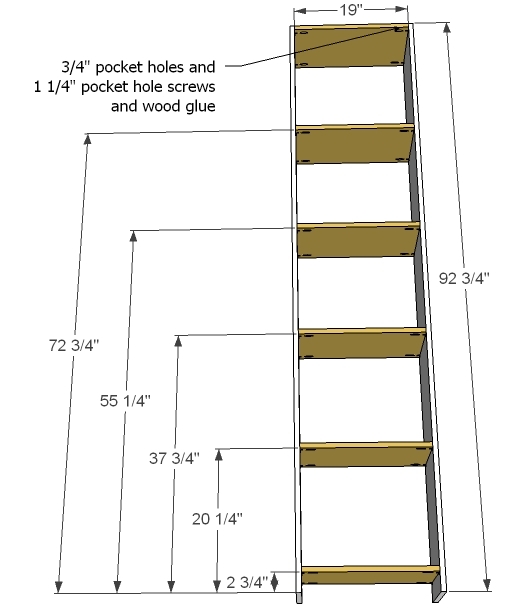
Step 2
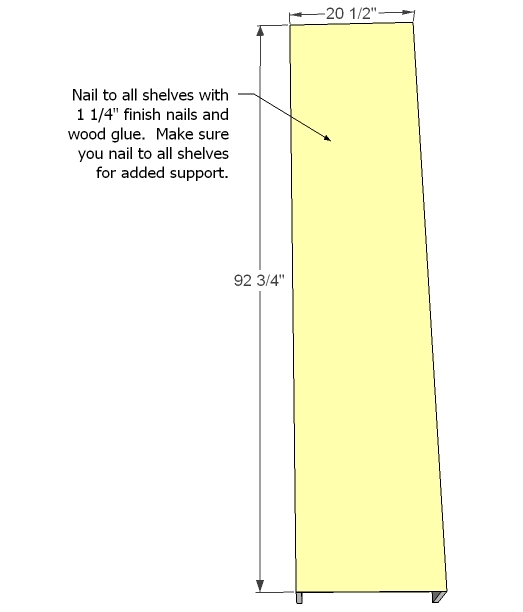
Attach back, using it to square up your project. Also attach to all shelves for the greatest support.
Step 3
Front trim can be nailed on or if you have a pocket hole jig, you can build the front face frame first, and then attach as one piece.
Step 4

Add the remaining pieces for the front face frame.
Step 5
Step 6
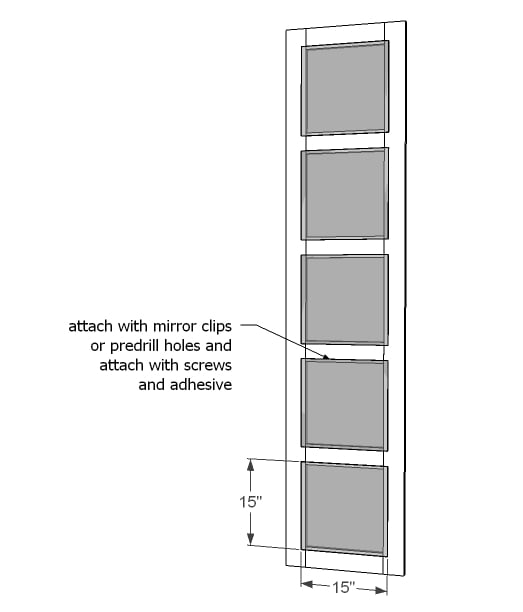
If you are using glass or acrylic glass, attach with mirror hooks or glue. You can also use 1/4" plywood for the backs.
Step 7

Door is attached with hinges. The easiest method is hinges on the outsides.
Step 8
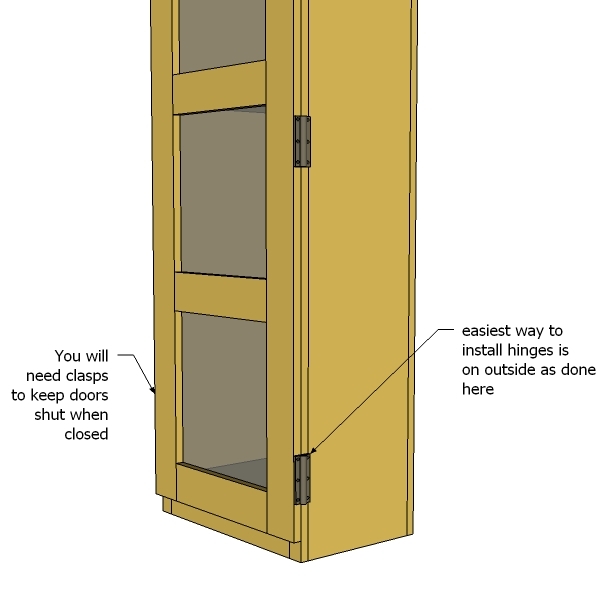
You may need a clasp to keep the door shut.
This cabinet MUST be secured to a stud in the wall behind as it will be very top heavy to prevent tipping.
It is always recommended to apply a test coat on a hidden area or scrap piece to ensure color evenness and adhesion. Use primer or wood conditioner as needed.
Comments
Kat1976 (not verified)
Fri, 01/06/2012 - 10:39
Beautiful!
Just one question - where could I find acrylic glass, and will they cut it to size for me? Thanks!
handymommy
Fri, 01/06/2012 - 10:55
Plexiglass
I got the acrylic glass at Lowes and yes, they did cut it for me!
cherie82
Fri, 01/06/2012 - 11:07
Great!
That looks like such a good space saver! Can't wait to add it to my craft room!
Keri Beth (not verified)
Fri, 01/06/2012 - 14:28
Did you put a plywood back on
Did you put a plywood back on the cabinet? Also, what's the best practice for attaching something like this to a stud? Is it enough to just screw through a plywood back that's only attached to the cabinet with nails and glue?
Guest (not verified)
Fri, 01/06/2012 - 15:55
Step #2 is either a 1/4"
Step #2 is either a 1/4" plywood back or a double face frame.
handymommy
Fri, 01/06/2012 - 17:05
I put a 1/4" plywood back.
I put a 1/4" plywood back. And because of my baseboards (which I did not want to remove)I had to actually attach a scrap piece of wood to the studs in my wall and then attach the cabinet to that. I went through the plywood. It at least helps with the sturdiness when pulling the door open. And my kids don't really go into that room that often, so I wasn't overly concerned. I wonder if anyone has a better idea though...
laurakc181
Sat, 01/07/2012 - 06:49
I want to use this template
I want to use this template to construct the shelves, but for the door want to use one big piece of wood with false drawers on the front to mimick an apothecary cabinet so I can add it to either side of the apothecary cabinet console I am making for my media center. What are the wood pieces I can eliminate from the purchase list that construct the door? That way I don't purchase wood I won't need for this project ;)
You guys are awesome!
handymommy
Sat, 01/07/2012 - 07:44
Door pieces
First of all - that is going to look awesome! Can't wait to see pictures of that one!
The door pieces are all 1x4s. There are 2 91" pieces and 6 13.5" pieces. So you could eliminate buying 2 of the 8' 1x4s. But you will still need the 17.5" 1x4 piece for the footer of the cabinet itself. So you could get away with using a scrap for that or buying a 4' 1x4.
In reply to Door pieces by handymommy
laurakc181
Sat, 01/07/2012 - 09:38
Thanks I appreciate it! This
Thanks I appreciate it! This is something I have been wanting to make for a long time :) I can't wait to get the money to purchase the wood and saw now. I have been saving up for a bit so I can do all this at once and not in stages. Also, sort of waiting until we get a house so I make sure the dimensions will fit properly in the media center area of the house we move to. We are looking at the difference of building or buying pre-existing. I hope we build so I can just make a bunch of stuff in the house :) Would be truly fun!
Amy @ this DIY life
Sat, 01/07/2012 - 12:28
Great plan
I think this will be great in my craft room! I want something that will go all the way to the ceiling to maximize my space. I just have one question. From what I can tell, the shopping list would be for if you were using a double face frame on the back instead of the plywood. Am I reading that right, or am I enjoying my weekend so much that I'm too relaxed and not thinking right? Thanks
handymommy
Sat, 01/07/2012 - 13:11
Sorry!
Actually, the shopping list is just omitting the plywood for the back. The cut list shows it, but it didn't get listed in the shop list. If you wanted to face frame the back, that is not included in the list at all. Just double up on the the front 1x2 facing pieces.
Also, I noticed another error. You will actually need 2 8' 1x4s and 1 TEN foot 1x4. The cutting for 1x4s goes slightly over 3 8 footers.
Hopefully everyone else reads these comments before they build!! Rookie plan checking mistakes by me, I apologize!!
Guest (not verified)
Wed, 01/11/2012 - 21:14
I wish I could enter for the
I wish I could enter for the giveaway . No Facebook .
mamalecia11
Mon, 01/16/2012 - 19:09
Just what I want to build next
My daughter is moving out and she is leaving a space at the top of the stairs where her bookcase was and I have been wanting to put a linen closet up there and was just getting on to see what would work from Ana's plans and eureka, you had your craft closet on and I love it, just gonna make it a little wider and with wood panels instead of acrylic!! Thanks so so much!!!
handymommy
Tue, 01/17/2012 - 03:56
Great!
I think it would look really nice with beadboard too!
mamalecia11
Tue, 01/17/2012 - 18:20
Yes, I agree!
Yes, I agree and I actually have some left over from another project. I will get a pic on as soon as I finish it. Unfortunately it is too cold to paint where we are so I will have to finish it when it warms up.
Guest (not verified)
Mon, 02/13/2012 - 21:33
I keep getting this error
I keep getting this error when I click on the PDF file: TCPDF ERROR: [Image] Unable to get image: file:///home/anawhite/public_html/dev/acquia-drupal-1.2.33/sites/default/files/3154803794_1325856702.jpg?1325870525
ErinVE (not verified)
Sat, 02/18/2012 - 12:15
Perfect!
This is just what I was looking for to get my wheels turning! I too need a glass font cabinet to store my fabrics. I think I'm actually going to make it wider and put two doors on the front, vary the shelf height (I have some on the bolt, so need at least 26" of space between two of shelves) and maybe do two glass panels on each door instead of 5. So excited!!
handymommy
Sat, 02/18/2012 - 13:31
Great Idea!
Mine is now chock-full of fabrics. It is actually quite roomy. And so perfect with the glass fronts. It makes it so much easier to remember what fabrics I have. But I like the idea of being able to fit bolts in there somewhere too!
handypat
Mon, 07/22/2013 - 09:20
Building this
By adding a few extra shelves, this would work well to store some of my wife's craft supplies (fabric, scrapbook paper, etc.) Thanks!
dyemond47
Tue, 02/09/2016 - 13:29
Studless???
Ok so this is my question, I have plaster walls, no studs to speak of. Is there a way to make this tower so it is stand alone? Love the tower just nothing to attach it to.
Kristina Neville
Thu, 04/23/2020 - 08:12
Quick question could this…
Quick question could this be turned on its side and hung on a wall almost like a barrister cabinet