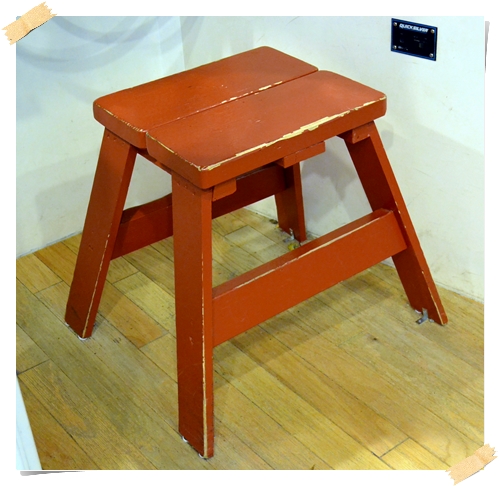


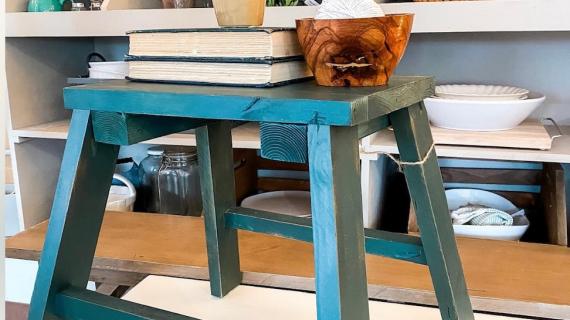
Free plans to build a skipper stool! Stool features splayed legs and lots of character!
Preparation
2 - 1x3 @ 8 feet long (there's extra so you can practice some cuts)
1 - 2x2 @ 2 feet long
1 - 2x6 @ 3 feet long
1 1/4" PH screws
2" screws
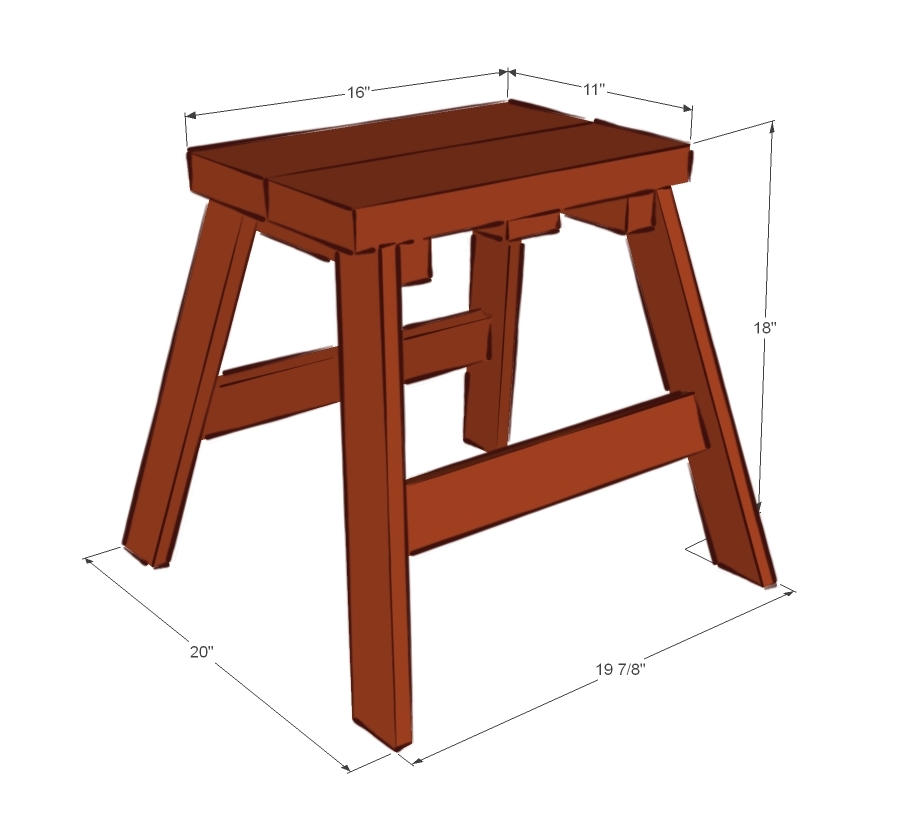
2 - 2x6 @ 16"
2 - 2x2 @ 11"
1 - 1x3 @ 11"
4 - 1x3 @ 17 1/2" long, 15 degree angle and 10 degree bevel, ends are parallel, longest point to shortest point measurement
2 - 1x3 @ 16 1/4" (both ends cut at 10 degrees off square, ends NOT parallel, long point to long point measurement)
Please read through the entire plan and all comments before beginning this project. It is also advisable to review the Getting Started Section. Take all necessary precautions to build safely and smartly. Work on a clean level surface, free of imperfections or debris. Always use straight boards. Check for square after each step. Always predrill holes before attaching with screws. Use glue with finish nails for a stronger hold. Wipe excess glue off bare wood for stained projects, as dried glue will not take stain. Be safe, have fun, and ask for help if you need it. Good luck!
Instructions
Step 1
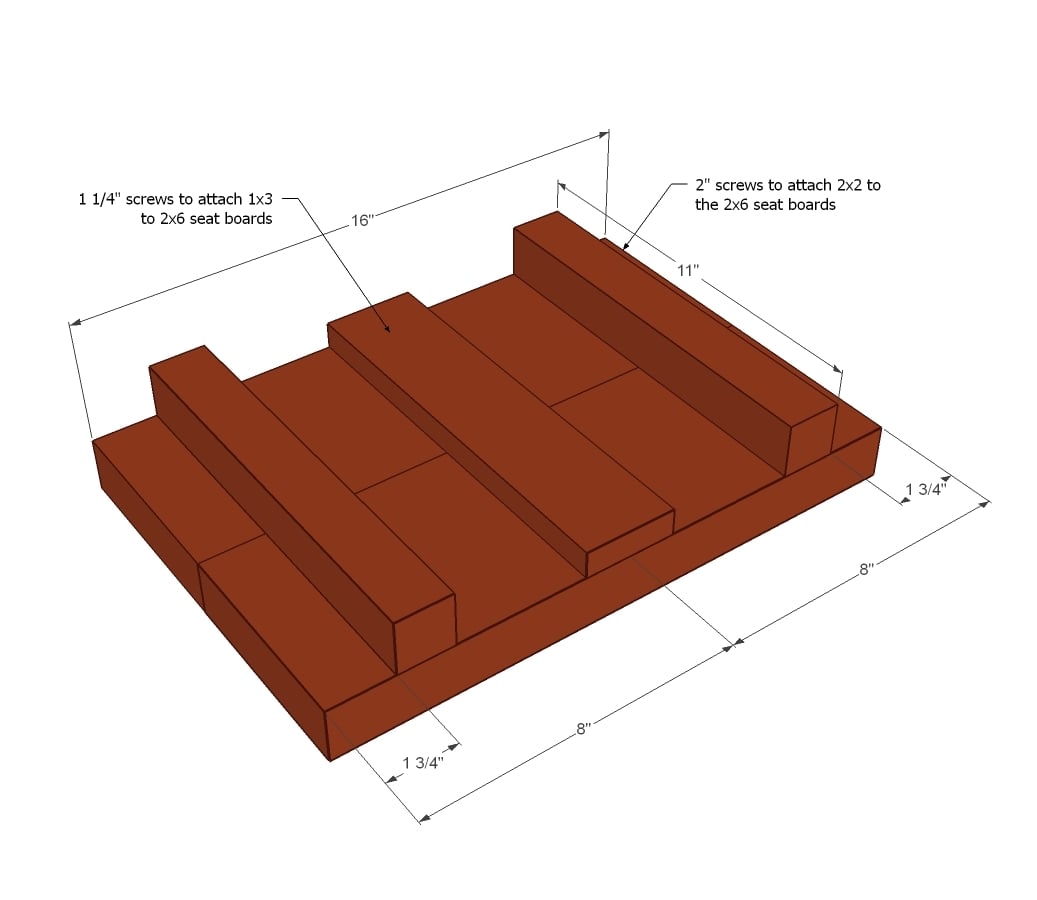
Let's start by making the seat. Mark out the location of the 2x2s on the seat boards and attach with glue and screws. Set aside the seat.
TIP: Instead of buying other 1 1/4" screws, just use a couple of 1 1/4" PH screws to attach that middle 1x3 to the seat.
Step 2

Now for those legs. The look much more difficult than they are! Just set your compound miter saw first to a 15 degree angle, meaning the entire saw head is rotated like a clock to the 15 degree mark. Now we need to angle the actual blade at 10 degrees, sort of like slicing carrots at an angle. Each saw is different, rotate yours to a 10 degree bevel. Then cut one end of the 1x3 off as close to the end as possible - we are just getting the first edge cut here.
With one end cut to size, slide the board down 17 1/2", mark correct length, and cut your first leg. DO NOT MOVE OR ROTATE BOARD YET!!!
Check this first leg to make sure you did everything right on the stool seat. If you did, all you will then need to do is slide the board on your saw down 17 1/2" and cut, repeating until you have all four legs.
Attach legs to seat, outsides are flush to edges. I recommend hiding 3/4" PHs and 1 1/4" PH screws on inside top edge of each leg instead of 2" screws from outside.
Check to make sure the overall leg widths match to make sure your legs are being installed right.
Step 3

Now the stretchers are just cut at a 10 degree angle. So turn your miter saw back to everything square. Then just rotate the entire saw head so you are cutting at a 10 degree angle. Cut the stretchers. Drill 3/4" PHs on each end, 2 per end. Attach to stool legs with glue and 1 1/4" PH screws.
It is always recommended to apply a test coat on a hidden area or scrap piece to ensure color evenness and adhesion. Use primer or wood conditioner as needed.

Comments
babysteps
Fri, 07/20/2012 - 20:05
So Cute
This is really cute. It's a stool but looks like the tiniest picnic table ever!
Pam the Goatherd
Mon, 07/23/2012 - 07:18
I see they have it screwed to
I see they have it screwed to the floor. Is that so no one walks away with it's cuteness?
Was also wondering if maybe it should have another set of stretchers going the short way to keep the legs from splaying that way too?
Nate (not verified)
Sat, 09/01/2012 - 12:43
Needs another stretcher
This stool design definitely needs stretchers between the splayed legs. You're putting a lot of torque on the top joints, especially since a 15° angle puts the 17.5" leg 4.5" out from the base. Using a 1x3 means your load line is not through the leg, and the joint at the top is the only thing keeping the legs from collapsing outward.