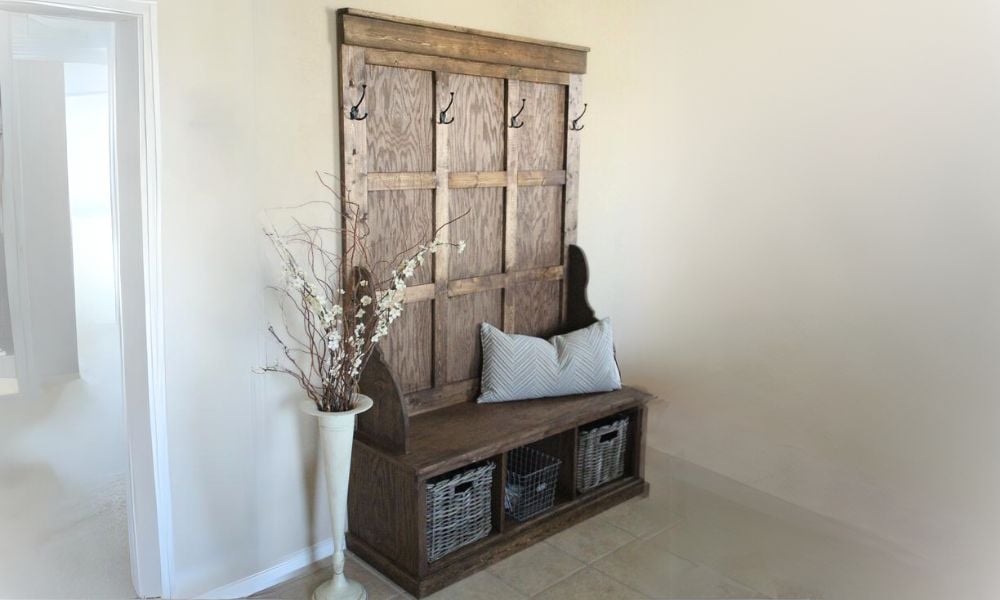
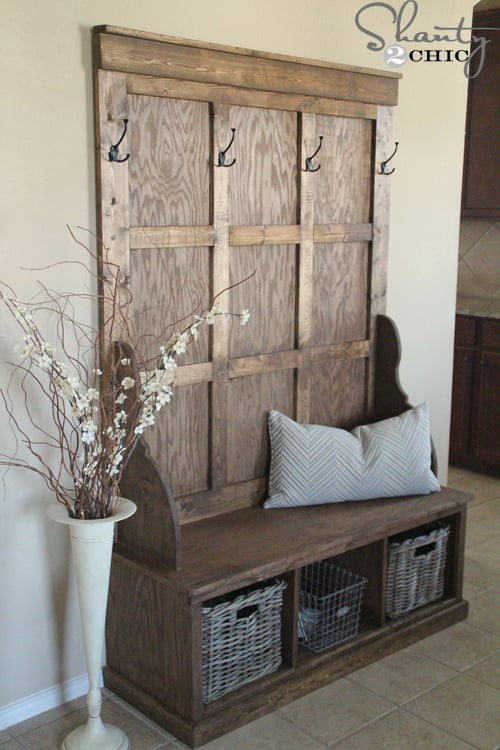
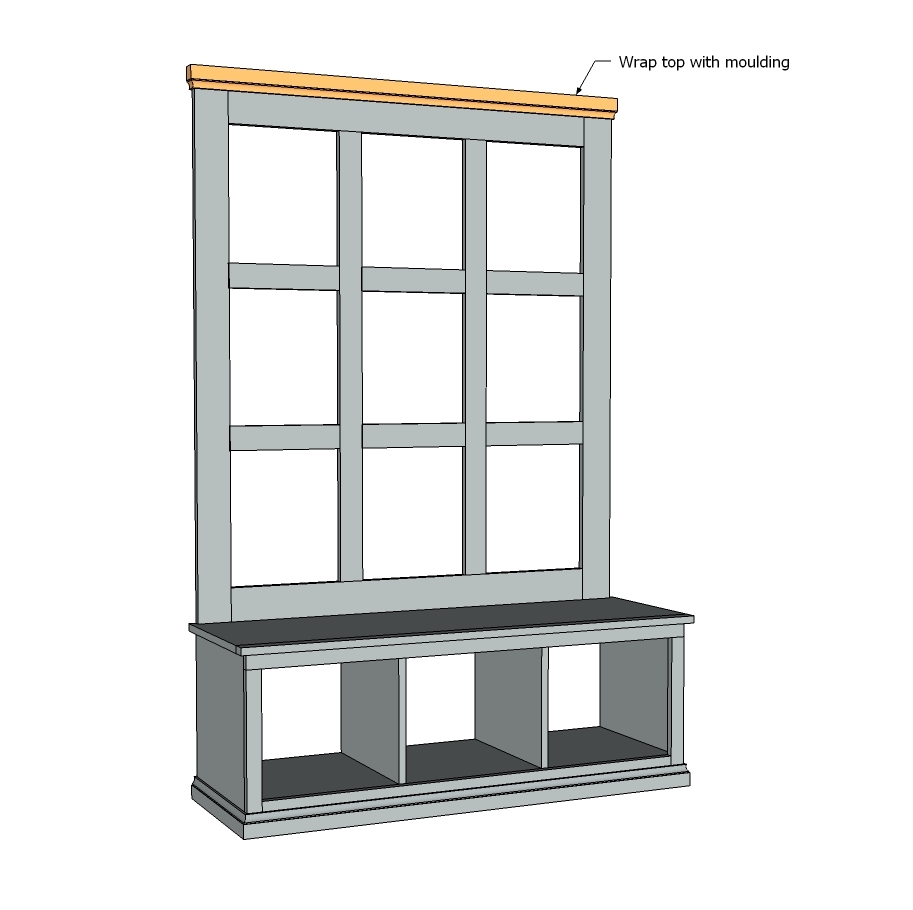
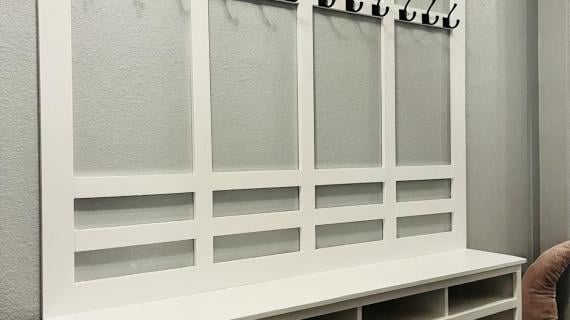
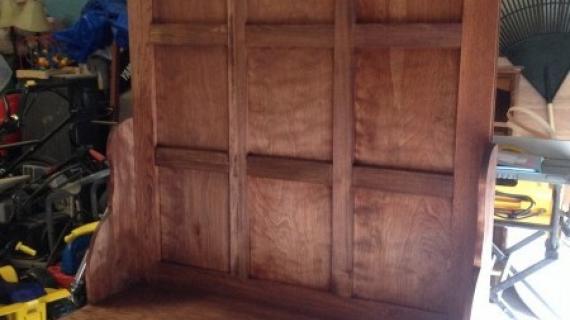
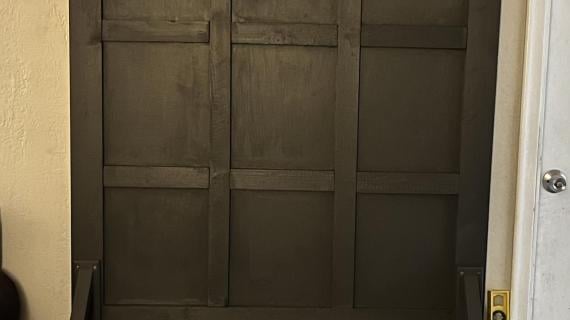
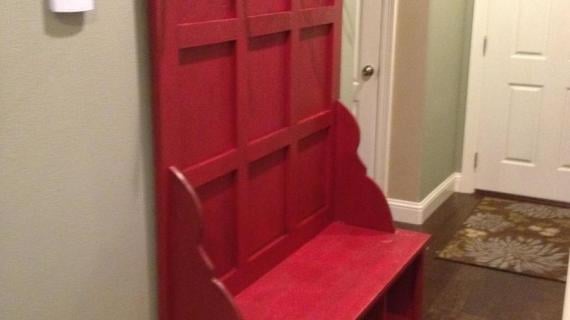
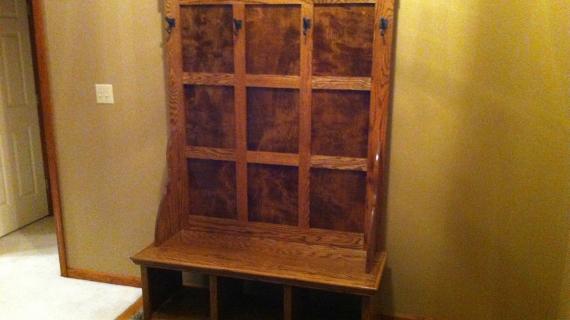
Free plans to build a Farmhouse Hall Tree. Step by step plans include shopping list, cut list, and detailed diagrams to help you build your own hall tree.
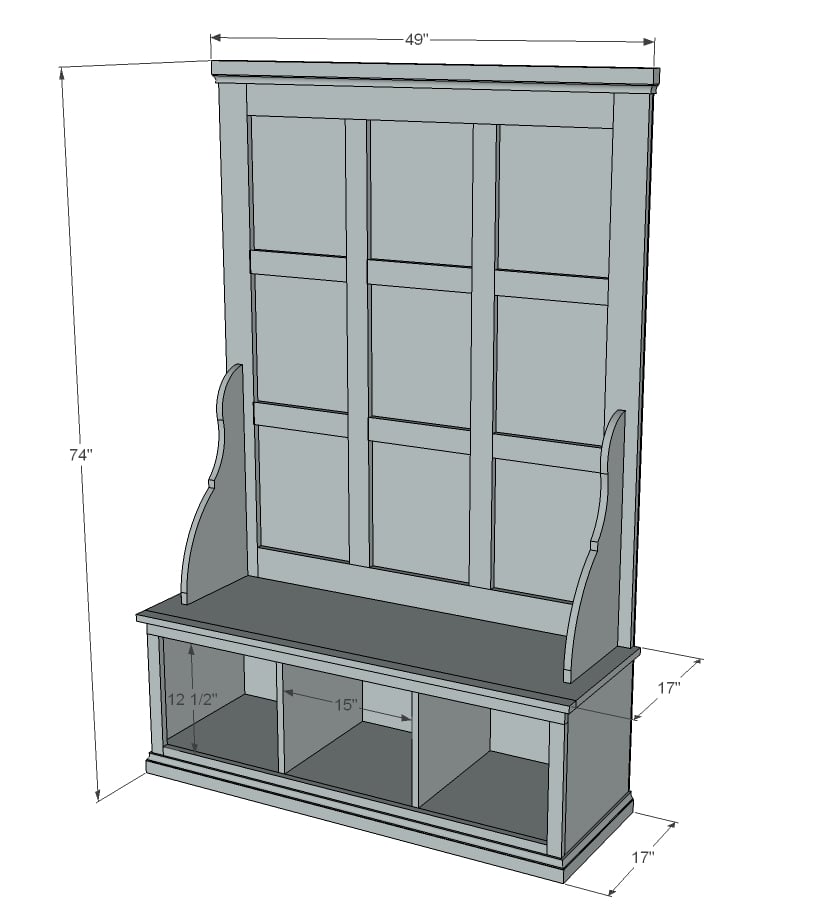
Preparation
- 1 sheet ¾” plywood ripped into strips 15 ¾” wide (referred to as 1x16 in plan)
- 2 – 1x4 @ 8 feet long
- 2 – 1x2 @ 8 feet long
- 3 – 1x3 @ 8 feet long
- 1 – 1x6 @ 4 feet long
- 1 – 1x12 @ 4 feet long
- 1 – sheet ½” plywood (if you need to you can rip into strips 16” wide to transport)
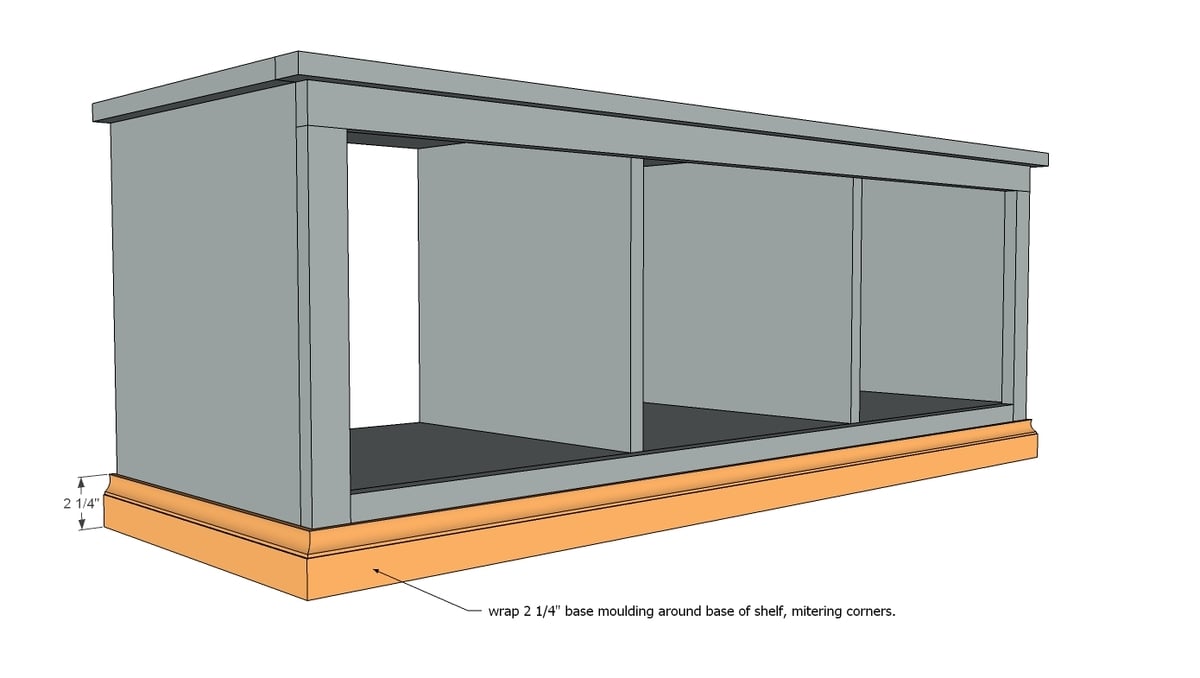
- 8 feet of 2 ¼” base moulding
- 1 ¼” PH screws
- 1 ¼” finish nails
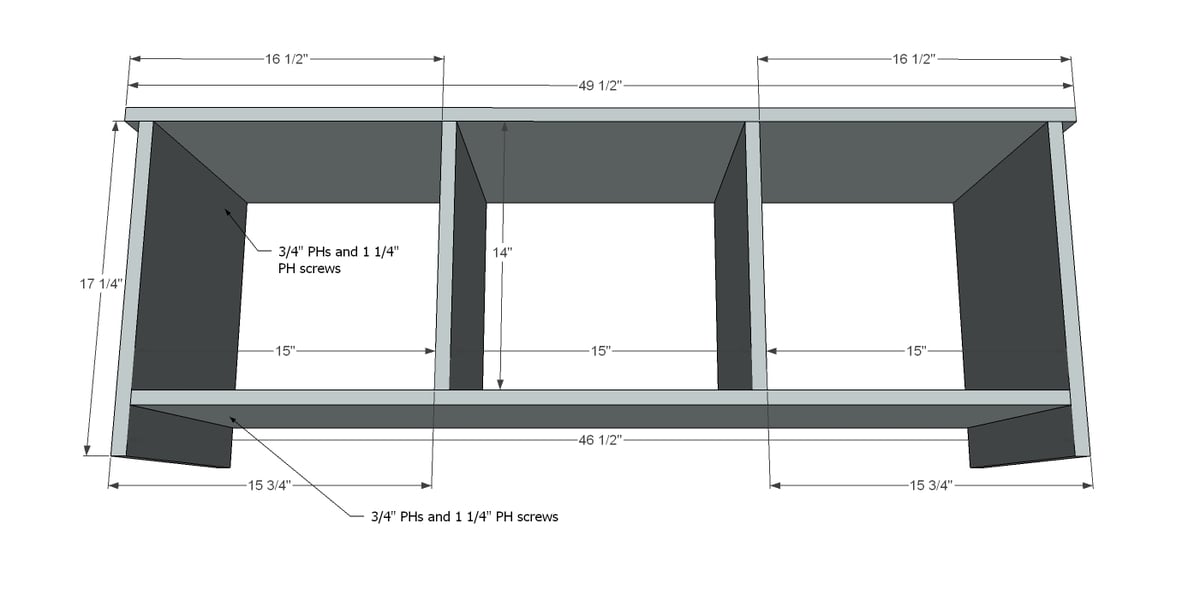
- 1 – 1x16 @ 49 ½”
- 1 – 1x16 @ 46 ½”
- 2 – 1x16 @ 14”
- 2 – 1x16 @ 17 ¼”
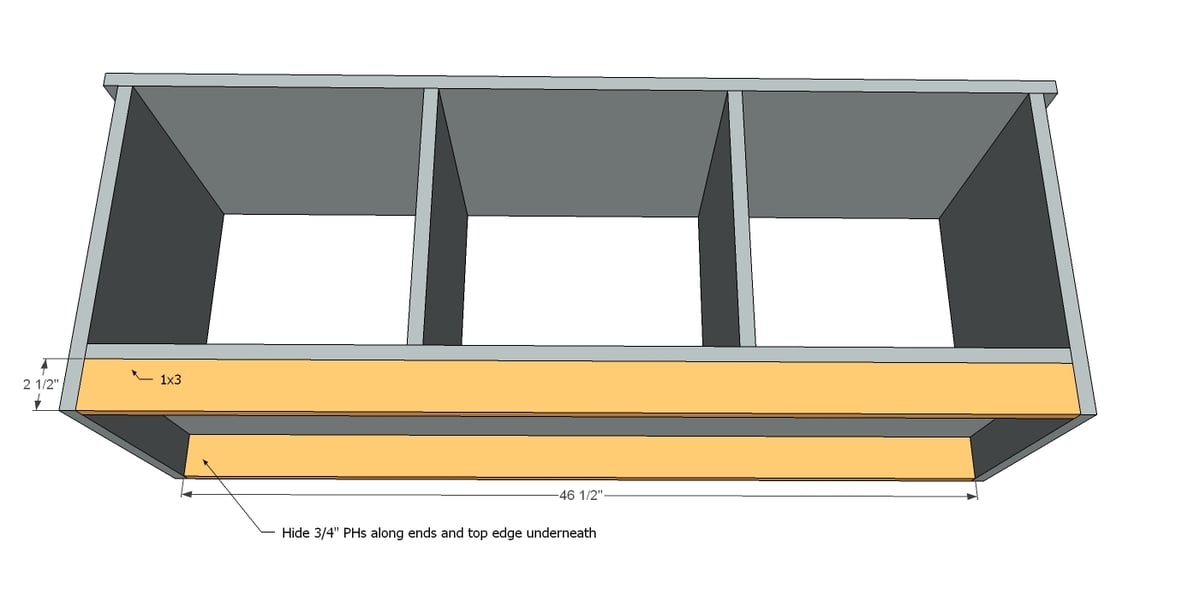
- 2 – 1x3 @ 46 ½”
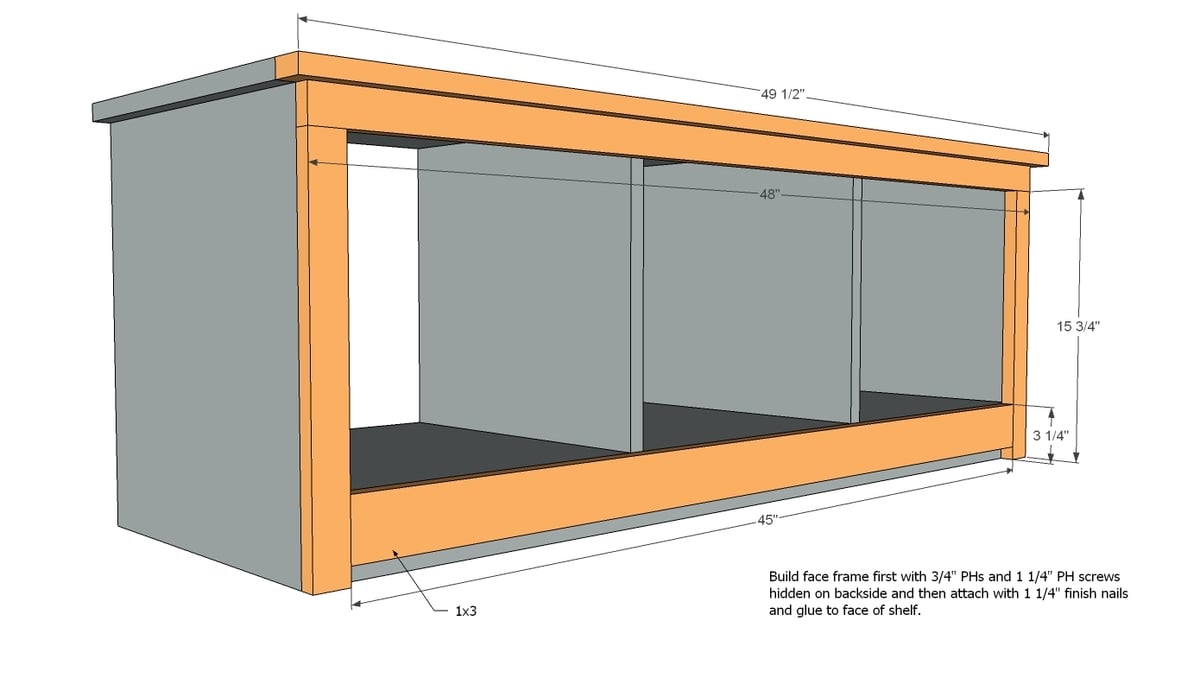
- 1 – 1x2 @ 49 ½”
- 1 – 1x2 @ 48”
- 2 – 1x2 @ 15 ¾”
- 1 – 1x3 @ 45”
BACK
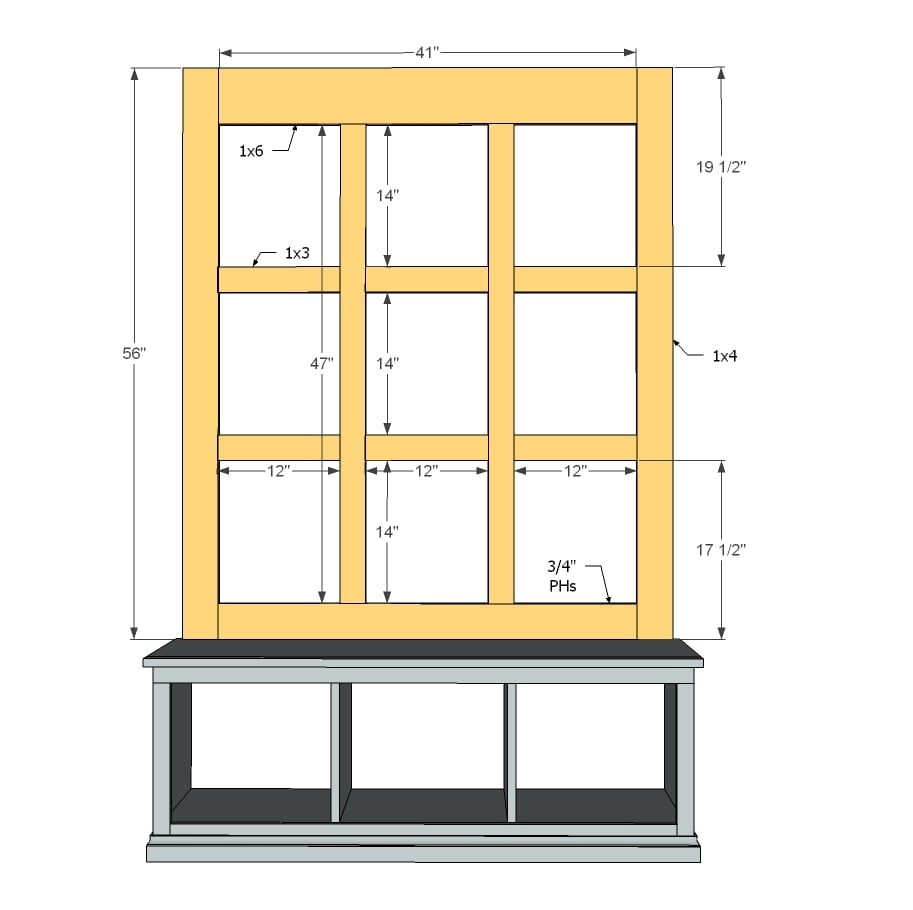
- 2 – 1x4 @ 56”
- 2 – 1x3 @ 47”
- 6 – 1x3 @ 12”
- 1 – 1x4 @ 41”
- 1 – 1x6 @ 41”
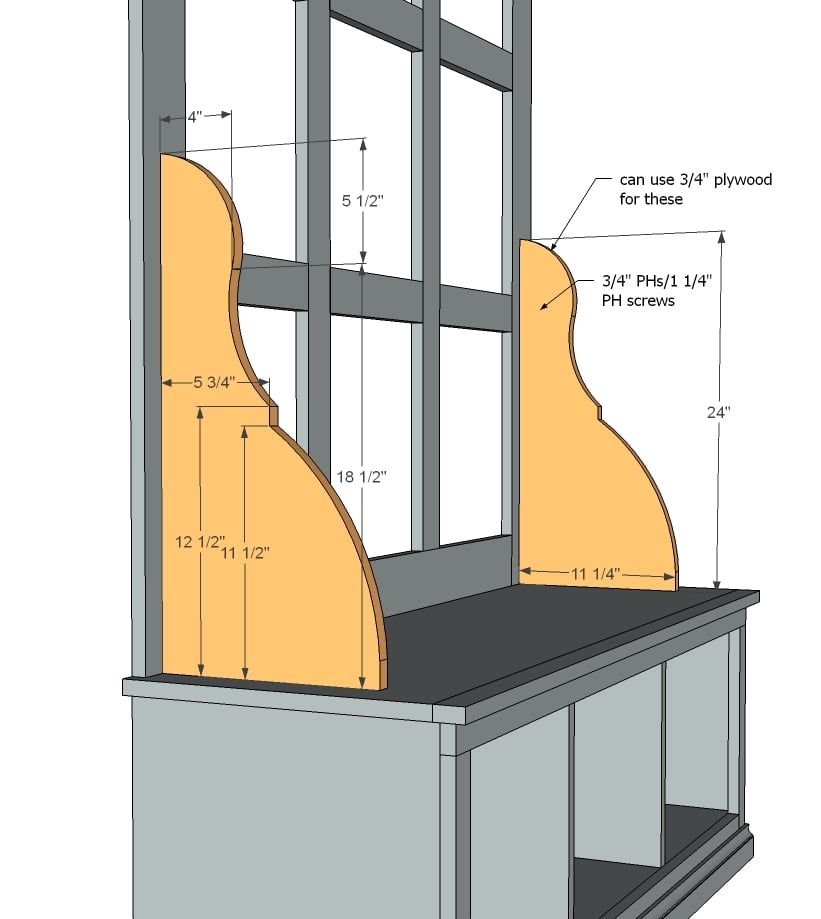
- 2 – 1x12 @ 24”
- Back is ½” plywood 48” x 74”
Please read through the entire plan and all comments before beginning this project. It is also advisable to review the Getting Started Section. Take all necessary precautions to build safely and smartly. Work on a clean level surface, free of imperfections or debris. Always use straight boards. Check for square after each step. Always predrill holes before attaching with screws. Use glue with finish nails for a stronger hold. Wipe excess glue off bare wood for stained projects, as dried glue will not take stain. Be safe, have fun, and ask for help if you need it. Good luck!
Instructions
Step 1
Step 2
Step 3
Step 4
Step 7
It is always recommended to apply a test coat on a hidden area or scrap piece to ensure color evenness and adhesion. Use primer or wood conditioner as needed.





Comments
shechrissy (not verified)
Mon, 08/13/2012 - 13:17
THANK YOU THANK YOU THANK YOU
THANK YOU THANK YOU THANK YOU THANK YOU THANK YOU!!!
I've been searching for plans to build my own hall tree for SO LONG! We eyed up some really nice ones for sale for over $400, but they're constructed with poor quality pressed wood that would probably become damaged in transit. I'm a single mom with such a cluttered entryway, and this project will be perfect for our household! I can't wait to tweak the design and add our own personal touches to it.
I can't say it nearly enough,
THANK YOU!!!
RL (not verified)
Mon, 08/13/2012 - 13:53
Baseboard
This is so great! I can't tell from the picture, have you removed the baseboard behind this unit?
dbizzle
Wed, 12/11/2013 - 12:15
baseboard
It would probably be easier to shorten the back and start it above the baseboard.
TiffanyW (not verified)
Mon, 08/13/2012 - 14:53
Thanks!
Thank you so much!! I've been trying to make my own plans for this and lets say I just gave up. I'm soon to be opening up a family day care in my home and bought cubbys for their coats and backpacks but I wanted it raised off of the floor so that getting shoes on and off of 8 children multiple time daily would be less of a chore! This, I think, will be perfect if I can figure out how to add a shelf to store bedding for the tots who still need naps! This couldn't have came at a better time!! I was looking at a pin on pinterest that called for buying a TV unit from IKEA but one, it was too small and two, out of our price range. This I can make fit exactly what we need. Thank you again!!
craftyalien (not verified)
Tue, 08/14/2012 - 10:30
wow...
I love it. I may do a 2/3 version because my walls are tiny, but that is perfect. My next house is going to be craftsman style and the design is perfect.
theJam (not verified)
Wed, 08/15/2012 - 21:06
Done with assembly already...
Now on to finishing!
Great plans, btw, only two caveats, you need 3 1x3's to get all the cuts, instead of the 2 that are listed here as well as an additional 1x4, unless your boards are just a bit over 8 feet, you won't make the length you need for a solid build.
If my math or cut configuration is off, please let me know so I can figure out what I did wrong!
Thanks!
Sugar (not verified)
Mon, 11/26/2012 - 17:16
1x3s
I followed your advice and got an extra 1x3 and 1x4 just incase. I didn't need the extra 1x4, but three 1x3s are required! I love reviews. Thanks for the tip! (an extra 1x4 is better than an extra trip to the lumber store!) :)
Reachel McLoud (not verified)
Fri, 08/17/2012 - 09:48
I want to do this!,!
I want to do this!,!
Suzi Taggart (not verified)
Fri, 08/17/2012 - 20:02
Love this!...got any tips for converting to corner piece?
I've been looking for one of these FOREVER! I have a spot for this, but I want to make mine L shaped for a corner...any tips?
how2home (not verified)
Thu, 08/30/2012 - 11:15
this is fantastic and it
this is fantastic and it looks great!
AmyGuest (not verified)
Tue, 09/11/2012 - 21:57
I love the finish on this!
I love the finish on this! What stain did you use?
ashleyquinn
Thu, 02/27/2014 - 05:39
Stain
Did you find out the color of the stain? I love it, too!
Jennifer McManus (not verified)
Thu, 09/13/2012 - 10:10
Question
What color stain did you use?
Kristie Mitchell (not verified)
Mon, 10/15/2012 - 07:09
We love our new hall tree!!
I came across your site a few weeks ago and so glad I did! I've always wanted a hall tree, but never willing to pay the crazy prices. My husband, our two girls and I built this in no time and we had the BEST time. It was very easy to build. We look forward to building more from your site. Thank you so much!!!
SCollings (not verified)
Tue, 10/16/2012 - 10:31
Please Help!
I am working on this now and I have the storage area built. I have a few questions. On the plans, they call for 3/4" PHs and 1 1/4 PH screws. I understand the 1 1/4 screws, but what is the 3/4" PHs they are talking about? Also, for the top frame, how are all of the pieces attached together? I just can't figure it out. :-) I am soooo excited to have this in my home, it is beautiful! One more thing... The plan calls for 2 1X4s but you actually need 3 to get all of the cuts. Nothing another trip to Home Depot didn't fix. :-)
Mike Meadows (not verified)
Wed, 10/31/2012 - 08:47
reply
The PHs that are mentioned are referring to "Pocket Holes". Ana is a fan of Kreg pocket-hole joinery and recommends using a Kreg Jig for such tasks. Search for Kreg Jig and wait for a whole new world of projects to open up.
The joints that you are referring to in this project are created by using Pocket Holes on the back face of the wainscot grid. Never to be seen by anyone once you put the backing on.
Best of luck!
Joanjema (not verified)
Mon, 12/10/2012 - 09:45
I am so glad I found your
I am so glad I found your blog again! It used to be on my favorites, but my computer crashed! I have yet to try any of your projects, but I am always so amazed at your work!! Can't wait to see more of your creations:)
Doreen (not verified)
Sat, 12/29/2012 - 13:01
Screws
Hello,
I would like to build this and just looked through your directions and was wondering how do you screw on the sides and tops etc without having the screw holes showing???
Heidi Harrod (not verified)
Wed, 01/02/2013 - 11:15
Tree Hall
I have been searching for something for my entry way and this will be just perfect! Everything I have priced has been from 500-2000! That's just insane. I am so excited to make this and fill the empty space in my foyer! Thank you!
Heidi Harrod (not verified)
Wed, 01/02/2013 - 11:15
Tree Hall
I have been searching for something for my entry way and this will be just perfect! Everything I have priced has been from 500-2000! That's just insane. I am so excited to make this and fill the empty space in my foyer! Thank you!
Laura McDaniel (not verified)
Fri, 01/11/2013 - 13:49
My Hall Tree bench
I just finished your project and I love it! Great plans, easy to follow and I love my finished product! Check it out here:
laurabethmcd.blogspot.com
ashleyquinn
Thu, 02/27/2014 - 05:41
Love this Stain!
What color is it??
justindalby
Thu, 10/16/2014 - 05:40
Love this and am modifying
Love this and am modifying the plans to fit my area. A couple of questions, though, how do you attach the 2 inside vertical supports (14") in the bench? Also, How do you attached the decorative sides? Am I supposed to use finishing nails for these pieces?
samhully
Mon, 11/24/2014 - 08:37
seat
this may sound stupid but what is the seat bit made of ?? is it a 15 3/4" x 17 1/4"?
susehatch
Mon, 12/22/2014 - 10:20
I love the stain/finish, too!
I love the stain/finish, too! Please divulge, as it makes the piece!
Thanks!
dumper
Fri, 04/10/2015 - 16:18
Securing..?
What's the best looking and secure way to fasten this to the wall?
Carpentry 101
Mon, 05/04/2015 - 00:17
Hall Tree Project
Made our Hall tree longer and a little different than yours....Much appreciation for the design!!
dcostillo
Thu, 06/11/2015 - 08:40
Stain used?
Shanty Chic, can you share the method you used for staining and sealing?
In reply to Stain used? by dcostillo
dcostillo
Thu, 06/11/2015 - 08:43
Stain used?
Sorry, i'm seeing it's Ana who posted this re: Shanty2Chic! Any thoughts on stain used here, Ana?
Neilsick
Fri, 01/22/2016 - 18:33
Where are the plans?
are the few images on this page the only plans, or is there a detailed list of instructions somewhere? Step 1 says to build the bench and follow the plans, but I don't see any plans, then it just moves on to step two.
mgrundmeyer
Mon, 06/20/2016 - 10:44
How to accommodate for baseboards?
Hi! I have 1x6" baseboards and I'm trying to figure out how to account for them. Could I use 3/4" plywood instead of 1/2" and start the back boards higher, so they sit above the baseboards?
Any feedback would be greatly appreciated!
MichaelD41
Tue, 02/28/2017 - 16:48
Attaching plywood back
This may have been mentioned in the comments and if I missed it, sorry I'm making you repeat yourself. What are you attaching the plywood with? Finishing nails or screws? I don't think it was said in the plans for the build. Thanks in advance.
Don Ellery
Thu, 07/20/2017 - 09:49
Attaching the back
I used gorilla glue and 18 GA 1 1/4" brad nails. Be careful about nail length, depending on which plywood and face boards you use, board width is slighly different and brads might penetrate through the front of your piece and splinter the wood (this happened to me on my first nail, using select pine for face boards). I recommend playing it safe and either attaching from the front and filling with wood filler or using shorter brad nails.
Don
Agripp06
Thu, 12/28/2017 - 17:18
Need help
I am a single parent and my entryway is so cluttered with all of my kids stuff and I really want to build this but I haven’t EVER built anything before. Step 2 is confusing me big time. Is there any way to tell me on the cut list what each piece is for?
Egillming
Thu, 12/28/2017 - 17:59
The step 2 image shows the
The step 2 image shows the boards required and can be determined which boards are in the cut list by their length and size, 1x2, 1x3 etc. Step 2 boards are the last 4 boards specified on the cut list. Hope that helps.
Egillming
Thu, 12/28/2017 - 18:05
The step 2 boards can be seen
The step 2 boards can be seen in the image and can be determined by the length and size of wood 1x2, 1x3, etc. Hope this helps.
The step 2 boards are the following from the cut list.
1 – 1x2 @ 49 ½”
1 – 1x2 @ 48”
2 – 1x2 @ 15 ¾”
1 – 1x3 @ 45”
Fedder87
Wed, 03/14/2018 - 15:26
Stain color?
What stain was used for this tree hall? I don’t see it listed on the instructions?
Mhoban156
Wed, 01/29/2020 - 03:16
Shopping list .vs Cut List
Greetings,,,, Very nice piece,,,, I am about 1/2 way thru building and will post photos at the end,,,
Either I am reading the Shopping/Cut list incorrectly or something is up.... the Shopping list calls for two 1x4x8' 's and the cut list says two 1x4@ 56" and One 1x4@41" .... so you can't get two 56" boards from an 8' (96") board... and consequently once you cut 2 - 56"'s out of 96"'s - that leaves you with 40 inches,,, where is the 41" coming from ???
Dyork
Sun, 06/14/2020 - 15:02
Is there a pattern for the…
Is there a pattern for the side piece on top of the bench that connects the bench to the back? New to woodworking and not sure if I can get it to look good.