

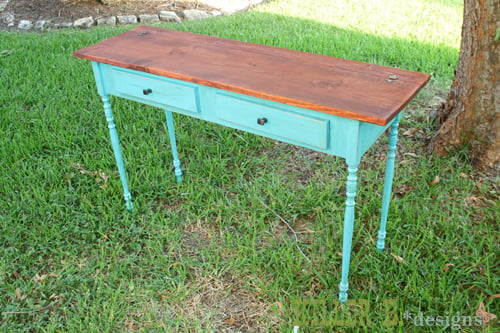
A very special treat for you today from Brooke of Killer B Designs! Brooke is sharing with us her step by step instructions on how she achieves that wonderful turquoise with chocolate glaze finish!
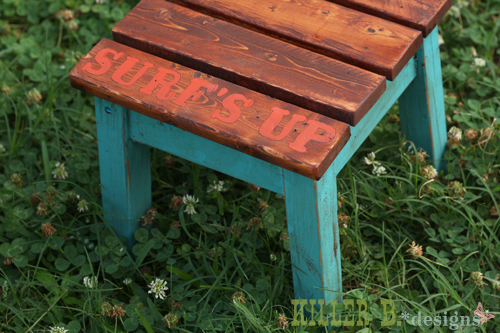
Brooke also used this finishing technique on the Surf Board Table and Benches she built for a charity event. So beautiful!
If you have questions for Brooke, or would like to see more photos, I encourage you to visit Brooke over at Killer B Designs.
Behr Semi-Gloss Water Based Paint in Mermaid Treasure
Valspar Tintable Glazing Medium
150 Grit Sandpaper
Brushes and Rags
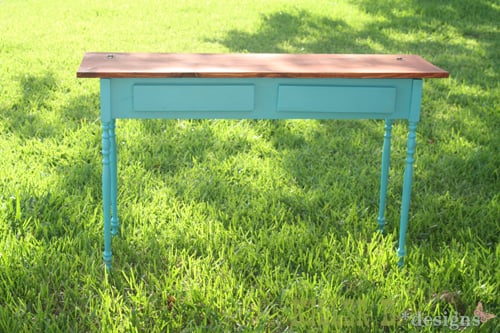
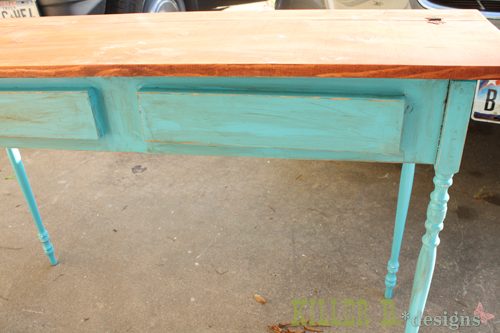
Start by painting the Behr Mermaid Treasure over the project. To bring out the distressed edges, try staining part of the project with the Minwax Gunstock.
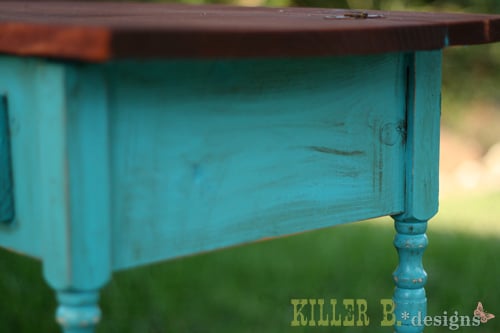
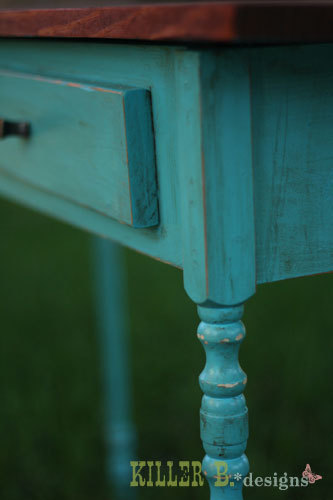
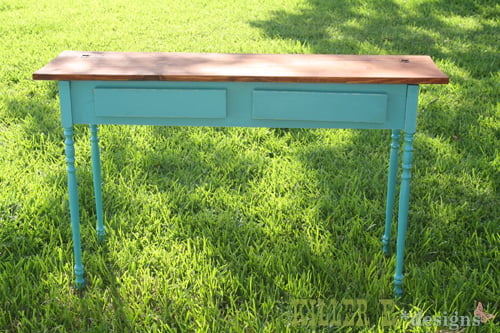
Brooke stained the top pieces, painted the main console part for a nice contrast.

Now comes the hard part ... This now is the most difficult step.
Let the paint dry.
I know it's hard - but just let it dry completely. If you sand too early, the paint will come off in chunks - not giving you that time worn distressed feel.
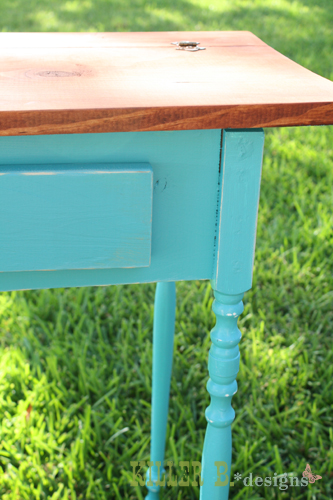
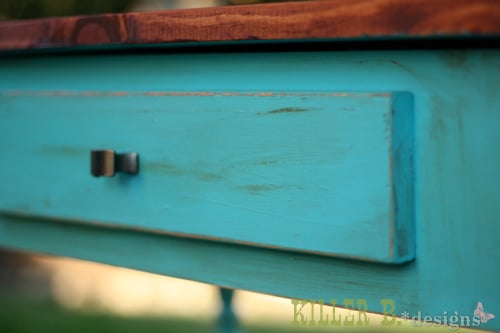
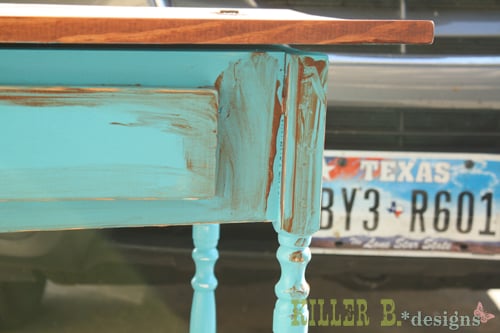
Projects that work well for distressing are ones that have lots of edges to distress! So look over you project at the edges - the most likely spots for wear - and lightly distress with 150 grit sandpaper. A sanding block works well - avoid using a power sander and over distressing your project.
If you did the sample block, distress edges until you are happy.
When you are happy with the distressing, remove all sanding debris and wipe clean with a damp cloth. Let dry completely.
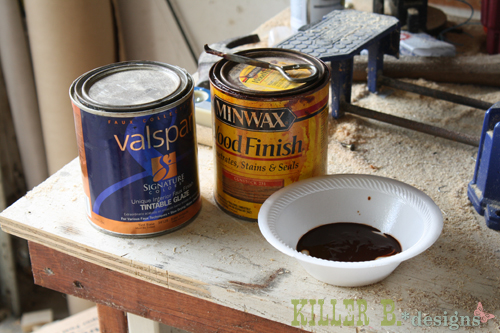
Next you need to make your glaze. Brooke used Valspar Tintable Glazing Medium, with a ratio of 4:1. If you want it darker, use 3:1, always with glaze in the higher amount. You don’t need a lot of stain to make the glaze dark.
Test the glaze on your sample scrap block.
Use a rag to work the glaze into the project. You will want to wear gloves, and make sure the glaze is worked into all the little crevices, across flat surfaces, and soaking up into the distressed areas.
Work in small sections for larger projects to avoid the glaze drying too fast.
Test wiping off the glaze with a clean rag. If the glaze comes off to cleanly, you will want to reapply and wait a little longer. If the glaze is too dark, simply use a damp clean rag to wipe off glaze.
Be patient during this step - you have a good window of time to get things just right.

With glaze removed, glaze remaining is concentrated in cracks and distressed areas.
Remember, at this stage you can repeat these steps for an even stronger distressing.

Allow the glaze to dry completely.<p>To protect the glaze, spray project with two coats of polycrylic top coat.</p><p>And a huge thank you to<a href="http://www.killerbdesigns.com/distressing-paint-with-glaze-and-stain/&q…; target="_blank"> Brooke at Killer B Designs</a> for sharing this tutorial with us! Thank you Brooke!</p><p><br /></p><p><br /></p>
Comments
Designs by Studio C (not verified)
Wed, 06/06/2012 - 06:45
Turquoise & Chocolate finish
Kathleen (not verified)
Wed, 08/01/2012 - 16:53
Distressed Turquoise with Chocolate Glaze
Shery M (not verified)
Sun, 10/14/2012 - 23:50
Distressed Turquoise w/Chocolate Glaze
Andrea Coble (not verified)
Fri, 01/04/2013 - 17:20
I can't find Valspar Tintable Glaze
Guest 101 (not verified)
Fri, 01/04/2013 - 21:18
I can't find Valspar tint-able Glaze. (Guam)
Andrea Coble (not verified)
Fri, 01/04/2013 - 22:28
Thank you! I will try that!
FlorenceCommons
Fri, 02/22/2013 - 02:41
Hey,I will also follow these steps
FlorenceCommons
Fri, 02/22/2013 - 03:11
Hey,I will also follow these
kazey
Thu, 05/02/2013 - 20:21
Stunning
della121314
Mon, 07/08/2013 - 23:27
Coin Jewelry
della121314
Mon, 07/08/2013 - 23:27
Coin Jewelry
della121314
Sat, 07/13/2013 - 18:35
cute costumes
della121314
Sat, 07/13/2013 - 18:35
cute costumes
ashturn
Tue, 09/24/2013 - 17:31
White Distress