

Free plans to DIY a simple desk inspired by Pottery Barn Teen desk. It's just 2x4s and we got the step by step!


Hi everyone!
Do you need a simple, small desk for your kids, but don't want to pay a fortune for it?
Well, do we ever got you covered!
I partnered up with my super amazing friend Brook from Being Brook (yes, she is really super amazing, I exaggerate not) to bring you a simple desk that you can make from 2x4s and 2x6s.
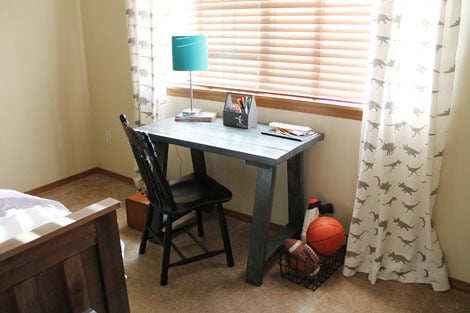
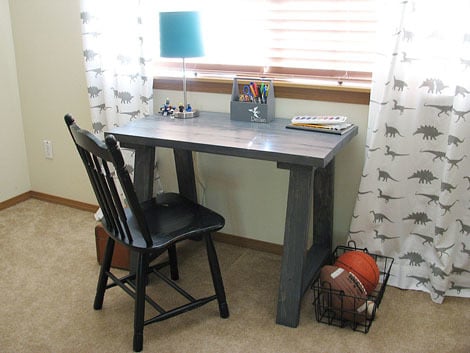
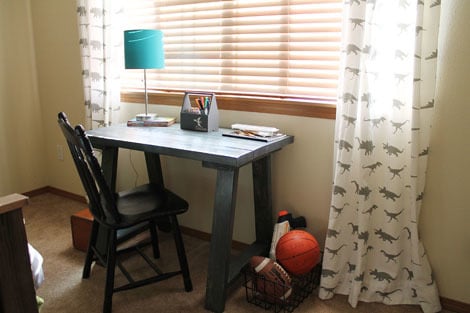
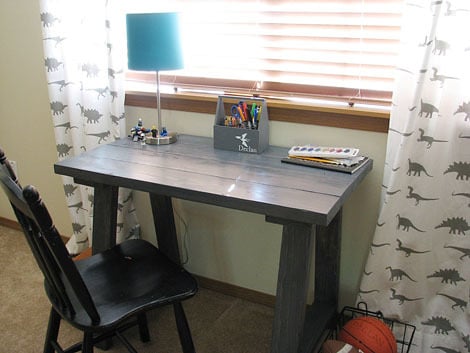
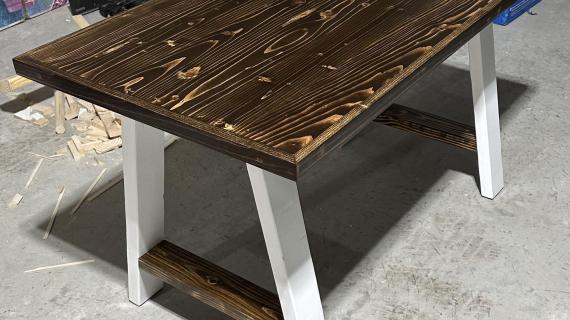
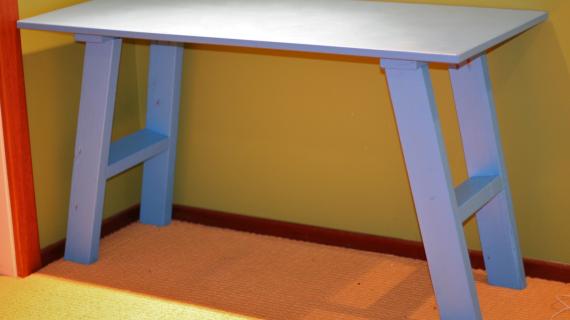
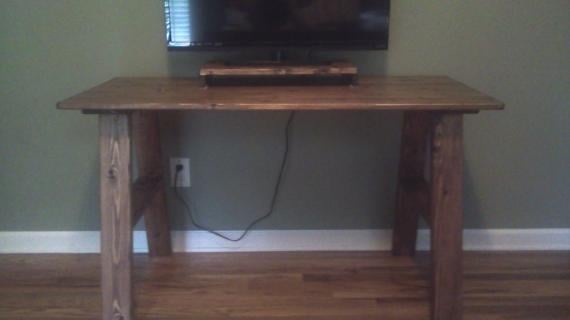
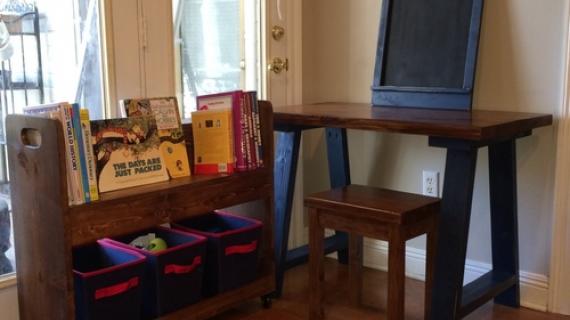
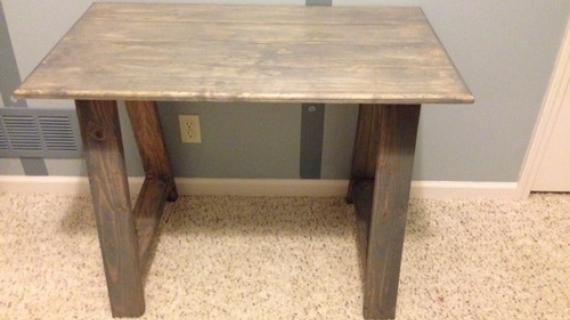
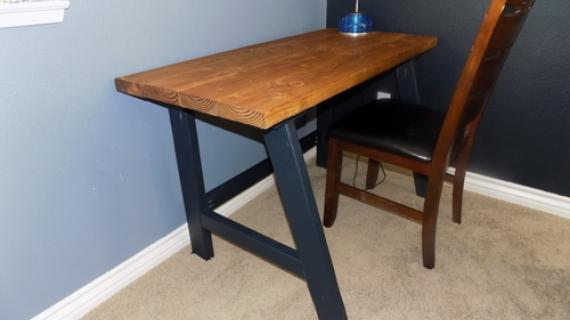
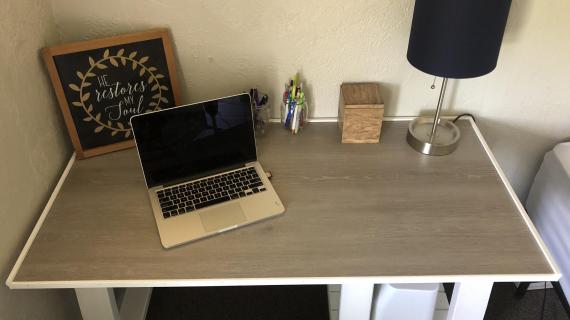
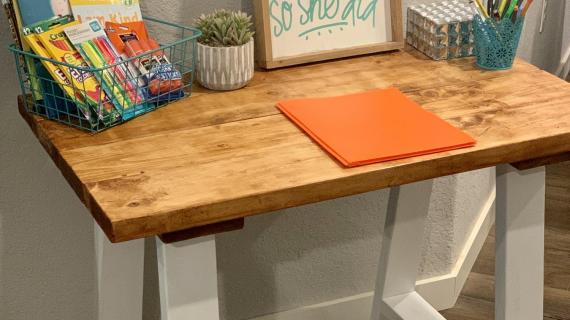
Pretty cute, eh? I think so too!
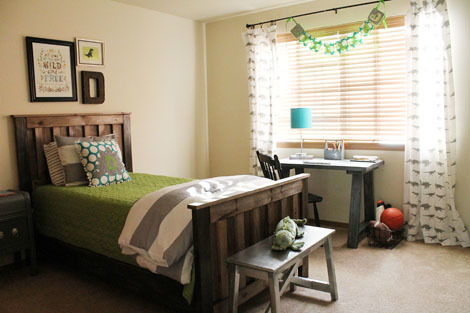
ROOM FULL OF DIY!
And the rest of Brook's son's room is no disappointment either! You can also build this bed with free plans and the X bench!
So here's what to do. Go head on over to Being Brook to load up on tons of inspiration, come back here and print out the plans, and let's get building!
And if you love the finish, we've got you covered there too! I'll be posting the step by step tutorial so you can build and finish your furniture beautifully and easily!
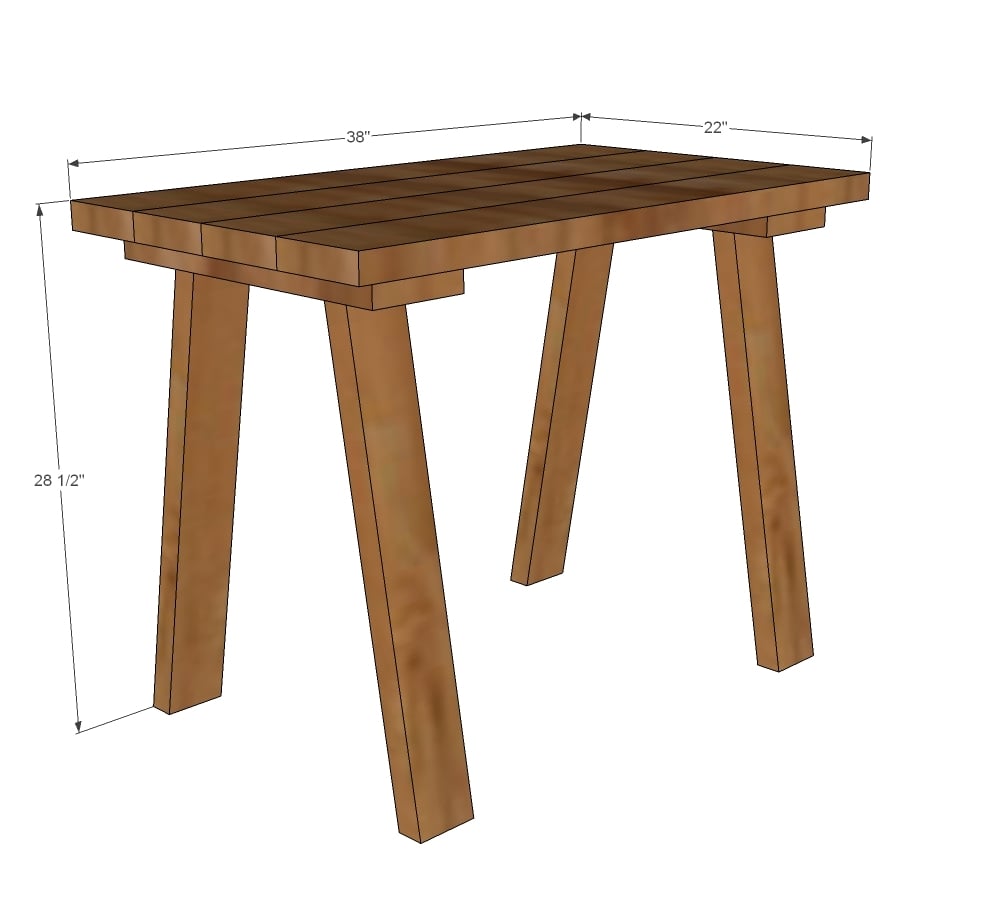
Preparation
1 – 2x4 a 104 5/8” (9 foot wall stud) or 1 – 2x4 @ 10 feet long
2 – 2x6 @ 8 feet long
2 ½” PH screws
4 – 2x4 @ 25 7/8” (both ends cut at 10 degrees off square, long point to short point, ends ARE parallel)
2 – 2x6 @ 19”
4 – 2x6 @ 38”
2 - 2x4 @ 17 1/2" (long point to long point, both ends cut at 10 degrees off square)


Please read through the entire plan and all comments before beginning this project. It is also advisable to review the Getting Started Section. Take all necessary precautions to build safely and smartly. Work on a clean level surface, free of imperfections or debris. Always use straight boards. Check for square after each step. Always predrill holes before attaching with screws. Use glue with finish nails for a stronger hold. Wipe excess glue off bare wood for stained projects, as dried glue will not take stain. Be safe, have fun, and ask for help if you need it. Good luck!
Instructions
Step 1

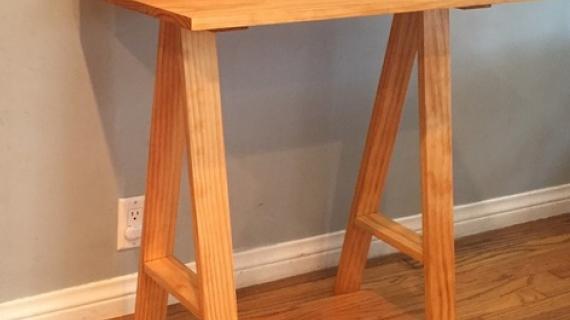
Attach legs to top apron.
Step 2

You can also use a premade top or top the desk in a piece of acrylic or mat to make a smooth writing surface.
Step 3

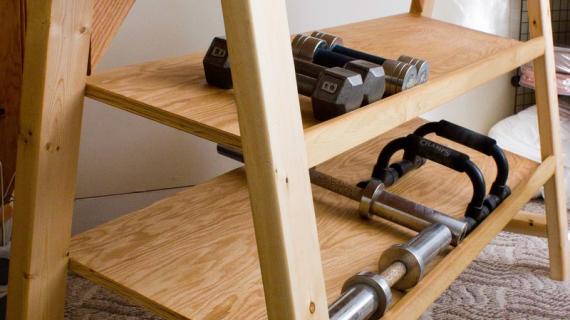
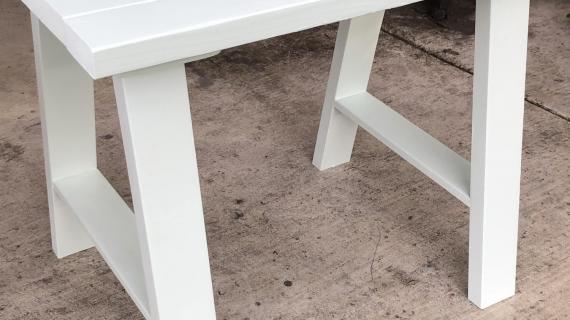
For the most support, attach bottom shelf brace as shown here.
It is always recommended to apply a test coat on a hidden area or scrap piece to ensure color evenness and adhesion. Use primer or wood conditioner as needed.

Comments
Jessica Warfield (not verified)
Thu, 10/18/2012 - 10:23
Thanks
Thanks for all of the great plans!
Dena Stewart (not verified)
Fri, 10/19/2012 - 07:40
simple small trestle desk
I would like to make this for my son's room for his laptop, but I have a question: How far apart or how far from the edge of the apron are you attaching the legs?
In reply to simple small trestle desk by Dena Stewart (not verified)
MikeB
Sun, 10/21/2012 - 10:41
I just finished drawing these
I just finished drawing these plans in Sketch up, because I also didn't see the measurement for how far in from the apron to mount the legs. Using all of the other dimensions from the plans, I came up with 3 inches in. By 3 inches in, I mean from the outside of the leg to the end of the apron. That should give you 10 inches between the two legs. And the bottom of the legs (measuring outside to outside) is really close to 22 inches, the same as the table top. Hope all of that makes sense.
Dena Stewart (not verified)
Sat, 11/17/2012 - 16:47
trestle desk
Thanks, MikeB. That will definitely help. Just finished cutting my wood and made a BIG mistake - went in order of the cut list when I should have done my longer cuts first on the 2x6. Ran short of a 36" for the top. Have to run back to the depot :(
Jeff (not verified)
Sat, 12/08/2012 - 08:14
Shopping list short?
Plans call for a total of about 139" of 2x4's. Shopping list has 104 5/8 or 120" if you get the 10' wall stud.
NoviceJulia
Thu, 10/02/2014 - 04:08
excited to get started
I think this will be my very first project. Other than buying extra 2x4 and placing the legs 3" in from the apron, are there any other pointers anyone has?
Mtwagley@sbcgl…
Sun, 01/21/2018 - 11:42
Maybe hardwood
I'm considering building this desk but making the frame out of red oak (1x4's) and the top from leftover hardwood flooring. I think it would give it a more refined look and I'm looking to work with hardwood. I'm just finishing the X end coffee table. Love the plans!!!
hellopf
Mon, 11/11/2019 - 13:50
Material for Desk Top
I have a piece of MDF the exact size that I want the top of this desk to be. I am wondering if I can use MDF for the top with good results. Has anyone has made this desk or something similar using MDF for the top?If so, do you have any suggestions as far as construction goes (e.g. what type screws to use, glue plus screws or just screws, precautions, etc.)
Any help will be appreciated.
Thanks,
P. Frederick