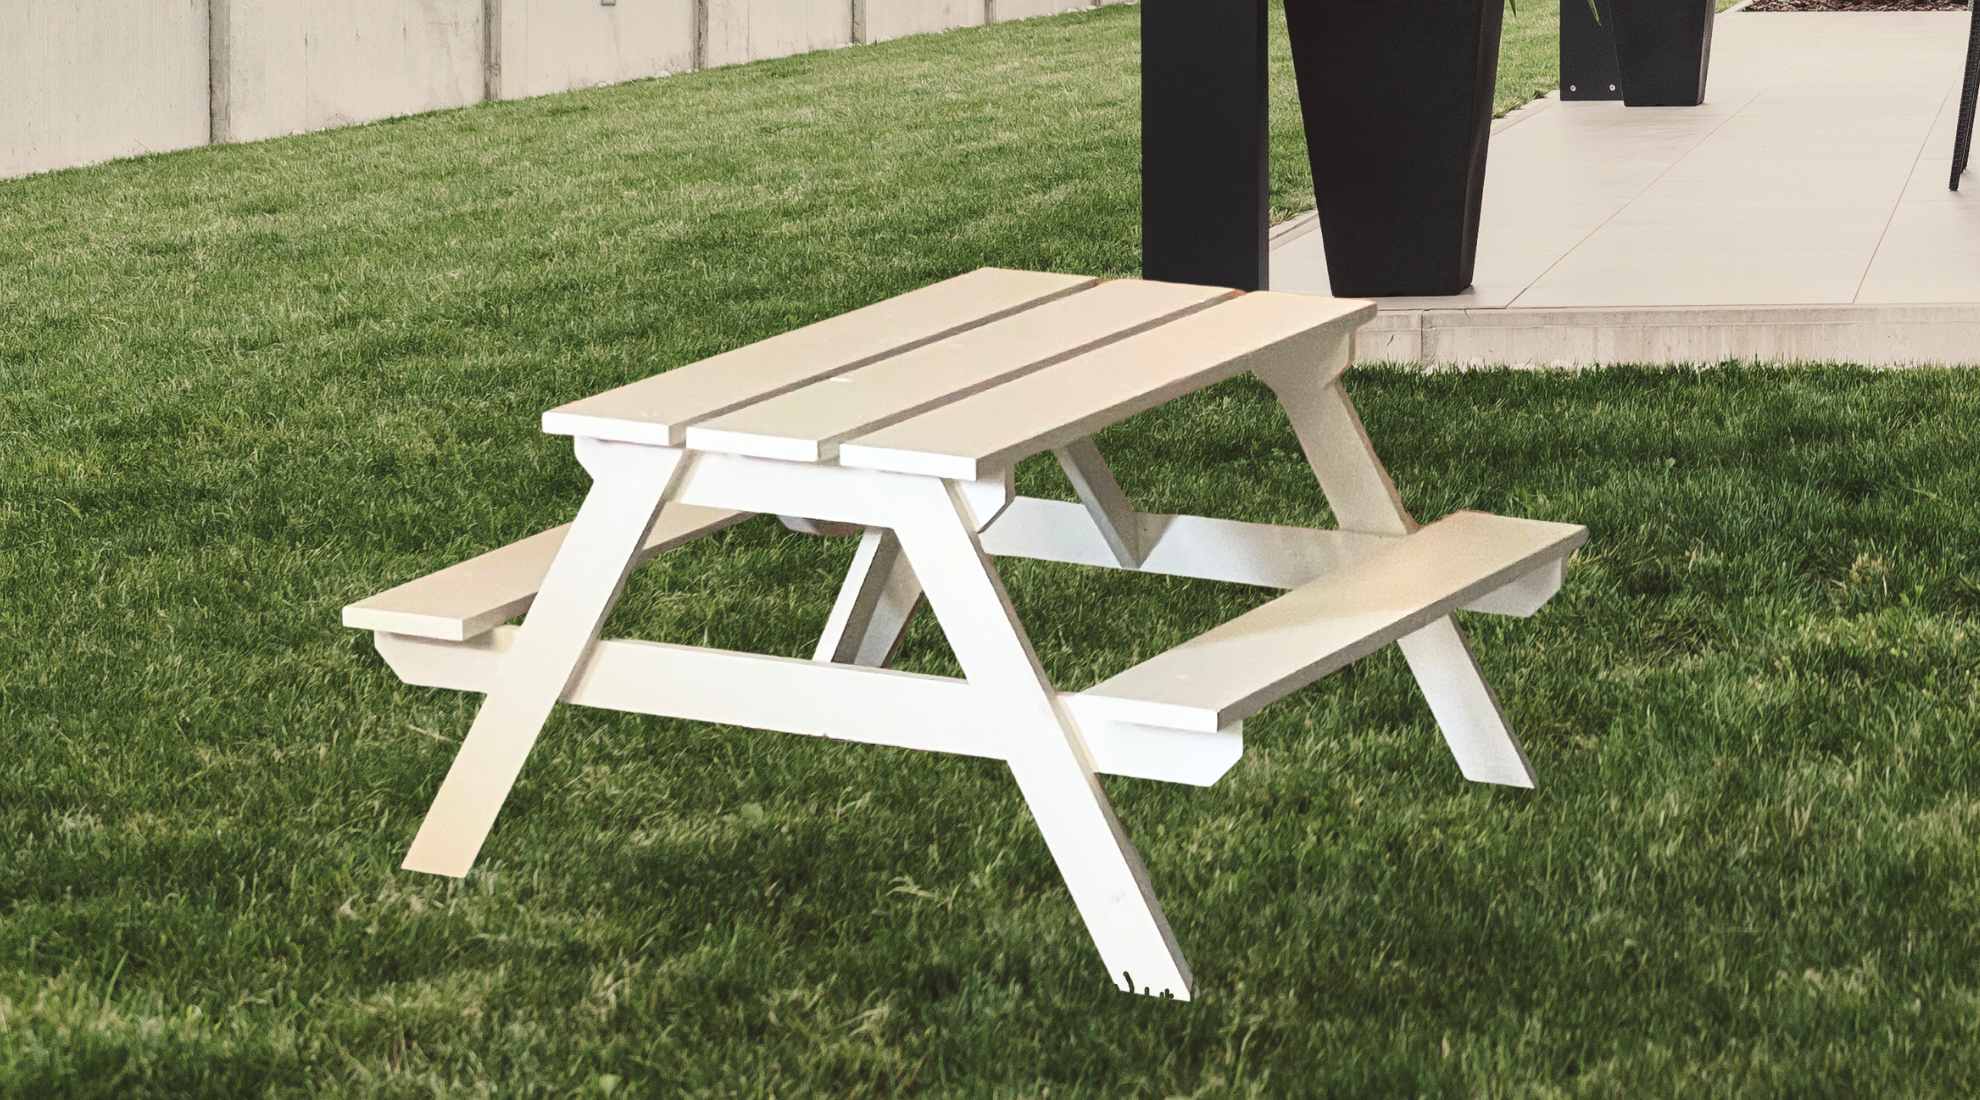
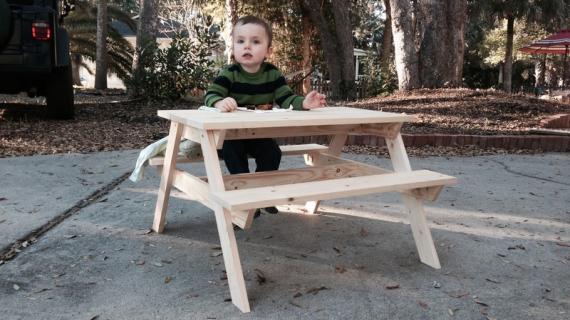
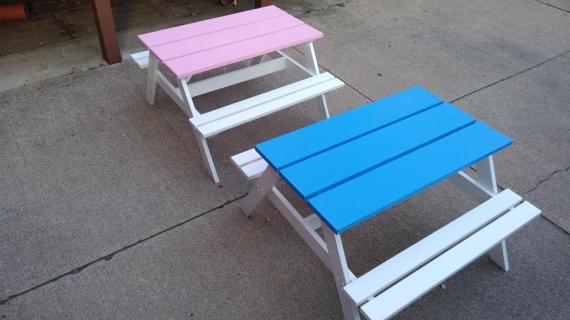
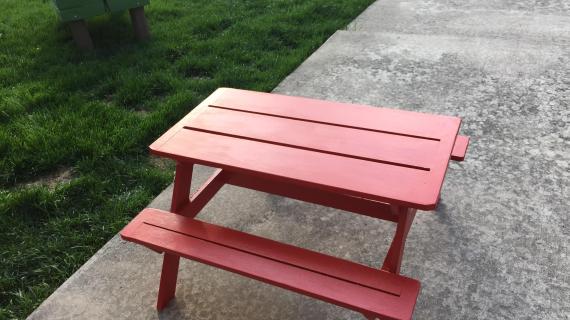
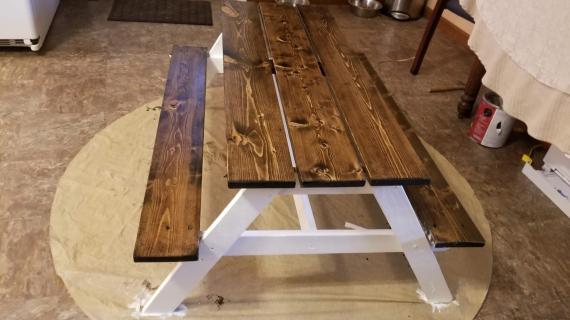
Build your own mini sized picnic table with our free plans. This toddler or preschool sized picnic table is one of the most popular plans. Due to the simple design, easy building instructions, and perfect sizing for littles, thousands of these tables have been built! We love this table as a gift too!
RELATED: We also have a big kids picnic table plan, and an adult sized one too!
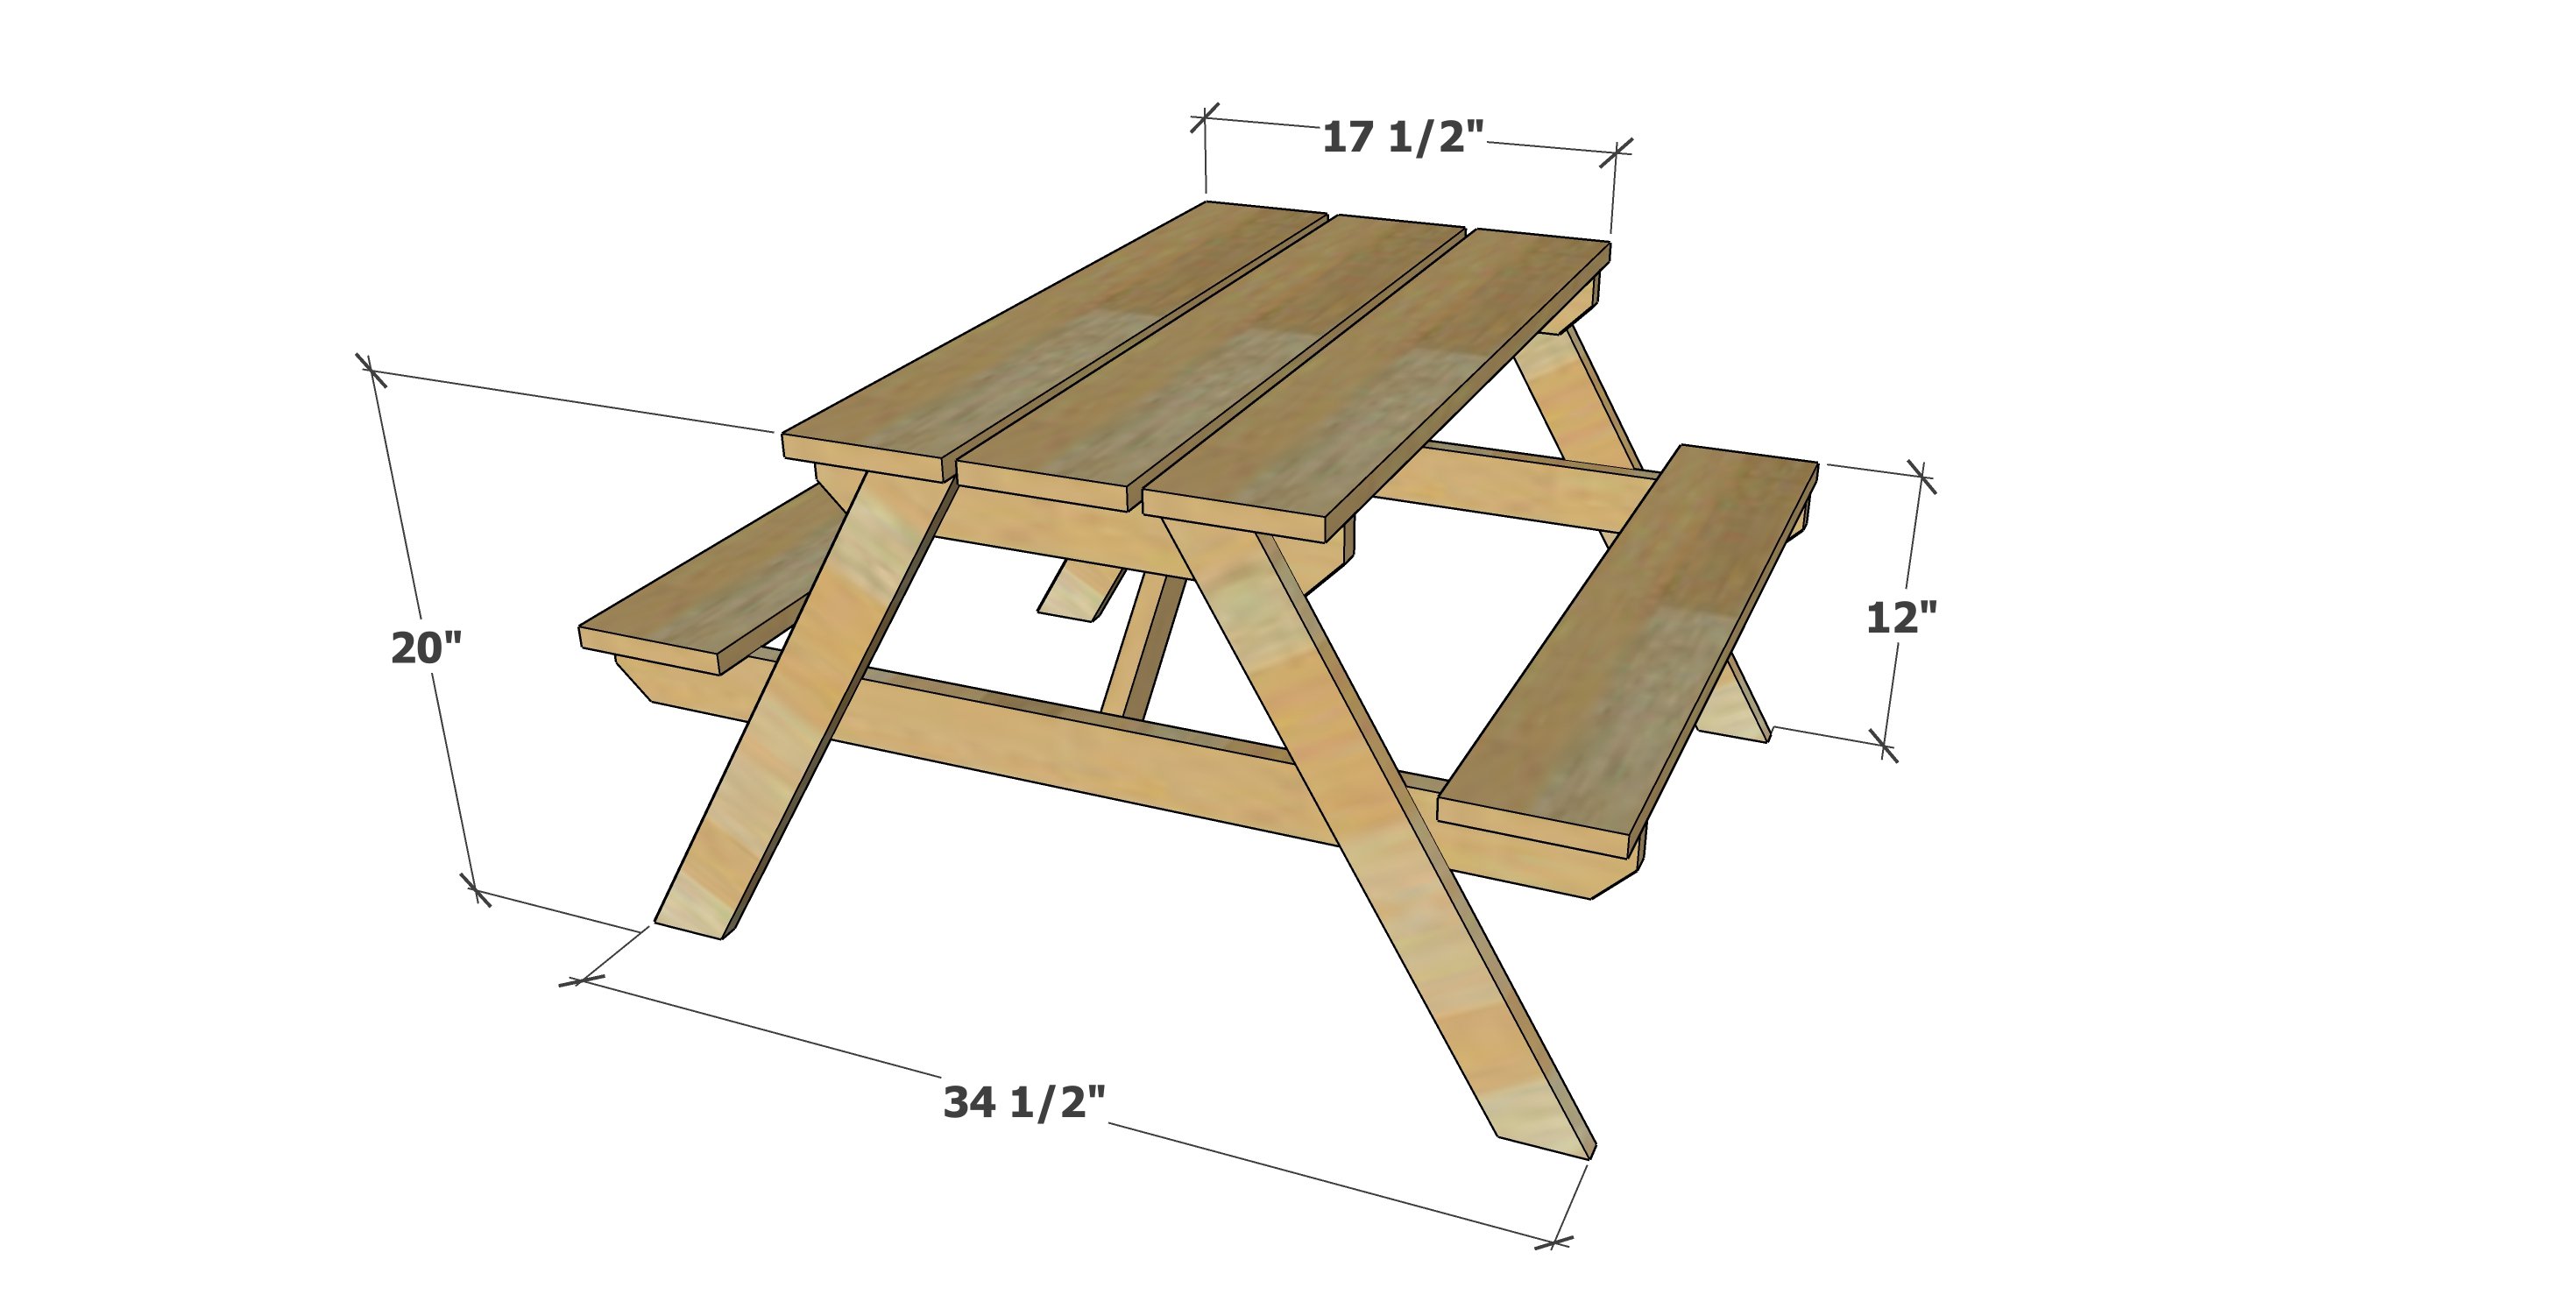
Preparation
- 1 - 1x6 @ 8 feet long
- 1 - 1x6 @ 6 feet long
- 3 - 1x3 @ 8 feet long
- 1 - 1x2 @ 3 feet long
- 1 1/4″ self tapping star bit screws (about 50)
- interior/exterior wood filler
- 120 grit sandpaper
- exterior appropriate wood stain
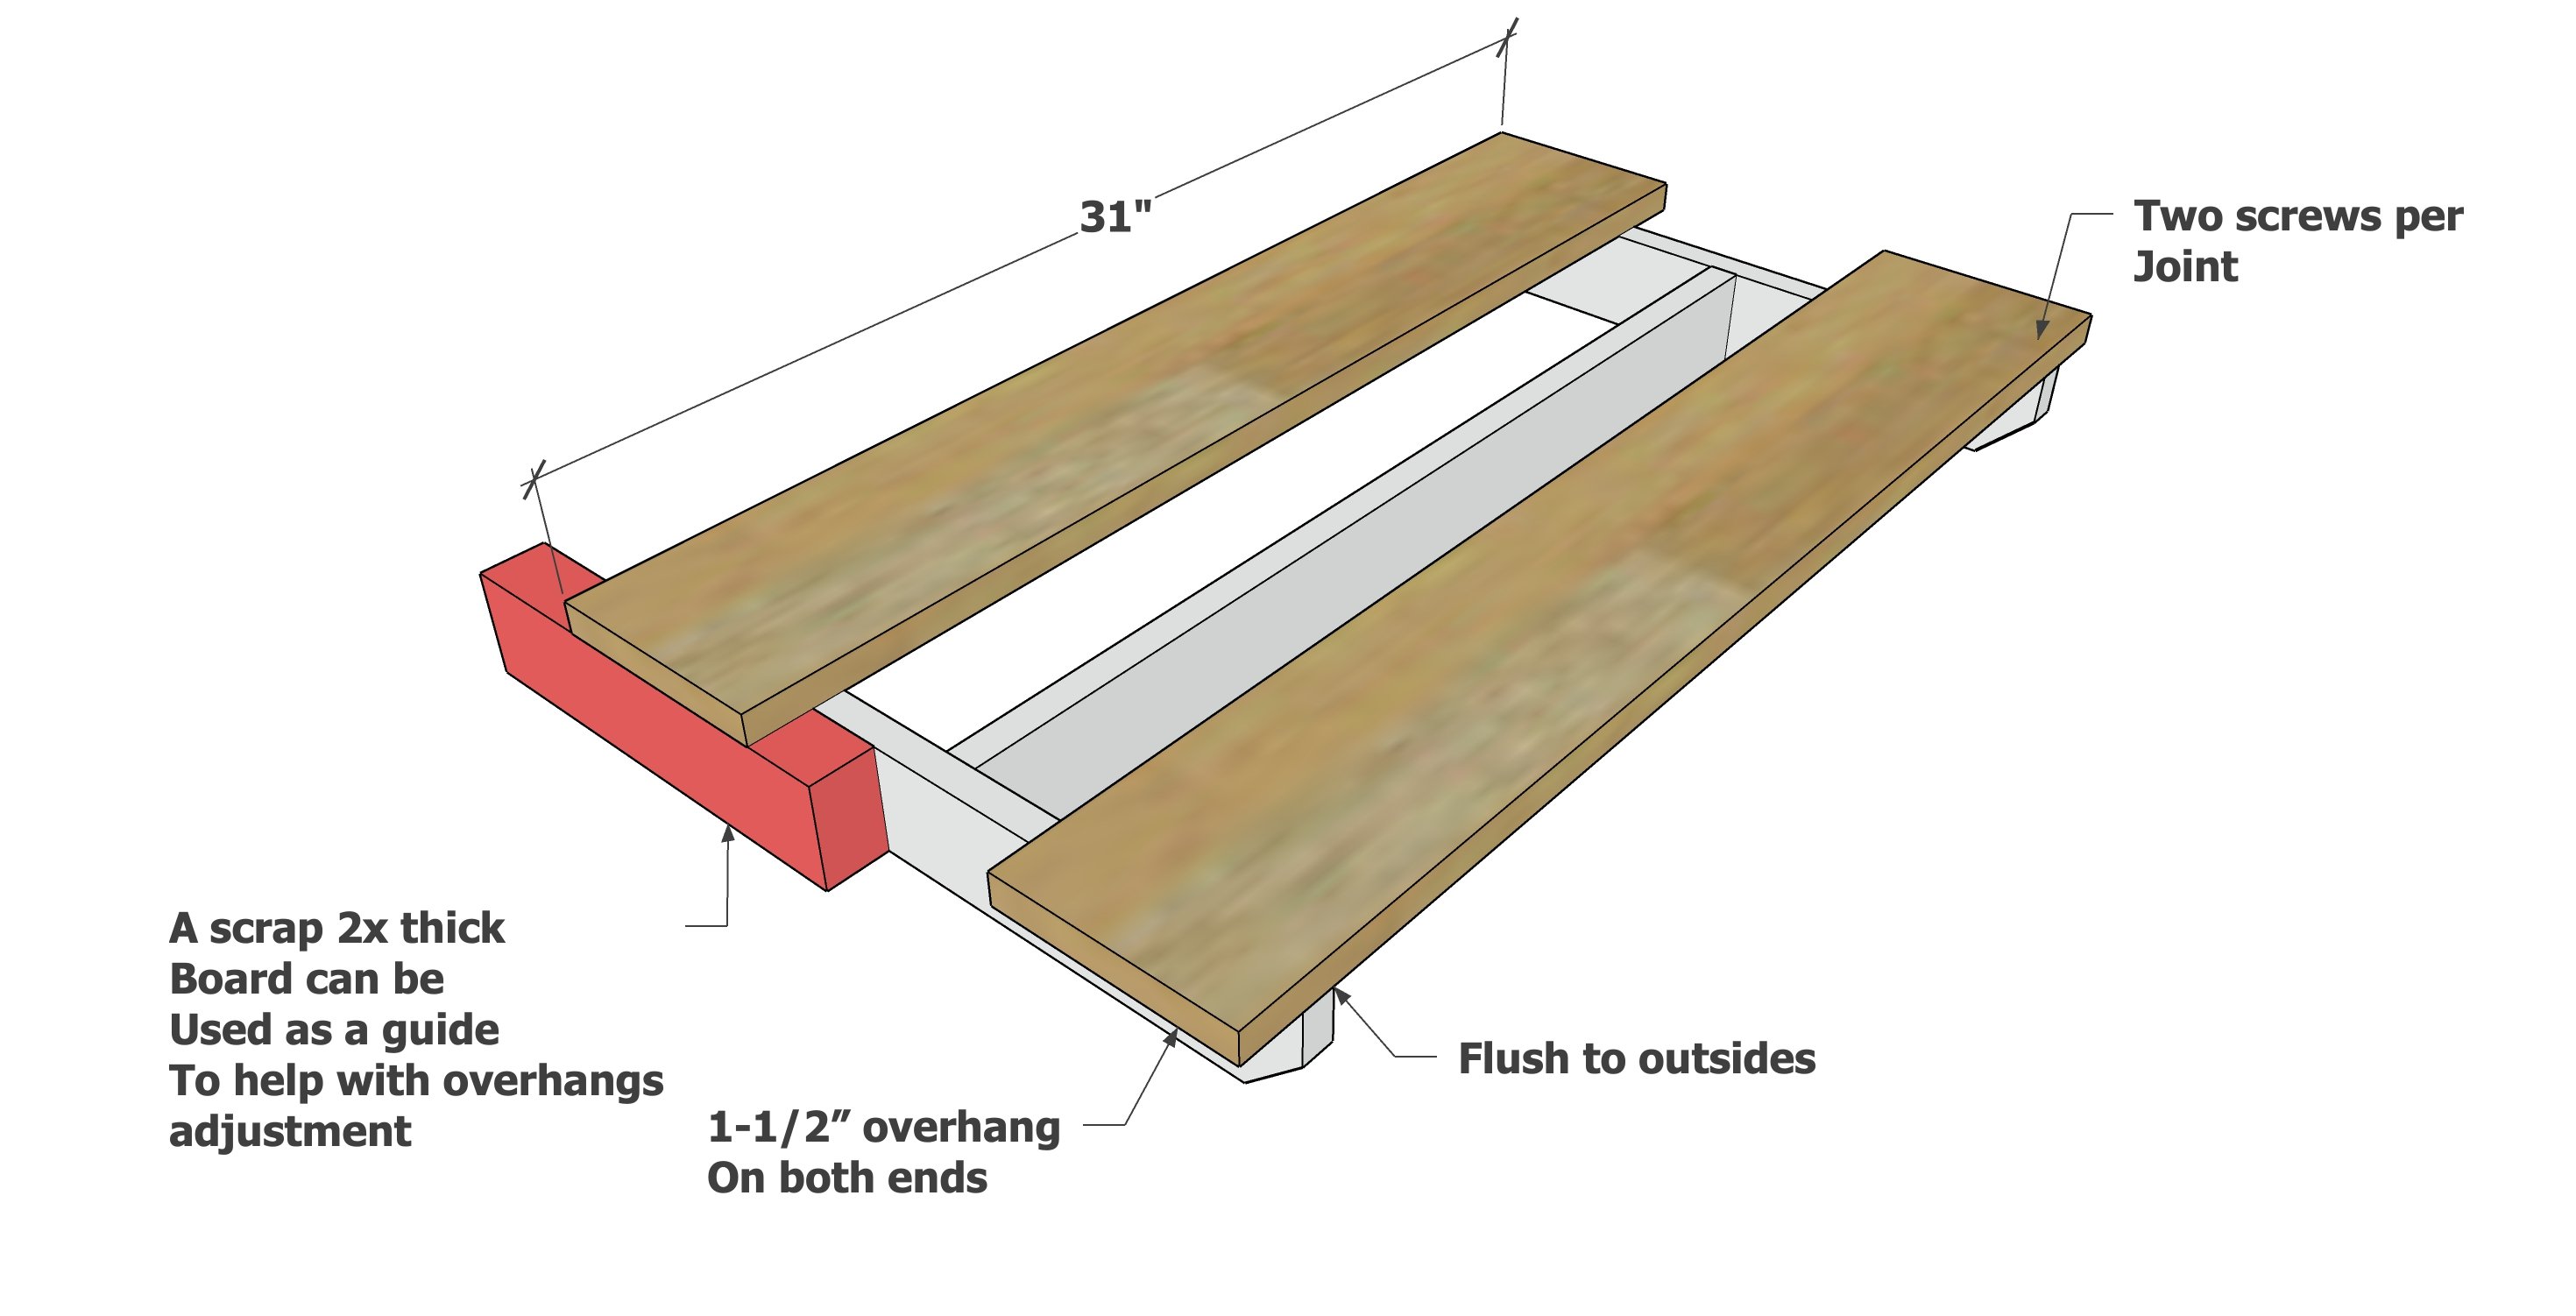
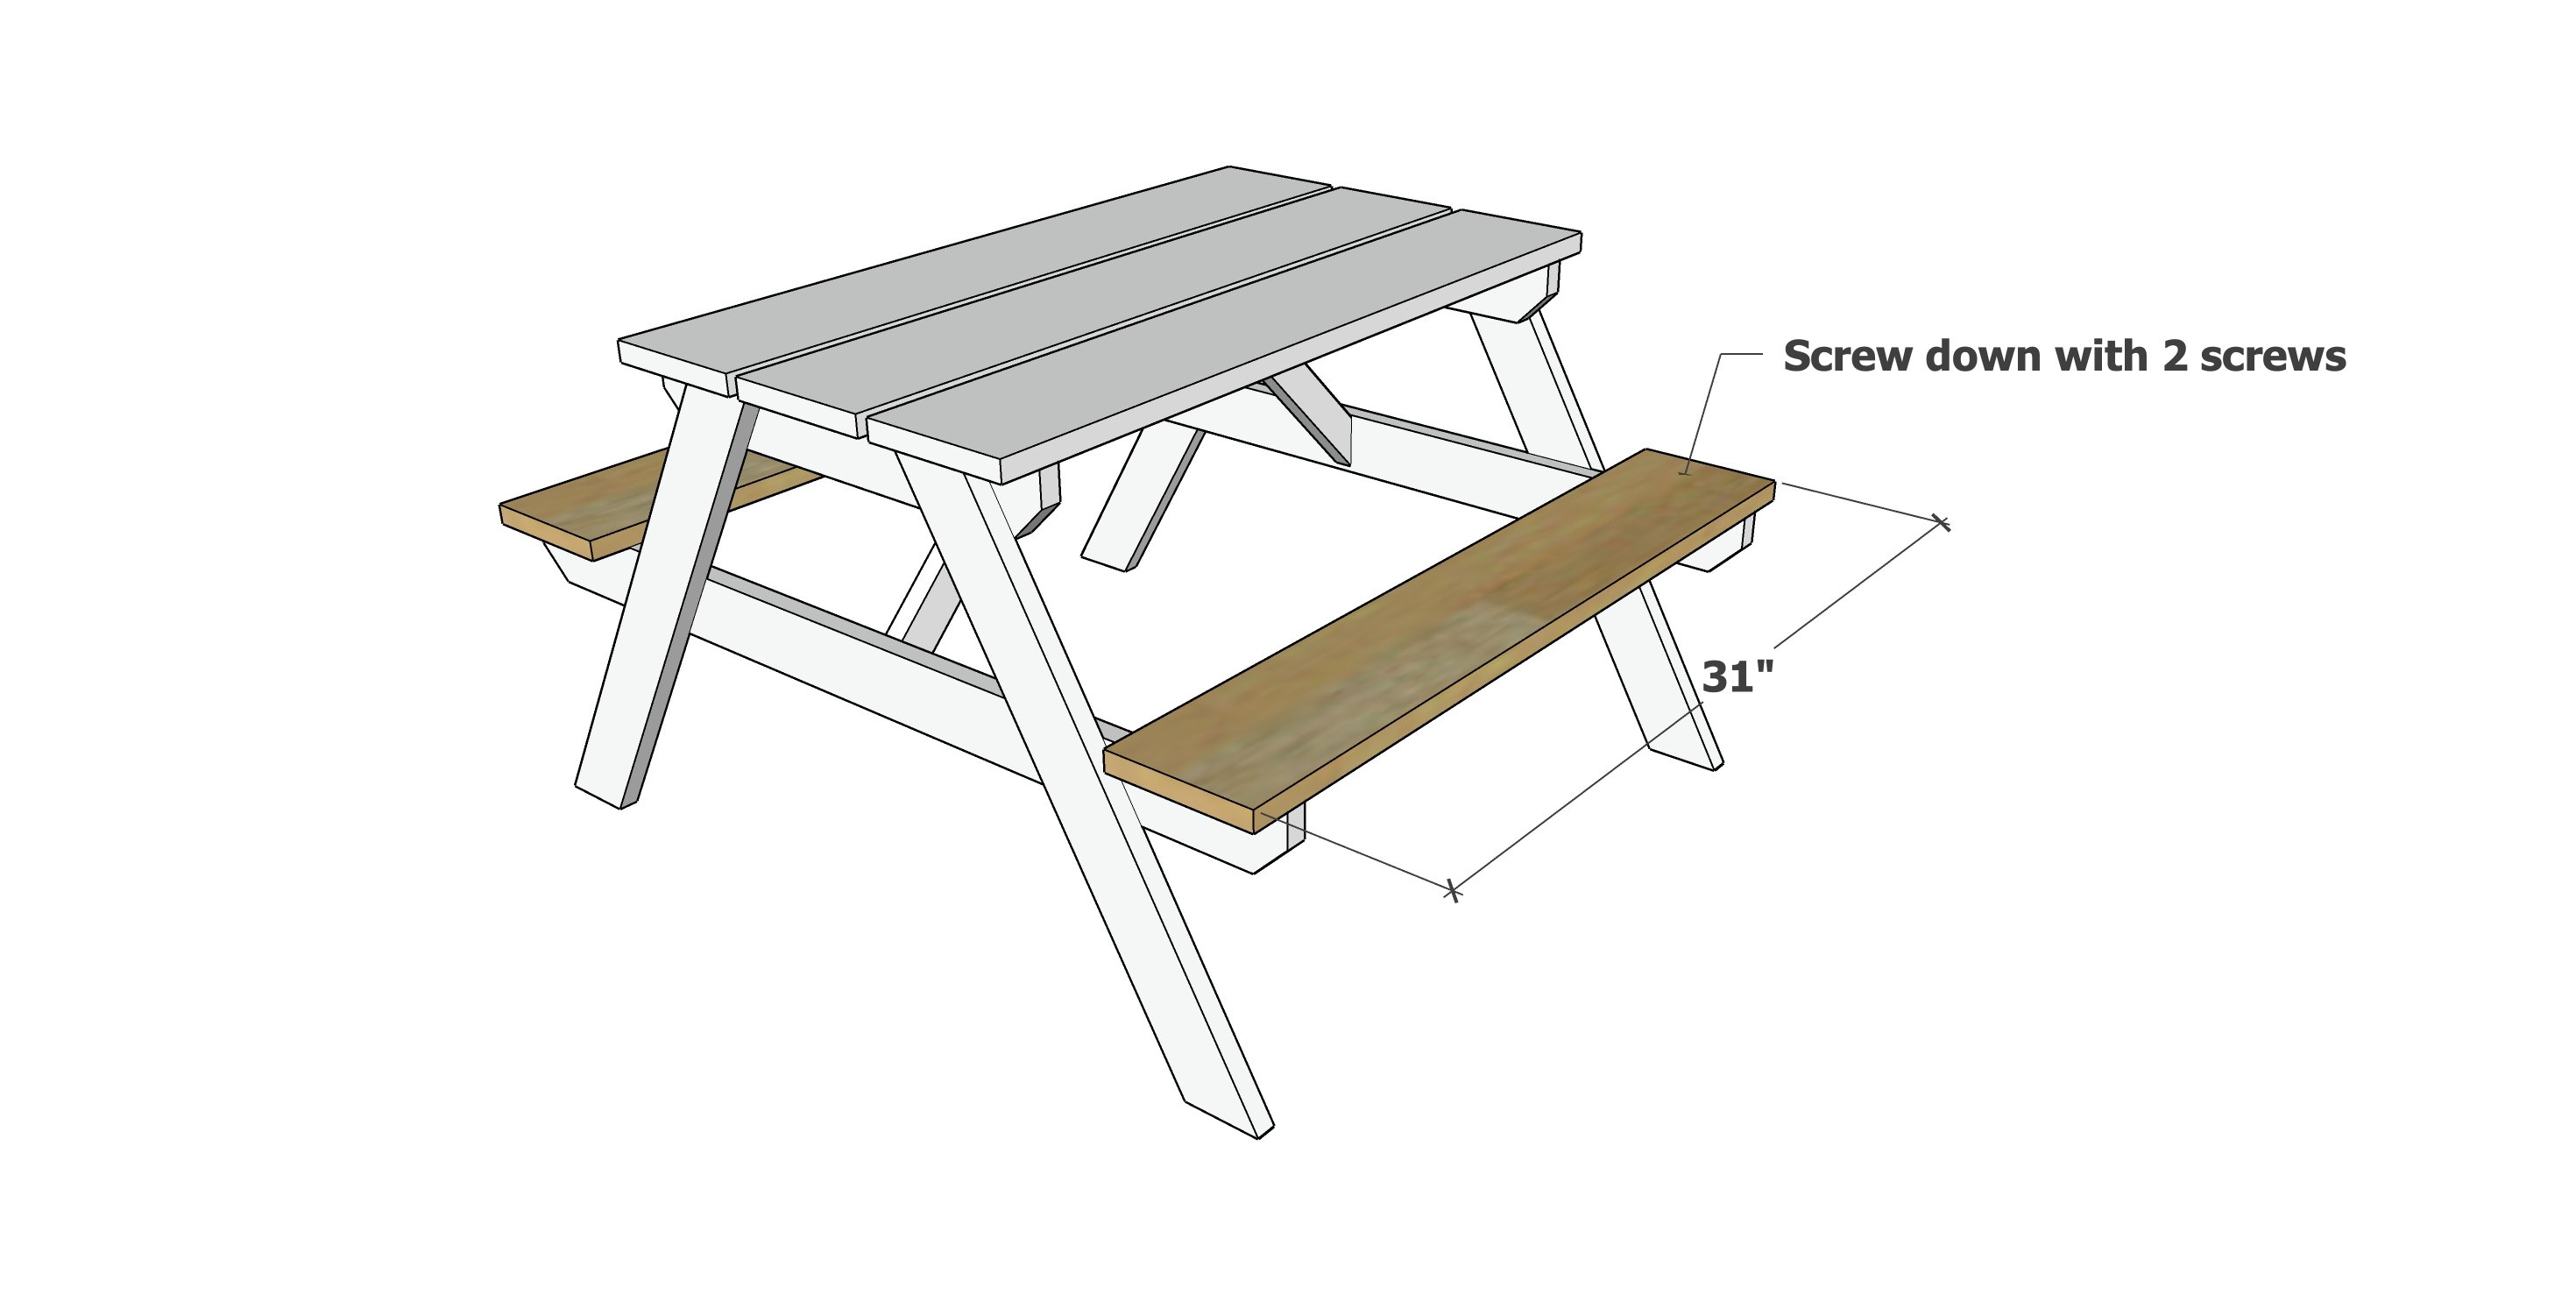
- 5 – 1×6 @ 31″ (Tabletop and Seat Pieces)
- 2 – 1×3 @ 17 1/2″ (Under Table Supports) *
- 1 – 1×3 @ 26 1/2″ (Center Support)
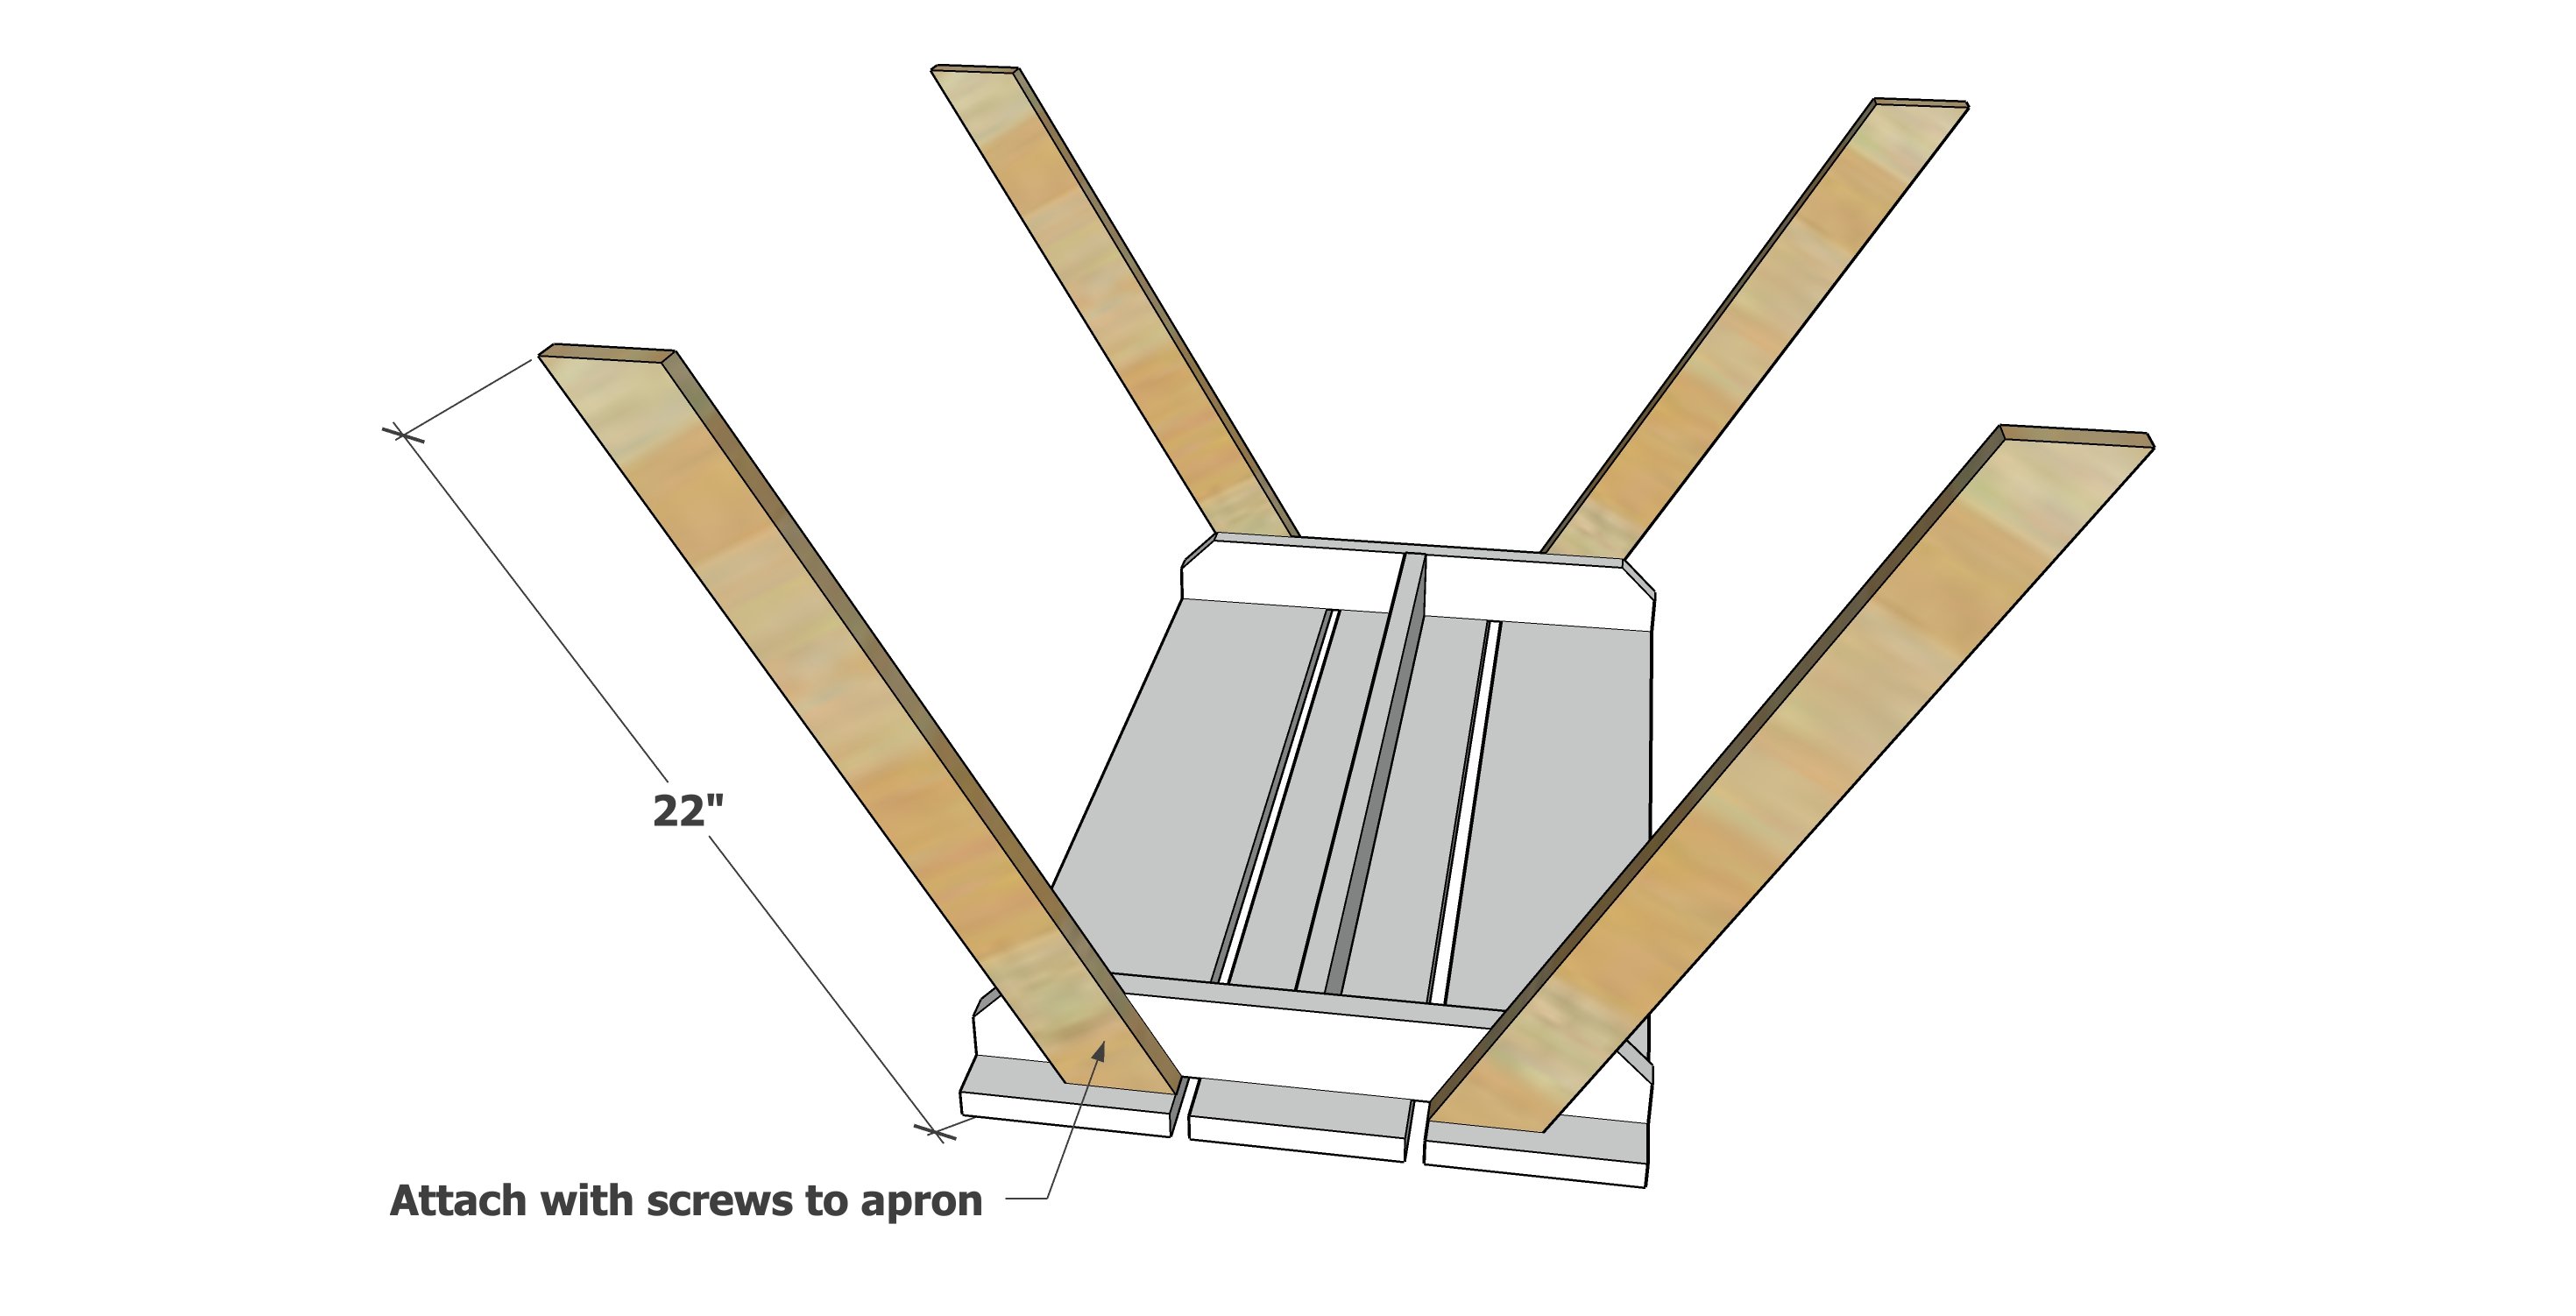
- 4 – 1×3 @ 22″, both ends cut at 30 degrees off square, long point to short point measurement, ends ARE parallel (Legs)
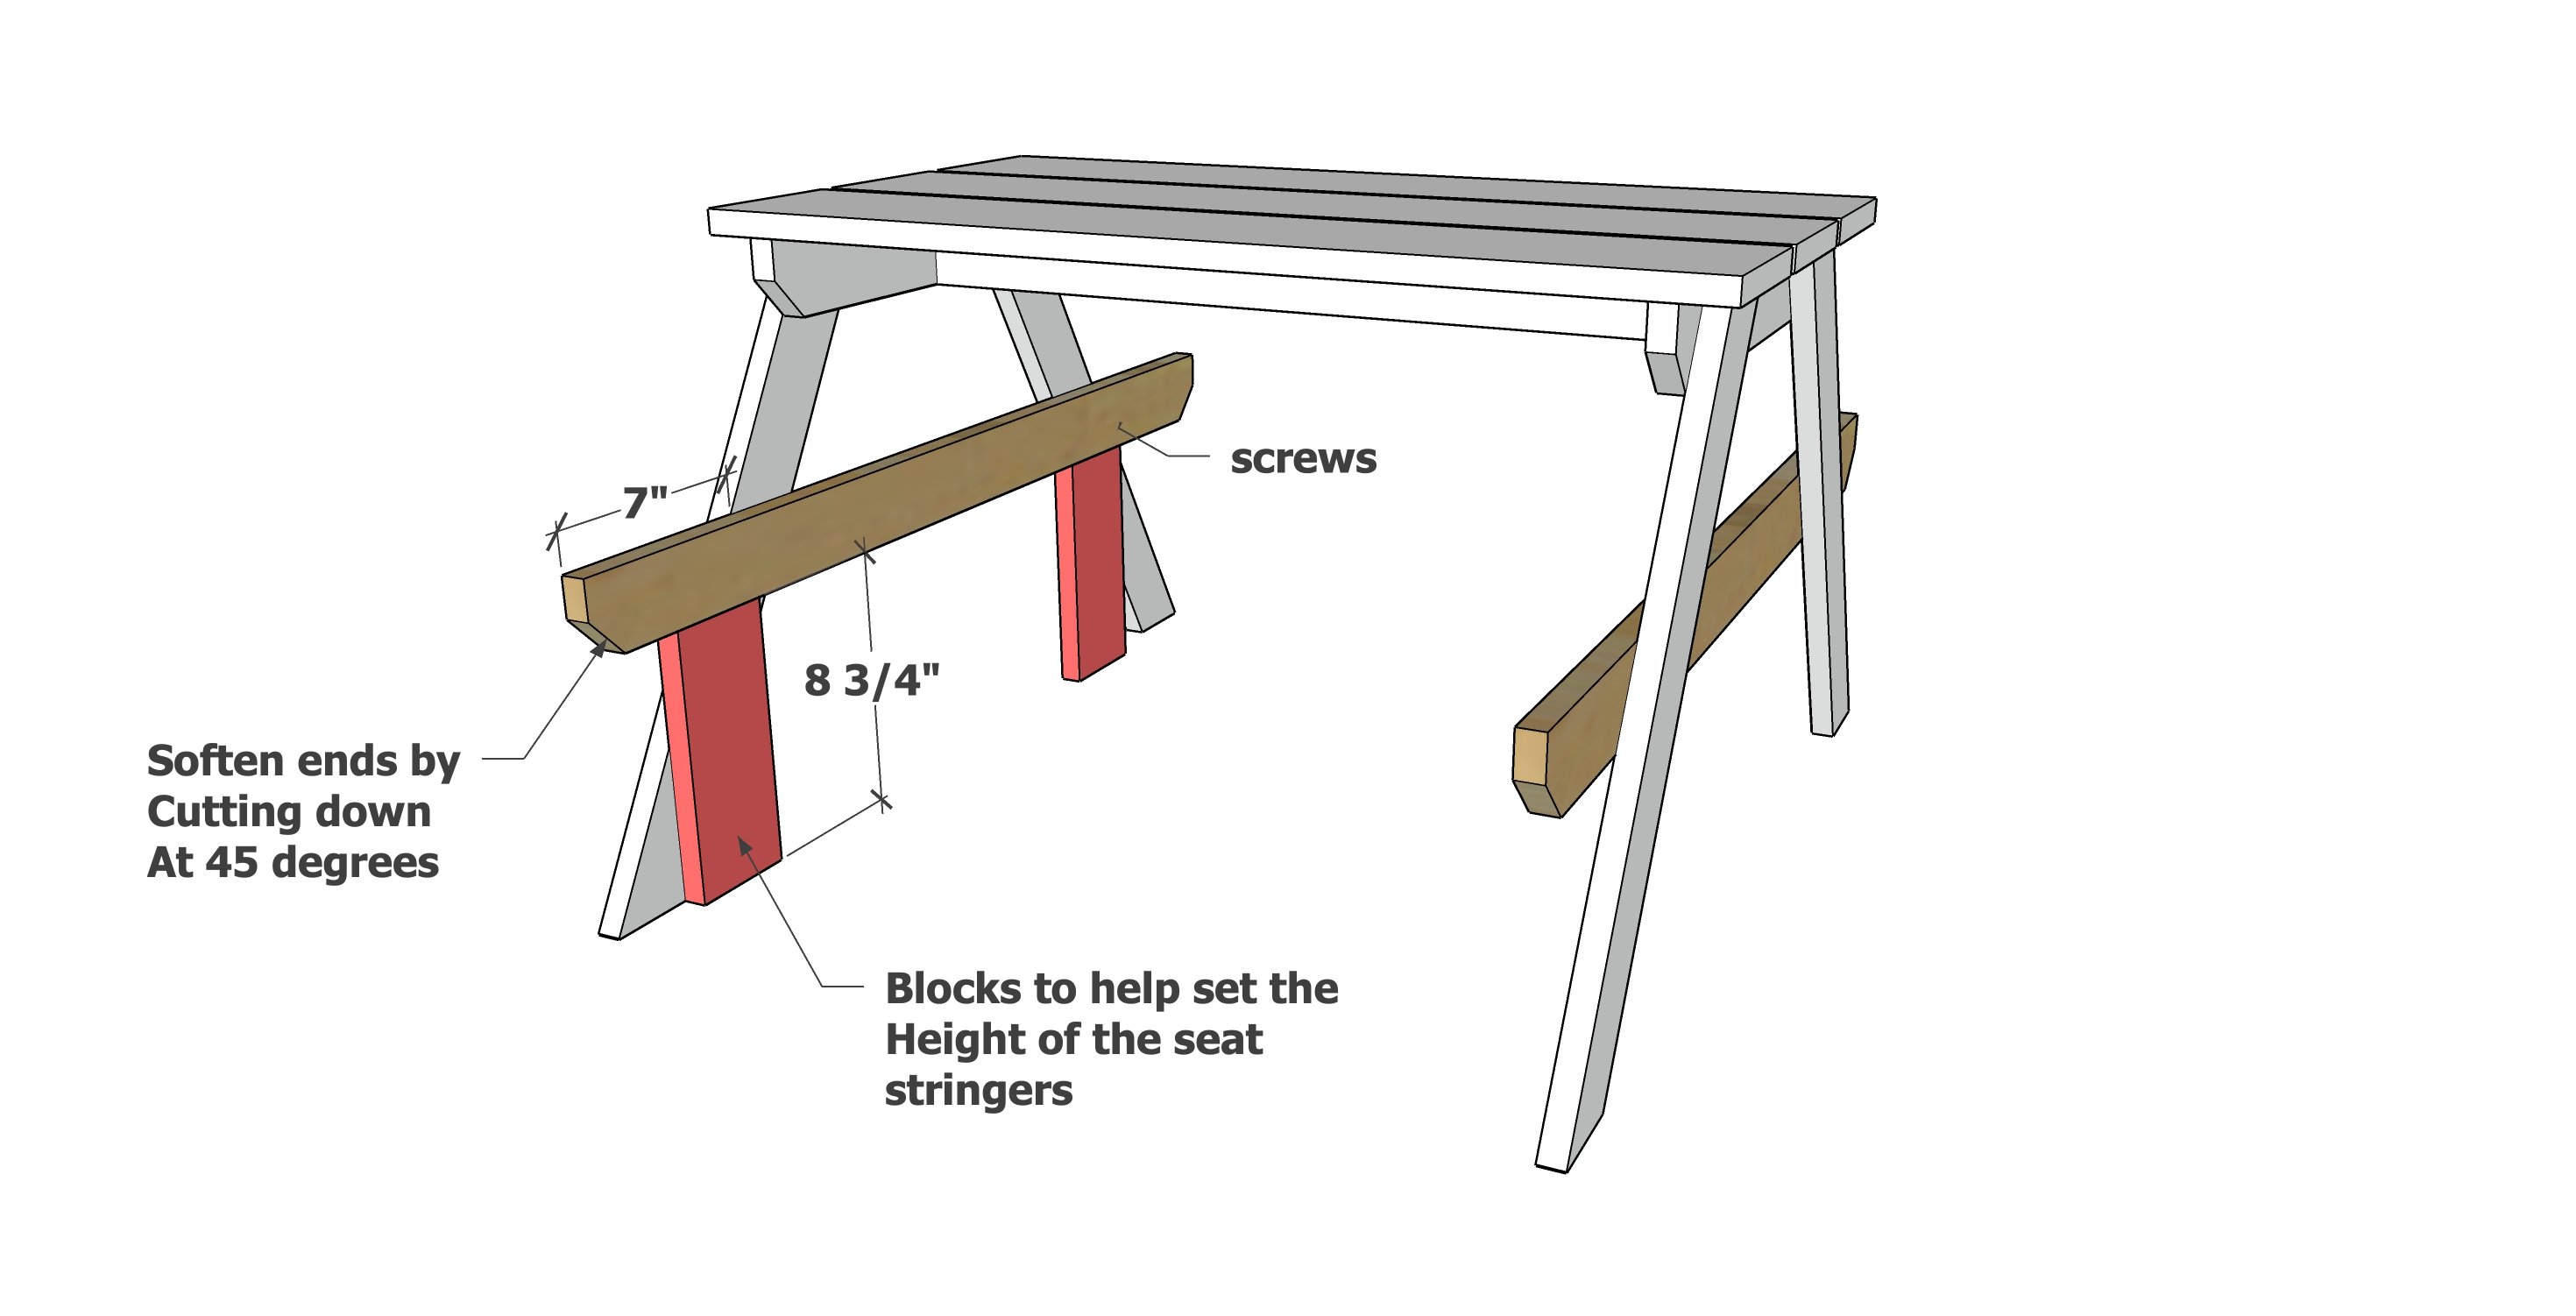
- 2 – 1×3 @ 35-1/2″ (Seat Stringer) *
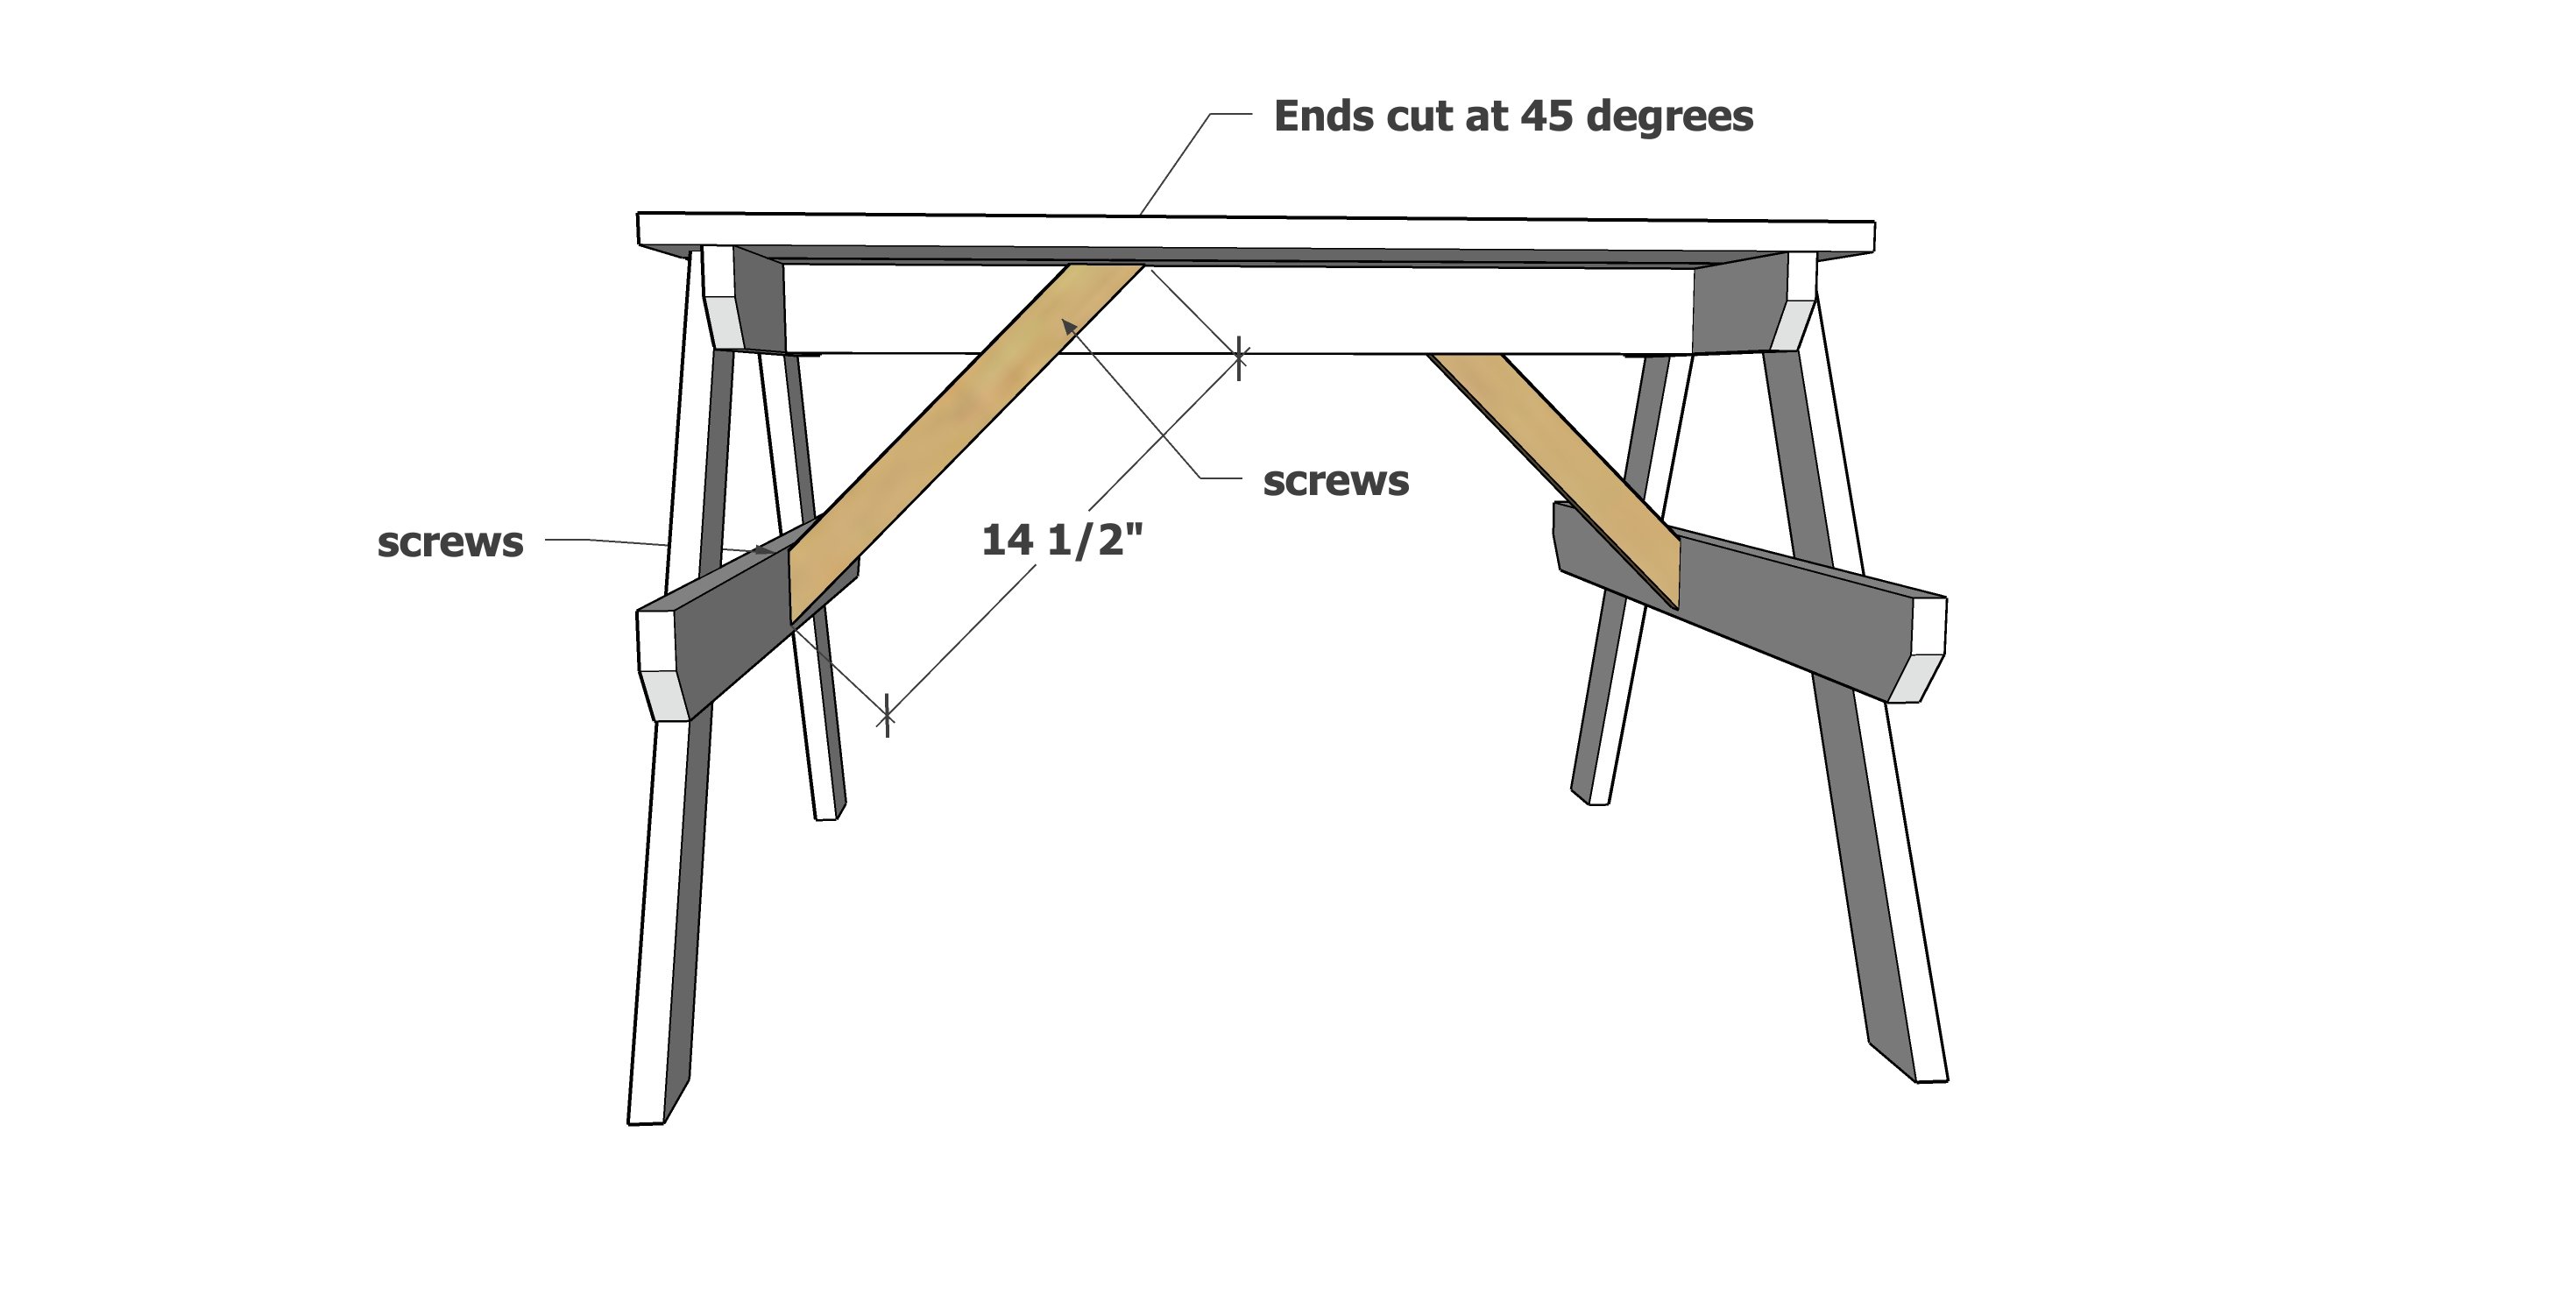
- 2 - 1x2 @ 14-12", both ends cut at 45 degrees off square, long point to long point measurements, ends are NOT parallel (Cross Supports)
*Ends are clipped at 45 degrees to soften edges, see in diagrams
General Instructions. Work on a clean level surface and use proper safety precautions. Check for square after each step. Predrill and countersink all screws.
Instructions
Step 1
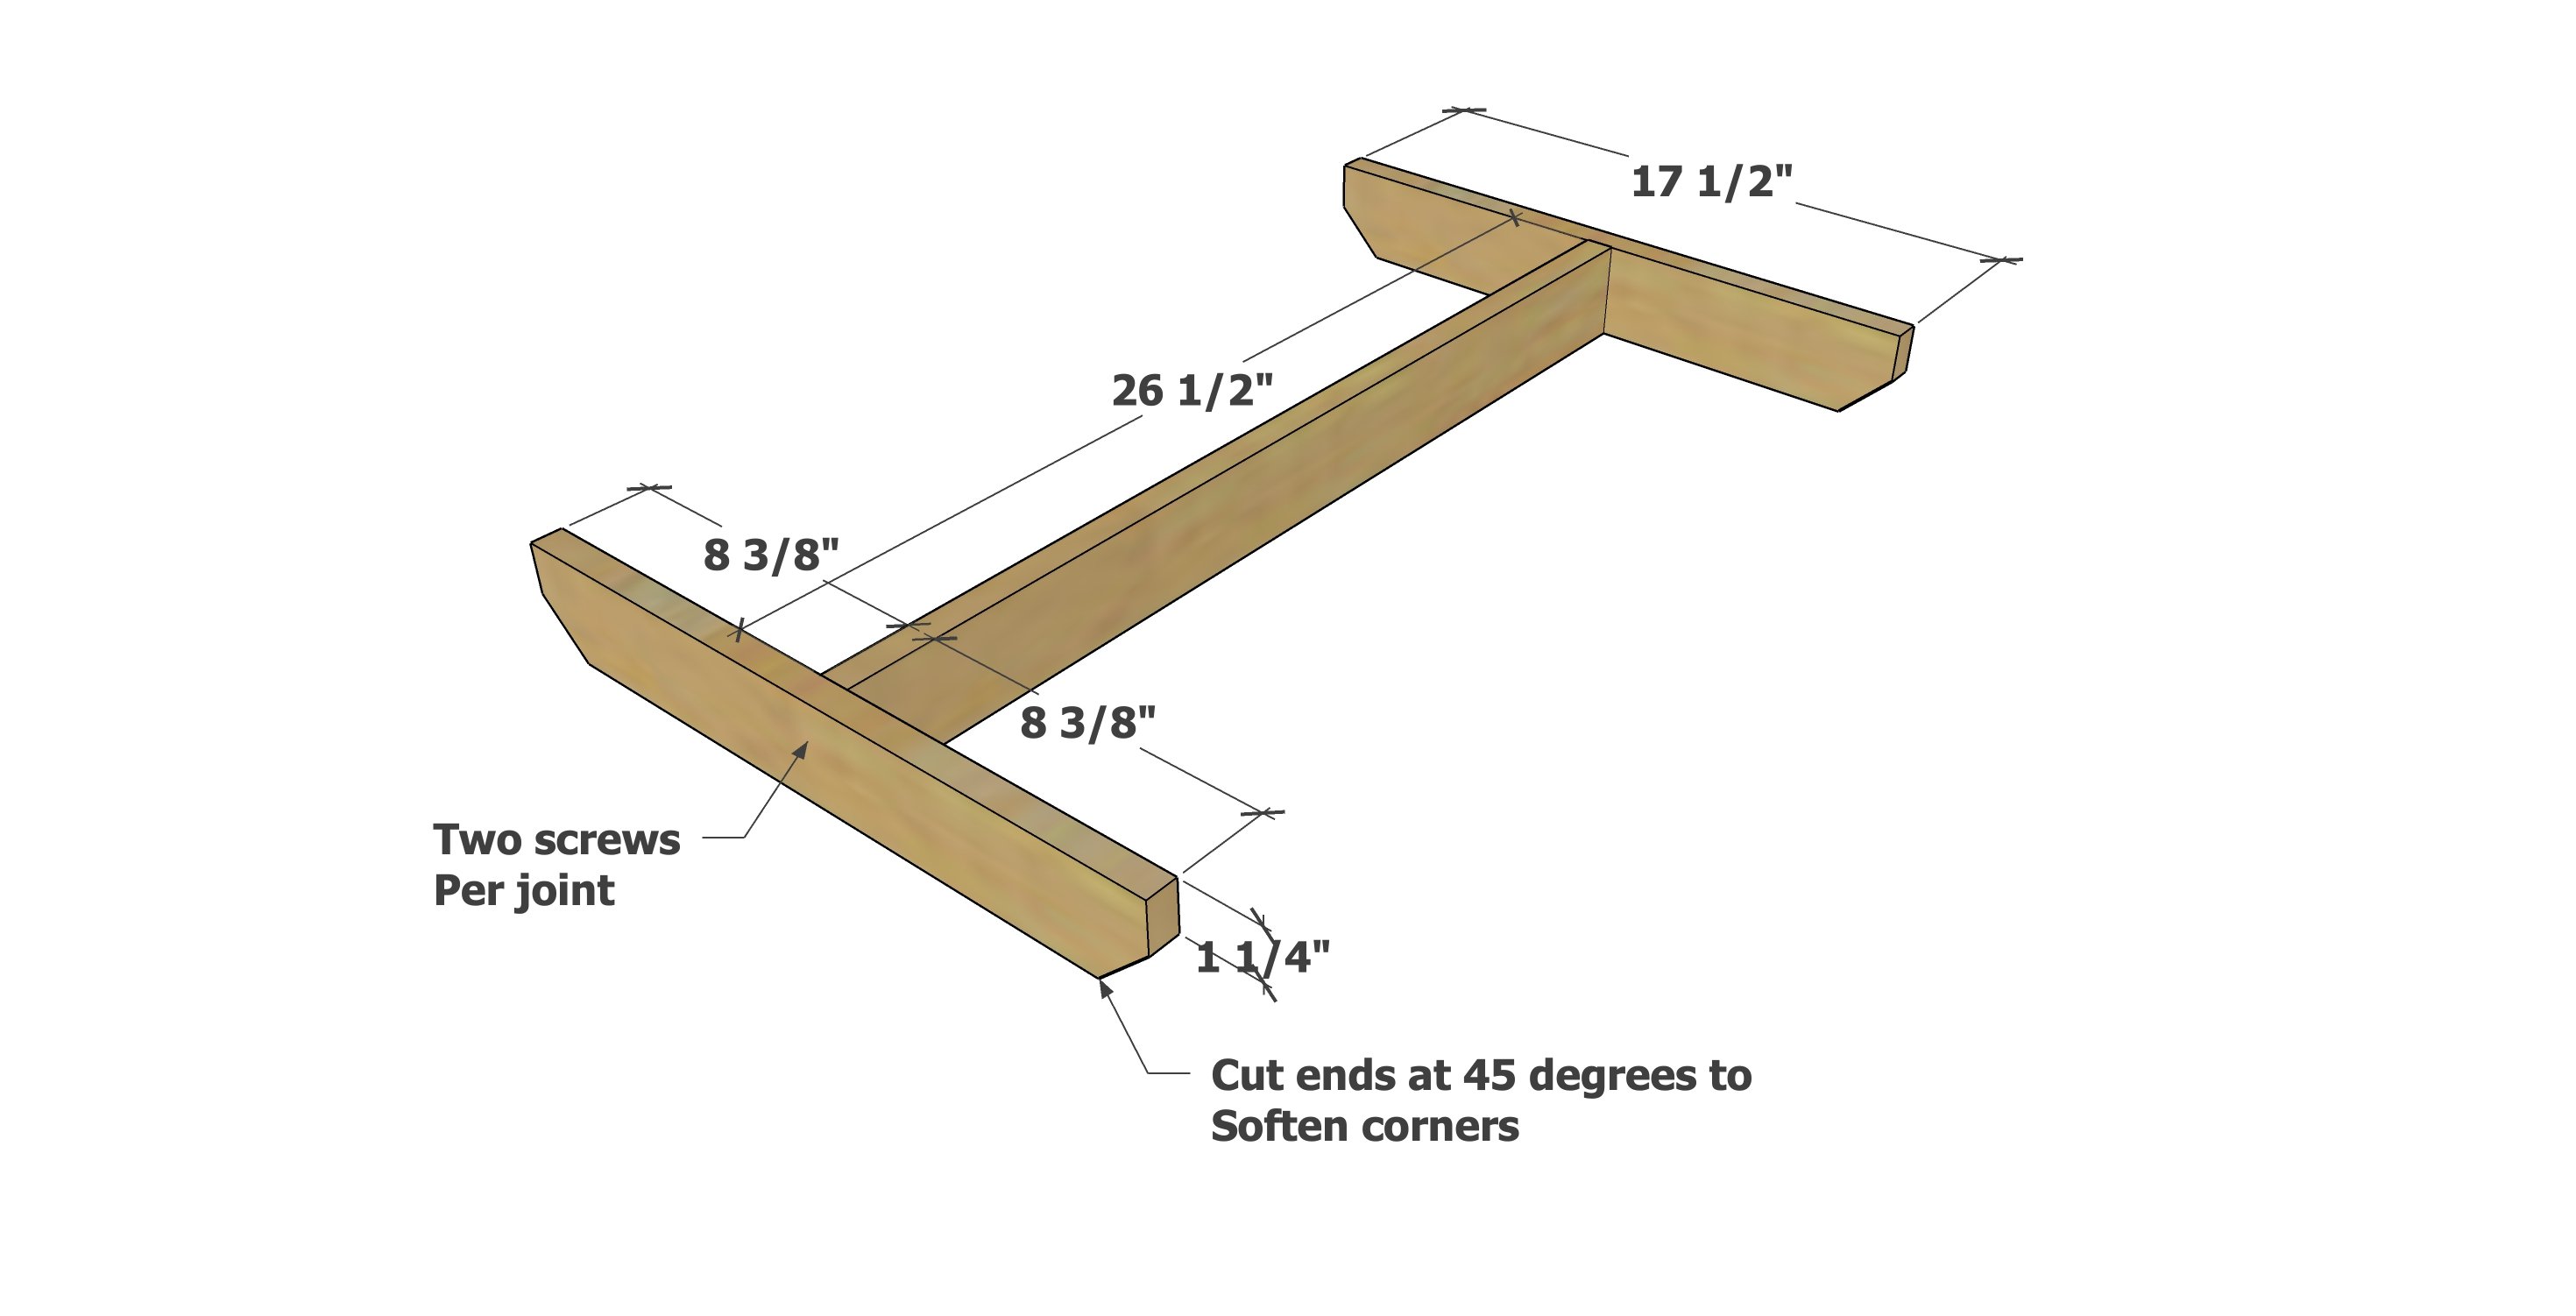
Cut the ends of the tabletop supports back at 45 degrees as shown to soften edges.
Attach the center tabletop support to the two ends to make an I shaped support system.
Adjust for square, meaning the outside corner diagonal measurements match - this is to ensure your project is a rectangle and NOT a parallelogram.
Step 2
Step 4
Step 5
Step 7
Finishing. Fill screw holes with wood filler, sand and finish as desired.


Comments
Katie S. (not verified)
Fri, 11/26/2010 - 16:54
My husband surprised me with
My husband surprised me with a miter saw today (great black friday deals!). This is my first project that I am working on this weekend. Thanks so much for all the awesome plans! I love your site
josh.ruppert
Thu, 07/04/2013 - 08:26
I was curious as to which
I was curious as to which type of paint you use for the picnic table. My thoughts were to use an oil base since its so durable. The downside is the clean up. Your thoughts?
SoybeanDad
Tue, 05/27/2014 - 19:55
Time Flew
A few nights back, I had plans in hand for a DIY water blob, which involved melting painter's plastic sheeting between parchment paper with a hot iron and promised only 30 minutes of work. After multiple hours, multiple beers, all of X-Men, half of Gladiator, and several iron burns, I completed a water blob that held most of the water inside it. Needless to say, I and was somewhat leery of this plan because of how simple it appeared to be on its face.
That said, I can't stress enough how simple this one was. I started it after the kid went to bed (8ish) and was finished before 10. It would have been done a bit earlier if I'd had an extra pair of hands, but a set of small Vise-Grip clamps more than compensated. Excellent for a free timeslot of only a few hours. I'll still need to sand and stain it, but I was very, very pleased with the simplicity of the project. The one major tweak I made was to use 1x4s instead of 1x3s, only because they were easier to get at Home Depot. This enabled me to make a table that was more vertical and can hold a little more weight. The tradeoff was that the benches don't have the half-inch gap they're supposed to, so they don't match the tabletop exactly. Not a big deal for me, but the way to compensate using 1x4s would be to make the bench supports about 3 to 4 inches longer.
Again, awesome project. I'll DEFINITELY be doing more from Ana.
Thanks,
Patrick
Hokulani1
Thu, 06/12/2014 - 07:52
pocket hole screws
Hi! I see the plans say 1 1/4" pocket hole screws but it doesn't show where to put the holes like many of your other plans. Did you use pocket holes or just counter sink? Also, are the 2" screws done from the top of the table with a counter sink bit? Thank you!
stannius
Sat, 07/16/2016 - 14:44
Paint
I'm going to buy some paint for this. How much will I need? A quart? A gallon? An amphora?
TK58
Sun, 04/11/2021 - 09:36
Kreg's pocket hole jig.
I notice that you include the Kreg's pocket hole jig in the "tools needed" section, but I don't see any specific instructions regarding the location and number of holes and screws to be used in the project. Can you provide detailed information on this?
nyyankeegrl38
Tue, 08/03/2021 - 08:49
Love this table!
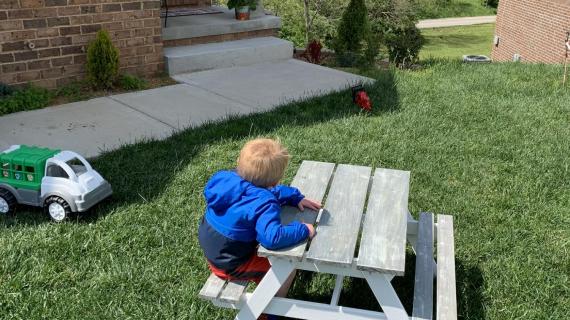
Last minute project for our grandson, after my husband and I built the Modern Farmhouse bed (for son and daughter-in-law- which they loved). Grandson loves this table so much, daddy had to take it inside for him.