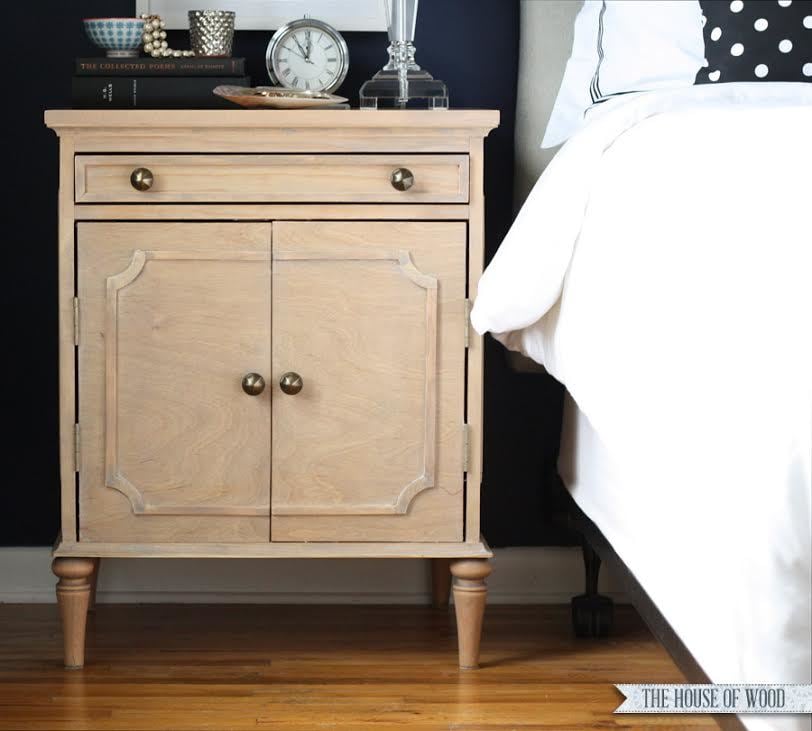
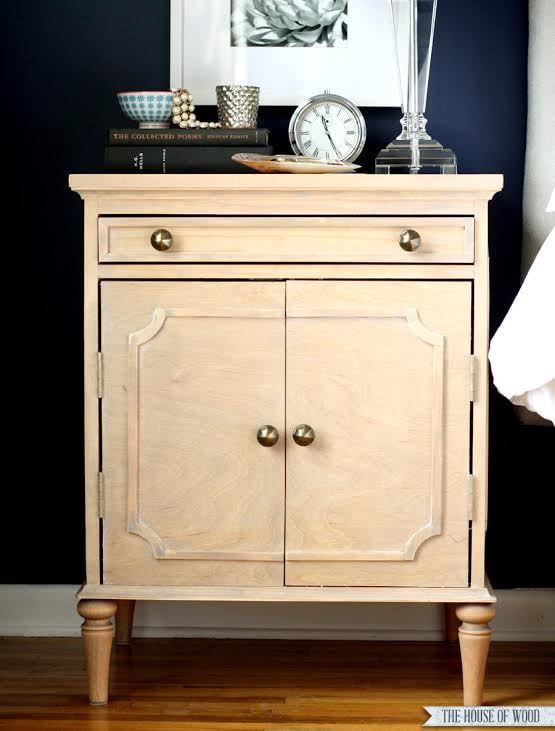
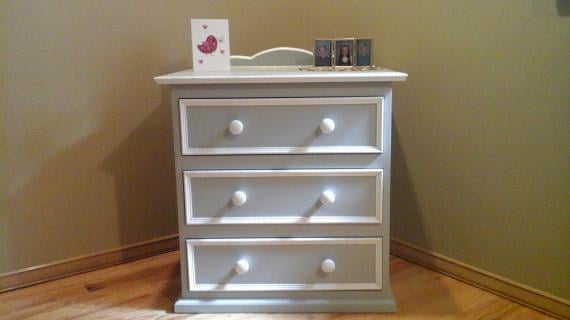
Free plans for pretty nightstand inspired by Ballard Designs Isabella Nightstand. Plans by ANA-WHITE.com
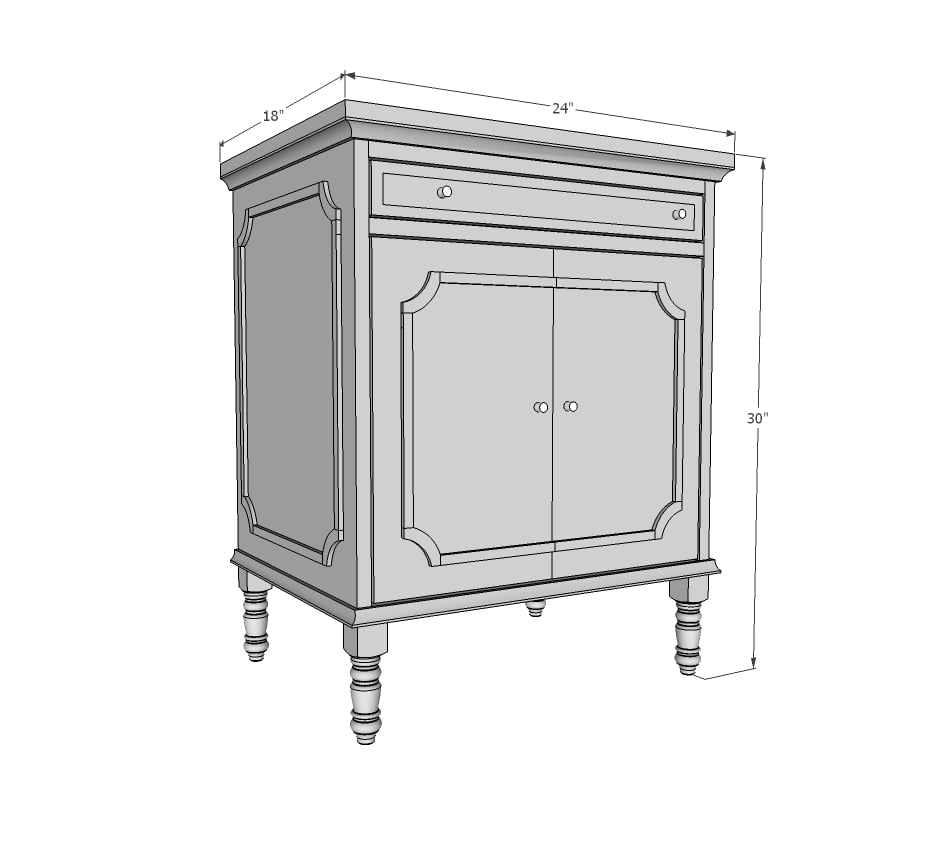
Preparation
1/2 sheet of 3/4" plywood
1/4 sheet of 1/4" plywood
2 - 1x2x6'
1 - 20-3/4" of 1x3
4 Osborne Wood turned legs
Iron-On Veneer edging
3/4" x 3/4" cove moulding
moulding for the drawer face
3/4" brad nails
1 set of 14" drawer slides
4 knobs
4 hinges
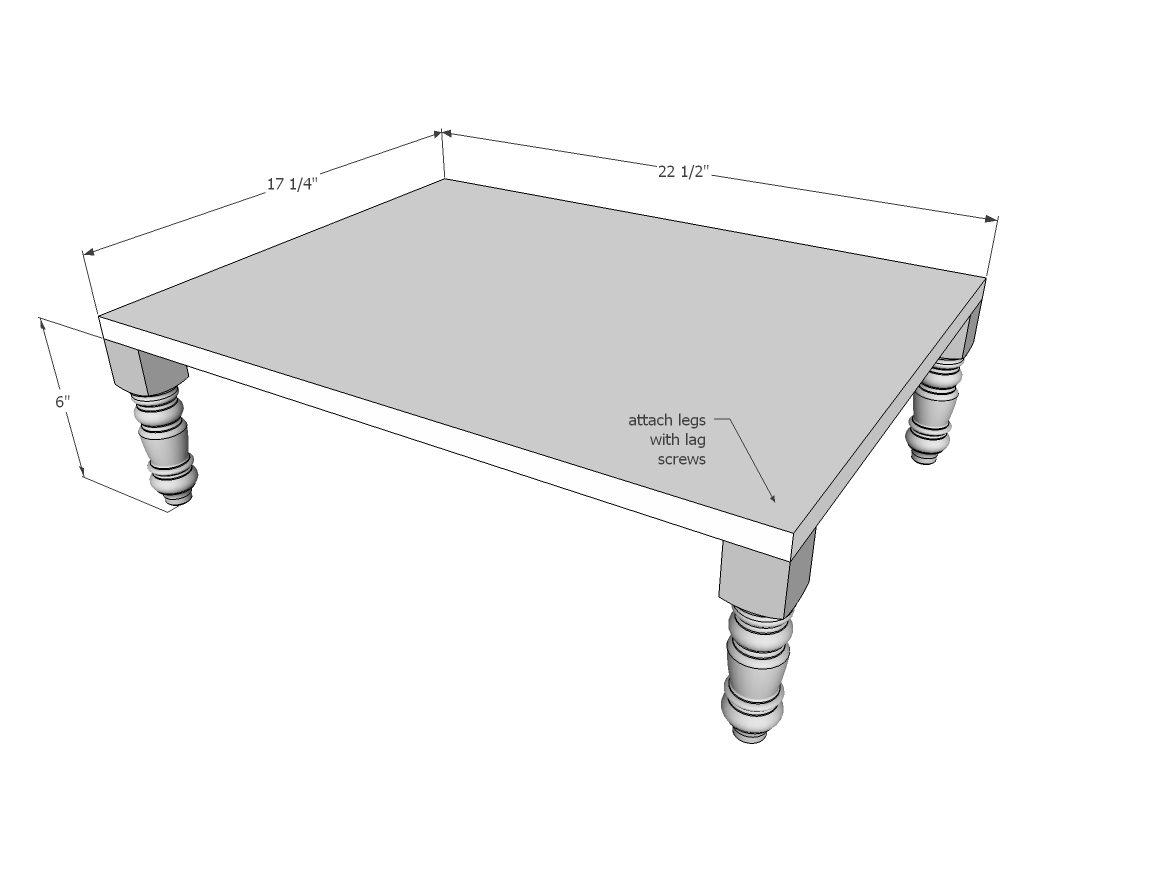
Hanger bolts/tee nuts or lag screws
4 turned feet, 6" long (we got ours from Osborne Wood
Cut List:
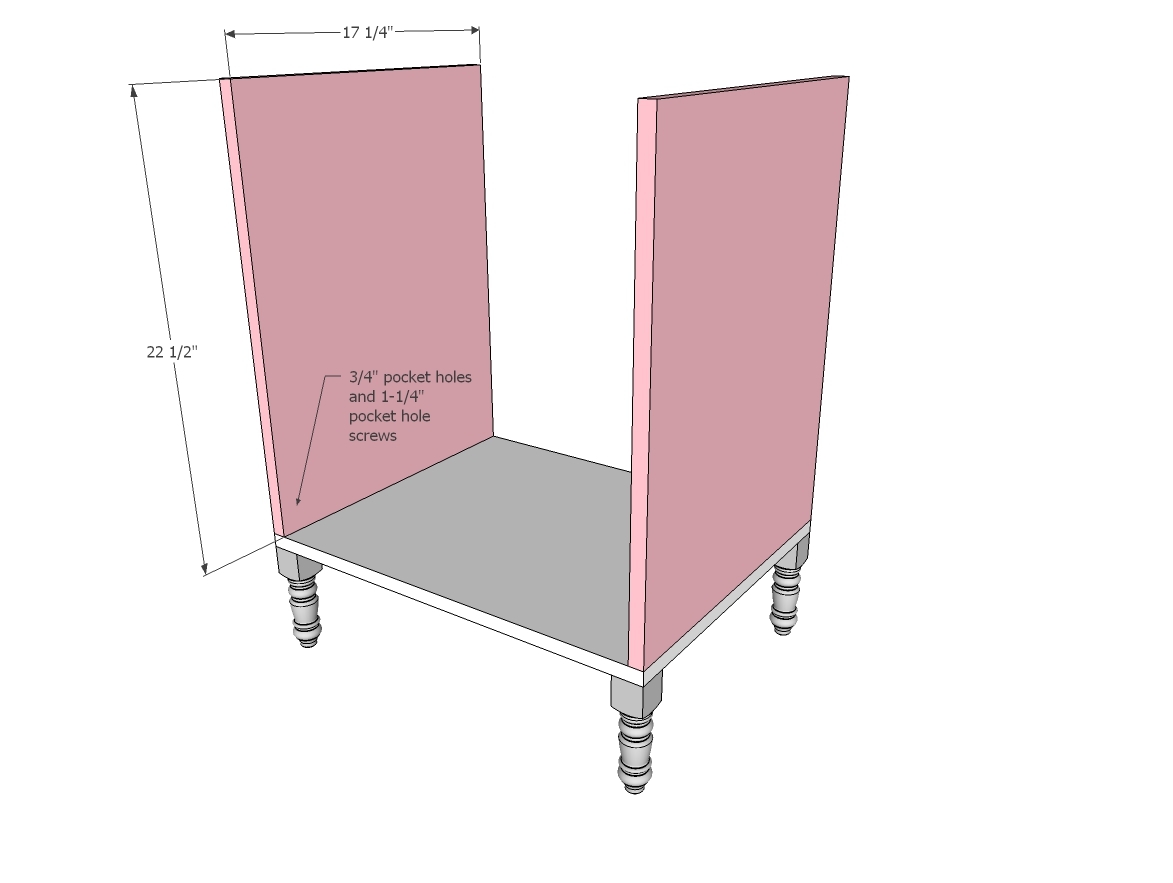
3 - 3/4" plywood @ 22-1/2" x 17-1/4" (bottom & sides)
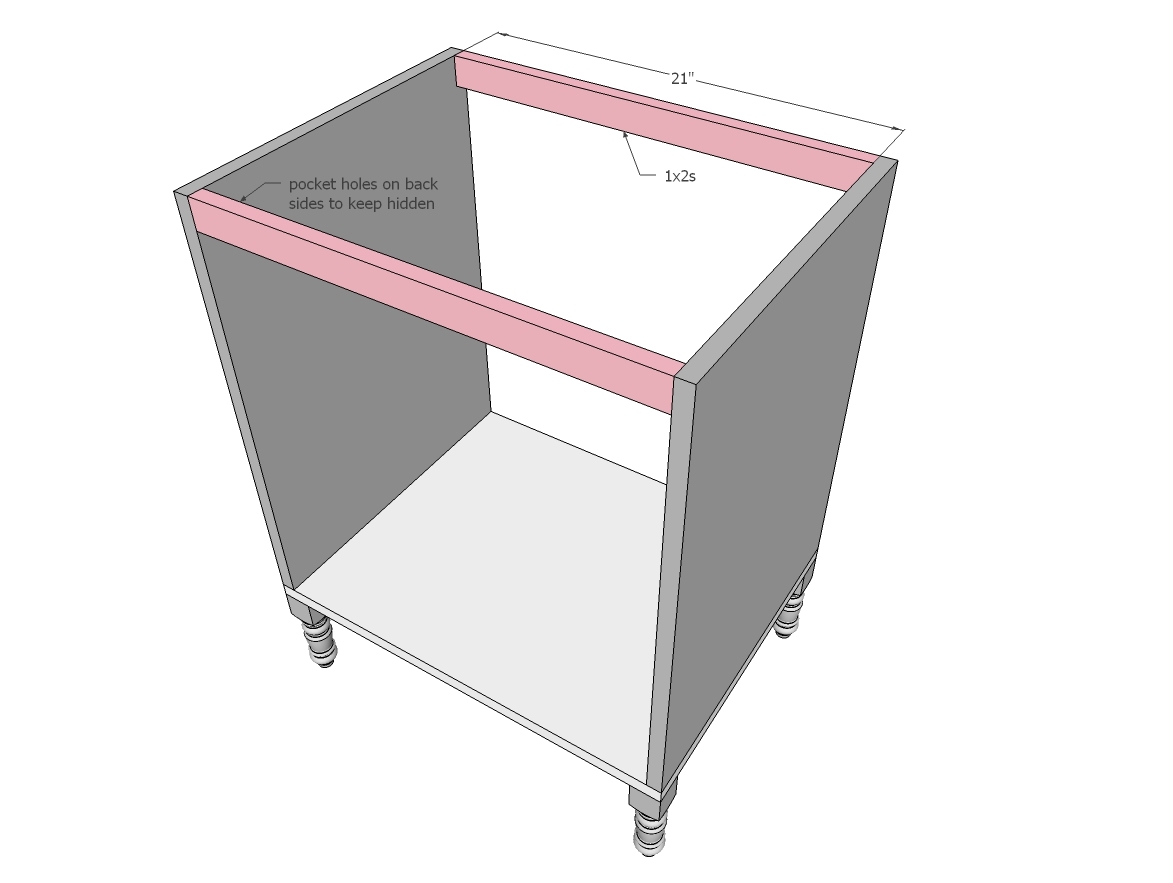
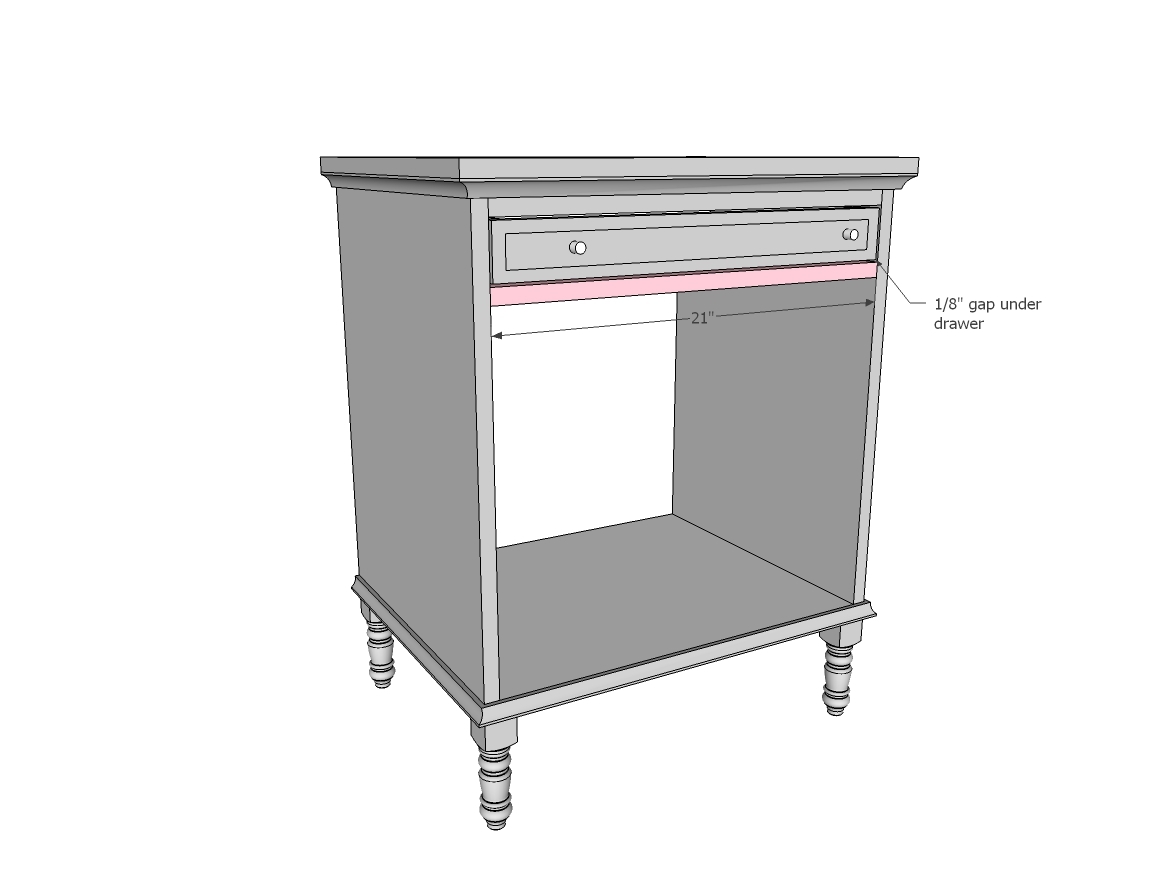
3 - 1x2 @ 21" (carcass supports)
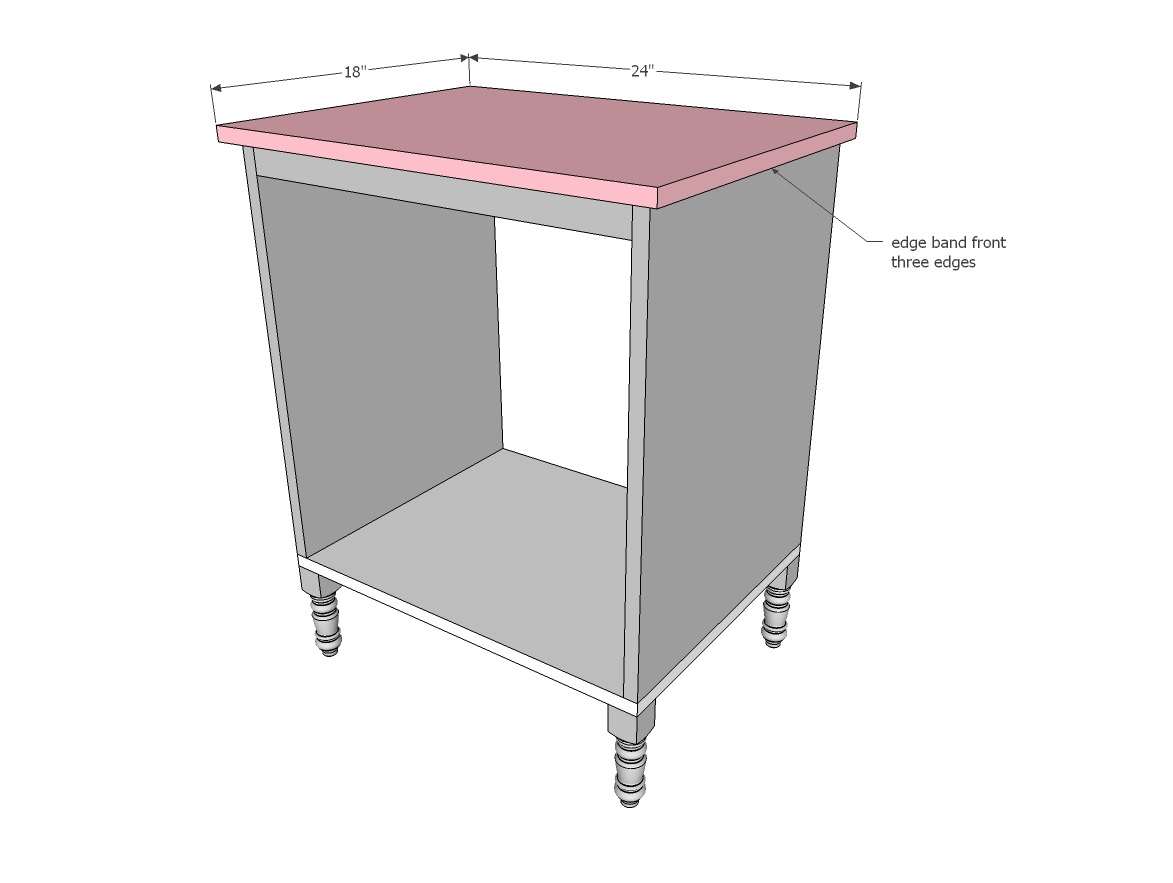
1 - 3/4" plywood @ 24" x 18" (top)
2 - 3/4" x 3/4" cove moulding @ 24" (top and bottom trim)
4 - 3/4" x 3/4" cove moulding @ 18" (top and bottom trim)
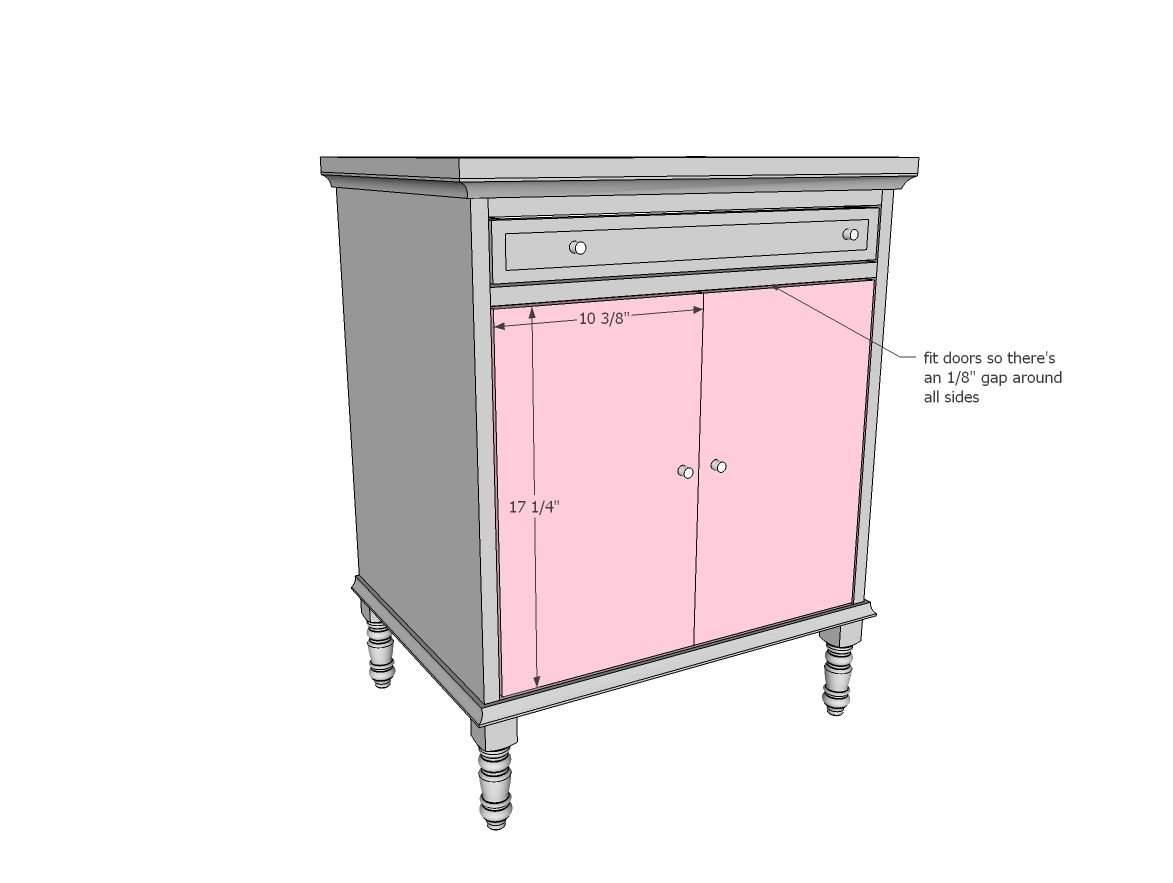
2 - 3/4" plywood @ 17-1/4" x 10-3/8" (doors)
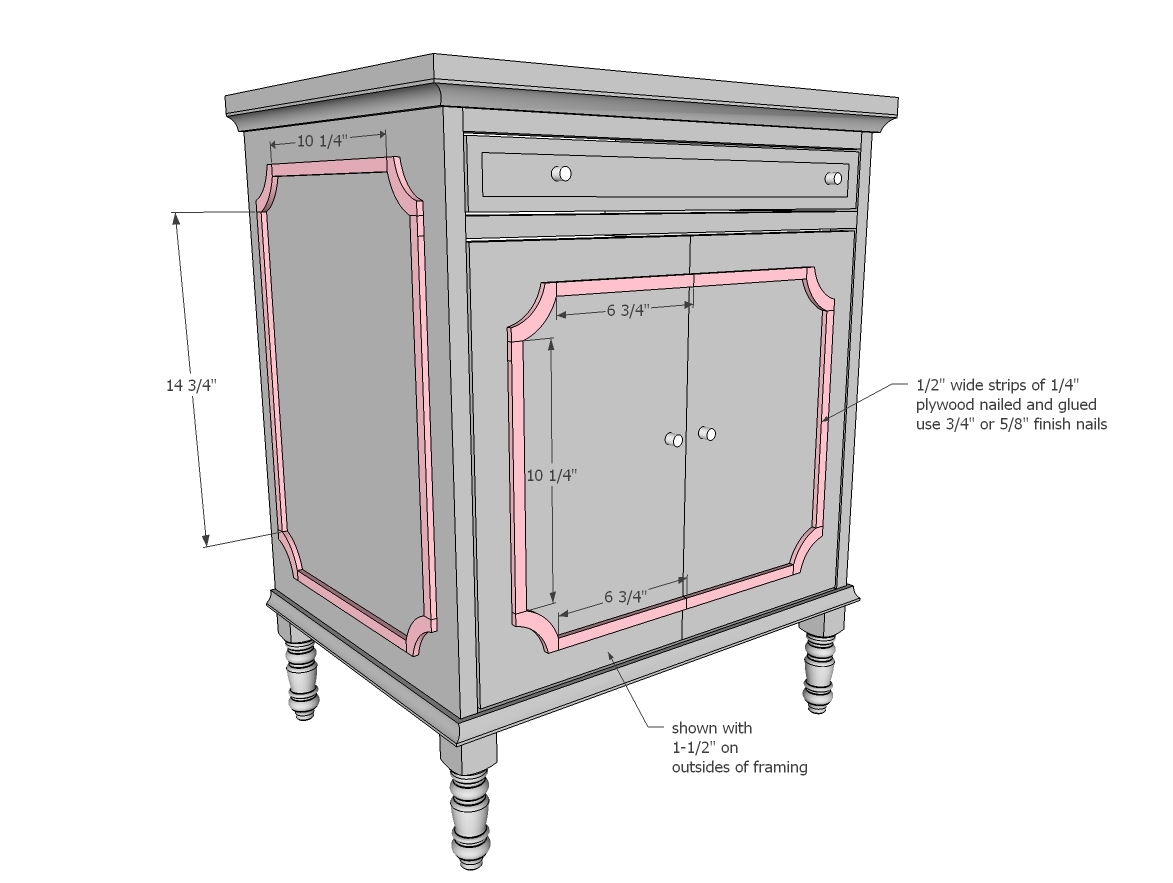
4 - 1/2" x 1/4" moulding @ 14-3/4" (trim)
6 - 1/2" x 1/4" moulding @ 10-1/4" (trim)
4 - 1/2" x 1/4" moulding @ 6-3/4" (trim)
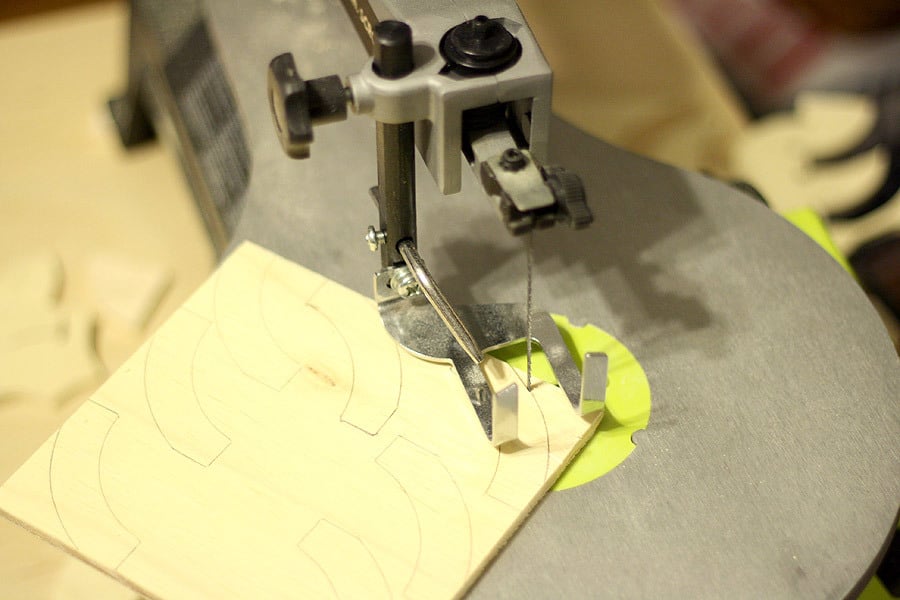
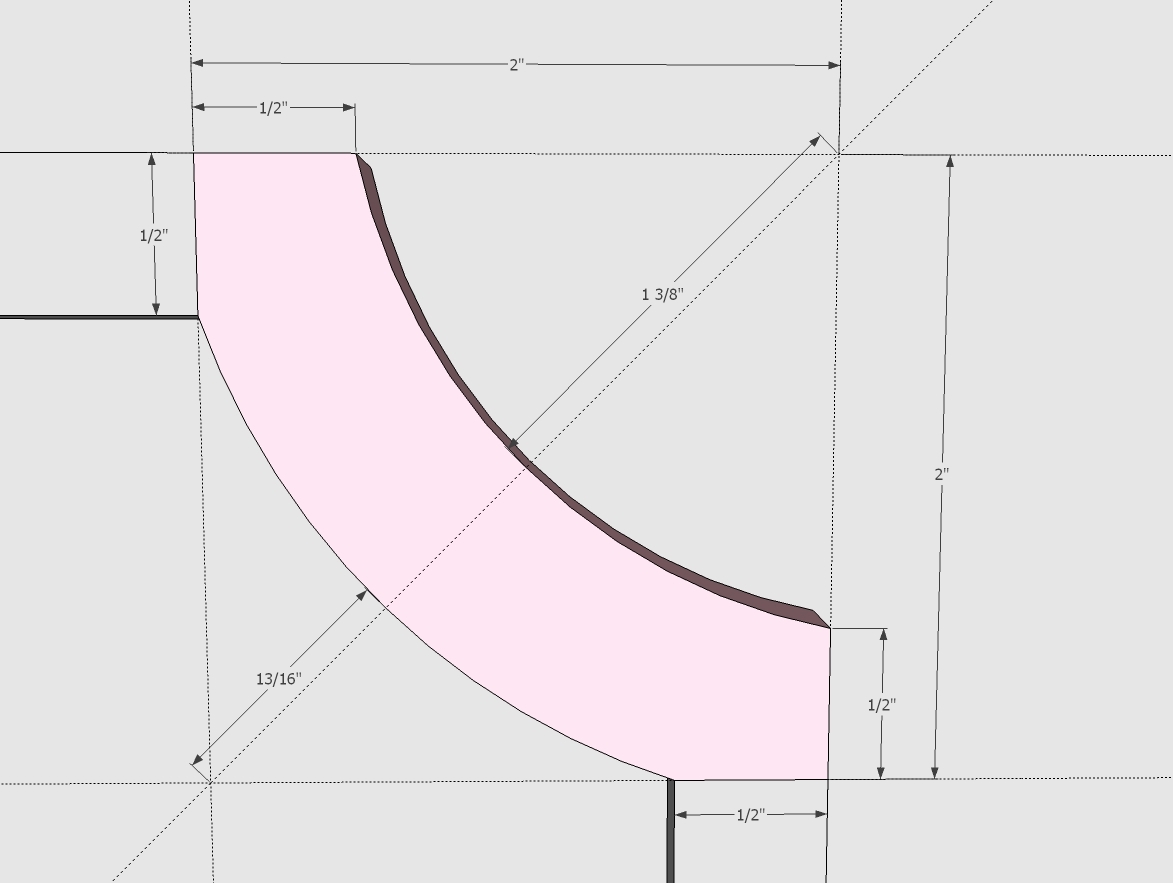
12 - curved moulding (cut out of 1/4" plywood - see diagram)
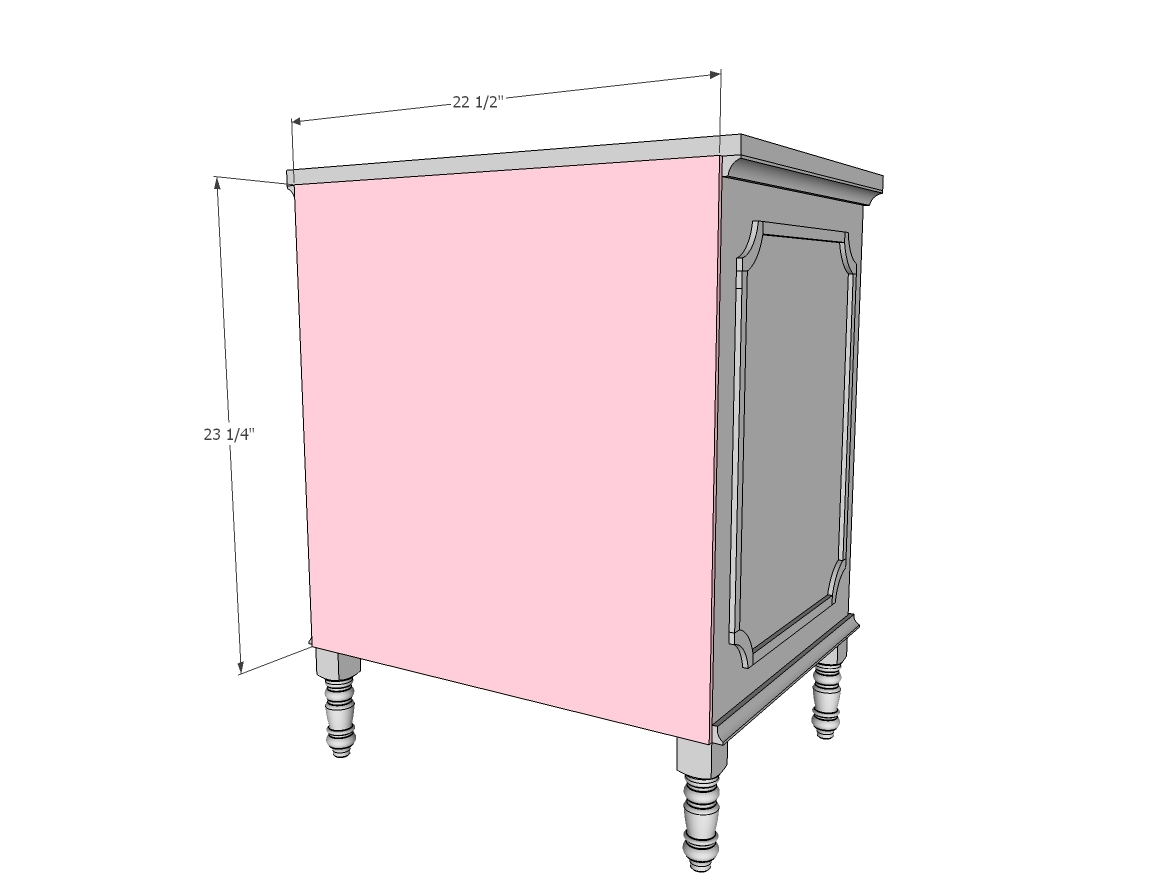
1 - 1/4" plywood @ 23-1/4" x 22-1/2" (back)
1 - 3/4" plywood @ 21" x 16-1/2" (optional shelf)
Drawer:
2 - 1x2 @ 18-1/2" (drawer front/back)
2 - 1x2 @ 14" (drawer sides)
1 - 1/4" plywood @ 20" x 14" (drawer bottom)
1 - 1x3 @ 20-3/4" (drawer face)
2 - moulding @ 20-3/4" (drawer face trim)
2 - moulding @ 2-1/2" (drawer face trim)
Please read through the entire plan and all comments before beginning this project. It is also advisable to review the Getting Started Section. Take all necessary precautions to build safely and smartly. Work on a clean level surface, free of imperfections or debris. Always use straight boards. Check for square after each step. Always predrill holes before attaching with screws. Use glue with finish nails for a stronger hold. Wipe excess glue off bare wood for stained projects, as dried glue will not take stain. Be safe, have fun, and ask for help if you need it. Good luck!
Instructions
Step 1
Step 2
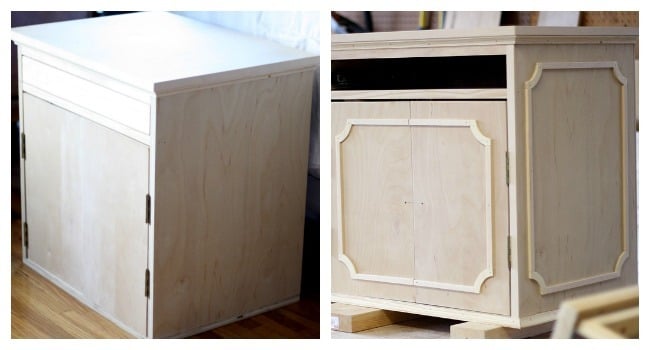
You'll want to edge band the front edges of the side panels. If you are a perfectionist, you'll want to take about an 1/8" off the front edge (you'll need a tablesaw) to allow for edgebanding (depending on thickness of your edgebanding). If you are painting, you can also fill the front edges of the plywood with wood filler, sand and paint.
Drill 3/4" pocket holes facing upward for attaching the top in later steps on the insides.
Attach side panels to base with 3/4" pocket holes along bottom inside edge with 1-1/4" pocket hole screws.
Step 3
Step 6
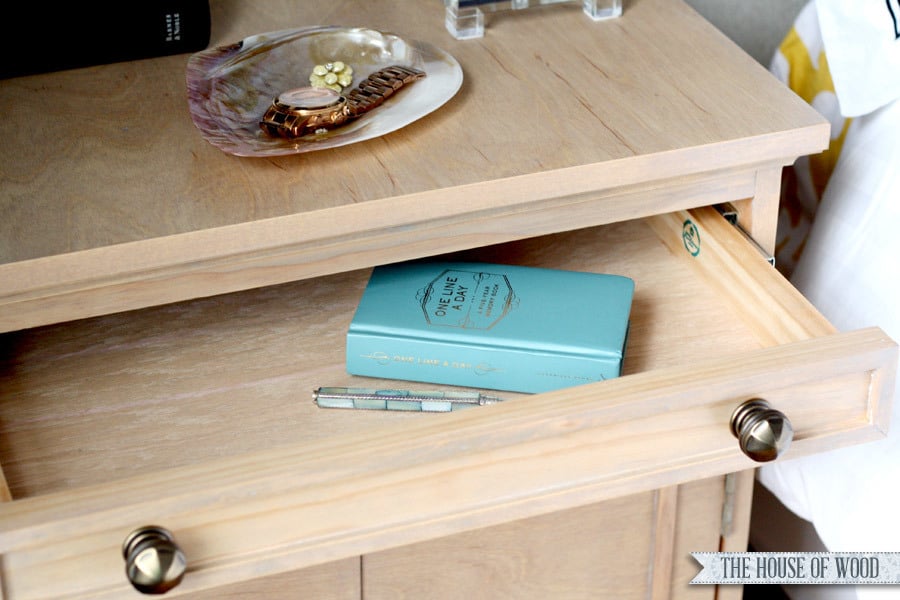
Build the drawer to fit your drawer slides and openings - the drawer shown is for drawer slides that require 1/2" clearance on each side (total of 1" clearance) and if your opening is true to width. Place pocket holes on outsides - they will be hidden by drawer face. Attach 1/4" plywood to bottom with nails (3/4") and glue.
Step 7
Step 8
It is always recommended to apply a test coat on a hidden area or scrap piece to ensure color evenness and adhesion. Use primer or wood conditioner as needed.










Comments
spiceylg
Wed, 02/04/2015 - 10:02
OMG
That is seriously impressive and the scroll work? Wow! First time! Nicely done!
emilyb823
Wed, 11/18/2015 - 13:48
May be a silly question, but
May be a silly question, but I'm making the drawers and for the life of me can't figure out what you secure the draw sides to drawer bottom with??
Ana White Admin
Thu, 11/19/2015 - 12:17
attach botton
See step 6 Attach 1/4" plywood to bottom with nails (3/4") and glue.