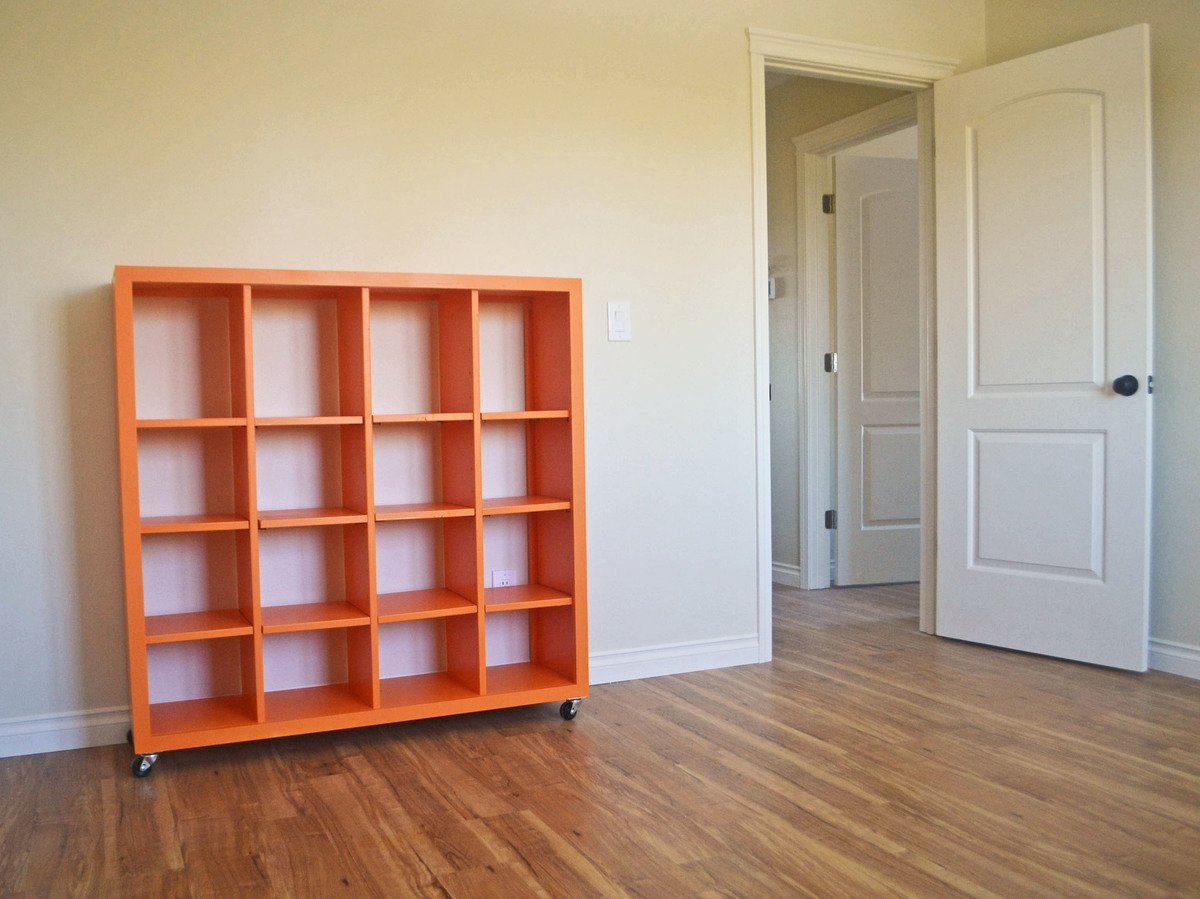
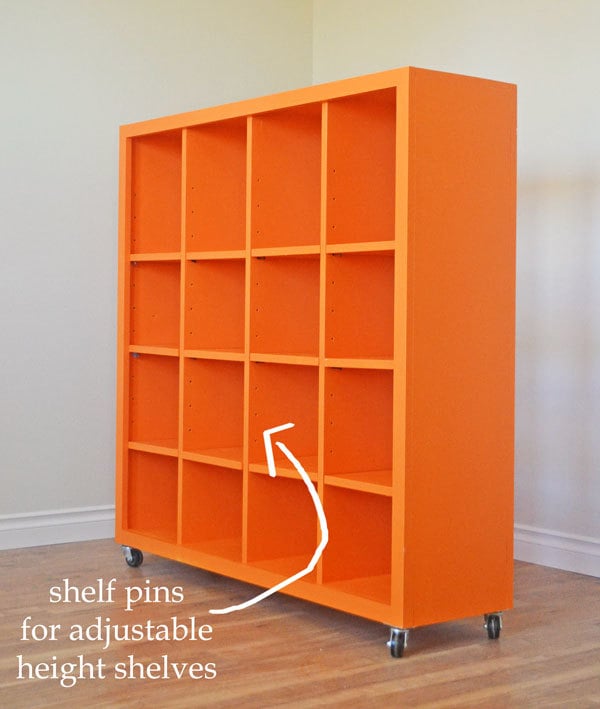
DIY rolling cube shelf with adjustable shelves, can be used as a room divider or for storage - detailed plans by Ana-White.com
Preparation
- 5 - 1x12 @ 8 feet long
- 4 - 1x2 @ 8 feet long
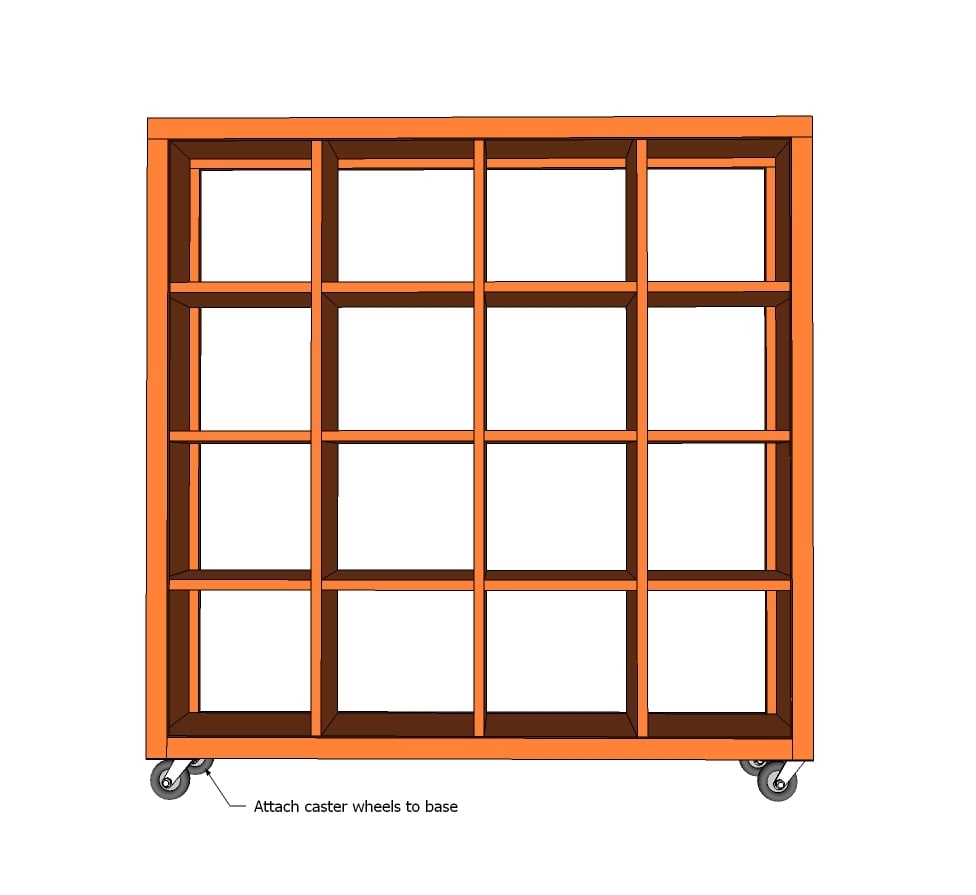
- 4 caster wheels and screws for attaching recommend
- 1 1/4" pocket hole screws
- 1 1/4" brad nails
- 48 shelf pins to match shelf pin hole size (optional)
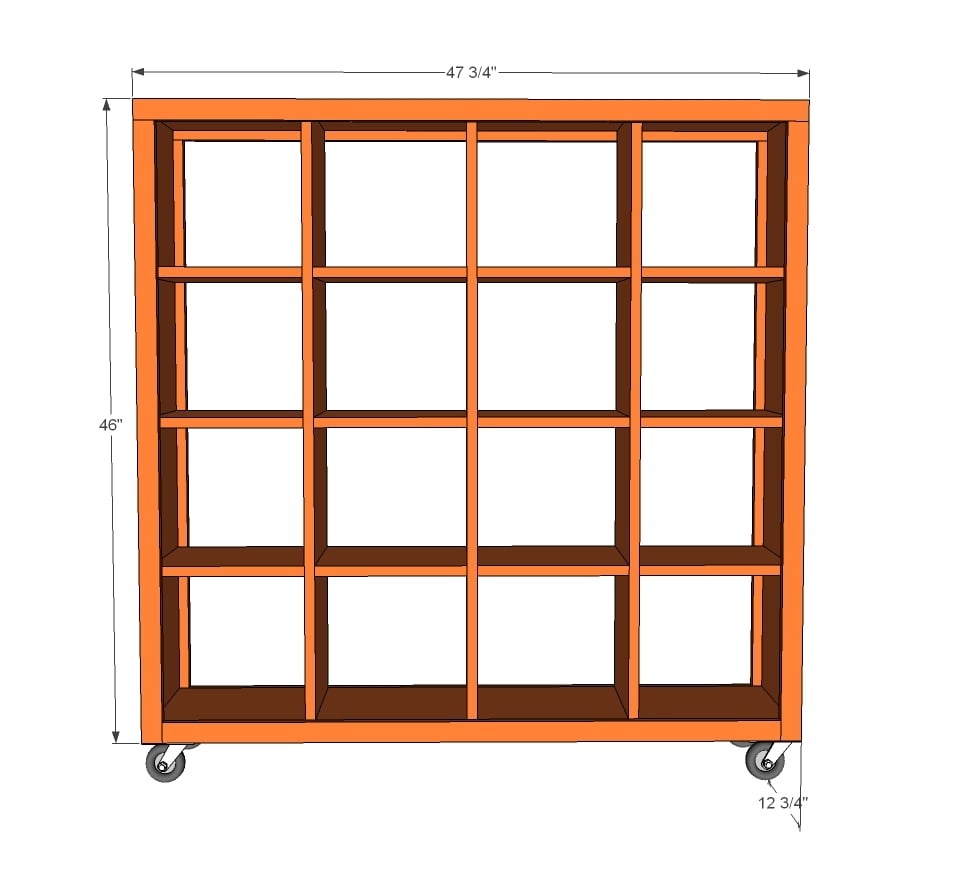
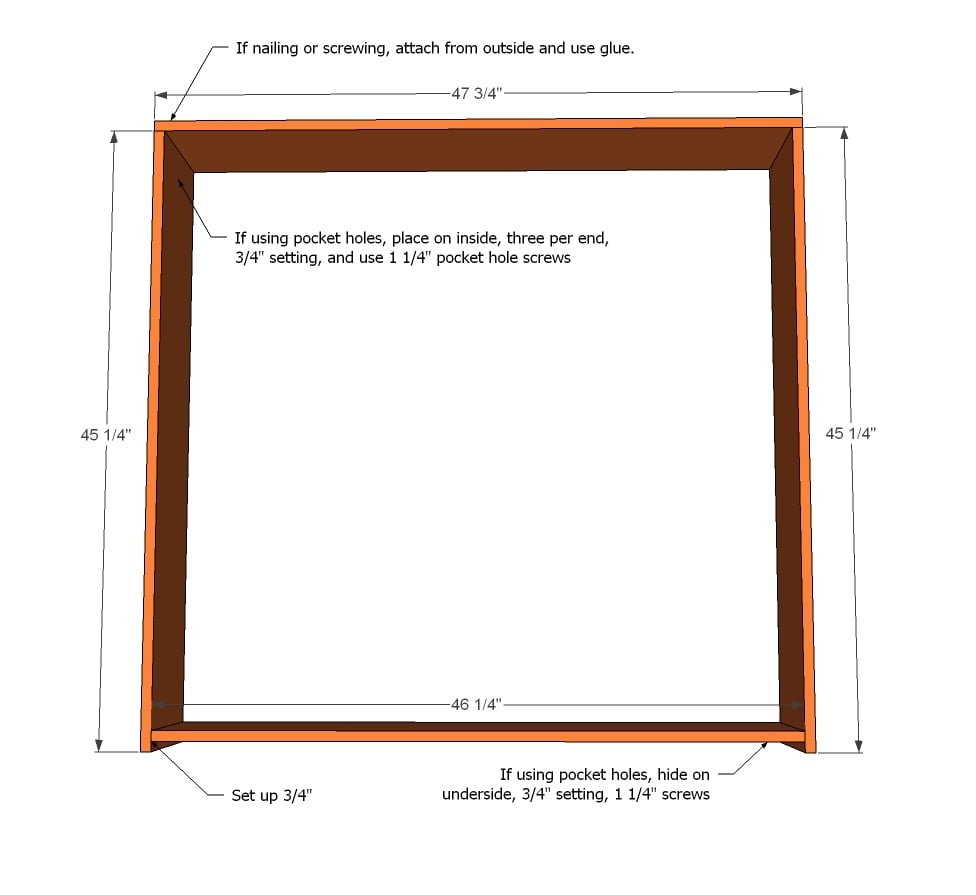
- 1 - 1x12 @ 47 3/4" (top)
- 2 - 1x12 @ 45 1/4" (sides)
- 1 - 1x12 @ 46 1/4" (bottom)
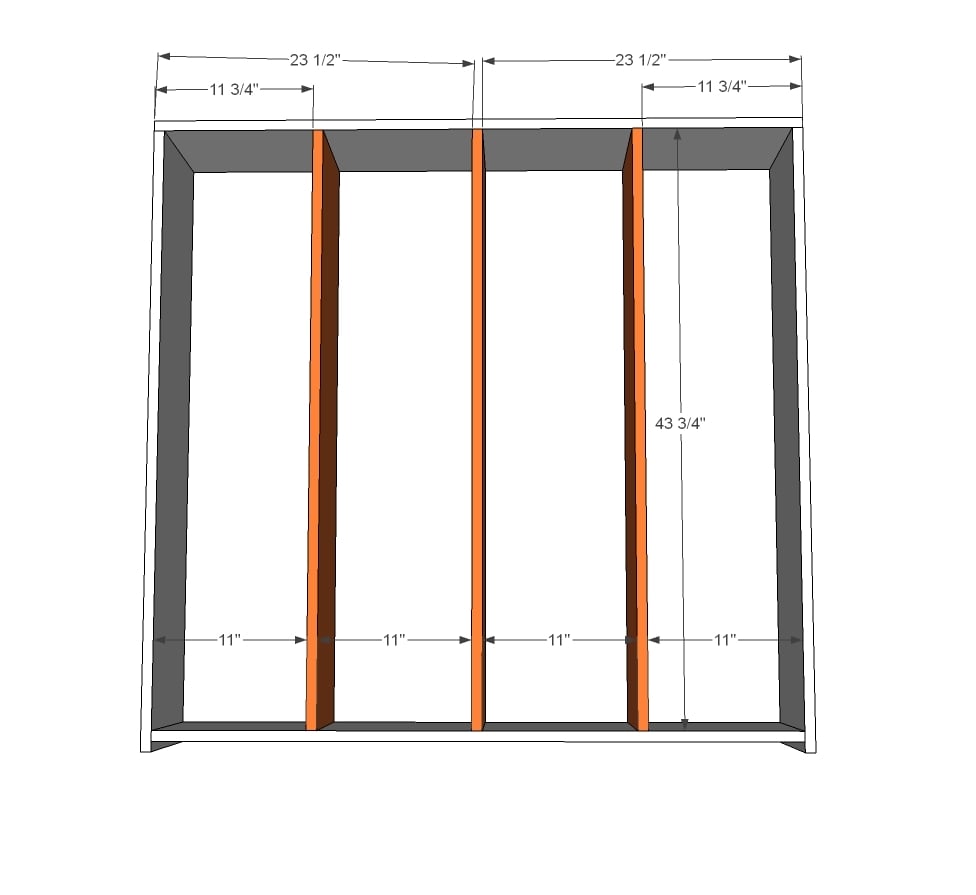
- 3 - 1x12 @ 43 3/4" (dividers)
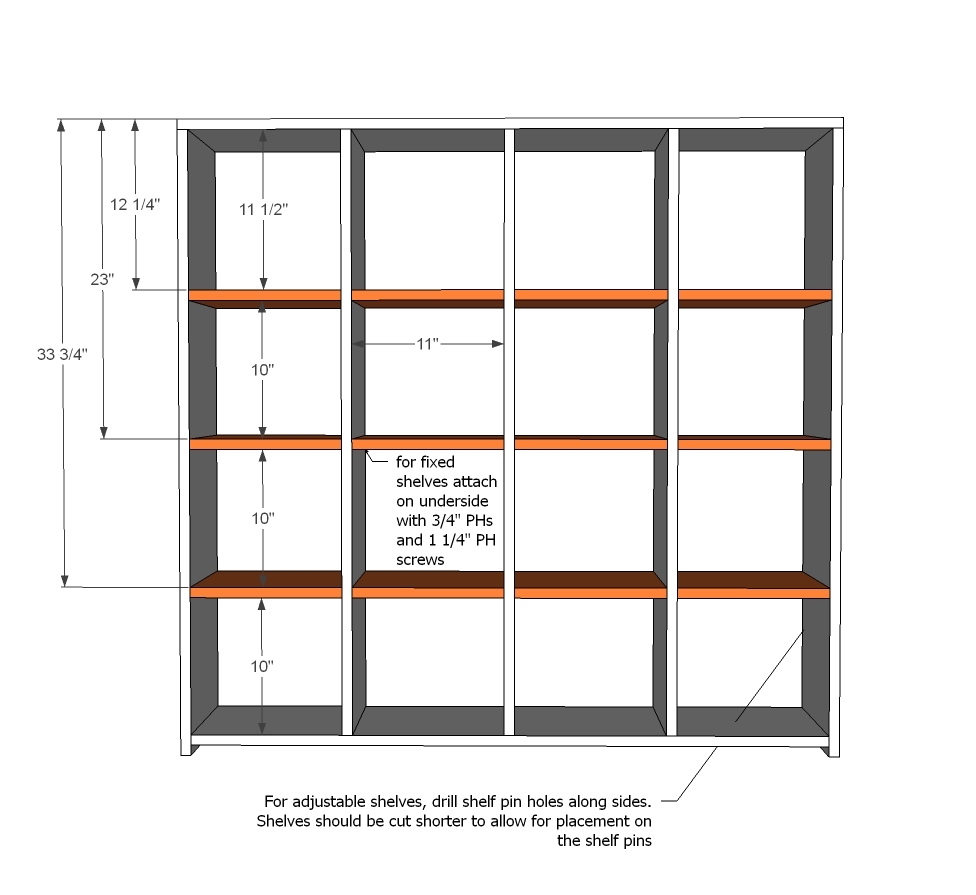
- 12 - 1x12s @ 11" (shelves) - For adjustable shelves, cut to fit shelf pins
- 2 - 1x2 @ 47 3/4" (top trim)
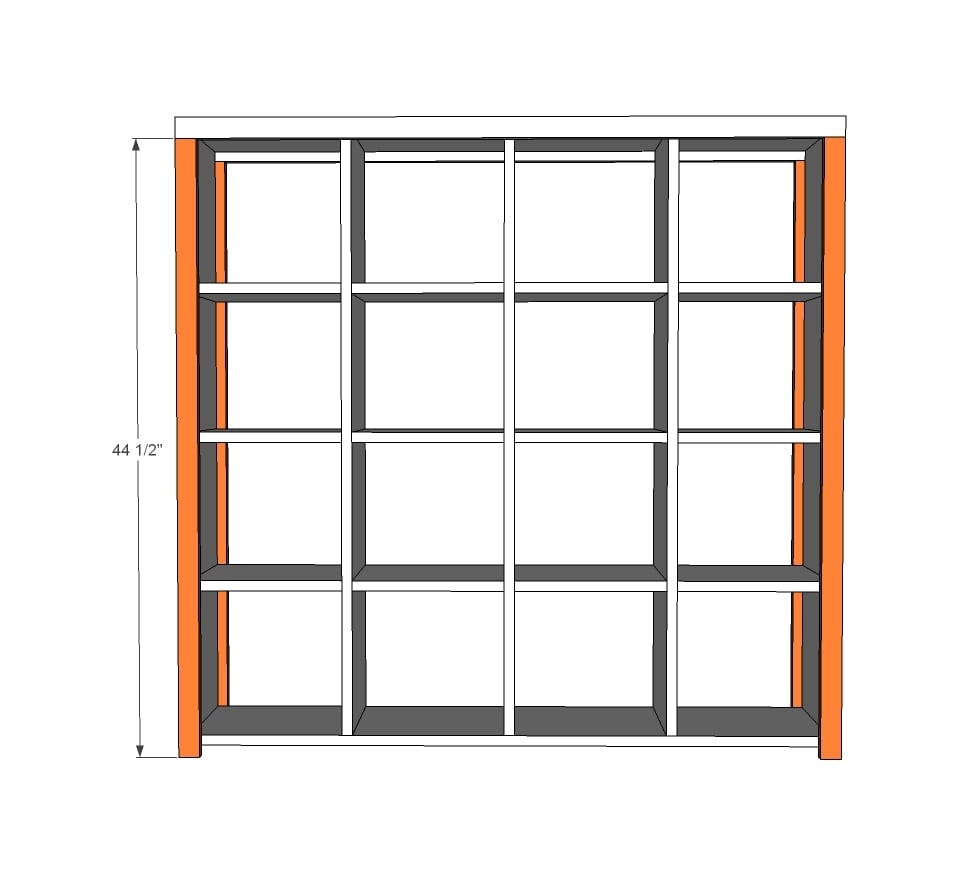
- 4 - 1x2 @ 44 1/2" (side trim)
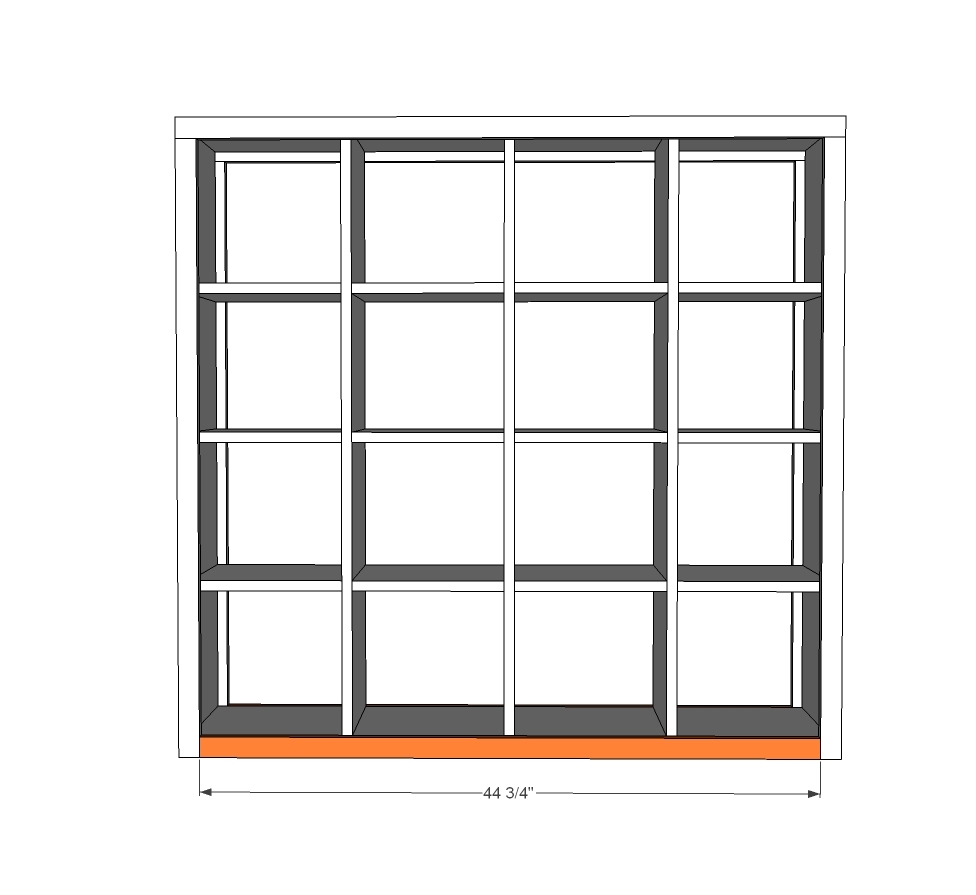
- 2 - 1x2 @ 44 3/4" (bottom trim)
Please read through the entire plan and all comments before beginning this project. It is also advisable to review the Getting Started Section. Take all necessary precautions to build safely and smartly. Work on a clean level surface, free of imperfections or debris. Always use straight boards. Check for square after each step. Always predrill holes before attaching with screws. Use glue with finish nails for a stronger hold. Wipe excess glue off bare wood for stained projects, as dried glue will not take stain. Be safe, have fun, and ask for help if you need it. Good luck!
Instructions
Step 1
Step 3
For the shelves, you can either add them in now or drill shelf pins for adding them in later on.
Here's a quick video of the shelf pin jig we used and how it works:
Step 4
It is always recommended to apply a test coat on a hidden area or scrap piece to ensure color evenness and adhesion. Use primer or wood conditioner as needed.





Comments
TeriA
Thu, 09/26/2013 - 10:57
So much better then the
So much better then the particle board one we have!
Tsu Dho Nimh
Thu, 09/26/2013 - 11:51
Keeping it square?
How does this keep from "racking"? (slanting sideways like this /_/ )
In reply to Keeping it square? by Tsu Dho Nimh
Ana White
Thu, 09/26/2013 - 13:41
Hi Tsu - great point! With
Hi Tsu - great point! With the face frames on front and back (and the face frames built with pocket holes) this sucker is sturdy with no racking. If you didn't do the full face frames, I'd definitely put a back on it.
Lady Goats
Thu, 09/26/2013 - 13:11
Looks great!
I love this, Ana! Your cousin is so lucky! Haha! I can see this being one of the most built items on the site, soon! I just wish I had a spot for it (I can think of 1,001 uses for it!). Ok, enough exclamation points! (oops!)
Noob Builder
Wed, 04/01/2015 - 22:16
Amazing!
Hi Ana, I have a really stupid question :(
it's not clear to me how to do the fixed shelves... Glues? Nails? Pocket screws?
In reply to Amazing! by Noob Builder
Ana White
Fri, 04/03/2015 - 11:30
Yes glue and PH screws as
Yes glue and PH screws as shown in step 2. Hope this helps!
Noob Builder
Wed, 04/08/2015 - 08:25
Thanks Ana!
Thanks Ana!
You mentioned in step 2 to use 3/4" and 1 11/4" PH screws.... why two different screws?
In reply to Thanks Ana! by Noob Builder
Ana White
Wed, 04/08/2015 - 11:30
That is referring to the
That is referring to the pocket holes for 3/4" stock. You will set your
kreg jig collar for 3/4" stock and use 1 1/4" screws to attach the boards.
Hope this helps!
Noob Builder
Wed, 04/08/2015 - 18:24
Hi Ana, this is clear to me
Hi Ana, this is clear to me now! Sorry for such a noob question! And keep adding new projects! You are truly my hero!