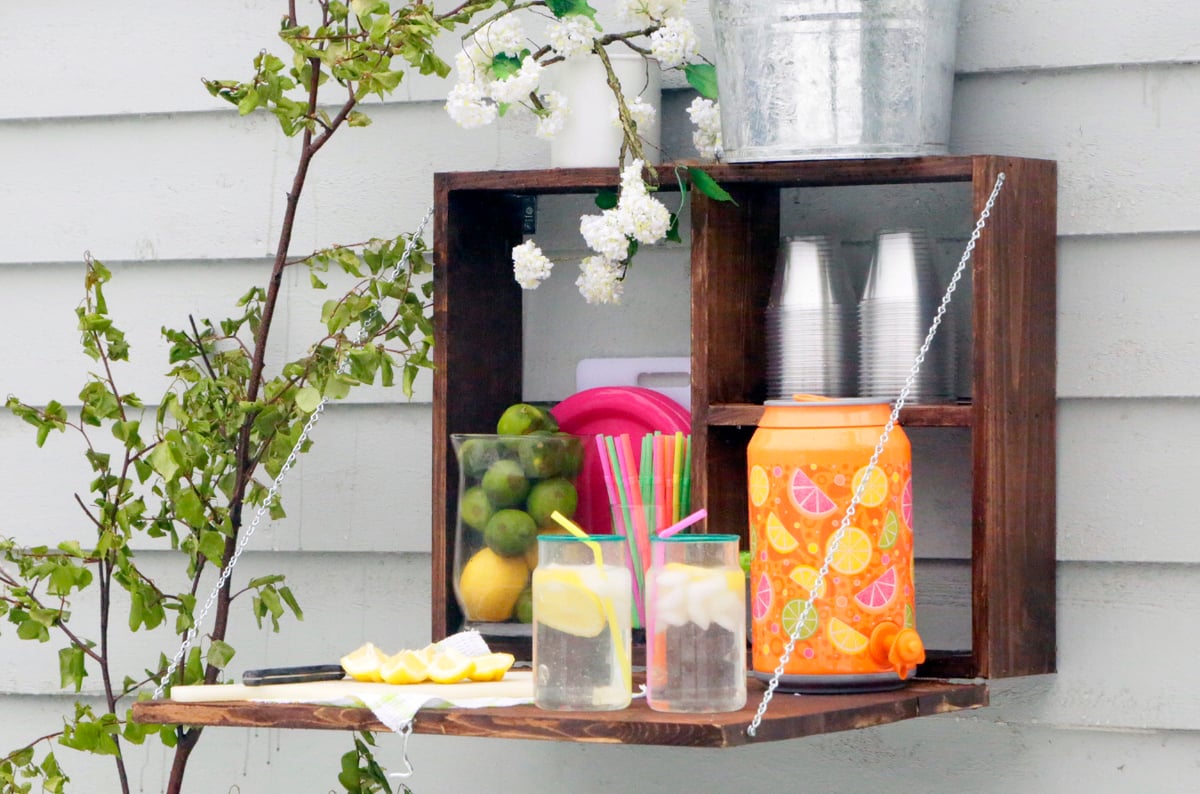


Here's a way to add a serving area outdoors build your own fold down serving station! Perfect for drinks to dinner. Step by step plans with building photos and diagrams.

I built this project as a Home Depot workshop a few years back. A special thank you to the Anchorage, Alaska store for letting me be part of such a fun evening! We all had a blast and can't wait for the next workshop!

I'm pretty excited to share with you today how to build it at home too!
This one is really easy -

You'll need about 10 feet of 1x6 boards. Just cut into six pieces (per cut list below)

Apply glue at all joints (very important since we are stapling)

Then just staple all the boards together.

And I got it all wrong in the video - I actually used Varathane Dark Walnut for the stain.

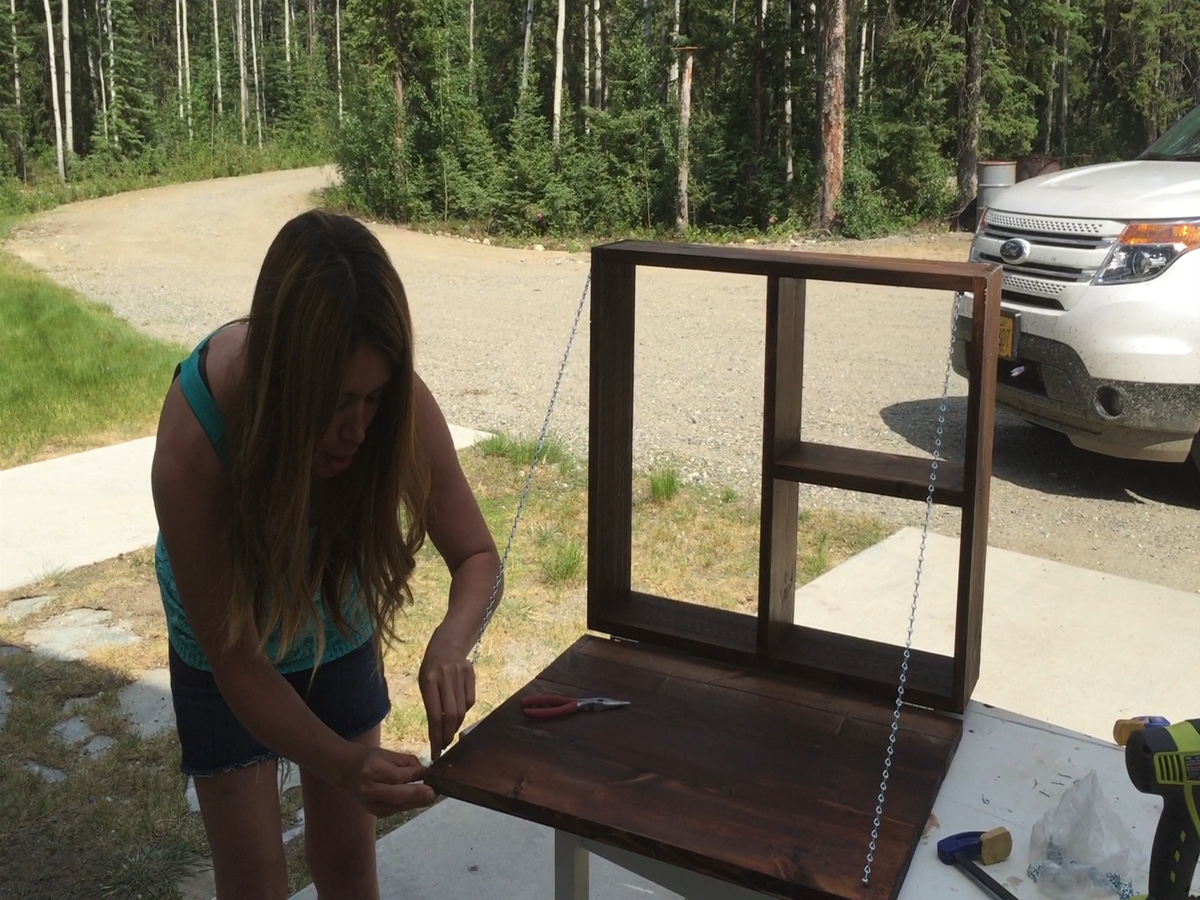
For the hinges, I ended up deciding to place on the outside, on the bottom (project is upside down backwards here). I did this because when closed, the front covers the entire project. The tradeoff is when the project is open, the bottom shelf is not level with the fold out portion. The other option is to cut your front 3/4" less in size (18" x 24") and hinge on from inside.
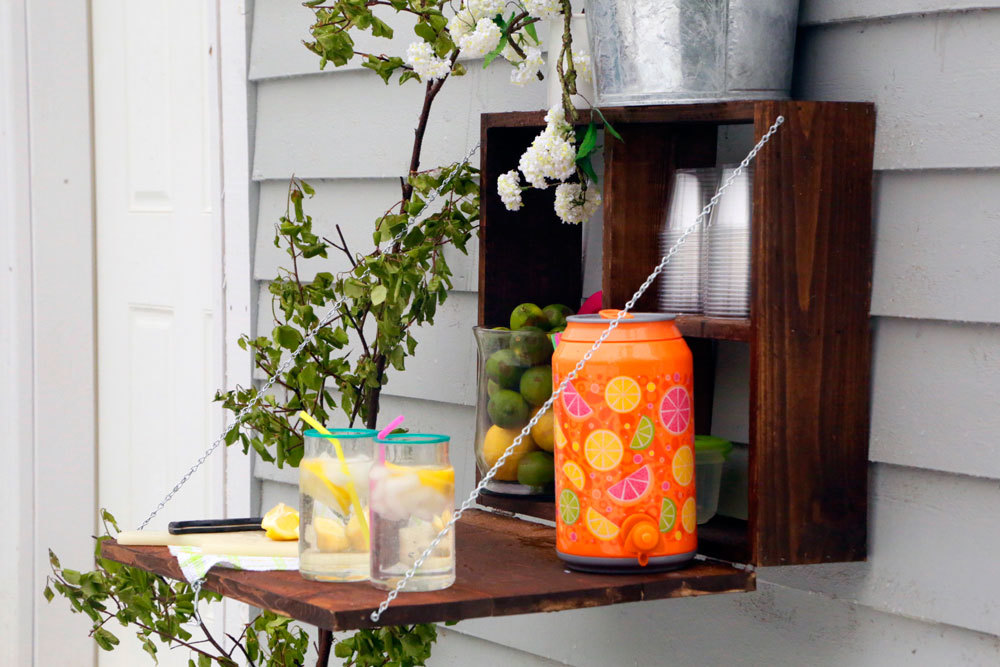
I also changed things up a bit and placed my chain supports on the outside - I redid the chain shown on the upper right photo so both are on the outside. The reason for this is when closed, the chain hits the small shelf. If you used perhaps smaller chain, wire, or s 1x4 for the shelf, you wouldn't have this issue.

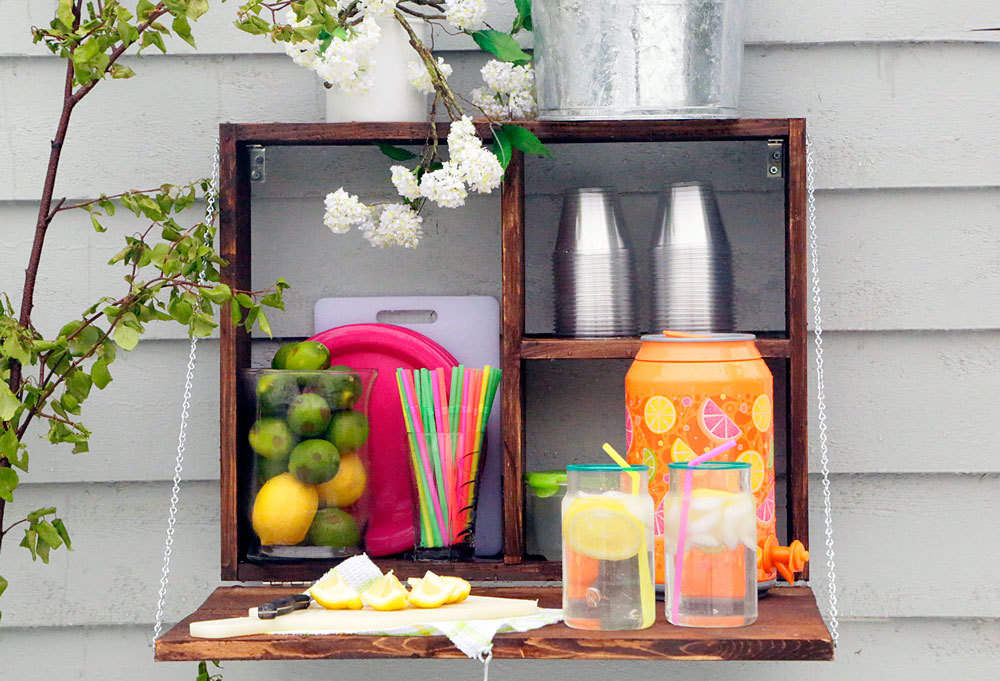
Then I just used L brackets to attach to the wall - I recommend four, one in each corner, for optimal stability.

For the closure, I added a hook and eye to the top by predrilling holes and screwing the hardware in.

The results are very sturdy and functional! I love it!
I also put together a quick video that you can watch of all the steps too -
And of course, the detailed plans are below (click read more if this is the homepage). Hope all this information helps if you are building this project.
PS - Want to see lots of other modified version by other bloggers? Go here!
Preparation
- 1 - 2 ft x 2 ft, 3/4" project panel
- 1 - 10 ft, 1" x 6" pine board
- 1 1/4" brad nails to fit nailer
- Paint or stain
- 4 - 5/8" screws
- 1 - 2" hook & eye kit
- 5 ft jack chain and pliers
- 2 - 3" utility hinges
- 4 - 3" deck screws (for hanging)
- 2 - 3" corner braces (for hanging)
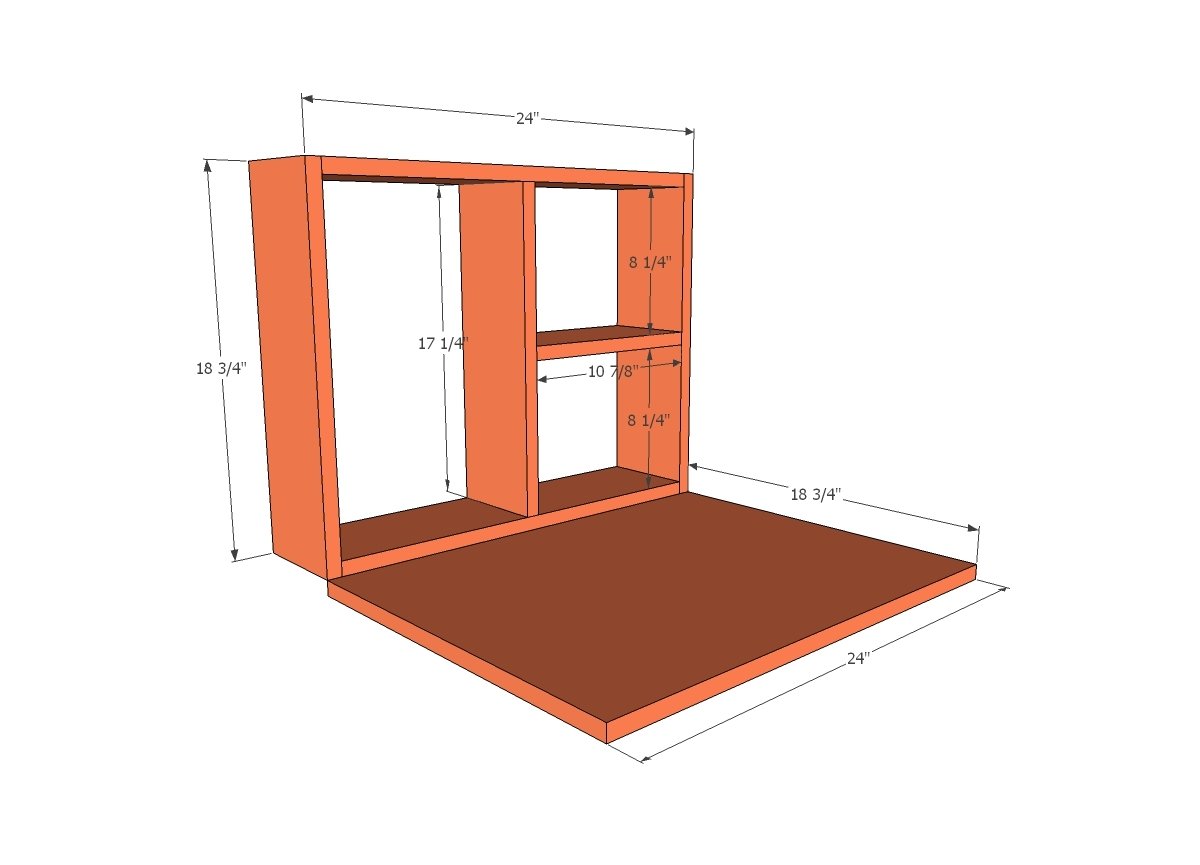
- 2 - 1x6 @ 18-3/4"
- 2 - 1x6 @ 22-1/2"
- 1 - 1x6 @ 17-1/4"
- 1 - 1x6 @ 10-7/8"
- Project Panel cut down to fit front


Please read through the entire plan and all comments before beginning this project. It is also advisable to review the Getting Started Section. Take all necessary precautions to build safely and smartly. Work on a clean level surface, free of imperfections or debris. Always use straight boards. Check for square after each step. Always predrill holes before attaching with screws. Use glue with finish nails for a stronger hold. Wipe excess glue off bare wood for stained projects, as dried glue will not take stain. Be safe, have fun, and ask for help if you need it. Good luck!
Instructions
Step 1
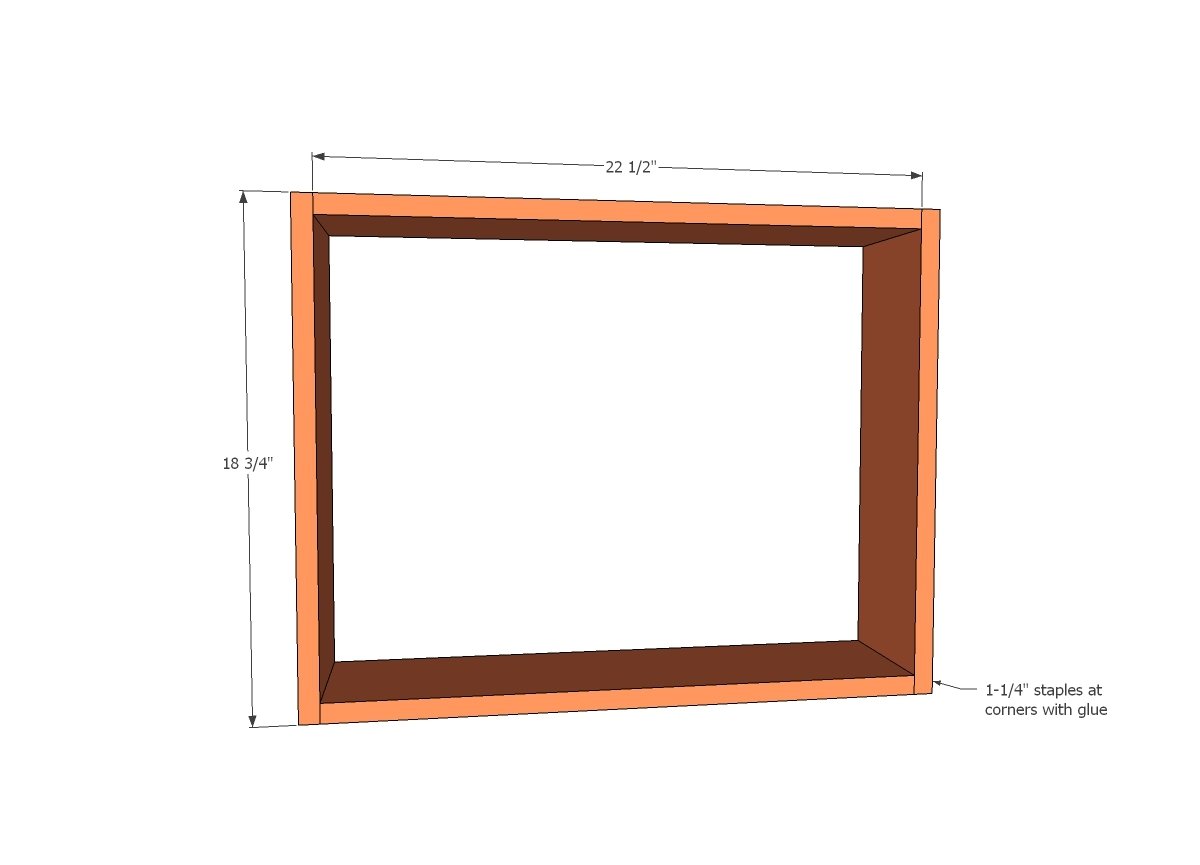
Use 1-1/4" staples or nails to build the basic box for the project. Use glue at all joints. Adjust for square.
Step 2
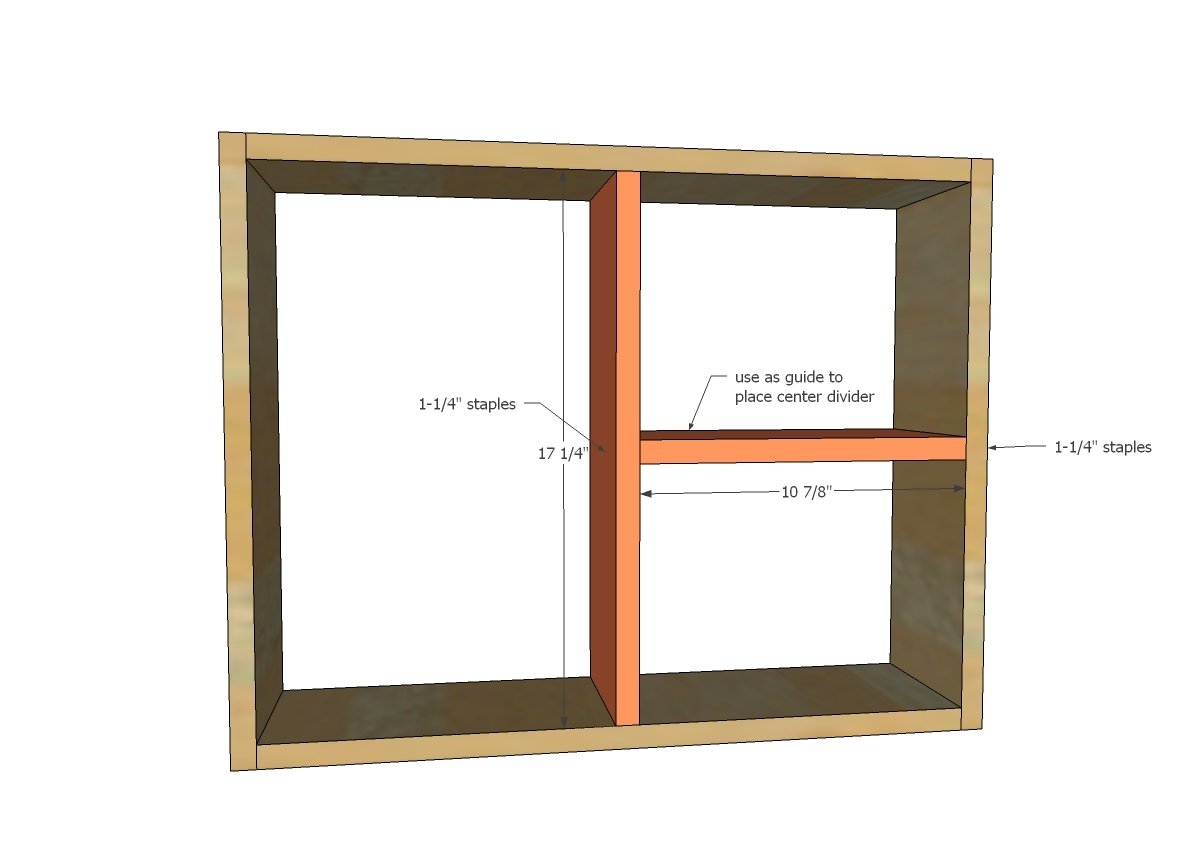
It may be easier to build the divider and shelf piece first (may get tight fitting a nailer in to add the small shelf once inside the project) and then attaching the entire shelving portion to the box as one. Consider adding a stain or paint finish at this step.
Step 3
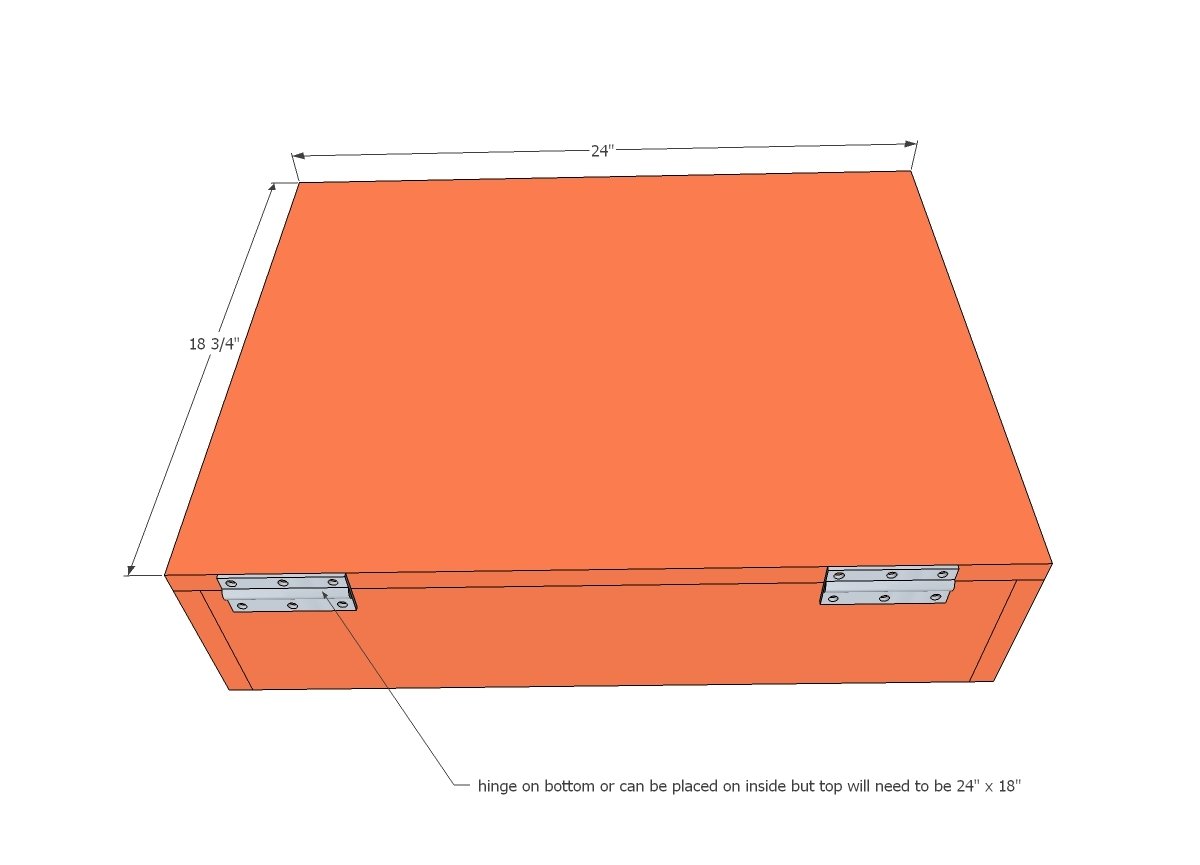
Add hinges and hardware to complete the project.
It is always recommended to apply a test coat on a hidden area or scrap piece to ensure color evenness and adhesion. Use primer or wood conditioner as needed.
Comments
handmadewithash
Fri, 06/26/2015 - 19:39
I really want to try one of
I really want to try one of the DIH workshops. It looked like it was a lot of fun. Some day soon!
kwhitt
Thu, 11/19/2015 - 09:21
Different latch
Do you think you could use a magnetic catch instead of the hook and eye? I'm thinking of making this for my parents, and I can see them having trouble with the hook and eye.
Ana White Admin
Thu, 11/19/2015 - 12:33
Sure!
Yes, just look for a decently stong magnetic clasp.