


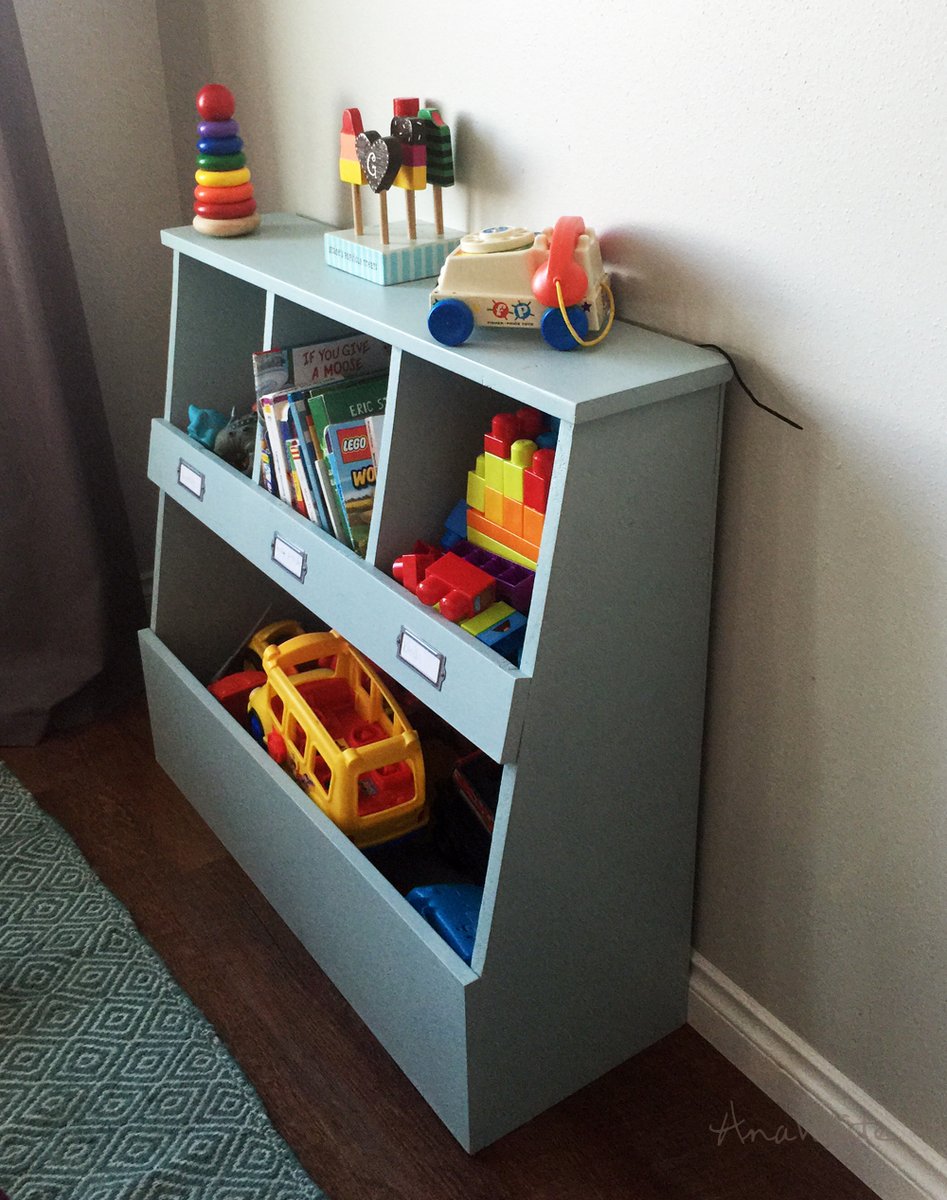
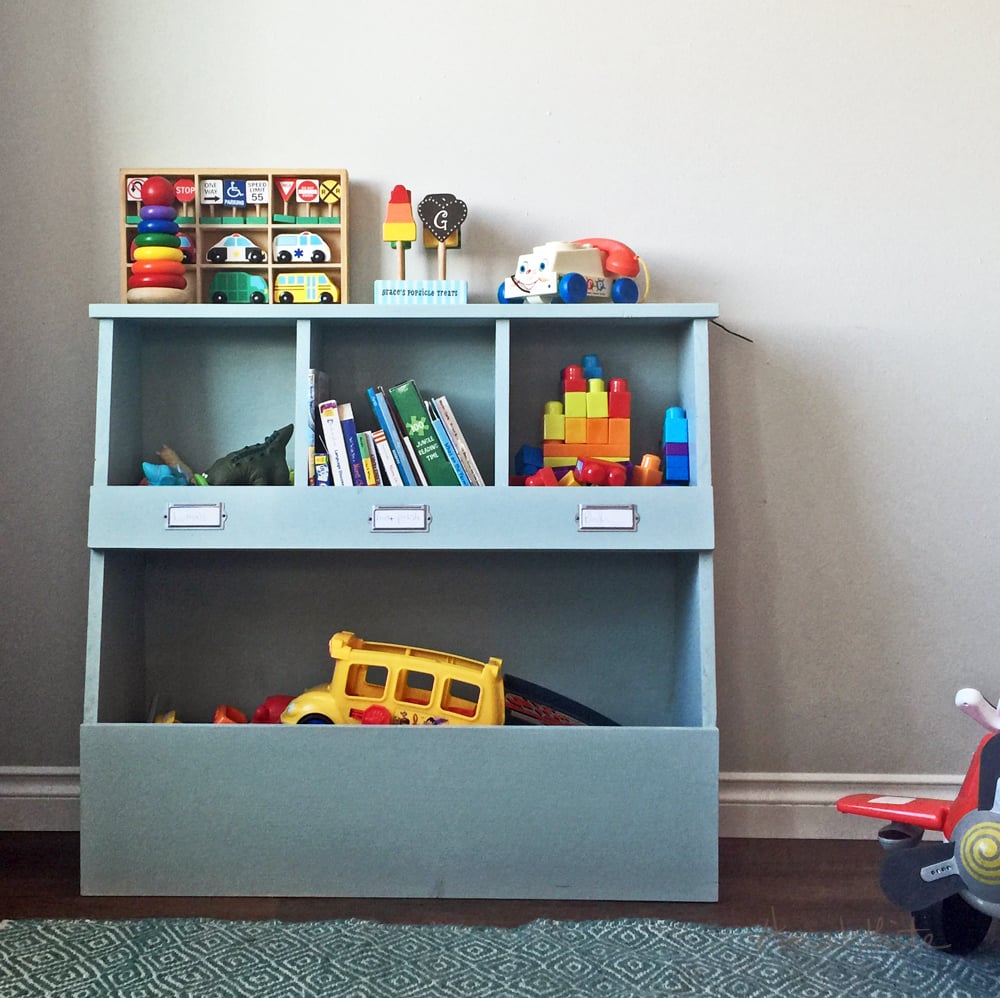
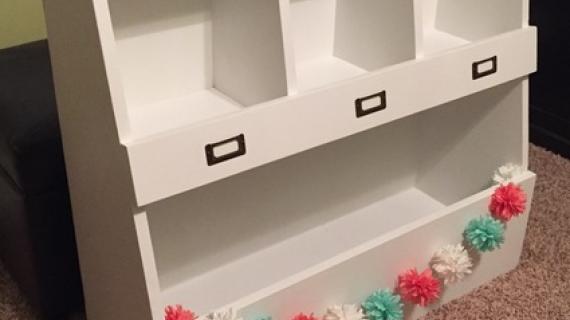
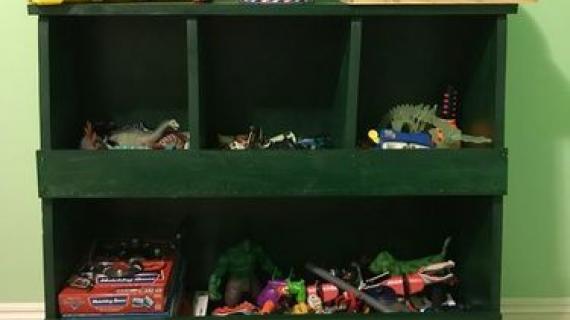
DIY pine board vertical toy box with cubbies and dump storage toy bin. Free plans by ana-white.com

Good morning friends!
I'm so excited to share this project with you! You've seen a sneak peek on Instagram, and for those of you who subscribe on YouTube, you've seen the video -
PS - I love you for following and supporting so thank you!
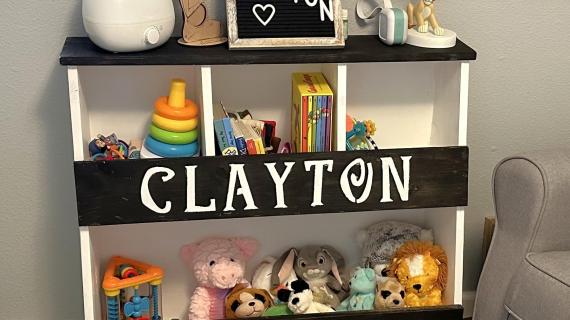
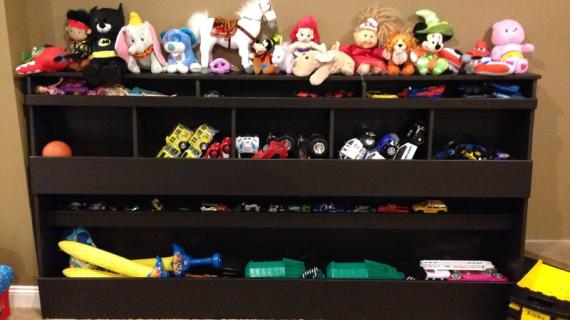
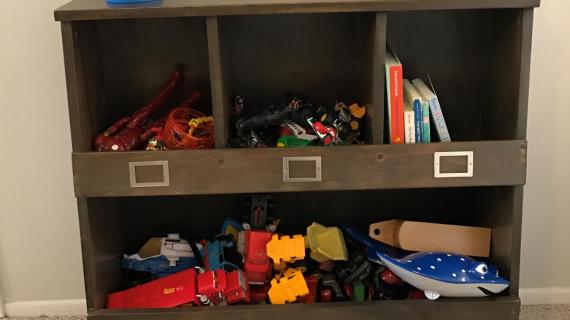
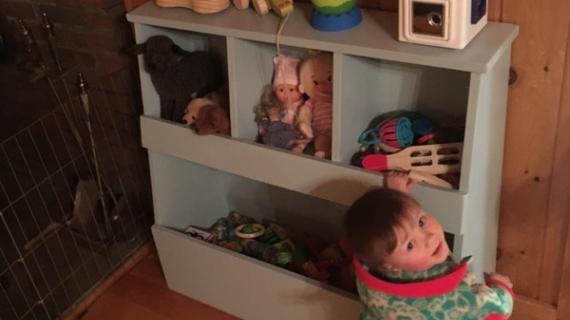
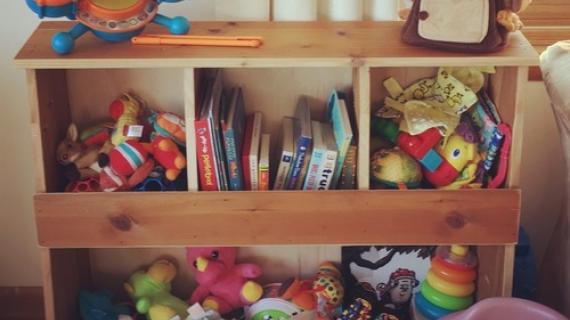
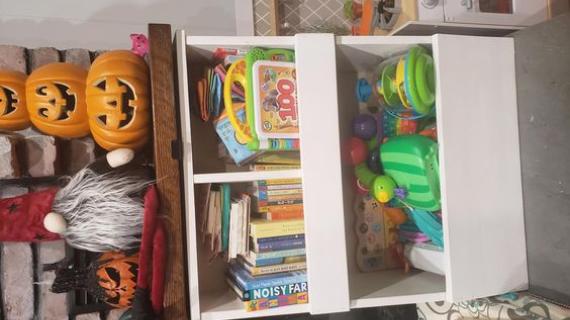
It's the new thing in toyboxes - vertical toy boxes!!! You know, where you still have all the awesomeness of telling your one year old to throw his toys in a big wood box - but on top there's smaller storage cubbies so you can organize littler toys.

The top also serves as a smaller shelf for smaller toys, books, games, or even decor.

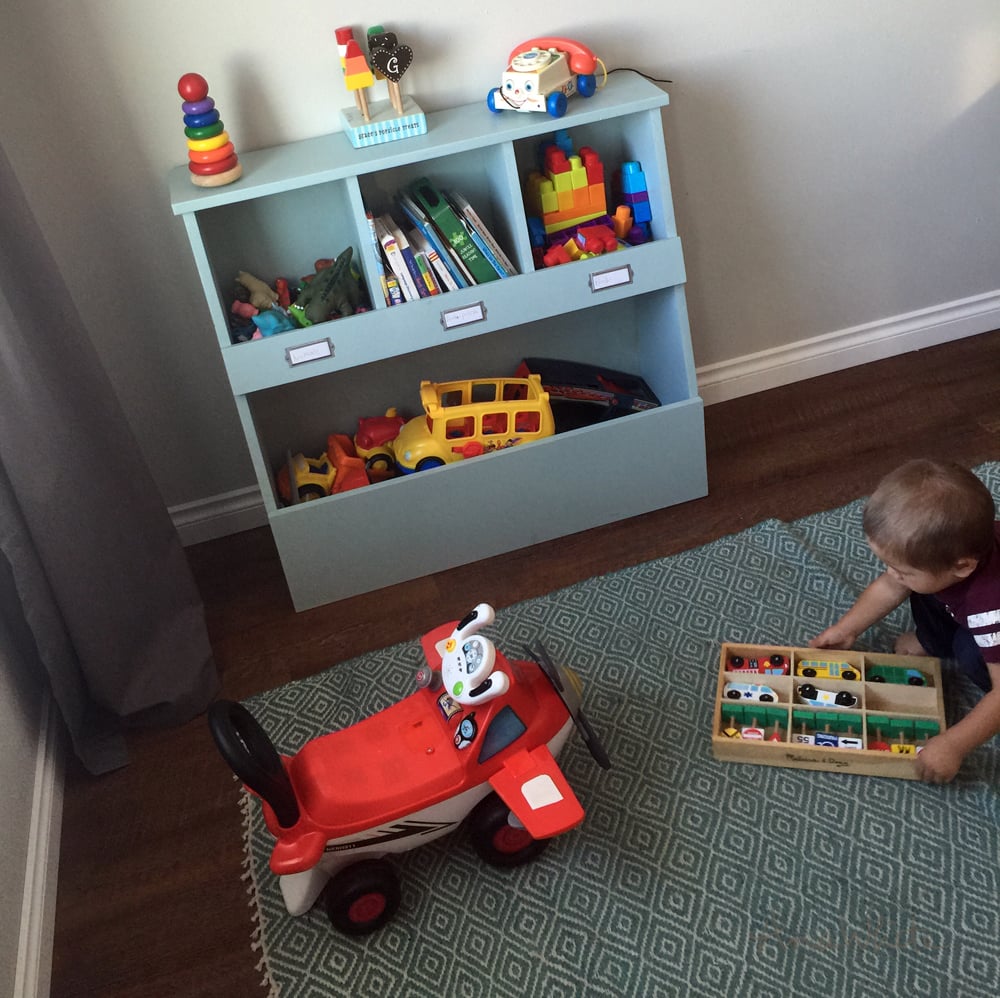
We love this thing so much and are giddy excited to be sharing the plans with you today. Or at least I am. He just wants to dig his toys out and play with them.
You'll love that this plan is all from 1x boards. I've done alot of head scratching and plan re-working to optimize the boards so the project is as inexpensive and easy to build as possible. Friends don't make friends buy an extra 1x12 when you really only needed a couple of inches. I got your back!
The detailed plans follow (you'll need to click READ MORE below if this is the homepage). Also do watch the video - it's got a lot of little tips and tricks in it that will not only make building this toybox easier, but stuff that applies to building in general. That, and you are of course dying to see my messy shop.
Pin to your build list right now!
Enough of me chattering, you've got a project to build!
Have an awesome day!
XO Ana + Baby

Preparation
- 1 - 1x12 @ 8 feet long
- 1 - 1x10 @ 8 feet long
- 1 - 1x8 @ 3 feet long
- 1- 1x4 @ 3 feet long
- half sheet of 1/4" thick plywood or other hardboard for back (can also use a wainscoating panel if 32" tall)
- 2 - 1x12 @ 31-1/2" - sides
- 1 - 1x12 @ 33" - bottom
- 1 - 1x8 @ 35-1/2" top
- 1 - 1x10 @ 33" - shelf
- 2 - 1x10 @ 12-1/4" - cubby dividers
- 1 - 1/4" plywood @ 34-1/2" x 32-1/4" - back
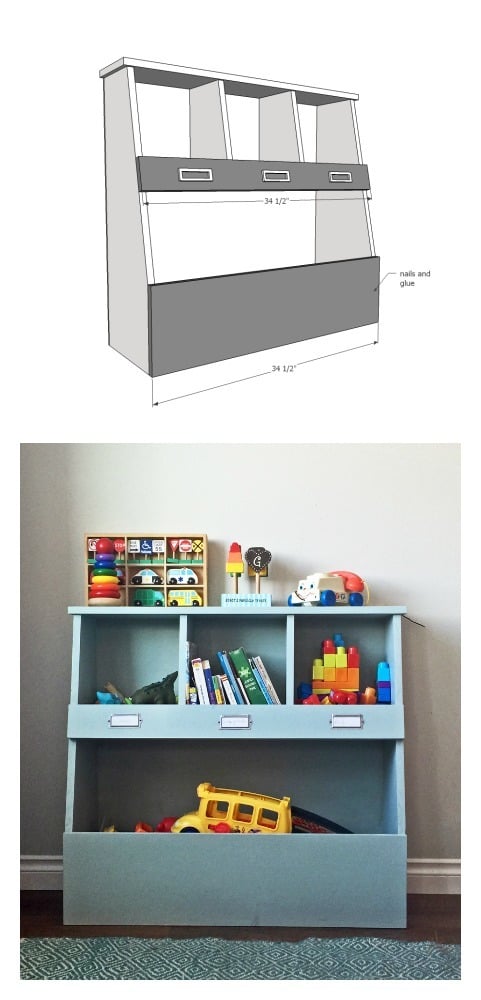
- 1 - 1x10 @ 34-1/2" - front apron
- 1 - 1x4 @ 34-1/2" - cubby front - NOTE: I kinda wish I had used a 1x6 here. It would have made it difficult to store books in there, but the 1x4 just doesn't provide a big enough lip for containing small things like legos and little cars.


Please read through the entire plan and all comments before beginning this project. It is also advisable to review the Getting Started Section. Take all necessary precautions to build safely and smartly. Work on a clean level surface, free of imperfections or debris. Always use straight boards. Check for square after each step. Always predrill holes before attaching with screws. Use glue with finish nails for a stronger hold. Wipe excess glue off bare wood for stained projects, as dried glue will not take stain. Be safe, have fun, and ask for help if you need it. Good luck!
Instructions
Step 1
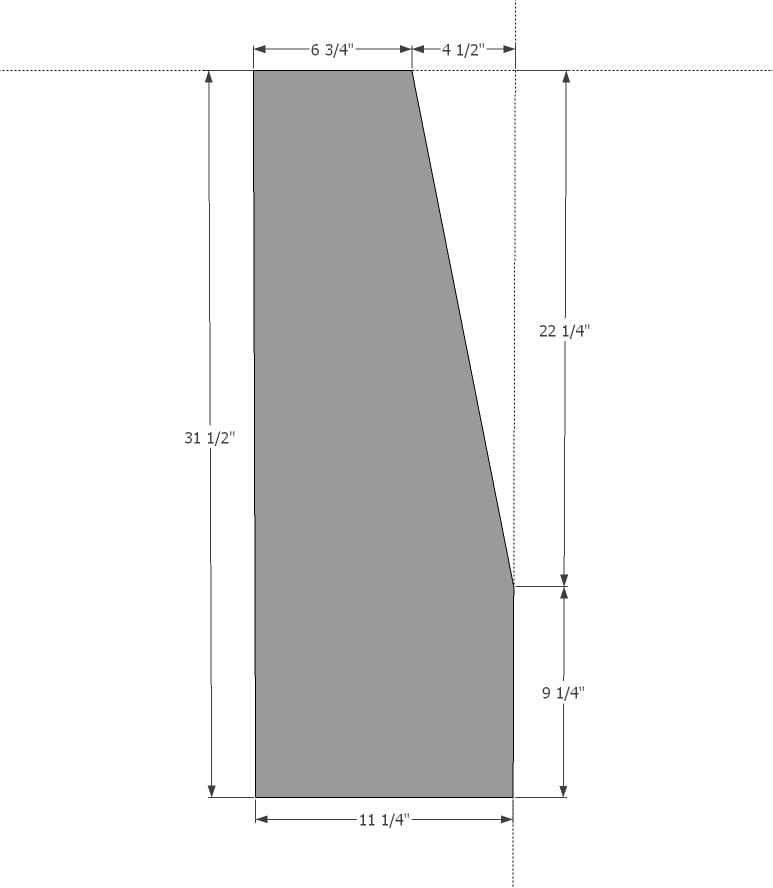
The first step is to take your side boards, carefully mark as pictured above, and cut off with a circular saw. As I do in the video, start on the shorter end - it will be easier to start than trying to start the circular saw at a steep angle.
Make sure you clamp your boards securely to a work surface so you can concentrate on your cut and not keeping the boards steady.
I used the first board as a pattern to cut the second. That worked pretty good for me. Then I sanded the cut edges lightly so they matched and were smooth. It's easier to do this now than when it's part of the project.
TIP: If you are using pocket holes to build, drill 3/4" pocket holes on the insides (the two sides are in mirror) of the top for attaching the top in step 3.
Step 2

Now attach the bottom. You can use pocket holes if you are lucky enough to have a Kreg Jig. You can also nail this project with glue, because the project is reinforced with a full back and the front aprons.
A trick I do in the video is elevate the bottom shelf up on 2x2s to get the 1-1/2" gap, and then attach the sides.
Step 3
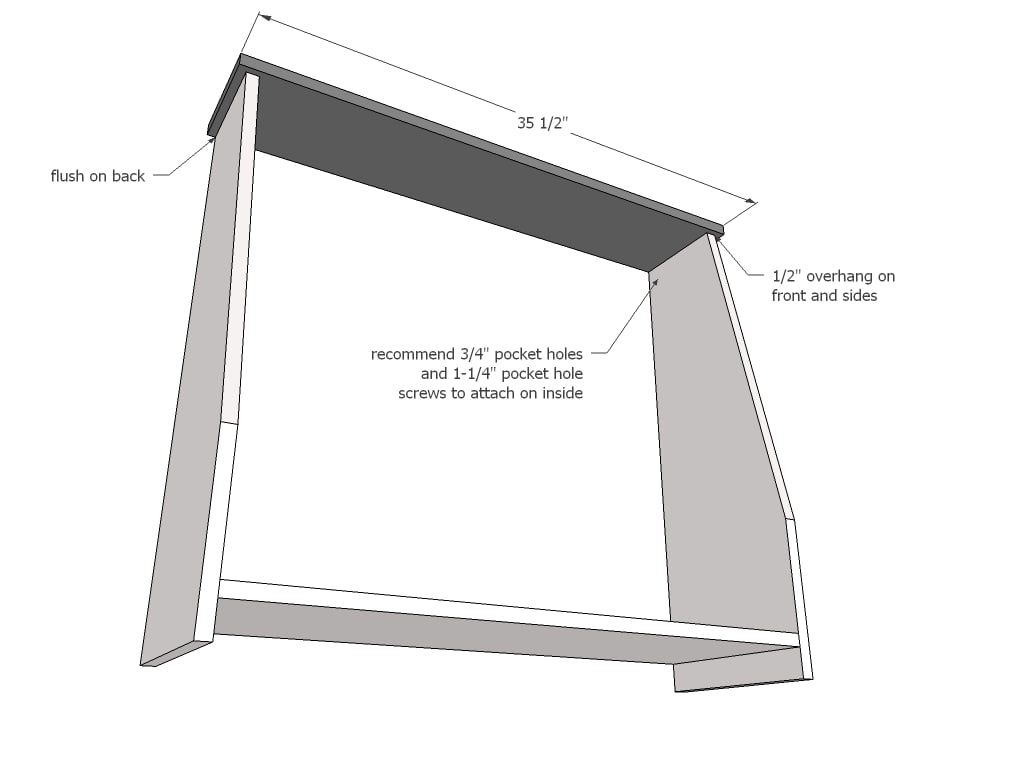
The top overhangs the sides and front by 1/2". I nailed mine to the sides with glue. If using the pocket holes, attach with 1-1/4" pocket hole screws.
Step 4
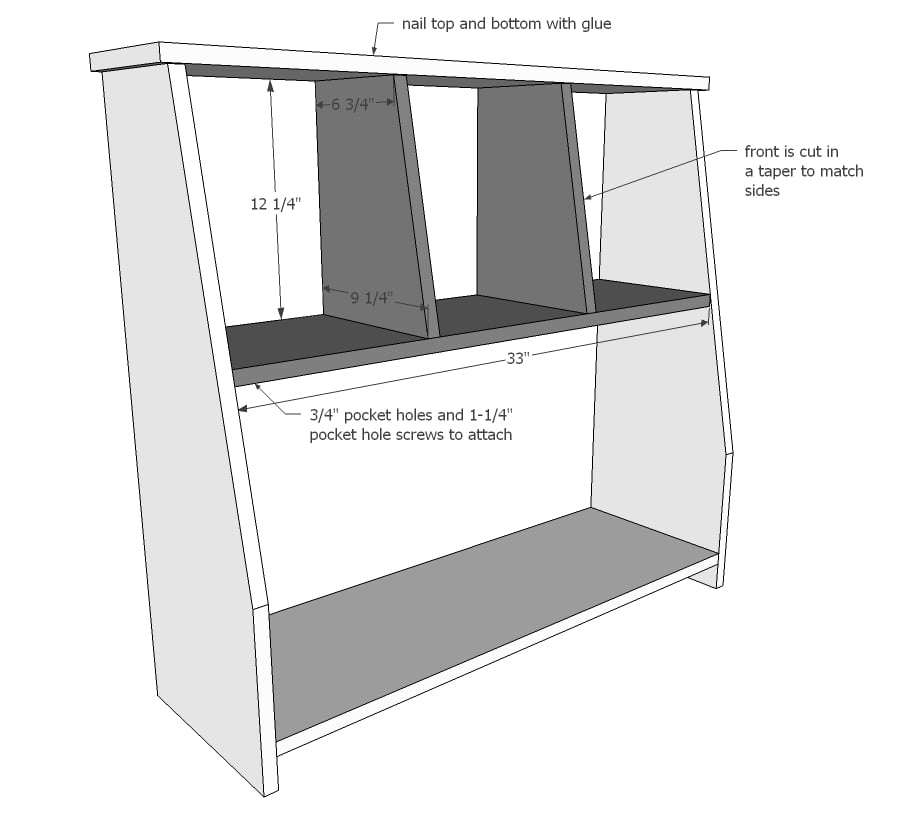
First take the dividers and place next to the sides. Trace the cut side profile on to the dividers and cut with a circular saw. Then place the dividers back inside the project, next to the sides to use as a spacer to find the placement of the middle shelf. Then attach middle shelf to the sides with either pocket holes or nails from outside (I use 1-1/4" nails and ample wood glue).
Then nail the dividers in place, with an even spacing between the dividers and sides.
Step 5

Step 6
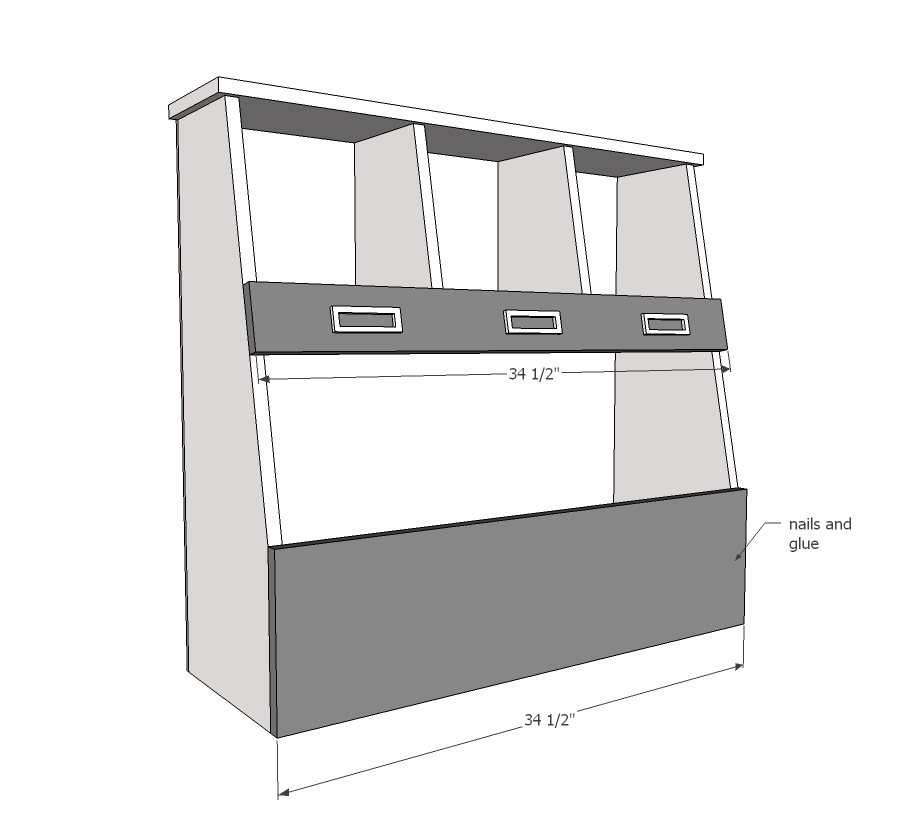
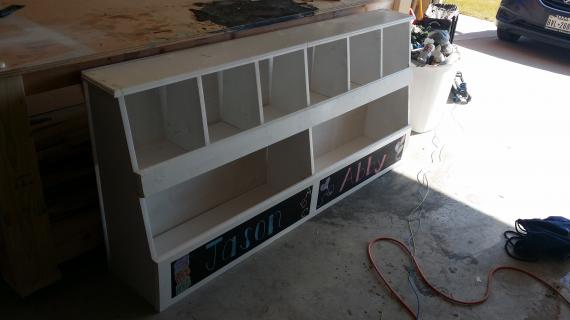
Finally the front aprons!!!! Load your nailer back up with 1-1/4" nails, spread the glue, and attach to the sides and shelves.
Wouldn't it be fun to personalize the toybox with a kid's name?
It is always recommended to apply a test coat on a hidden area or scrap piece to ensure color evenness and adhesion. Use primer or wood conditioner as needed.

Comments
TTOKC
Wed, 10/07/2015 - 13:54
Love it but 1x lumber is pricey
Love the toy box but 1 by lumber can be pricey. At the home Depot website the wood supply list $69.52. Versus cutting all the parts from one sheet of 3/4 plywood at $31. Here is the cut diagram.
http://i1199.photobucket.com/albums/aa462/ercoder/toy.jpg
Susanna.Marie
Sat, 12/12/2015 - 10:33
I would like to start by
I would like to start by saying this was extremly helpful - I am in the middle of making this and just wanted to point out an error in the plywood diagram - thankfully I caught it before making the cuts. The sides are 31 1/2" tall, not 21 1/2".
Ana White
Wed, 10/07/2015 - 18:16
Very smart! Thank you for
Very smart! Thank you for putting the plywood diagram together! Much appreciated!
milleall
Thu, 10/08/2015 - 07:34
Correction?
Love it, and perfect timing. I got started on this last night to hold my two year old's toys that have overflowed to the living room. I think the cut list has the widtch and length of the cubby dividers listed backwards. It's listed as a cut at 9 1/4 inches, but that is the width of the board, and the cut is at 12 1/4 inches I believe.
In reply to Correction? by milleall
Ana White
Thu, 10/08/2015 - 10:12
Yes, you are right. I am so
Yes, you are right. I am so sorry for my typo, thank you for letting me know, I have corrected it.
Can't wait to see how yours turns out!
kellycoleman
Sat, 10/31/2015 - 15:16
Quick Question!
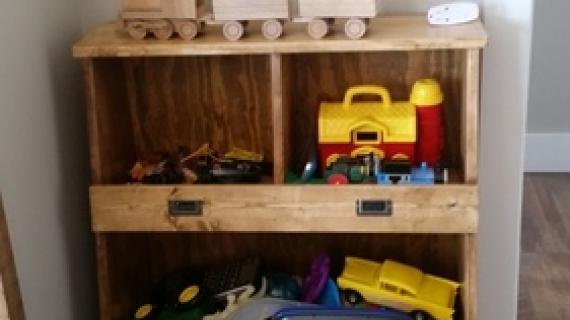
Where did you get the little silver subject plate things for each cubby section? My husband just built this and I'm not sure what to even search on-line to order some.
Larry St Croix
Wed, 12/30/2015 - 13:51
little silver subject plate things
Amazon has them. Just search "Eco Modern Label Metals" and a bunch of different ones will come up. They have them in brass, gold, copper, regular & antiqued and I am sure silver too.
Larry St Croix
Wed, 12/30/2015 - 13:55
little silver subject plate things
Amazon has them. Just search "Eco Modern Label Metals" and a bunch of them will come up. They have gold, brass, copper, antiqued & I am sure silver too. Fancy twiddly ones also.
In reply to Quick Question! by kellycoleman
Clint Porter
Mon, 02/01/2016 - 09:06
I've seen them at Hobby Lobby
I've seen them at Hobby Lobby too. They are by the stickers.
Clint Porter
Sun, 01/31/2016 - 18:41
The 1x12 board
Just wanted to point out something about th e 1x12 cuts. The cut list says to make two cuts at 31 1/2" then one cut at 33". The issue is that these cuts don't account for the 1/8" width of the blade. It's not a huge deal but the 33" board comes out to 32 15/16". Again it's only a sixteenth of an inch and can easily be corrected when you make your 1x10 cut for your shelf by making the cut to match the bottom.
In reply to The 1x12 board by Clint Porter
Lionessong
Sun, 09/18/2016 - 12:07
Measuring for 1X12 cuts
If you measure the cut length after each cut then it'll come out accurately. I did this for the boards and thought about how I was going to do it for a different project and then forgot and measured it all out and my small little pieces were so wonky! Lesson learned, either take the kerf into account or measure after each cut!
kcnjamie
Fri, 08/26/2016 - 23:35
What color did you use?
Hello from Anderson, Alaska!
Wonderful site! I was wondering what color did you use for the storage unit?
Thanks!