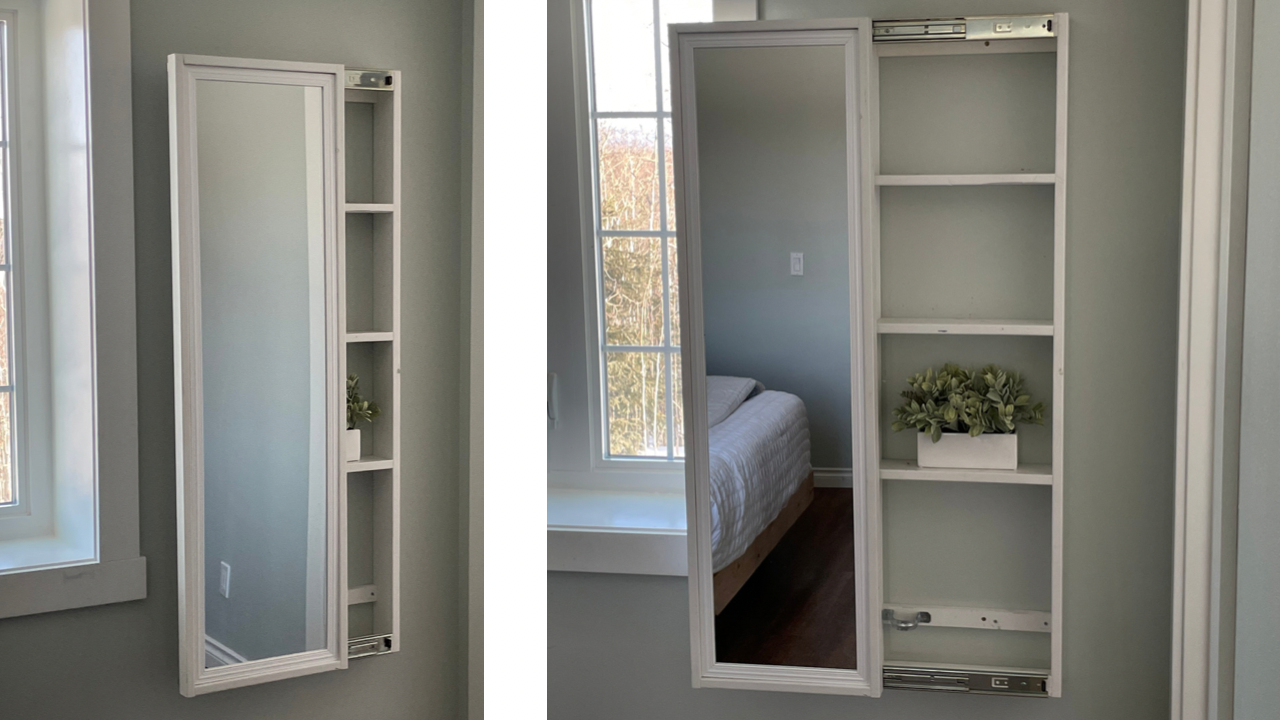


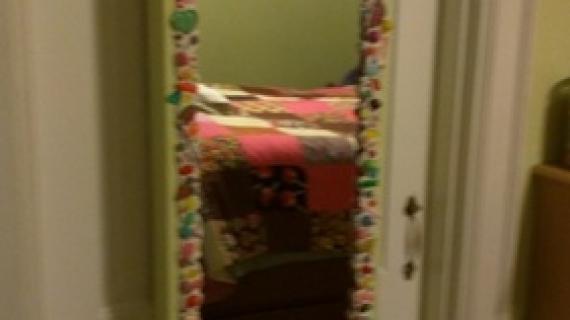
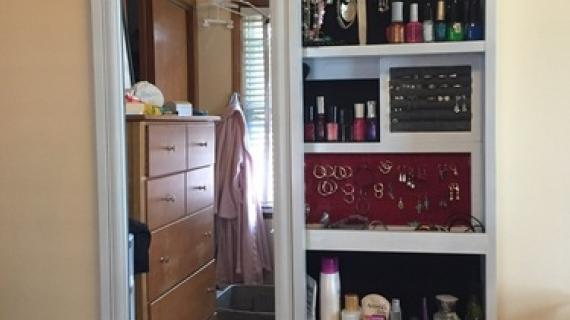
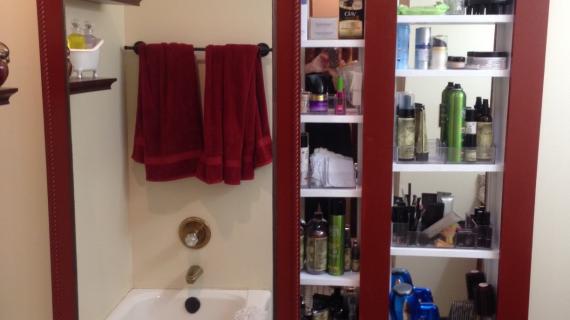
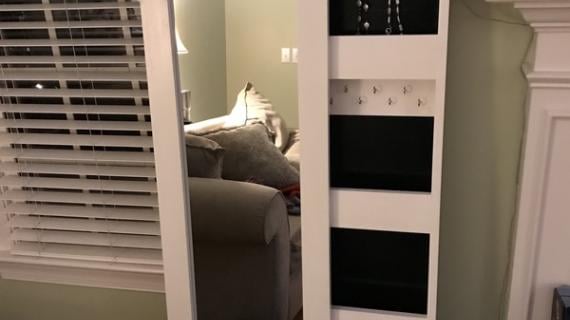
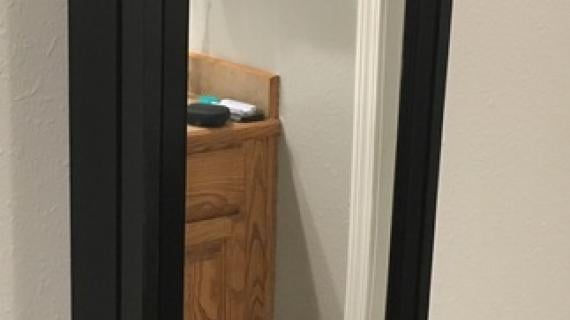
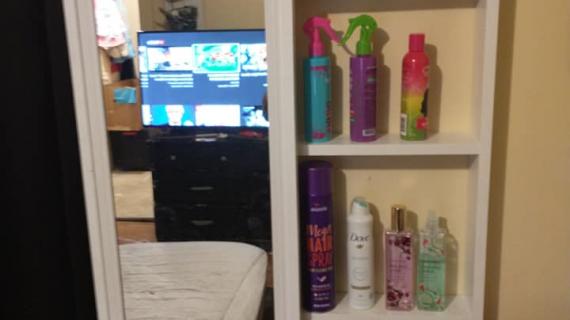
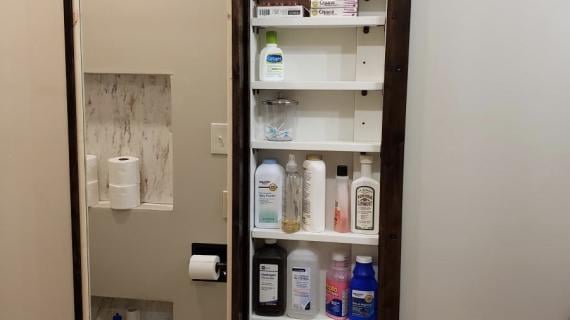
Turn a $6 wall mirror into the ultimate beauty cabinet! The mirror slides to the side to access the storage - so the mirror is always visible, even when accessing the storage behind it. Cost is about $25 to build. Free step by step plans by ANA-WHITE.com
Using a $6 wall mirror and some drawer slides, I built this sliding mirror cabinet.
This is a GREAT project for hiding taller beauty items and keeping styling tools nearby. I used this project for years for hair and makeup - I highly recommend it!
This makes an awesome gift for a teen too!

Quick Build Video
Here's a super quick video showing how to build this project.
And of course, the step by step tutorial follows (if this is the home page you'll need to click READ MORE below).
Hope you like it!
Have an awesome weekend!
Ana
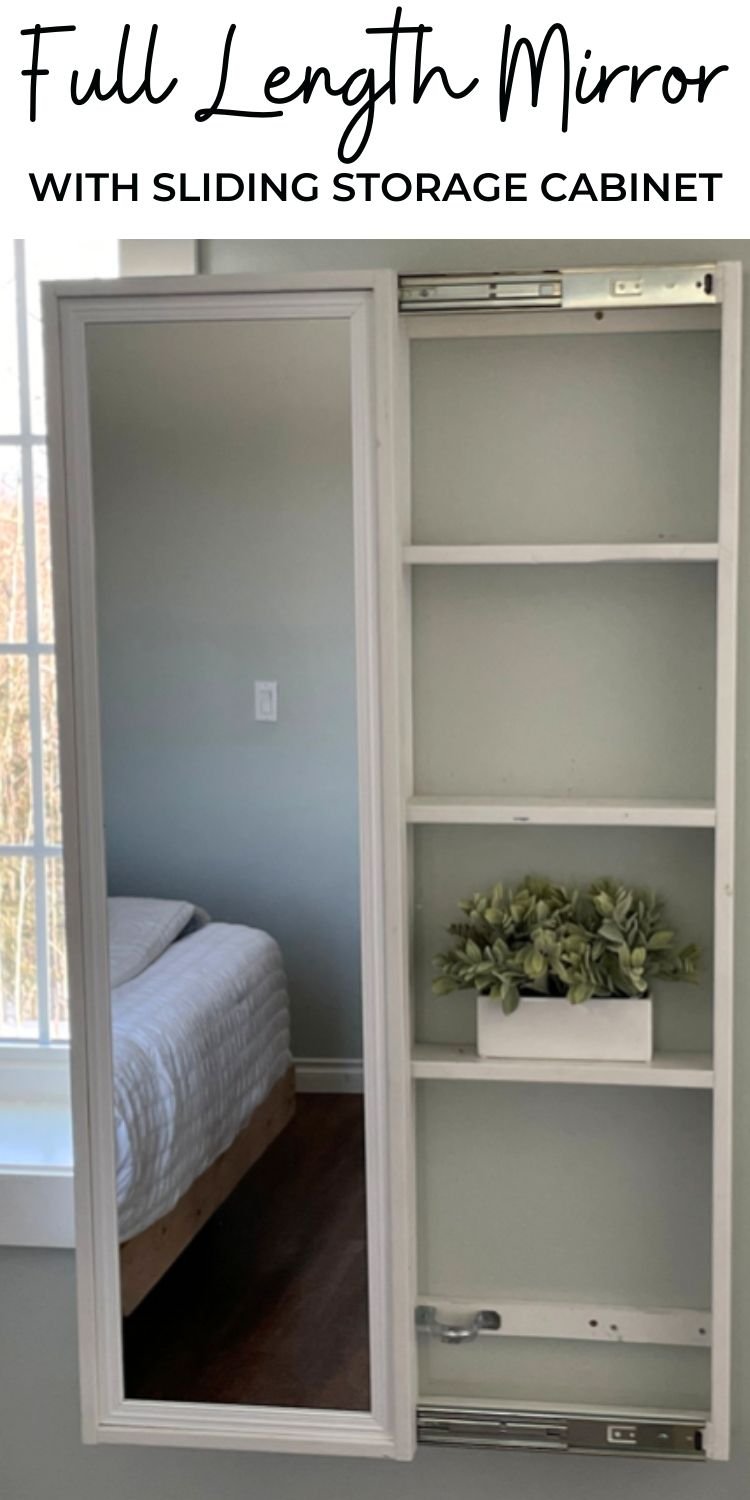
Pin For Later!
Preparation
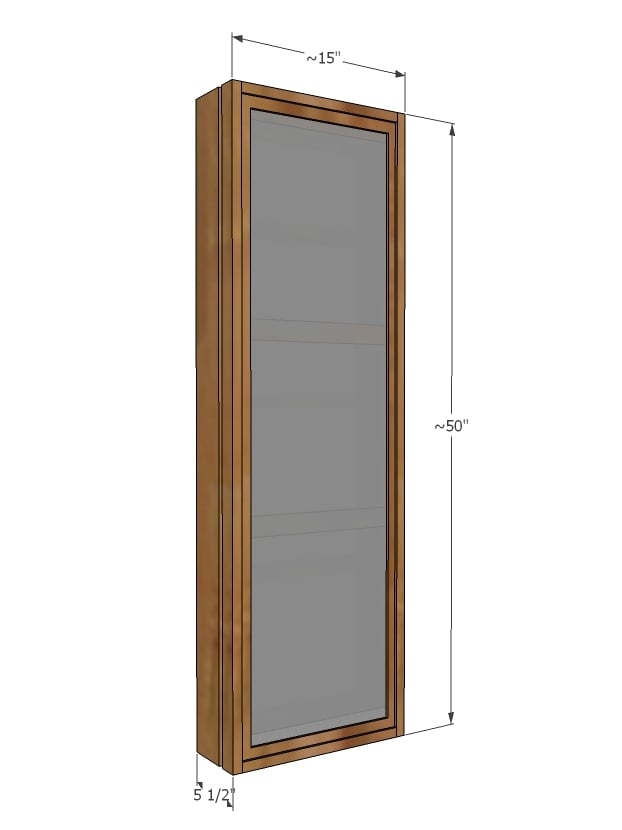
- 2 - 1x4 @ 8 feet long - may need more lumber for larger sized mirror
- 2 - 1x2 @ 8 feet long - may need more lumber for larger sized mirror
- 1 full length wall mirror
- 1 set of full extension side mount drawer slides, length smaller than the overall width of cabinet (my cabinet was about 15" wide so I used 14" drawer slides)
- 2 screws for mounting to wall (I used 3" screws and screwed directly to studs in the wall)
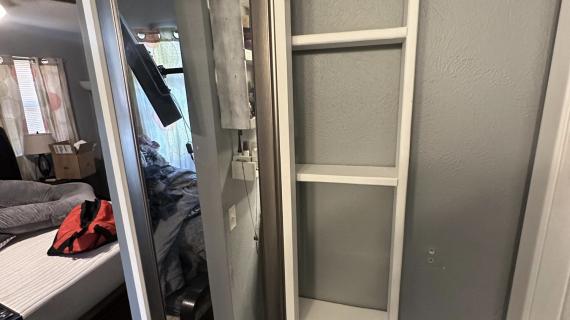
MIRROR FRAME
- 6 - 1x2 @ width of mirror
- 2 - 1x2 @ height of mirror PLUS 1-1/2"
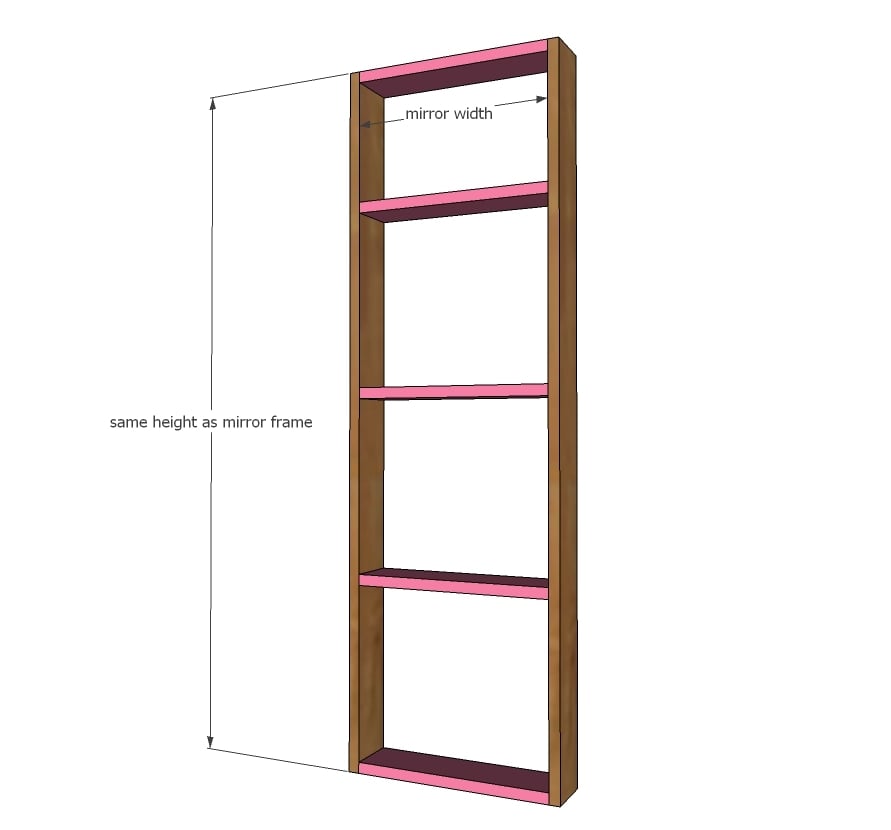
SHELF
- 2 - 1x4 @ height of mirror PLUS 1-1/2"
- 5 - 1x4 @ width of mirror
- 4 - 1x2 @ width of mirror (for attaching to wall and attaching drawer slides)


Please read through the entire plan and all comments before beginning this project. It is also advisable to review the Getting Started Section. Take all necessary precautions to build safely and smartly. Work on a clean level surface, free of imperfections or debris. Always use straight boards. Check for square after each step. Always predrill holes before attaching with screws. Use glue with finish nails for a stronger hold. Wipe excess glue off bare wood for stained projects, as dried glue will not take stain. Be safe, have fun, and ask for help if you need it. Good luck!
Instructions
Step 1
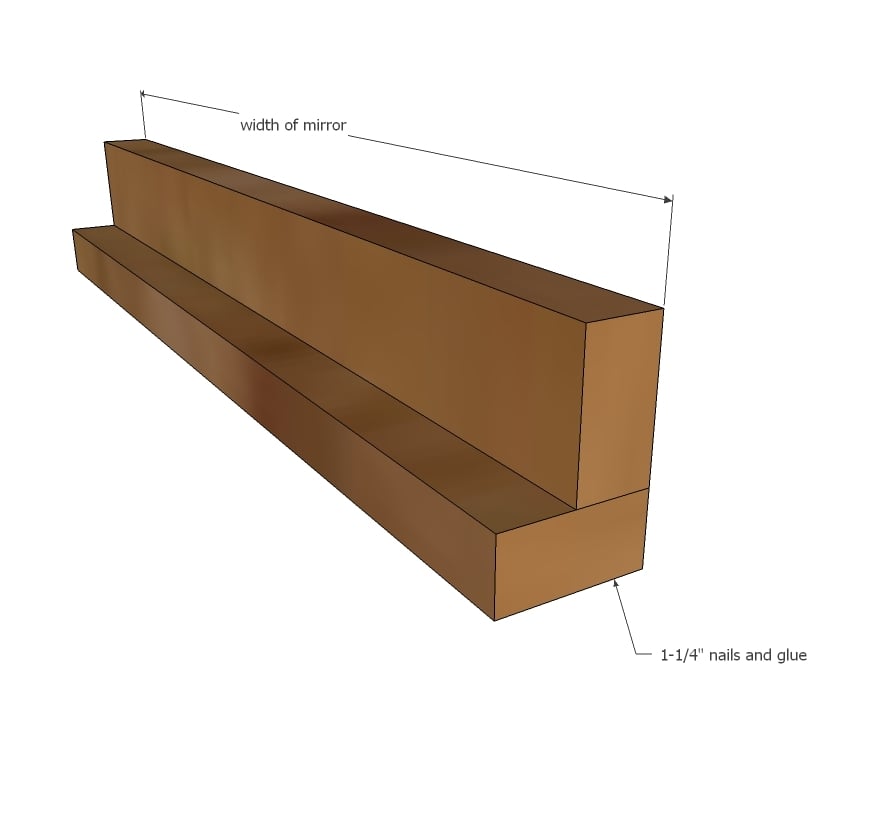
Nail two of the 1x2s together to make "L" shapes with 1-1/4" nails and wood glue. Build two of these.
Step 2
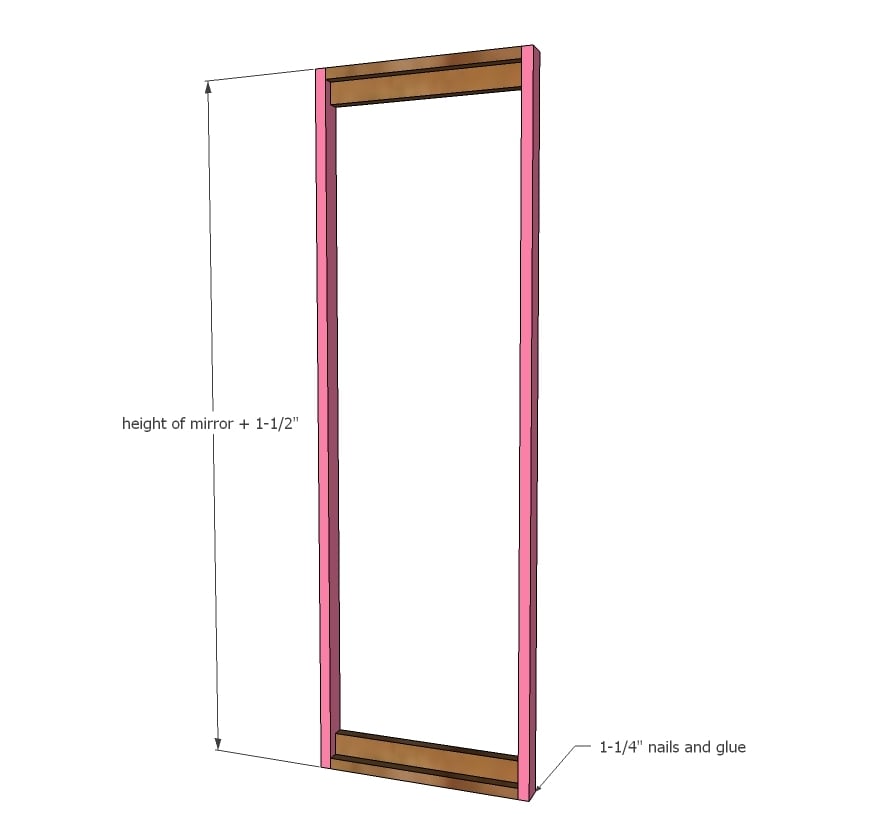
Attach sides to the "L" pieces to make the mirror frame, with 1-1/4" nails and glue. All outside edges are flush. Adjust for square.
Step 3
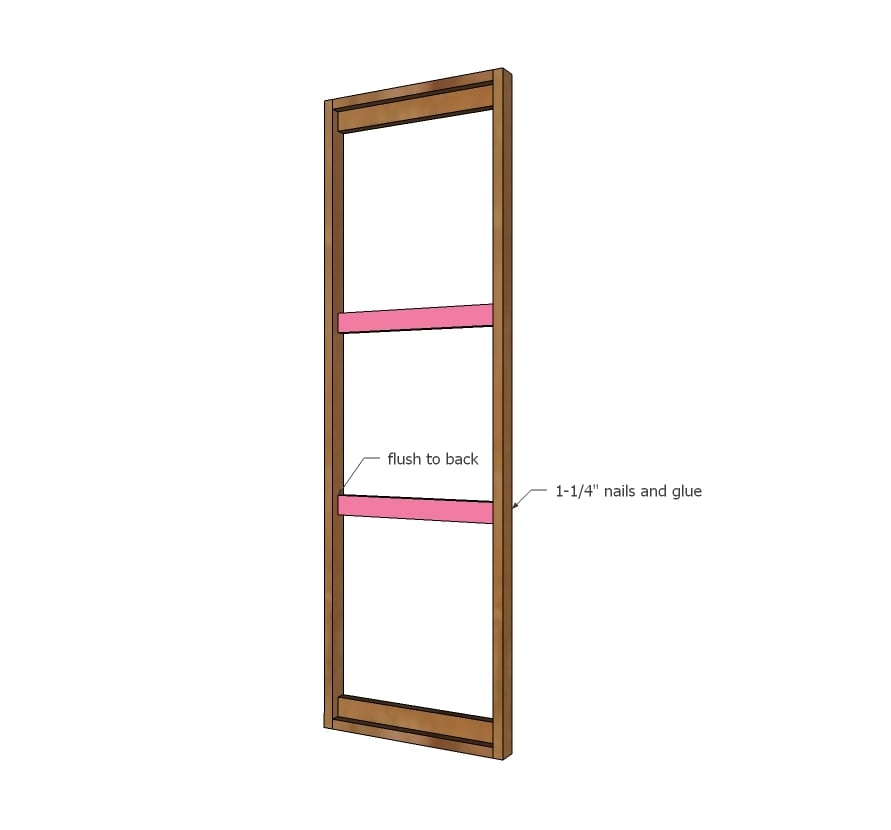
Add two back pieces for support. Keep flush to back.
Step 4

Glue mirror into frame. NOTE: I acutally did this at the last step so I could more easily attach my drawer slides.
Step 5
Step 6

Attach 1x2 boards for attaching the shelving unit to the wall. I also added additional 1x2s at front for attaching my drawer slides.
Step 7

For the bottom cleat, I attached it at a height so I could install pipe hangers for holding my hair styling tools. I used this cleat for attaching to the wall at the bottom.
Step 8
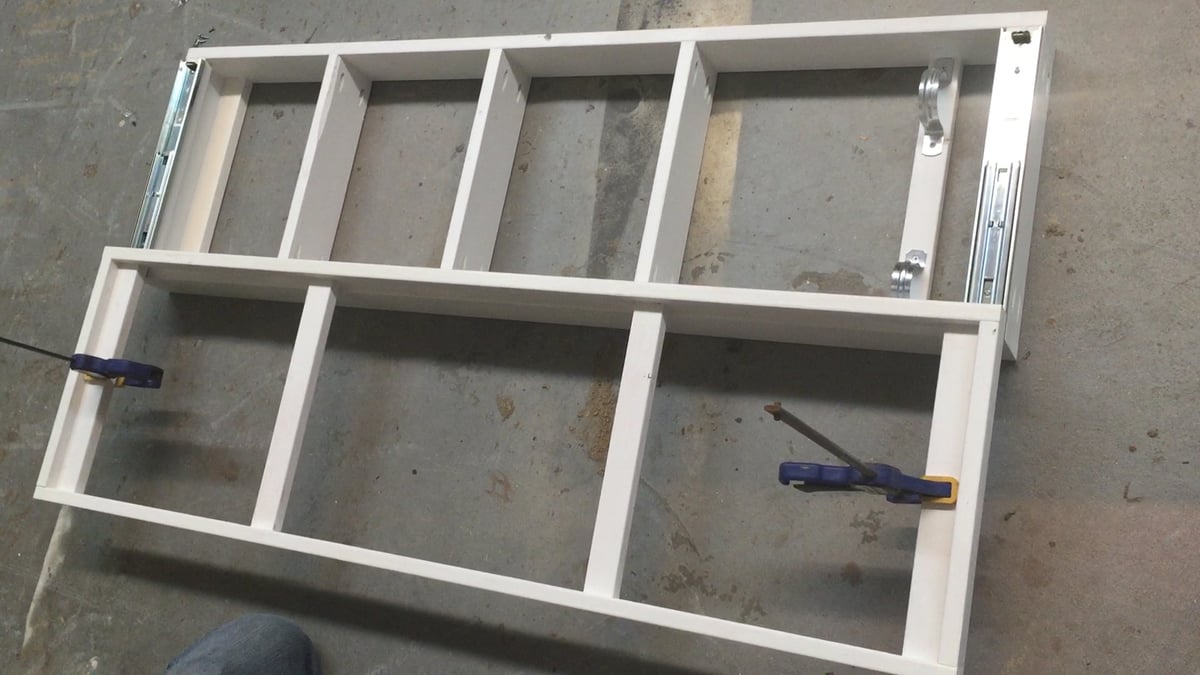
This cabinet works with full extension side mount drawer slides (the silver ones).
Notice how the screw holes for both the shelf part of the drawer slide and the mirror frame part of the drawer slide are in exactly the same location heightwise?
So measure down from the top of both the shelf and the mirror frame (where the drawer slides will be attached) 1-1/2" and a draw a line all the way across the top (the line runs parallel to the top of the shelf 1-1/2" down from the tops). Repeat for the bottom.
Install the drawer slide so the lines you drew are in the center of the screw holes, start the screws right in the middle of the lines you drew.
It is always recommended to apply a test coat on a hidden area or scrap piece to ensure color evenness and adhesion. Use primer or wood conditioner as needed.

Comments
handmadewithash
Fri, 08/28/2015 - 12:07
this is so cool Ana!
this is so cool Ana!
bradsims
Sat, 08/29/2015 - 10:13
This awesome, This will make a perfect aniversery girft. Ty ANA
This will make a perfect aniversery girft. Thank You Ana!!!
Bown
Thu, 10/15/2015 - 09:45
You read my mind!
I've been toying around with the idea of a bathroom cabinet like the one on Shanto to Chic website but wanted something that had slides because its going to go by my toilet and there is no room there for a swing out door. I just didnt know how to go about doing the slides, i didnt realize they were so easy to get!
I have a Kreg shelf pin jig and i am going to use that so i can have adjustable shelves.
Thanks Ana, I am just leaving the house now to go get the supplies. :)
Robin
tracygrafix
Thu, 01/21/2016 - 14:12
love this..
I really love this idea! I've been racking my brain on a clever way to organize my jewelry and this would be the perfect solution. However, I want to try to do it within the wall studs and put hinges on the mirror because the wall I want to use won't work with a slider. Thanks for the inspiration! I love all your work. I've already built several projects from your plans - modified for my purposes. You really are an inspiration!!! Thanks for sharing your talent and
In reply to love this.. by tracygrafix
Ana White
Sat, 01/23/2016 - 14:00
That is a great solution, can
That is a great solution, can't wait to see your version!
tracygrafix
Thu, 01/21/2016 - 14:16
Love this...
I've been racking my brain trying to figure out a way to contain and organize all my jewelry discretely. This will be the perfect solution! However, I'm going to attempt to build this in between the wall studs and hinge the mirror. Thank you for sharing all your creative ideas detailed plans and talent with us! I've already built several items from ideas I got from you and modified for my needs. Thank you!!
Bobbie_Momof2
Thu, 08/04/2016 - 09:06
OHHH!! I love this
I can NOT wait to put this in my bedroom!
Neil B
Tue, 02/07/2017 - 23:29
Full length mirror sliding
Awesome instructions easy to follow.
Well received present on Valentines day I hope!
Grim Acres
Thu, 01/11/2018 - 21:45
Already added to the growing list
Definitely doing this when we build our new home! Planning on making it inset into the wall so that it just looks like a mirror on the wall, not a cabinet. This way I can use it for beauty/personal care items but also to hide things like expensive jewelry, a vacation fund jar, etc.
Thanks Ana!
mom211kidz
Fri, 08/16/2019 - 12:52
Ok so here is my thought. I…
Ok so here is my thought. I am building my own house and we are in the framing stage. I am thinking we can recess the cabinet into the wall and just have the mirror portion sticking out from the wall, I like everything to be as flush, clean lines as possible.
sharon-l
Sat, 08/17/2019 - 03:38
Modified for jewelry?
I've been trying to come up with a solution for jewelry storage for a small space in my bedroom. This basic plan should work for that! I will try to post when I get it done! Thanks once again Ana!
janellrayne03
Thu, 03/25/2021 - 12:07
sliding mirror storage unit
I have a question . The supplies list say's one 15 inch slide but it looks like I will need two sets . One for the bottom and one for the top, right ? Also on the video it shows a 16 inch slide not a 15 inch . Is that a different mirror cabinet that you were doing ? Thank you for your response . I love your designs and can't wait to make this for my daughter
janellrayne03
Thu, 03/25/2021 - 12:13
I am also finding on amazon…
I am also finding on amazon 14 inch and 16 inch but no 15 inch slides like these . Can I use 14 inch ?
kebsam
Sat, 07/03/2021 - 11:24
Mirror on hinges - anyone tried it?
Thank you for this! I wonder if anyone has tried this with the modification of having the mirror on hinges (opening like a door) instead of using the glides. Would love a how to on it.