Do you want to start building projects, but have no idea where to start? In this guide, I'll walk you through the tools you need and the basic steps we take to build almost any project.
What are the Basic Tools I Need to Get Started?
You only need about $150-$200 in tools to get started with building projects. These are the basics.
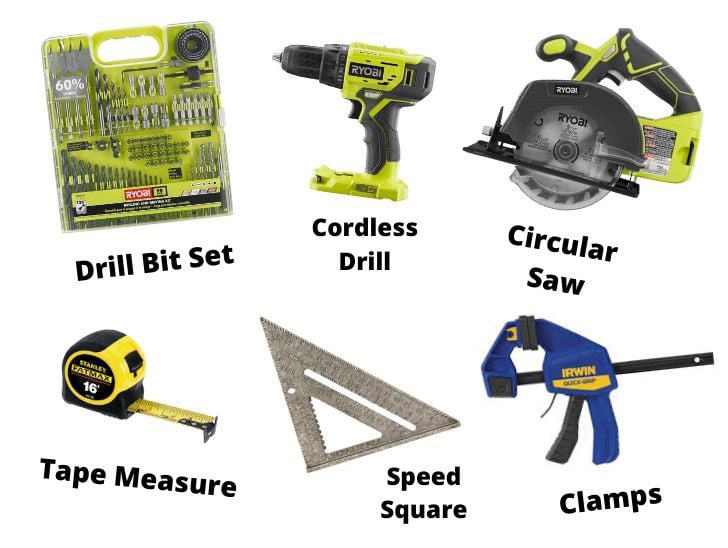
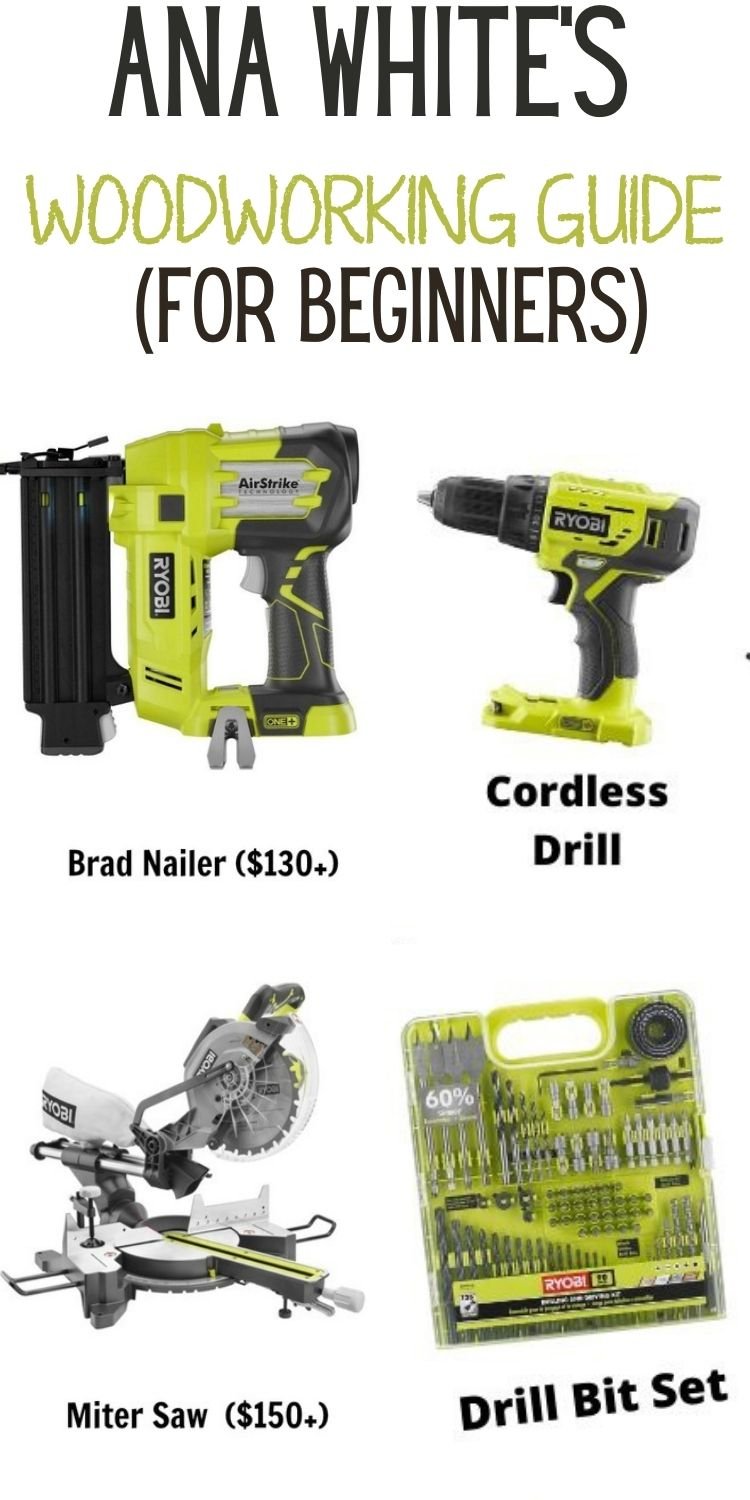
- 18 volt Drill and Circular Saw Combo Kit (should be under $100) with battery and charger
- 16' or longer tape measure
- Speed square (7" x 7") can be metal or plastic
- Safety glasses and hearing protection
- Drill Bit set including driving and drilling bits
- Clamps for holding your board down while you cut
You can build almost any project using just these tools with self tapping screws as fasteners. But as you build more projects, you may find you want to build higher quality projects faster. If this is the case, you'll need to invest in a few more select tools.
What Saw Does What and Why?
There's three main saws that I use regularly - the jigsaw, circular saw, and the miter saw.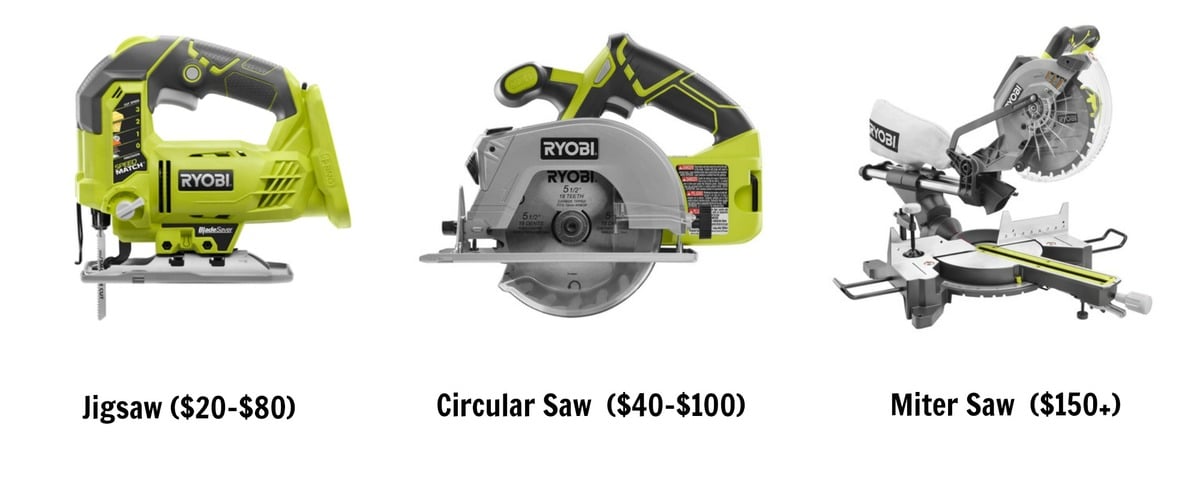
-
Jigsaw - Jigsaws are saws with a small blade that moves up and down (similar to a hand saw motion) to cut wood. The ideal use of a jigsaw is making curved cuts or small cuts. Since the blade is only attached at the top with the bottom of the blade free, the resulting cut may be beveled or rough, so it is not ideal for making straight cuts. Jigsaws are generally easy to use. A good blade appropriate for your material and clamping the wood down will help make cutting even easier.
-
Circular Saw - Circular Saws are the most versatile for making straight cuts and the least expensive. You can use a circular saw to do everything from cutting plywood panels to cross cutting 2x4s. I recommend cutting on top of a piece of styrofoam, so your wood is fully supported as you cut.
-
Miter Saw - The Miter Saw is essentially a circular saw built into a track system to assist you in making precise straight, angled or beveled cuts quickly and easily. Why do you need it? Because it's quicker, faster, easier and more precise than a circular saw. A miter saw is a game changer in making home built furniture. The down side is you can't cut wood bigger than the miter saw deck (usually about 12") so you still need that circular saw for cutting plywood panels.
How Do I Attach the Wood? What Type of Fastener Do I Need?
Most of the plans on this website use three basic construction methods, or a combination of the three. Here is a video showing these three methods.
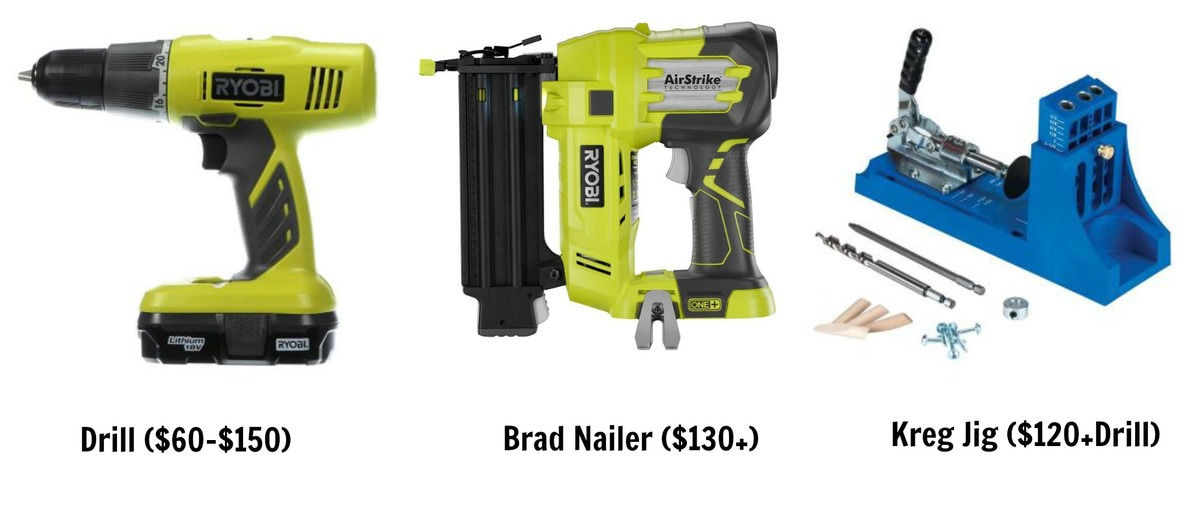
Here are the three tools required for these different construction methods.
-
Drill - The drill used to create a variety of joints, with the most basic a simple screw. If fastening a project with screws, I recommend self tapping screws with a star bit. The screw length generally speaking needs to be about double the thickness of the top wood, minus about 1/4" so the screw does not go through the second board. So if you are attaching a 1x board to a 1x, the screw should be about 1-1/4" long. If your second board is thicker, you can use a longer screw. This is just the minimum recommendation. I use an 18 volt cordless drill.
-
Brad Nailer -Why a Brad Nailer? For three reasons - 1. Brad nails are easier to hide because the nail hole is tiny. 2. Brad nails are much quicker and easier for non-structural joints 3. Brad nails are much less expensive than screws or pocket hole screws. Why use and expensive fastener when a quick, cheaper fastener will do the job? I recommend an 18 gauge brad nailer, but not to be used for structural joints - use it for things like attaching the back on a bookshelf, building a picture frame, adding trim to a console table. I use an 18 gauge brad nailer, 18 volt cordless so the battery matches my drill.
-
Kreg Jig - IA Kreg Jig is a tool that works with your drill that can help you attach boards together with the screw hole hidden. It makes structural joints easier to attach and more precise. You can use it to attach boards together edge to edge (think tabletops). If you want to build better projects, the Kreg Jig is a must. I have both the Kreg Foreman and the 700 series.
Pros and Cons of Different Construction Methods
|
Tool |
PROS |
CONS |
|---|---|---|
|
Brad Nails |
Nails are inexpensive, easy, and quick, requiring minimal clamping. Easy to hide. |
Not as strong as screws and may pull out over time. Longer nails tend to stray. Can be difficult to hold some joints together while attaching. Do not use to attach 2x boards to anything. |
|
Screws |
Fast and strong, works well when attaching 2x material together. Best for outdoor projects or workshop projects. |
Expensive, hard to hide. May split wood or require predrilling. Can be difficult to hold joint together while attaching. Difficult to attach into end grain of 1x board without splitting. |
|
Kreg Jig |
Easy, precise and fast. Hidden screw joint but still same strength as screws. Not attaching into end grain. Easy to hold boards while making joint. Can attach boards edge to edge and into thick table legs. |
Pocket hole screws are more expensive than nails and take an extra predrilling step. Sometimes not ideal when joining small pieces of wood or angled cuts. |
Most of our plans give recommendations on what type of construction method to use and where. We also try to give alternatives to fit different tool sets.
Here's some examples of how I commonly join boards:
|
Joint |
Preferred method |
|---|---|
|
Building the carcass or structure of a project (for example, the 1x12 board shelf boards to 1x12 sides of a bookshelf) |
Kreg Jig |
|
Face Frame Building (trim that is sometimes used on front of project and can include the legs) |
Kreg Jig |
|
Face Frame Attaching (attaching the face frame to the project) |
Brad Nailer with 1-1/4" brad nails |
|
Attach 1/4" plywood to back to the project |
Brad Nailer with 3/4" brad nails |
|
Attaching trim to a project (moulding or aprons etc) |
Brad Nailer with 1-1/4" brad nails |
|
Attaching aprons to table legs |
Kreg Jig |
|
Building a tabletop |
Kreg Jig |
|
Using 2x4s on a workshop project |
2-1/2" Self Tapping Screws |
|
Screwing shelving down quickly in garage |
2" or 2-1/2" (depending on shelf thickness) Self Tapping Screws |
|
Attaching slats to a slatted shelf or back |
2" Self Tapping Screws |
I build with a mixture of these three different types of joints, always considering the cost of the fastener, the strength required for the joint, how to hide the fastener with respect to the finish, and common sense. As you build, you'll develop a sense for when you should use what tool to build with.
This set of tools and knowledge should be enough to get you building most any project needed for your home.
What Other Things Do I Need?
You'll need a few more hand tools to help you in the building process -
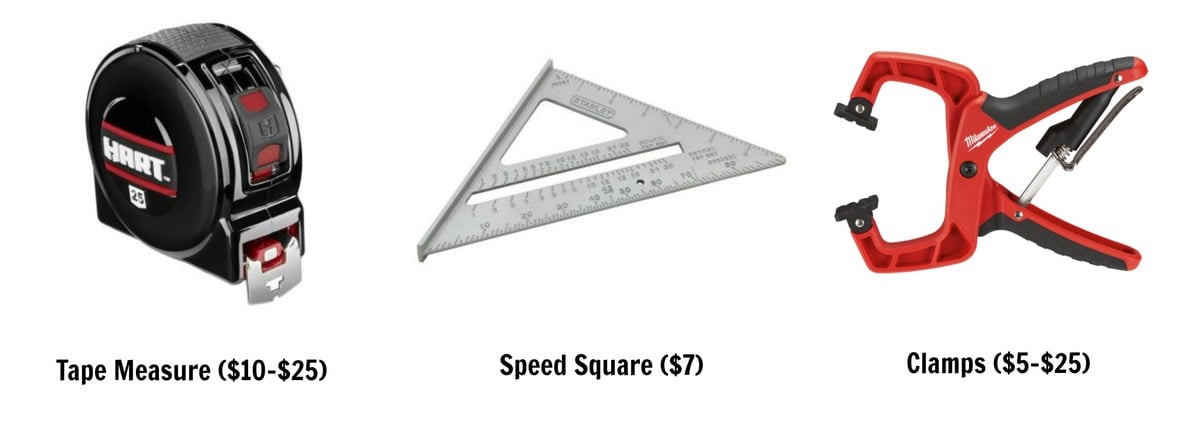
The basic hand tools will help you throughout the build
-
Tape Measure - You'll use the tape measure to mark cuts, and also to layout the build. I prefer a smaller tape (16' is all you'll need for building projects) but you may want to invest in a longer one if it is your only tape measure in your home.
-
Speed Square - Speed squares are super handy. If you are cutting with a jigsaw or circular saw, you can use the speed square to draw a line perpendicular to the board edge with it. You can also clamp the speed square to the wood and use it as a guide, running your saw along side it as you cut. When building, the speed square can be used to attach boards square to each other.
-
Clamps - You'll need at least two clamps to secure boards to the tabletop when cutting and building. Make sure the clamps are big enough to clamp to your project and your workbench - 6" seems to be a good size for a standard workbench top.
-
Safety Glasses and Hearing Protection - You'll do a better job and building will be alot more fun if you are being safe. Wear eye and ear protection, and be safe - power tools can be dangerous if used incorrectly, and injury is not worth it.
-
Random Orbital Sander - The finishing project makes a HUGE deal in the final look of your project. I use a random orbital sander to sand my projects.
What Type of Wood to Use?
At your home improvement store, ask for the "whitewood" boards, sometimes called common pine. I recommend starting with this type of wood because it is very inexpensive and easy to cut and drill or nail into. As you progress, you can get pickier about your wood, but right now it's about easy, inexpensive and minimal tools.
It can be a little confusing when picking out wood because the name of the wood size does not equal the actual wood size for off the shelf, planed lumber. Always double check your lumber sizes, but here is a table of the expected sizes for wood used on this website:
| Board Name | Actual Size |
|---|---|
| 1x2 | 3/4" x 1-1/2" |
| 1x3 | 3/4" x 2-1/2" |
| 1x4 | 3/4" x 3-1/2" |
| 1x6 | 3/4" x 5-1/2" |
| 1x8 | 3/4" x 7-1/4" |
| 1x10 | 3/4" x 9-1/4" |
| 1x12 | 3/4" x 11-1/4" |
| 2x2 | 1-1/2" x 1-1/2" |
| 2x4 | 1-1/2" x 3-1/2" |
| 2x6 | 1-1/2" x 5-1/2" |
| 2x8 | 1-1/2" x 7-1/4" |
| 2x10 | 1-1/2" x 9-1/4" |
| 2x12 | 1-1/2" x 11-1/4" |
One thing we must discuss about using real wood (especially soft wood) is shrinkage. Wood does shrink (especially soft wood), it is a natural material. It is not plastic. If you buy kiln dried wood, and live in a dry climate or the project is indoors, just bring your wood into the room it will reside in, and let it acclimate for a day or two. Then get building. On a project like the ten dollar ledges, you won't have to worry about wood shrinkage so much. As you tackle bigger projects, it becomes more of a factor, and then you start thinking about using plywood because it is more stable.
Plywood and Sheet Good Sizes
We don't recommend plywood for a first project because it requires ripping down in width to use, but eventually you'll want to start using it. Why? It's generally cheaper than 1x boards, you can get wider widths (for example, 16" wide) and it behaves better (no shrinking, cupping, twisting, warping etc).
Plywood and sheet goods, usually is true to it's name. 3/4" thick plywood is 3/4" thick.
When working with plywood, there are three main sizes that come off the shelf -
| Plywood size | Dimensions |
|---|---|
| Full Sheet | 4 feet x 8 feet |
| Half Sheet | 4 feet x 4 feet |
| Quarter Sheet | 2 feet x 4 feet |
3/4" thick plywood can be substituted for 1x boards (since both are 3/4" thick). You will need to have your hardware store rip (cut with the grain, or the long way) the plywood down into strips the desired width. While you probably wouldn't do this to make smaller boards, this comes in very handy when you need a board wider than a 1x12 (for example 16" deep shelving).
How to Rip Plywood without a Tablesaw
You can use your circular saw to rip plywood without a table saw. You will need a guide to make straight cuts, you can purchase a track saw kit, or a guide, there are many options to choose from.
If you'd like to make your own rip jig, here is a video and a detailed written post of how I recommend ripping plywood without a table saw-
Written post on finishin
How to Finish Plywood Edges?
Finishing those cut plywood edges is actually fast, easy and inexpensive! Here's a written post on how to apply edge banding to plywood edges, and the video tutorial follows:
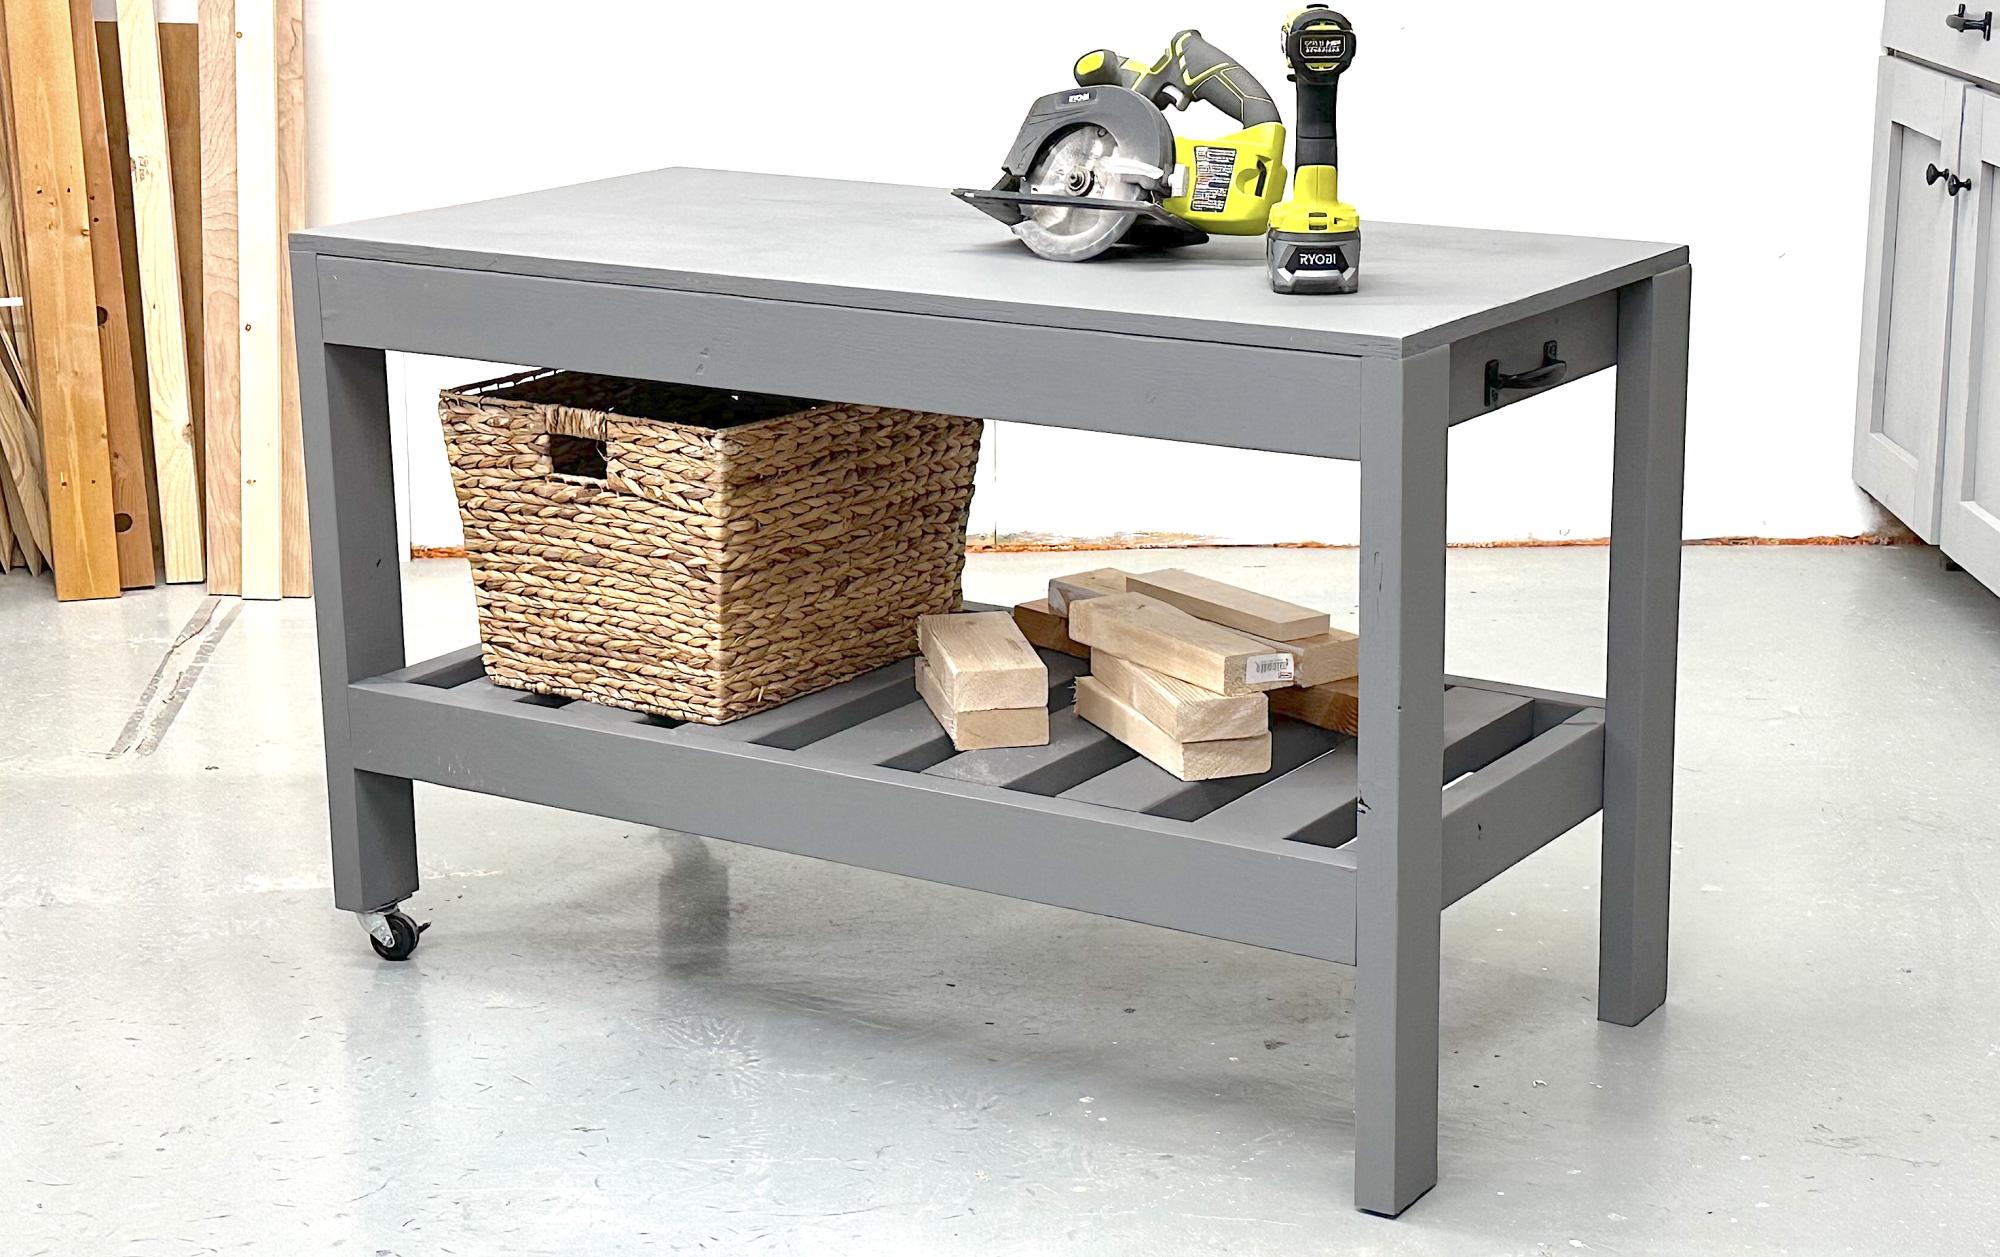
Your First Project: Building a Workbench
Having a dedicated workbench will change everything about building. It's like cooking without a kitchen. You need a spot to build, to store your tools.
You can gain some experience and skills, all while creating that necessary workbench by building a workbench as your first project. I specifically designed this workbench to be a first project recommendation:
Some Beginner Woodworking Tips
So that's the basic tools and materials, and here's a few more newbie tips:
-
Always take the time to find nice straight boards. Look down the board like it is an arrow on a bow to determine if the board is straight or not.
-
When cutting, remember that the saw blade removes material from the wood (the sawdust). This is called the saw blade kerf. You'll need to consider how you mark your boards, and on what side of the line you cut your boards to get accurate cuts.
-
When using a brad nailer, keep your hands well clear. Nails can shoot out to the side, especially if they hit a knot.
-
Always cut the factory end of a board before you start making your final cuts, as there is not guarantee the factory end is square.
-
Wood glue is essential when using nails or staples. But be careful to not overdue it, as wood will not take stain the same if it has glue on it.
-
Clamp everything, any time you are in doubt. If you are nervous about cutting, clamp it. If you are hesitant when nailing, clamp it.
-
When cutting, only secure one side of the board and allow the other side to float free to avoid pinching your saw blade and bucking your saw.
-
Take the time to get to know your tools, their uses and safety features.
-
Never cut a small piece that requires your hand to be too close to the saw blade. Instead, cut the small piece from a larger piece.
-
Check your project for square by find an area on your project that should be a rectangle. Measure from opposite diagonals to get two different diagonal measurements. If the project is square, the diagonals will match. If not square, push longer diagonal ends together and recheck both diagonals until square.
A Few Notes on Safety
-
Power tools are powerful. If a saw blade binds, it will kick the saw back. If a drill catches, the torque of the drill may cause it to twist on you. A tablesaw bind can cause the board to push back with force. Power tools can injure you beyond the blade or bit.
-
Clamp everything down, to prevent variables when cutting and building
-
Keep hands clear of saw blades and nailer tips at all times
-
Remove batteries or unplug when changing bits, saw blades, or adjusting tools
-
Wait until the saw blade stops turning to remove the saw
-
Do not work in a distracted environment
-
Use appropriate safety equipment
-
Always read tool manuals and get to know your specific tool before using
-
Never use a tool in a manner that it is not designed to be used
-
Use common sense - if it doesn't feel safe, it probably isn't. Don't do it - it's not worth the risk
Choosing Your First Woodworking Project
Pick a project that is inexpensive, and doesn't require a ton of tools, cuts, or steps. Avoid for now, anything with plywood, pocket holes, drawers, doors; basically anything big or with moving parts.
We have tons of starter projects, but might I recommend this one - The Ten Dollar Ledges - it's versatile and will get you started with something useful.

Next Projects - More Advanced Starter Projects
After you get done with your first project, try tackling a few more smaller projects. Keep the projects small, no angles, no doors, no drawers, all 1x material at this point. There will be plenty of time to work up to bigger, more complicated projects, and you can make pretty amazing stuff with beginner tools and skills. Here's a few examples-
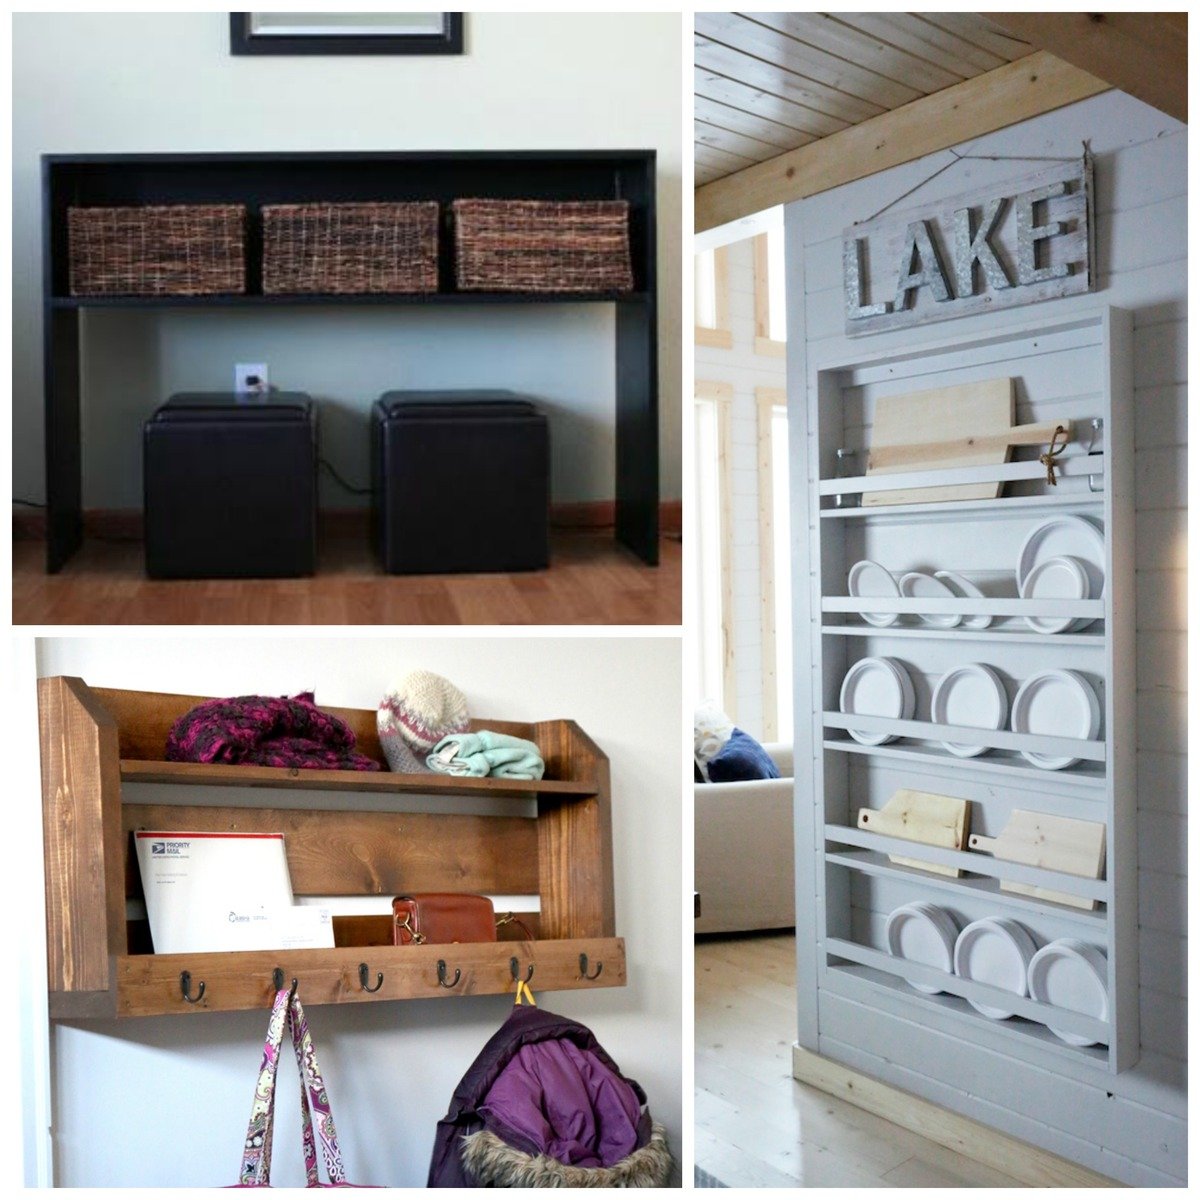
Shown above: Easy Rustic Console, Pallet Style Coat Rack, Easy Wall Plate Rack
Once you've mastered the basic skills, feel confident using power tools, it's time to move on to a few bigger projects and a couple more tools.
Comments
gaby0528
Tue, 12/29/2015 - 13:24
Angle Cuts
Hi Ana. I've been following your beautiful plans for years. I realized I never signed up so here I am. I have become better at wood projects as I build but I have a hard time understanding the angles cuts like "30 off square short point to short point" Parallel o not parallel? I tried looking in your web site for videos and a;so in other web sites with no luck. Do you have any advise on videos about that or can you make a video about angle cuts? Thank you and happy New Year. I love your creativity. Gaby
dsantil71
Sat, 11/30/2019 - 03:46
I believe Ana White has…
I believe Ana White has videos on youtube.
MissesErbstösser
Sat, 01/02/2016 - 10:50
Convert mass
Hello Ana,
Many Greetings from Germany:)
We love your Playhouse Loftbed and really cant wait to build it.
But we got problems with mass. The normal mass in Germany is meter / centimeter.
At the shoopinglist for example is listed "7 – 1x2s, 8′ long" but we have no idea for what this could stand for.
Could you please give us an advice?
Thank you so much.
Kate
chhelga
Tue, 01/05/2016 - 14:26
Abmessungen
Hallo Kate,
Die Maße kann man nicht in cm umrechnen, da das Holz in Deutschland/Österreich andere Maße hat, andere Stärken, man müsste die ganze Zeichnung anpassen.
Ana's Buch ist aber auf Deutsch zu haben, es heisst "meine Möbel von mir gebaut" und beinhaltet 34 Projekte. Das Puppenhaus-Bett ist leider nicht im Buch, für Kinder jedoch eine Spielküche, Kindertisch, Kindersessel und ein Etagenbett für Kinder. Alle Maße sind in cm, meist für MDF-Platten z. B. 19mm dick.
Alles ist sehr gut beschrieben, ich kann das Buch auch für Anfänger empfehlen :-)
schau mal hier: http://www.amazon.de/Meine-M%C3%B6bel-gebaut-Projekte-ganze/dp/39544001…
Liebe Grüße
Helga
lsargent11
Fri, 04/08/2016 - 15:30
Home DIY Farmhouse bed
Yes I could not find the right place for a comment to thank Ana white for her website. I built the Farmhouse bed. and the wife loves it. We are going to build the Nightstands now to Show it off. Would like a plan for a Dresser 6 or 9 drawers. When I figure out how to post to the right location I will brag and show my End products. I am new to DIY and love it. Thanks again Ana
Ana White Admin
Sat, 04/09/2016 - 14:11
Dresser
Hello, We have quite a few dresser plans. For now the best search option is google. I would recommend a google image search for "Ana White dreser" and "Ana White drawers"
karim5
Tue, 04/19/2016 - 23:26
Proud of your web.
I love to be a carpenter and looking for more ideas , projects , all the best for you
kcoach
Mon, 05/02/2016 - 16:06
Mantle
Built mantle from your plans last week. Came out great. Thanks
Kevin Noa
CarpenterBee79
Thu, 06/16/2016 - 08:22
Hey this is Carpenter Bee
Hey this is Carpenter Bee
KathaKon
Mon, 06/20/2016 - 07:22
Hello,
Hello,
are there any possibilities to use the plans in Germany? Some kind of a formula how to adjust the measurements?
Thanks
Katharina
In reply to Hello, by KathaKon
Ana White
Mon, 06/20/2016 - 12:00
http://www.ana-white.com/diy
http://www.ana-white.com/diy_forum/forums/converting-plans-metric/home
Hope this helps!
tj4ndirish
Fri, 06/24/2016 - 09:05
Mixing wood species in build
Hi Ana,
I'm wondering if I can mix wood species in a build? I want to do one of the farm house tables. I found someone local that has reclaim barn wood, oak, that I'd like to use for the legs, and someone else has rough cut cherry at 1 1/4" that i'd like to use for the top. Is this a no no or can it be done? Thanks.
dsantil71
Sat, 11/30/2019 - 03:52
Hi, another "Ana-White" Fan,…
Hi, another "Ana-White" Fan, Personally, There are basically 2 types of woods - soft and hard, So as long as they are all hard or soft. Like pine is soft but oak is hard. Another website with helpful info like that would be popularwoodworking.com or finewoodworking.com. They have articles on projects like that I think.
paperbeagle
Thu, 06/30/2016 - 09:55
disabled member seeking a hand with designing plans
As I have said in my bio, I have a rare disorder that affects mobility. I get around fine now, but I have to be very mindful of what I do. I am not incapable. I am obsessed with building my own tiny home... and it can't happen quickly, I have to raise funds, find land and so on. BUT.. step one is the plan. I can't use most plans I find because they rely on loft space for bedrooms or for storage. I could use it for storage if it isn't stuff I need often - but I can't rely on climing any sort of ladder or stairs long term. I have to have an accessible tiny home. So it will have to be longer or wider or some arrangement that gives me what I need. I can't just have a 24ft one... that would be far too samll when one takes the accessible aspects into account. I don't know... perhaps building two structures that can be connected somehow might work? As an artist I'd like to add an out building that would be a studio space any way. A lot of storage is required for the art materials... and I want to have the studio be separate so I can focus on the work I do. In my head, right or wrong, workable or not, I have had this vision of three little buildings, that together still don't add up to the sort of excessive space most of us live in now. I imagine them either being just nestled together with a large free standing roof/shelter/awning over the area where the three of them sit together. I see it as then having a deck connecting them as well. So during the summer I can use that area as an external living area but in the winter I wouldn't have to go far to get to the other spaces. I'm wondering if I should modify one plan to just be bigger (wider or longer or both) or if doing three smaller plans is the right way to go. I am almost certain that we don't have the same restrictions on home size here that the US has... but I don't know if having it be on wheels is a good idea or no... I'd like it to stay put but maybe be "possible" to move it...?
I don't know... I just need real help. Thanks.
Doug B
Thu, 07/07/2016 - 10:32
Getting started
I tell people that the number one rule for carpentry is you can screw things down but try not to screw things up!
SSmart
Wed, 07/13/2016 - 14:43
Ana-
Ana-
I'm looking for a place to ask you or your crew a question and this is what I found. I'm building the 2 x 4 Outdoor Couch. Where do you get the cushions? Thanks, Steve
jlharrison
Mon, 08/15/2016 - 08:41
Kreg Jig Guide
Greetings Friends.
I recently purchased the Kreg Jig R3 Version with the DIY set. I am new to this whole scene and was wondering if I need to purchase the Kreg Guide as it didn't come with the kit that I bought/. Is this a necessity or will I be alright without it. I haven't used my Kreg yet, but will be soon and want to be prepared before I get into the project and figure out I need something else or that it would've made things easier.
Thank you for your help!!
HandyMam
Sat, 08/27/2016 - 08:46
Hey Ana!
jackiemce
Sat, 11/05/2016 - 07:29
Fancy X Farm House table
Hi Ana,
We are making the Fancy X Farm House table for my daughter-in-law house but can not find the instructions on how to attach the table top. I'm assuming it would be from the bottom so that it doesn't show thru the top - but where would we put the screws? Husband, who has more experience than I is also asking. BTW - love your site.
eye.candi.81
Sun, 11/13/2016 - 10:39
Corner Double Oven Cabinet
Anybody know where I can find plans for a corner style double oven cabinet? Remodeling my kitchen and building everything from scratch and have found plans for nearly everything right here, but can't seem to find oven cabinet plans at all much less one for a corner. I've even started searching for just tall corner cabinet plans that I could modify but I'm not having any luck going that route either
Lisavictoria
Sat, 12/03/2016 - 08:04
Sweet pea bunk bed
Hi! I am so in love with this bed! I have been looking for someone to build it for me and have been unsuccessful. I've contacted contractors and cabinet builders as well.
Any advice ...... I am not handy, work excessively and honesty don't have the time. I have even been searching for a used one..... hoping that someone's child has outgrown the bed and I can purchase but no luck so far.
Any advice is greatly appreciated.
Thanks
Lisa
Ana White Admin
Mon, 12/05/2016 - 13:31
Have it built!
Have you checked out builders in your area on our new site pineandmain.org?
Lloydply
Tue, 12/27/2016 - 11:32
New Member.
Hi Ana,
I just setup a login for your site. You have so many beautiful projects and ideas. I also like how you do not talk down to anyone but make all feel welcome to try their hand at your projects.
Have a Happy New Year!
Lloydply
Ken Stegeman
Tue, 01/17/2017 - 14:48
Website Navigation
I just created a new user account, but when I navigate between different pages there is a "Login" button at the top of the page which makes me think that I'm not recognized. There's no drop-down box with a "log out" option, and I want to make sure to do that after a visit. Please advise...
Also, just a huge THANK YOU for all of the fantastic projects here! I recently joined Pinterest and first ran across your website from there and I've become a bit of an addict...
Thanks,
In reply to Website Navigation by Ken Stegeman
Ana White
Tue, 01/17/2017 - 15:00
You should see a "logout"
You should see a "logout" option if you are signed in. We are thrilled that
you found us!
slamarca
Tue, 01/17/2017 - 16:13
Off square, NOT parallel, long point to long point ?? HELP
Hi Ana & Crew, I am so held up on building the Henry desk, I know you have before (can't find it again) but could you possibly explain the what is an off square, NOT parallel, long point to long point measurements. I would really appreciate it. Thanks so much for helping me find something that I enjoy, hoping someday to be as good. Susan TY!!!
In reply to Off square, NOT parallel, long point to long point ?? HELP by slamarca
Moltroub
Fri, 02/03/2017 - 07:48
Off square
Dear Ms. Susan,
Off Square means not 90 degrees. I went searching for the instructions and saw that the plan is asking for ten degrees off square. Hopefully you have purchased the speed square and can use it to make your angle line. http://www.familyhandyman.com/tools/how-to-use-a-speed-square/view-all
Long point to long point measurement is where you take your tape measure and measure from the long point on one end to the other long point on the other end. The tape will bisect the piece of lumber (board) just about in half. These are helpful, but not necessary
http://www.leevalley.com/us/wood/page.aspx?p=56766&cat=1,42936
there should be some play in the silver catch of your tape measure, its supposed to be that way, don't try to take a hammer and tighten it.
hope this helps,
Elaine
In reply to Off square by Moltroub
jlmendoza1985
Fri, 09/15/2017 - 19:37
Reference
hello, I was wondering if you happen to know a good reference for beginners to understand stuff like off square , short to long etc. I'm very new and was wondering if you happen to know if any videos or resources to help me with the basics. Thank you
In reply to Reference by jlmendoza1985
Ana White
Tue, 09/19/2017 - 18:00
Have you checked out our
Have you checked out our getting started section
http://www.ana-white.com/2012/12/get-started
There are also a lot of great youtube videos out there!
In reply to Have you checked out our by Ana White
jlmendoza1985
Tue, 09/19/2017 - 22:31
Yes I have. Thank you . I
Yes I have. Thank you . I would search you tube and see what I can find. The biggest problem I have I guess is with the off squares, parallel, etc. But I will keep looking.
majele
Mon, 02/06/2017 - 05:02
rolling closet
I love your tiny house you just finished! Looking at it I would make a couple of changes to the bedroom area. I would probably make the window shorter so I could make a small closet at the end of bed and possibly a window at the side of the bed following the roof line. I love the elevator bed but would add a low head board to protect the artwork and lean on when reading in bed.
Also a suggestion is to make a rolling closet that would go under the bed at the foot if the bed if it is not lowered all the way that could be used as a 2nd step to the half lowered bed if you are using the lounger as a 2nd bed. It could be rolled close to the lounger as a working surface with an extra flap possibly at the back that flips up as a table that gives room for your knees when using it. If lowering the bed right down it could be rolled out of the way.
Unicorn1960
Tue, 02/21/2017 - 11:13
Parallel not parallel angled cuts
I cannot fgure out the angle cuts when it says "parallel to each other long point to short point". Am I cutting both cuts in the same direction
like this /____/
or in the opposite direction
Like this /__\
Thanks for any assistance.
Roxiroo
Wed, 09/06/2017 - 11:33
Full length beauty mirror cubpoard
Hi. I want to make this with a mirror I already have . It has a detail pediment on top. How can I adapt the plane so I can use this mirror. Thank you.
Packerfan 47
Thu, 03/29/2018 - 07:42
Hi everyone
I would like to build the Grandy Sliding Door Console
http://www.ana-white.com/2015/08/free_plans/grandy-sliding-door-console
My problem is I do not have software to figure a shopping list or a cut list. The one in the plans is 91" wide and I need shopping and cut list for a 60" console.
Anyone out there willing to help???? Please and Thank You
Brian Famous
Thu, 03/29/2018 - 12:32
60" Grandy console
i've done plans for a 70" Grandy Sliding Door Console, but at 60", even with just 3 bays, each bay is getting kind of narrow. Is that what you are picturing, three narrower bays?
Wildstuff32_
Wed, 10/16/2019 - 00:06
alter farmhouse plans to fit my kitchen help :)
how can I ask a question for help ,on this blog here?iam new
lmeredith
Sat, 12/07/2019 - 11:20
Software
I just found your amazing channel. We built a house many years ago but not the cabinets, etc. I notice that you use software, can you share the software program you use?
Thank you
Linda Meredith
hbenton17
Sun, 03/29/2020 - 10:27
Beginner questions
Hi!
I'm just starting off with some DIY projects and say your square farmhouse table. I'm also just learning a lot right now and was wondering about difference in screws. I am wondering if there is a difference between construction and wood screws. I have used self tapping construction screws with star heads recently and have loved the results, but don't know if this would work for wood working projects? Also, do you have a video of how to apply the wood glue etc?
Thanks!
Heather
Amy.Calkins
Thu, 05/14/2020 - 06:42
Thank you!!
This site is great!! Thank you for explaining everything so well for someone who is just beginning. I am excited to start making things.
smitcher
Thu, 06/11/2020 - 19:49
Hermes Shoe Cabinet
Shoe cabinet
Hi Ana, I really like your videos and project plans. Thank you so much for posting them. I wonder if you could help with how to go about building a shoe cabinet like the Hermes shoe cabinet from IKEA?
ianr
Mon, 06/15/2020 - 07:13
Staple Gun
Hi Ana,
In your ultimate workbench project you mention attaching the 1/4" plywood with 1 1/4" staples but you don't say what width and you never mention a staple gun in any of your tool lists. What do you recommend?
chrisdowling
Tue, 07/07/2020 - 13:22
HELP! Did I use the wrong wood?????
Hi Anna,
I built an outdoor chair using kiln dried 2x4s. Can you tell me the best way to stain and weather proof the wood for outdoor use? Also, can you recommend a good wood filler to use that wont show after its dry and sanded?
Thank You,
Chris
alojennie
Tue, 07/14/2020 - 10:26
Storage
Hi Ana, I love everything that you put your touch to. I watched on" YouTube" the Storage that you added to your TH, I am doing the same with my 22 Ft by 8 1/2 wide Tiny House, can you please tell what size of wood do I need to get for the structure ( Yes I am a Dummy home builder) is it 2x4? and I was told that I need to get a steel brace where I am putting the back storage, that was not mentioned on your video?
Hohoho@123
Thu, 07/16/2020 - 02:53
Work table & clamps
Can you do a video on how to build your work table? The one you use in your videos. And all the rails and clamps you use?
joshua.b.harper7
Mon, 08/17/2020 - 18:23
How brag post?
Hi, how do you make a brag post?
pilachii
Tue, 10/13/2020 - 09:09
سئو سایت
Hi Ana, I really like your videos and project plans.
https://www.pilachii.com/
heatheranne24
Tue, 11/03/2020 - 10:02
circular saw
Hi, what size Circular saw do you use? I am trying to decide between a 6 1/2 inch or 7 1/4 inch. Thanks!
Kirui
Thu, 12/31/2020 - 00:05
Beginner.
Hey Ana, I love your plans and videos. I would like to start Woodworking and thus would like to know more on beginner tools. Especially budgeting.
Beckface
Sat, 01/30/2021 - 07:33
Hi Ana I've followed your…
Hi Ana
I've followed your YouTube channel for a while and I love your videos. I finally have space in my small house to do some basic woodworking, but I'm finding with my drill that it isn't brilliant for screwing in fastenings. I've been advised to buy an additional impact driver for these tasks. I'm wondering whether you use one in your vids or whether your drill can handle these tasks.
Thanks :)
foofoo5
Sun, 03/07/2021 - 18:39
No way to get past the sign-up screen to sign-in
With your new "sign-up for the newsletter," it is impossible to access the sign-in (rather than "sign-up" form) without entering an address to receive the newsletter. I can't imagine you intend a new email address sign-up every time someone returns to your site (after reading the newsletter & having a reason to return)!
Mathew88
Fri, 04/02/2021 - 07:43
Convert Mass
Hi :)
I'm Mathew from central Europe, and I have a problem with the mass :) I try to link into: https://www.ana-white.com/diy_forum/forums/converting-plans-metric/home But it's not work. I would be grateful for an idea on how to convert the greenhouse plan. Best wishes
Carpentress
Mon, 10/25/2021 - 11:13
Everything station?
Hi Ana, I love your plans and look forward to receiving them all the time. I love to build things, but I am not very creative. I am really accurate though. I need a plan for a station in my garage, where the central vac hangs. I would love to put the hose and accessories out there, as well as brooms and put the recycling system for bottles and paper and then the actual garbage bin with them as well. It could take up about 9 feet of wall space. I have good construction skills, but I can't begin to imagine what this would look like. Any Ideas? Thanks
pberoberts
Thu, 11/11/2021 - 17:41
Ultimate Roll Away Workbench with miter saw stand project
For the Ultimate Roll Away Workbench with miter saw stand project, what's the best 3/4 inch plywood to use for the bench top?
Thanks!
Paul
Christina_Keller
Mon, 01/31/2022 - 06:47
Hi!!
Hi Ana! I'm wondering, what software do you use to create your plans? I've been working off of others plans but want to try my hand at creating my own projects and your plans are so easy to follow with the images and showing where to drill pocket holes, etc.
Thanks!
lululovesu
Mon, 01/30/2023 - 10:42
Floating Shelf Help
Hello.
Was looking for a way to ask a question, but I'm not finding a platform for that. The comments don't look to be responded to, but I'll take a shot. I watched the floating shelf video. I'm wondering what weight (just for even the shelf), would be safe for a (not hardwood) cabinet. It would be attached to a stud on the wall side, not just the cabinet. And only 11.5" long and 5.25 width/deep. . . . Also I was wondering if you are self taught or did you go to school? I'm just looking if there is way to not feel like I'm so green every time I look to start something.
Hussein.Taib
Wed, 03/26/2025 - 08:32
Appreciating Ideas
Your idea about furniture making is really interesting, thank you for Sharing .I appreciate your willingness to share your ideas and insights.