

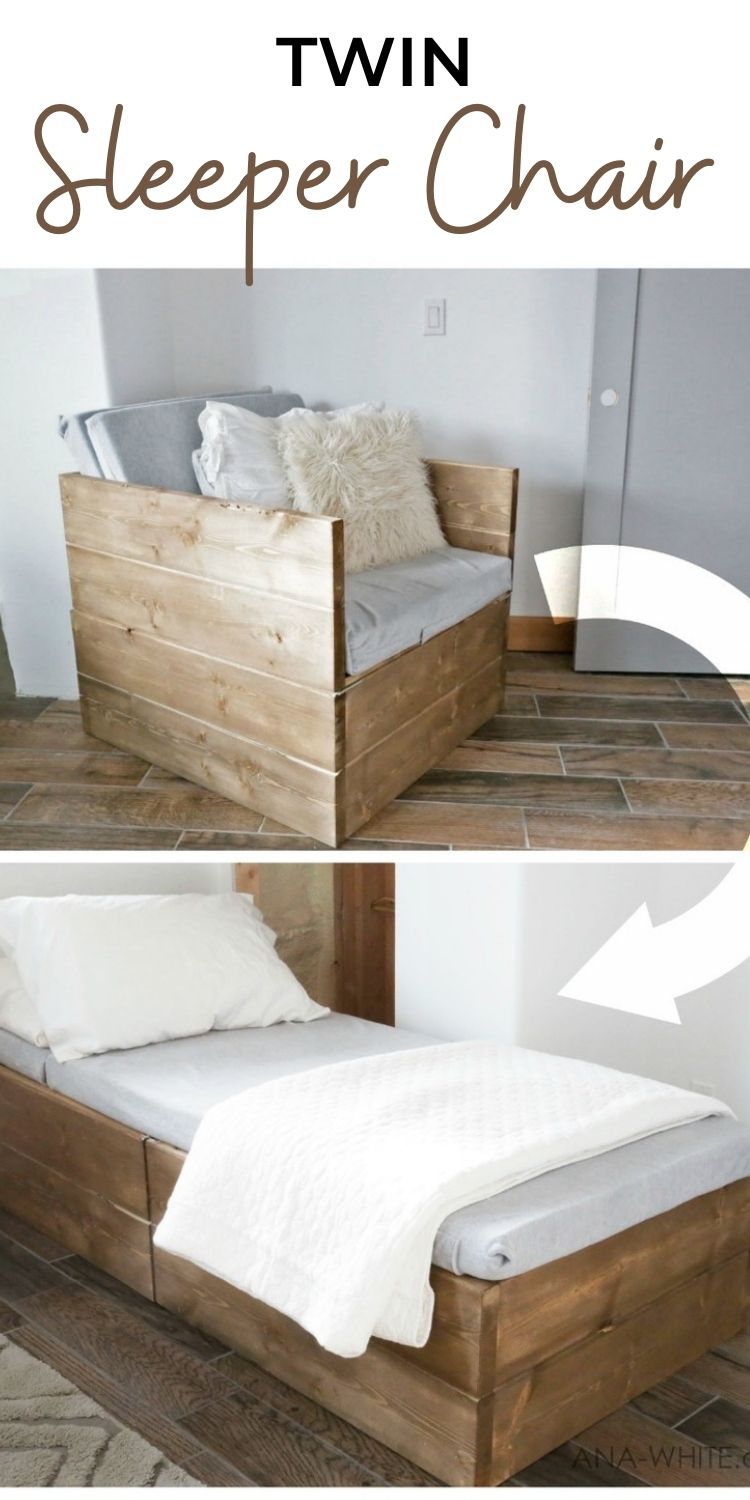
DIY twin sleeper chair - free how to plans by ANA-WHITE.com


Our guest room is really coming along!

We've DIYed it all - the Farmhouse bed, the nightstands, the sign, the end of bed benches that look like luggage racks.
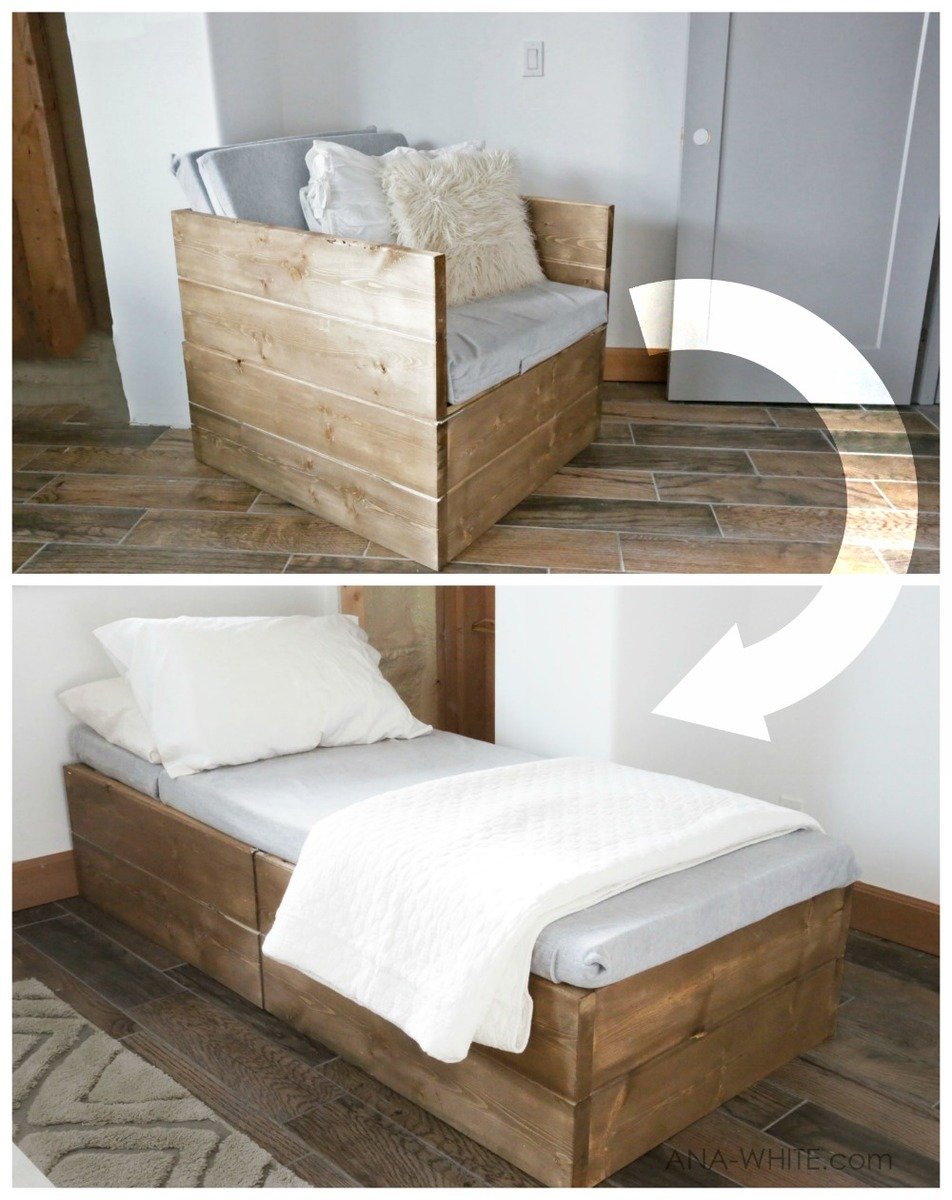
But every guest room needs a side chair. And since I dread sewing so much, my plan had been to buy a chair for our guest room. But then I had this wild idea .... what if I built a chair that flipped forward in half, and became a bed?
Soooo.... here's how it all went down -
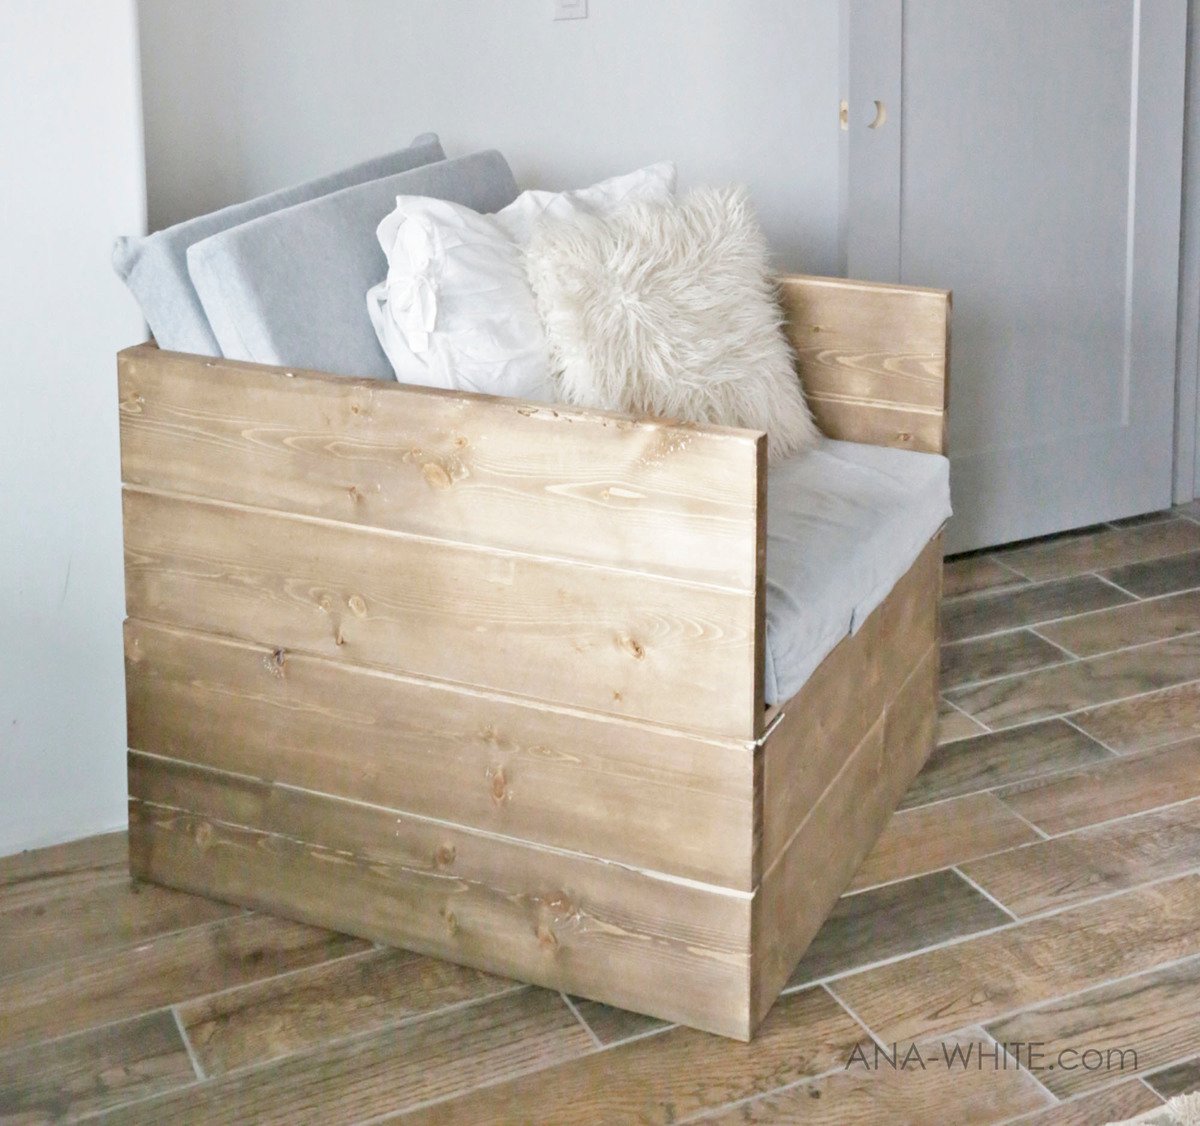
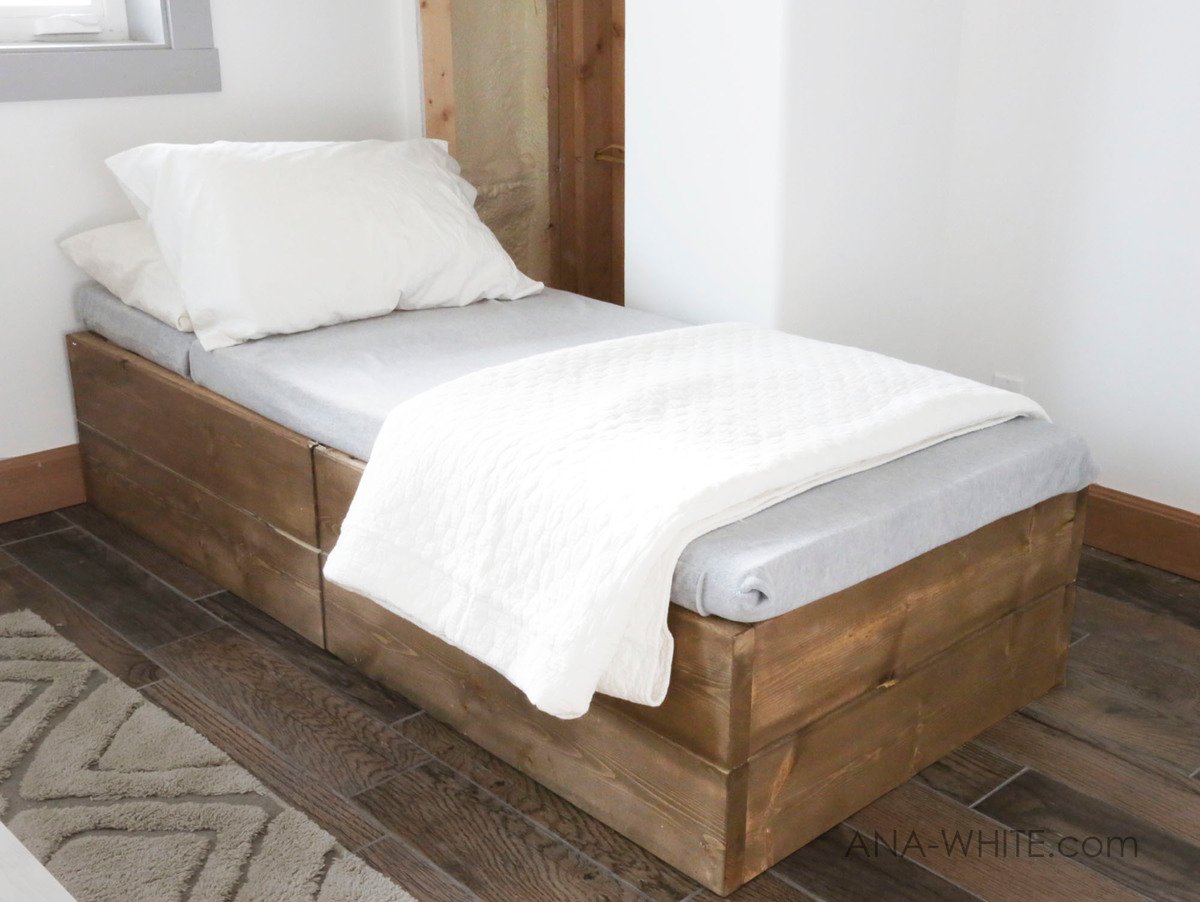
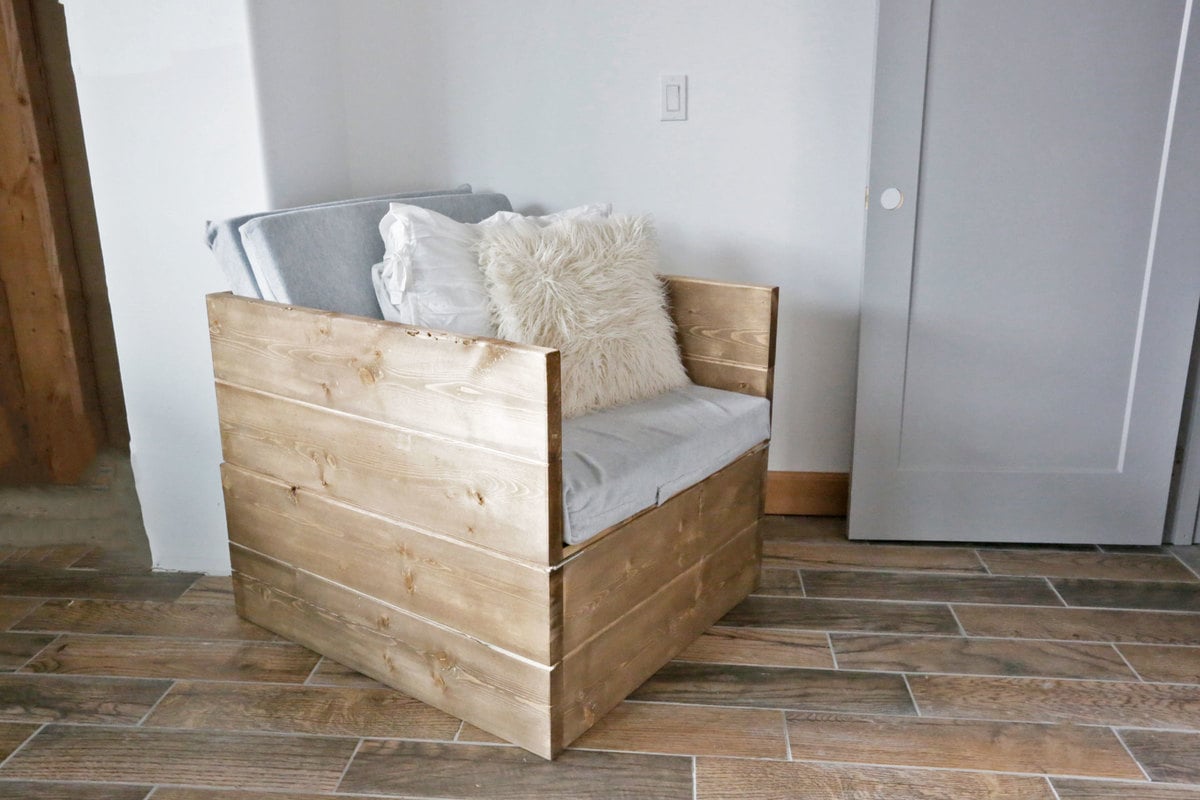
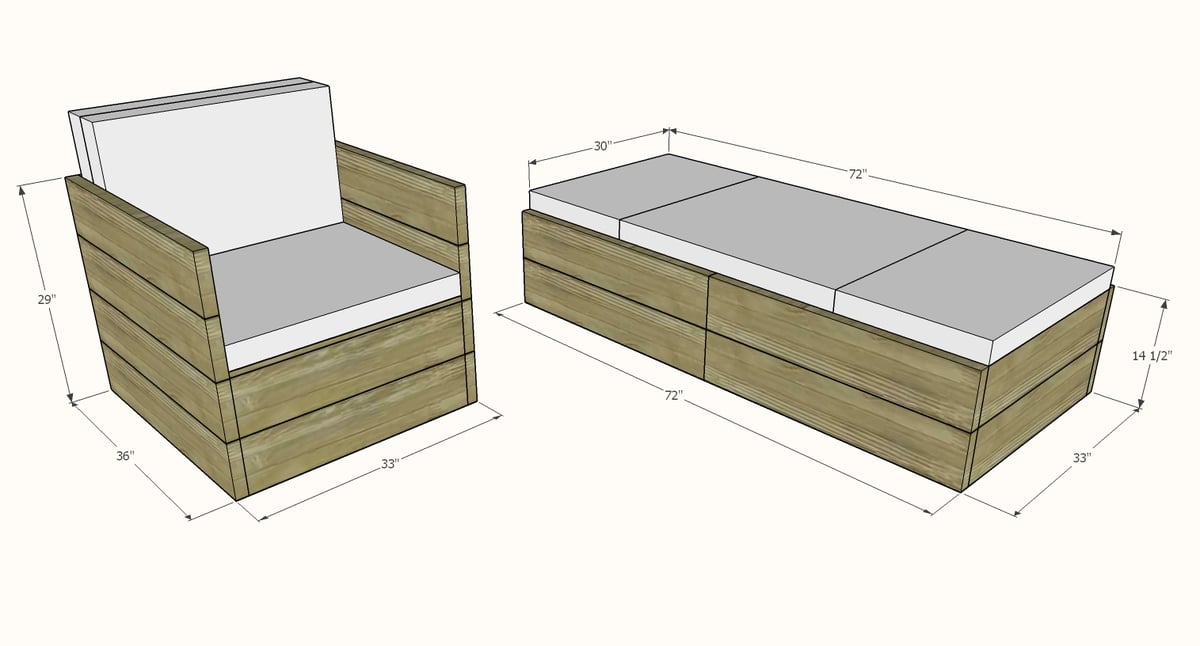
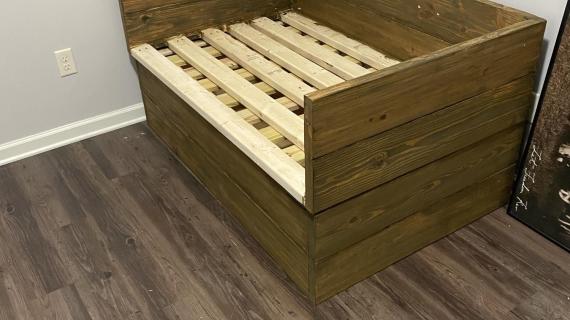
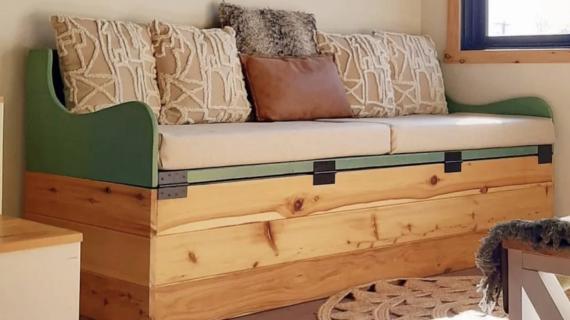
We love our new chair! It's quite sturdy and comfortable as a chair, and just right for an extra guest in our guest room.
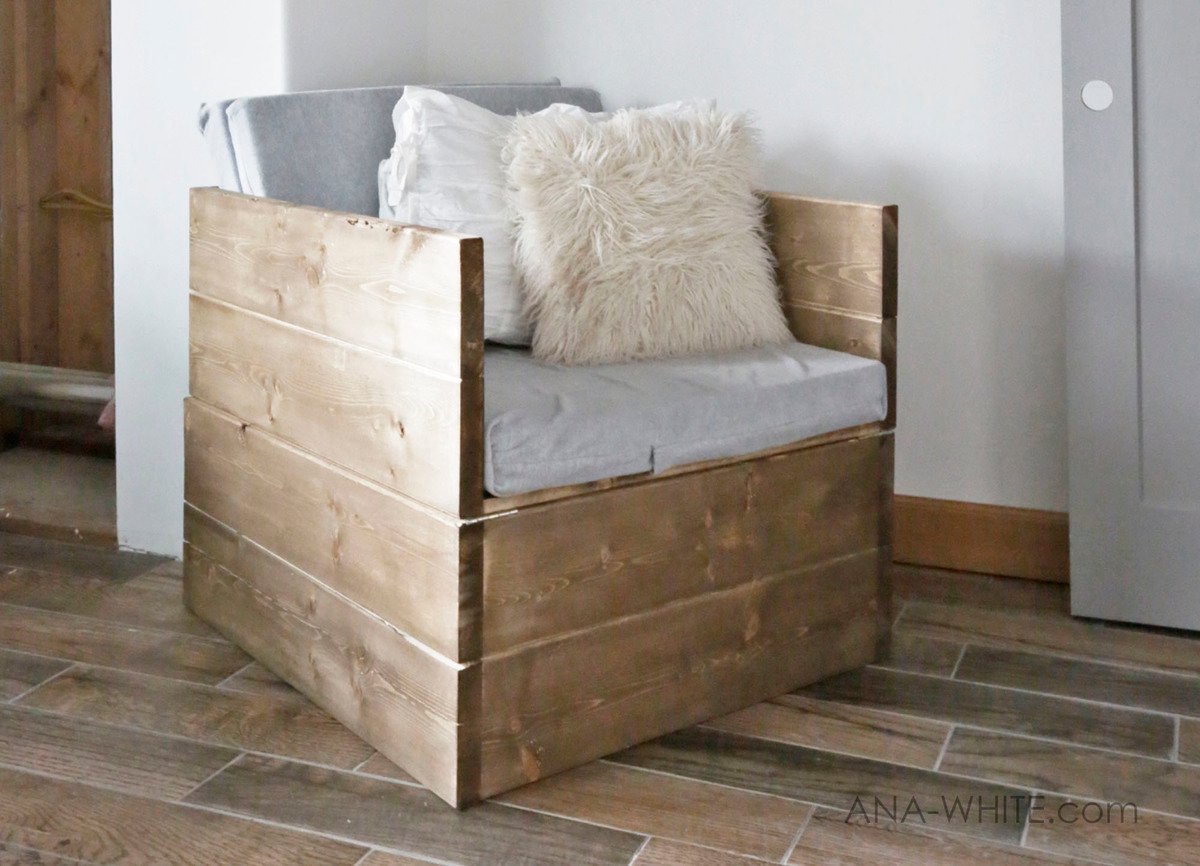
The chair has a very modern look (but you could use the same idea but different style to create a more tradditional twin sleeper chair).
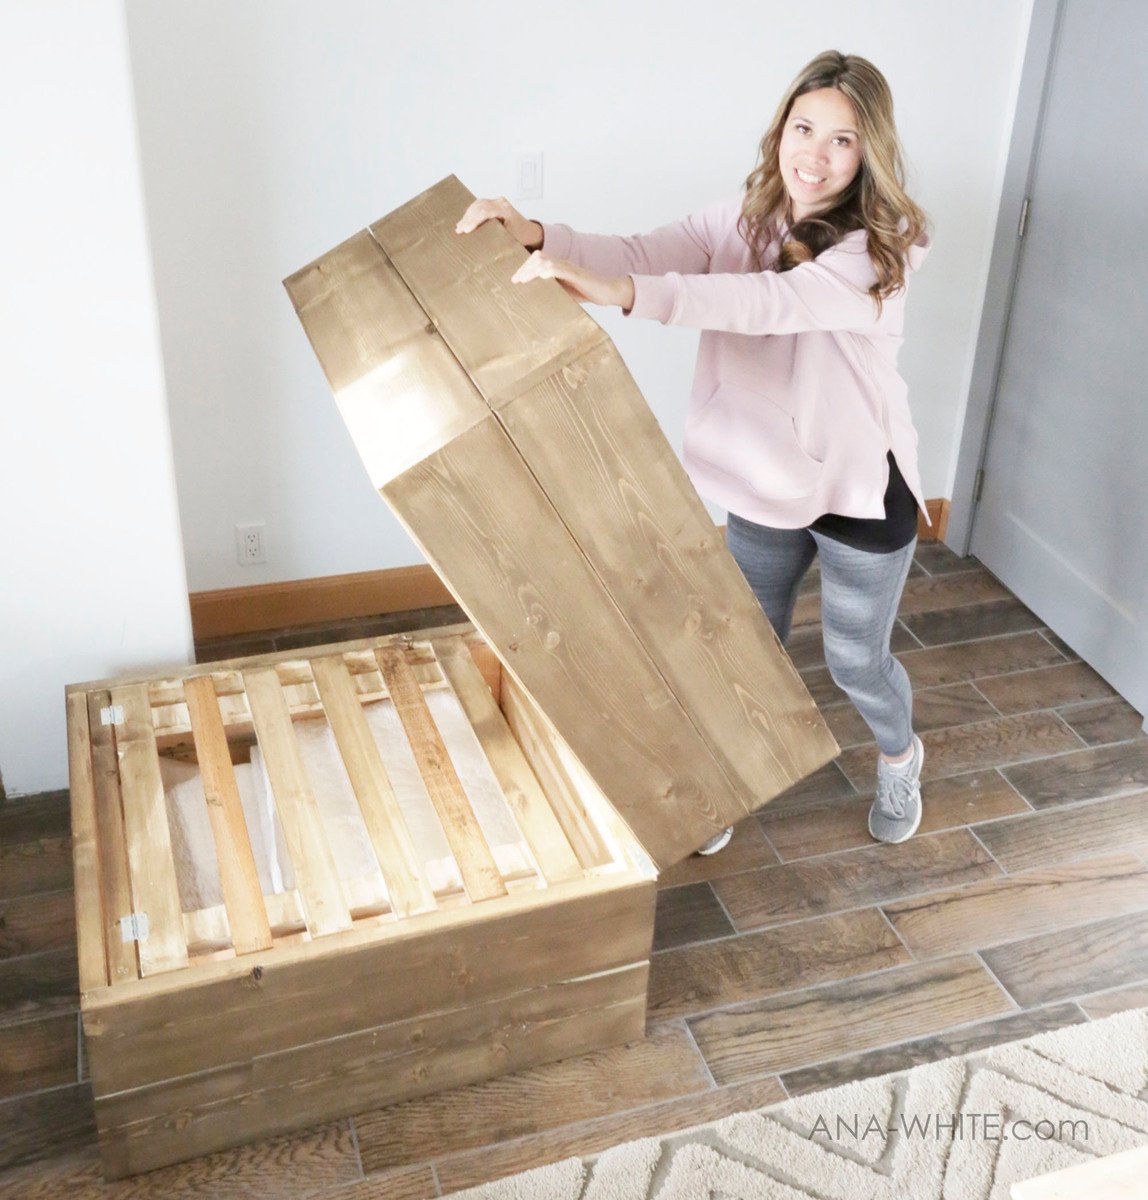
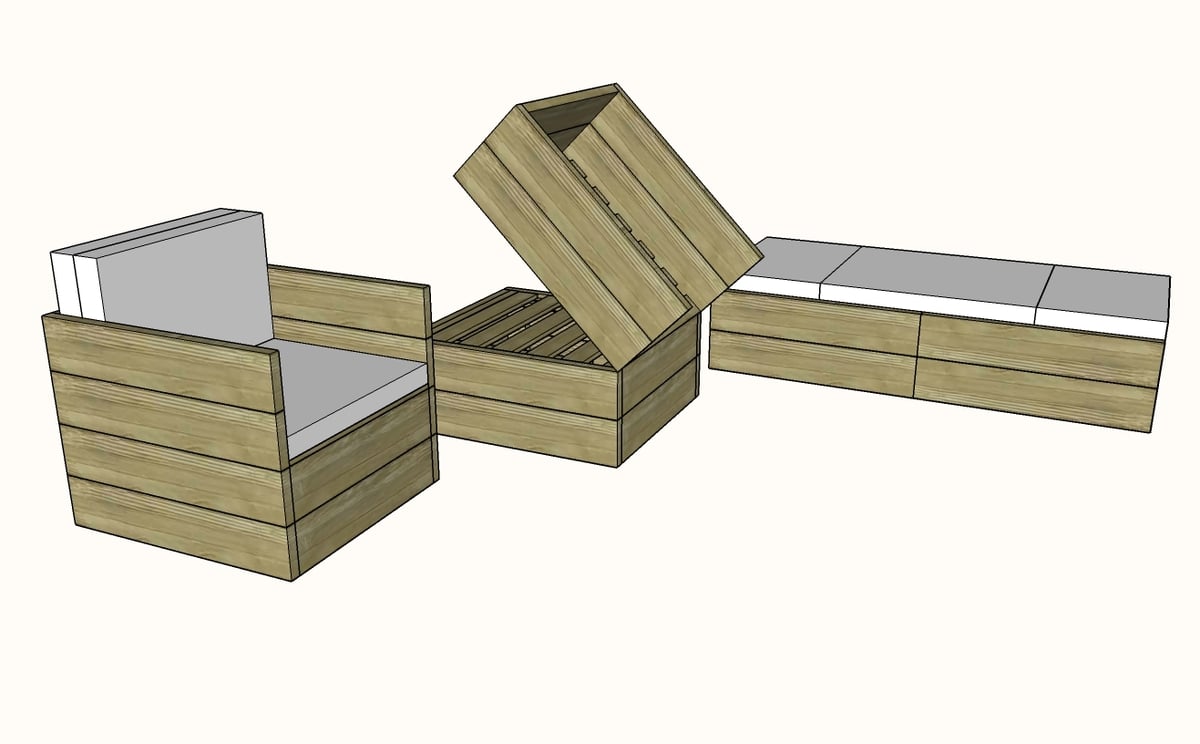
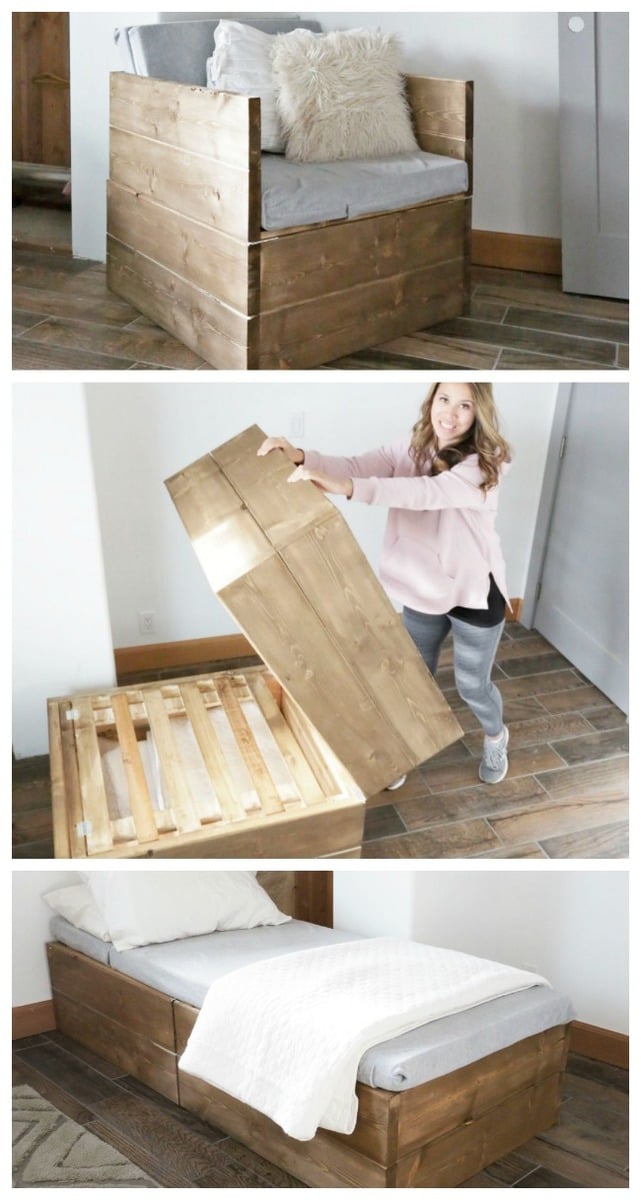
To convert to a bed, simply set the cushions aside and pull back of chair forward (so you don't even have to move the chair when converting it to a bed)

Then just bring the front flat to the floor. It is heavy, but nothing I can't manage entirely by myself.
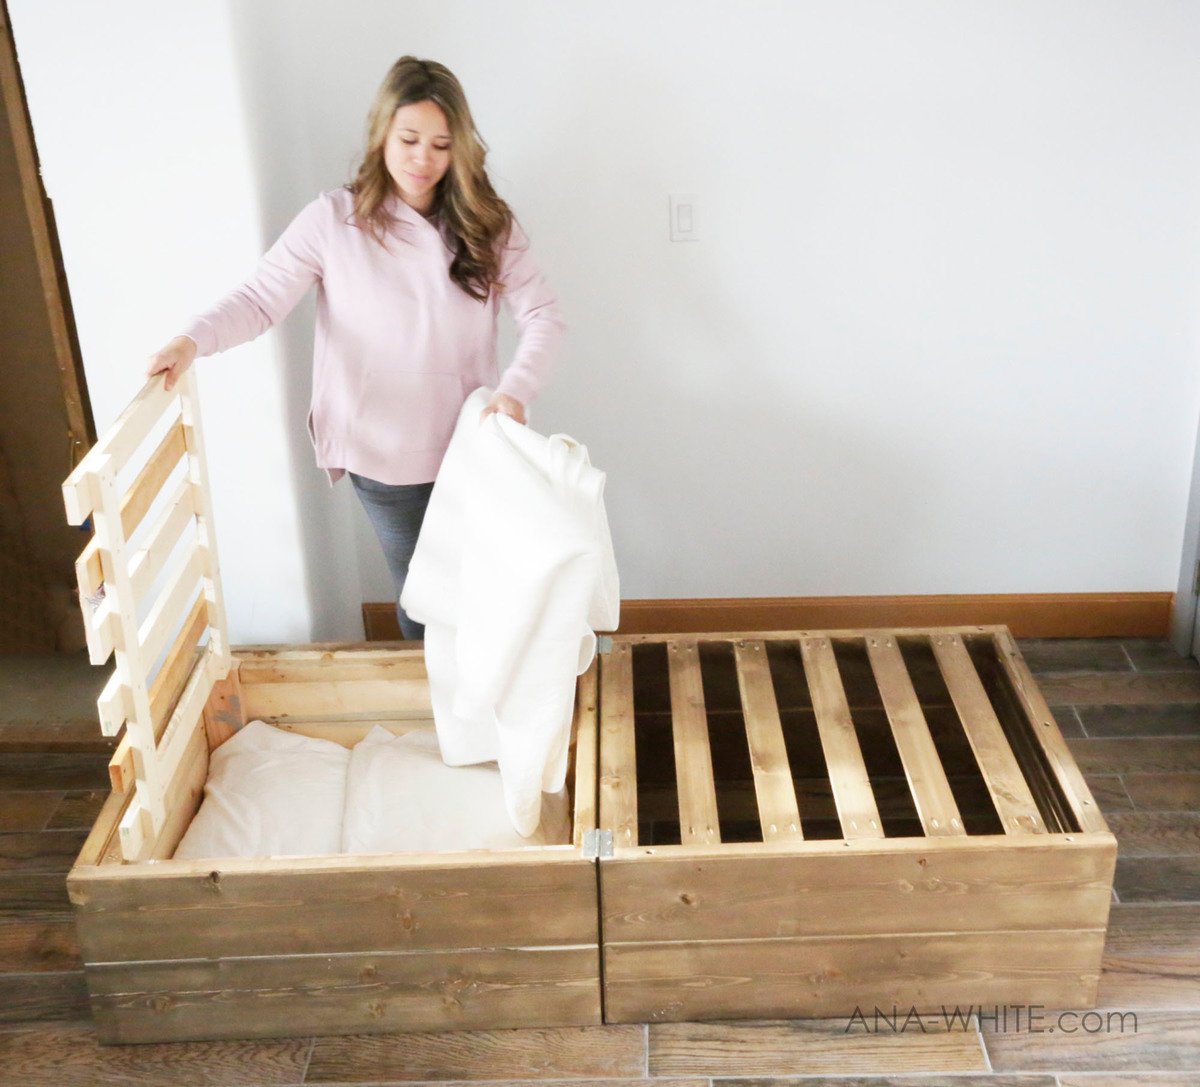
Another reason for this styling was I wanted a compartment in the chair for storing bedding that is very easy to access. Bedding and bed pillows can take up quite a bit of space, so having a built in storage space is crucial.
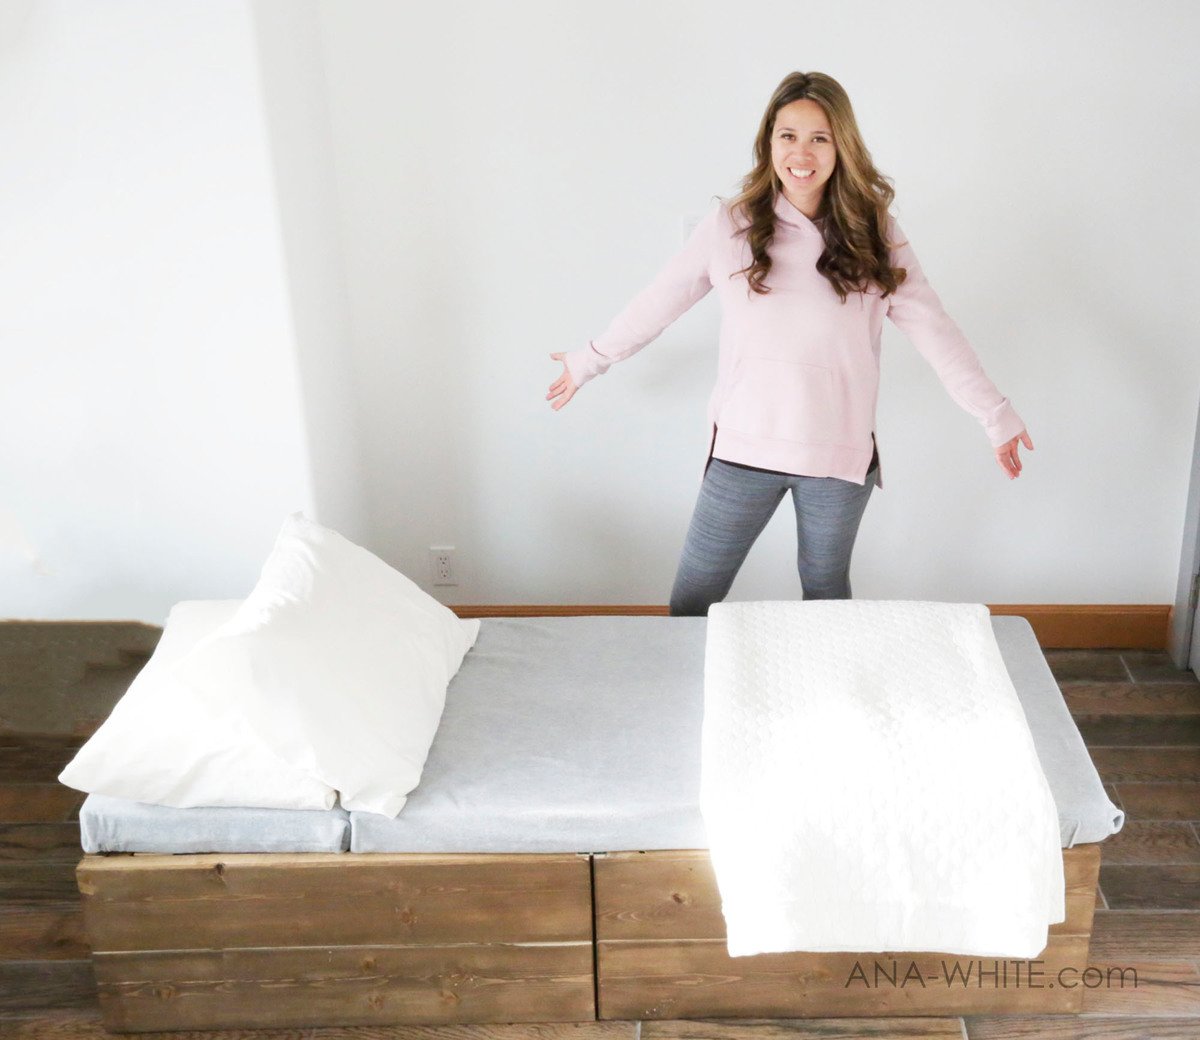
Then you replace those exact same cushions on the bed and add the bedding and it's a bed!
Many of our guests have small children, so having this extra bed option is great in our guest room.
Especially when it acts as a very comfortable and sturdy chair when not in use.
We spent about $100 on this chair. The cushion cost $20 (it's a camp pad) - make sure you watch the video for more details on it and how we sewed the cushions.
We are so excited to be able to share these plans with you, and truly can't wait to see you build (and outbuild) us!
Enjoy the plans following,
Ana
Twin Sleeper Chair Plans
We used the same finish as the luggage rack benches -
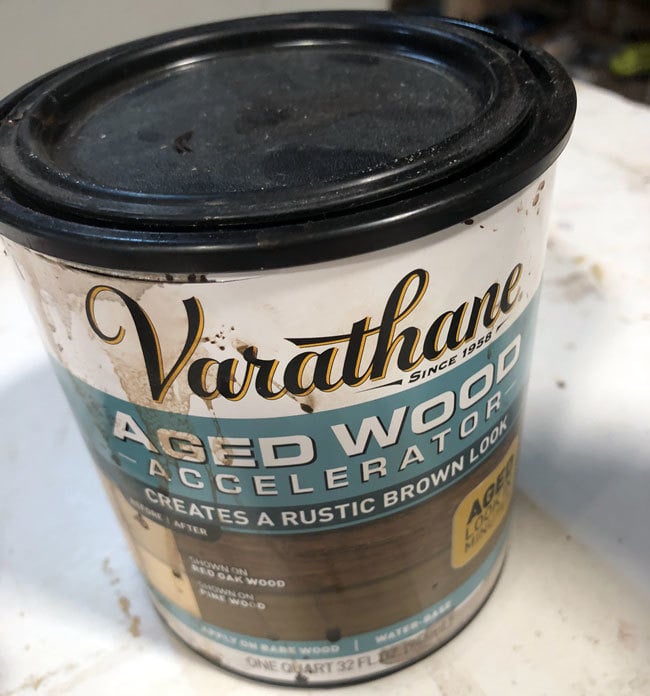
Varathane Aged Wood Accelerator in Rustic Brown. It is a true neutrel brown and goes on blotch free and beautiful.
Pin For Later!
Preparation
5 - 2x8 @ 10 feet long
1 - 2x4 @ 4 feet long (could also use 2x8 scraps)
1 - 2x2 @ 4 feet long
1 - 1x2 @ 10 feet long
4 - 1x4 @ 8 feet long
1 - 1/4" plywood @ 33" x 30" (for heaver loads, use 1/2" or 3/4" plywood)
1 - Camp Foam pad, medium to firm, 72" x 30"
6 - 8" long screws, long drill bit for predrilling
2-3/4" self tapping wood screws (about 25)
2 sets of hinges (one should be heavy duty)
1 handle
6 - 2x8 @ 30" - frame fronts/backs
8 - 2x8 @ 36" - frame sides
4 - 2x4 @ 13" - bottom frame corners
2 - 2x2 @ 26" - bottom frame cleats
1 - 1/4" plywood @ 33" x 30" (for heaver loads, use 1/2" or 3/4" plywood)
2 - 1x2 @ 30" - bottom frame top pieces
2 - 1x2 @ 26-1/2" - bottom frame slat cleats
5 - 1x4 @ 29-1/2" - bottom frame slats
6 - 1x4 @ 30" - top frame slats
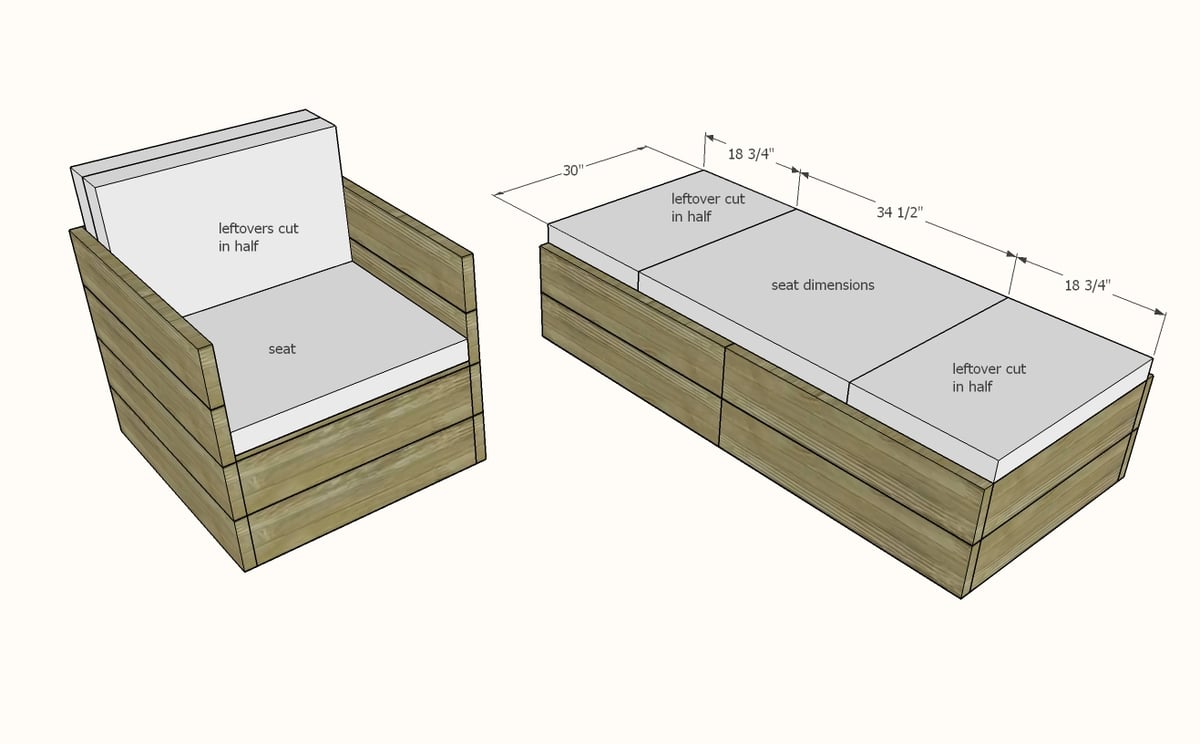
FOAM 30" x 72"
cut one piece to seat dimensions
cut leftover piece in half


Instructions
Step 1
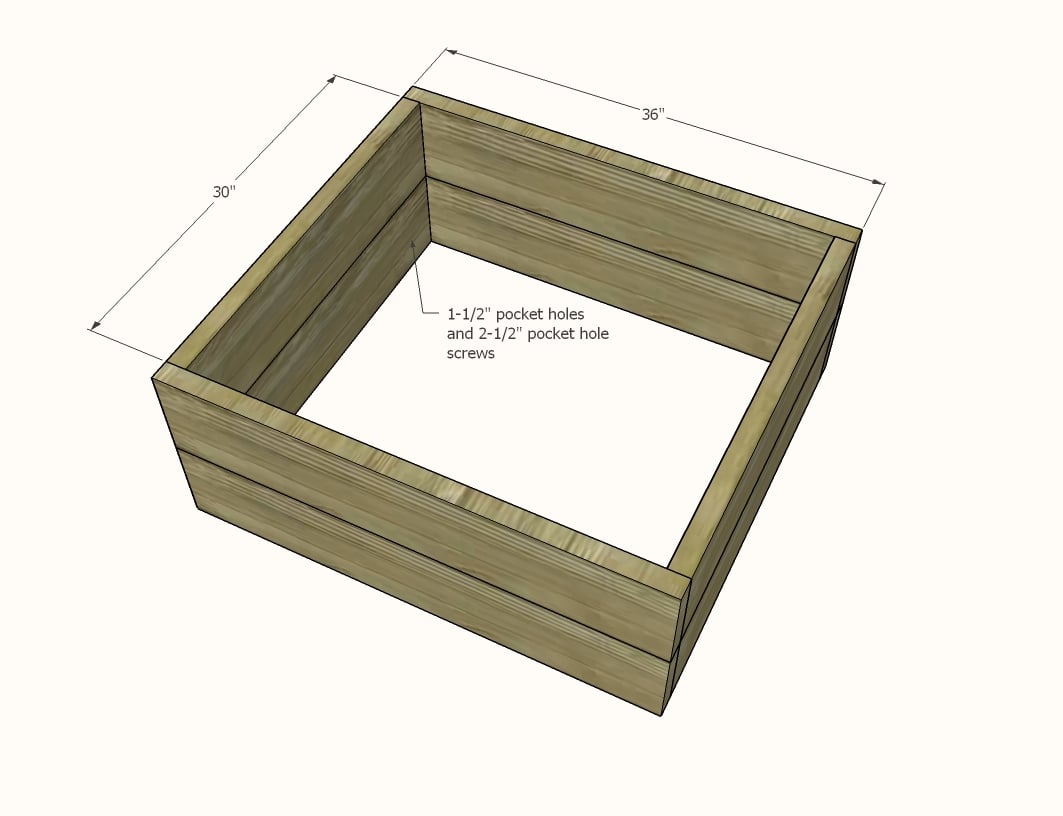
Make two full frames out of 2x8s, joining corners with 1-1/2" pocket holes and 2-1/2" pocket hole screws.
Step 2

Stack frames on top and attach at corners with 2x4s. Elevate 2x4s so there is a 3/4" gap on top and bottom.
TIP: 1x material is 3/4" thick and can be used as a spacer.
Step 3

Attach in between 2x4s the 2x2 cleats with 2-3/4" self tapping screws and glue.
Step 4
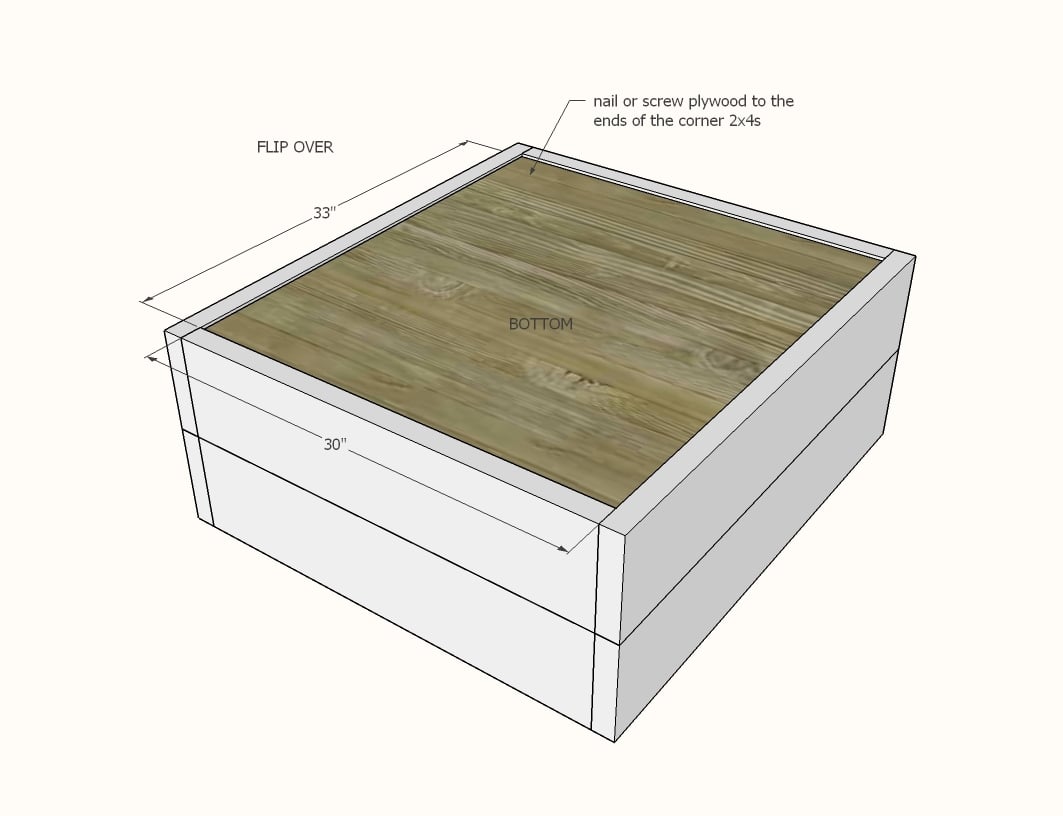
Flip project over.
Cut plywood panel with circular saw or tablesaw.
Screw to bottoms of 2x4s.
Step 5
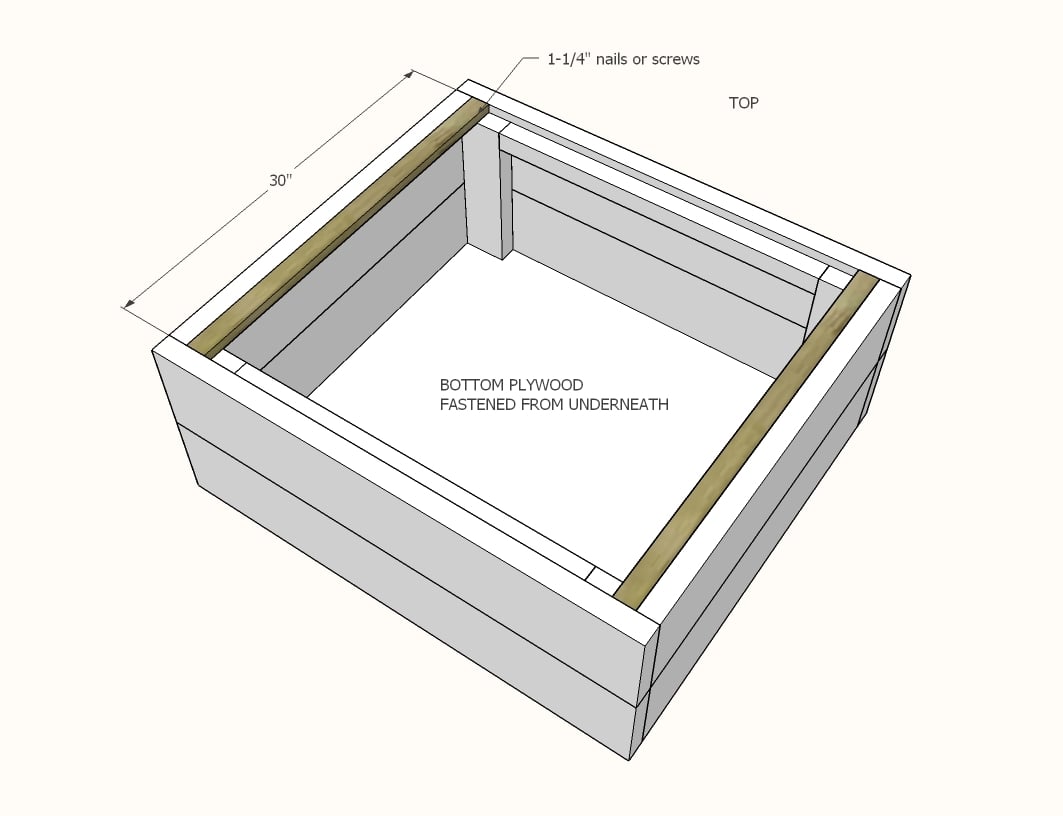
Step 6
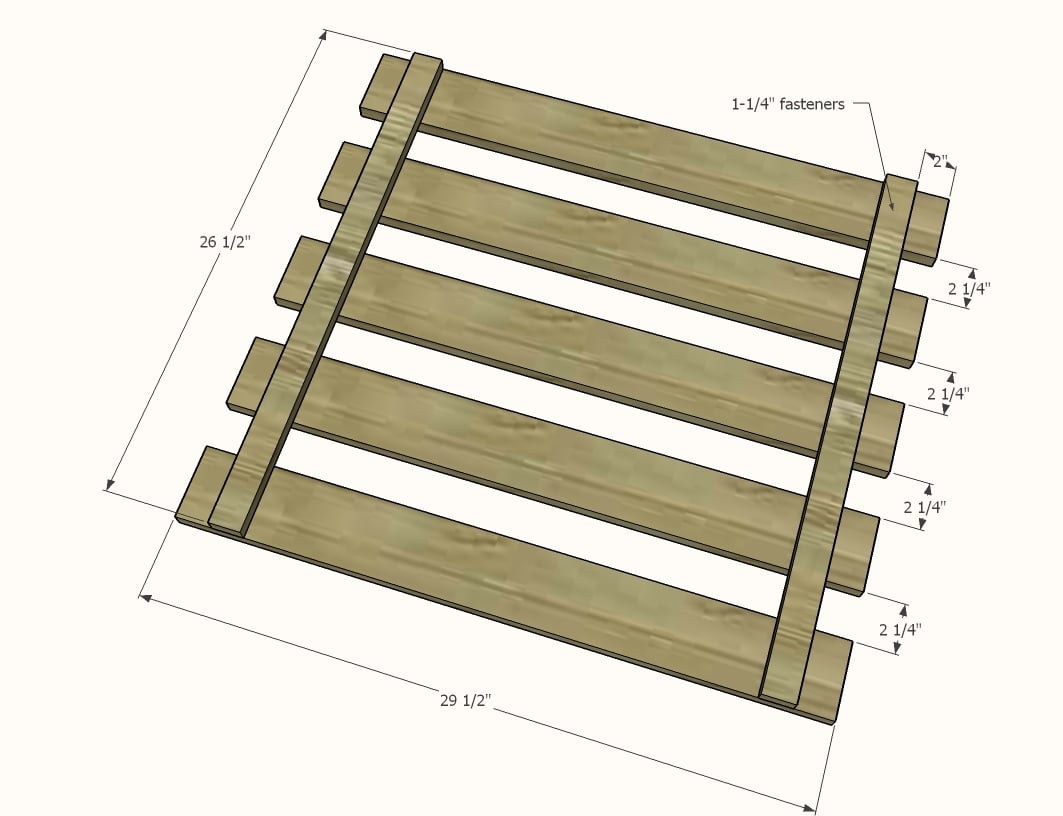
Build the slat lid as shown, attaching with 1-1/4" fasteners and glue. Make sure the frame is square (I constructed mine inside the chair frame to make sure it was square).
Step 7
Hinge frame to the 1x2.
This completes the bottom frame build. Set aside.
Step 8
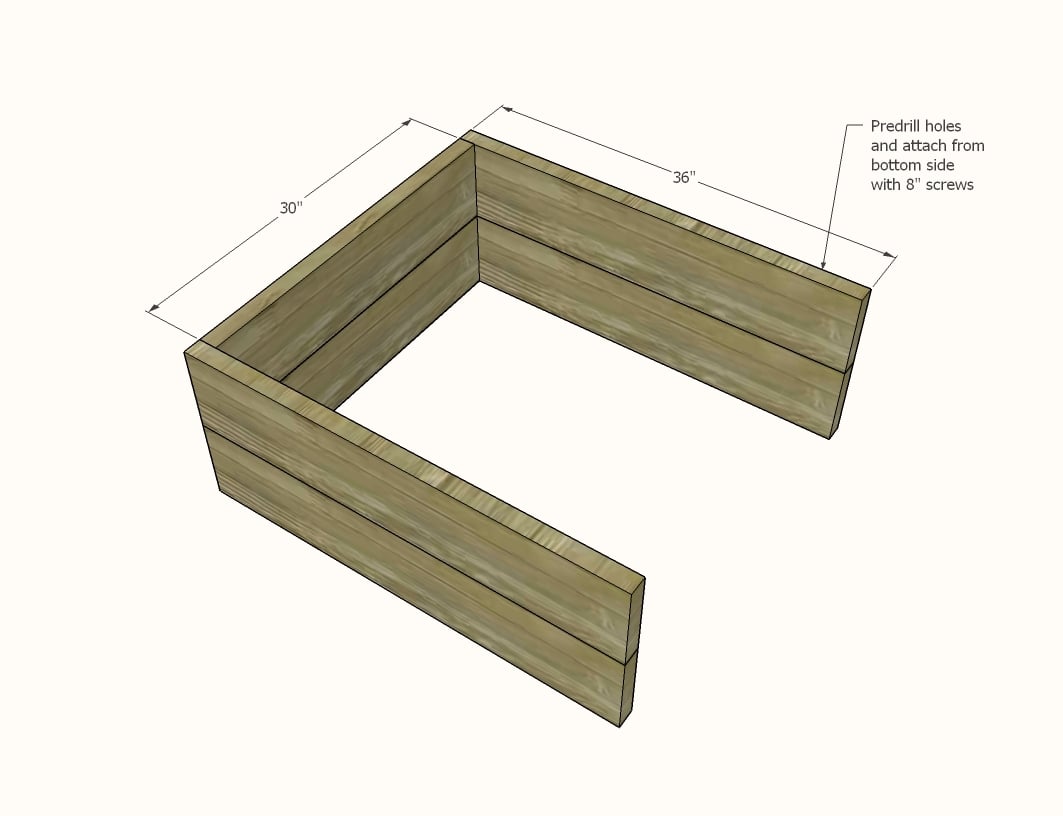
Attach remaining frame 2x8s at corners with pocket holes. Stack on top. Drill holes with a long drill bit and countersink 8" screws to attach the two frames together, two screws per side.
Step 9
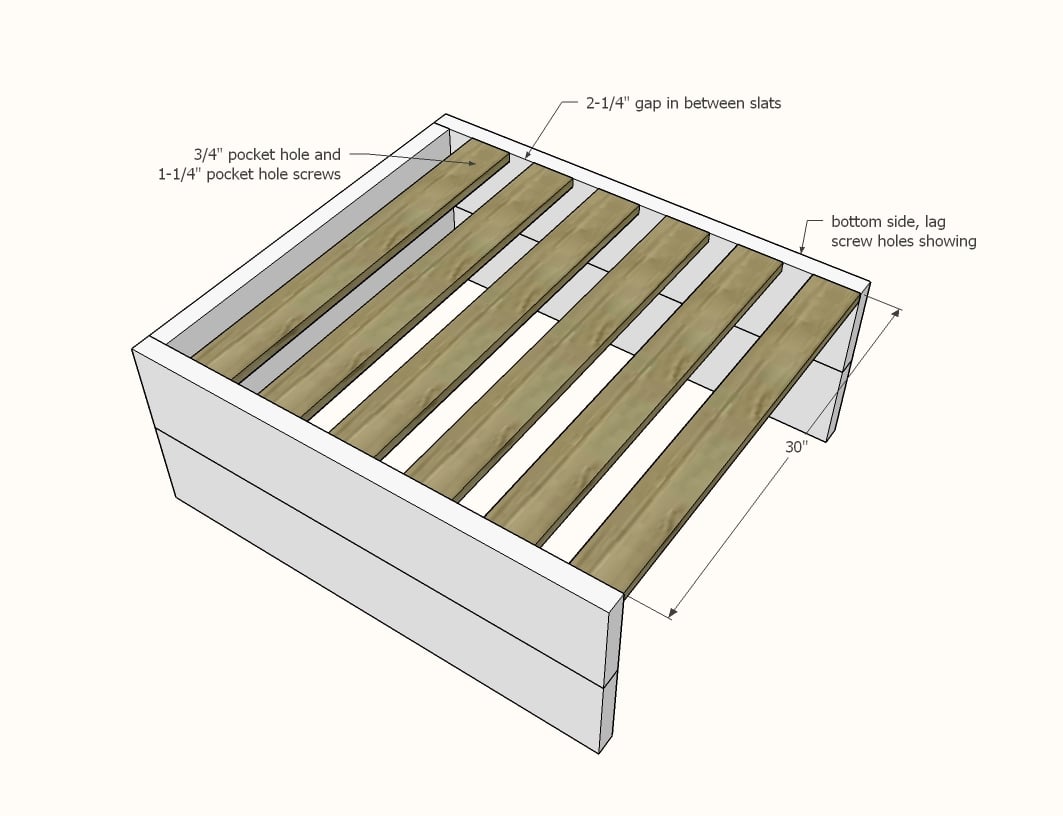
Attach slats to frame with 3/4" pocket holes and 1-1/4" pocket hole screws.
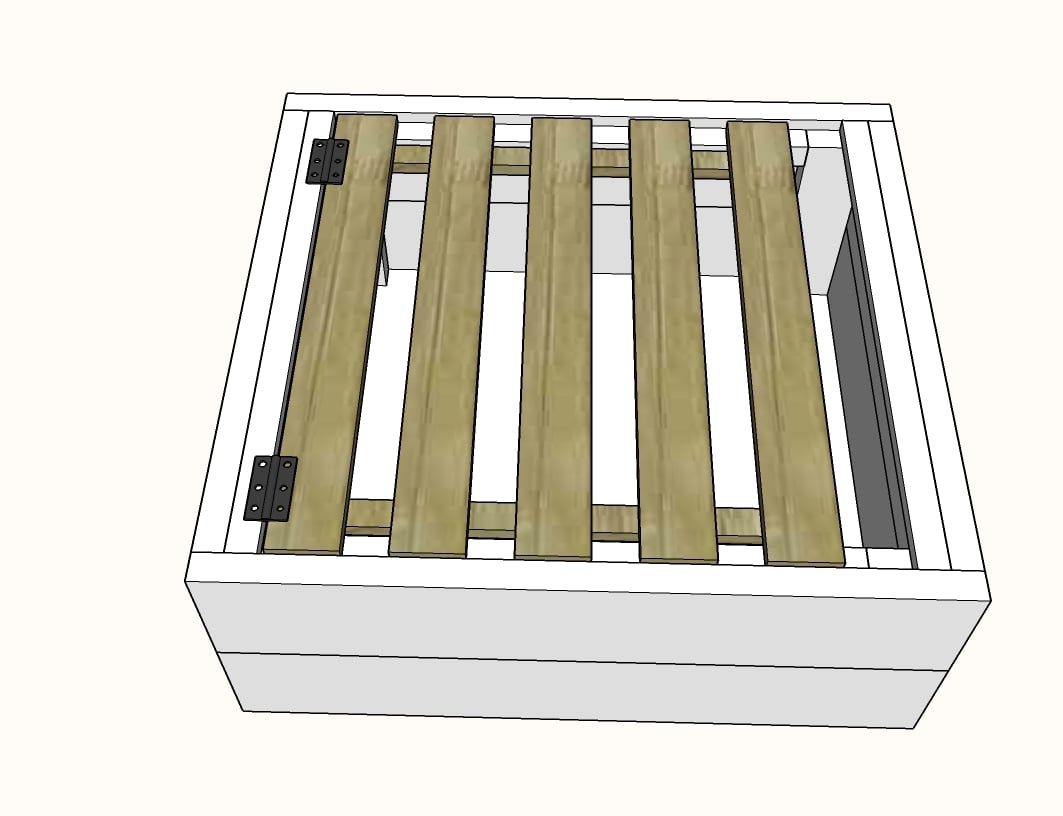
Step 10
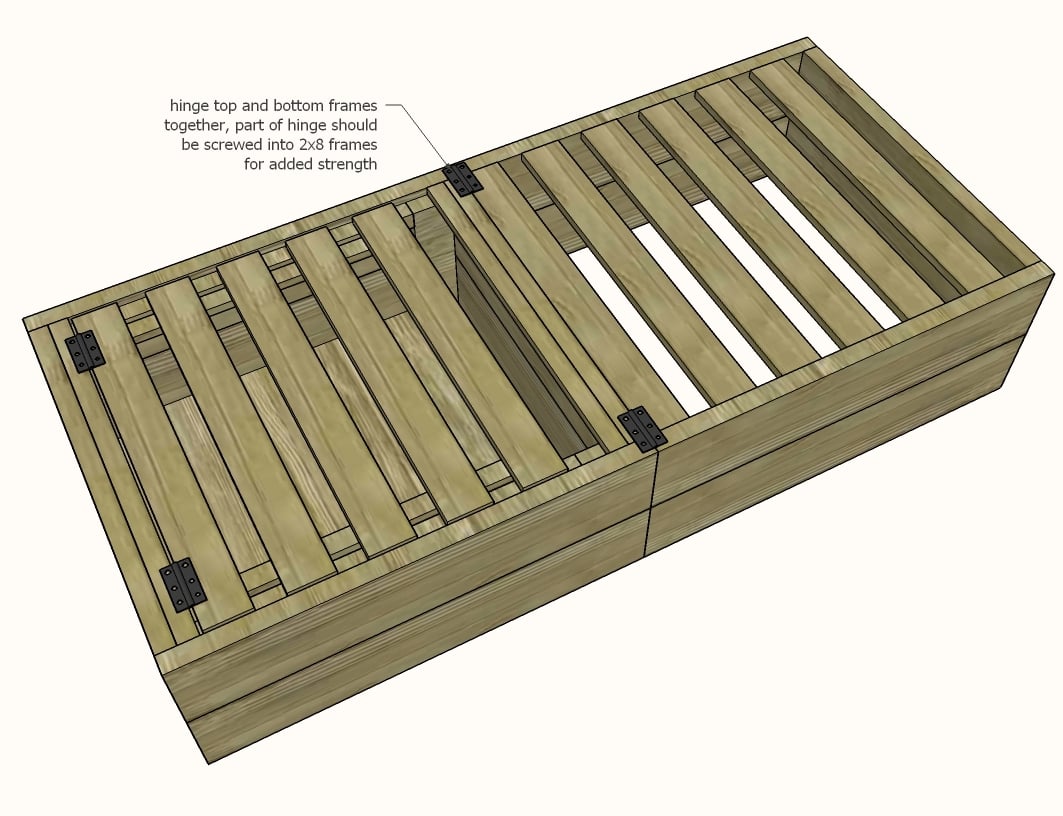
Hinge the two frames together with the heavy duty hinge.
Step 11

Add a handle on the back.
Step 12
Cut the foam with a sharp knife. Cover foam in fabric (I used polar fleece since it's stretchy, thick, and cheap)

Comments
artishok
Thu, 06/20/2019 - 05:17
I really like this chair…
I really like this chair. How can i get 3d project?
emfrazer
Sun, 10/20/2019 - 19:46
Scale up to a queen bed
Do you think this chair could be scaled up to a love seat size and fold into a queen size bed?
mzinbtown
Fri, 11/01/2019 - 04:48
I was hoping to do the same…
I was hoping to do the same thing! Can anyone help with a cut list for a queen size/love seat? Thanks!
Aleanore
Wed, 03/04/2020 - 00:16
Great project
Hello Ana!
I built this chair one week ago and I'm very happy with the result! I had some troubles at first as I live in France and I had to do a lot of adaptations in order to fit with the wood dimensions I could find to your instructions but it was worth it!
Thank you for sharing this plan, I can't wait to begin another project!
eroosjew
Sun, 04/19/2020 - 07:36
Hi Aleanore, Any chance you…
Hi Aleanore,
Any chance you still have the measurements of the wood you used? I live in the Netherlands and im also struggling to find everything... maybe you're findings can help me out 😊
thanks!
Roos
johannes
Tue, 01/26/2021 - 09:56
Europeans :)
Hey Aleanore,
I'm in the same situtation, would you share your adaptations or conversions with me aswell? would help me out a lot!
:)
nmnatacha@gmail.com
Mon, 08/30/2021 - 11:45
Hello Aleanore, I'm also in…
Hello Aleanore,
I'm also in the same situtation (Belgium), would you mind sharing your adaptations or conversions with me as well? Plan on making this chair in a few months :-). Thanks in advance
ElleBuilds
Sat, 09/19/2020 - 12:22
Hi Ana, I love your ideas…
Hi Ana, I love your ideas and have made a few of your plans which turned out great! And I Love this guest bed idea!
One question I have is do you have to make it with 2x8 s, can you make it with 1x8 s?
The reason being I have 14 grandchildren and I'd like to move this bed around to different rooms to suit which family comes. I'm thinking it would be heavy to move to a different room or down the stairs.
Thoughts?
weekend warrior
Thu, 03/04/2021 - 14:07
Hi ElleBuilds, Of course I'm…
Hi ElleBuilds,
Of course I'm not Ana, but I've been wanting to build something like this for my grandbabies when they have sleepovers with me. As I was reading the plans, I was thinking this would be perfect, and easy to move around if you add those caster wheels to the bottom. I like the sturdiness of the 2x8's.
frstborn
Sat, 07/03/2021 - 10:30
Twin Sleeper Chair Naterials
How thick is the foam pad? I am so excited to build this (with hubs' help) - got all the materials today, except for the foam pad!