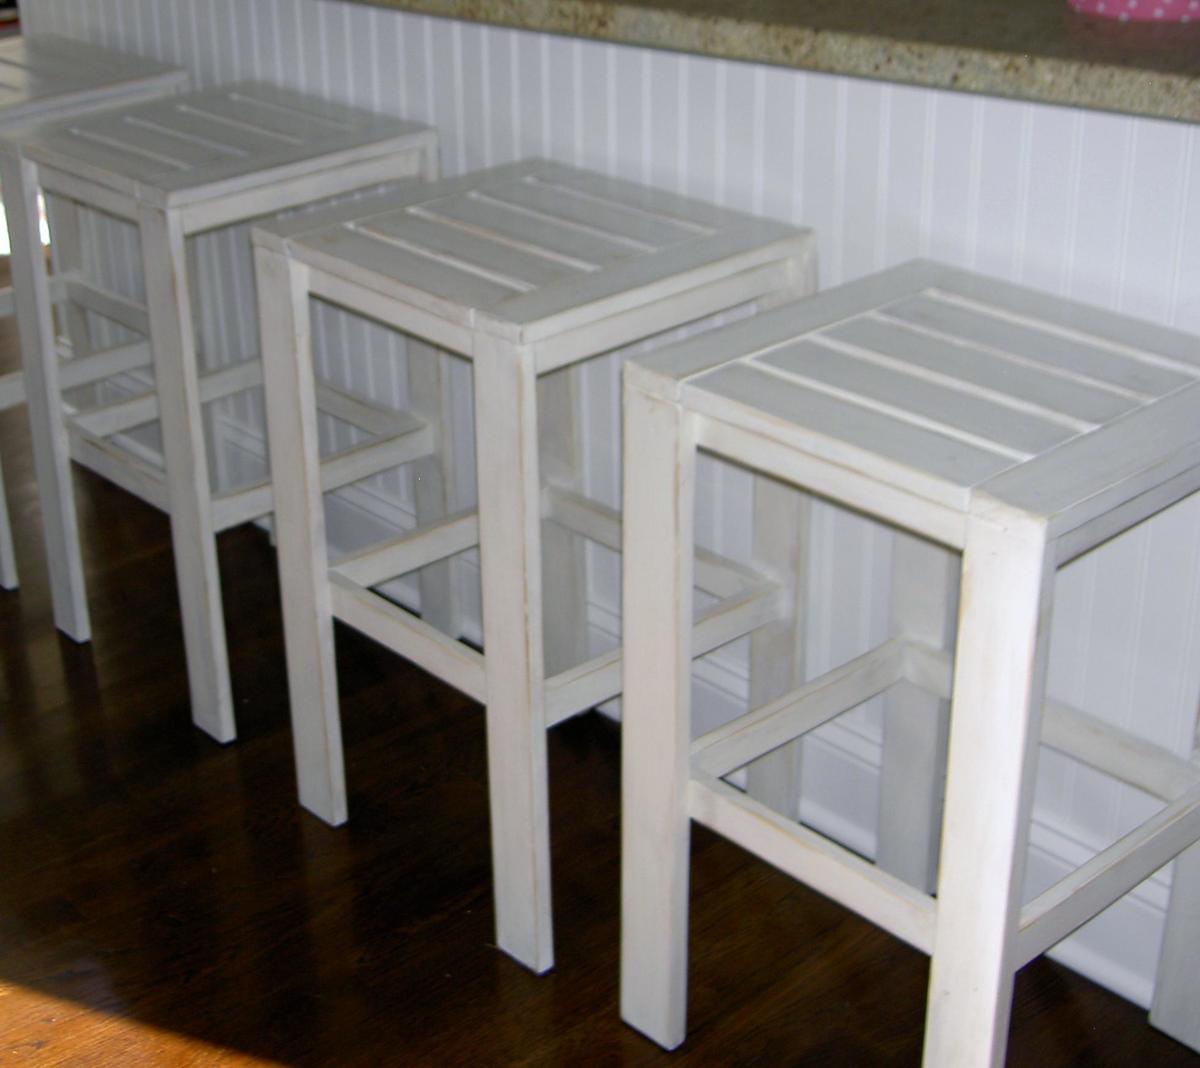
These simple modern outdoor bar stools look great on your patio or even indoors. Simple and inexpensive to build, flat legs add updated style.
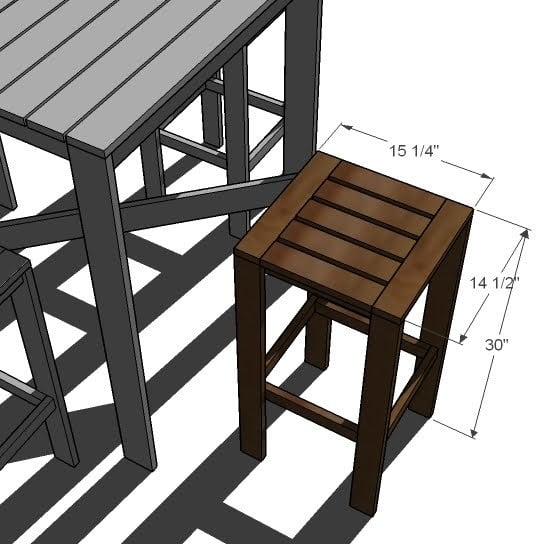
Preparation
12′ of 1x2s
18′ of 1x3s
2″ Screws
1 1/4″ Screws
CUT LIST
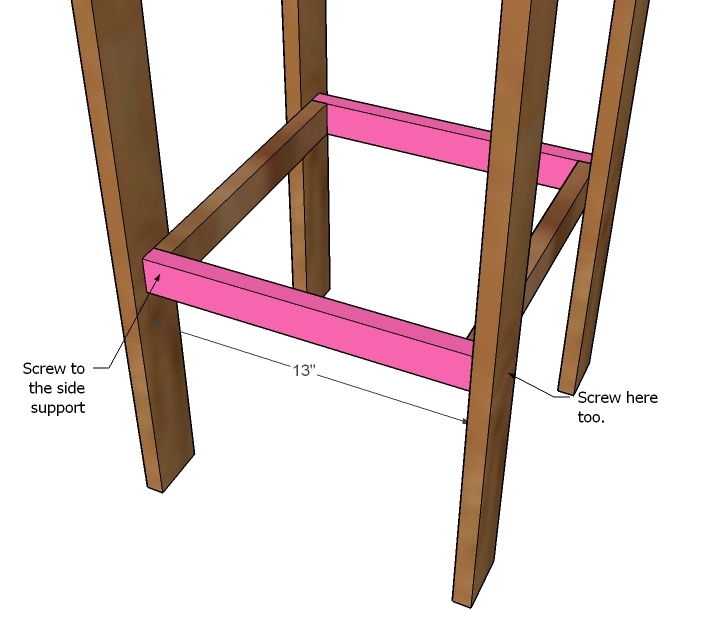
2 – 1×2 @ 13″ (Seat side aprons)
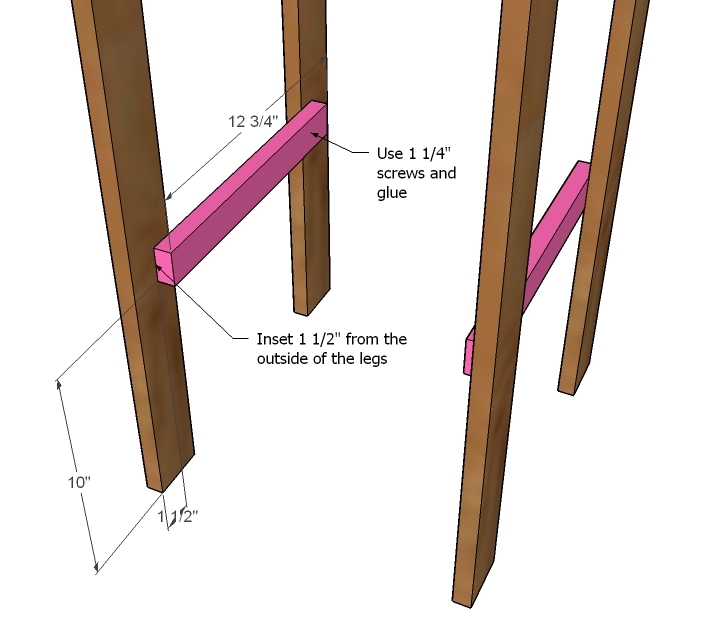
2 – 1×2 @ 12 3/4” (Seat end aprons)
2 – 1×2 @ 11 1/2″ (Seat supports)
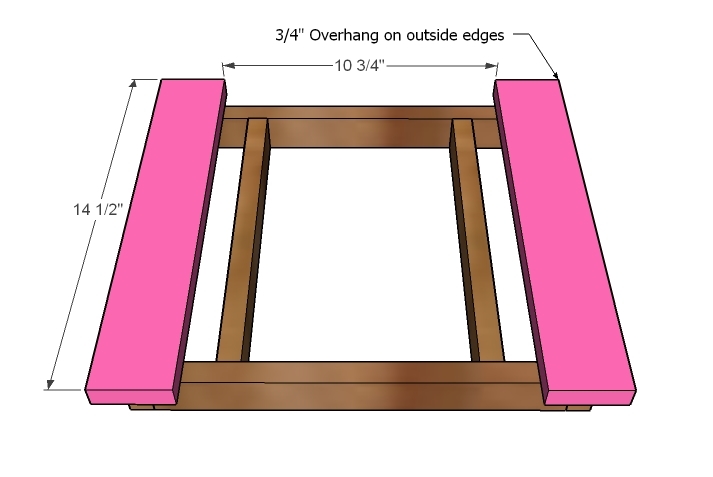
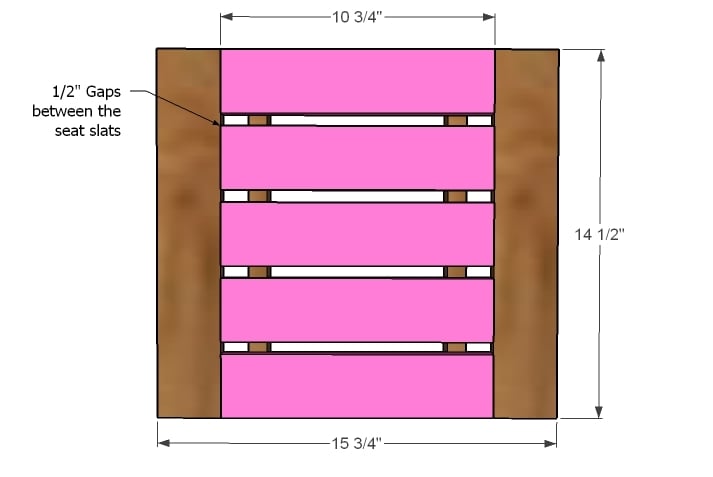
2 – 1×3 @ 14 1/2″ (Breadboard Ends)
5 – 1×3 @ 10 3/4″ (Seat Slats)
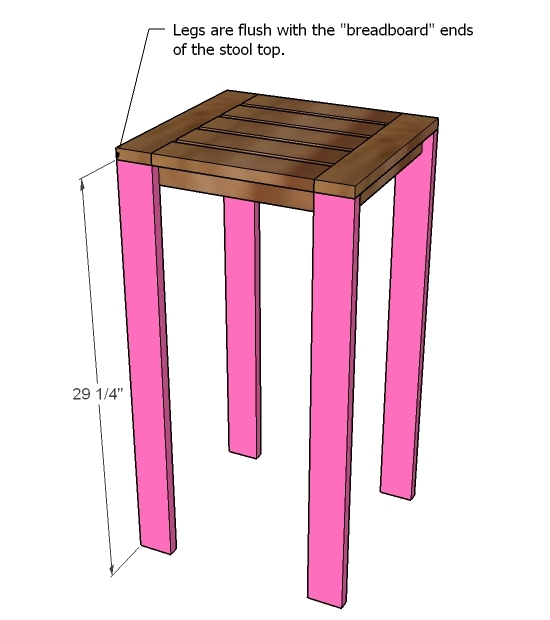
4 – 1×3 @ 29 1/4″ (Legs)
2 – 1×2 @ 13″ (Bottom Supports)
2 – 1×2 @ 12 3/4″ (Bottom Supports)
Sand and finish your board before assembling (unless you can use a spray finish). Work on a clean level surface and predrill and countersink your screw holes. Keep outside edges flush and use glue. Check for square after each step. Be safe, have fun.
Instructions
Step 1
Step 2
Step 6
Step 7
FINISHING
Your stool should have at least a base finish layer. You can touch up screw holes with paintable silicone or wood filler, lightly sand even, and add a touch up coat of paint.


Comments
Katie (not verified)
Fri, 05/28/2010 - 03:47
Ana- I just remembered that I
Ana- I just remembered that I have a HUGE pile of fence boards cut in half behind my shed from our old fence. Do you think they would be sturdy enough to use in building these stools? Other than being weathered, they look like they are in good condition.
Ana White (not verified)
Fri, 05/28/2010 - 10:03
I would be careful with
I would be careful with stools, you don't want them to break when someone stout sits on them! Maybe try building one first and check out how strong it is? It really is going to depend on the boards.
Mary (not verified)
Wed, 06/16/2010 - 13:24
I am going to shorten the
I am going to shorten the legs on the stool plan to make a side table to go with my chairs!
M.B.Walker (not verified)
Sat, 08/14/2010 - 09:37
What about a back on these?
What about a back on these? I'm looking at it thinking it couldn't be hard to add a back (and make it 6" shorter) perfect for my counter.
diymyhome (not verified)
Tue, 08/31/2010 - 07:36
M.B.Walker, That's exactly
M.B.Walker,
That's exactly what I wanted to do. Here's a link to my plans w/ low back added: http://mydiyhome.wordpress.com/2010/08/23/project-bar-stool/
Basically just extended the back legs up higher and added a board between them :)
diymyhome (not verified)
Sun, 09/05/2010 - 18:09
We moved our site (so the
We moved our site (so the link above won't be working for much longer:
Here’s a link to my plans w/ low back added: http://diy-my-home.com/2010/08/project-bar-stool/
Basically just extended the back legs up higher and added a board between them
Happy building!
questions abou… (not verified)
Mon, 09/06/2010 - 08:13
[...] another outdoor
[...] another outdoor chair-side table to give to my mom for her birthday. I figured, Hey! That stool (Stools for the Bar Table for the Simple Outdoor Collection — Ana White) would make a pretty sweet table if I lowered it a mite. Well, yes, but again with the math. First [...]
jcostigl (not verified)
Thu, 09/09/2010 - 13:37
THANKS TO YOU ANA!! we now
THANKS TO YOU ANA!! we now have some counter stools for our new island. I simply took your bar stool plans and shortened the leg height to 26". My kids love, love, love them. Here's the link to see pictures
http://thatsmyletter.blogspot.com/2010/09/s-is-for-stools.html
How to Build S… (not verified)
Thu, 09/23/2010 - 19:32
[...] Aren’t they just
[...] Aren’t they just beautiful! Actual reader photo from these plans. [...]
A Little Bite … (not verified)
Tue, 12/28/2010 - 11:27
[...] the amazing plans from
[...] the amazing plans from Ana White. We’re still trying to decide between these modern ones and these simpler ones, which one do you like [...]
Pamela Stevens (not verified)
Sat, 06/25/2011 - 05:34
Quick Question
I love the look of these and plan to build them but I have a question first. The materials section mentions a kreg jig, which I do have, but the step by step plans don't mention when or where to use it. Is that because the step by step plans assume not having one? I just don't want to make any mistakes on these. Also, do you know how much weight they hold? Thank you very much!
I love this site!
Guest (not verified)
Mon, 02/20/2012 - 10:12
Same question as Pamela
In the materials it mentions using a kreg jig but then the step by step plans don't mention when or where to use it. Any clarification would be appreciated!
trfountain22
Mon, 04/27/2020 - 06:38
Does this make just one…
Does this make just one barstool?