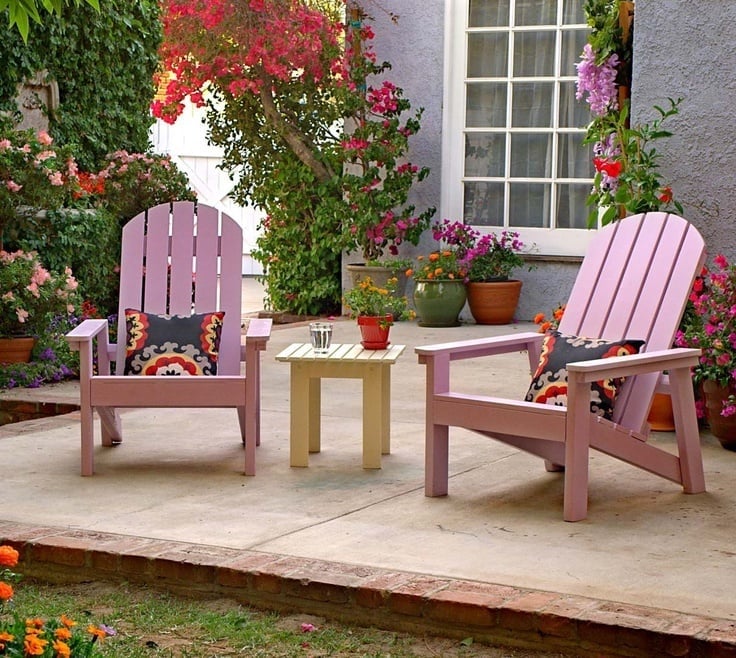


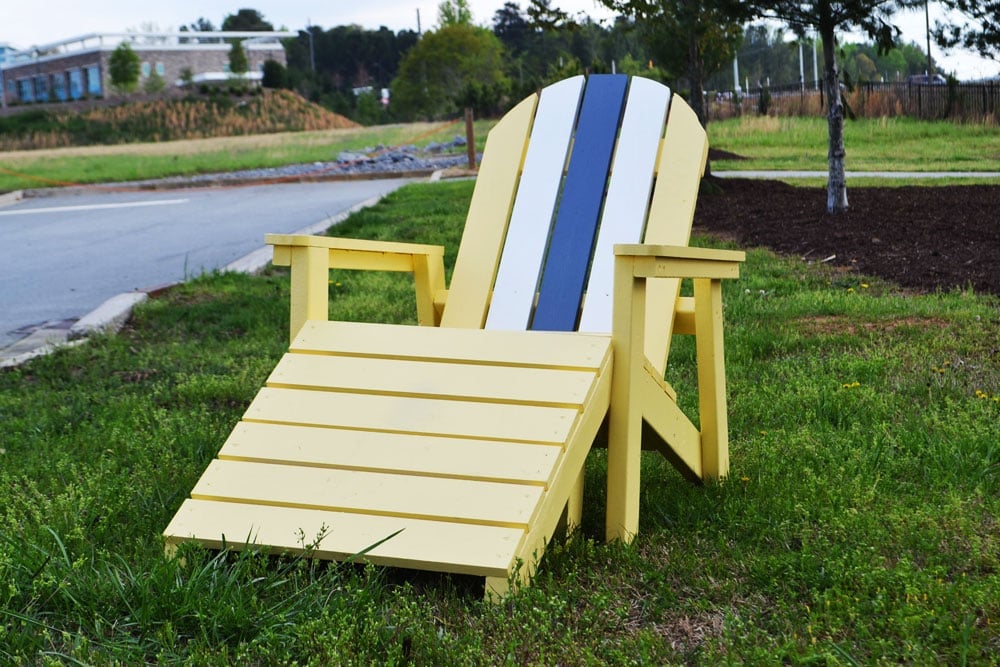
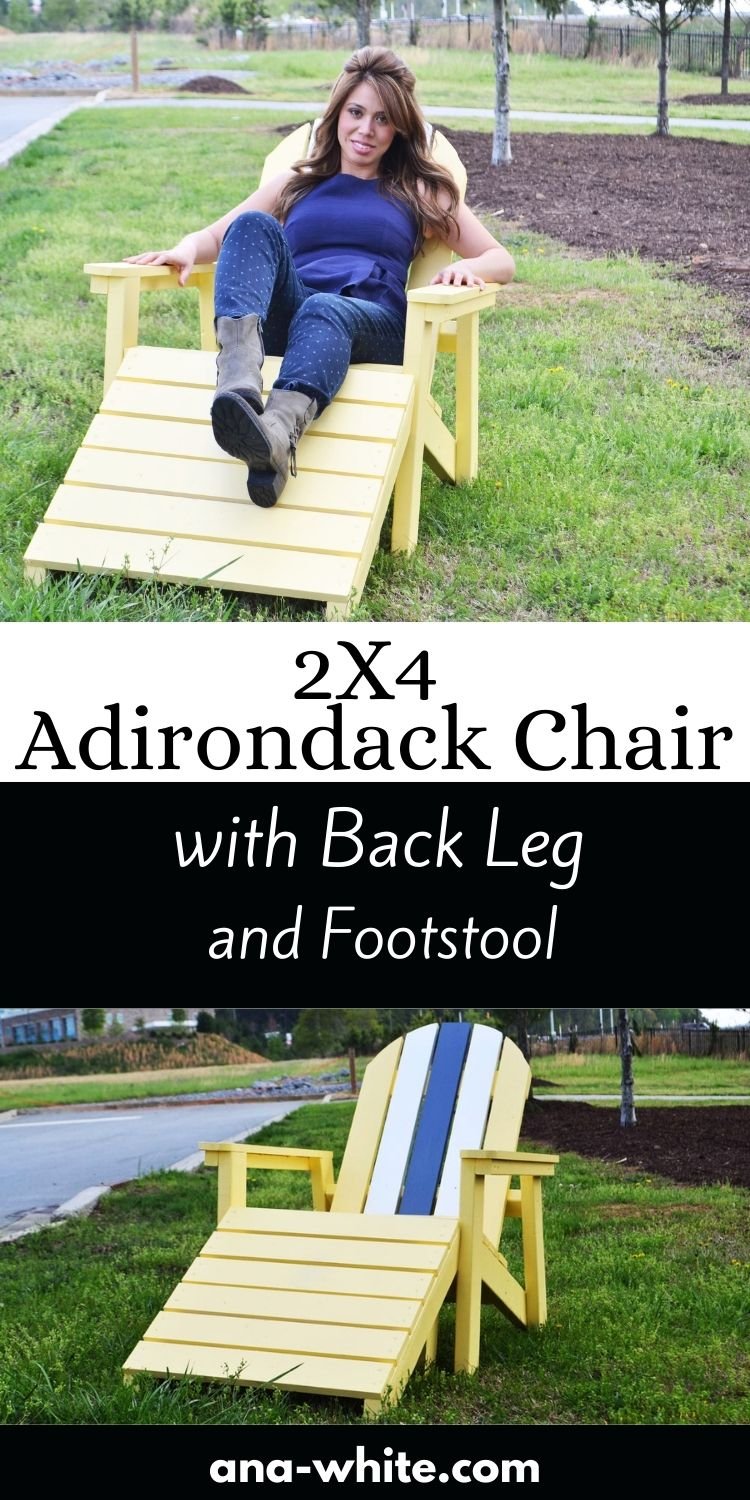
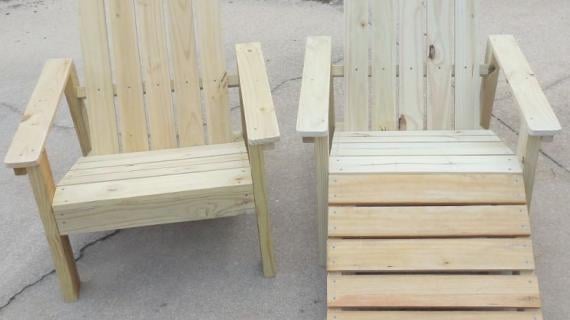
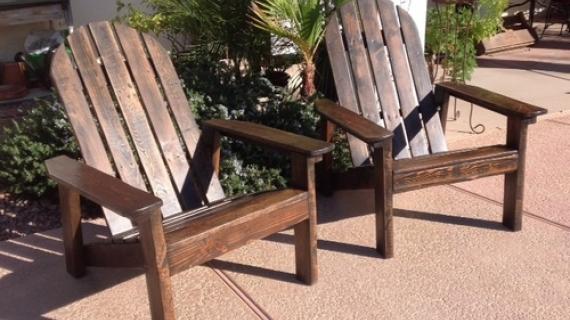
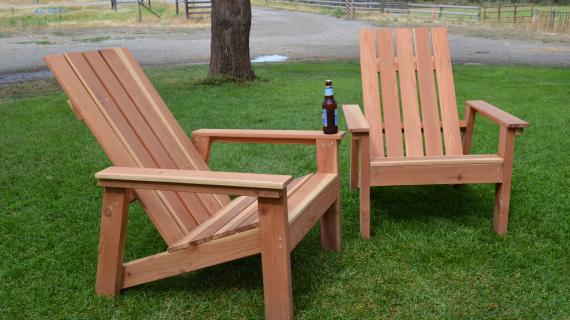
Easy to build adirondack chair. We made the base stronger with all 2x4 framing. This Adirondack chair is a reader favorite and has been built thousands of times.
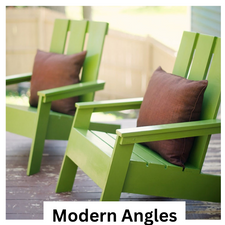
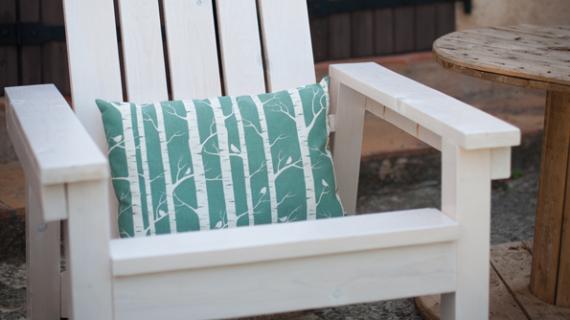
We also have a modern version here.
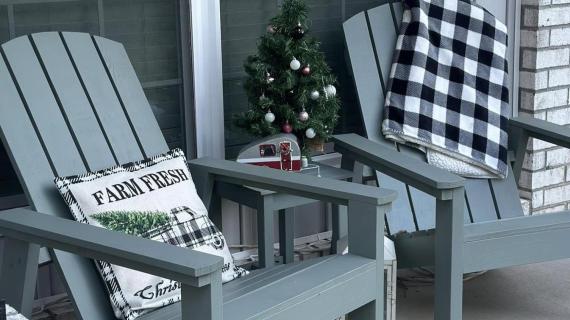
This plan includes a footstool. You can also build a matching coffee table and a matching side table. Check out all our outdoor furniture plans here.
More Free Adirondack Chair Plans from Ana White

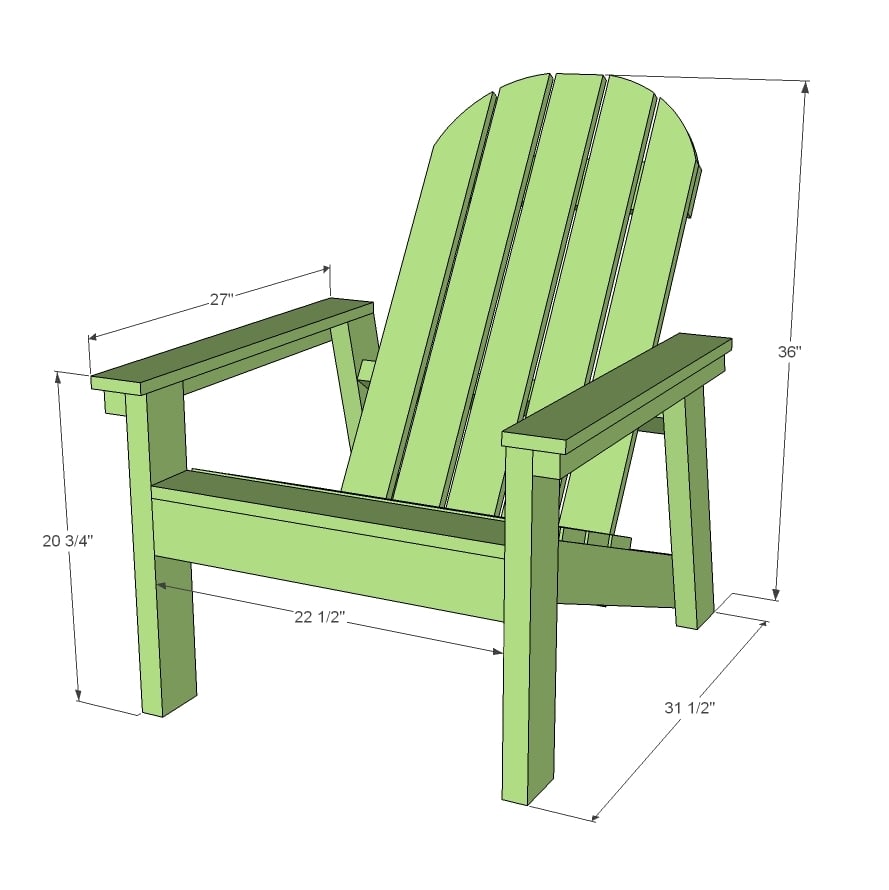
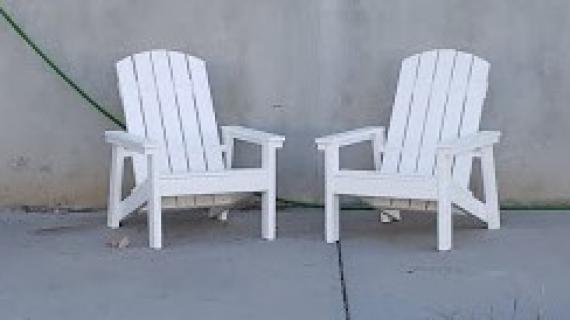
Sturdy Adirondack Chair Plans
Because we use 2x4s for the legs (and add the back leg) this decreases the overall cost, but increases the strength and durability. This also makes the chairs easier to build.
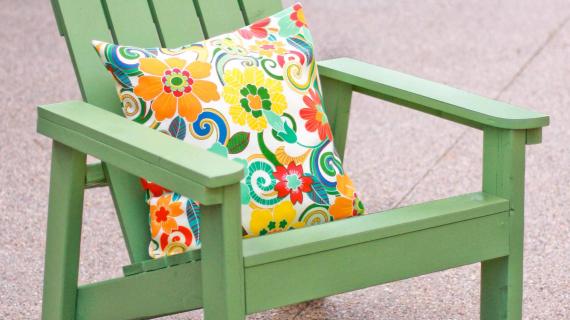
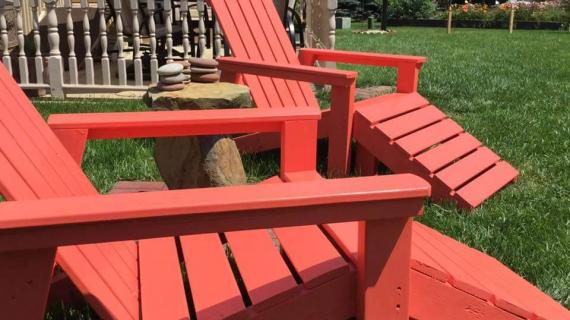
But we don't sacrifice comfort - with the deep recline and optional footstool plans, these chairs won't disappoint.

Optional Footstool Plans
I have also created a matching footstool plan (see below) that works with this Adirondack chair.

Video of Building this Adirondack Chair Plan
This plan is featured in Home Depots Adirondack chair video here:
More About Outdoor Wood Finishing
Outdoor furniture should be finished more like a deck than a dining table. It's not complicated, but knowing just a few tips can make your furniture last much longer. I share all my hard earned outdoor wood finishing secrets in this post.
Pin For Later!
Preparation
- 3 – 2×4 @ 8 feet long
- 1 – 2×2 @ 6 feet long
- 4 – 1×4 @ 8 feet long
- (30) 2 1/2” self tapping wood screws
- (60) 2” self tapping wood screws
- (20) 1 1/4” wood screws
- exterior appropriate wood glue
2 - 2x4 @ 20 3/4” long with BOTH ends cut PARALLEL at 15 degrees off square, long point to short point measurement (back legs)
2 - 2x4 @ 20” (front legs)
2 - 2x2 @ 26 1/2” long, longest point measurement, ONE end cut at 15 degrees off square (arm support)
2 - 2x4 @ 31 7/8” long, ONE end cut at 35 degrees off square to longest point, OTHER END cut at 20 degrees off square to shortest point - see step 1 (stringers)
2 - 2x4 @ 22 1/2” (front apron and back support)
5 - 1x4 @ 22 1/2” (seat slats)
5 - 1x4 @ 36” (back slats)
1 - 1x4 @ 19 1/2” (back top support)
1 - 2x4 @ 19 1/2” (back base support)
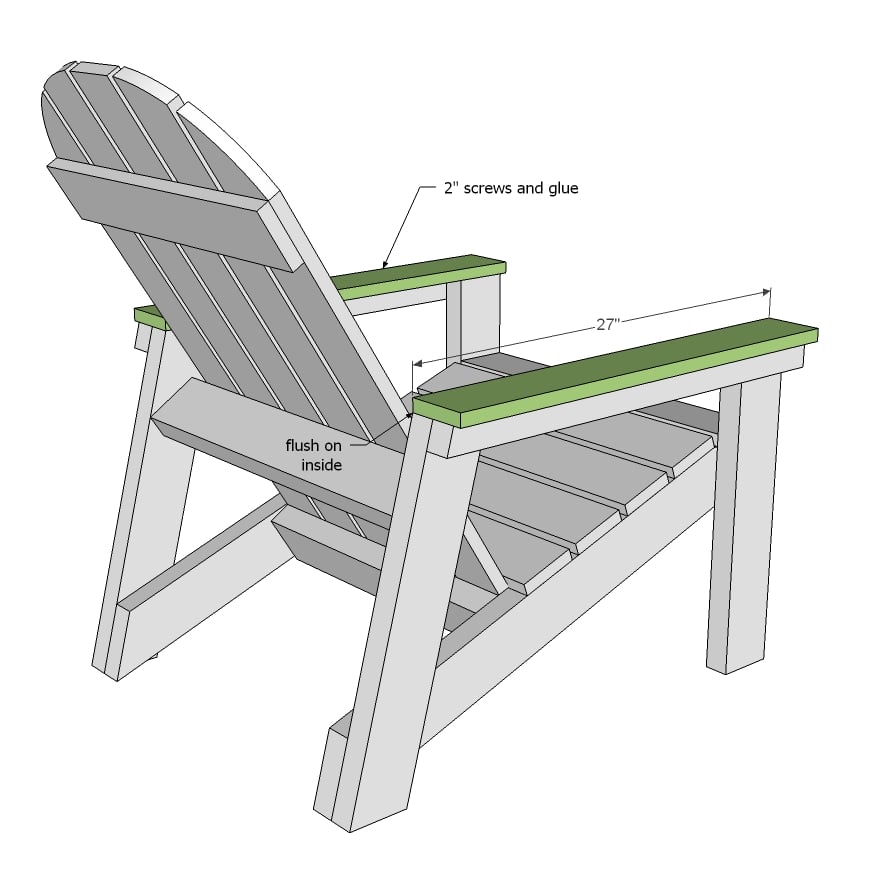
2 - 1x4 @ 27” (arm rests)


Instructions
Step 1
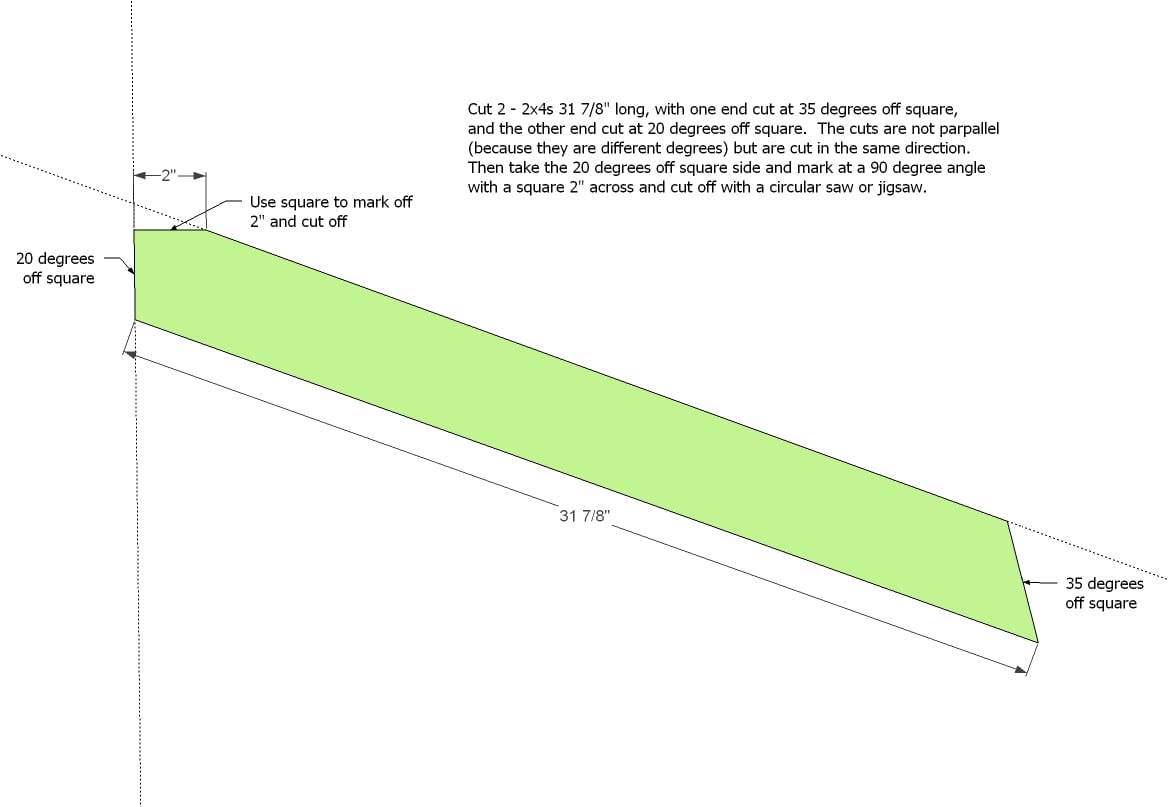
From stretcher board, cut off top portion by marking with a square and cutting off with a jigsaw. Do this on both stretcher boards.
Step 2
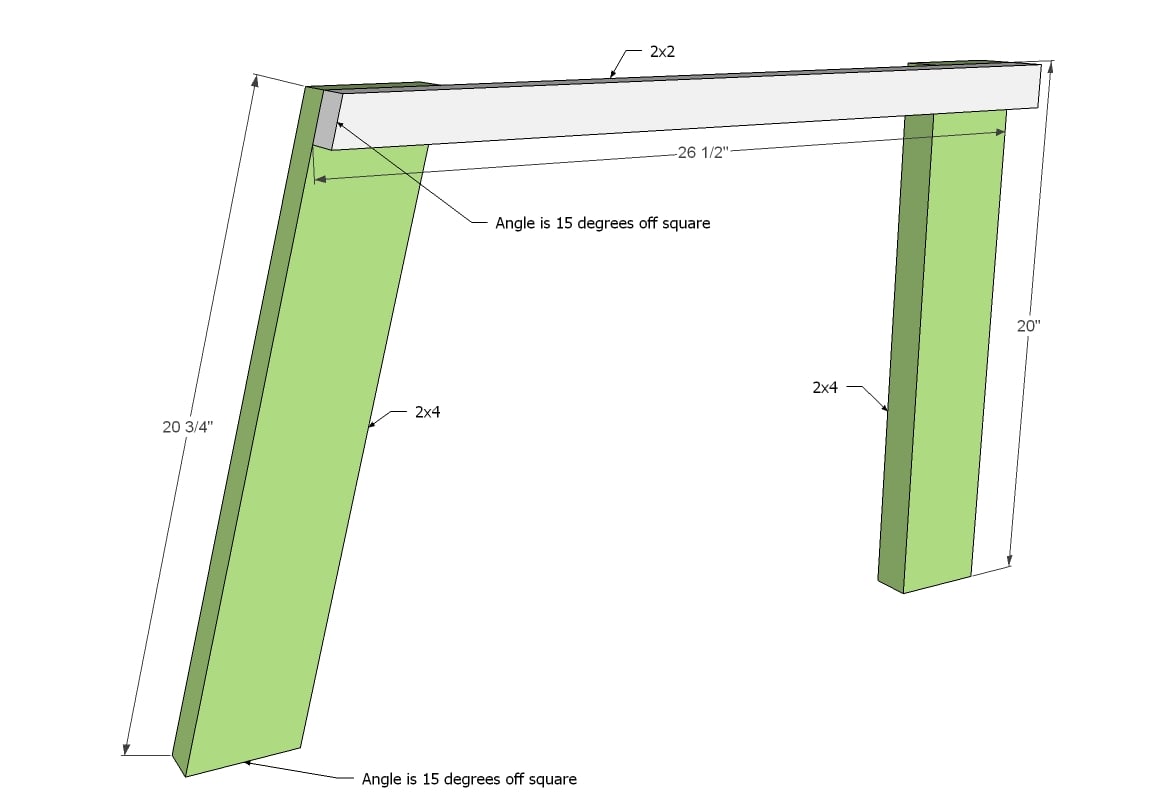
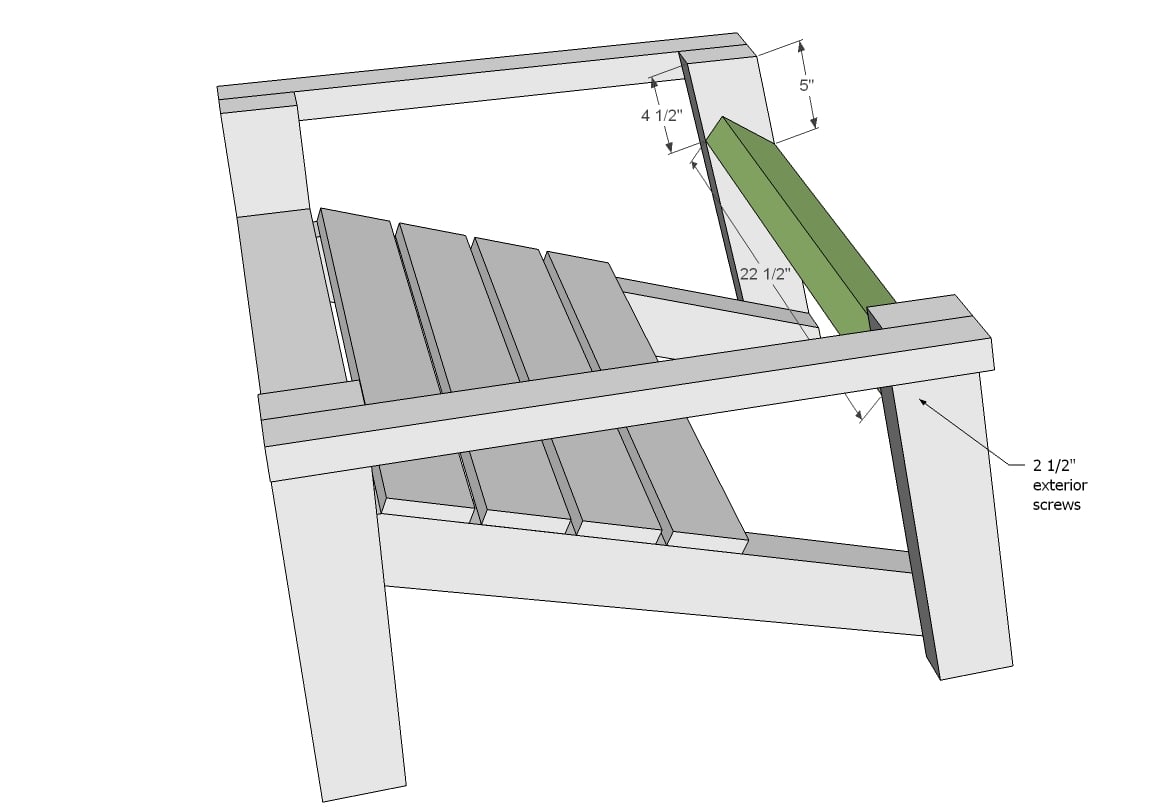
Attach one back leg and one front leg to a arm support with 2 1/2” exterior screws. Keep the top and outside edges flush.
Step 3
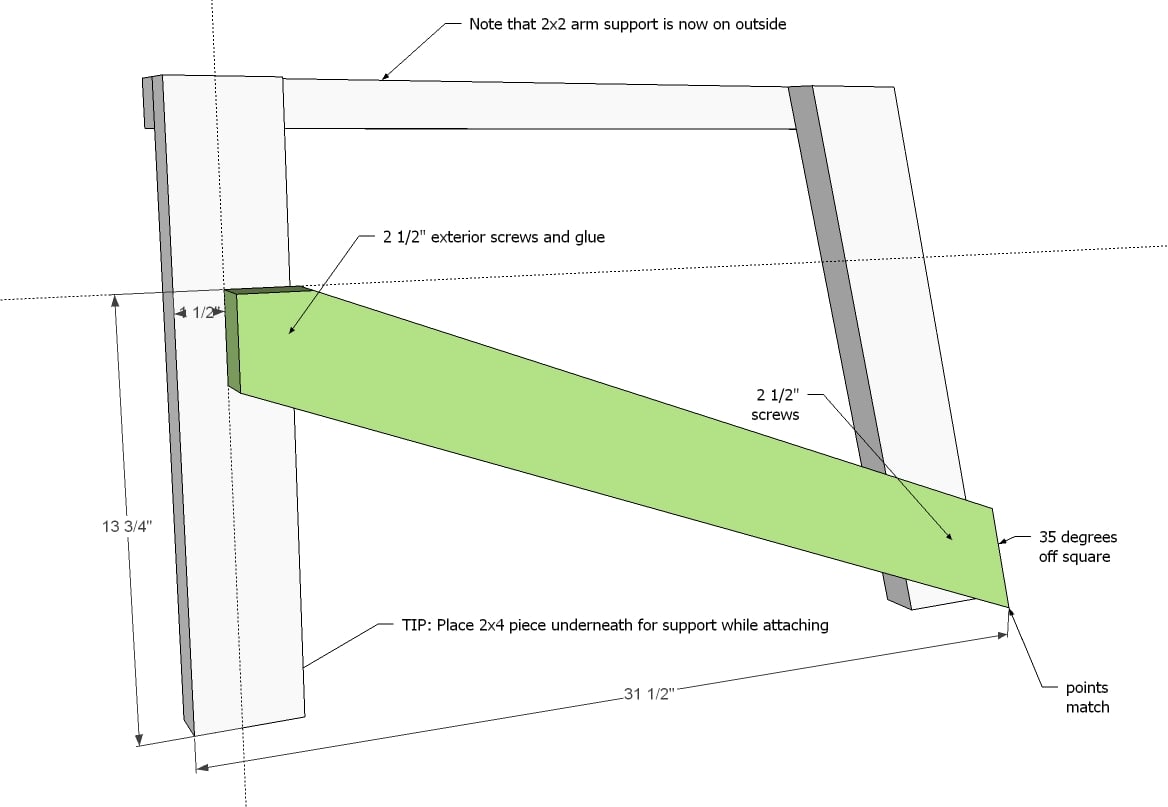
Mark front leg on inside with arm support on outside, as shown in diagram. Leave 1 1/2” space in front of stretcher. Attach stretcher to front and back legs with 2 1/2” exterior screws and glue.
Step 4
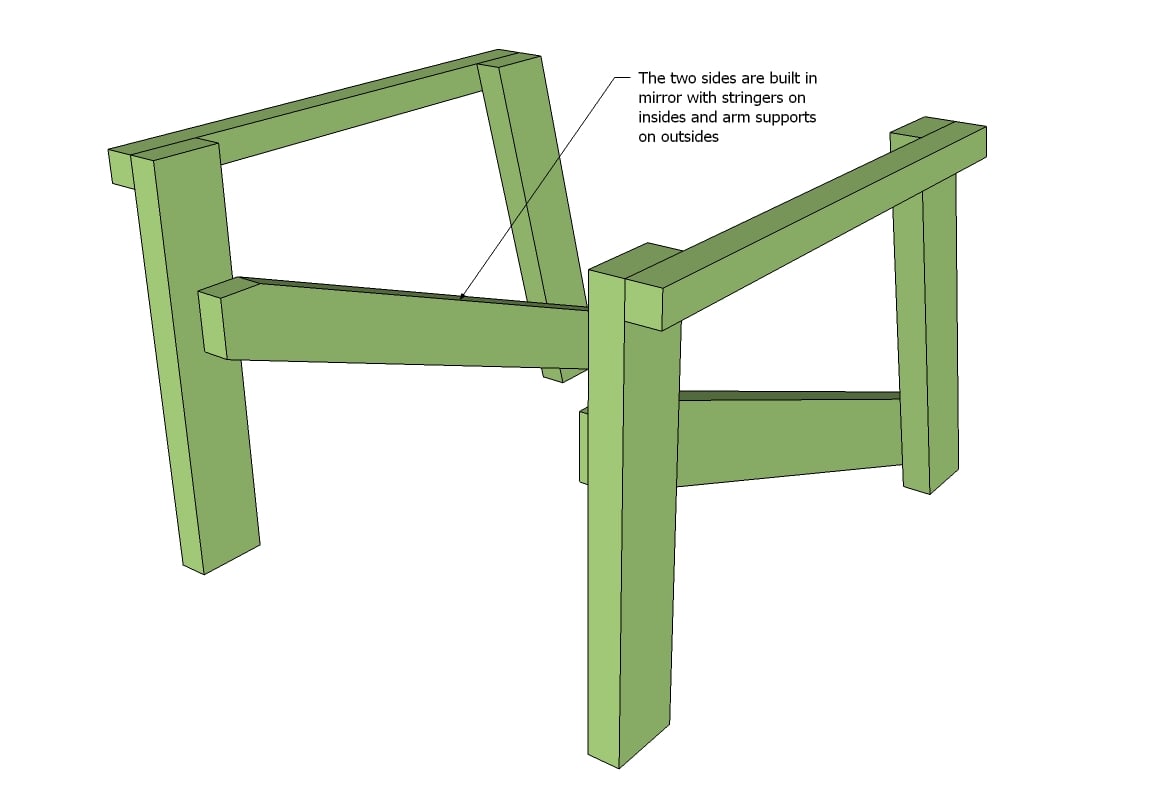
Build opposite side of chair in mirror, with arm supports to outside and stretcher to inside. Make sure the two match up.
Step 5
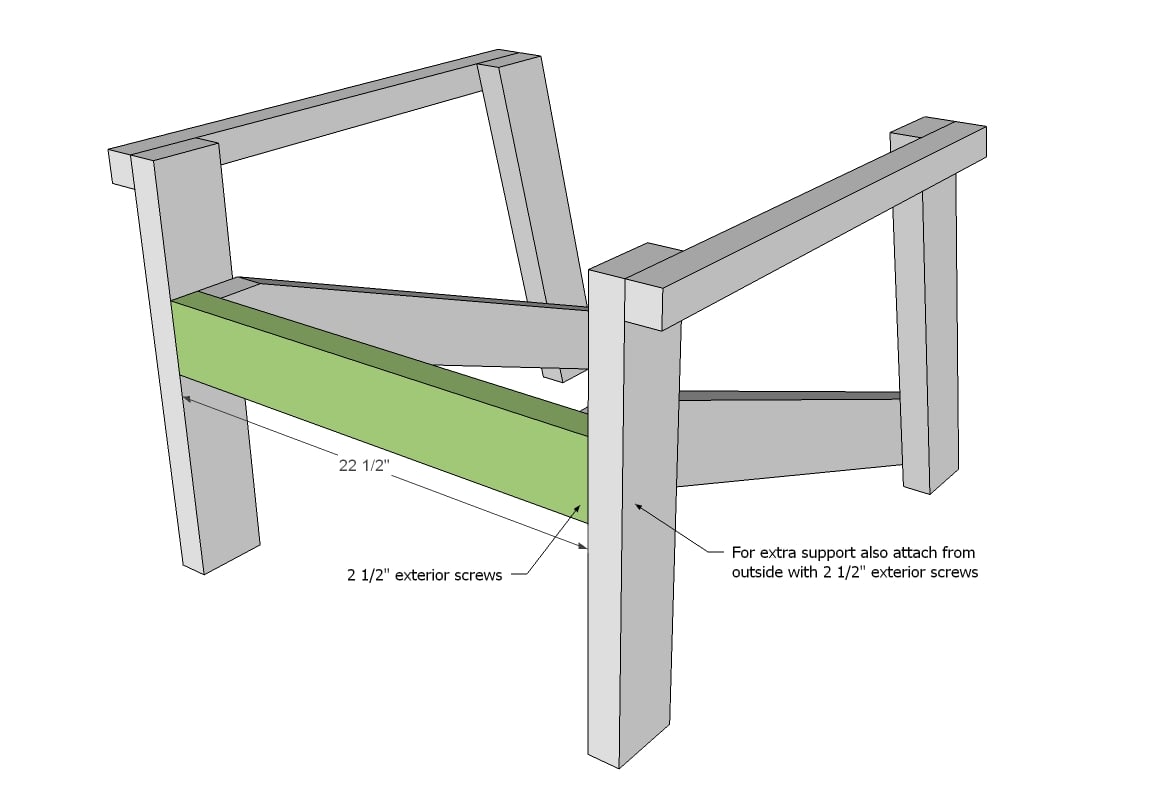
Front Apron is attached to fronts of stretcher and from outside of chair for additional support.
Step 6
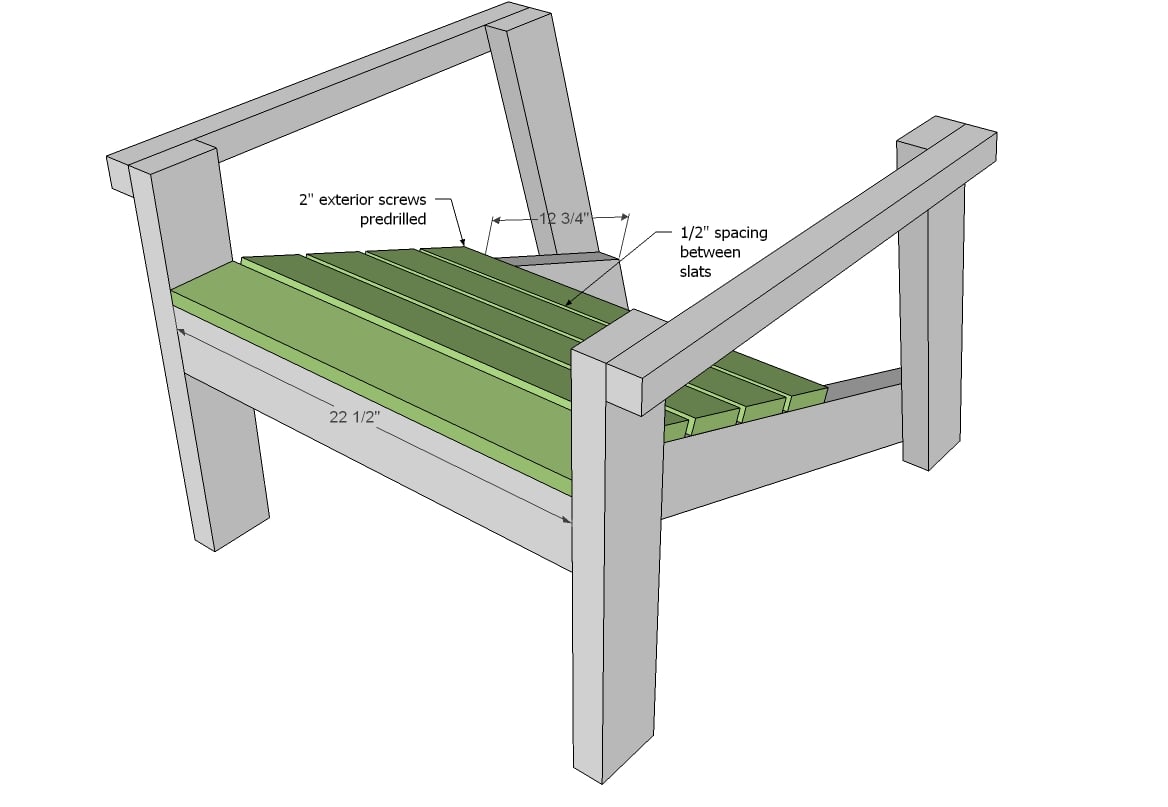
Begin at the front of the chair and attach seat slats to stretcher with 2” screws and glue. Leave a 1/2” gap between seat slats.
Step 7
Attach back support to back legs with 2 1/2” exterior screws, matching up measurements in diagrams.
Step 8
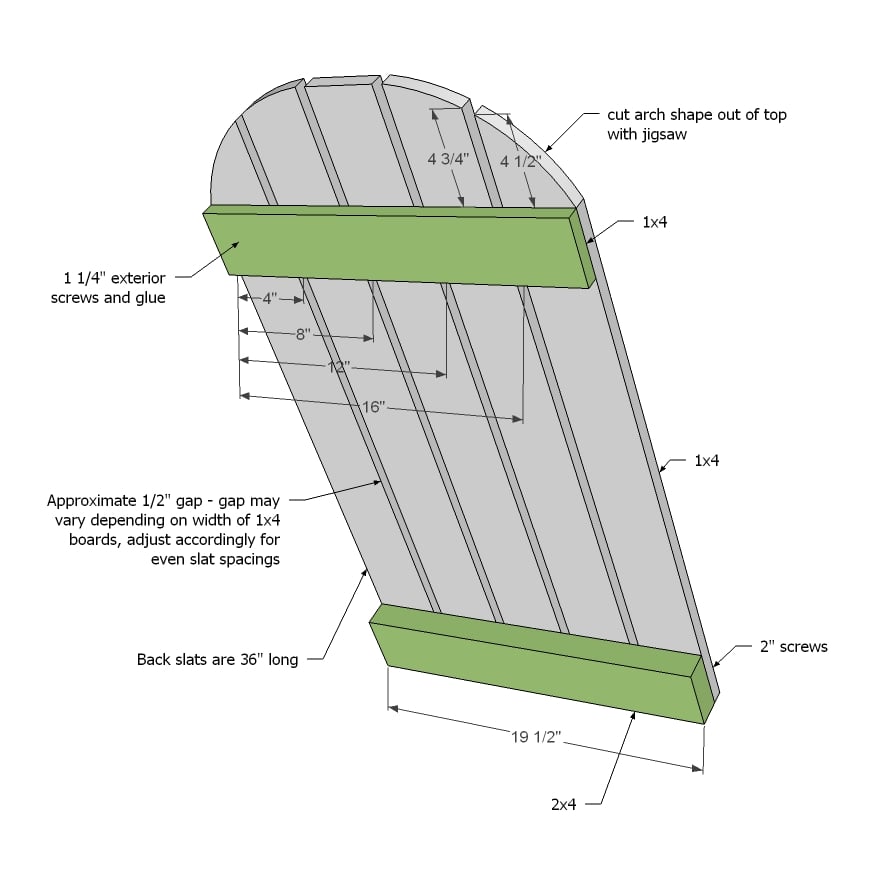
Build back by attaching all back boards to seat back base support, leaving approximately 1/2” gap in between. Then attach at top with 1 1/4” screws. Cut arch shape on back top using a large round object to guide you.
Step 9
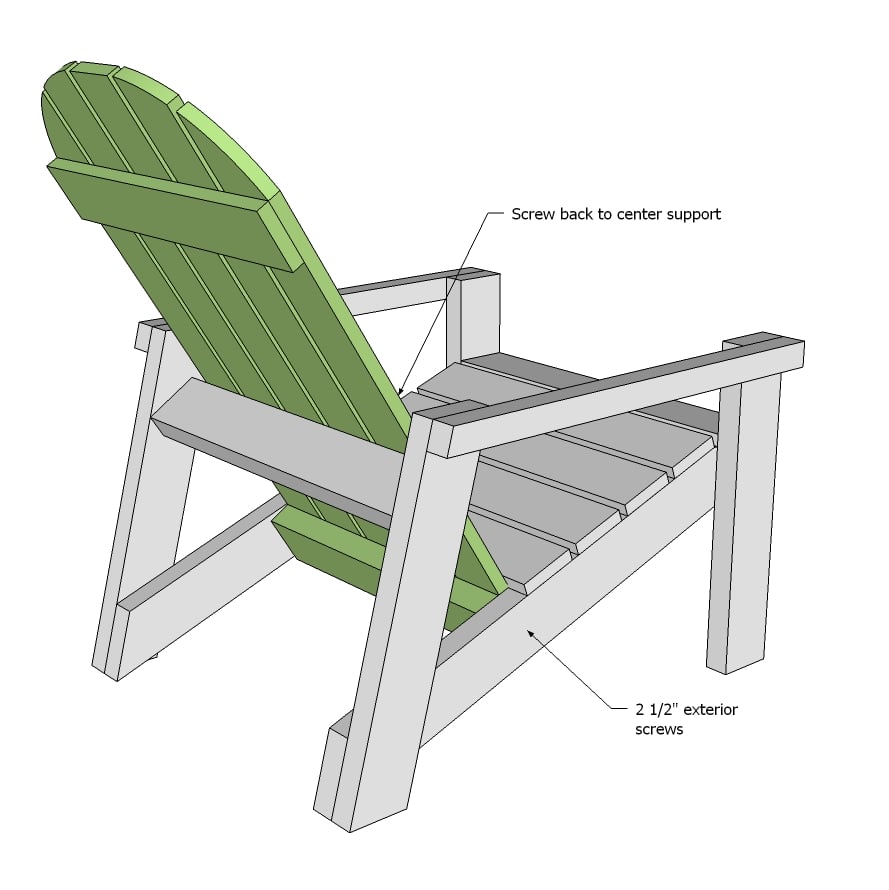
Place back inside chair and secure in place with 2 1/2” exterior screws. Also screw back to back support with 2” exterior screws.
Step 10
Secure armrests to arm supports and tops of legs with screws and glue.
Step 11
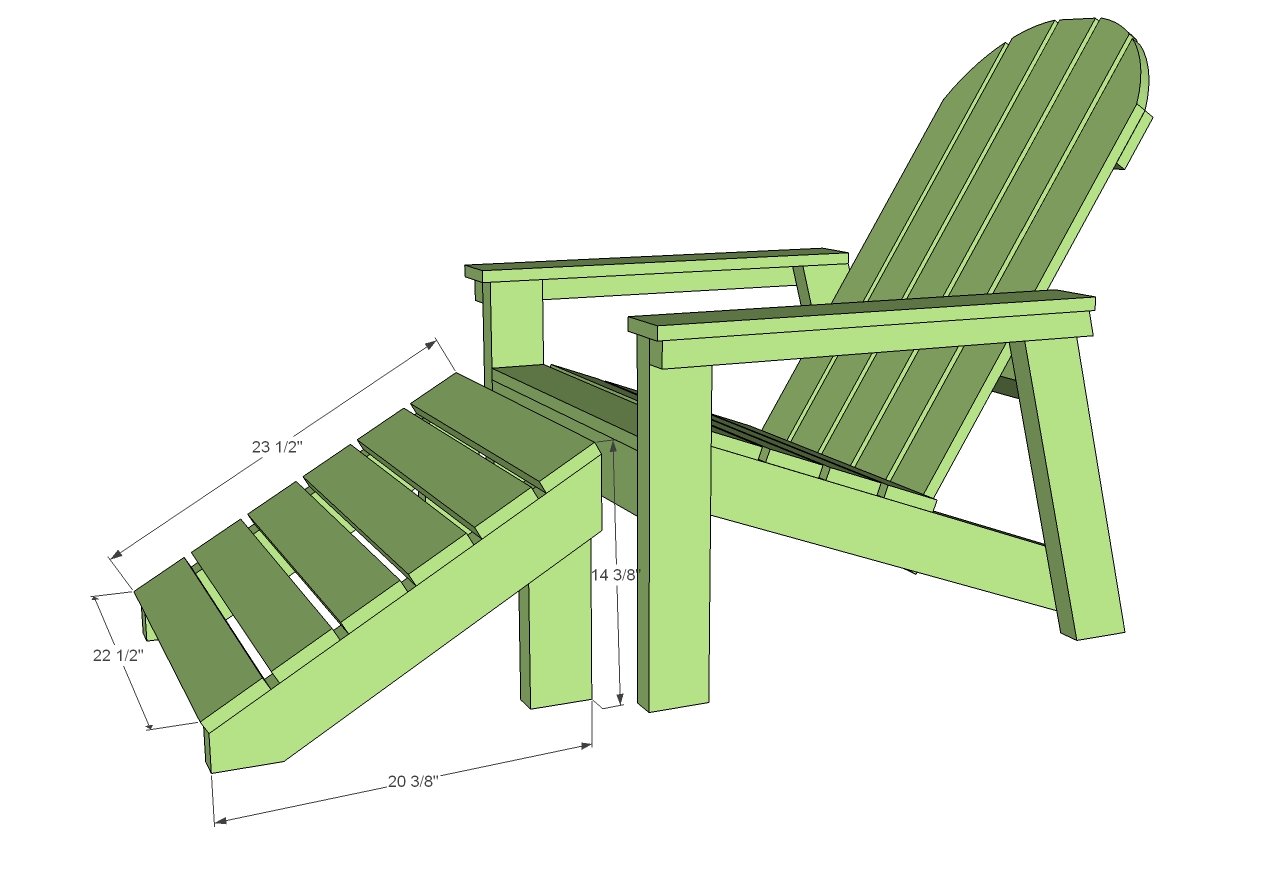
Optional Adirondack Footstool Plans
Adding a footstool to your adirondack chair will increase the comfort! We've included the plans below that match this adirondack plan.
FOOTSTOOL SHOPPING LIST
1 - 2x4 @ 8 feet long or stud length
1 - 1x4 @ 12 feet long
2” and 2 1/2” exterior screws
FOOTSTOOL CUT LIST
2 - 2x4 @ 23 1/2” long with both ends cut at 30 degrees off square, parallel to each other, long point to short point measurement (stringers)
6 - 1x4 @ 22 1/2” (top boards)
2 - 2x4 @ 13 3/4” long with one end cut at 30 degrees off square, longest point measurement (legs)
Step 12
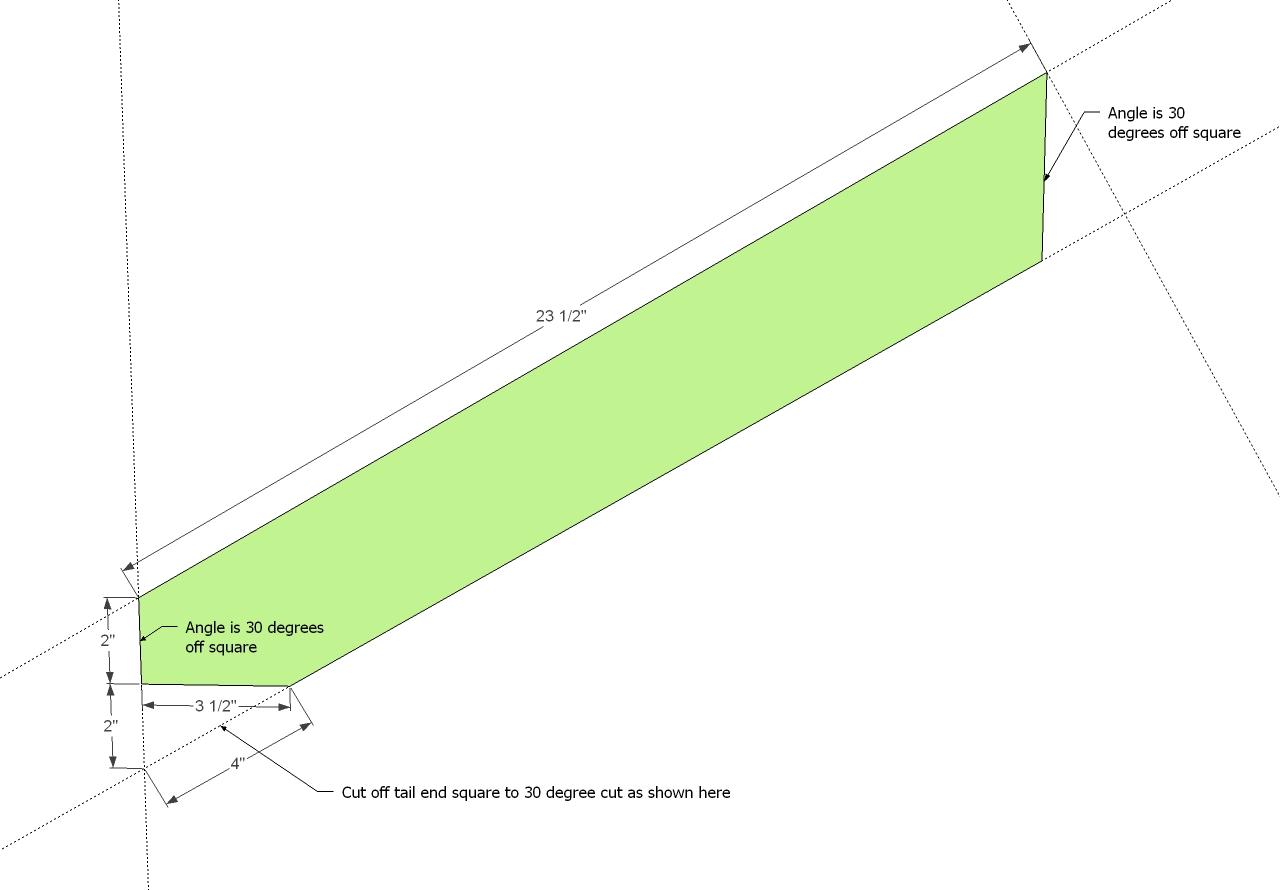
Cut the adirondack foot stool stringers with a compound miter saw first. Then use a square to mark the cut off and cut with jigsaw or circular saw.
Step 13

Use 2" screws and glue to attach the deck boards on top of the stringers.
Step 14
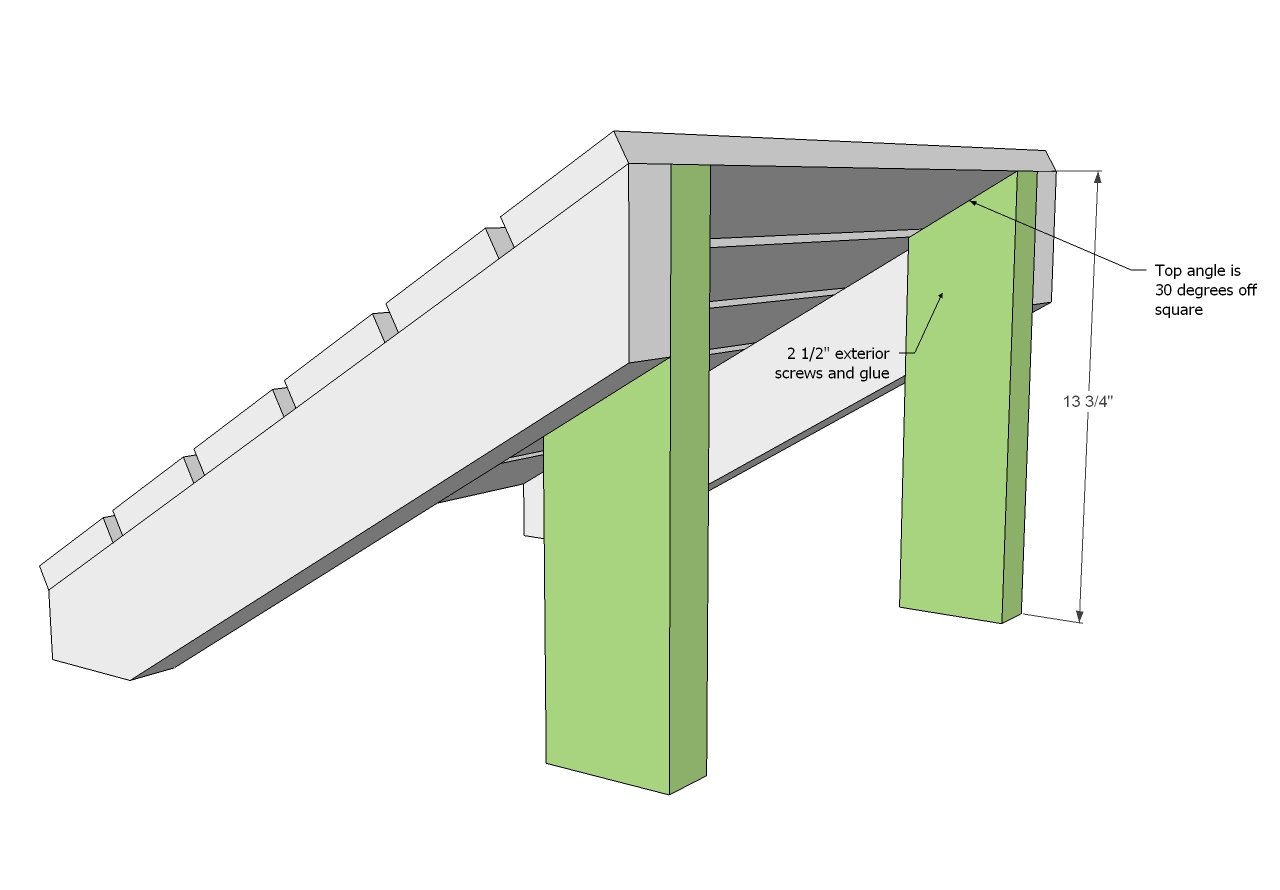
Attach legs with 2-1/2" screws to insides of the stringers to complete the footstool.
It is always recommended to apply a test coat on a hidden area or scrap piece to ensure color evenness and adhesion. Use primer or wood conditioner as needed.


Comments
dakotacreekchic
Thu, 06/06/2013 - 23:25
Awesome
Love the chairs...definitely want to make a few of these to have around the fire pit this summer...and congrats on your exciting news!! So happy for you.
JenWoodhouse.com
Fri, 06/07/2013 - 05:56
Come to my HD!
I was wondering if that was your design when I saw the DIH workshop on the calendar at my HD! I can't wait to build a couple of these... the weather has been beautiful so this workshop is coming at the perfect time!
randi
Fri, 06/07/2013 - 08:45
Super!
These are super! I'm definitely going to have to put these on the to-do list.
Any chance of adding a loveseat version to this collection?
Pursuit of Handyness
Sun, 06/16/2013 - 09:27
Really cute chair
What is the big difference between this chair and the one in your book. I was all set to build six of the one you have in your book and then I saw your instagram post. Is it just stronger because of the 2x4's?
mjc8870
Thu, 06/27/2013 - 10:06
measurementd
Are measurements correct. Some one commented that the measurements were wrong on the HD site.
mc4710a
Wed, 01/13/2016 - 06:46
Links don't work
The links don't seem to work to the Home Depot site. Do you know where I could find a copy of the plans?
In reply to Links don't work by mc4710a
shawnubis
Thu, 01/14/2016 - 11:15
Plans
I'm in the same boat. I would love to have plans for this, but the Home Depot links are dead. :(
barbpalmer
Sun, 03/20/2016 - 06:56
broken link - any update?
Still wanting to get my hands on the plans for these chairs - anyone have a copy or is there any update on the 'broken link'? Thank you!
Ana White
Thu, 01/14/2016 - 23:04
So sorry about this guys, I'm
So sorry about this guys, I'm looking into it. Thanks, Ana
In reply to So sorry about this guys, I'm by Ana White
ozaret
Sun, 01/17/2016 - 09:44
Plans
Any word on the plans? I'd like to build this chair.
DrSnuggles
Sun, 01/17/2016 - 19:04
Plans
I would really like to build these adirondack chairs but link still doesn't work? Anyone like to share the original plans since the Home Depot link doesn't work :(
thank u so much!!!
ckafer
Sat, 02/13/2016 - 07:10
Please post the plans or fix the links!
Broken links for a long time now, Ana.
theSmurfette
Fri, 02/19/2016 - 19:12
Here's a link to the plans.
Here is a link to the plans for the chair.
http://media.blog.homedepot.com/wp-content/uploads/Ana-White_HD-Adirond…
GamacheM1980
Tue, 02/23/2016 - 14:57
Thank you
Thank you so much for the plans. Now I can make some of these around my firepit outside.
GamacheM1980
Tue, 02/23/2016 - 14:55
Thank you for the plans. Now
Thank you for the plans. Now I can make these for around my firepit.
sprimack
Mon, 05/16/2016 - 11:45
Adjustable height?
Can this chalir be made taller? Didn't know if it would effect the strengh of the chair. Thanks
Sandig
Tue, 05/31/2016 - 16:28
Home Depot DIH Adirondack Chair
I am unable to access the plans for this chair and am planning to build this weekend. How can I go about gaining access to the plan? Thanks!
BullDog1968
Thu, 08/25/2016 - 18:11
Great design.
I need to make a variation of these. I had a stroke a while back and need the seat level and slightly higher.
mrpaul32@yahoo.com
Fri, 08/11/2017 - 12:59
Confusied 2 in cut 20 degree side
the streacher I have 31 7/8 from long point 35 degree to short point 20 degree. Can somebody provide measurements advice 2 in cut on 20 degree. is it on long sid e I am just bit confused
thanks
cbizzle
Sat, 06/06/2020 - 12:40
Did you have figure this out…
Did you have figure this out? I'm in the middle of this cut right now and the measurements just don't make sense.
In reply to Confusied 2 in cut 20 degree side by mrpaul32@yahoo.com
commodon
Sat, 06/27/2020 - 14:07
Step One - start with 33" in length
Without knowing the overall length of the 2x4 I found step one a bit confusing, but I figured out if I start with a 33" 2x4, then cut the 35 degree angle, then measure 31 7/8 then cut the 20 degree angle, it became easy to cut the 2" at a right angle. I've since built four chairs using this method.
DMAC in TX
Sat, 01/06/2018 - 17:57
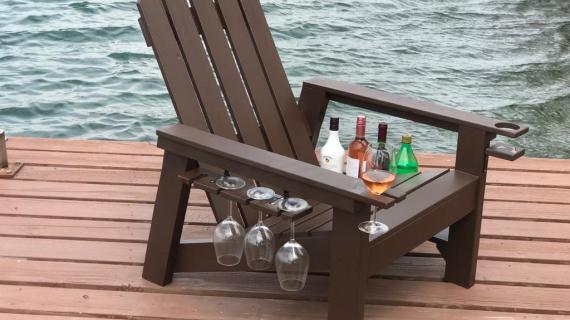
Wine- A-dironack Plan
Thanks for sharing the pdf plans. I cannot upload any pics (its asking for an URL/link), but hope you don't mind I made some modifications to your easy to make and comfortable Adirondack design. Changes:
1. Arm rests are now 1x8. Added holes and slot to hold wine glasses (2) front and (2) back
2. Added a bottle shelf left side with metal band
3. Customized the paint for neighbor who is a huge Oklahoma University fan (Red with OU decals)
Twk812001
Tue, 01/09/2018 - 10:33
Can't access plans
Bought all materials but can't access plans to build
Twk812001
Tue, 01/09/2018 - 10:35
Can't access plans
Bought all materials but can't access plans to build
In reply to Can't access plans by Twk812001
Ana White
Sat, 01/13/2018 - 18:00
http://www.ana-white.com
http://www.ana-white.com/sites/default/files/Ana%20White%20-%202x4%20Ad…
Ajhelmink
Thu, 03/25/2021 - 13:21
Wheel
How big is the wheel you added and how did you attach it
randy4par
Thu, 03/01/2018 - 11:34
Adirondack made from Wine Barrel
Does any have Plans?
jonnystokes
Mon, 06/17/2019 - 10:03
How to protect from weather
I made a set of this. I would like to know the best way to protect them as I made them from untreated 2x4's.
Hallqu99
Tue, 08/20/2019 - 08:02
Your link doesn't work. I…
Your link doesn't work. I was going to show you another chair that your plans could easily be modified into but I can't link the photo.
jckarp3
Fri, 03/20/2020 - 13:07
Great plan! I made two of…
Great plan! I made two of these with slight modifications. I used 2x4s instead of 1x4s, where called for. I also used 1x6 fence posts for the back rest, seat (cut to 1x4) and arm rests, so it's pretty solid and heavy which is good considering the high winds we get in Colorado. I was a little confused in determining the actual length of the pieces in Step 1 but eventually started with a 33" piece which gave me room to make those angled cuts. Btw, after I made my first one my wife said, "That's great! I want five more." :-)
welshyboy
Sat, 04/04/2020 - 15:54
Perfect reading chair
Thanks for the great plan great way to do some fun work during lockdown
ajaynital302@g…
Wed, 04/22/2020 - 09:03
Wood Type
What type of wood do you recommend for this and other exterior wood projects. Look for a high quality look. Thanks
phj1616
Mon, 05/25/2020 - 19:08
Love the plans. Very easy to…
Love the plans. Very easy to follow. I am ready to stain them. Prior to doing so I have sealed the bottom of the legs with epoxy to keep moisture from penetrating from underneath.
KyleChristensen01
Sun, 06/07/2020 - 11:54
Advice: Reverse steps 6 and 7
This is a great, easy to follow plan. I made 5 of these chairs, and painted them vivid colors. My friends and neighbors love them. I used a Kreg jig to hide almost all fo the screws, for an even cleaner overall look.
My only recommendation is to reverse steps 6 and 7. Fastening that back support in first will help ensure you maintain the right distance between sides at the rear of the chair as you assemble the seat boards. This is a lesson learned through experience... I came up 1/2 inch short on 1, and couldn't set the back in place. It wasn't a huge deal to correct, but still... something better avoided.
asartori2391
Mon, 07/27/2020 - 04:29
Just built 6!
These chairs are relatively simple to make - this is only my second time trying to make furniture, so this was a great tutorial to follow. I did find the video to be a helpful complement to this to figure out which side the screws should go on, etc. Like a lot of the comments, the stringer board was probably the most difficult to figure out. I was initially worried that they'd be a little on the smaller side, but was super happy to find that the size is perfect! I decided to paint mine black, and WOW do they look good. My husband told me they look like they'd cost $300 a piece from Restoration Hardware... now THAT'S a complement! I think it ended up costing right around $30-35 per chair in lumber, then a bit more if you factor in the wood screws, wood filler and paint. Time spent to build and prep for painting (so filling with wood filler and a final sanding) was closer to 6 hours per chair, then painting was about 2 hours per chair. I may be a little on the slower side (I tend to measure exactly where the pilot holes will go so everything looks consistent and symmetrical), but this is not a quick afternoon project (especially if you build six!!), but absolutely worth it!
gomez124
Mon, 12/07/2020 - 19:31
Love these chairs I made two…
Love these chairs I made two of them with the foot stool and a table very simple to follow
petey10000
Thu, 04/08/2021 - 14:08
Wrong dimensions?
Made one of these chairs as a lockdown project. 2 points to make
1 this is a heavy duty chair the pictures don’t really seem to do justice to the 2x4 timber used.
2 some of the dimensions are definitely wrong. Look at step s 8 and 11 and do some simple maths.
The other thing I noticed was cutting the stringers. This didn’t seem to work quite right - this may have been my cutting though!
Pleased with final result though