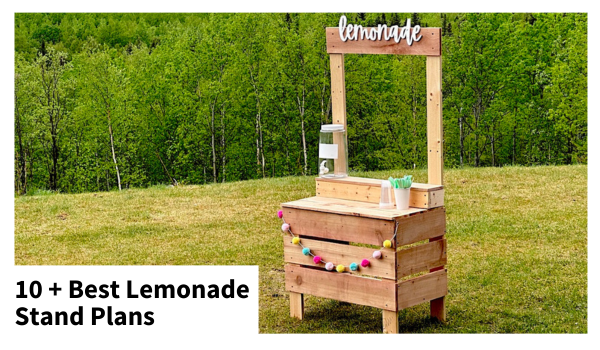
Are you looking for lemonade stand ideas? Have you considered building your own lemonade stand?
Building your own lemonade stand has some awesome benefits that'll make you glad you took on the project!
It's Fun! building your own lemonade stand is a great way to unleash your creativity. You get to design and personalize it however you want. Choose the colors, add decorations, and make it a reflection of your unique style. It's like your very own mini masterpiece!
It's Good Life Lessons! Give the kids a real life lesson in making money plus the management and the basics of running a small business. Plus, who doesn't love making money while sipping on delicious lemonade?
You Really Can Make Money! Yep, lemonade stands, when done right - professional looking and clean, with the right product, can make real money for your kids, or for an organzation.
Whether you're in it for the creative outlet, the money-making potential, or simply the joy of seeing the smiles on your kids face, building your own lemonade stand is a fantastic experience. Embrace the fun, meet some neighbors and make some new friends.
Here are the best designs for, whether you are a beginner woodworker or more advanced!
Lemonade Stand Ideas and Plans to Consider
1. Lemonade Stand from 1x12 and Fence Pickets
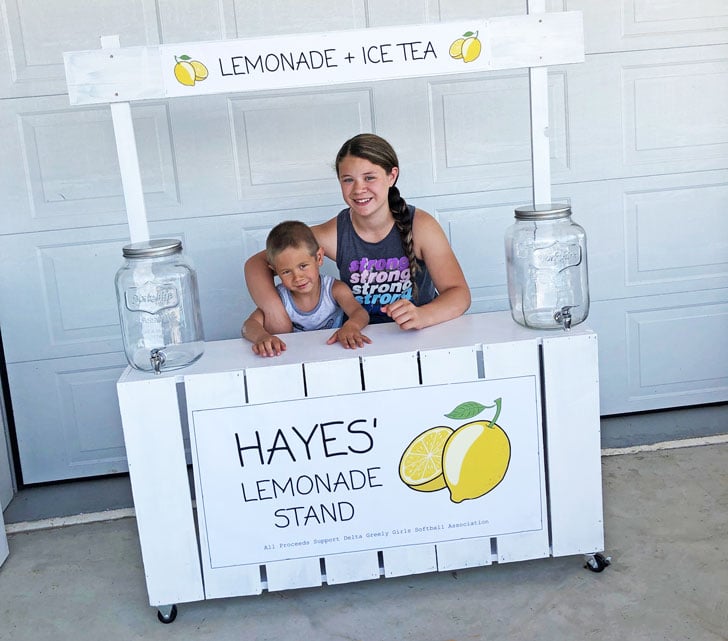
Image Credit: Ana White Plans
| Skill Level: | Beginner |
|---|---|
| Tools Needed: | Tape Measure, Saw, Brad Nailer, Drill, Sander, Paint |
| Materials: | 1x12, cedar fence pickets 1x3, nails, screws, caster wheels (optional) |
An easy to build lemonade stand using 1x12s and cedar fence pickets. The sign can be removed and the base becomes a giant crate for transporting and storage. This lemonade stand can be built using reclaimed materials too! Free step by step plans from Ana White.
2. Lemonade Stand from 2x4s and Fence Pickets
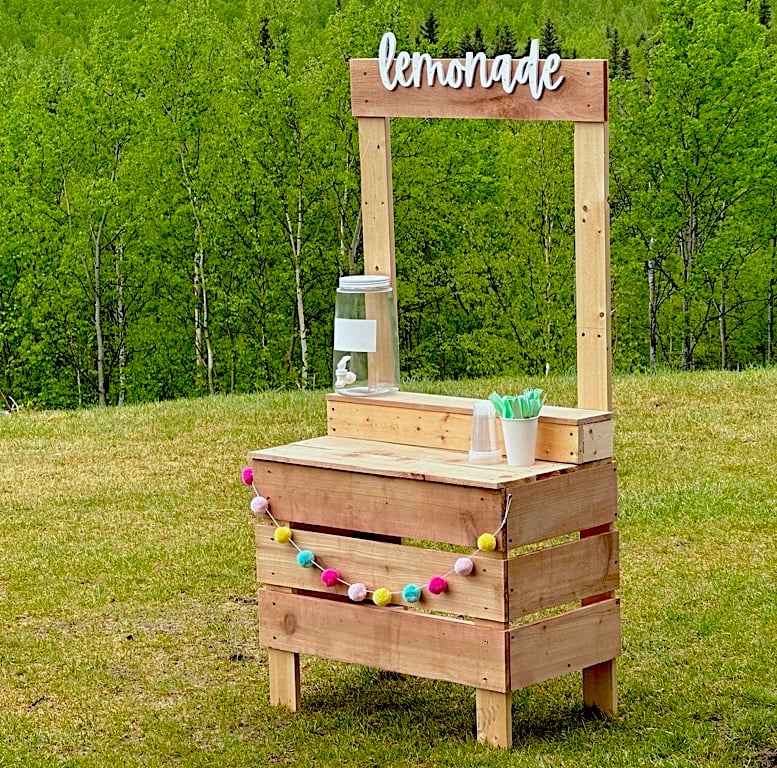
Image Credit: Ana White Plans
| Skill Level: | Beginner |
|---|---|
| Tools Needed: | Tape measure, saw, drill, sander |
| Materials: | 2x4s, cedar fence pickets, self tapping screws |
I wanted to create a lemonade stand that is super durable and easy to build - something that could be left out in the weather and still last a childhood. This simple plan is it! I love the horizontal run boards too. You'll love how quick and easy this lemonade stand is to build. Free step by step plans with diagrams and photos from Ana White.
3. Lemonade Stand from Crates
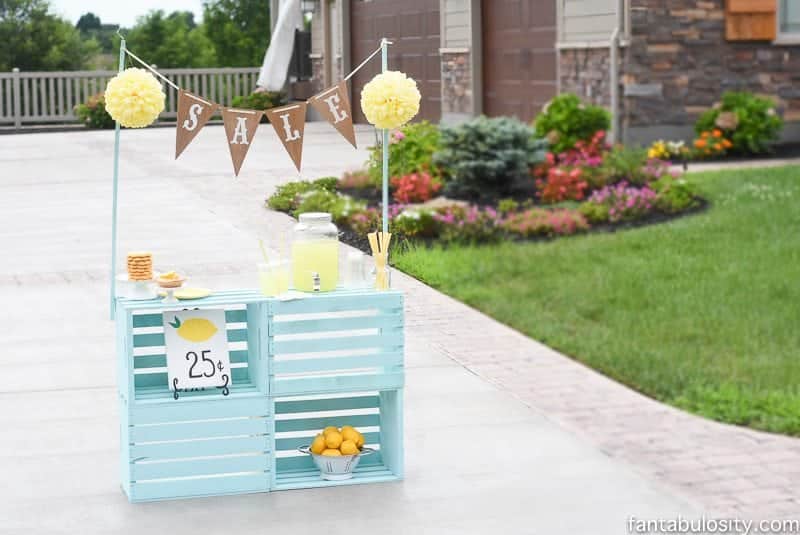
Image Credit: Fantabulosity
| Skill Level: | Beginner |
|---|---|
| Tools Needed: | Hammer, Safety Glasses |
| Materials: | Wood Crates, Wood Dowels, Nails, Spray Paint |
If you are looking for a super easy DIY project, try using four wood crates and nailing together to create your own lemonade stand!
4. Cape Code Lemonade Stand
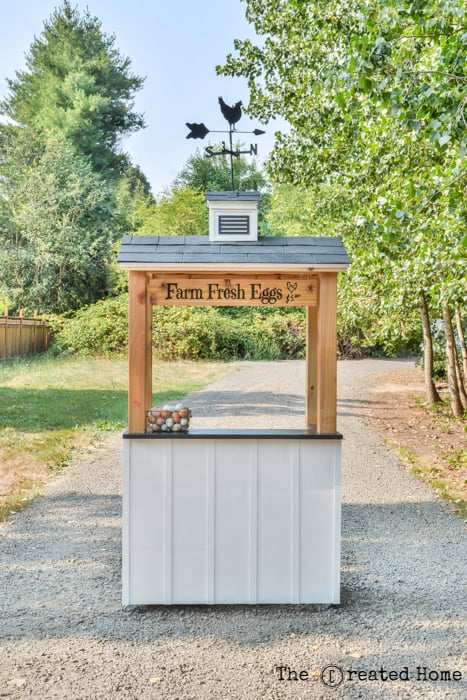
Image Credit: The Created Home
| Skill Level: | Intermediate |
|---|---|
| Tools Needed: | Circular saw, drill, kreg jig, nailer, sander, tape measure |
| Materials: | 1x and 2 x material, roofing, casters |
Sure, you could be like everyone else and build a lemonade stand from pallets. Or you can take it to the next level with this cape cod barn inspired stand, complete with cupola. Bring out the entrepreneur in your little ones with a totally stylish storefront. - Premium Plan on Spruc'd
5. Lemonade Bar
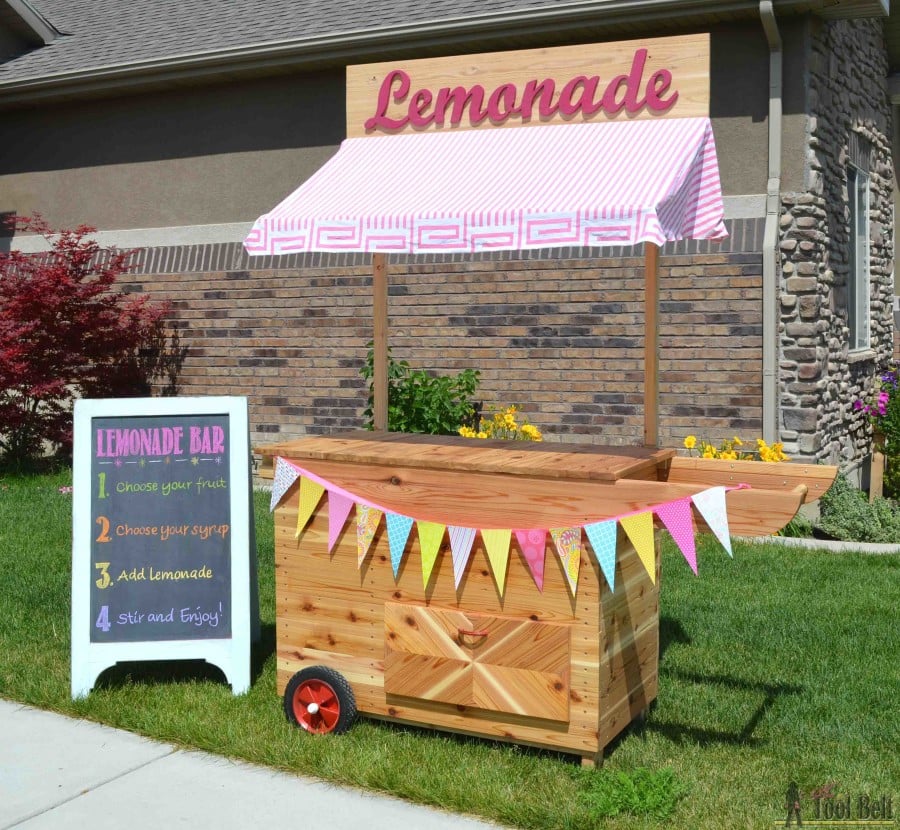
Image Credit: Her Toolbelt
| Skill Level: | Advanced |
|---|---|
| Tools Needed: | Cicular saw, drill, kreg jig, nailer, sander, tape measure |
| Materials: | 1x and 2x material, cedar fence pickets, plywood, fabric, wheels |
Build an ulitmate party station or as seen here, you can easily convert it to a lemonade bar!
6. Storefront Lemonade Stand
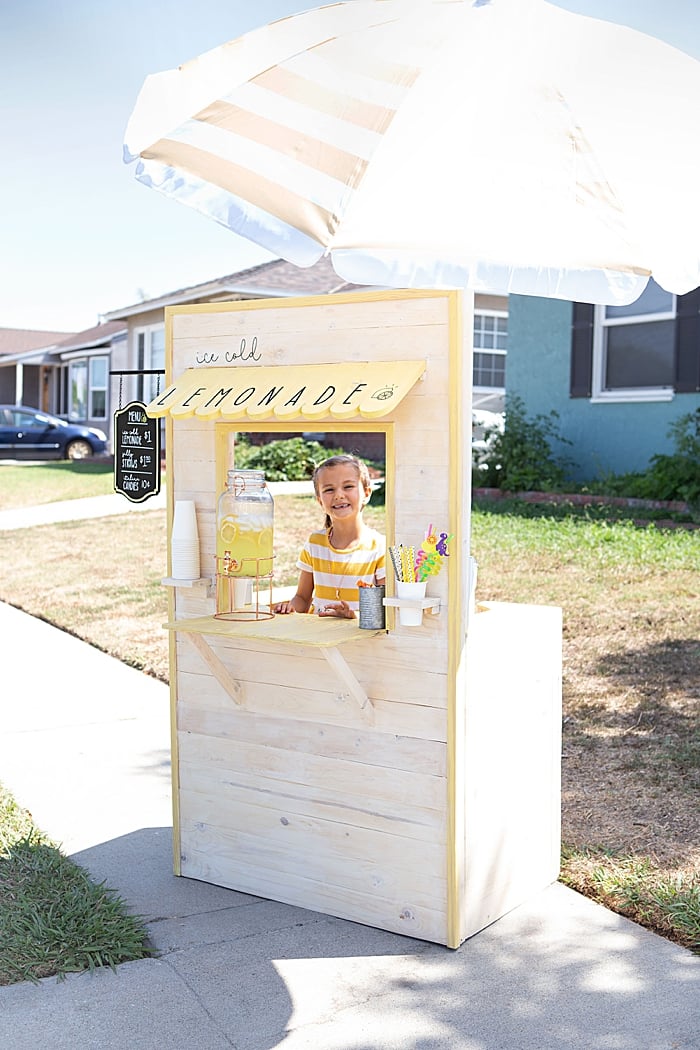
Image Credit: Something Turquoise
| Skill Level: | Intermediate |
|---|---|
| Tools Needed: | Circular saw, drill, jig saw, nailer, sander, tape measure |
| Materials: | 1x and 2x material, plywood, trim |
Building the stand is one thing. Creating all the extra cuteness takes it to a whole new experience!
7. Lemonade Stand with Roof

Image Credit: A Beautiful Mess
| Skill Level: | Intermediate |
|---|---|
| Tools Needed: | Cicular saw, drill, nailer, jig saw, kreg jg, tape measure |
| Materials: | 3/4" and 2x material, casters |
Such a sweet design. Love the added roof and chalkboard front!
8. Barn Style Lemonade Stand
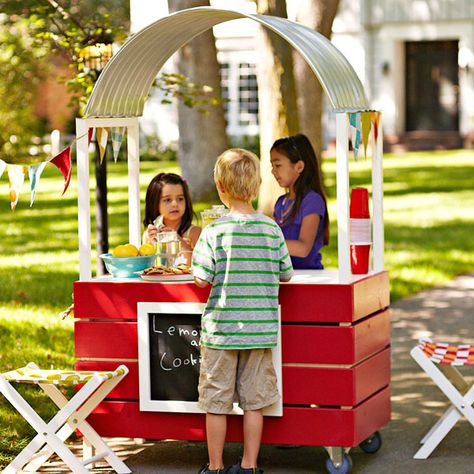
Image Credit: Lowe's
| Skill Level: | Intermediate |
|---|---|
| Tools Needed: | Cicular saw, drill, sander, tape measure |
| Materials: | 1x and 2 x material, plywood, casters, window well |
Build your kids the coolest lemonade stand on the block. It's fully loaded with a chalkboard sign, awning, built-in cooler, and casters for easy transport.
9. Collapsible Lemonade Stand
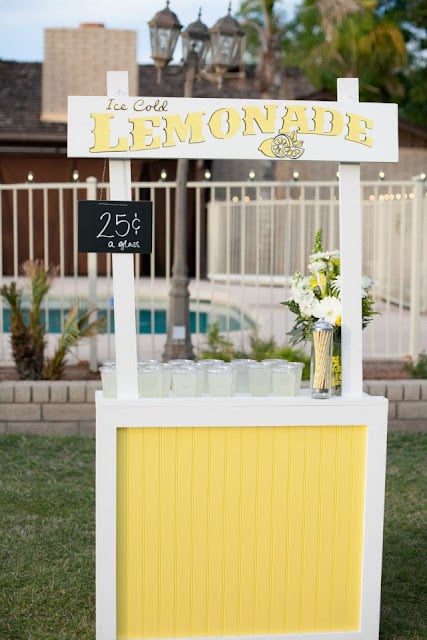
Image Credit:Craftify It
| Skill Level: | Beginner |
|---|---|
| Tools Needed: | Cicular saw, drill, nailer, sander, tape measure |
| Materials: | 1x material and paneling |
Such a great idea to make a collapsible lemonade stand to make it portable for multiple events and locations!
*This plan is not free
10. Super Simple Crate Lemonade Stand
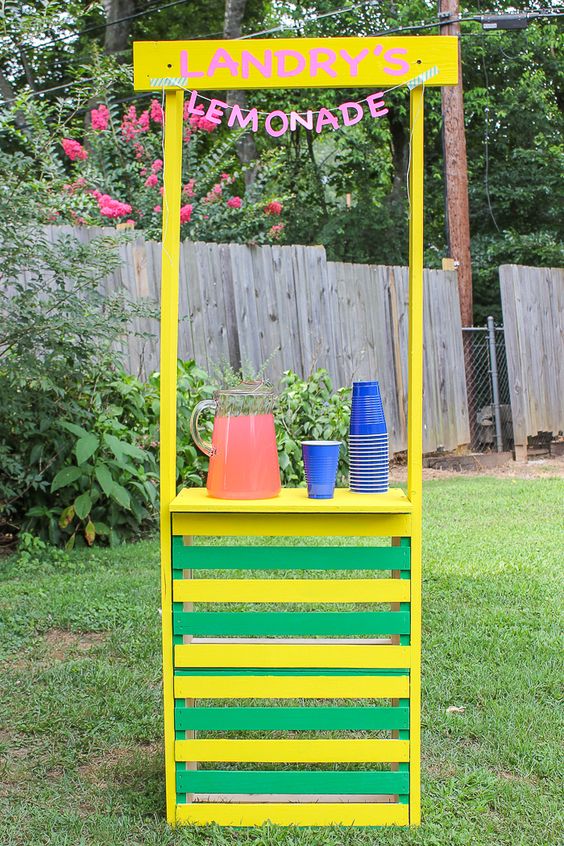
Image Credit: Rain on a Tin Roof
| Skill Level: | Beginner |
|---|---|
| Tools Needed: | Cicular saw, drill, sander |
| Materials: | 1x material, 2 crates, plywood |
If you don't have a lot of time to create a sweet little lemonade stand, this is a great design option that will save time and money!
11. Pallet Lemonade Stand
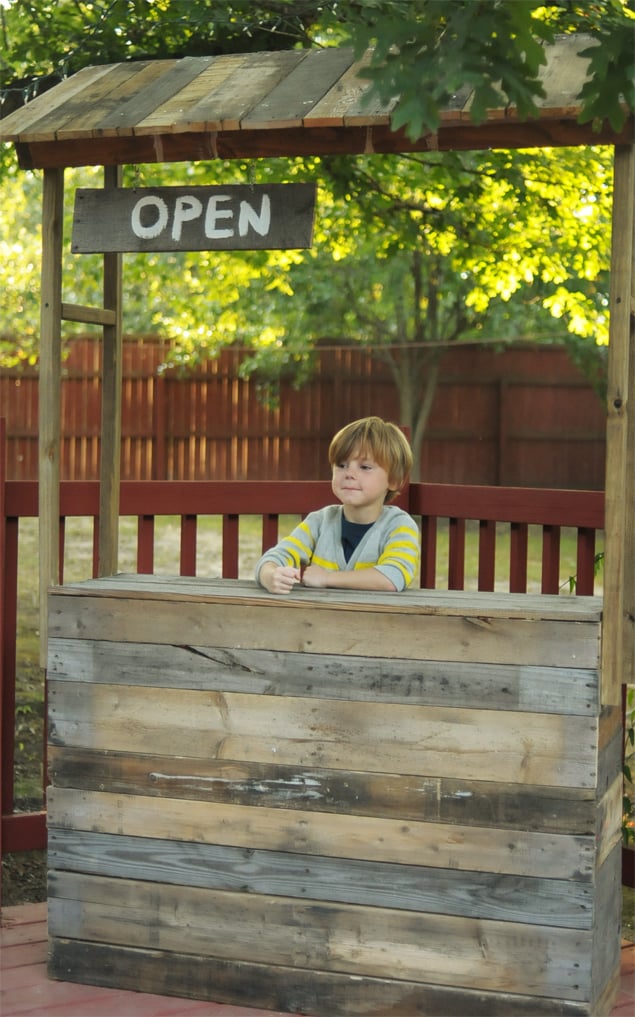
Image Credit: The Clueless Girl
| Skill Level: | Beginner |
|---|---|
| Tools Needed: | Circular saw, drill, hammer, sander, tape measure |
| Materials: | 2x material and pallets |
This is a super cute and inexpensive project if you have some pallets to repurpose!
12. Wooden Crate Lemonade Stand
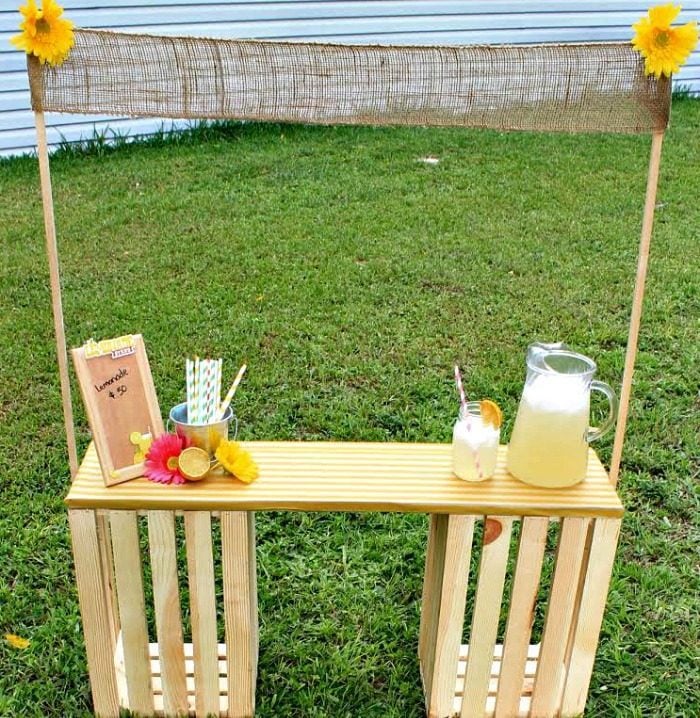
Image Credit: Divine Lifestyle
| Skill Level: | Beginner |
|---|---|
| Tools Needed: | Circular saw, drill, sander |
| Materials: | Wood dowel, wood crates, wrapping paper, burlap |
Quick and easy way to build a lemonade stand! Love that it would be easy to take down and store away or repurpose the crates.
