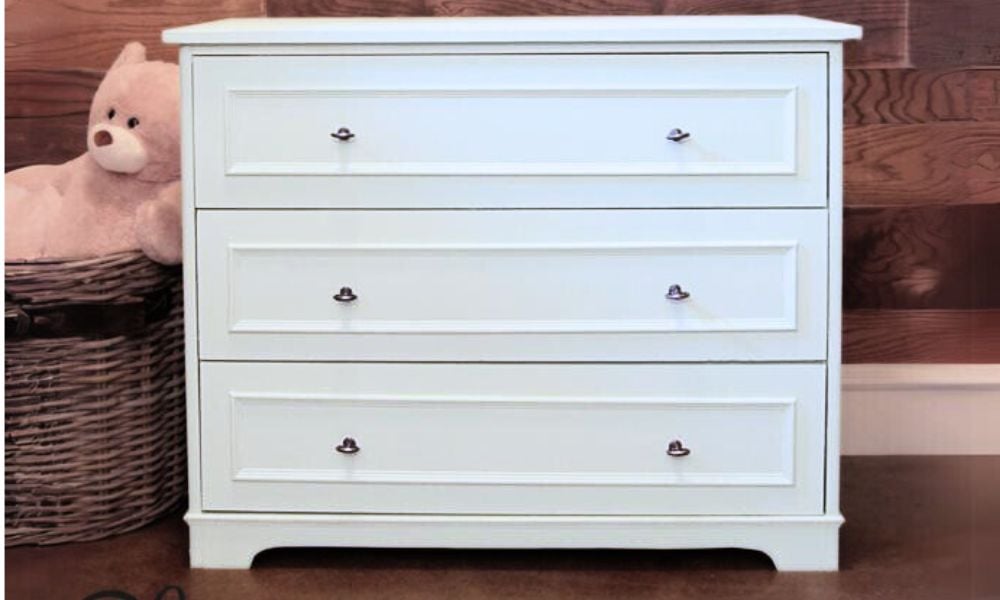
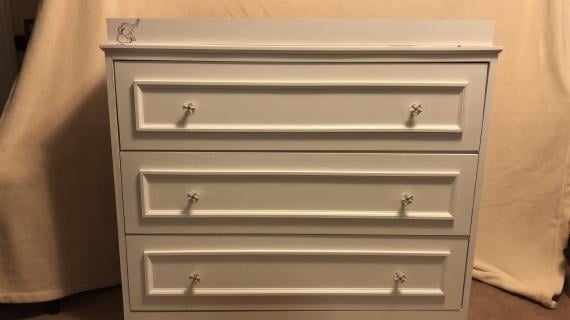
Free plans to build a dresser or changing table (with topper!) from Ana-White.com - this beautiful little dresser is perfect as a changing table too. Step by step plans with diagrams, shopping list, cut list and lots of reader submitted photos.
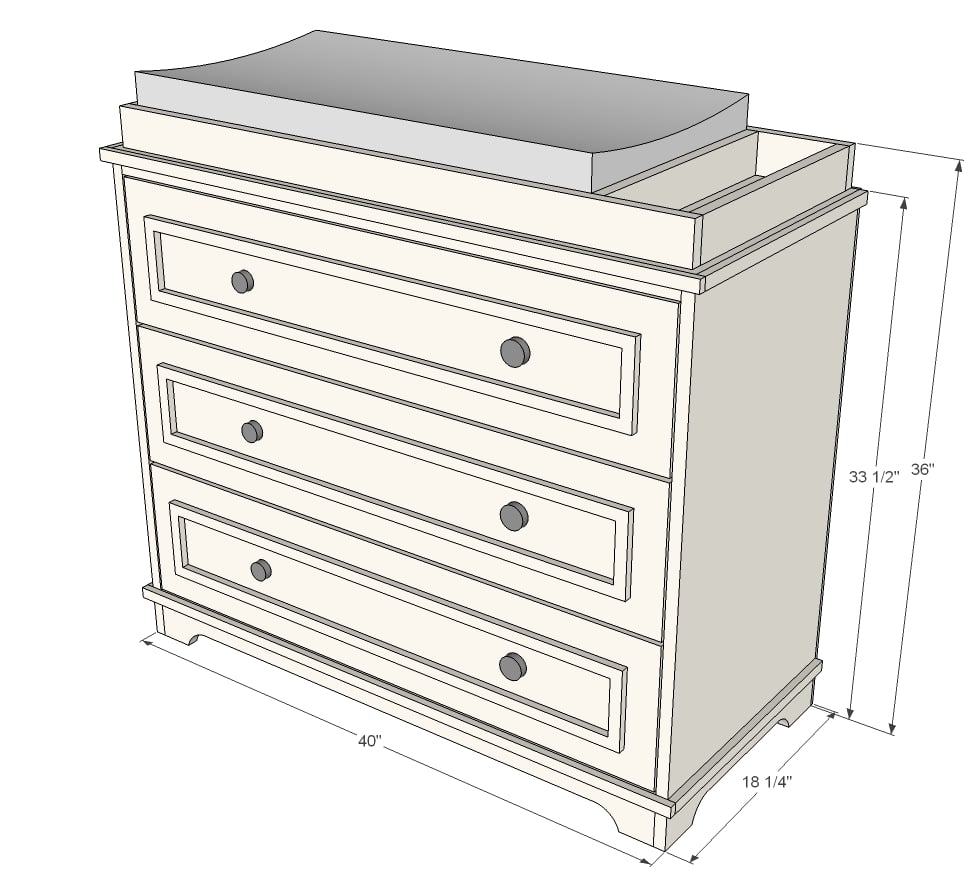
Preparation
- 1 - 1x10 @ 10 feet long (for drawer faces)
- 26 feet (I'd buy a little more to be safe) of 1x6 for drawer boxes
- 1 - 1x4 @ 8 feet long
- 4 - 1x2 @ 8 feet long
- 2 - 1x3s @ 8 feet long (for topper - can also use 1x4s here)
- 1 sheet of 3/4" plywood
- 1 sheet of 1/4" plywood
- 36 feet of moudling for drawer faces/top edge and bottom edge
- 3 sets 16" euro style drawer slides
- 6 knobs
- 1-1/4" pocket hole screws
- 1" and 1-1/4" brad nails
- wood filler or edge banding to finish plywood edges
- 2 - 3/4" plywood 18" x 32 3/4" (sides)
- 1 - 3/4" plywood 18" x 40" (top)
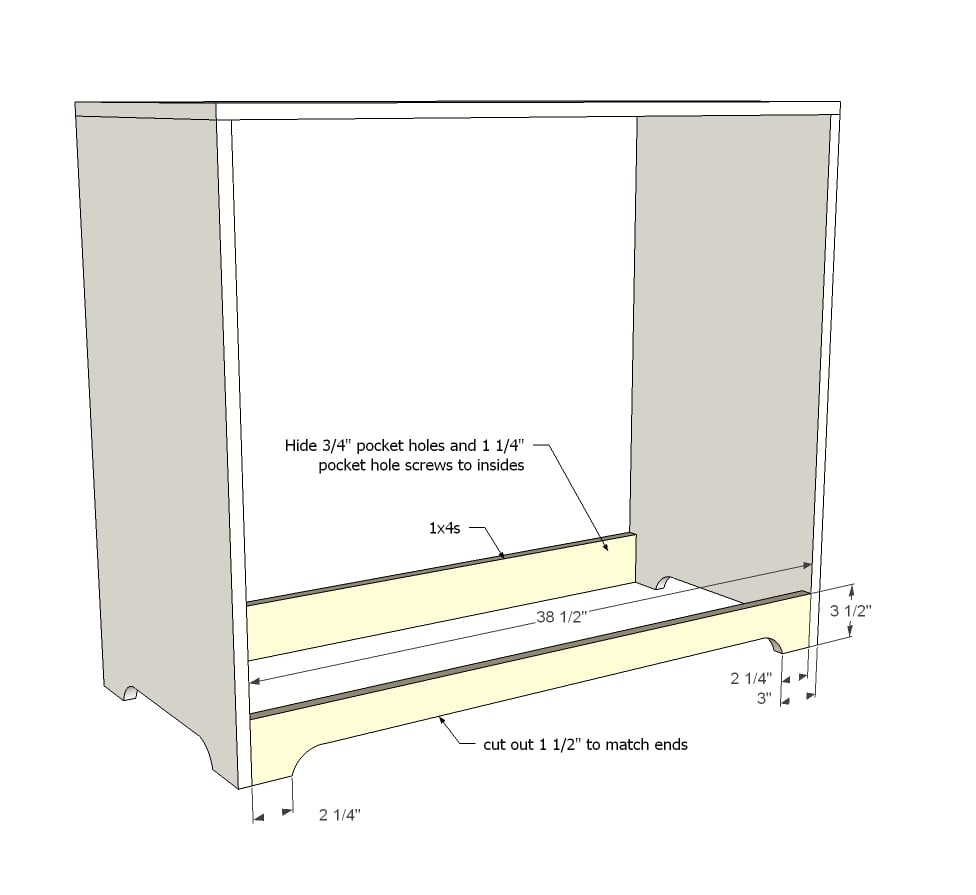
- 2 - 1x4 @ 38 1/2" (footers)
- 4 - 1x2 @ 38 1/2" (top supports and between drawer face supports)
- 1 - 1/4" plywood @ 40" x 33 1/2"
DRAWERS
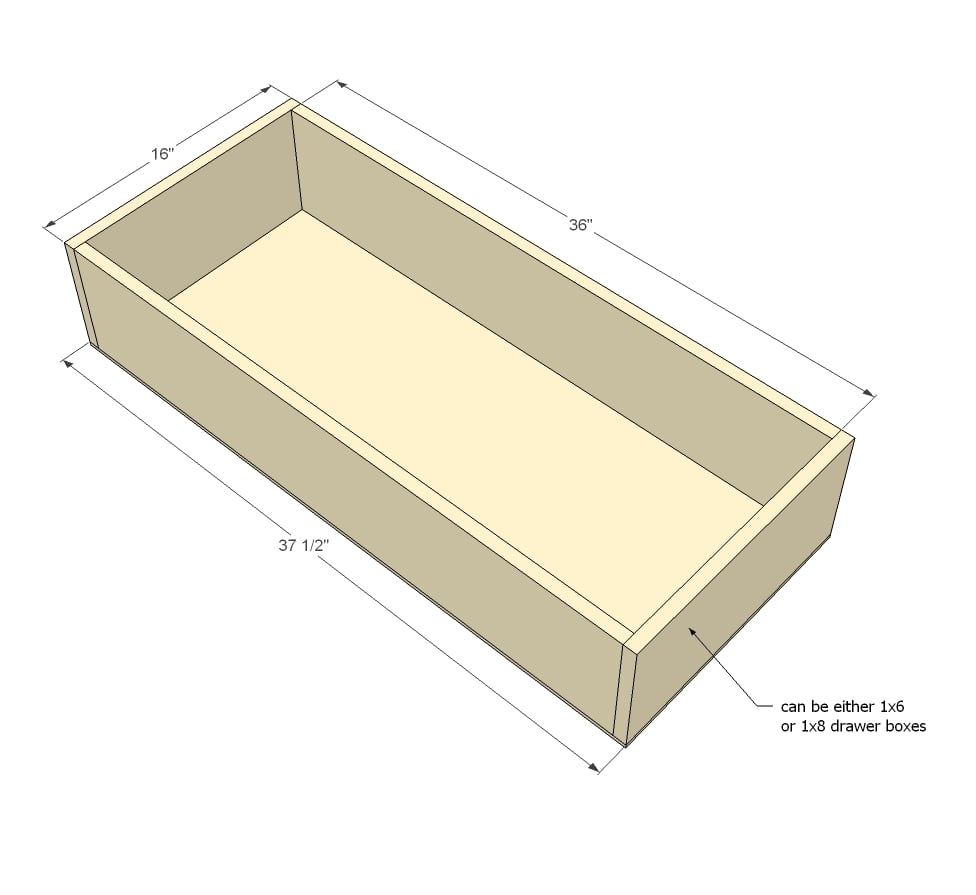
- 6 - 1x6 @ 16" (sides)
- 6 - 1x6 @ 36" (front/back)
- 3 - 1/4" plywood @ 16" x 37 1/2" (bottoms)
- 3 - 1x10 @ 38 1/4" (drawer faces)
TOPPER
- 3 - 1x3 @ 16"
- 2 - 1x3 @ 39"
Please read through the entire plan and all comments before beginning this project. It is also advisable to review the Getting Started Section. Take all necessary precautions to build safely and smartly. Work on a clean level surface, free of imperfections or debris. Always use straight boards. Check for square after each step. Always predrill holes before attaching with screws. Use glue with finish nails for a stronger hold. Wipe excess glue off bare wood for stained projects, as dried glue will not take stain. Be safe, have fun, and ask for help if you need it. Good luck!
Instructions
Step 1
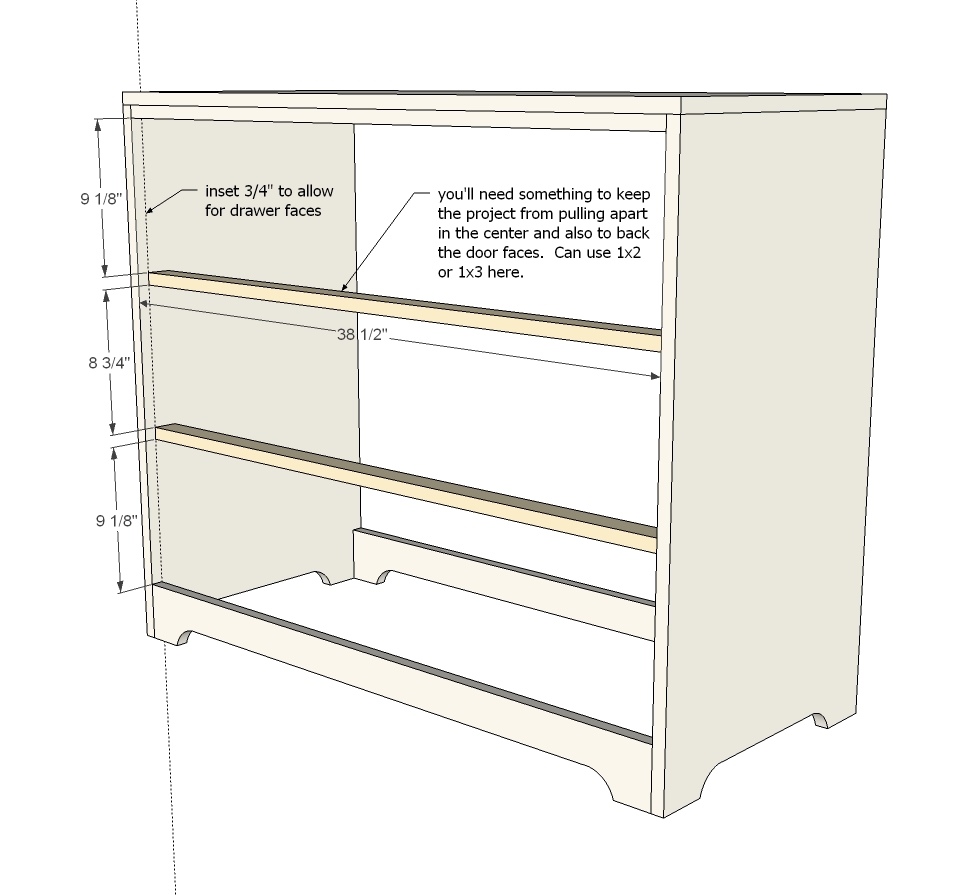
Start by attaching the sides to the top. I definitely recommend 3/4" pocket holes and 1-1/4" pocket hole screws here - the joint is just so much better and is hidden and so much easier to make - and since this project doesn't have a face frame, it will help keep the project square. If you are cutting out the base, take a second to jigsaw the sides out now. NOTE: For a stained finish, you will want to add edge banding to the front edges of the sides before assembly.
Step 2
Step 3
Step 4
Step 6
Step 7
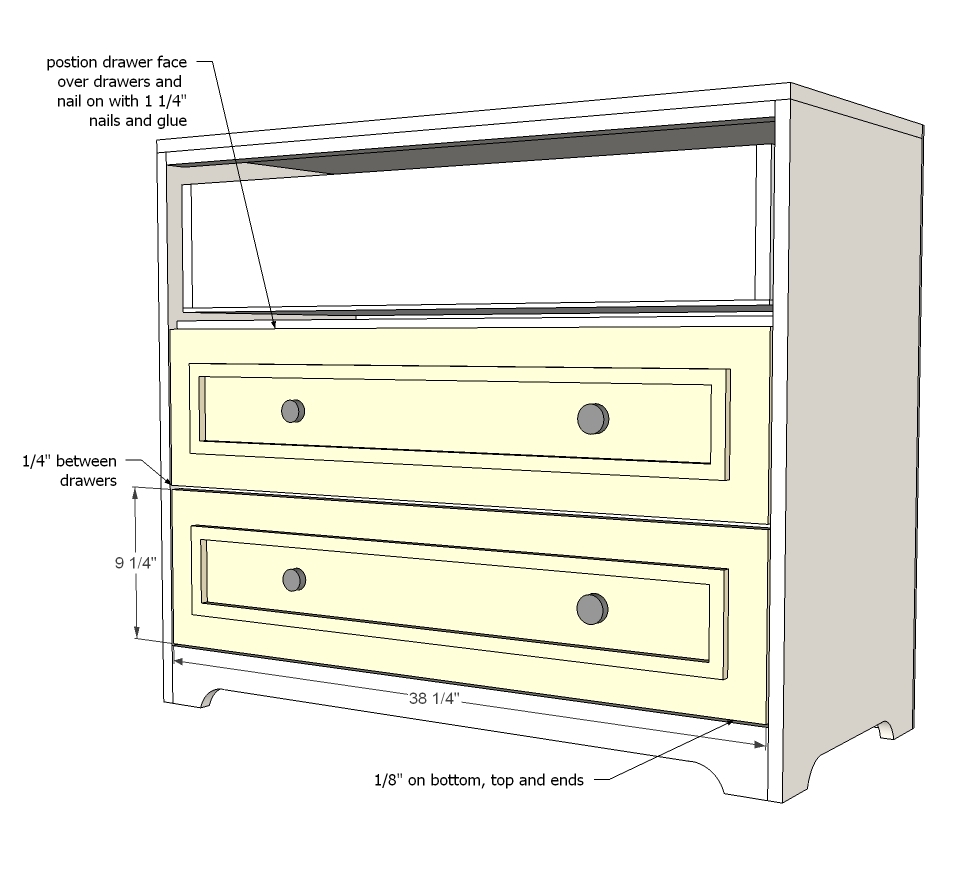
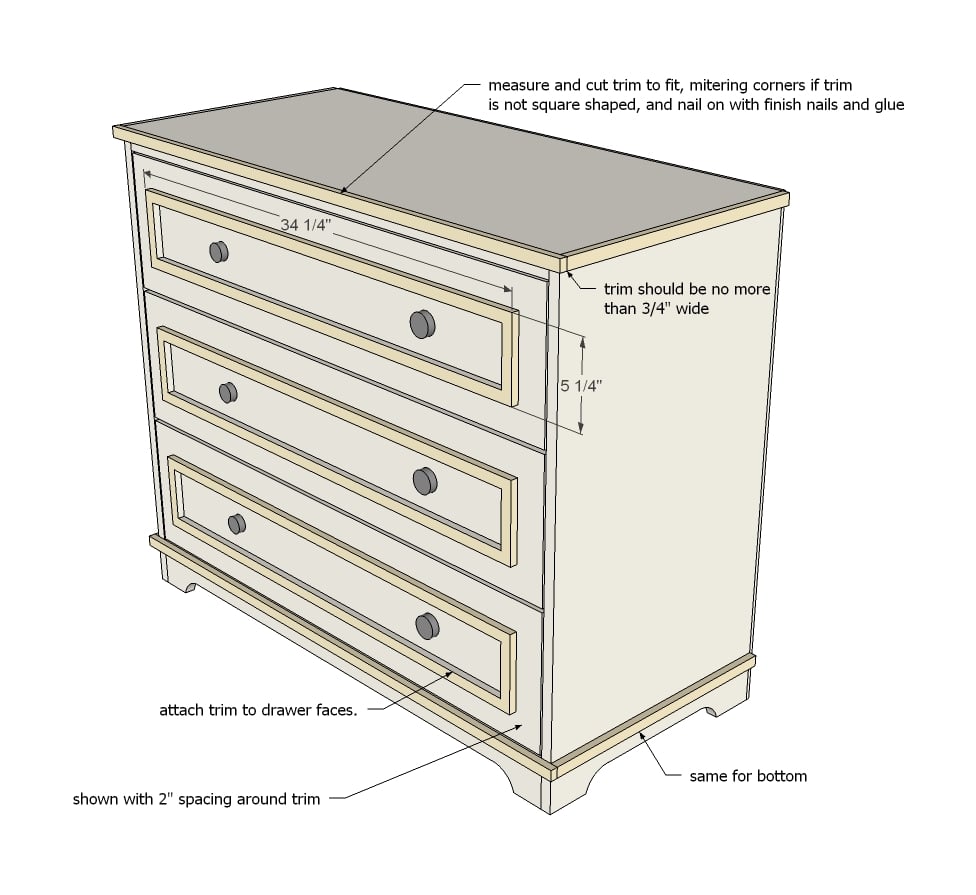
Attach drawer faced to fronts of drawers, allowing for a 1/4" gap in between drawers. You can use a nailer and 1-1/4" finish nails to attach, then open the drawer and add a few screws from the inside. Another tip is to install the knobs first so you don't have to drill through double thickness for the drawer fronts (as most knobs only have a bolt designed for 3/4" thick drawer faces). Dress the drawers up with trim or moulding if desired.
Step 8
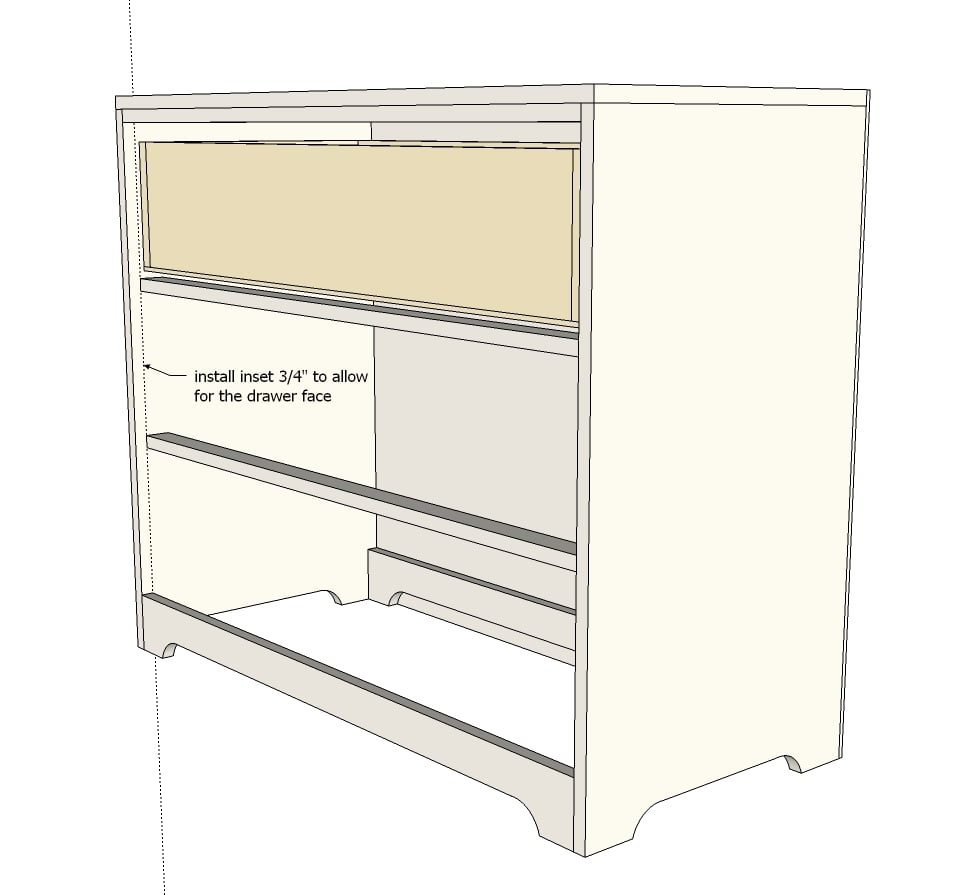
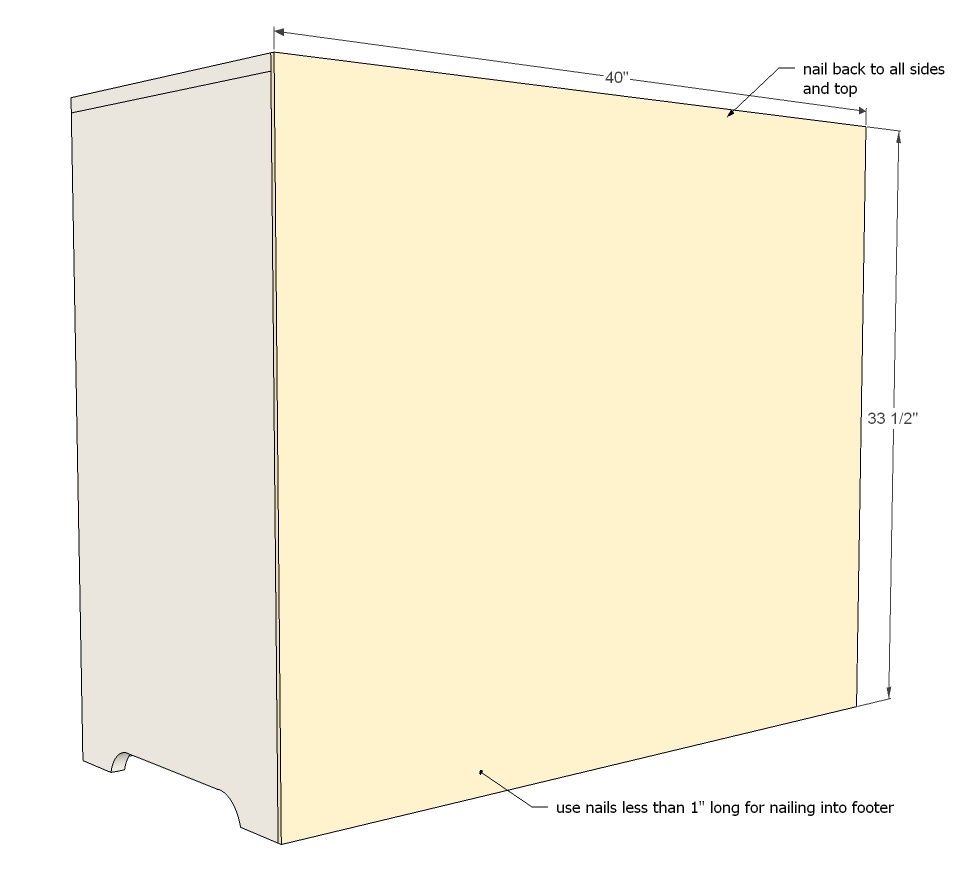
The back could have been installed at any time, but I like to leave it off until after the drawers are installed just to make reaching inside easier. The down side is the back does help keep the project square - so if your project is not square, it may make sense to put the back on earlier (around step 3).
Step 9
It is always recommended to apply a test coat on a hidden area or scrap piece to ensure color evenness and adhesion. Use primer or wood conditioner as needed.






Comments
DecorSanity
Wed, 11/06/2013 - 11:58
Love it!
Great details on the drawer fronts, above the base, and the cut-outs on the base. This is a very versatile dresser plan!