


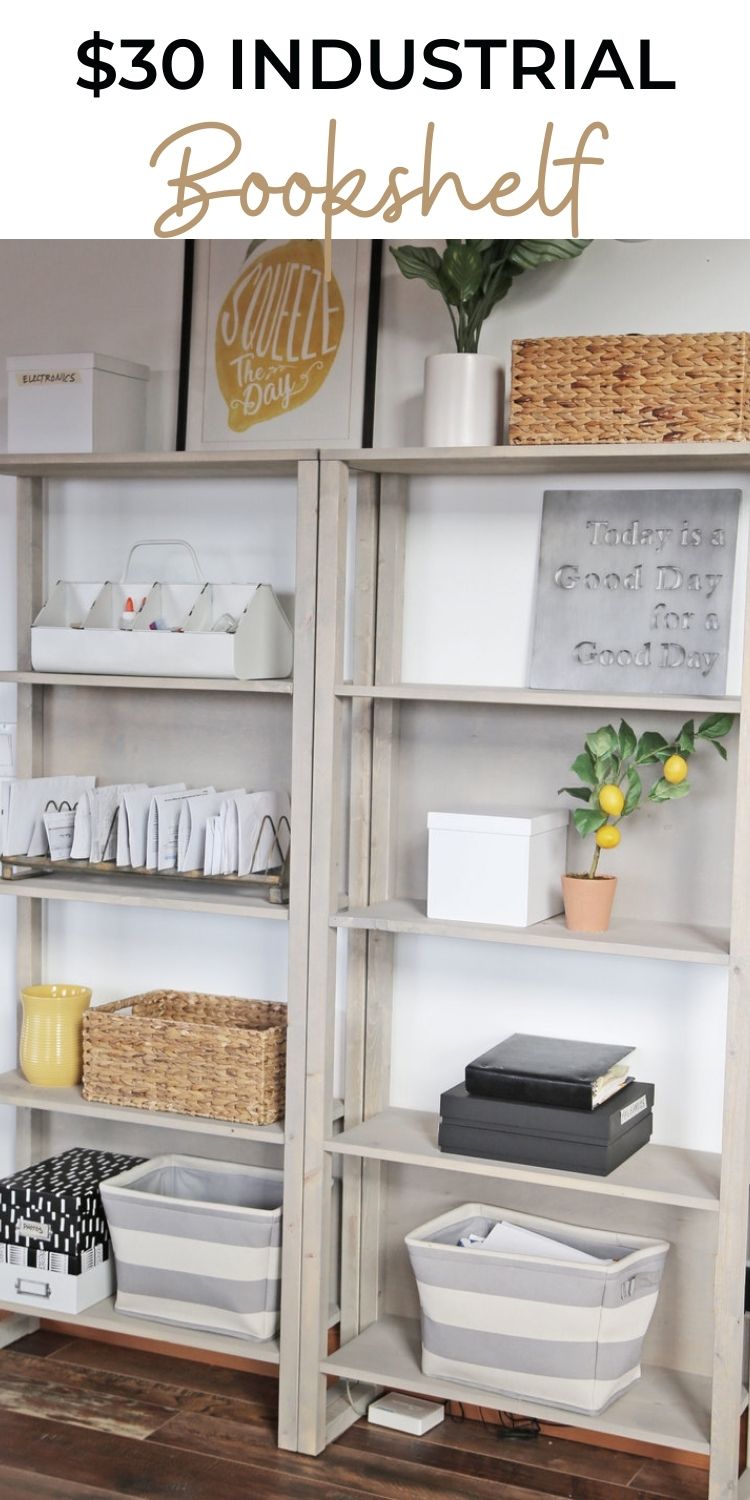
Build this gorgeous industrial bookshelf for just $30 a piece! Open bookshelf, narrow bookshelf. Beginner plans by ANA-WHITE.com
Industrial Bookcase Highlights
- Inexpensive, only about $30 to build
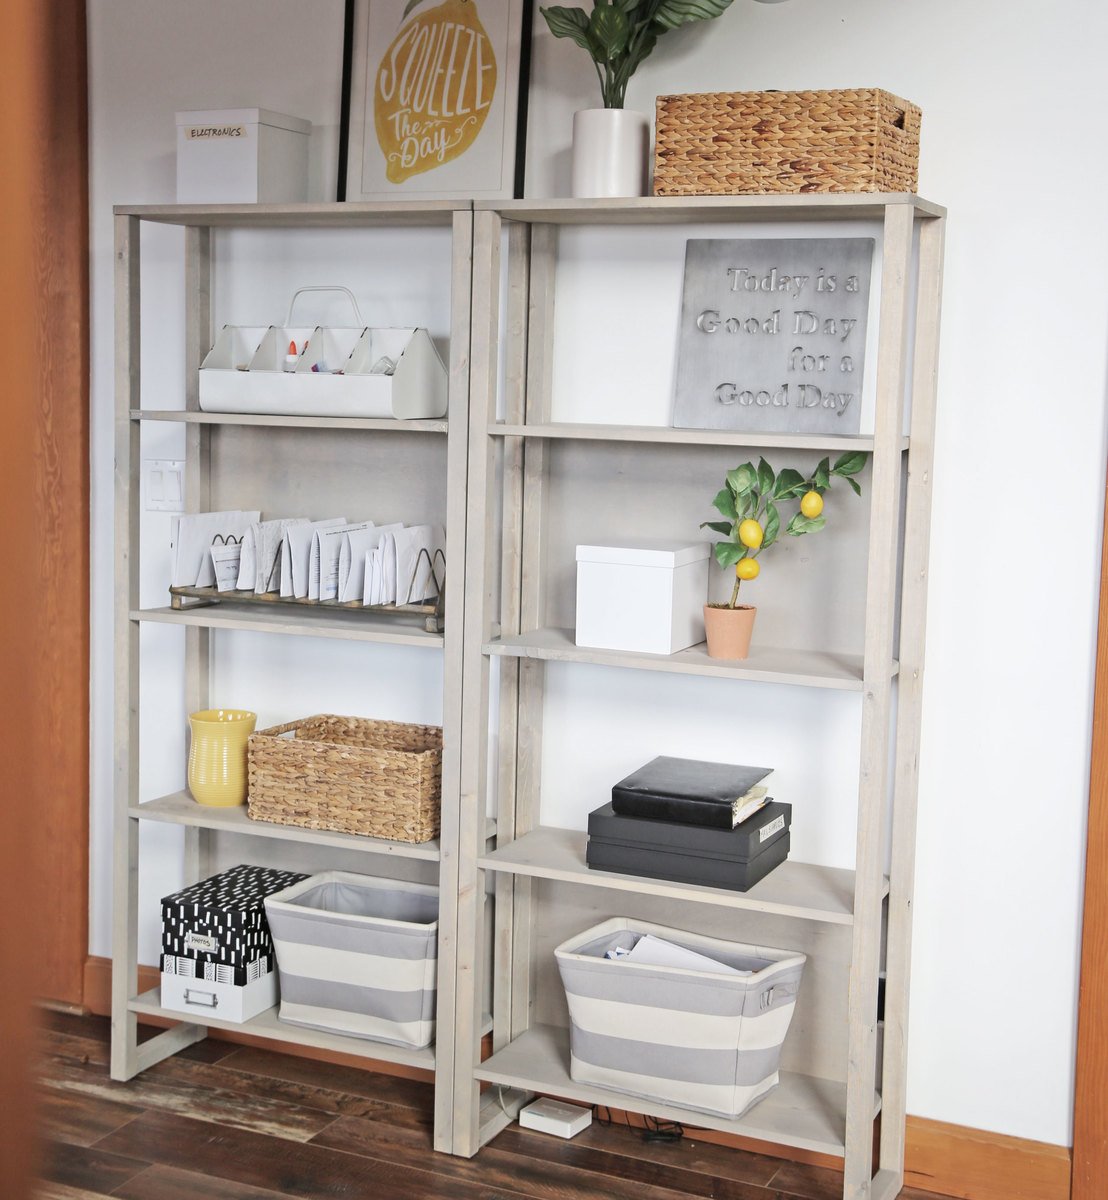
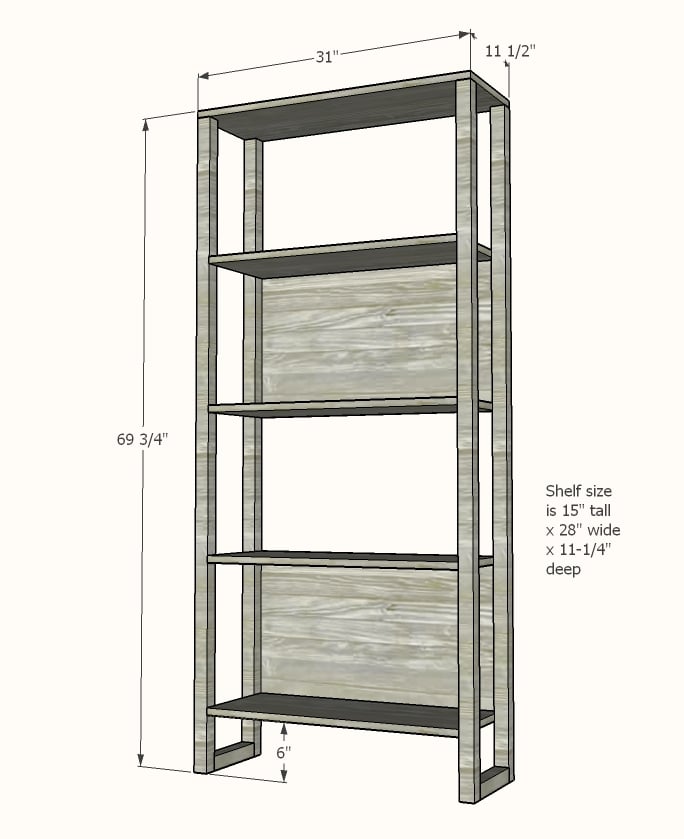
- Features four large, roomy shelves and a top
- Designed by a Mom for Moms - it's easy to clean underneath and the shelves are extra tall so you can actually reach things and put them away easily
- Works with lots of styles - farmhouse, industrial, modern, rustic
- Build your own and choose your own paint or stain!
- Open design makes rooms feel larger while providing lots of storage options
- Easy to clean underneath with high bottom shelf
- Back panels add design and structure - this bookshelf is very sturdy
- Only need basic woodworking tools - a drill, saw, brad nailer (or hammer) and Kreg Jig
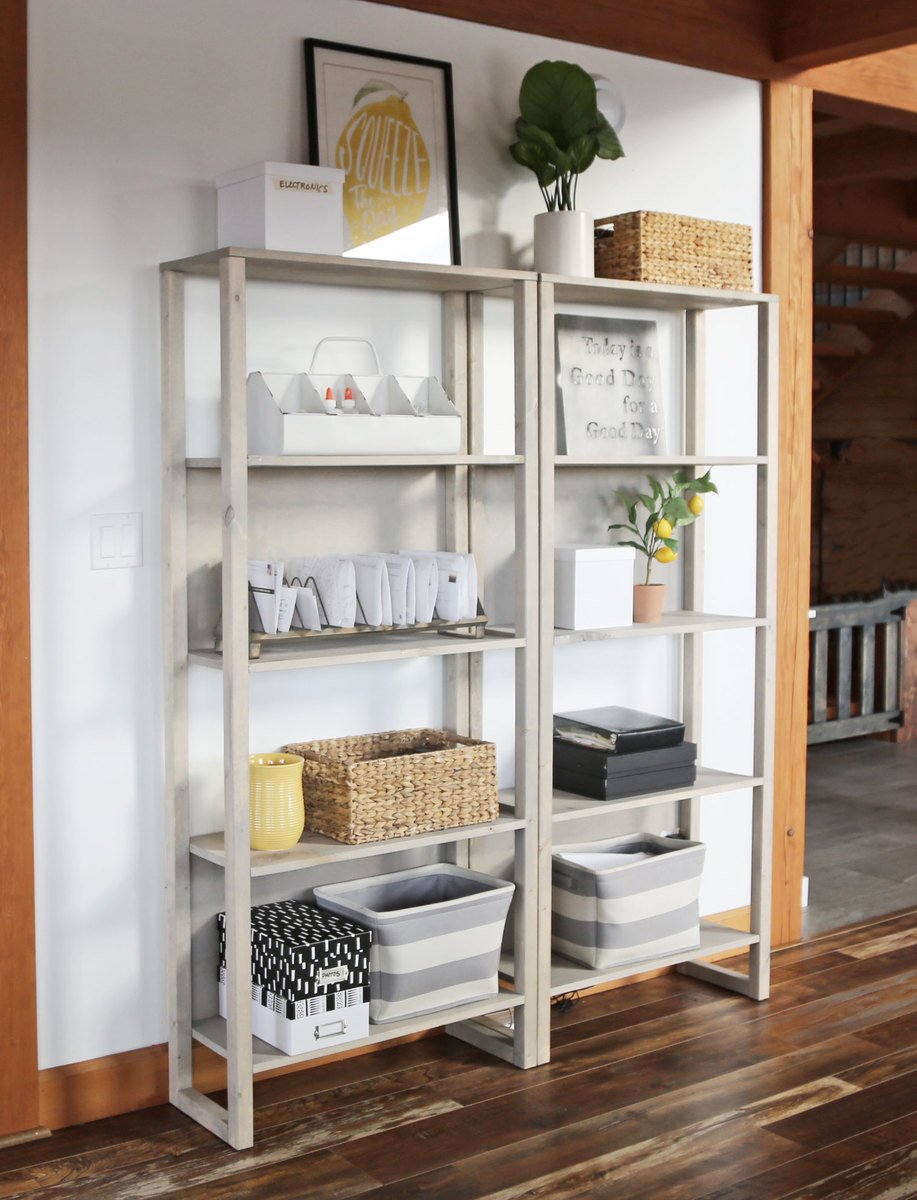
I needed some storage desperately in my home office area. Since my office area is open to the rest of the home - in a narrowish passage between the great room and dining room - something light and airy was definitely in order! I love me a quick and inexpensive project - so I designed this industrial bookcase using only about $30 in materials!

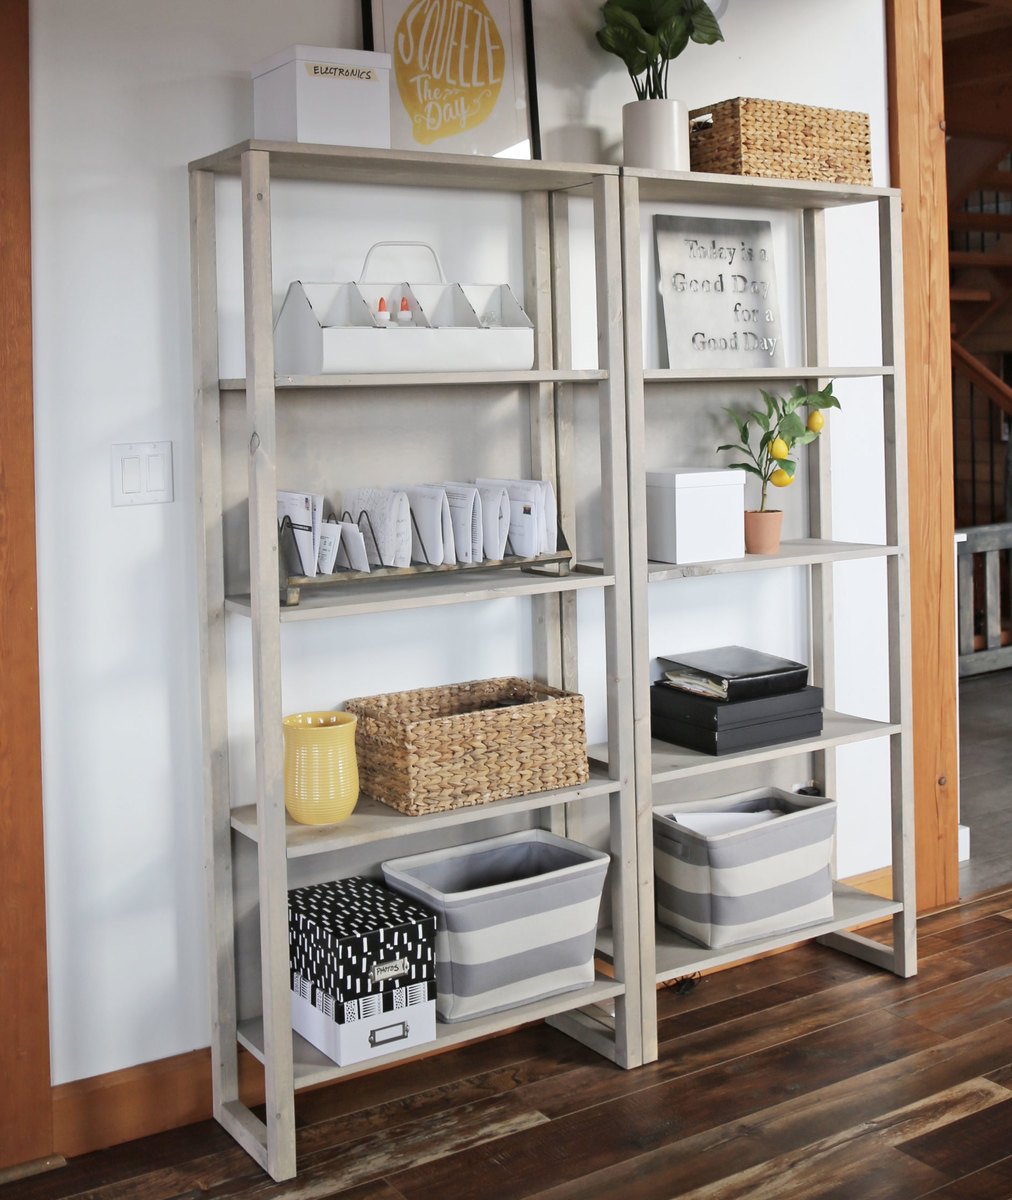
Yes, you read that right! THIRTY BUCKS for each industrial bookcase!

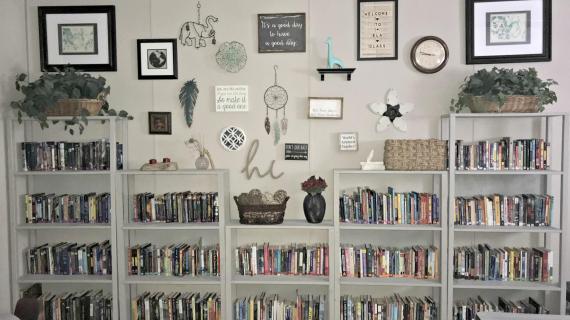
We love the open bookshelf design. And the open bookshelf allows the passage area to feel light and airy!

They are ridiculously gorgeous! So suprising for how simple and inexpensive they were to make.
Of course, what goes in an open bookshelf matters quite a bit! We found most of the accessories at Micheals -
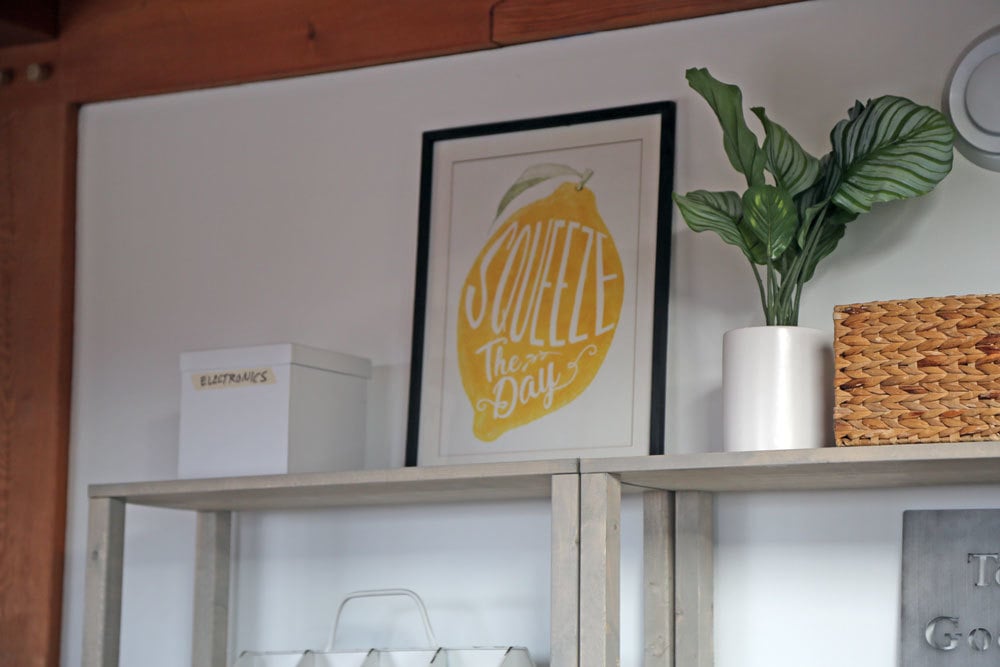
The Squeeze the Day art was from Micheals and was the inspiration for the accessories. The faux plant is from Target. Baskets are from Lowes.
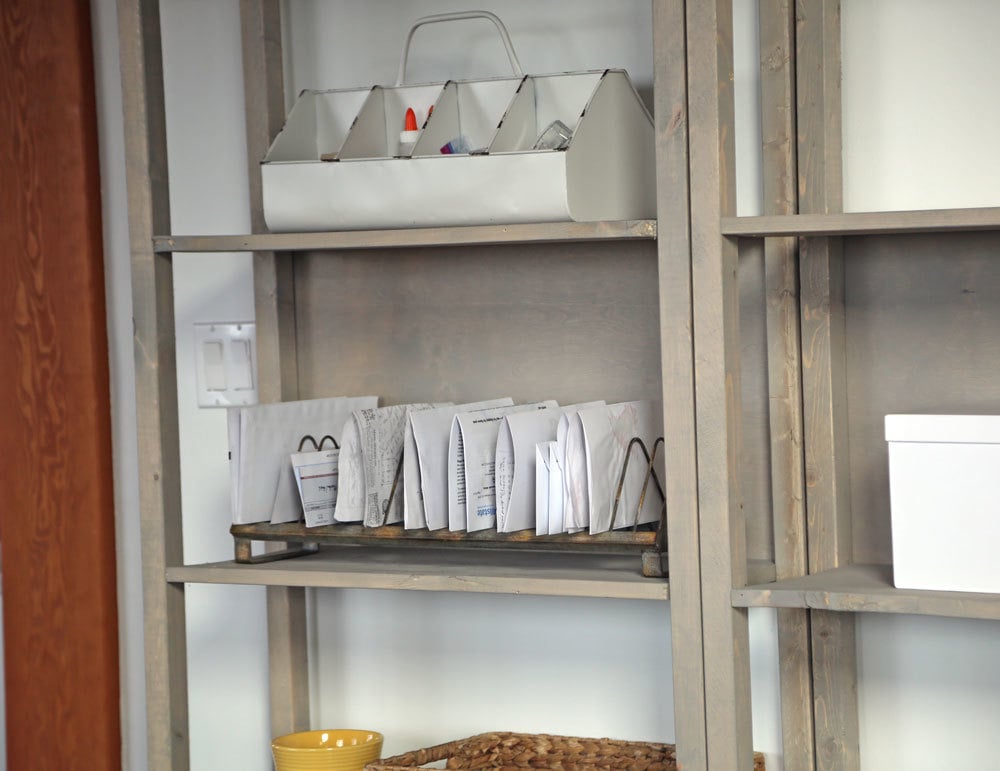
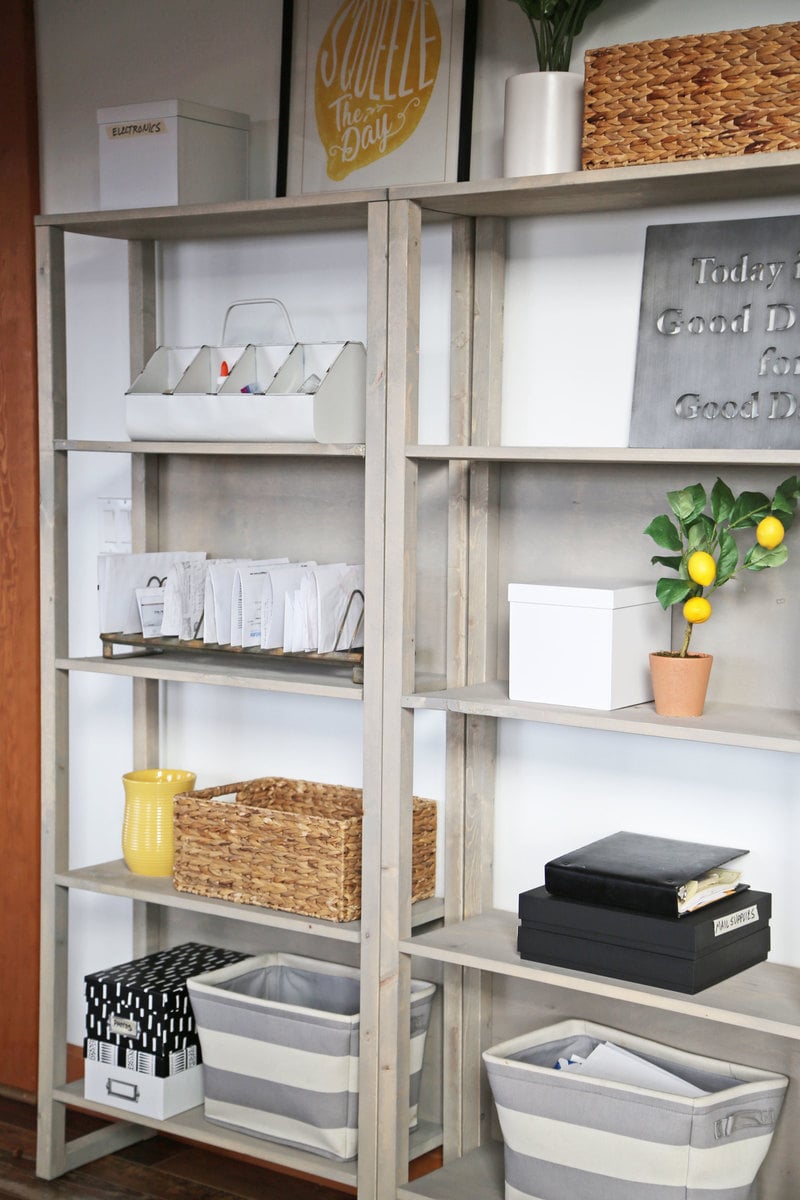
The letter sorter is awesome! It's from Micheals (as is the craft organizer on the upper shelf)
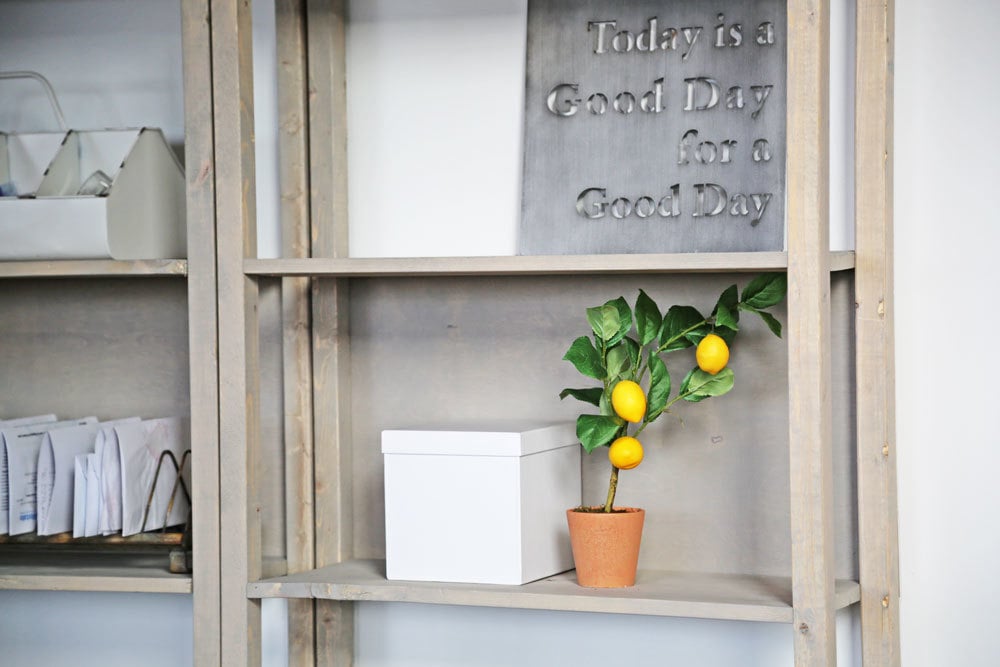
The faux lemon tree and metal sign are also from Micheals. Those two items really helped decorate the open shelving! I also love the plywood backs - it really adds interest and structure too.
I'm so excited to share the plans for this project with you!
We filmed the build - so do watch that -
And then grab the free plans and make this industrial bookcase yours!
Pin for Later!
Preparation
- 4 - 2x2 @ 8 feet long
- 1 - 1x12 @ 12 feet long - do not cut in half for transport - it is better to cut as listed in cut list for transport
- 1 - 1/4" plywood panel 48" x 48" (or two panels 24" x 48" if easier to transport)
- 4 - 2x2 @ 69" - legs
- 2 - 2x2 @ 8-1/4" - bottom leg supports
- 1 - 1x12 @ 31" - top
- 4 - 1x12 @ 28" - shelves
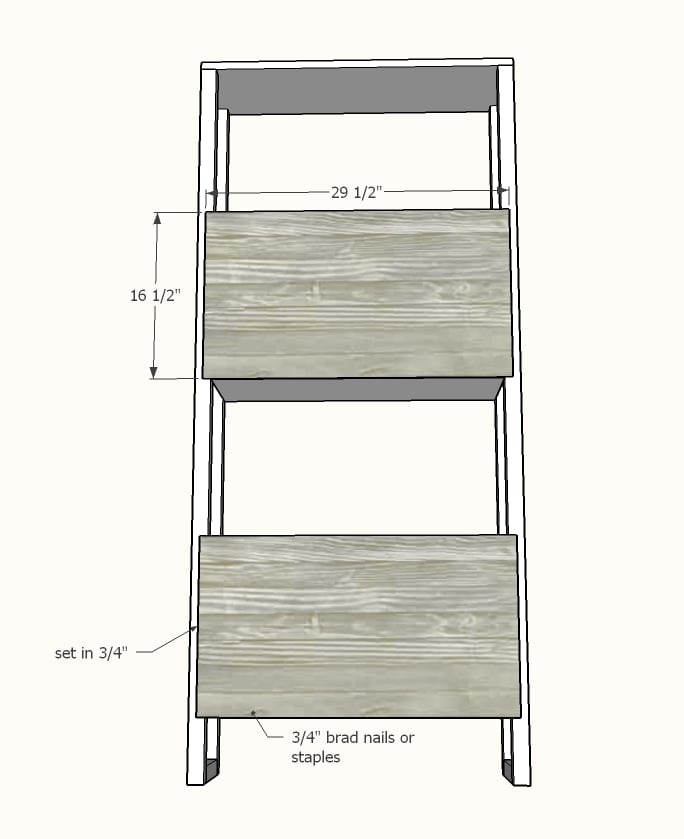
- 2 - 1/4" plywood @ 16-1/2" x 30-1/2" - back


For long term durability and more professional results, I recommend using a pocket hole joinery system for wood joints. Here is a video with tips for using a pocket hole jig:
Instructions
Step 1
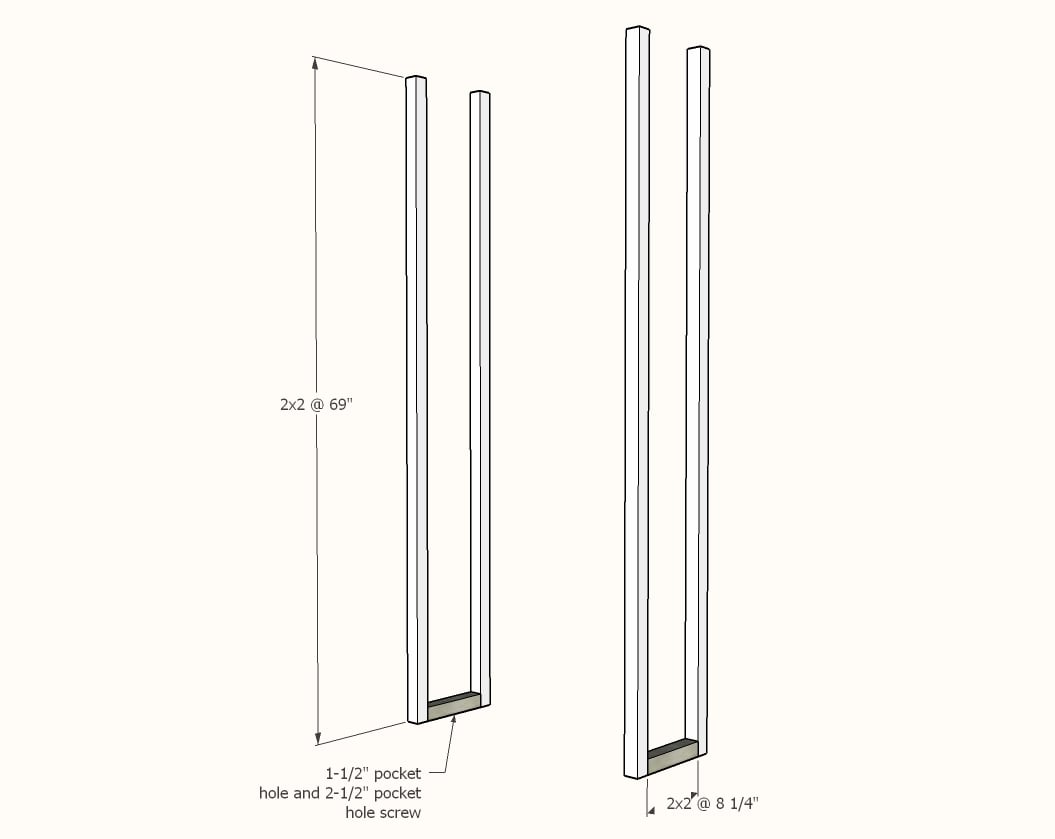
Set your Kreg Jig to the 1-1/2" setting.
Drill a single pocket hole on each end of the small 2x2 pieces.
TIP: Before attaching legs, you may wish to drill a pocket hole for attaching the top on each leg (see next step). Also make sure you rotate legs so the pocket holes are placed on the back of the legs.
Attach to the legs at the bottom with 2-1/2" pocket hole screws and glue.
Step 2
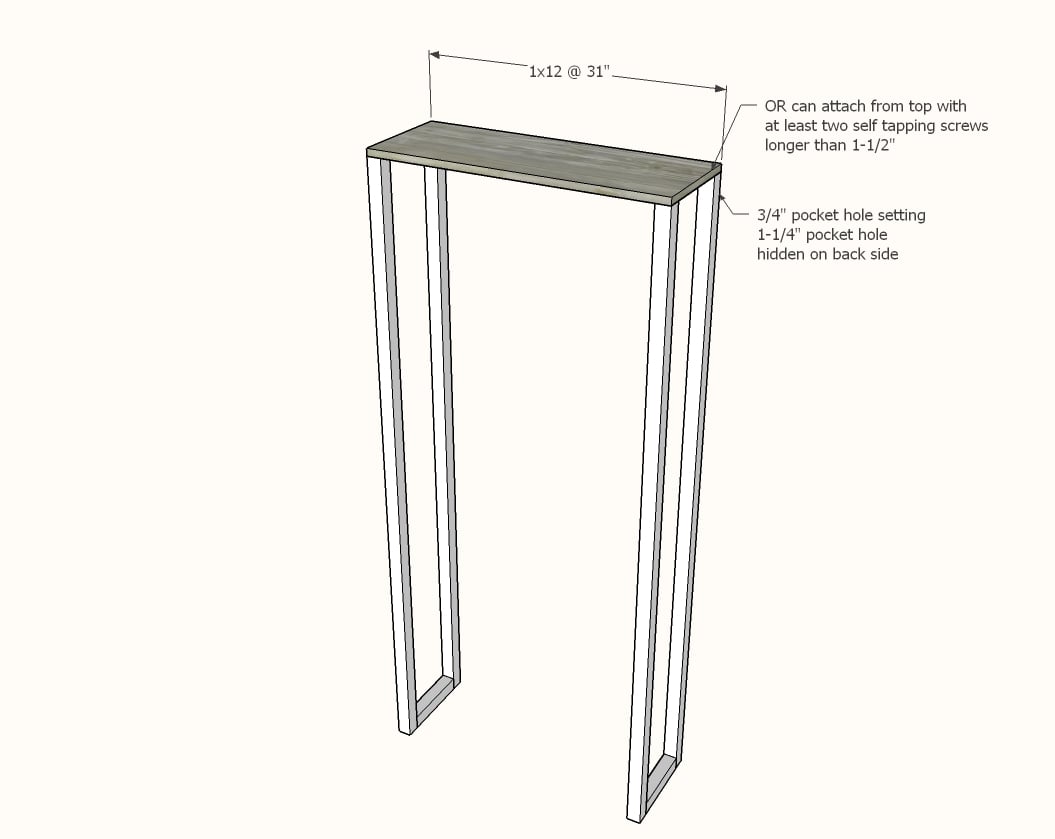
The top can be attached with screws from the top or pocket holes on the back side.
If using screws from the top, you'll need at least two screws per joint, small, self tapping screws are best.
If using pocket holes, set the Kreg Jig to 3/4" setting (but the clamp set for 1-1/2" thick wood). Drill a single pocket hole on backs of legs.
Attach with 1-1/4" pocket hole screws to top.
Step 3
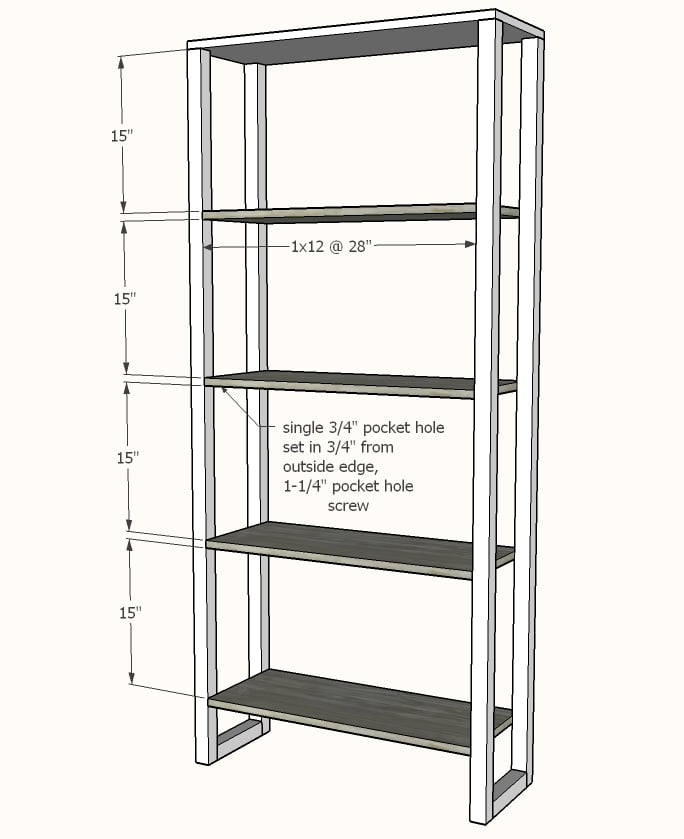
Set the Kreg Jig to the 3/4" setting.
On each end of the shelves, drill a pocket hole 3/4" in from the outside edge.
Attach to 2x2 legs with 1-1/4" pocket hole screws and glue.
Step 4
Make sure the project is square by taking diagonals of the outside corners, and making sure the diagonals match. If they don't match, adjust until they do by pushing the long diagonal corners together.
On back of project attach the 1/4" plywood panels with 3/4" brad nails or staples and glue, attaching to shelves and legs.
To prevent forward tipping hazard, attach to stud in wall on final installation with screws.


Comments
GLH5MHIL
Tue, 08/06/2019 - 15:39
Office Book Case project
Looking forward to this project to make one or two of them for my office/man cave
cajun custom
Fri, 06/12/2020 - 20:44
Shelves
The plan was easy to follow and my shelves came out nice.
lyds6382
Mon, 06/22/2020 - 20:45
Back pieces
Instead of just the two sections with backing, could you have some sort of lightweight piece that covers the entire back?