

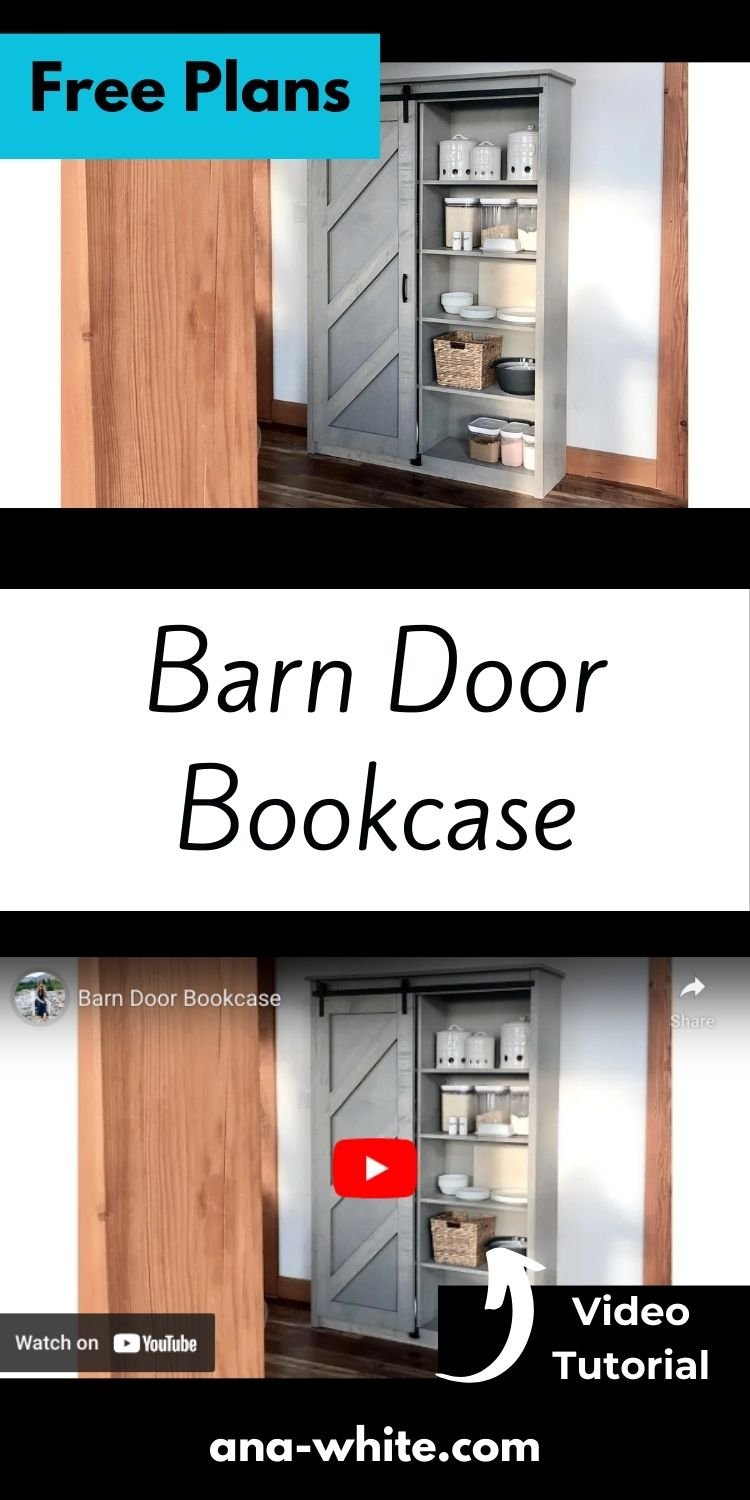
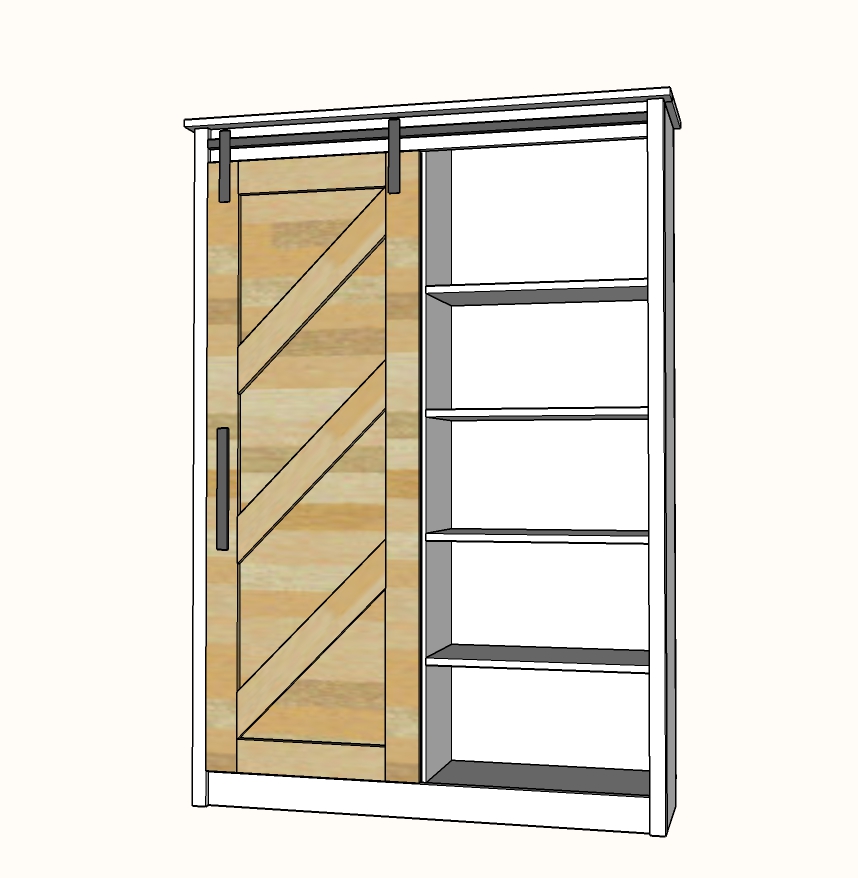
Build your own barn door bookcase with free plans from Ana-White.com It's a beautiful piece that displays and hides, adding functionality to any room of your home. Free step by step plans with diagrams, shopping list and cut list.
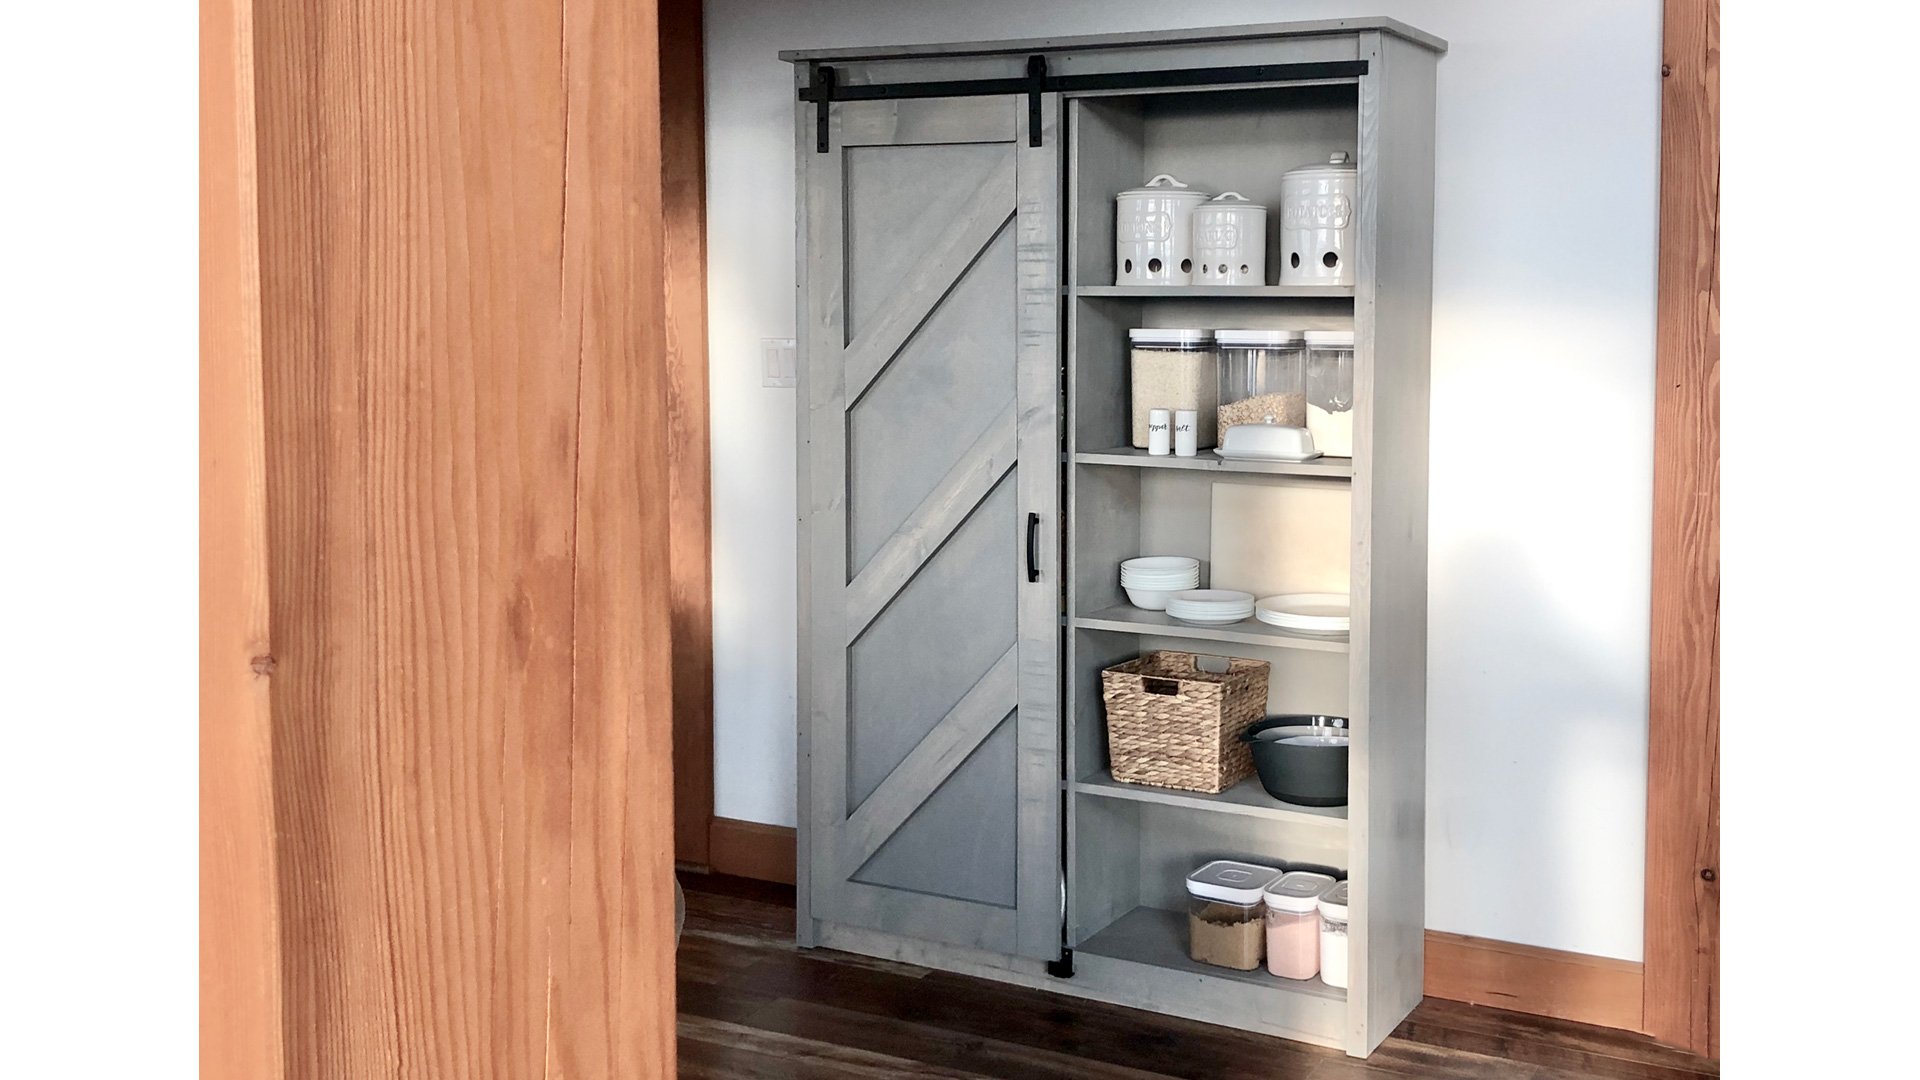
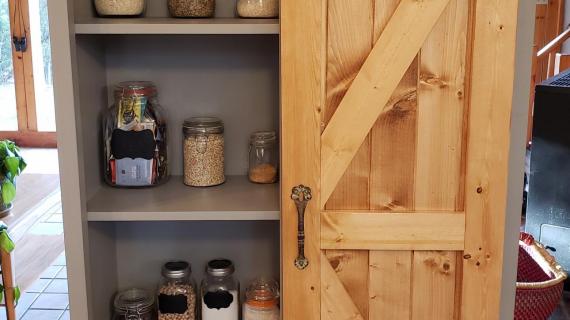
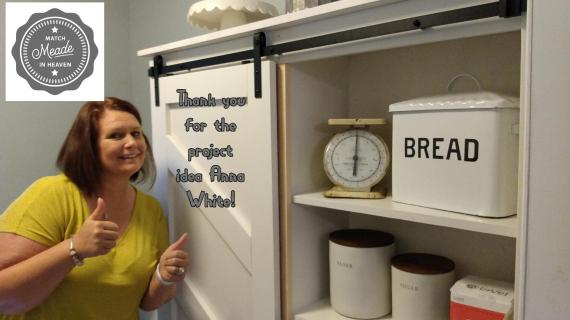
My mom's birthday is this week and my daughter wanted to build her a piece of furniture for her home. More than anything, she needs more storage and organization in her kitchen. A while back we built my brother a barn door pantry, and it was such a functional and beautiful piece, we decided Mom needed something similar.
My mom is short (part of the reason storage is such a challenge in her kitchen), so we scaled the height down, and also the width, to fit her space. It's narrow profile, so won't be a huge thing to walk around or dominate the room.
Building the Barn Door Bookcase
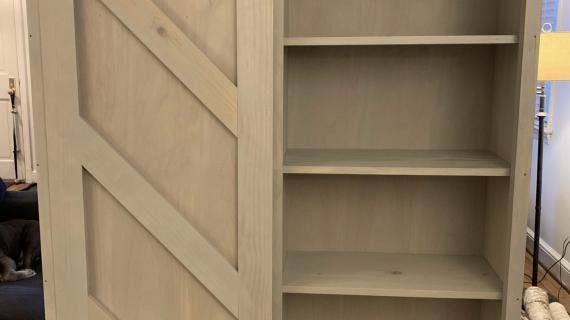
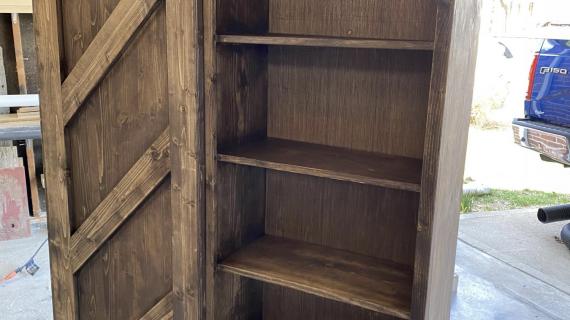
I used 1x12s to build a bookshelf, and stained it Sunbleached by Varathane
Then I used 1x4s to build a door, and hung it with barn door hardware -
It took me about two days, working on it when I could, and cost under $200 for everything (including the barn door hardware)

We just can't wait to bring it over to my Mom's and see how she likes it!
Barn Door Bookcase Uses
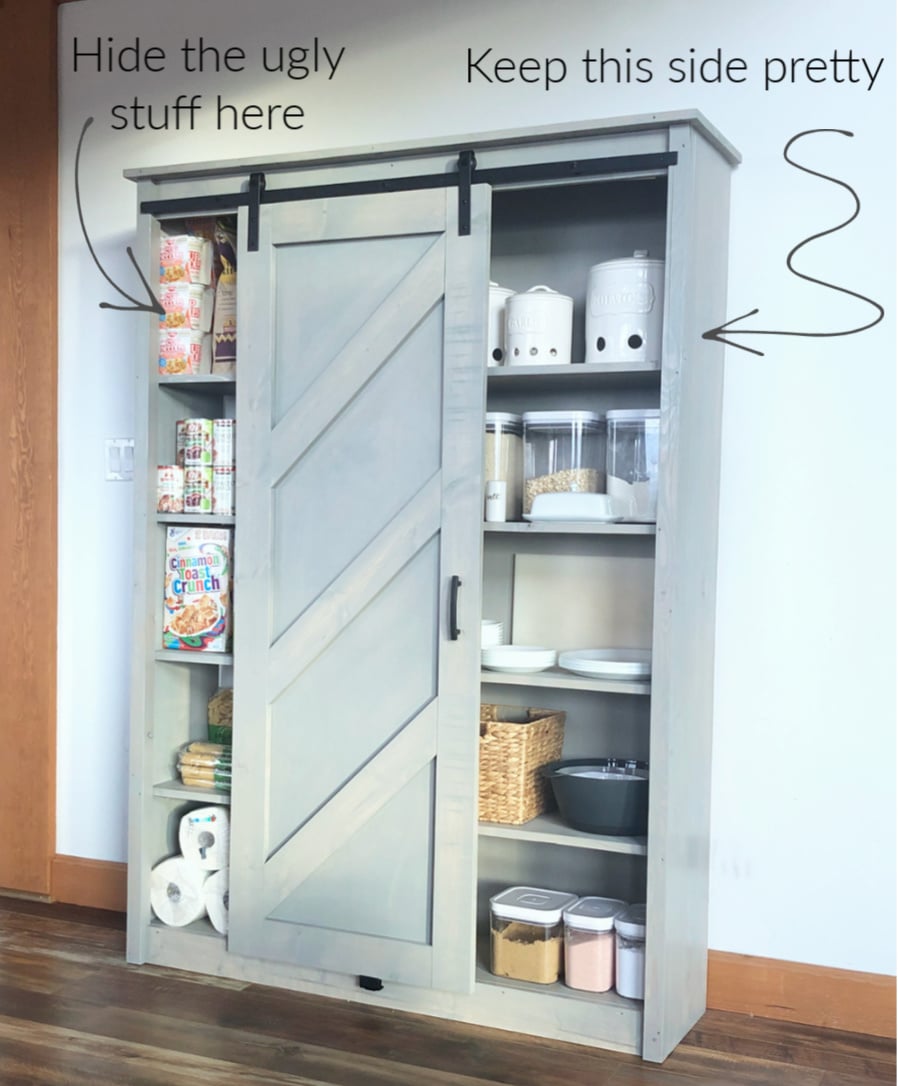
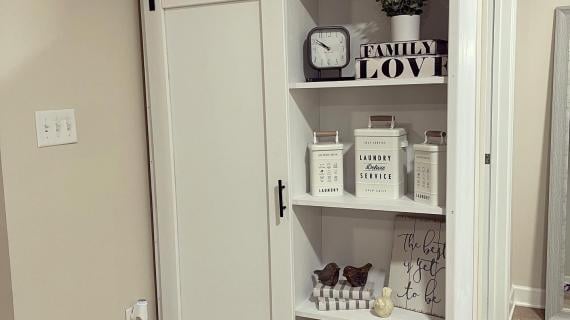
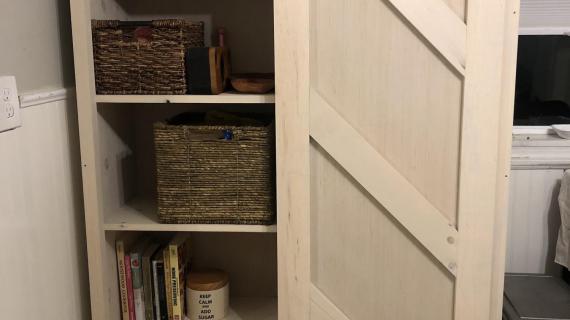
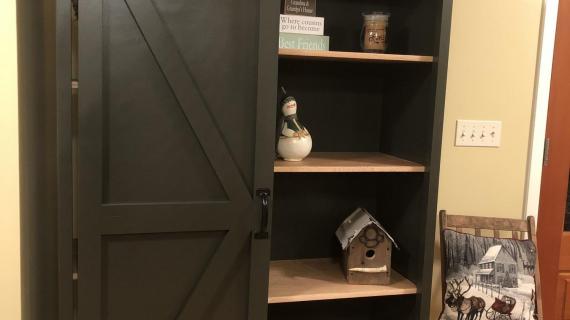
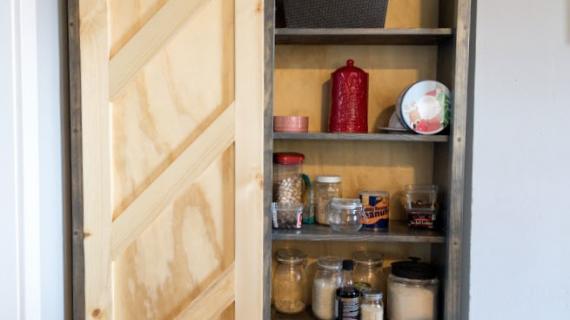
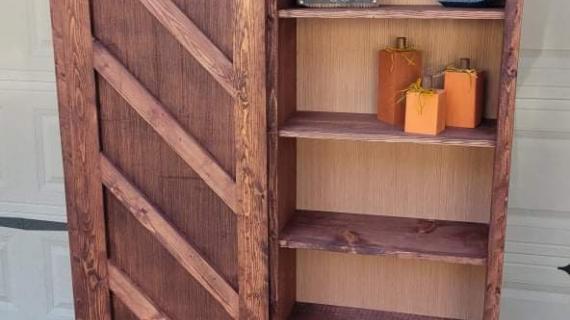
My mom is going to use it as a pantry. We love how on one side you can store dishes and more attractive things, things you need to grab quickly and often, like plates, cups, cutting boards, your tools and fixed items. Then on the other side, you can store all the ugly packaged goods - like cereal, canned goods, snack foods - everything you don't want to see all the time.
But we love this cabinet throughout the house!
- Bathroom - towels on one side, toiletries on the other
- Entryway - add coat hooks on the open side, and store shoes on the closed side - or build two and hang a hook bar in between in a long hall
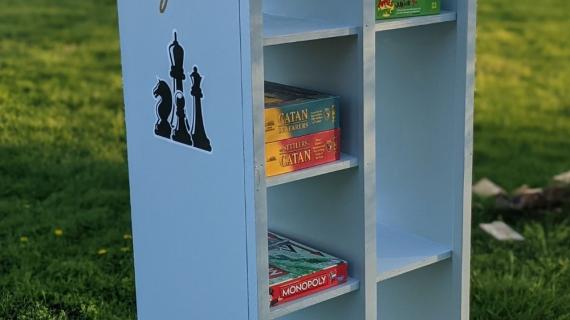
- Living room - build two, one on each side of the tv! Perfect for board games, controllers, and books.
- Nursery - everything baby needs can fit inside! Keep the diapers and wipes on one side, the collectible toys and outfits on the open side
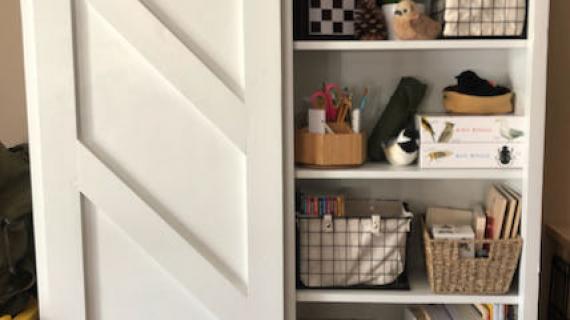
- Dining room - display beautiful dishes on the open side, hide board games and arts and craft supplies on the other
- Office - keep your office neat but still functioning - decor on one side, everything else behind the door
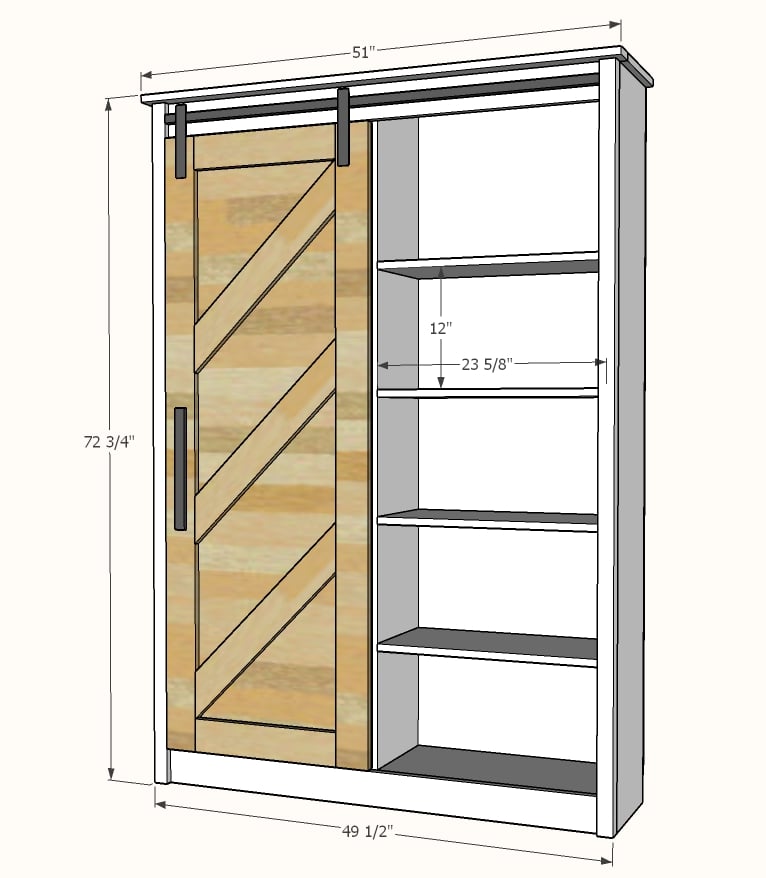
Barn Door Bookcase Build Video
We filmed the build process, for those of you who are visual learners.
And of course, the plans are below. I did change a few things in the plans to make it easier to build, happy to be the guinea pig for you guys!
Thanks for using my plans, please share a photo when you are done!
Ana
Pin For Later!
Preparation
- 3 - 1x12 @ 6 feet long (use for bookshelf sides)
- 2 - 1x12 @ 8 feet long (use for shelves)
- 1 - 1x12 @ 10 feet long (use for top, remainder for shelves)
- 2 - 2x2 @ 6 feet long
- 2 - 1x2 @ 8 feet long
- 1 - 1x3 @ 8 feet long
- 4 - 1x4 @ 8 feet long
- 1 - 1/4" plywood 4x8 full sheet
- 1 - 1/4" pocket hole screws (about 100)
- 2" trim screws (about 10)
- 3/4" and 1-1/4" brad nails
- wood glue
- 48" barn door hardware kit (I used this one from Amazon affiliate link)
Carcass
- 3 - 1x12 @ 72"
- 4 - 1x2 @ 23-5/8"
- 10 - 1x12 @ 23-5/8"
- 1 - 1x3 @ 51" - top
- 1 - 1x12 @ 51" - top
- 1 - 1/4" plywood @ 25" x 72-3/4" - back
Face Frame
- 2 - 2x2 @ 72"
- 2 - 1x4 @ 46-1/2"
- 1 - 1x2 @ 65"
Door
- 2 - 1x4 @ 66"
- 2 - 1x4 @ 16"
- 3 - 1x4 @ 22-5/8" - long point to short point, both ends cut at 45 degrees, ends are parallel
- 1 - 1/4" plywood @ 23" x 66"


Instructions
Step 1
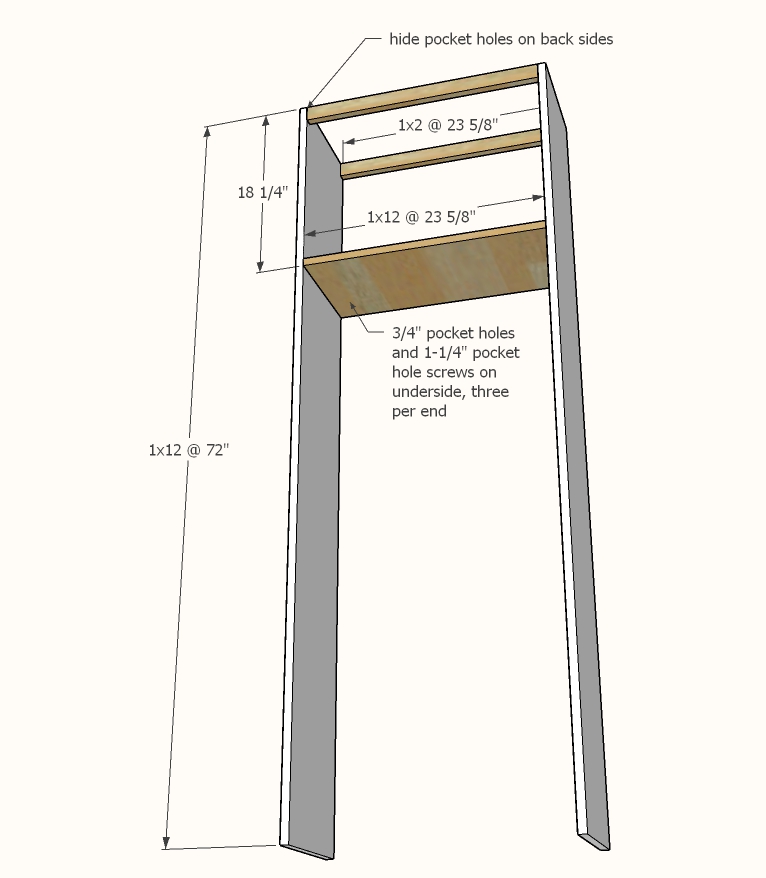
Cut 1x12 boards using the compound miter saw.
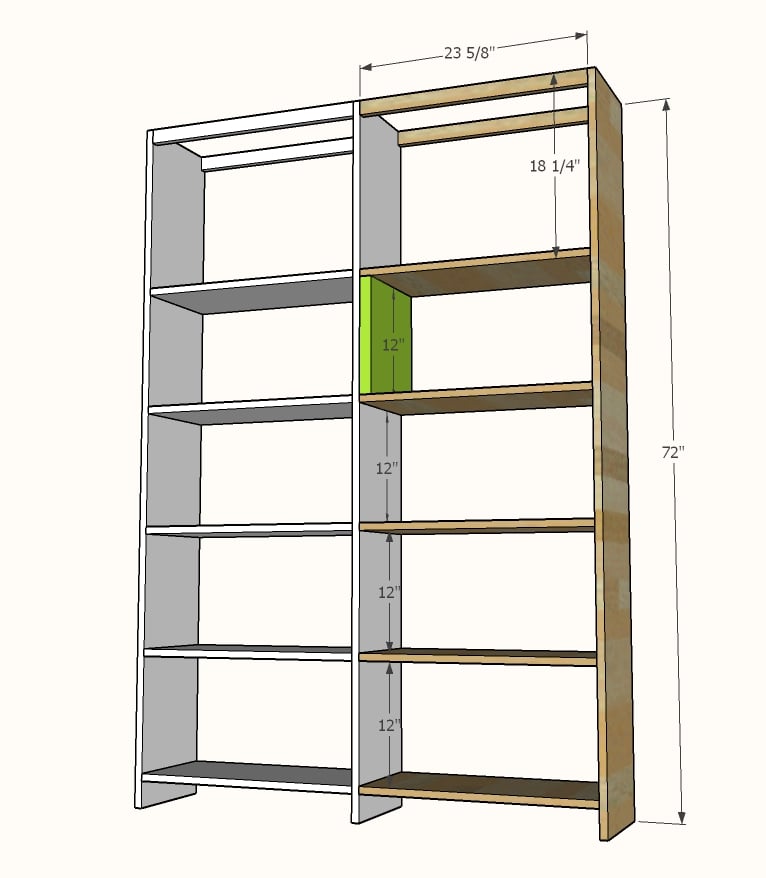
Drill 3 - 3/4" pocket holes on each end of all the shelf boards.
Drill 1 - 3/4" pocke thole on each end of the 1x2 @ 23-5/8" long.
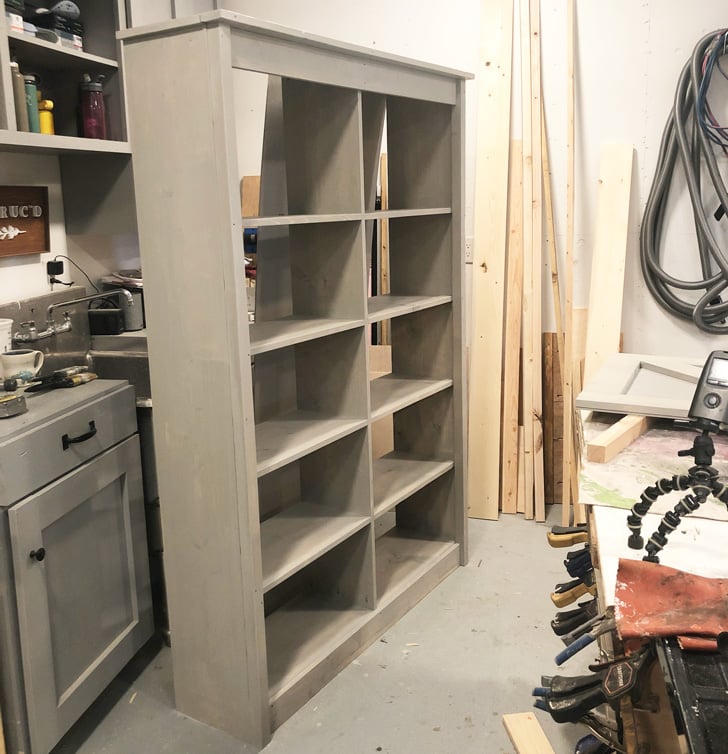
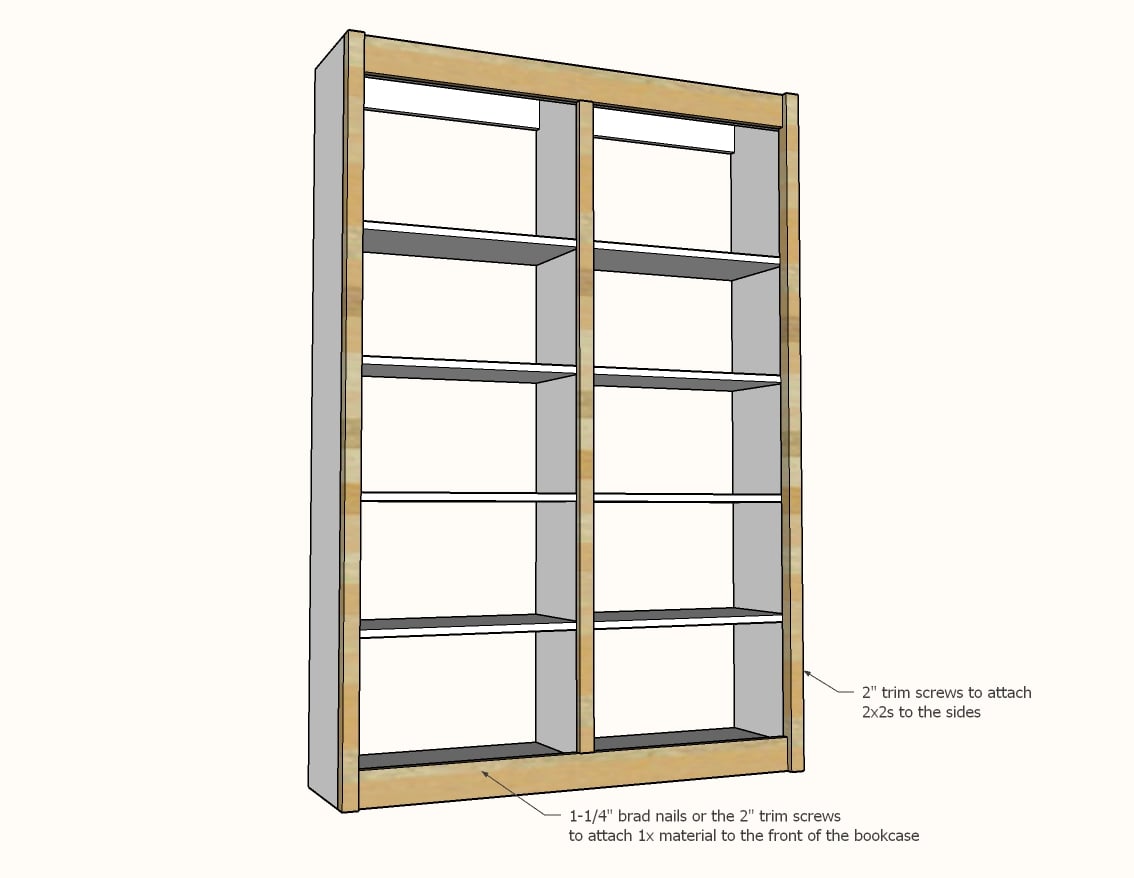
Start by building one bookcase as shown in diagram.
Step 2

Cut a scrap wood spacer block (or two) to 12" long.
Use it as a spacer and continue attaching shelves, working from the top down, with the pocket holes on the bottom of the shelves.
Step 3
Repeat to add the second half of the bookshelf to the first bookshelf.
Set aside.
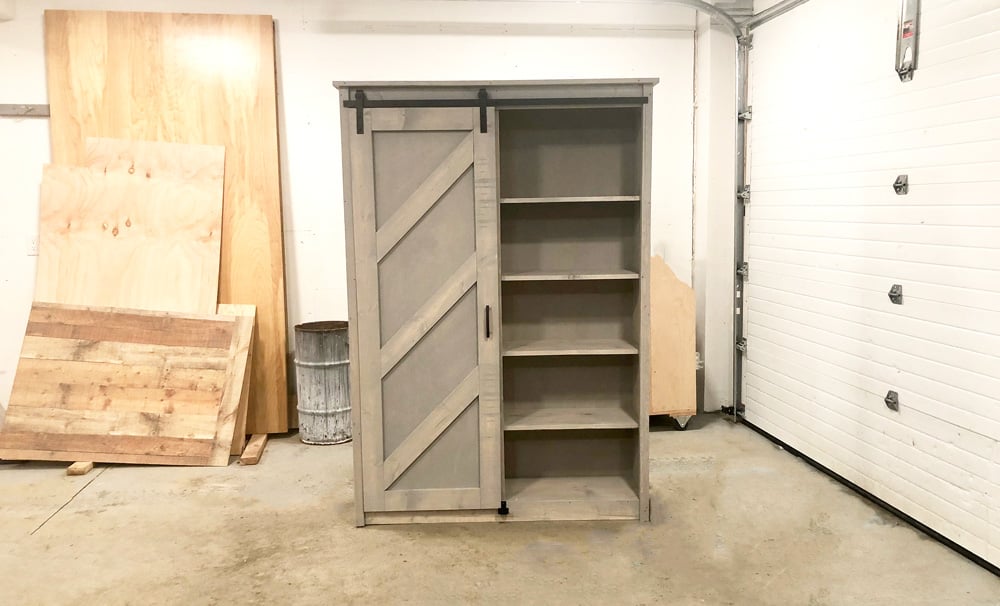
Step 4
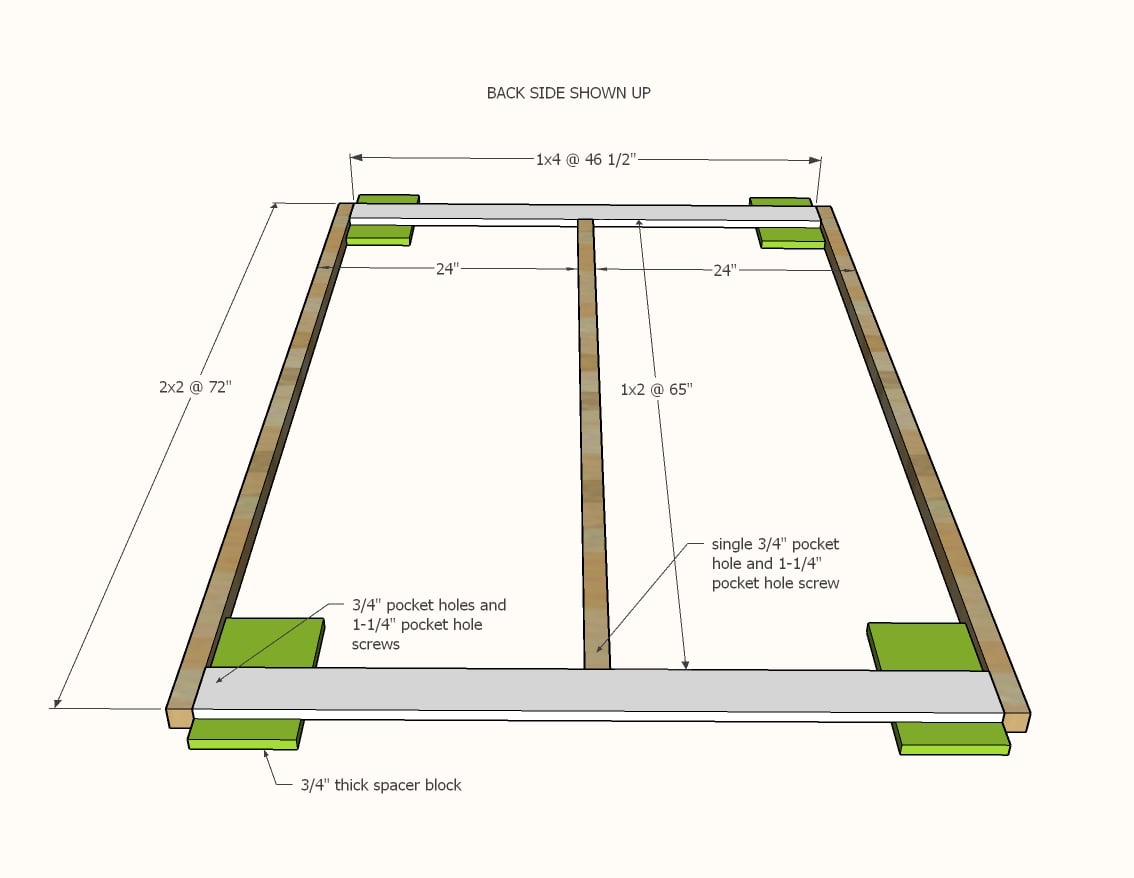
On a flat level surface, build the face frame as shown. Scrap 1x boards can be used as spacers to help you attach the 1xs to the 2x2 legs, since the wood is different thicknesses.
Step 5
Make sure the bookshelf is on a flat, level surface. Adjust for square if needed.
Attach the face frame to the front with glue and 1-1/4" brad nails. Use the 2" screws to attach the 2x2s to the bookcase sides.
Step 6
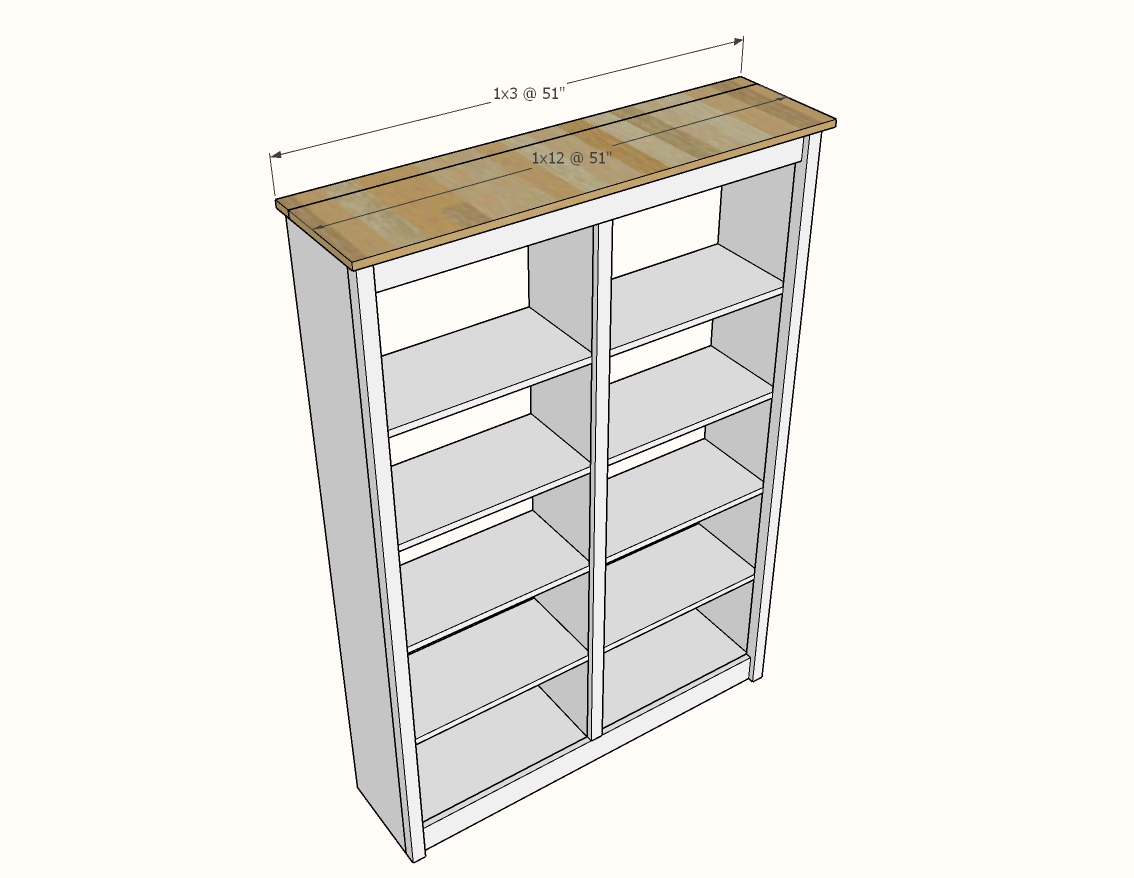
Attach the top with glue and 1-1/4" brad nails.
I also recommend adding some 2" screws.
Step 7

Build the barn door with 3/4" pocket holes and 1-1/4" pocket hole screws.
Cut the 1/4" plywood into two pieces, one 23" wide and one 25" wide, both 8 feet long.
Cut the 23" piece down in length to fit on the back of the barn door.
Add the back with 3/4" brad nails and glue.
Step 8
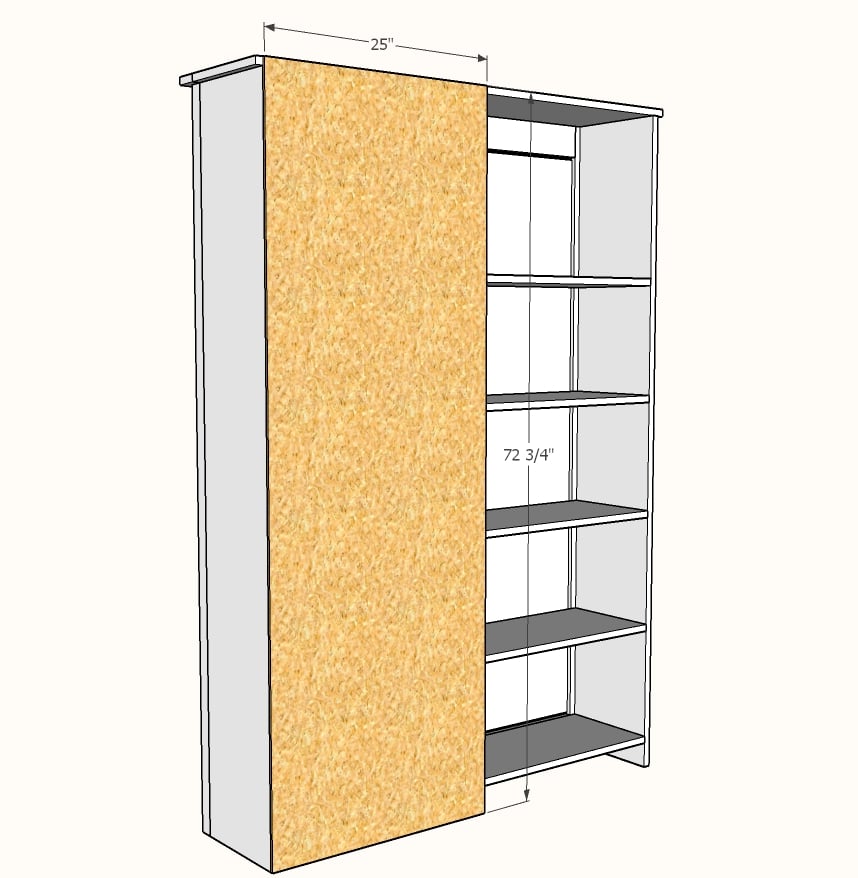
Add the remaining piece of 1/4" plywood to the back of the bookcase with glue and brad nails. Make sure the bookcase is square before attaching and use the square, factory edge to guide you when attaching.
Step 9
Add the barn door hardware to the barn door and the cabinet header. We show how I do this in the video so please take a second to watch.
Comments
OklahomaFarmGirl
Sat, 11/14/2020 - 10:48
Door question
Hi Ana,
Would this pattern work with 2 barn doors?
Lukilla
Fri, 09/03/2021 - 07:59
Remember, if you do…
Remember, if you do farmdoors you need one less door than spaces so there is an empty slot for the door to slide into. So if you wanted 2 farm doors, you would need 3 sets of compartments. I hope that helps and makes sense
mryannyla2
Mon, 12/07/2020 - 12:08
Full back?
Hi Ana!
I just love your plans and I thank you for helping me make our home lovelier! I plan to make this as a pantry for us. Would it be feasible to put a back across both sides?
Thank you for any input!
Lukilla
Sun, 09/05/2021 - 05:14
Yes, you can.
I just built this with a back on both sides. To do this you have 2 options.
Option 1 (what I did): The cabinet is 49.5 inches wide. Buy an extra sheet of 1/4 plywood then do 2 strip that are 24.5 inches wide for each back. This will leave you with about half a sheet left over.
Option 2 (what I would do next time): make the shelves 3/4 of an inch smaller, the top and face frame would be 1.5 inches smaller. This makes the entire cabinet 48 inches wide. You will still need to buy an extra sheet of 1/4 plywood, but now you just cross cut it at 72 inches and it fits the back.
I hope this helps and good luck!
bea
Sat, 05/28/2022 - 09:54
Modifications???
I want to make this for my fabric and sewing supplies storage, but I need it to be more dust proof. How difficult would it be to add a third shelf column and add either sliding doors over two sections with a hinge door on the third or use 3 hinge doors?