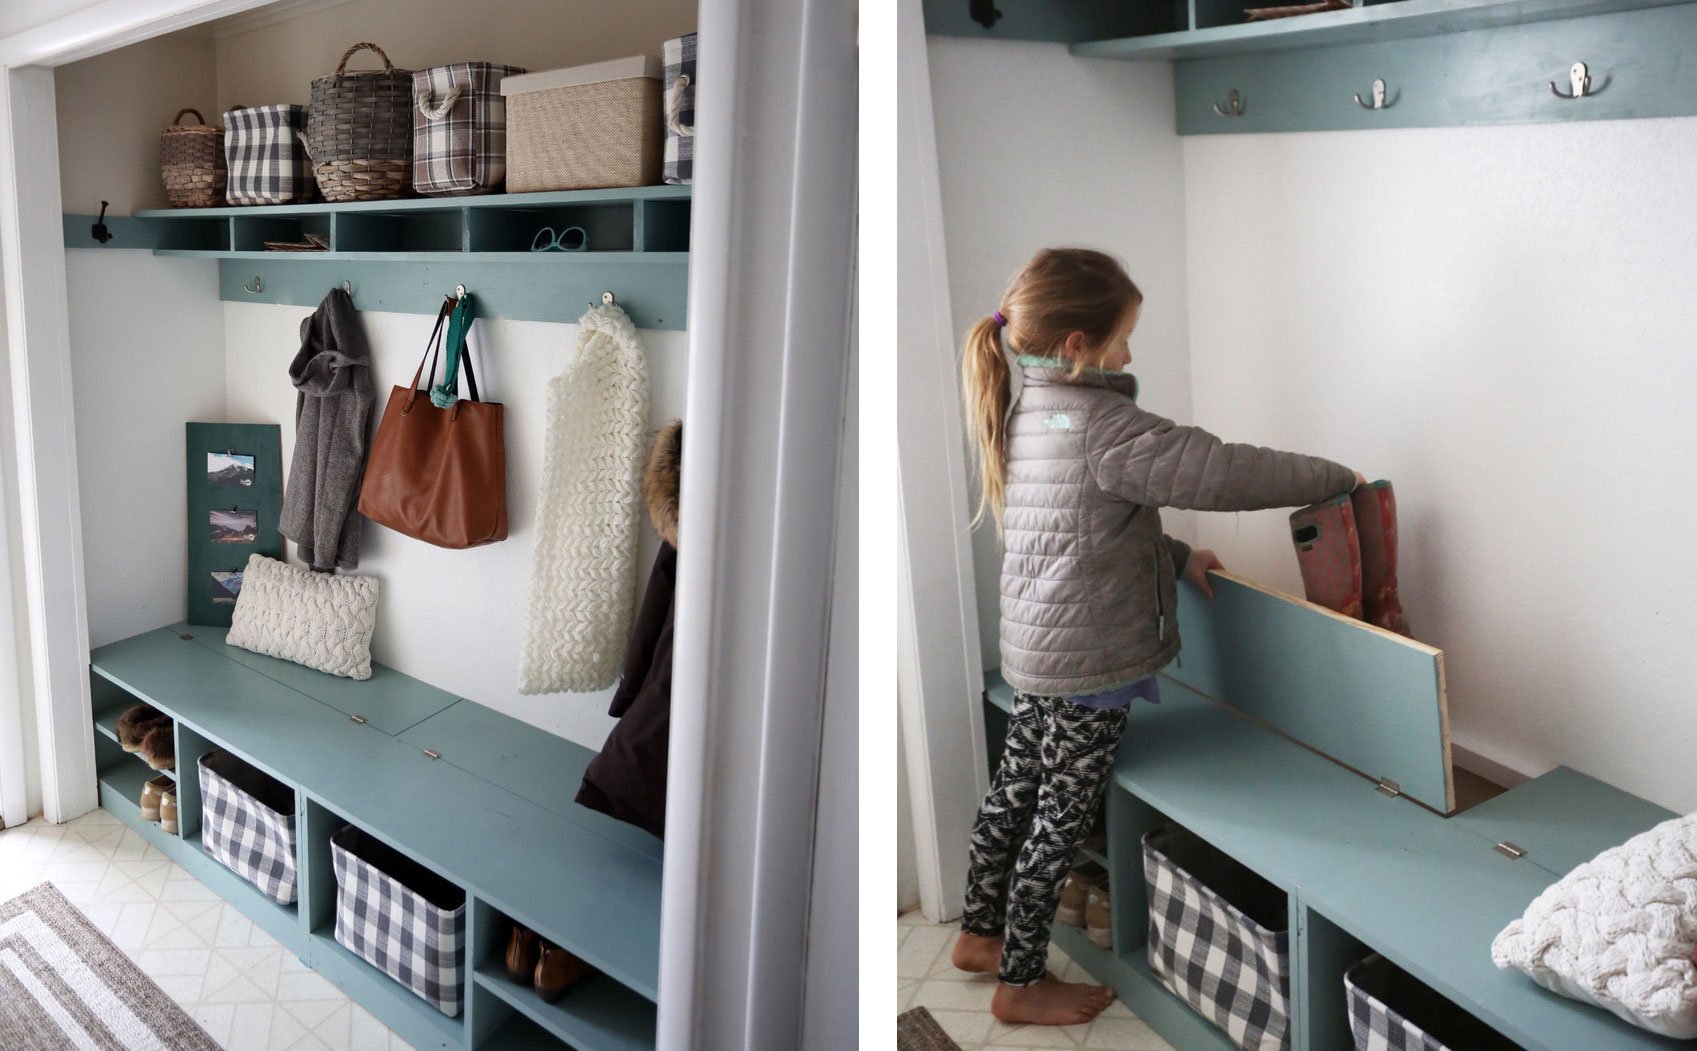

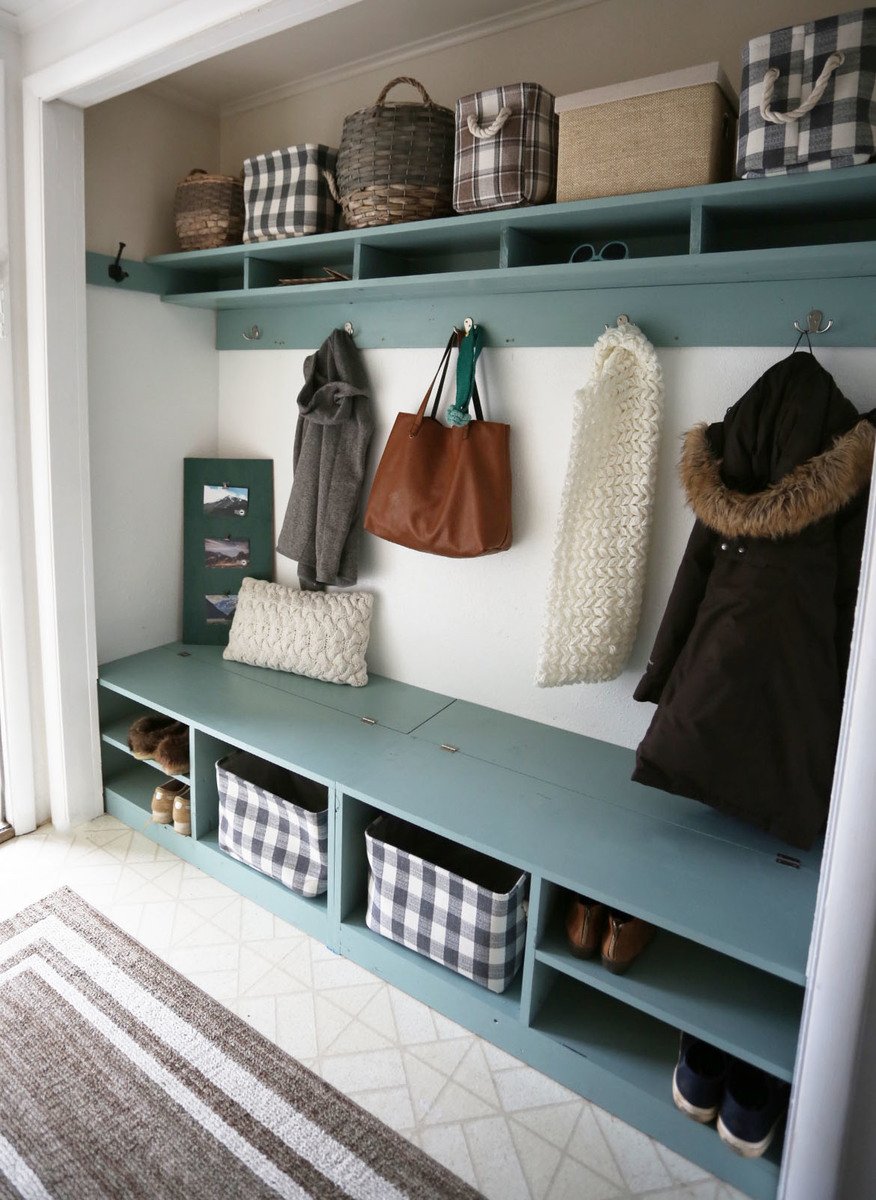
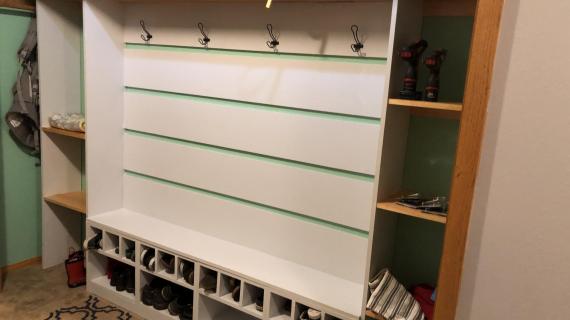
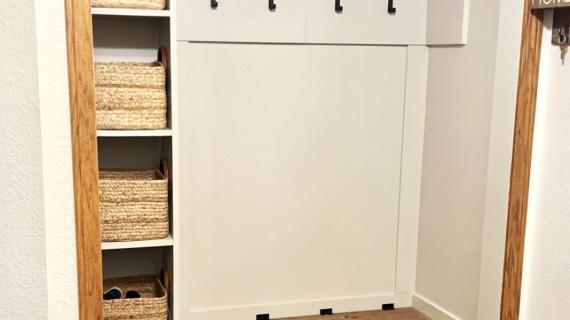
These clever and easy to build benches turn a closet into a mudroom with hidden boot storage. With shelves on the front for shoes, and a hinge up compartment on the back for boots, there's no wasted space and everything is accessible.
Use off the shelf 1x12s to build the benches for an easy to build and inexpensive project to transform your entryway! Check out our free tutorial with diagrams and helpful tips and lots of build photos from Ana-White.com
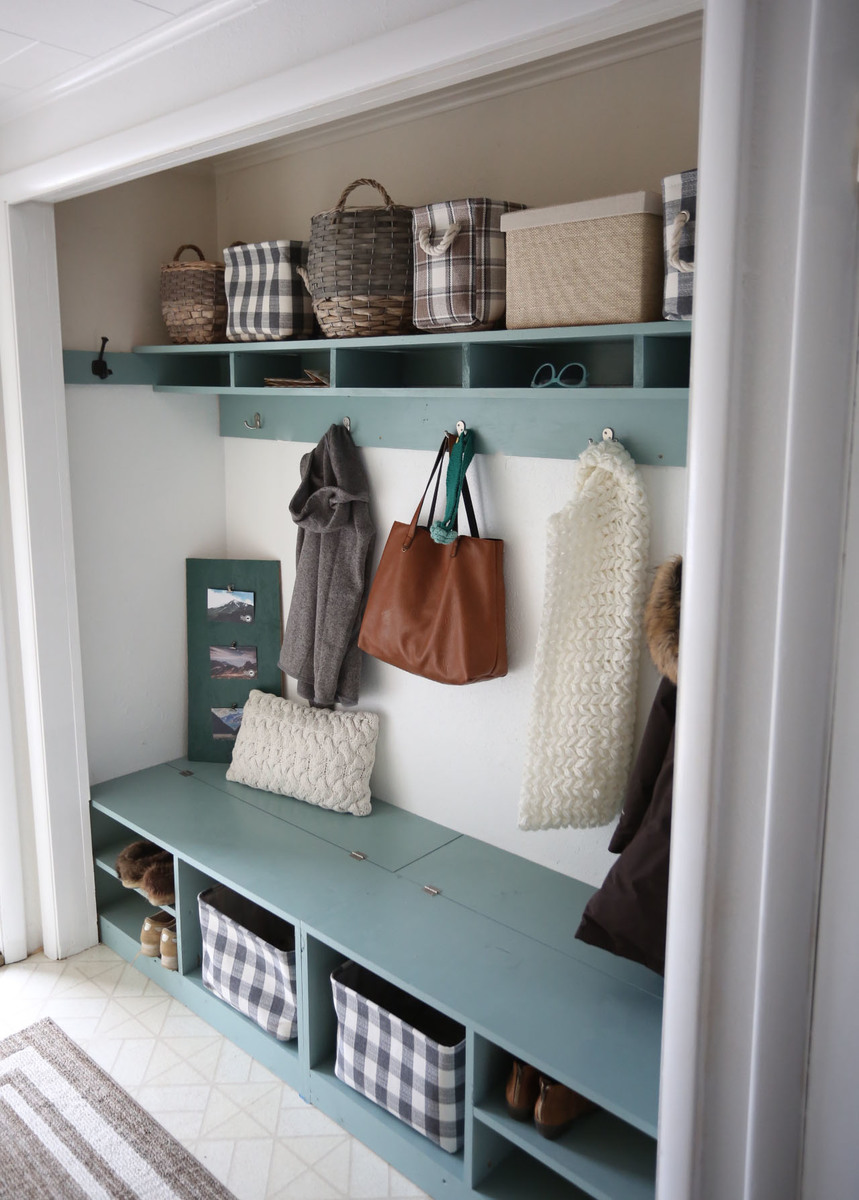
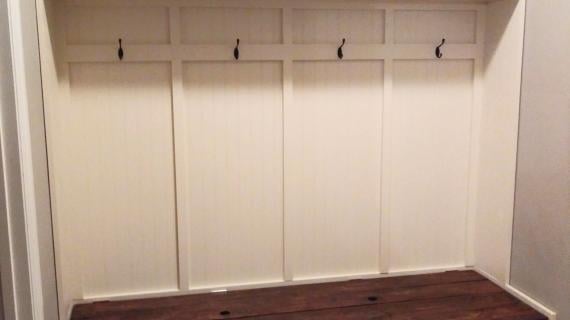
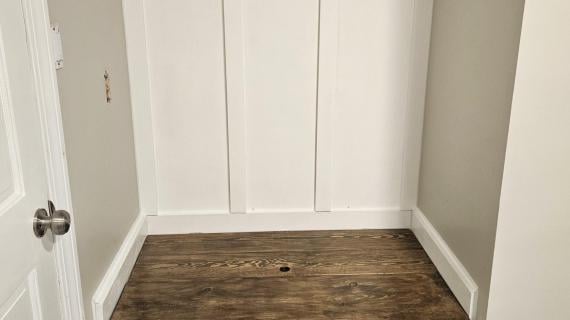
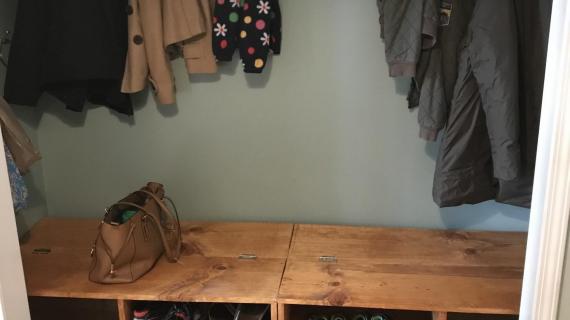
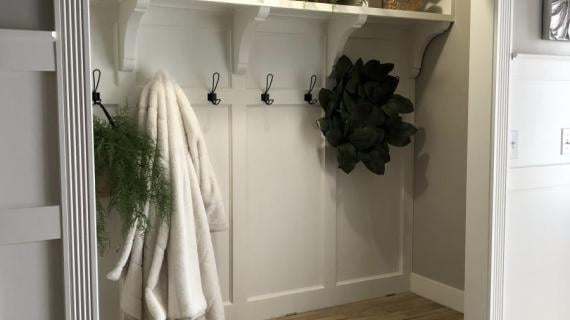
Before and After: The Easiest Mudroom Build Ever
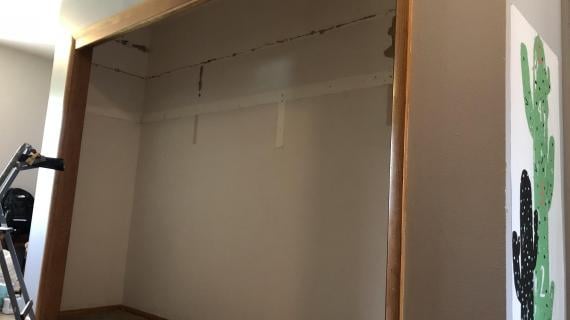
My sister has an entryway closet that wasn't working for a family of five with small children. With winter fast approaching here in Alaska, this closet needed to become a mudroom fast.
But a couple of problems. This closet is in a tight hallway, with the entry door swinging into the hall space. So a bench with drawers under it, or bins or baskets that slide out is not an option - the entry door could not be used at the same time as the bins/baskets/drawers were being accessed.
The closet is 24" deep - we didn't want to create shelving that is 24" deep at below the knee level - especially since most of the shoes are small kid shoes. Stuff would get lost in the too deep shelving, and no one wants to get down on their hands and knees and dig it out.
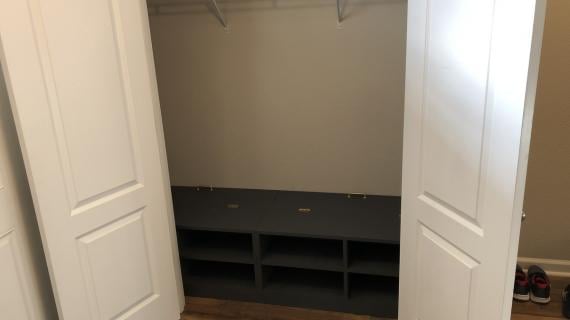
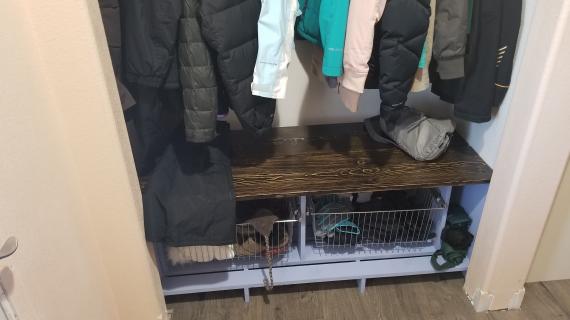
So we came up with an idea to have shelving on the front, and a hinged top on the back for boot storage.
No wasted space, no too deep shelving, no door/drawer collisions!
We love how this one turned out, and it was one of the easiest builds ever!
How I Built this Mudroom Project (SO EASY!)
This was one of the easiest mudrooms I've ever tackled. Here's what I did:
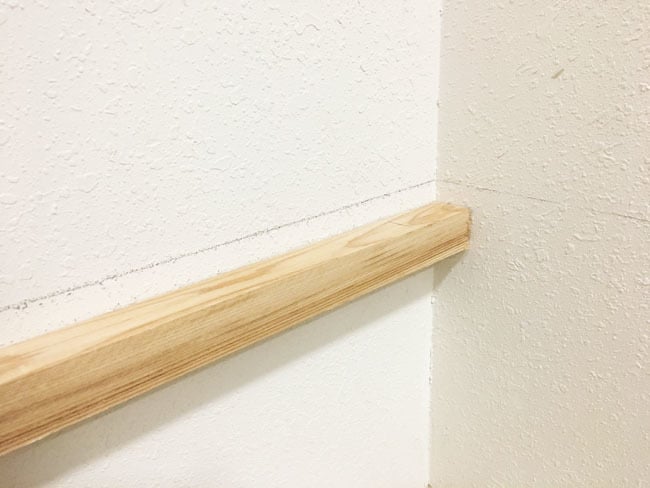
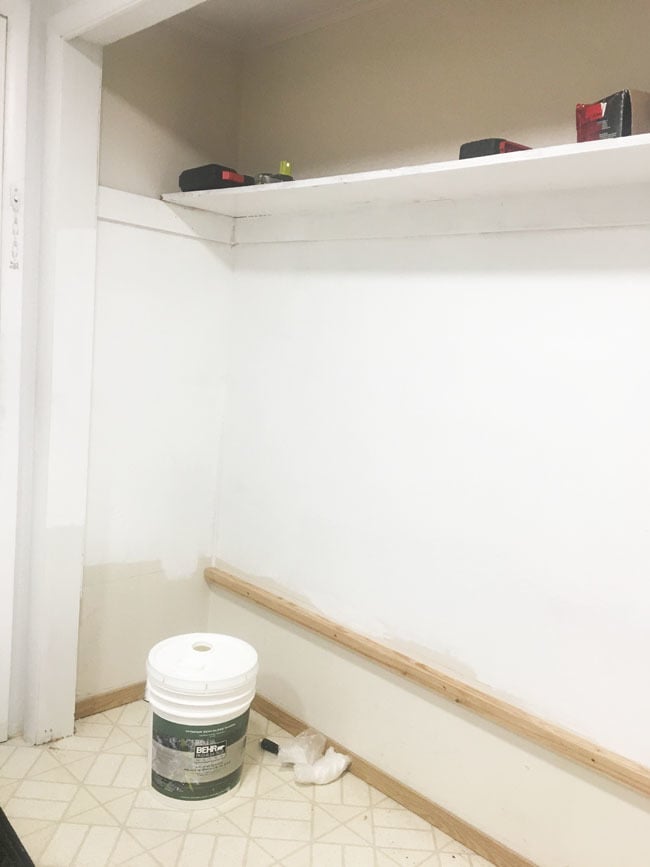
I drew a pencil line level around the back of the closet 18" above the floor.
I screwed a 2x2 cleat to the back wall, hitting studs in the wall. The cleat is attached 3/4" below the pencil line.
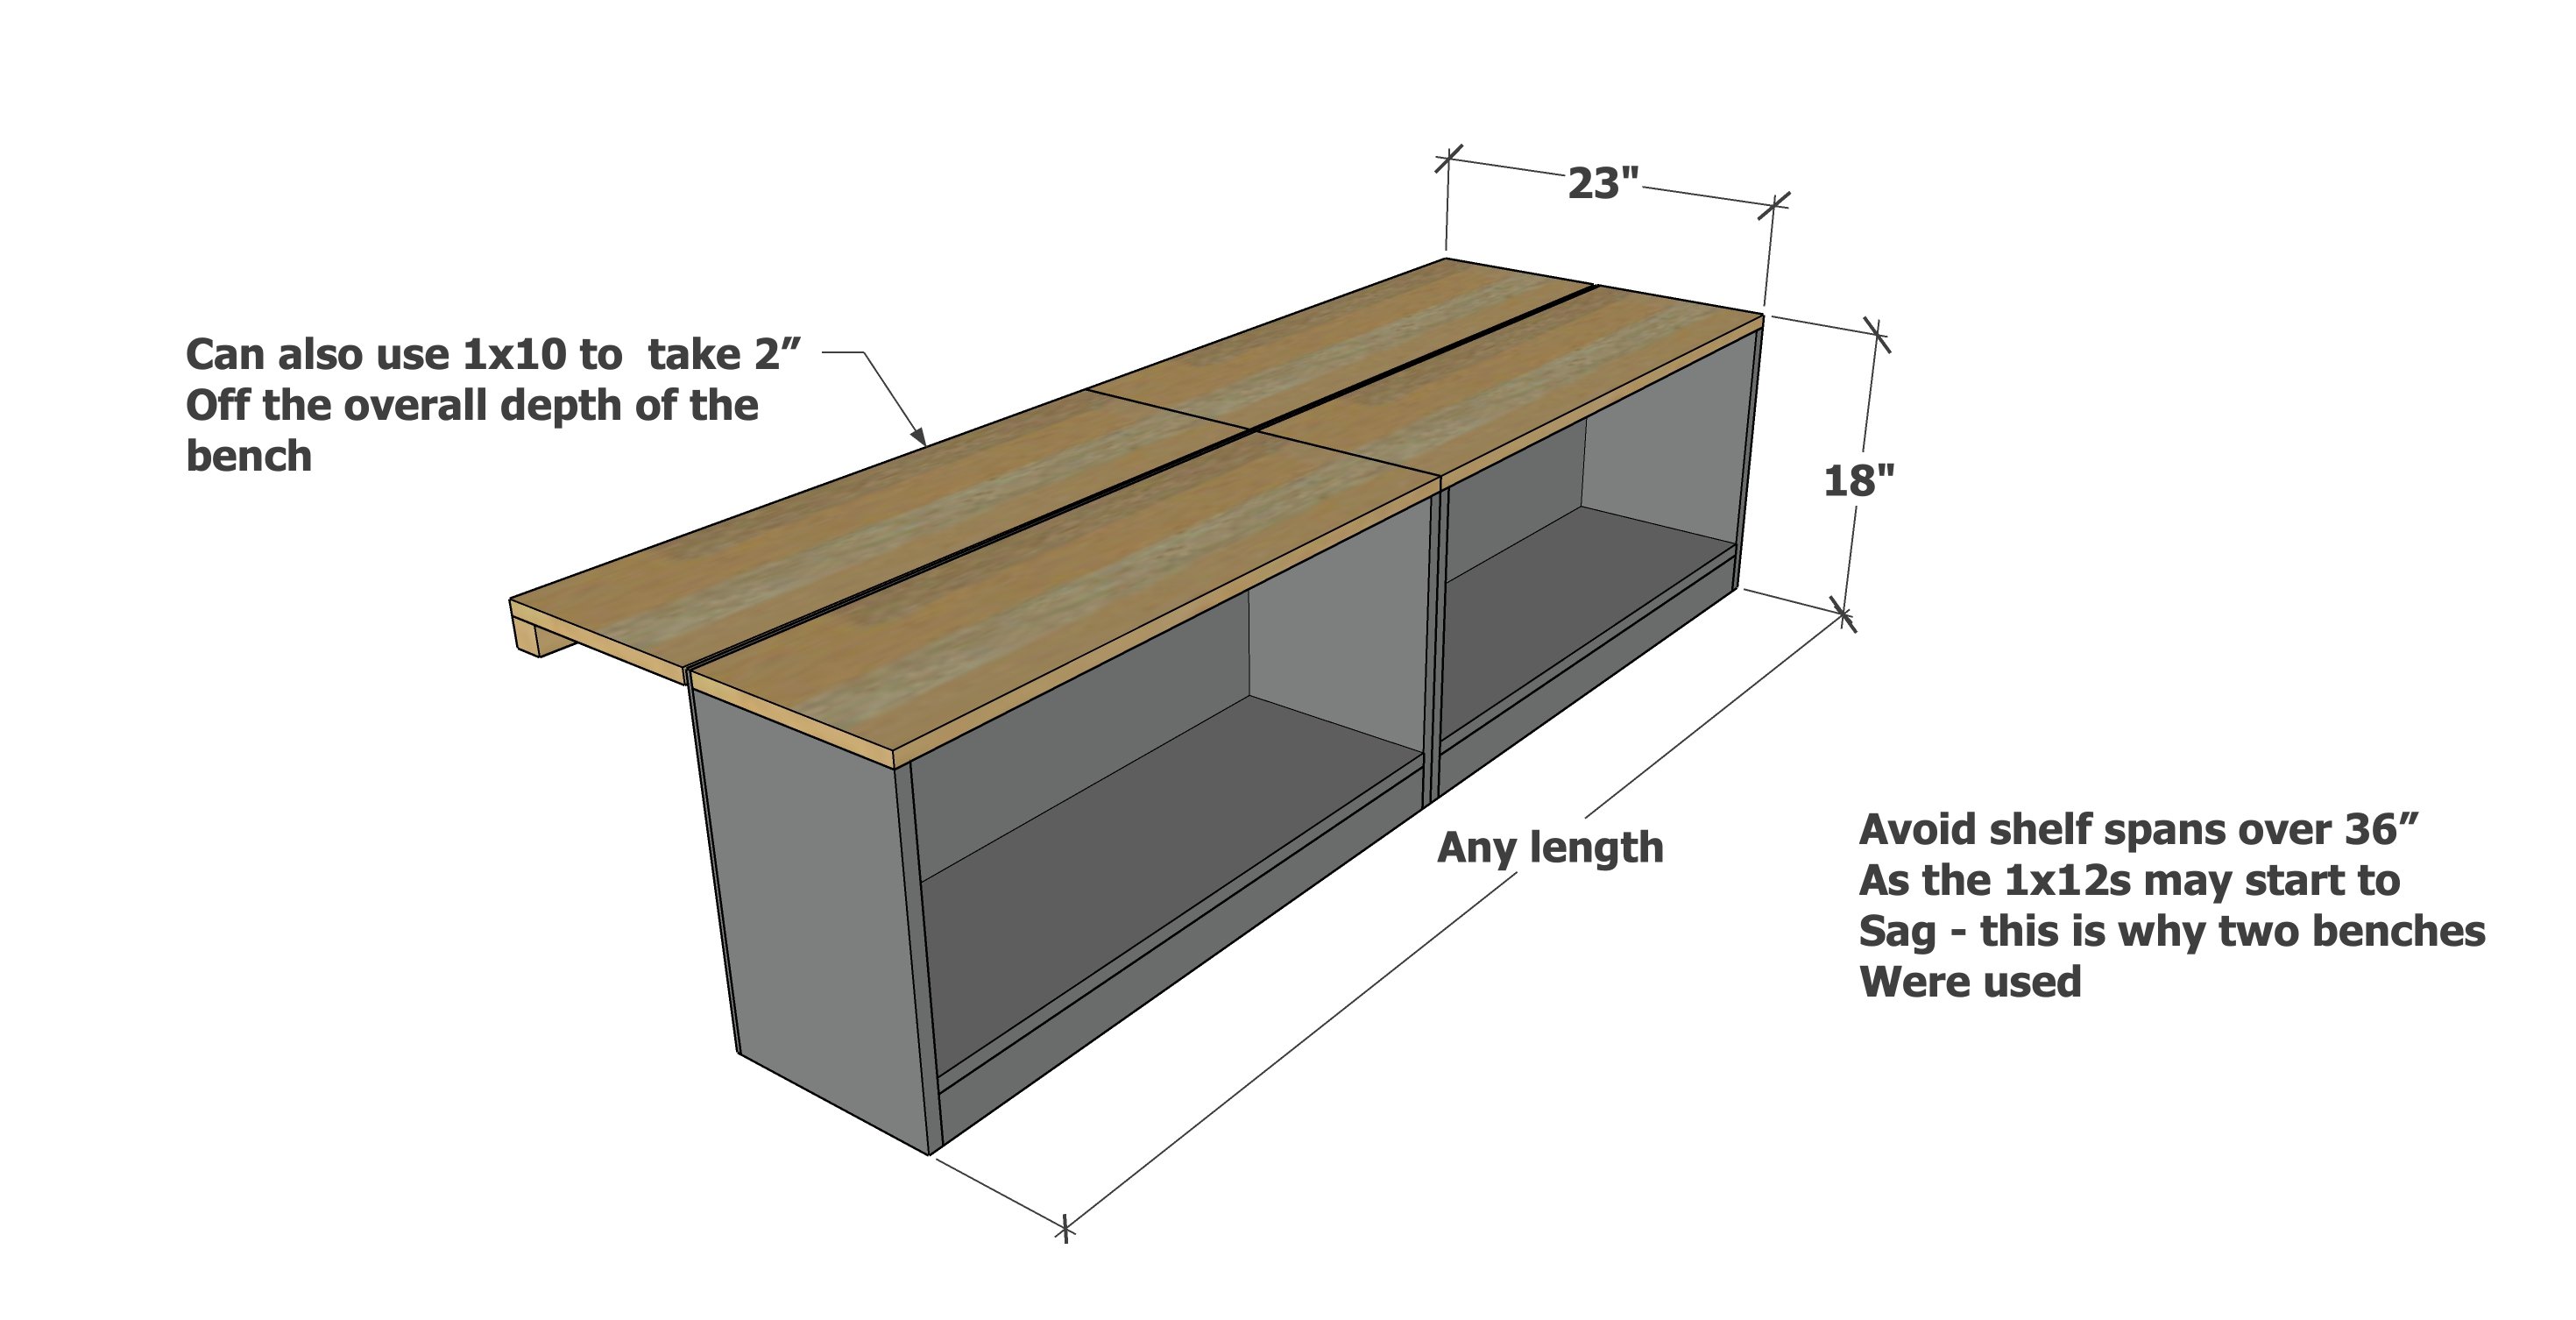
Then using 1x12s, I built two simple benches with a finished height of 18". We built two so the benches could be easily set inside the closet, as one bench would be impossible to get inside the closet and turn it.
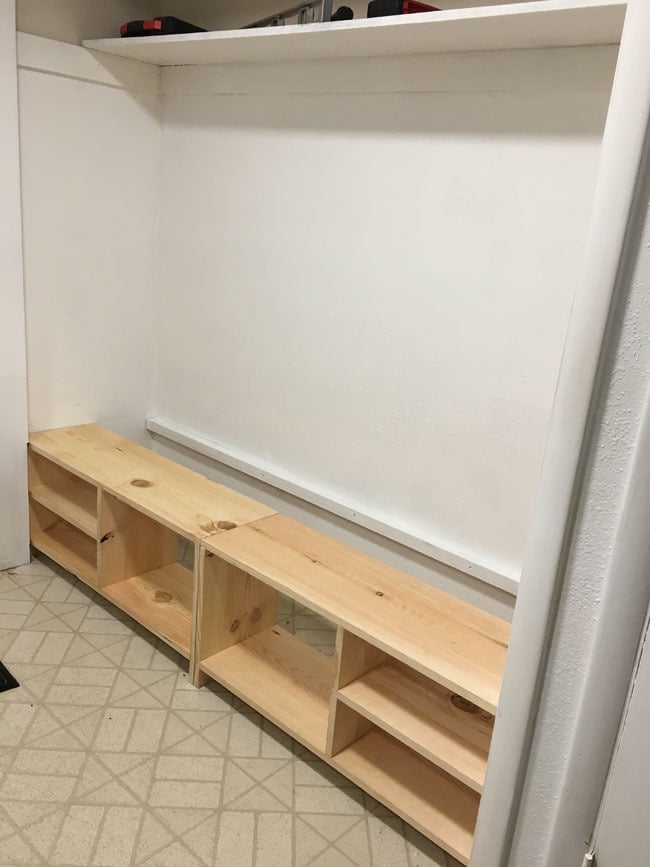
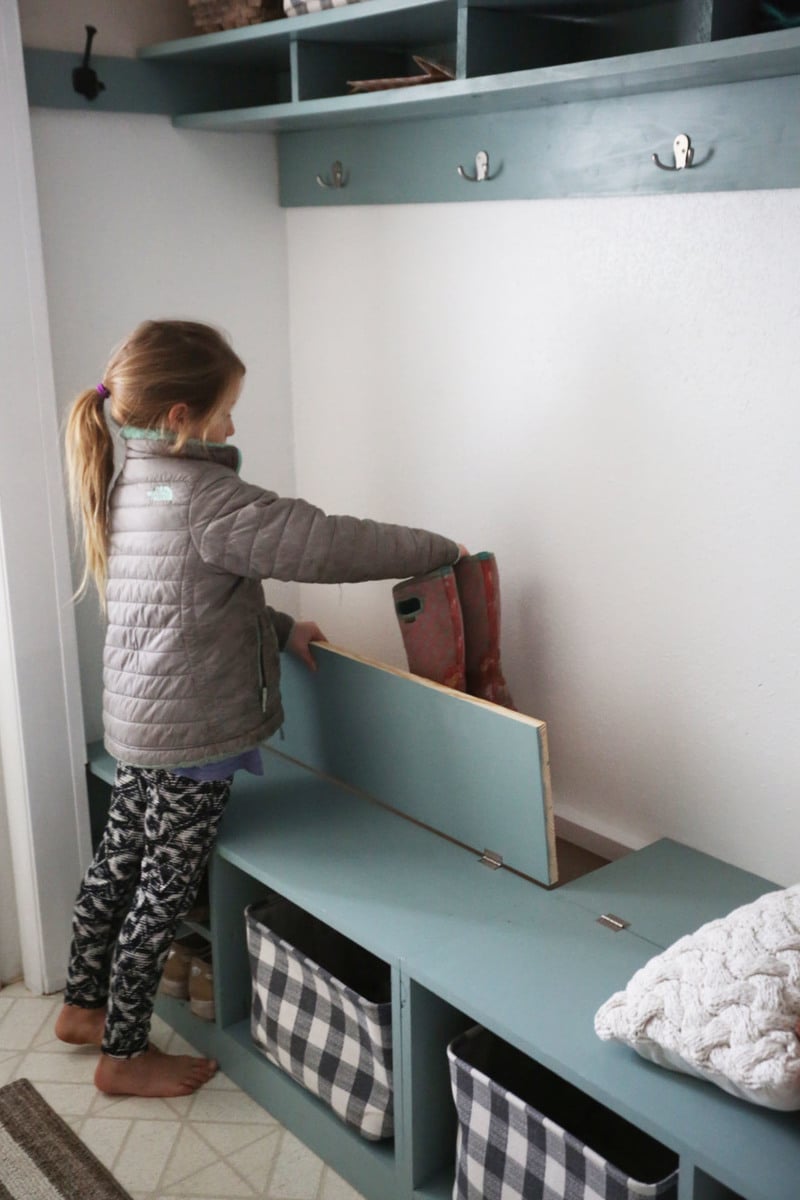
I screwed the benches together at the front of the closet opening. (I also added a back, I'll get to that in the plans below).
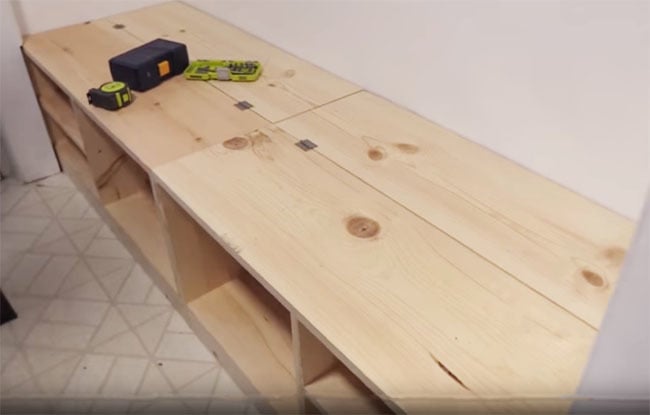
To the back of the bench, 1x12 boards are hinged to the top, they set on the 2x2 at the back side. The benches are set out so the 1x12 works out perfectly. If you need to, you can use a 1x10 or rip the 1x12s down in size.
This, building friends, is ALL I did.
Then we paint.
Pin For Later!

Preparation
- 3 - 1x12@ the width of your closet plus 18" per leg
- 2 - 1x3 @ the width of your closet
- 1 - 2x2 @ the width of your closet
- 1/4" plywood for the backs of the benches
- Benches can be assembled with 2" self tapping screws or 1-1/4" pocket holes
- 3/4" brad nails for attach 1/4" plywood to the back
- 3" wood screws for attach the 2x2 cleat to the back wall
See steps for cutting instruction


Instructions
Step 1
We recommend building two benches if longer than 40" (so shelves don't sag) or if you are trying to install inside a closet (so it's easy to place the benches in the closet).
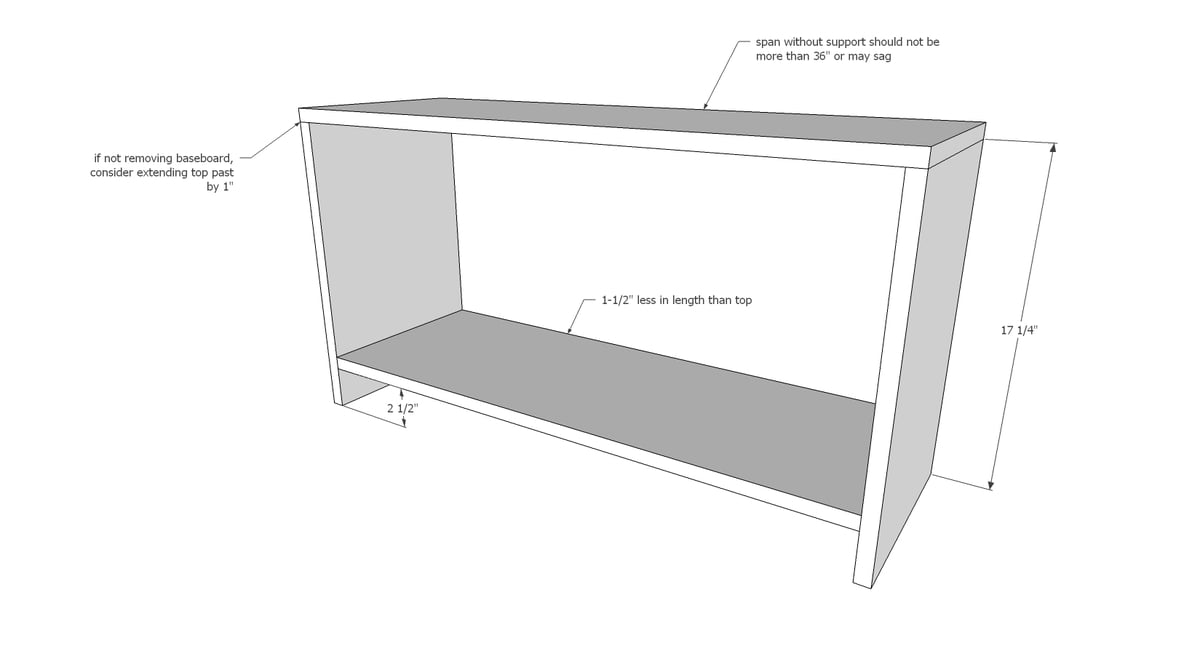
For benches inside the closet: Measure the overall width of your closet and divide by two. Subtract a 1/4" (so you have some "play") and cut the tops to this measurement. The bottom shelf is 1-1/2" smaller than the top. The legs are consistent regardless of width.
Using 1x12s, build bench frame as shown in diagram. We used a Kreg Jig and 1-1/4" pocket hole screws, but predrilled wood screws (2" length) will work as well.
Step 2
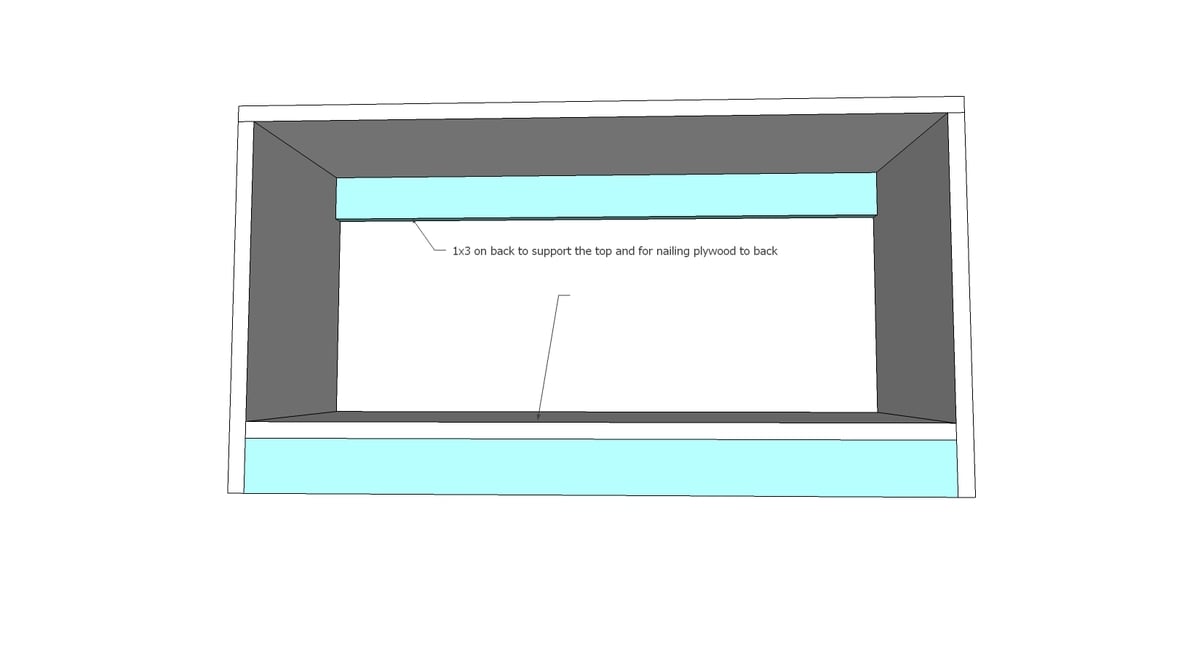
Cut two 1x3s the same length as the bottoms shelf.
1x3s are added to back top (inset in the cabinet) and front bottom (inset in the front bottom). Can be nailed (1-1/4" brad nails and glue) or screwed or Kreg Jigged in place.
Step 3
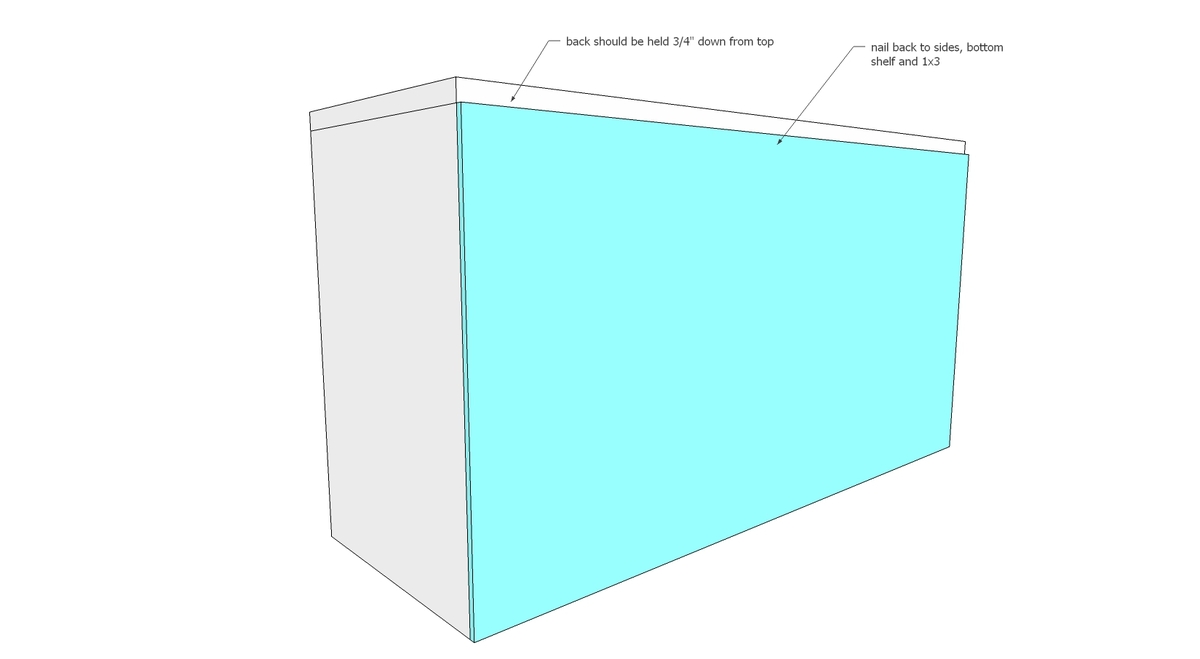
The back plywood needs to be held down 3/4" to allow for the hinged top. Nail to sides and 1x3 at top with 3/4" nails.
Step 4

Additional shelves and vertical dividers can be added with pocket holes, screws or nails as you see fit.
If adding vertical dividers, add before shelves. You will need to be notched out for the top back of the divider for the top 1x3 with a jigsaw.
Step 5

For install inside the closet, place the two benches inside the closet, at the front of the closet. Screw together.
Place a 2x2 cleat at the same height as the plywood on the back of the benches on the back side of the closet.
Measure the opening between the back closet wall and the back of the benches. Cut plywood or 1x12s to fit. Hinge to the back of the benches (so the tops rest on the cleats when closet).
Step 6
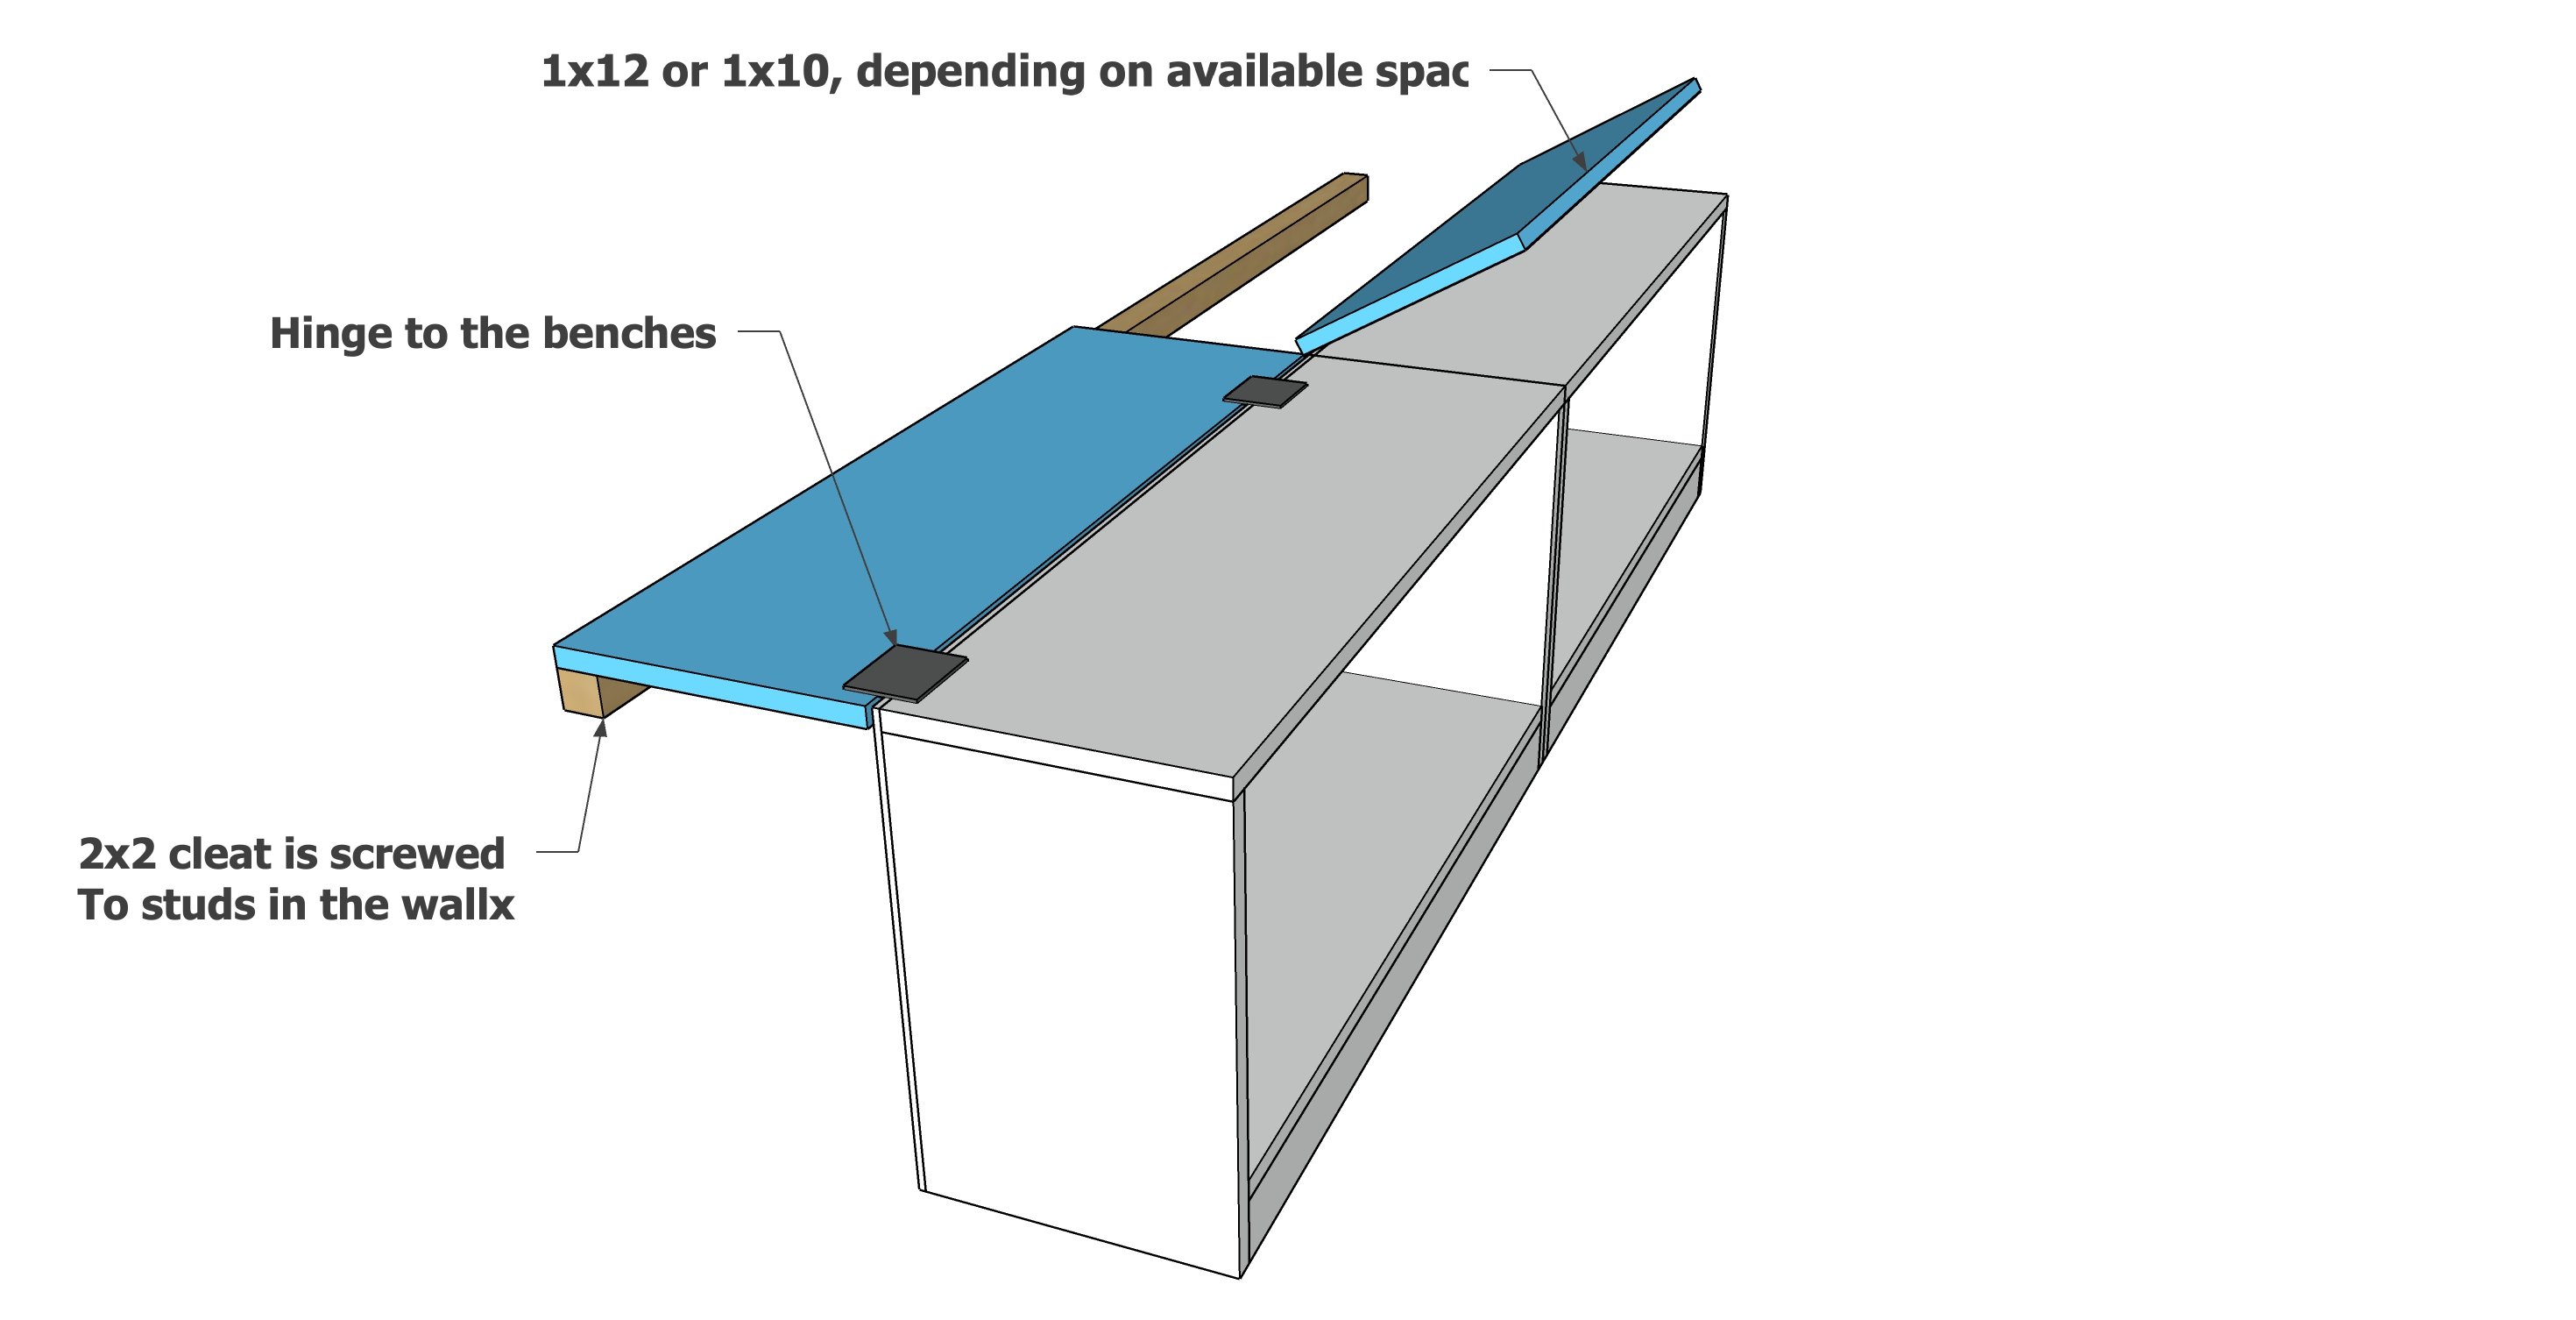
Diagram showing the hinge step.

Comments
Brownies33
Mon, 12/09/2019 - 16:42
Help with Top
I need help with the top part. I have a shelf in my closet already just like in the picture here. How did you create the second shelf underneath with the partitions, and how did you install it?
jimbardo
Mon, 11/16/2020 - 12:44
I'm wondering the same thing…
I'm wondering the same thing! I am assuming the 1x3s (appears to be 1x3s) must be strong enough to support the top shelving + partitions?
Reb3
Fri, 07/24/2020 - 12:25
Mudroom bench
I’d like to make this without the bottom part so I can just slide boot trays in and out directly on the floor. Would this be structurally strong enough without the bottom piece? Also, can the hinge be at the back of the shelf against the wall instead of in the middle of the bench? Thanks!