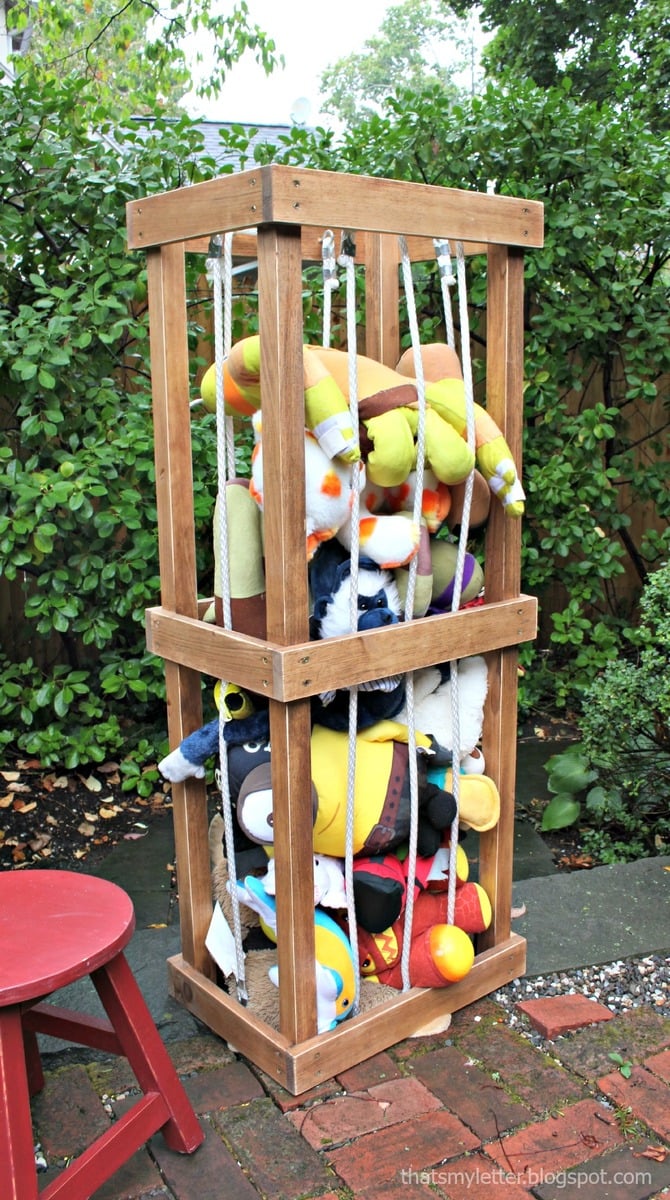


Finally a place for all those stuffed anilmals! Easy to build plans by ANA-WHITE.com
Hello, and Happy Friday!
For the past few years, my dear friend Jaime from That's My Letter and I have teamed up in the months before Christmas to bring you a new gift plan every Friday. It's been such a fun and rewarding series, and both of us look forward to it each year. We hope you do to!

It's hard to believe it is already October, and already time to start the #HandbuiltHoliday2015 - are you ready to get building? This year we have an amazing list of projects that we can't wait to share with you every Friday until Christmas!!!
To celebrate the kick off of Handbuilt Holiday 2015, Jaime is hosting an giveaway with some gifts for YOU!!!
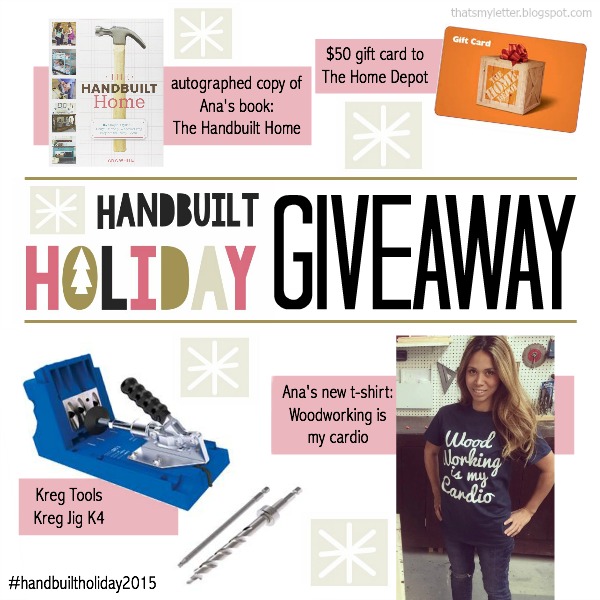
Head on over and enter this giveaway for a chance to win this prize package!
I'm so excited today to share with you the very first plan for 2015! This one I almost feel a little guilty about posting because it's more for mom than the kiddos -
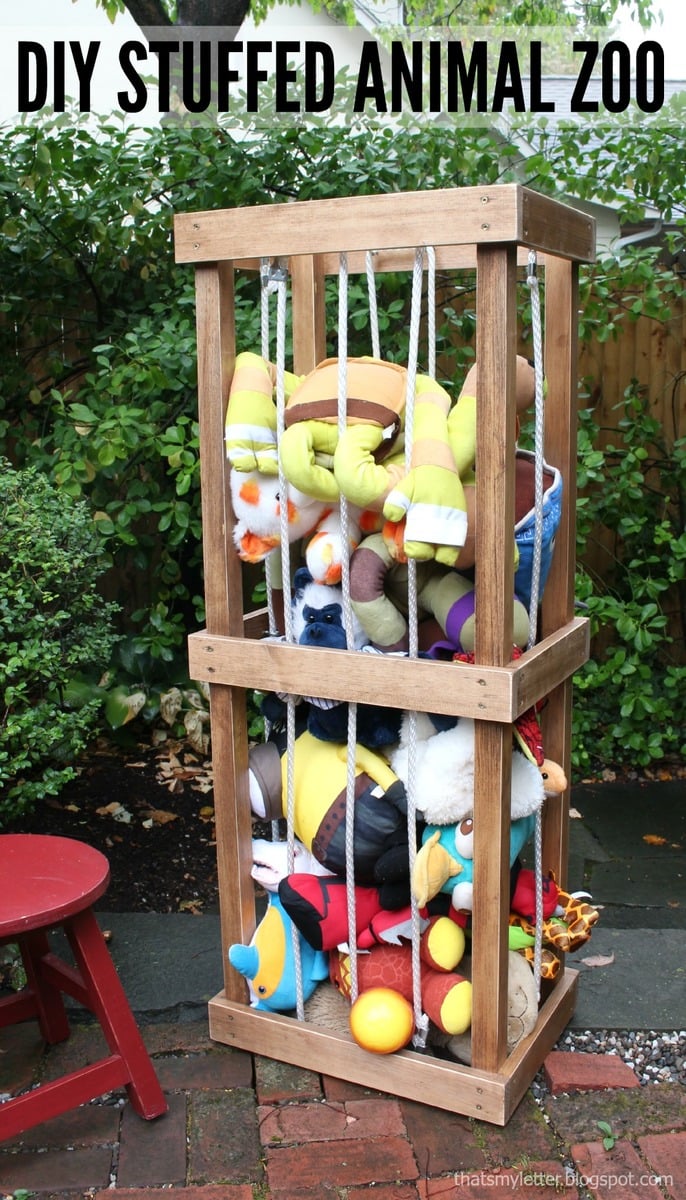
What mom kid wouldn't want this storage unit zoo for stuffed animals?
We've got you covered with the free plans below (if this is the homepage you'll need to click read more below), and Jaime's got you covered with lots more photos and building tips in her build post - so please check that out first!
Have an awesome weekend!
XO Ana + Friends
PS - Check out all our previous Handbuilt Holiday gift plans here!
PSS - Make sure you follow Jaime and I to get updates when the new plans post!
Preparation
2 - 1x3x8'
2 - 2x2x8'
40’ - 1 1/2” rope
8 - 1/2” rope clamps
24 - #6 screw eyes
Recommend attaching project with screws, between 1-1/4" and 2" in length. Try #8 self tapping screws. You can usually buy small boxes of these. You could also nail together with glue, but I do have some concerns with kids climbing on it and rough playing and the nails might not be enough.
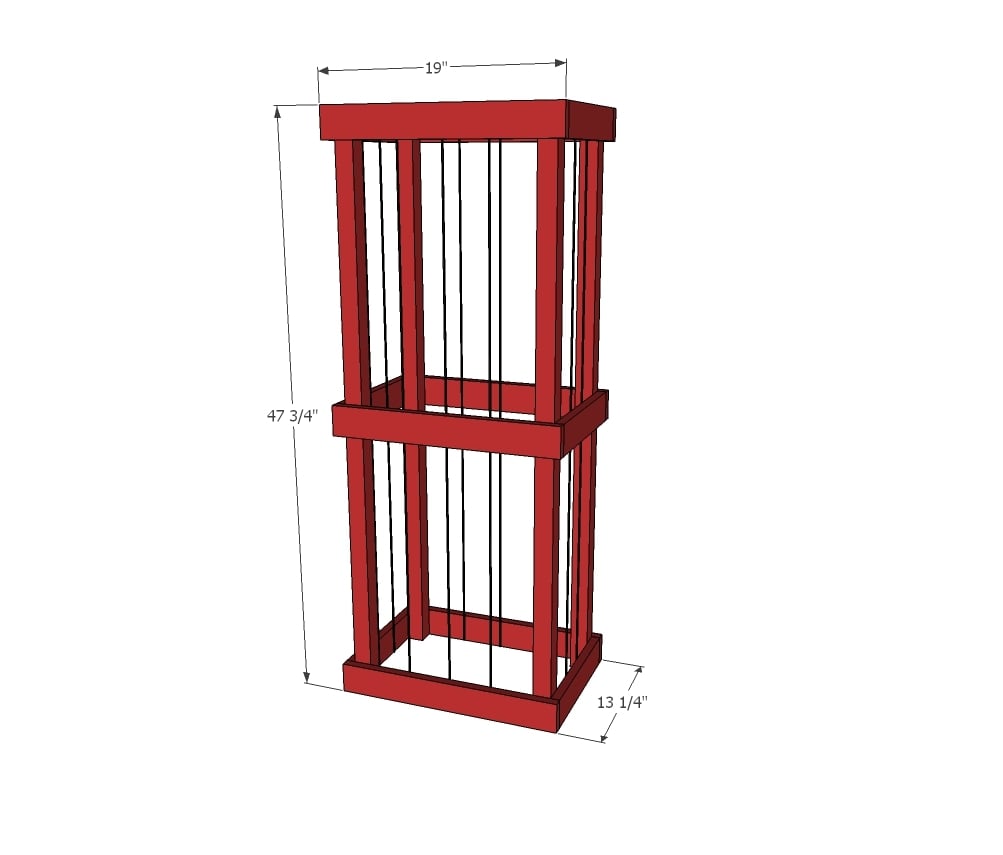
4 - 2x2 @ 47-3/4"
6 - 1x3 @ 11-3/4"*
6 - 1x3 @ 19"*
*Cut 19" 1x3s first to conserve boards


Please read through the entire plan and all comments before beginning this project. It is also advisable to review the Getting Started Section. Take all necessary precautions to build safely and smartly. Work on a clean level surface, free of imperfections or debris. Always use straight boards. Check for square after each step. Always predrill holes before attaching with screws. Use glue with finish nails for a stronger hold. Wipe excess glue off bare wood for stained projects, as dried glue will not take stain. Be safe, have fun, and ask for help if you need it. Good luck!
Instructions
Step 1
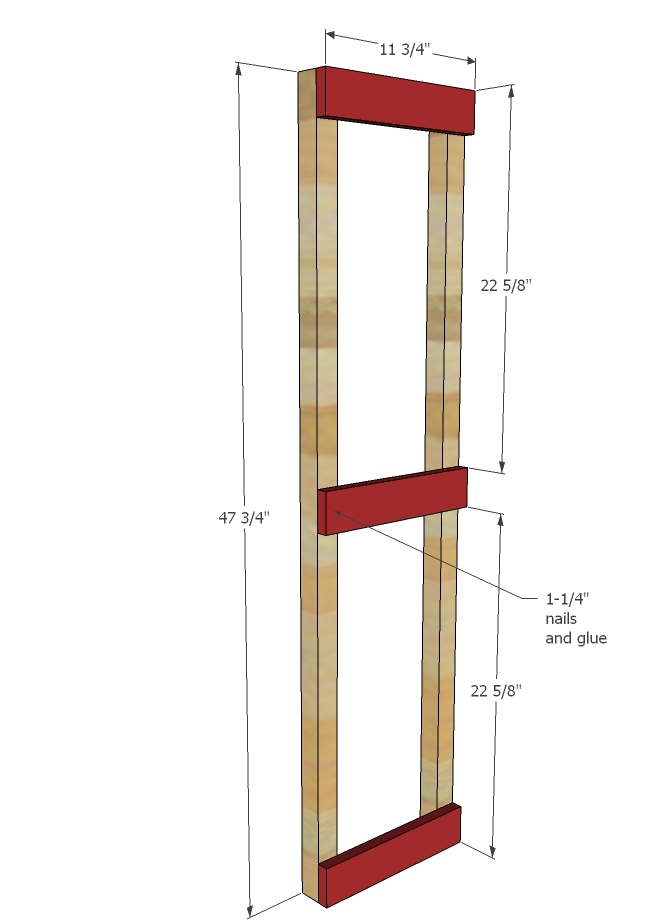
Make two of the leg sets by attaching the shorter 1x3 boards to the 2x2 legs with screws. You may need to predrill holes to prevent wood from splitting. Use glue.
Take diagonal measurements of the opposite outside corners to check for square. Make sure the two diagonals match. If they don't, push the longer diagonal points together to shorten. It is very important that these two end pieces are built square.
Step 2

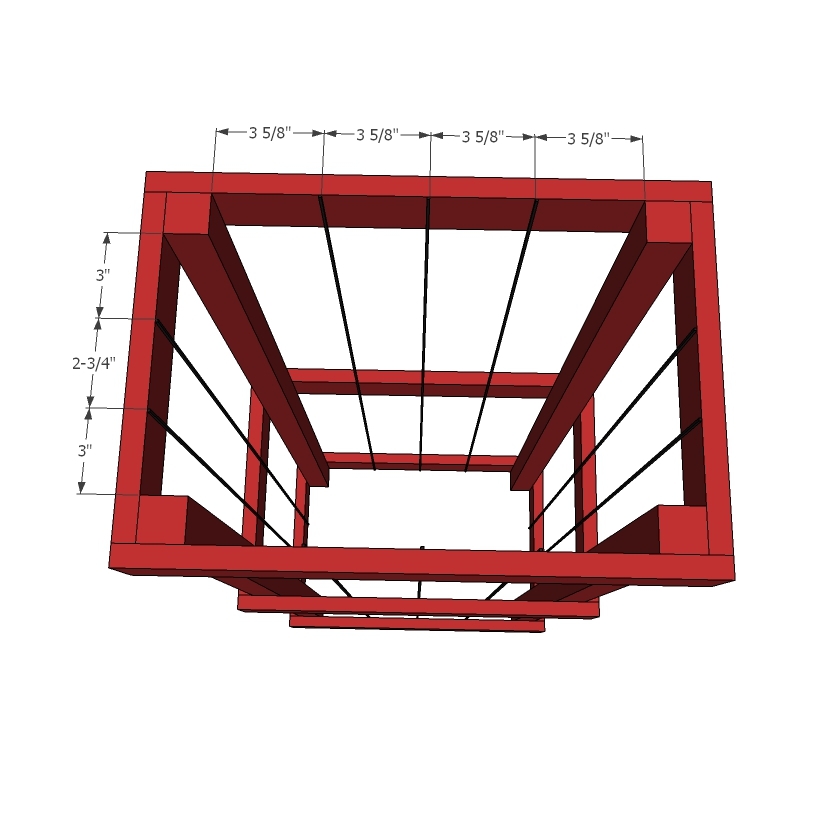
Once you have the two end pieces built, all you have to do is add the longer 1x3s to the front and back to complete the frame. Follow same steps as you did to make the sides in step 1.
Step 3
Now it's time to add the rope! I'd of course stain or paint first.
Jaime used eye hooks to secure her rope. You can get more details on how she did that here.
[[{"type":"media","view_mode":"media_original","fid":"3154908581","attributes":{"alt":"","class":"media-image","height":"609","style":"width: 650px; height: 396px;","typeof":"foaf:Image","width":"1000"}}]]
It is always recommended to apply a test coat on a hidden area or scrap piece to ensure color evenness and adhesion. Use primer or wood conditioner as needed.
Comments
PhoenixWytch
Sun, 01/31/2016 - 22:17
Making 2
I'm definitely making at least 2 of these! This would be a fantastic way of storing my son's soccer and basketballs as well, though I might have to alter it tiny bit for that one.
swwaterston
Tue, 12/20/2016 - 14:12
I made a few changes....
I made 3 of these cages, but made a few changes. Made them 24 x 24 - cut 1 x 3s as 24 and 22.5 inches. This made it possible to add a piece of plywood 24 x 24 on the base so that the cage can be moved without removing the animals. Also added furniture feet to protect carpet. The base made the tower more stable also. On the top, I cut mitred pieces to make the top more "finished". I also added screweyes on middle section, and ran rope for a "rope shelf". Hard to explain, but if I number the screweyes 1-5 on each side, I connected rope to opposing side: 1-1, 2-2, 4-4, 5-4 on both sets of sides. Then I ran a rope as a square from the #3 screweye to #3 on the adjacent side... This leaves a center hole big enough for animals to reach the bottom, but keeps all of the weight from the animals off of the bottom animals.... Anyway. Really like the design.