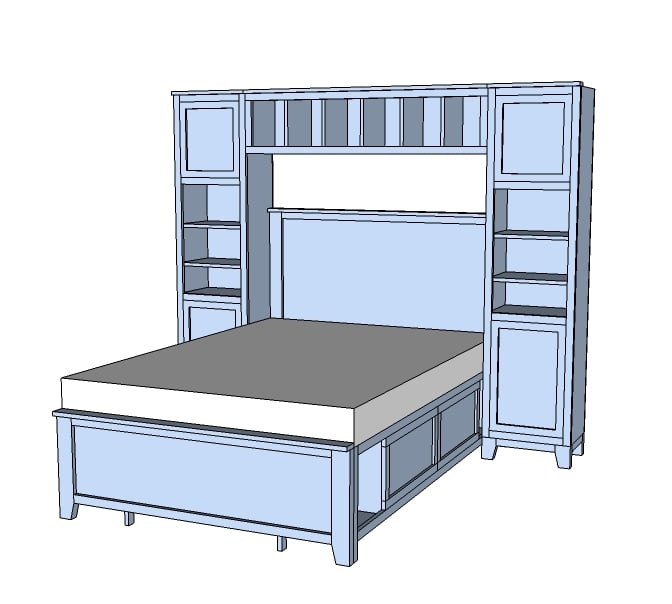


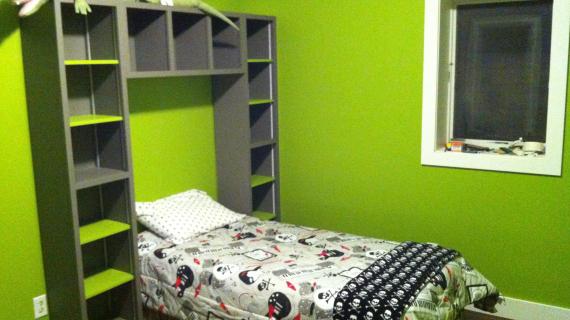
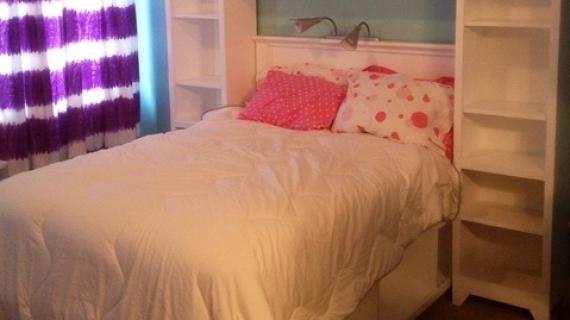
Storage Towers that can act as both a nightstand and a support system for a bed hutch. Add tons of storage to your child or teens room without taking up more space than nightstands. Works with the Hailey Storage Bedroom Collection.
Yesterday was my first day of preschool (Grace's too) so I didn't have a chance to post these plans. As our building community has gotten so savvy and smart, I have been trying to post plans that are particularly innovative (because you certainly are more than able to design your own bookcase) but I wanted to draw these plans up so that they could match Grace's Bed.

I have decided NOT to build these towers for Grace because the bed itself hold so much! Those storage compartments hold all of her books, and I keep extra blankets on the wall side. The baskets hold toys and stuffed animals.
I have other plans for the extra space in her room . . . so stay tuned to find out what that is going to be!
Preparation
3 - 1x12 @ 8 feet long
2 - 1x12 @ 69 1/2" (Tower Sides)


Please read through the entire plan and all comments before beginning this project. It is also advisable to review the Getting Started Section. Take all necessary precautions to build safely and smartly. Work on a clean level surface, free of imperfections or debris. Always use straight boards. Check for square after each step. Always predrill holes before attaching with screws. Use glue with finish nails for a stronger hold. Wipe excess glue off bare wood for stained projects, as dried glue will not take stain. Be safe, have fun, and ask for help if you need it. Good luck!
Instructions
Step 1
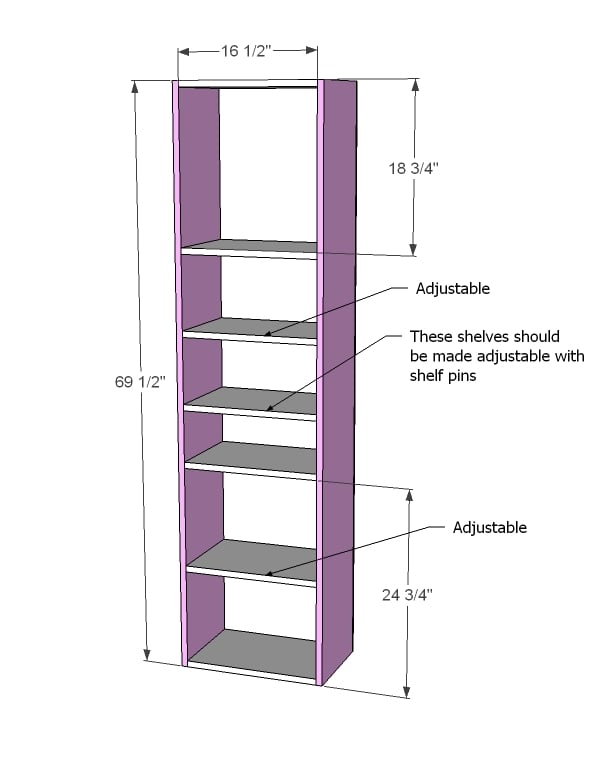
Like most storage, we start out by building a box. Pretty simple. Because this one is fully face framed with a plywood back, you can use your nailer to build the box. Just make sure that you adjust everything for square, and you use glue.
Also, some of the shelves should be fixed, and some should be adjustable. My favorite means of making adjustable shelves is with shelf pins.
Step 2
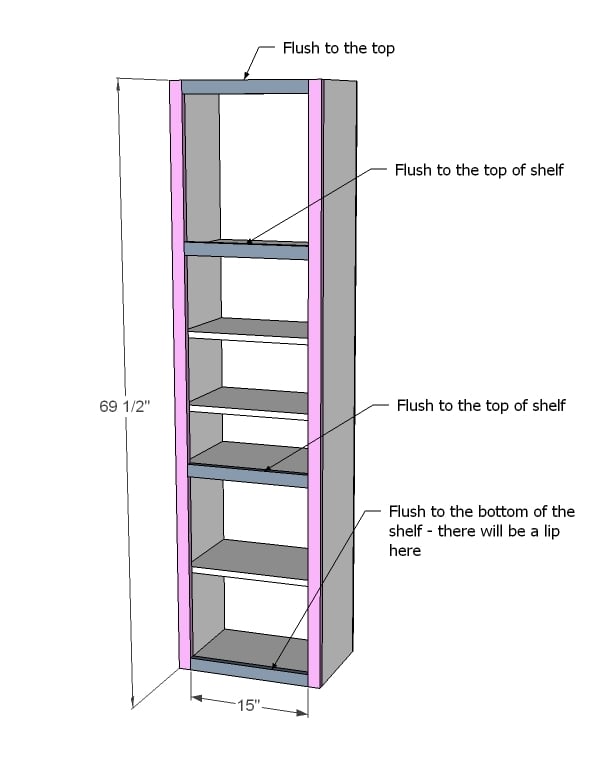
Now it's time for that face frame. Start by adding the longer side trim, using 1 1/4" finish nails and glue. Nail to the shelves that are fixed for added support.
Step 3
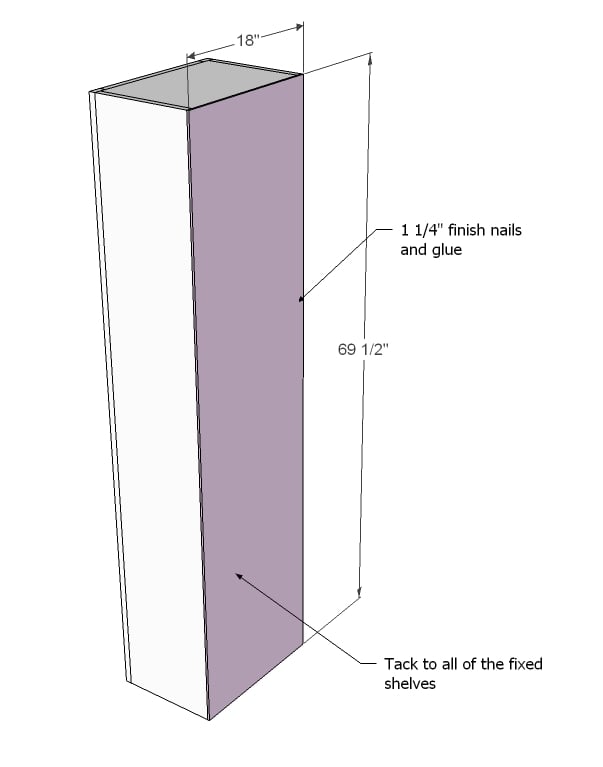
Attach the 1/4" plywood to the back as shown here. Use glue and attach to all fixed shelves.
Step 4

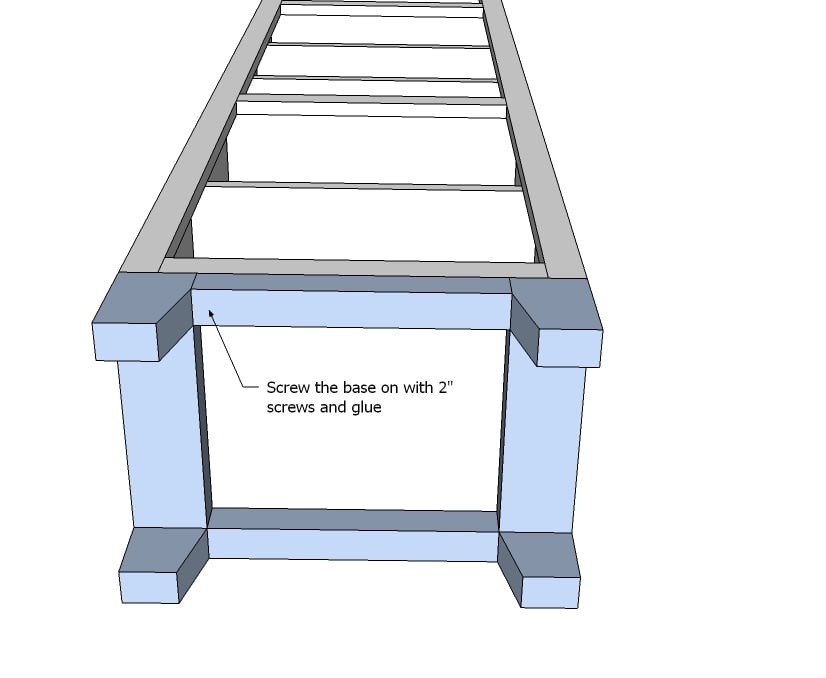
Build the base as shown above. The base above is shown with 2x4s that are ripped down to 3" widths - so if you don't rip yours down, the 2x2s will need to be 1" shorter.
Optimally, you would want to use pocket hole screws to build this base. But if you do not have pocket hole screws, simply screw the 2x4 pieces together as shown above, ignoring the joint to the 2x2s. Then attach the pieces to the base in step 5.
Step 5
Step 6
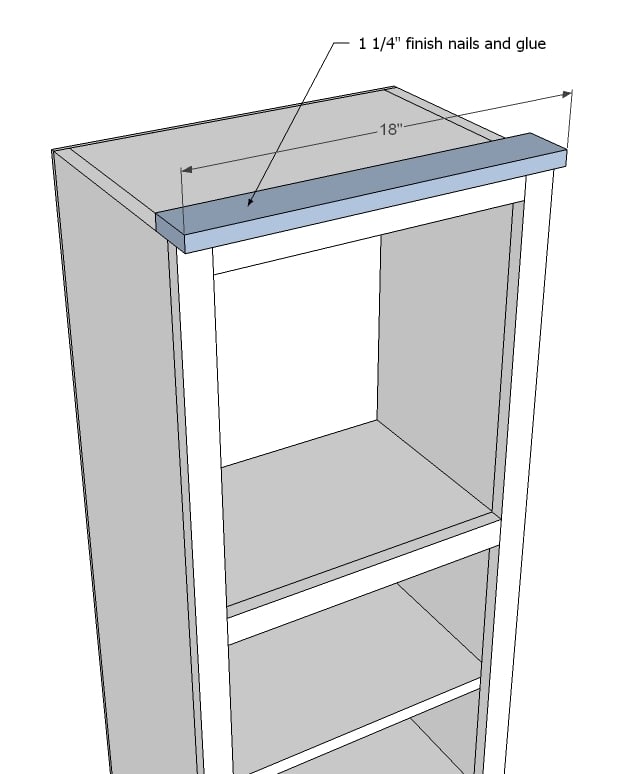
And a little crown to match the bed.
Step 7
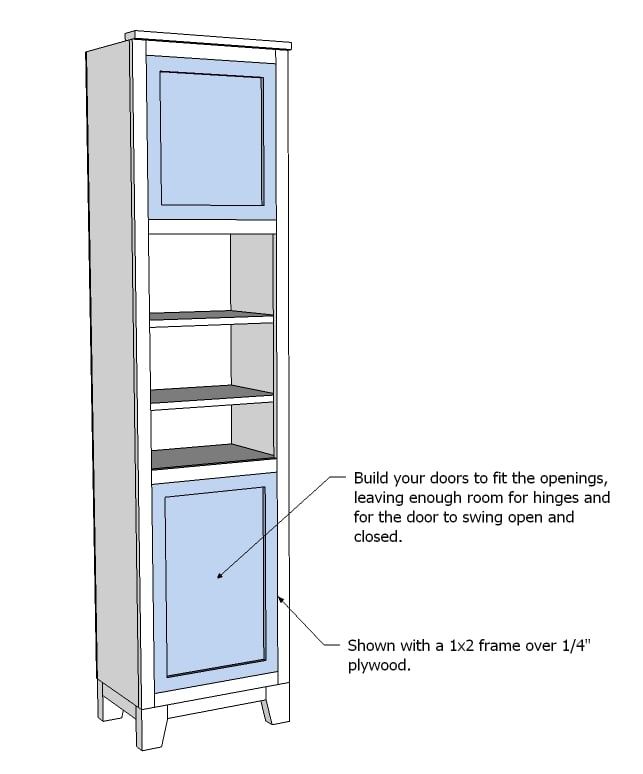
You should always build your doors to fit the openings. I like to leave a 1/8" gap around the doors. If you are worried about making inset doors, you can also build overlay doors (easier to get right than inset doors). The main things with doors is to use very straight boards, plywood that is not warped, and to measure and fit just right.
It is always recommended to apply a test coat on a hidden area or scrap piece to ensure color evenness and adhesion. Use primer or wood conditioner as needed.
Comments
Guest (not verified)
Sun, 10/09/2011 - 19:51
Towers
Towers
Melissa R (not verified)
Sat, 12/29/2012 - 22:30
Hailey storage bedroom collection
How do I make the bridge that is at the top and instead of placing a door at the bottom how can I place two drawers?
dmvjsims@gmail.com
Wed, 12/31/2014 - 10:20
Cut list for the bridge
Is there a cut list for the bridge or is that to taste for the builder based on bed size?
In reply to Cut list for the bridge by dmvjsims@gmail.com
Ana White
Wed, 12/31/2014 - 13:30
Take a look at thishttp://ana
Take a look at this
http://ana-white.com/
JoanneS
Wed, 12/31/2014 - 13:22
Link to Hailey Hutch for Twin and Full size beds
Ana has a plan with both twin and full sizes:
http://ana-white.com/2011/04/hailey-hutch-twin-and-full-beds