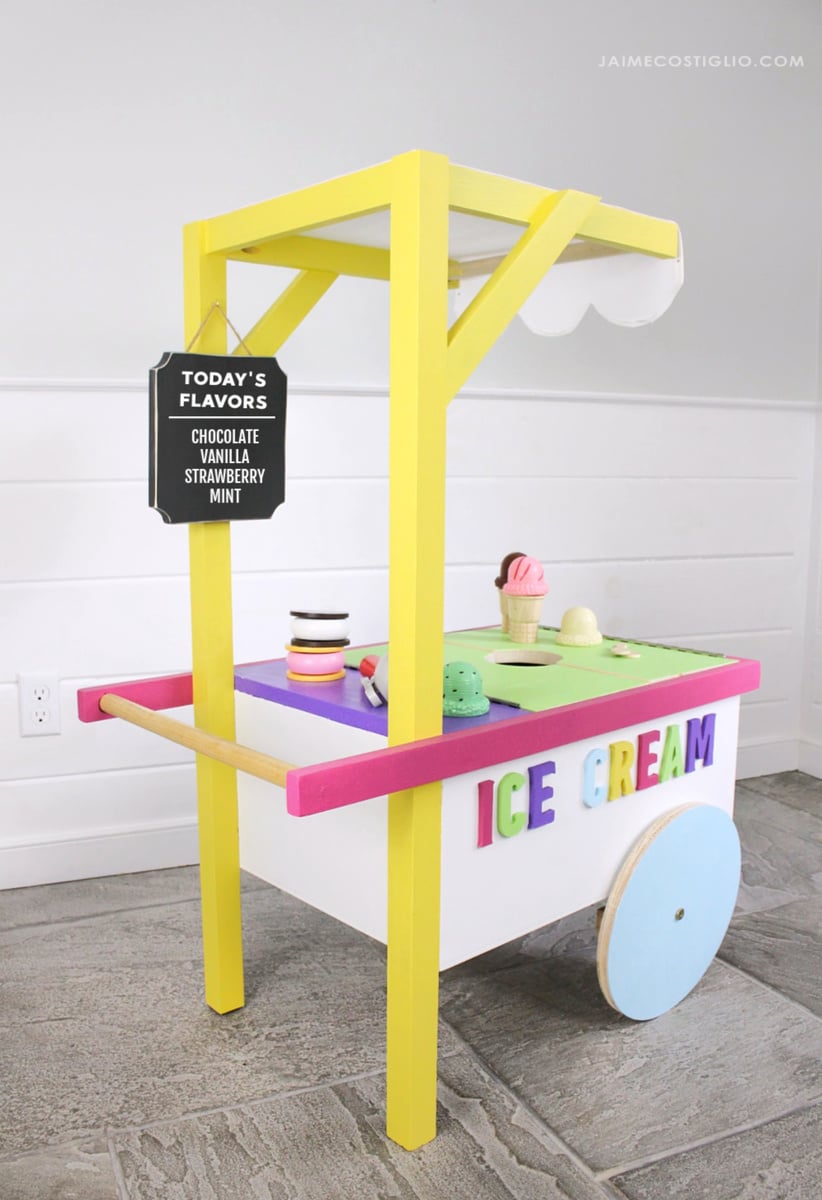
Ice Cream Cart

The free plans on this website are made possible with advertising and affiliate links.  Thank you for helping us keep plans free.


Difficulty
Intermediate
| Print this plan

DIY Ice Cream Cart for kids!  Free plans by ANA-WHITE.com

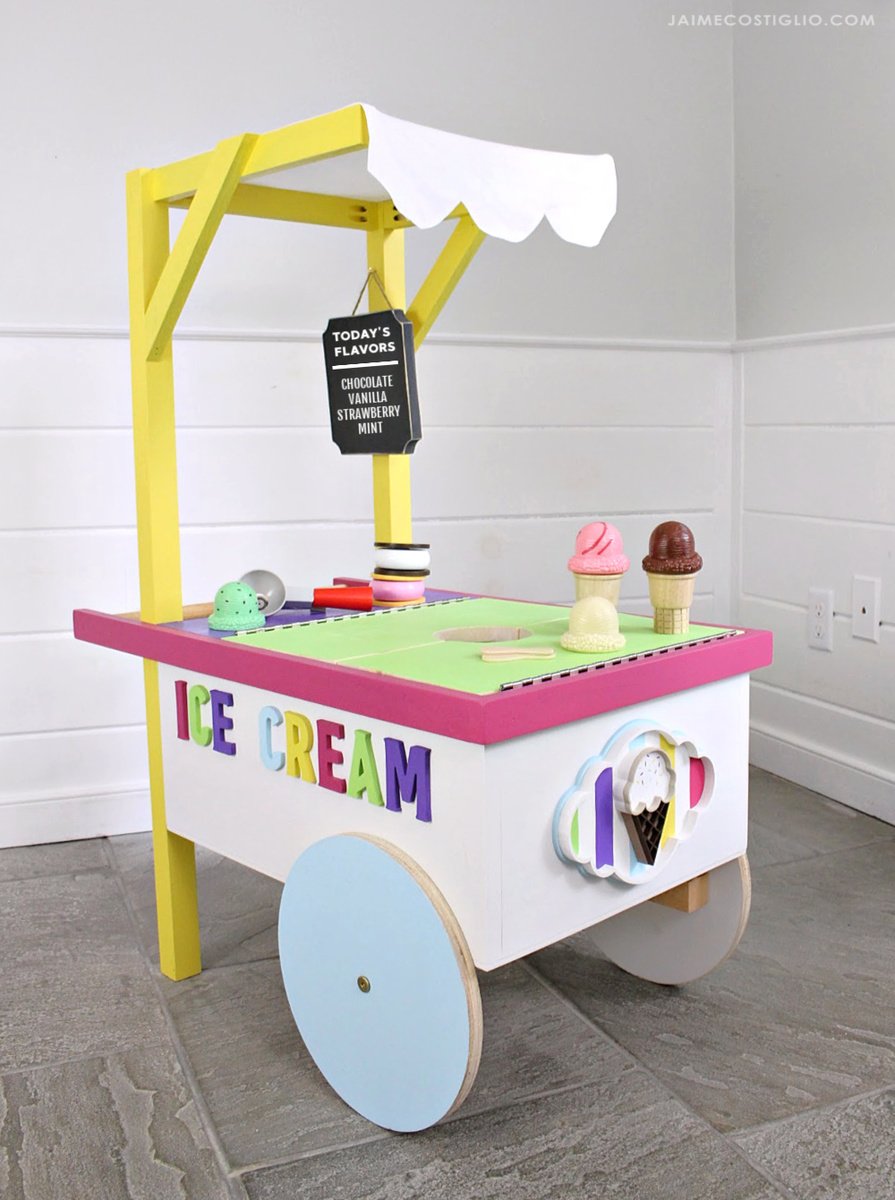
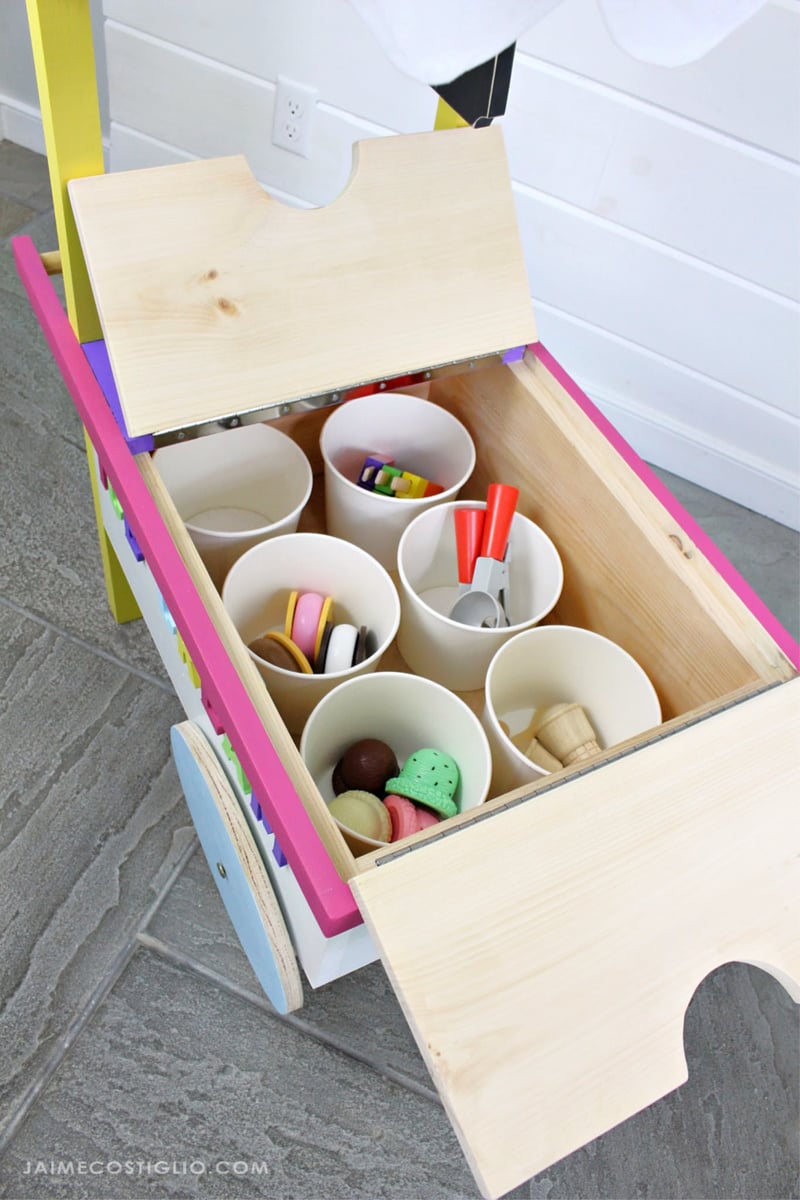
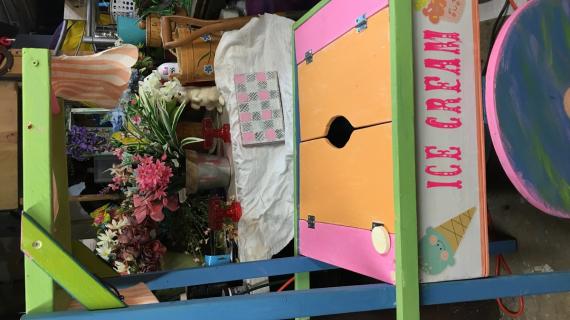
Are you looking of the perfect Christmas gift for your little ice cream lover?  This adorable ice cream cart is made of wood, and features rolling wheels and a roomy ice cream storage area.

As part of the Handbuilt Holiday series that Jaime Costiglio and I do in the ten Fridays leading up to Christmas, we share free plans so you can build it yourself.

It is our gift to you!

I do the plans (below) and Jaime does the build - so do take a second to hop over and read Jaime's build post, with lots more photos and build details.


CLICK HERE FOR MORE PHOTOS AND BUILD DETAILS AT JAIMECOSTIGLIO.COM


Enjoy the free plans following,

Ana

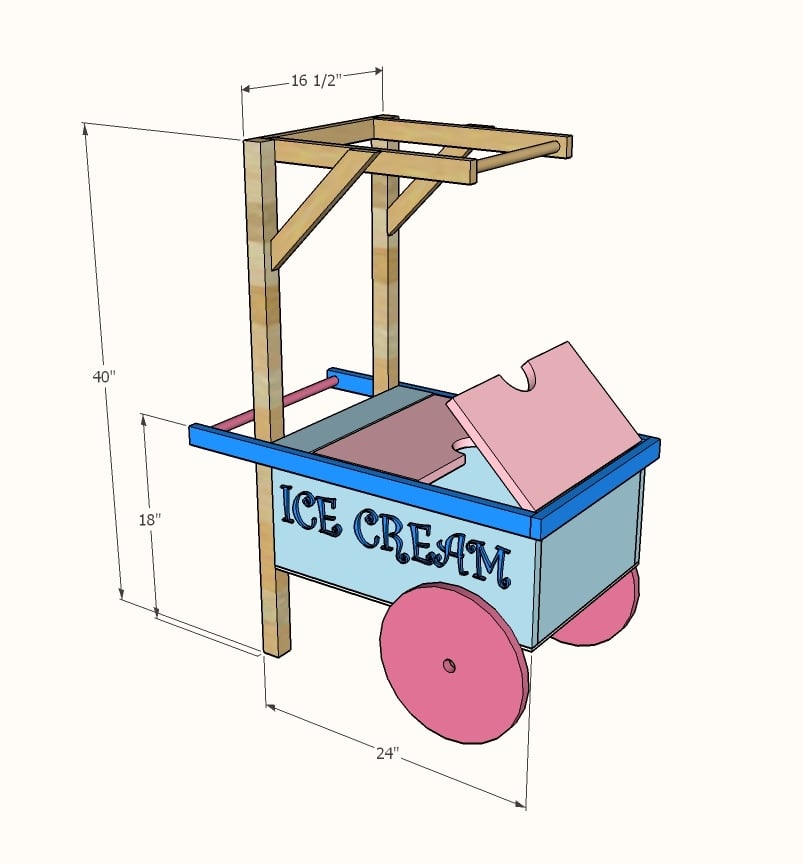
Dimensions
Dimensions shown above.

Preparation

Shopping List

1 - 1/4" plywood 24" x 24"

1 - 1x8 @ 10 feet 

2 - 1x2 @ 8 feet 

1 - 1-1/4" wood dowel @ 30"

1 - 2x2 @ 8 feet 

1 - 1x4 @ 4 feet

2-3/4" self tapping wood screws

Common Materials
3/4 inch finish nails
1 1/4 inch finish nails
Cut List

2 - 1x8 @ 15"

2 - 1x8 @ 22-1/2"

1 - 1/4" plywood @ 22-1/2" x 16-1/2"

2 - 1x2 @ 30"

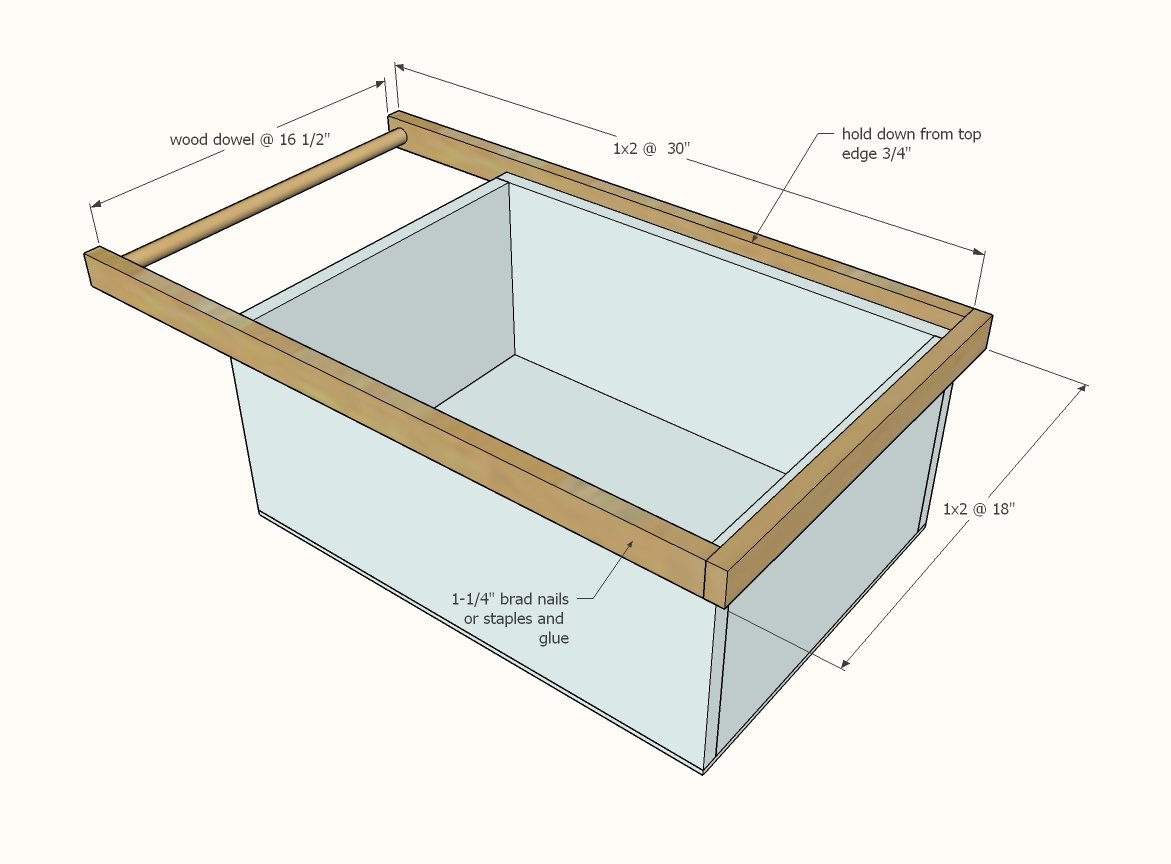
1 - 1x2 @ 18"

1 - wood dowel @ 16-1/2"

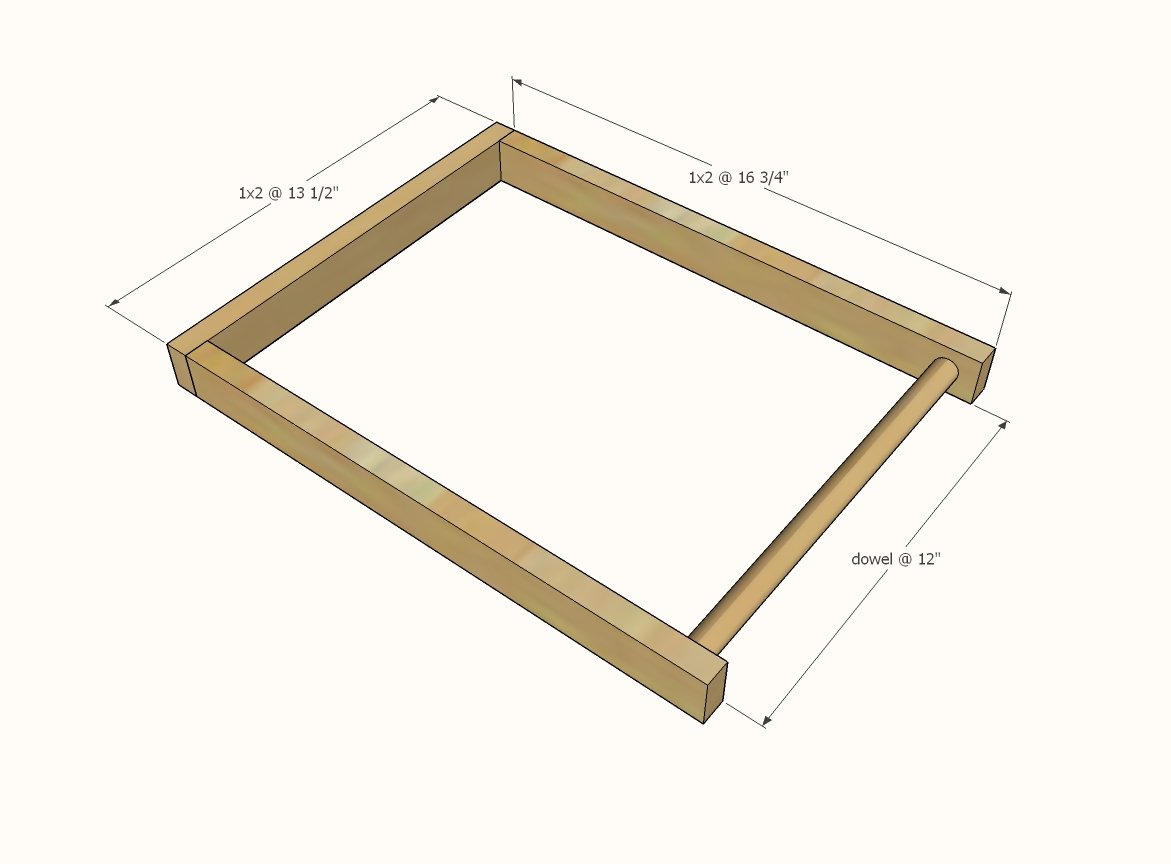
2 - 1x2 @ 16-3/4"

1 - 1x2 @ 13-1/2"

1 - wood dowel @ 12"

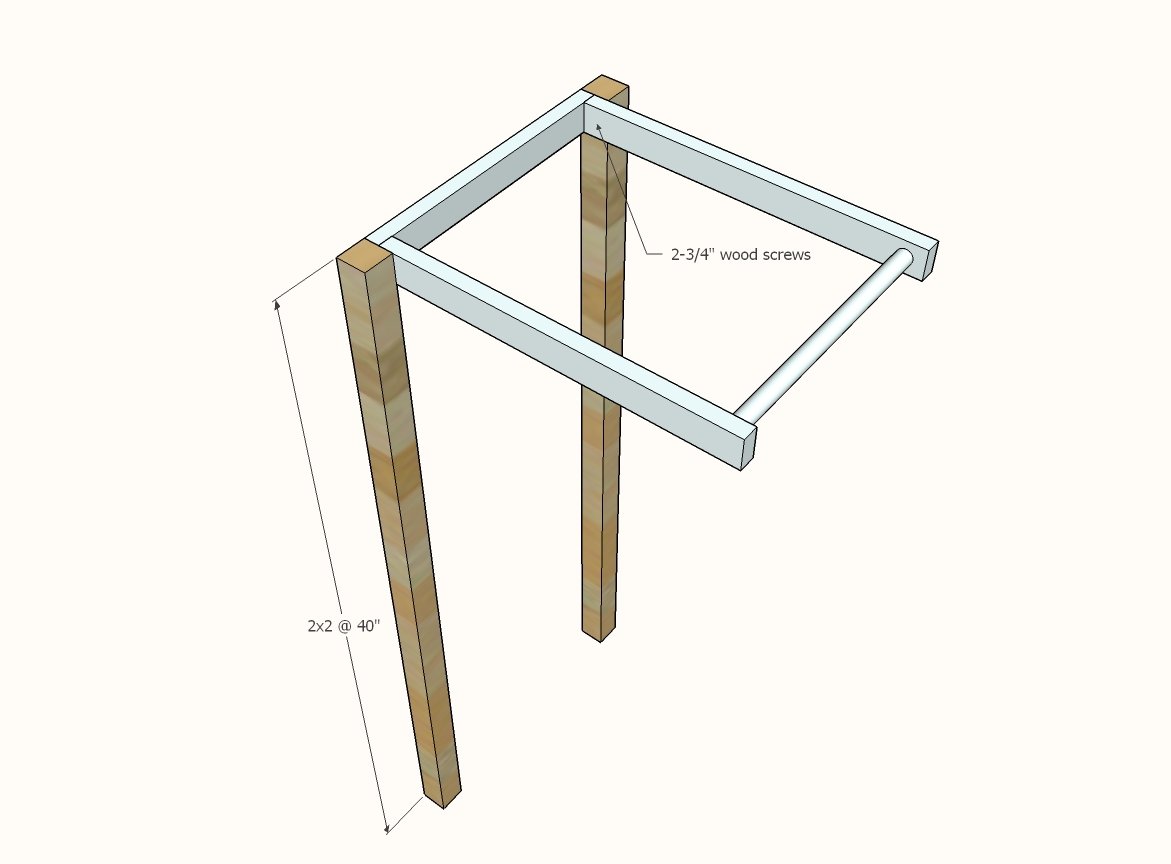
2 - 2x2 @ 40"

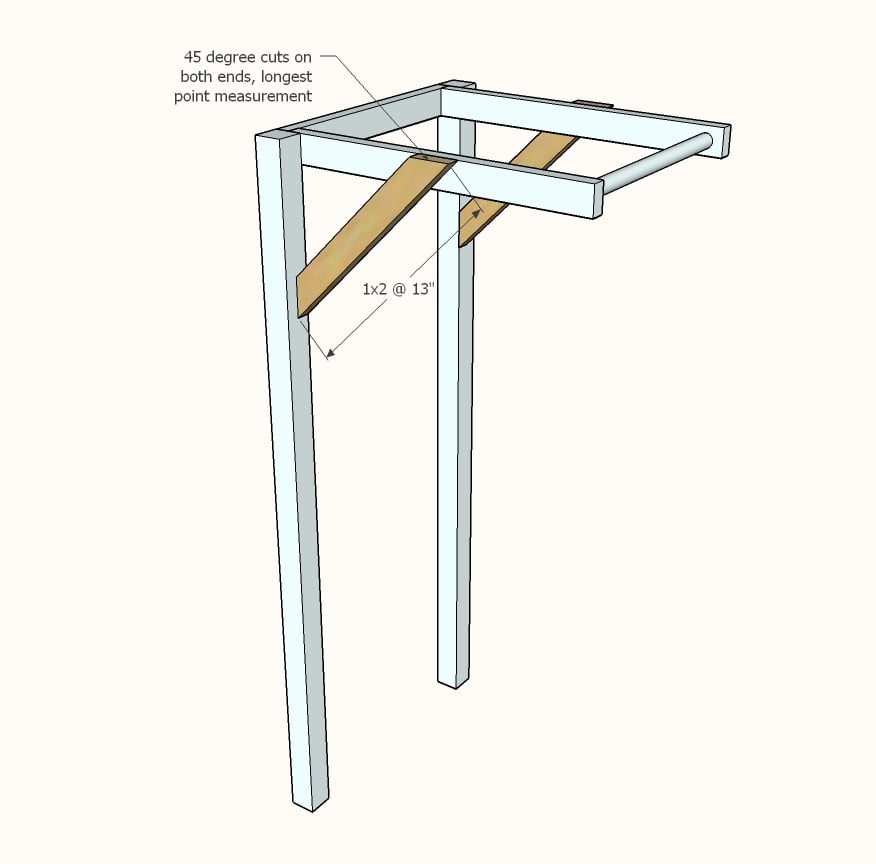
2 - 1x2 @ 13" - long point to long point, both ends cut at 45 degrees off square, ends NOT parallel

1 - 1x4 @ 15"

2  - 1x4 @ 4"

1 - 1x2 @ 15"

2 - 12" rounds

2 - 1x8 @ 16"

1 - 1x4 @ 16-1/2"


Tools
Tape Measure
Speed Square
Pencil
Safety Glasses
Hearing Protection
Kreg Jig
Drill
Circular Saw
Miter Saw
Brad Nailer
Power Sander

Instructions

Step 1

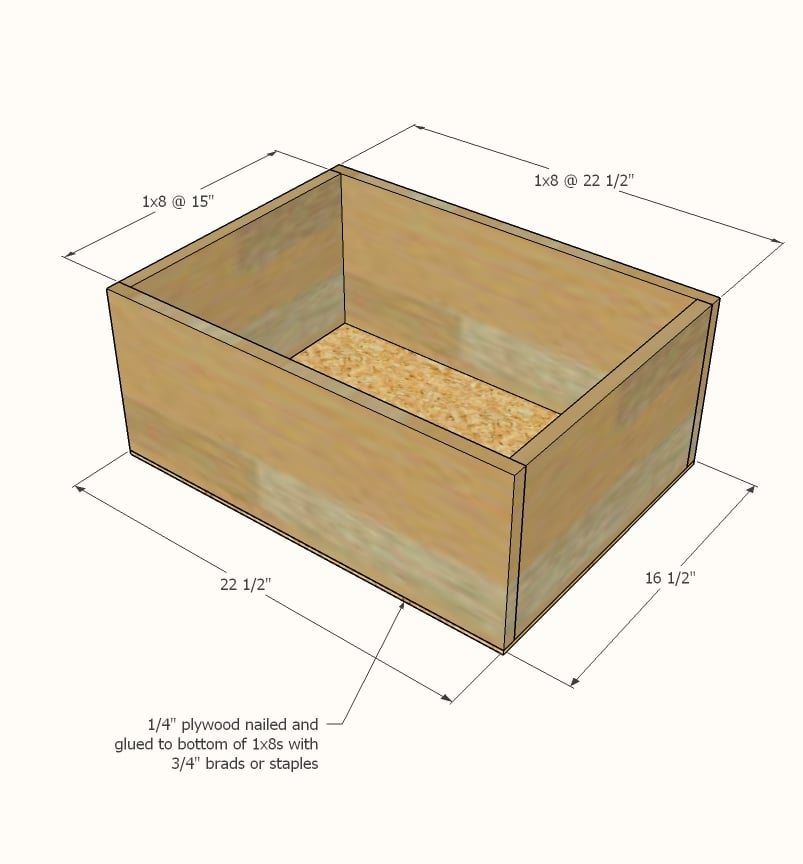
Build the box.  I recommend using a Kreg Jig set for 3/4" stock and 1-1/4" pocket hole screws.  You can alternatively nail and glue with 1-1/4" nails.

Attach bottom with 3/4" brad nails or staples.

Step 2

Attach trim with 1-1/4" brad nails and glue.  Attach dowel with 1-1/4" screws (you can use Kreg Jig screws or self tapping wood screws).

Set aside.

Step 3

Build top awning piece with pocket holes (preferred) or nailed and glue.  Attach dowel with screws.

Step 4

Attach to 2x2 legs with 2-3/4" wood screws.

Step 5

Step 6

Attach 2x2s to the box with 2-3/4" screws from inside.

Set aside.

Step 7

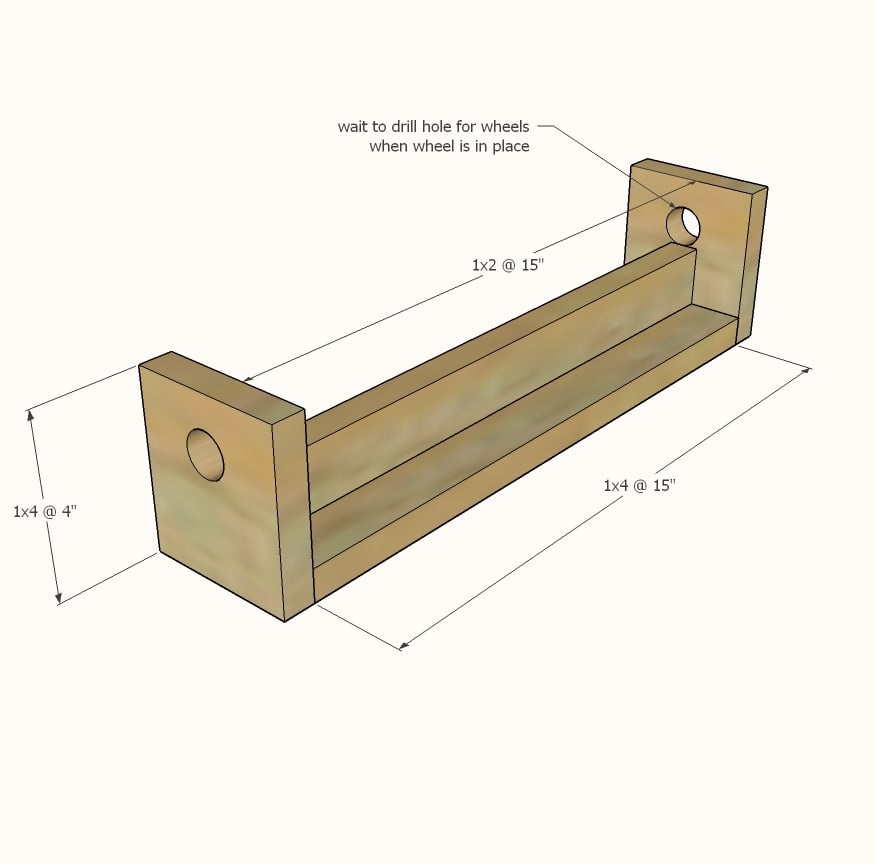
Build wheel support system as shown above.  Pocket holes are preferred, but 1-1/4" brad nails can be used.


Step 8

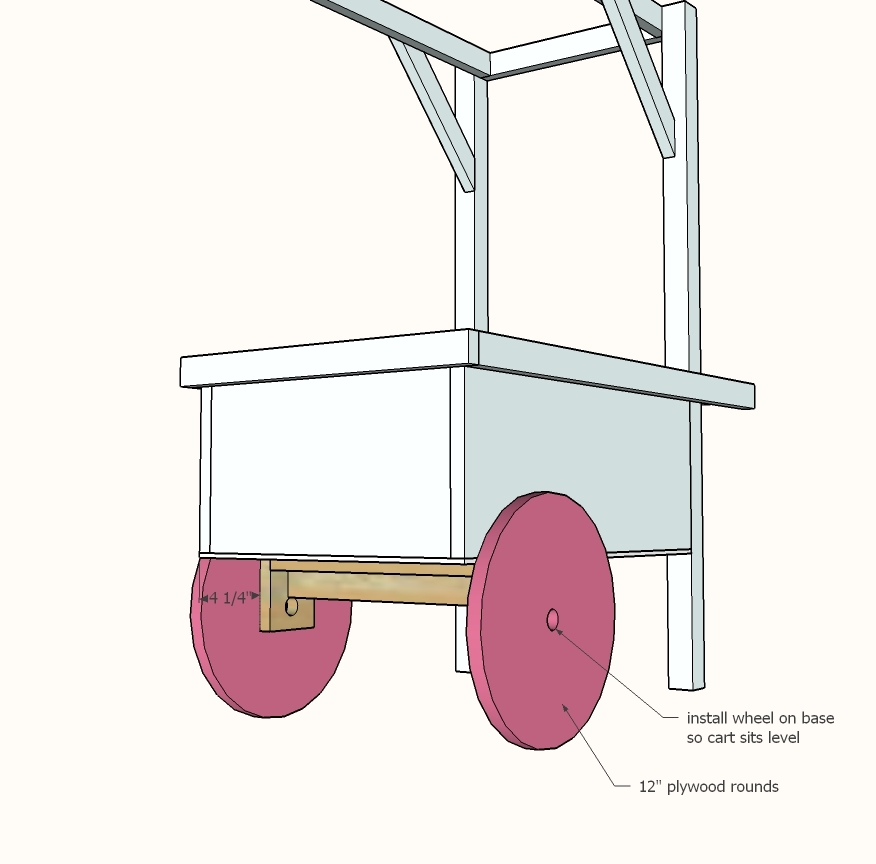
Clamp wheels to the wheel support system so the cart sits level.  Drill holes through the center of the wheel into the wheel support system.  Attach with bolts and washers and nuts.

Step 9

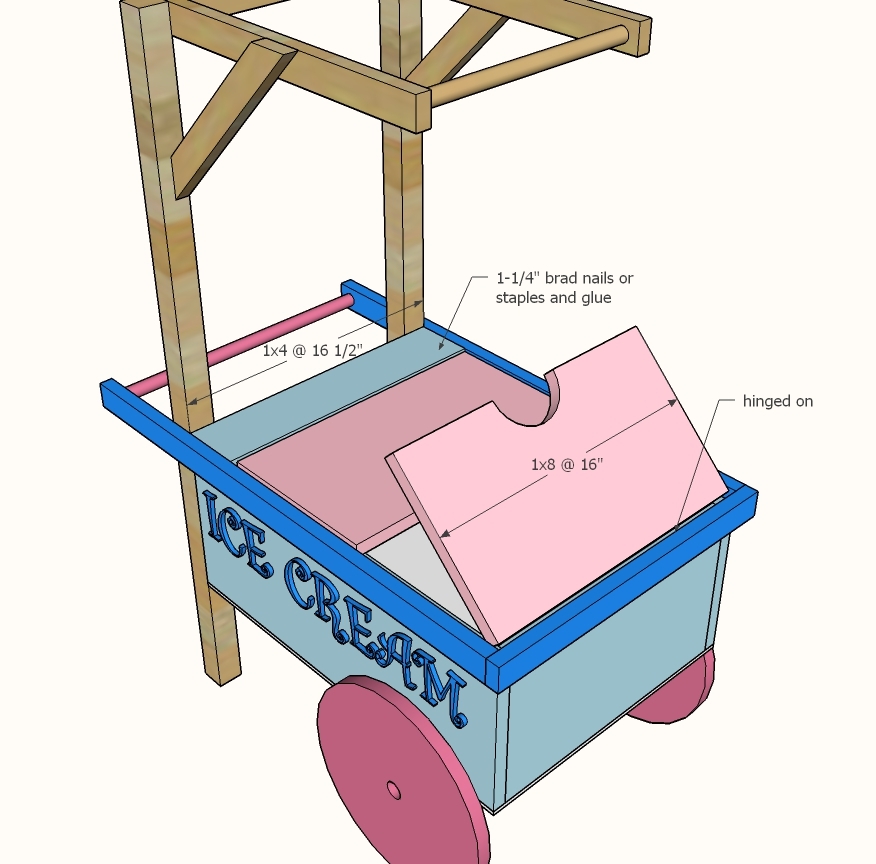
Hinge the 1x8s to the 1x2 trim.

Email Me
Free Plans

Get new plans sent right to your inbox for free!

    We won't send you spam. Unsubscribe at any time.