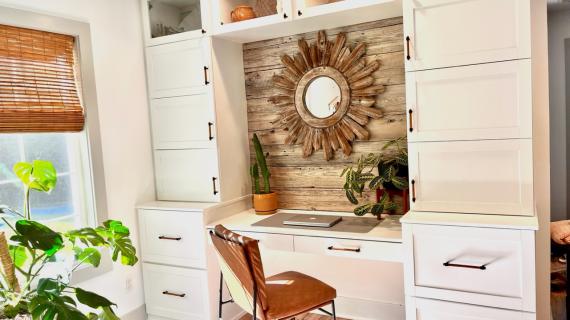


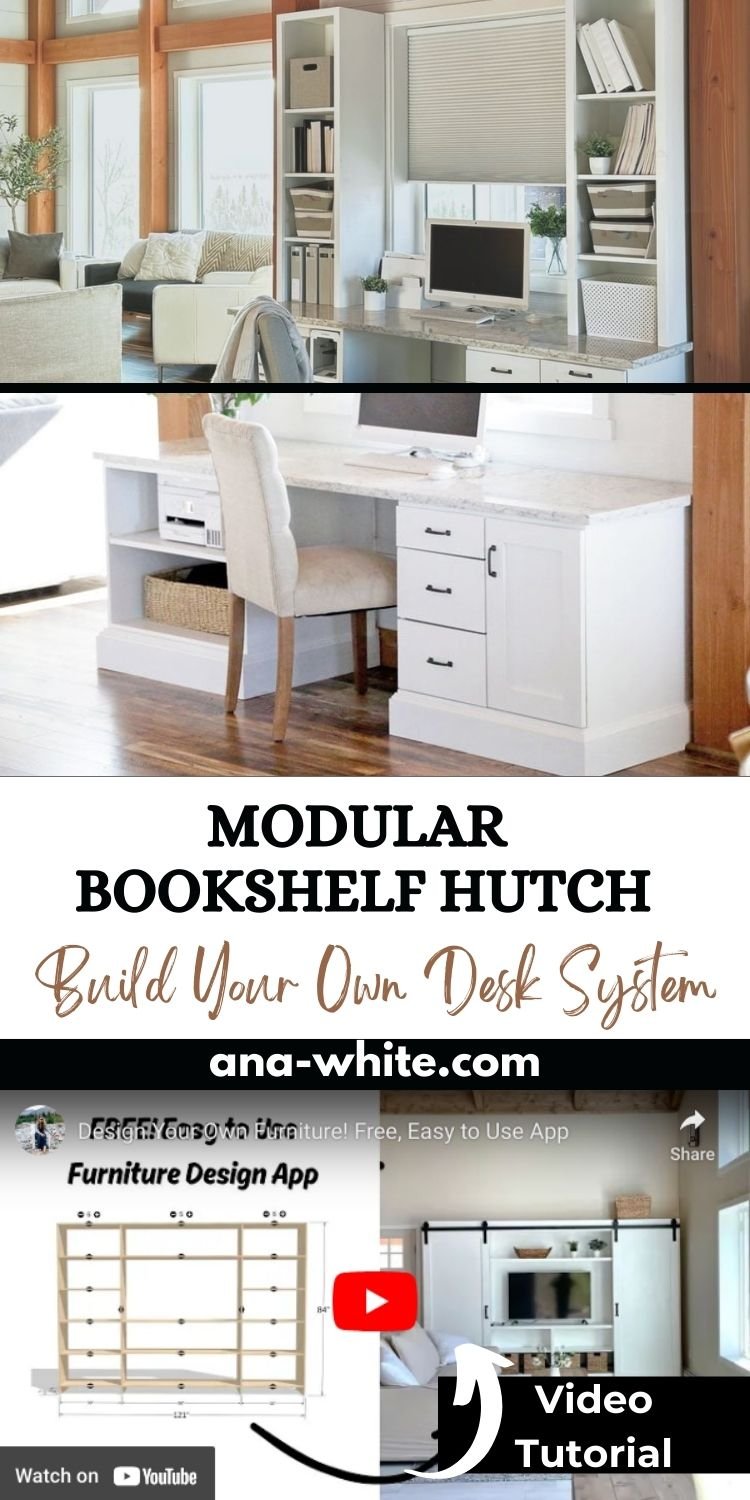
Do you need extra storage in your desk area? Adding bookshelf hutch towers to a desk system create tons more storage in an easy to access height. It also looks beautiful and give a desk a high end, built-in look.
This is a DIY project plan that will help you build your own bookshelf hutches for your desk, so you can save money and get the exact size and finish you need. The plans include video tutorial, configurator, recommended dimensions, diagrams, and more from Ana-White.com
MATCHING PLAN: Build the Modular Desk Bases with Free Plans Here
Why I Built These Desk Bookshelf Hutch Towers
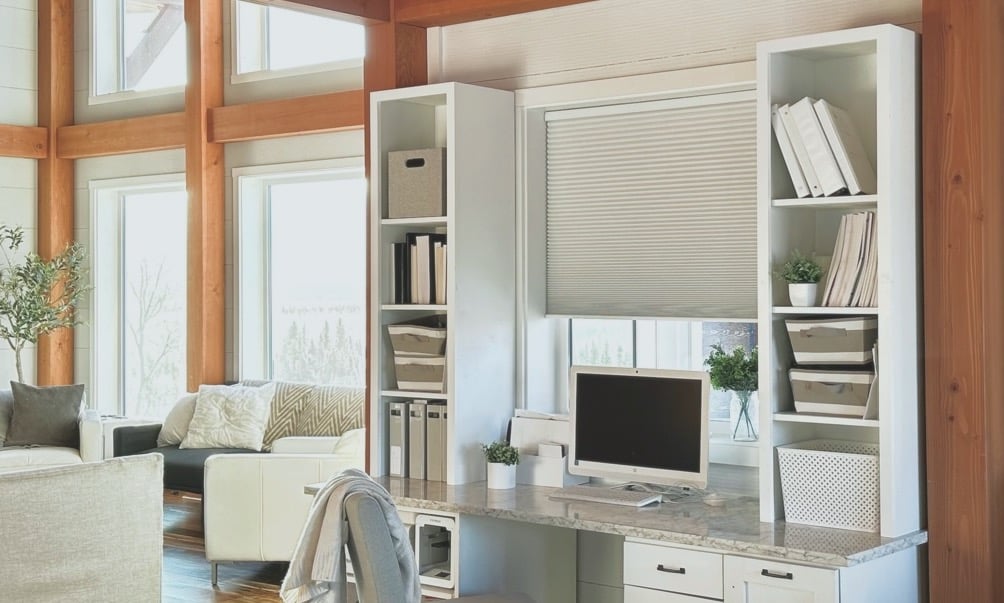
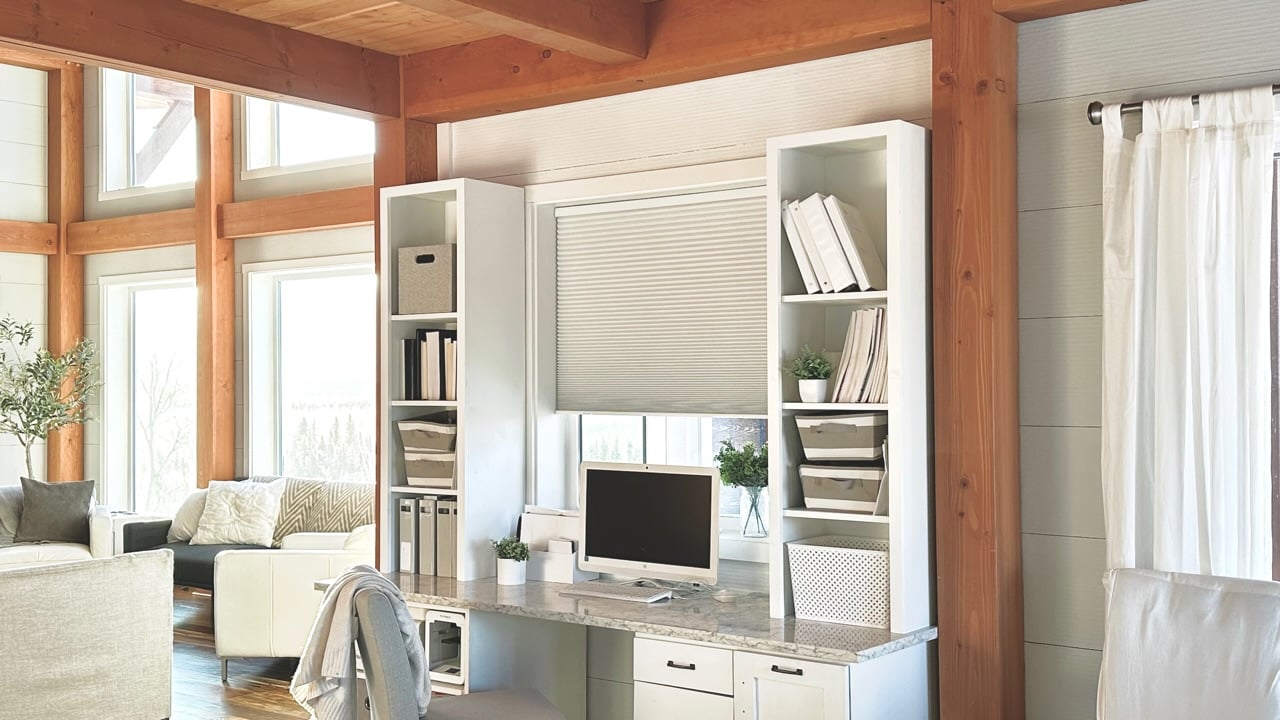
A couple years ago, I built this desk (plans here)
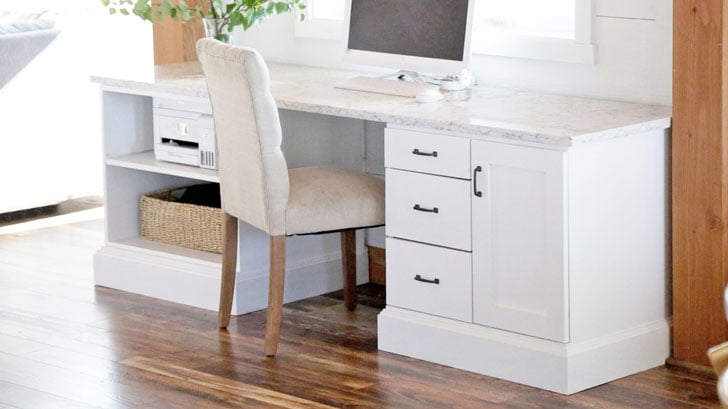
This desk has been GREAT and it is a forever solution, a perfect fit between the wood beams in my house.
But the problem was the desktop would get cluttered because there just wasn't enough storage at the desk area. I needed somewhere for things like binders and books, baskets, paper and decor to go.
The problem with buying hutch towers was 1) Each tower would cost $500 2) I needed slightly different widths for the towers because the space between the windows and the beams were an inch different 3) I wanted something that matched my desk in style and paint finish.
Watch - How I Designed and Built My Own Modular Desk Towers
I did film the building process when I built these towers - watch in the video below -
How Has The Desk and Hutches Held Up?
I built the desk bases a few years ago and they are doing awesome! The hutches I built about a year ago (finally getting around to posting the plans) and they look brand new and have been tremendously helpful in cleaning up the desk system.
Free Plans to Build Your Own Modular Desk Bookshelf Towers
Are you ready to build your own desk towers?
The free step by step plans using Ana's Design Tool are below. You'll want to use my design app since you'll want a custom sized hutches to fit your needs specifically.
Thank you for using my plans, I am glad I can help.
Pin For Later!
Preparation
3/4" hardwood plywood, ripped into strips 11-1/4" wide (maple or birch plywood recommended for painted finish)
3/4" wide edge banding in matching wood veneer
1/4" plywood for the back in matching wood veneer
1x2 for face frame in matching wood veneer (pine or poplar most economical for painted finish)
1x4 for back bay support
Cut list for the plywood is generated in the Design App
1/4" plywood for the back is cut to fit
1x2s for the face frame should be cut to fit
1x4 bay support is cut to match the cut length of the shelves


Instructions
Step 1

Custom Design Your Hutches
Use Ana's Design Tool to create the dimensions and cut list for your hutches and download the plans.
The parameters I entered are as follows:
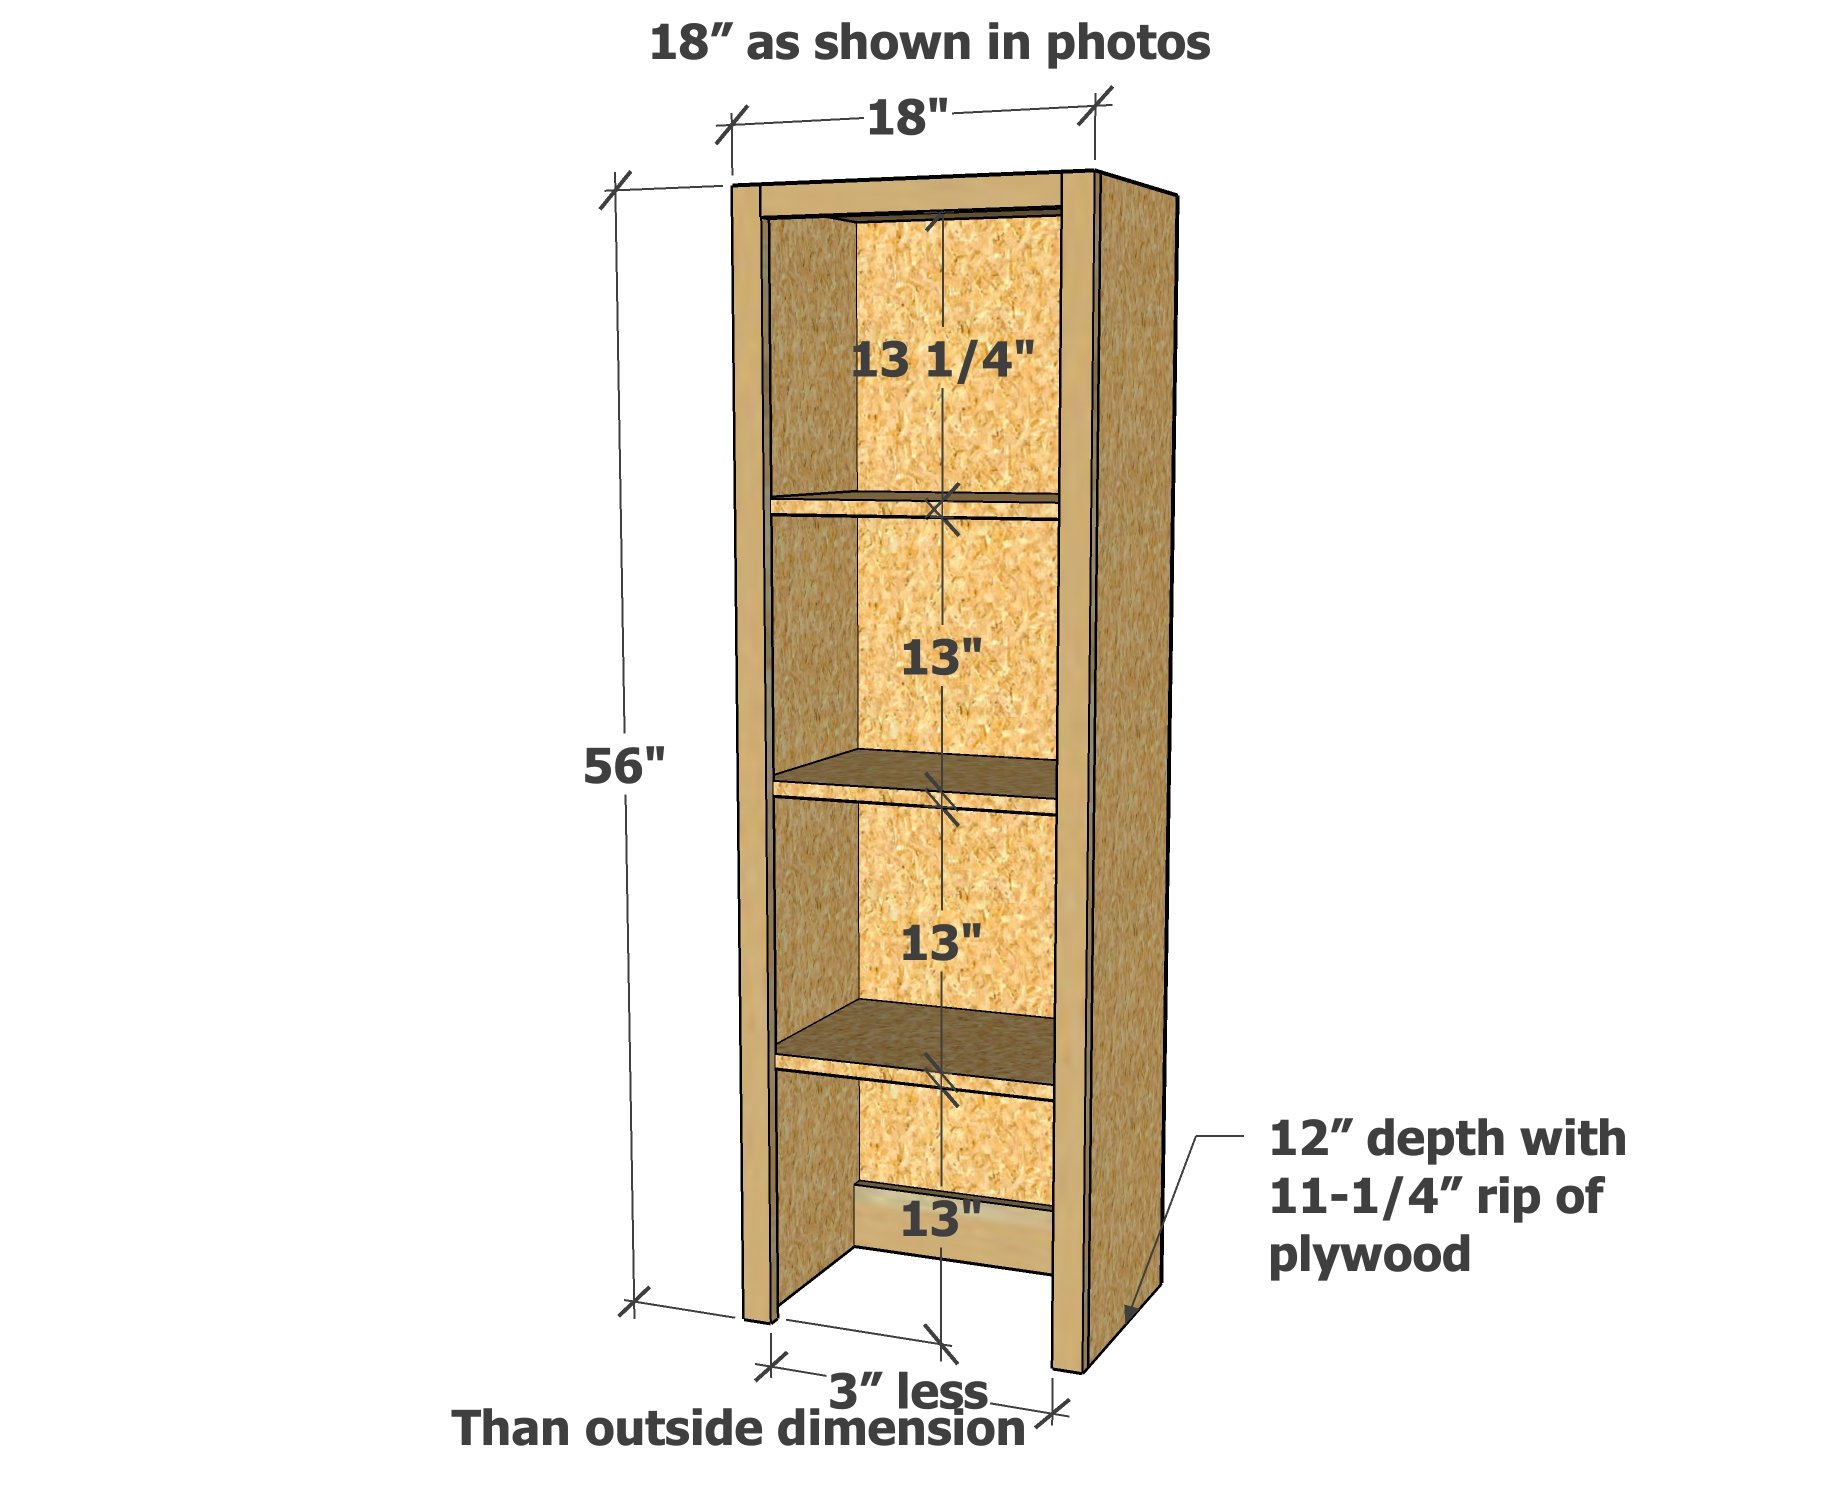
- Depth: 11.25"
- Height: 56"
- Width: 18"
- Number of Shelves: 4
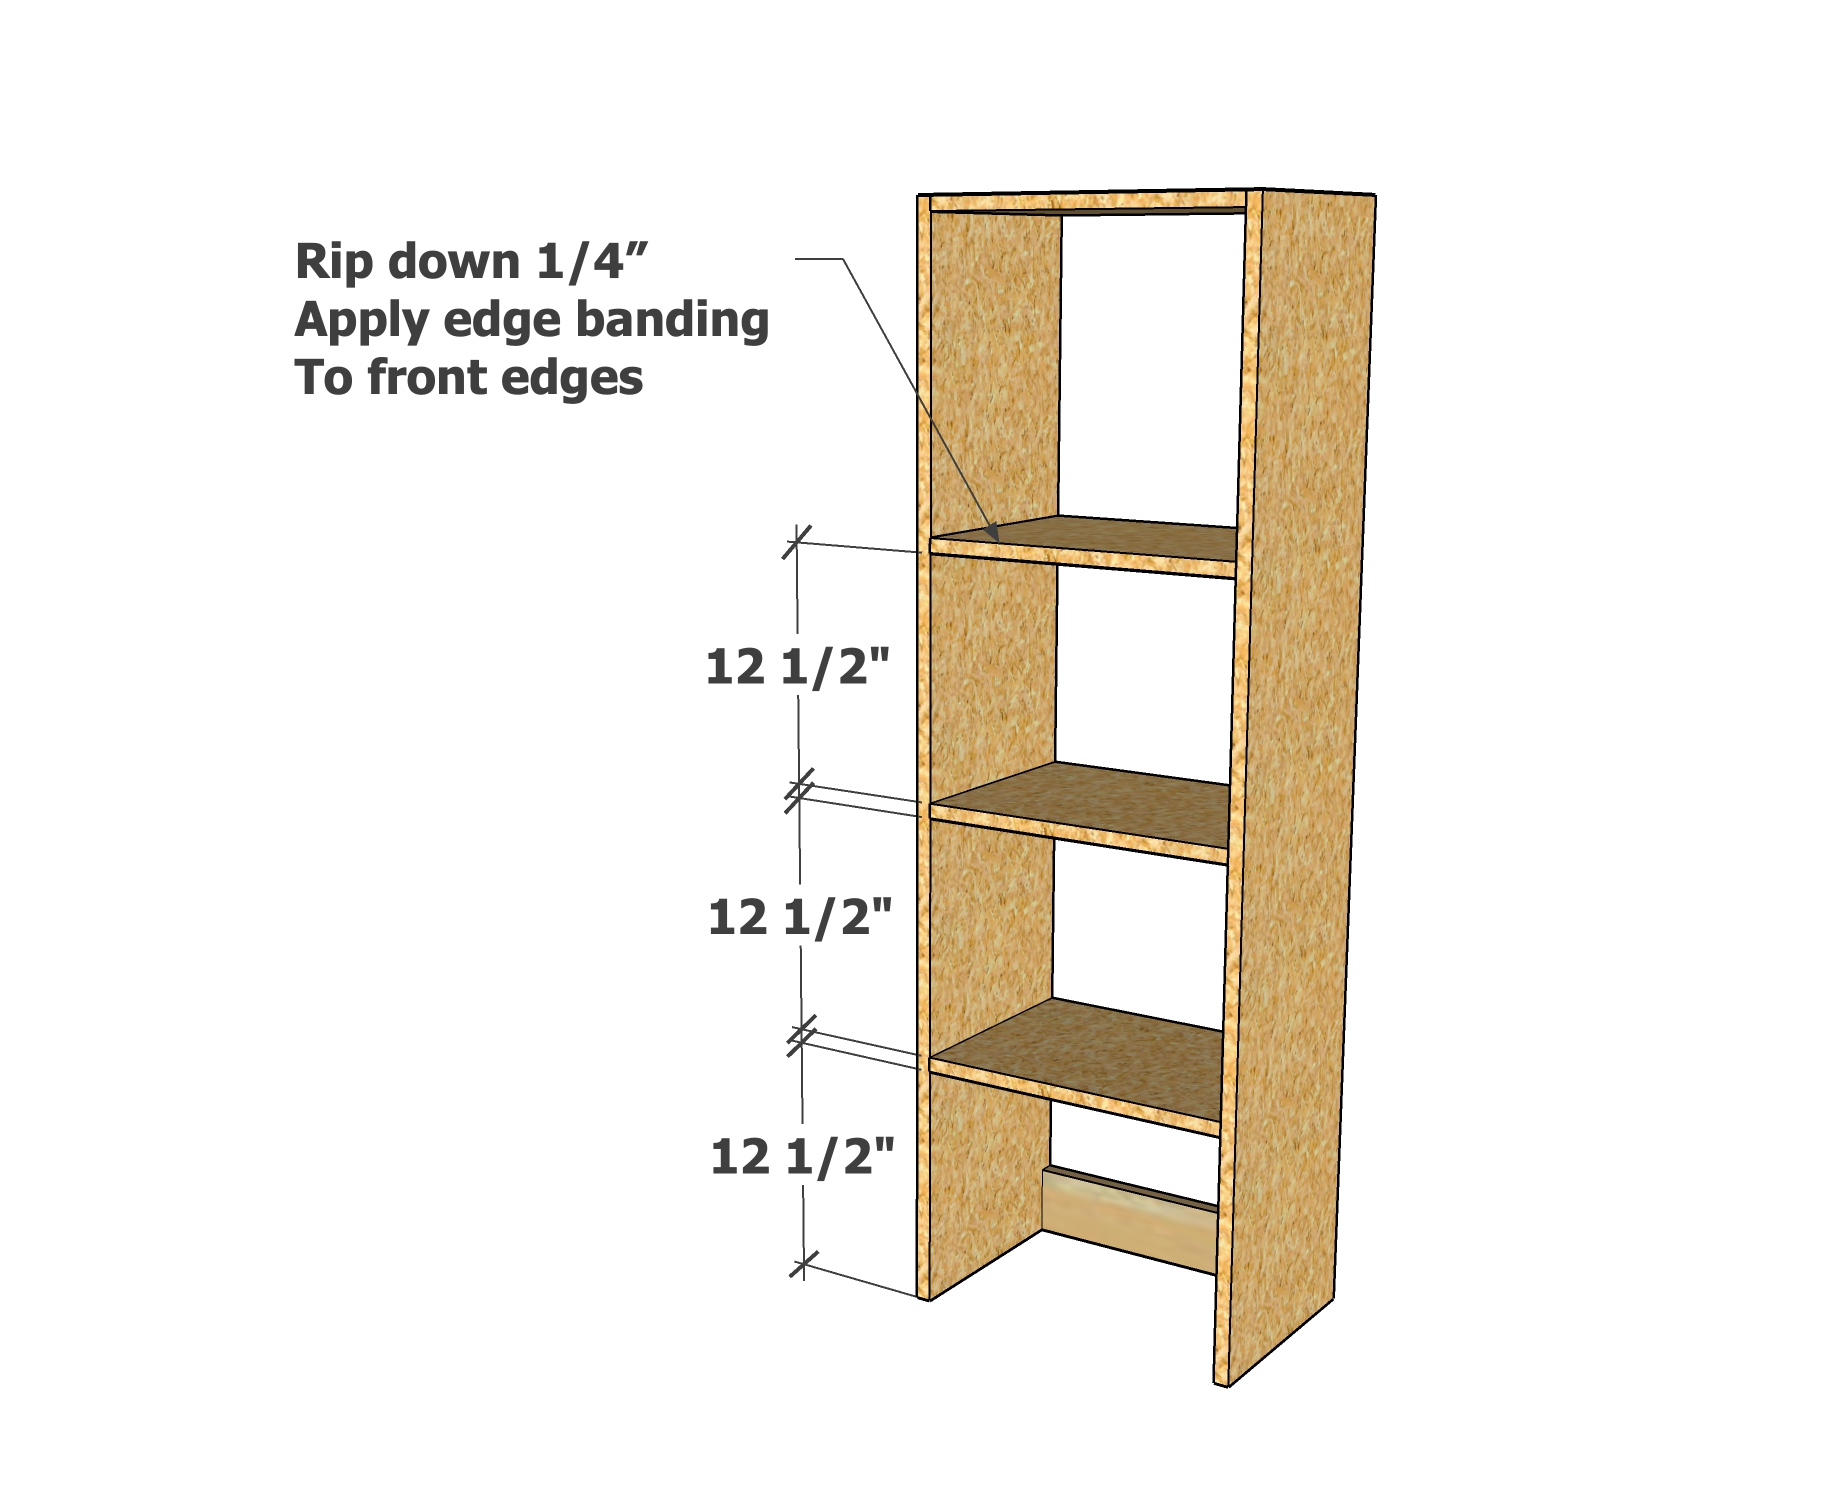
- Distance between shelves: 12.5" starting at the bottom, the distance left at the top shelf was more
Step 2
Cutting the Plywood Pieces
Once you have the plans downloaded from Ana's Design Tool, on the second page you will find the cut list.
Rip the 3/4" plywood into strips to match your width (my width is 11.25") by 8 feet long. It's best to use a tables or a track saw.
Then cross cut the plywood strips into the pieces you'll need.
TIP: I always plan out my cuts on scratch paper before I do any cutting to minimize scrap pieces.
Step 3
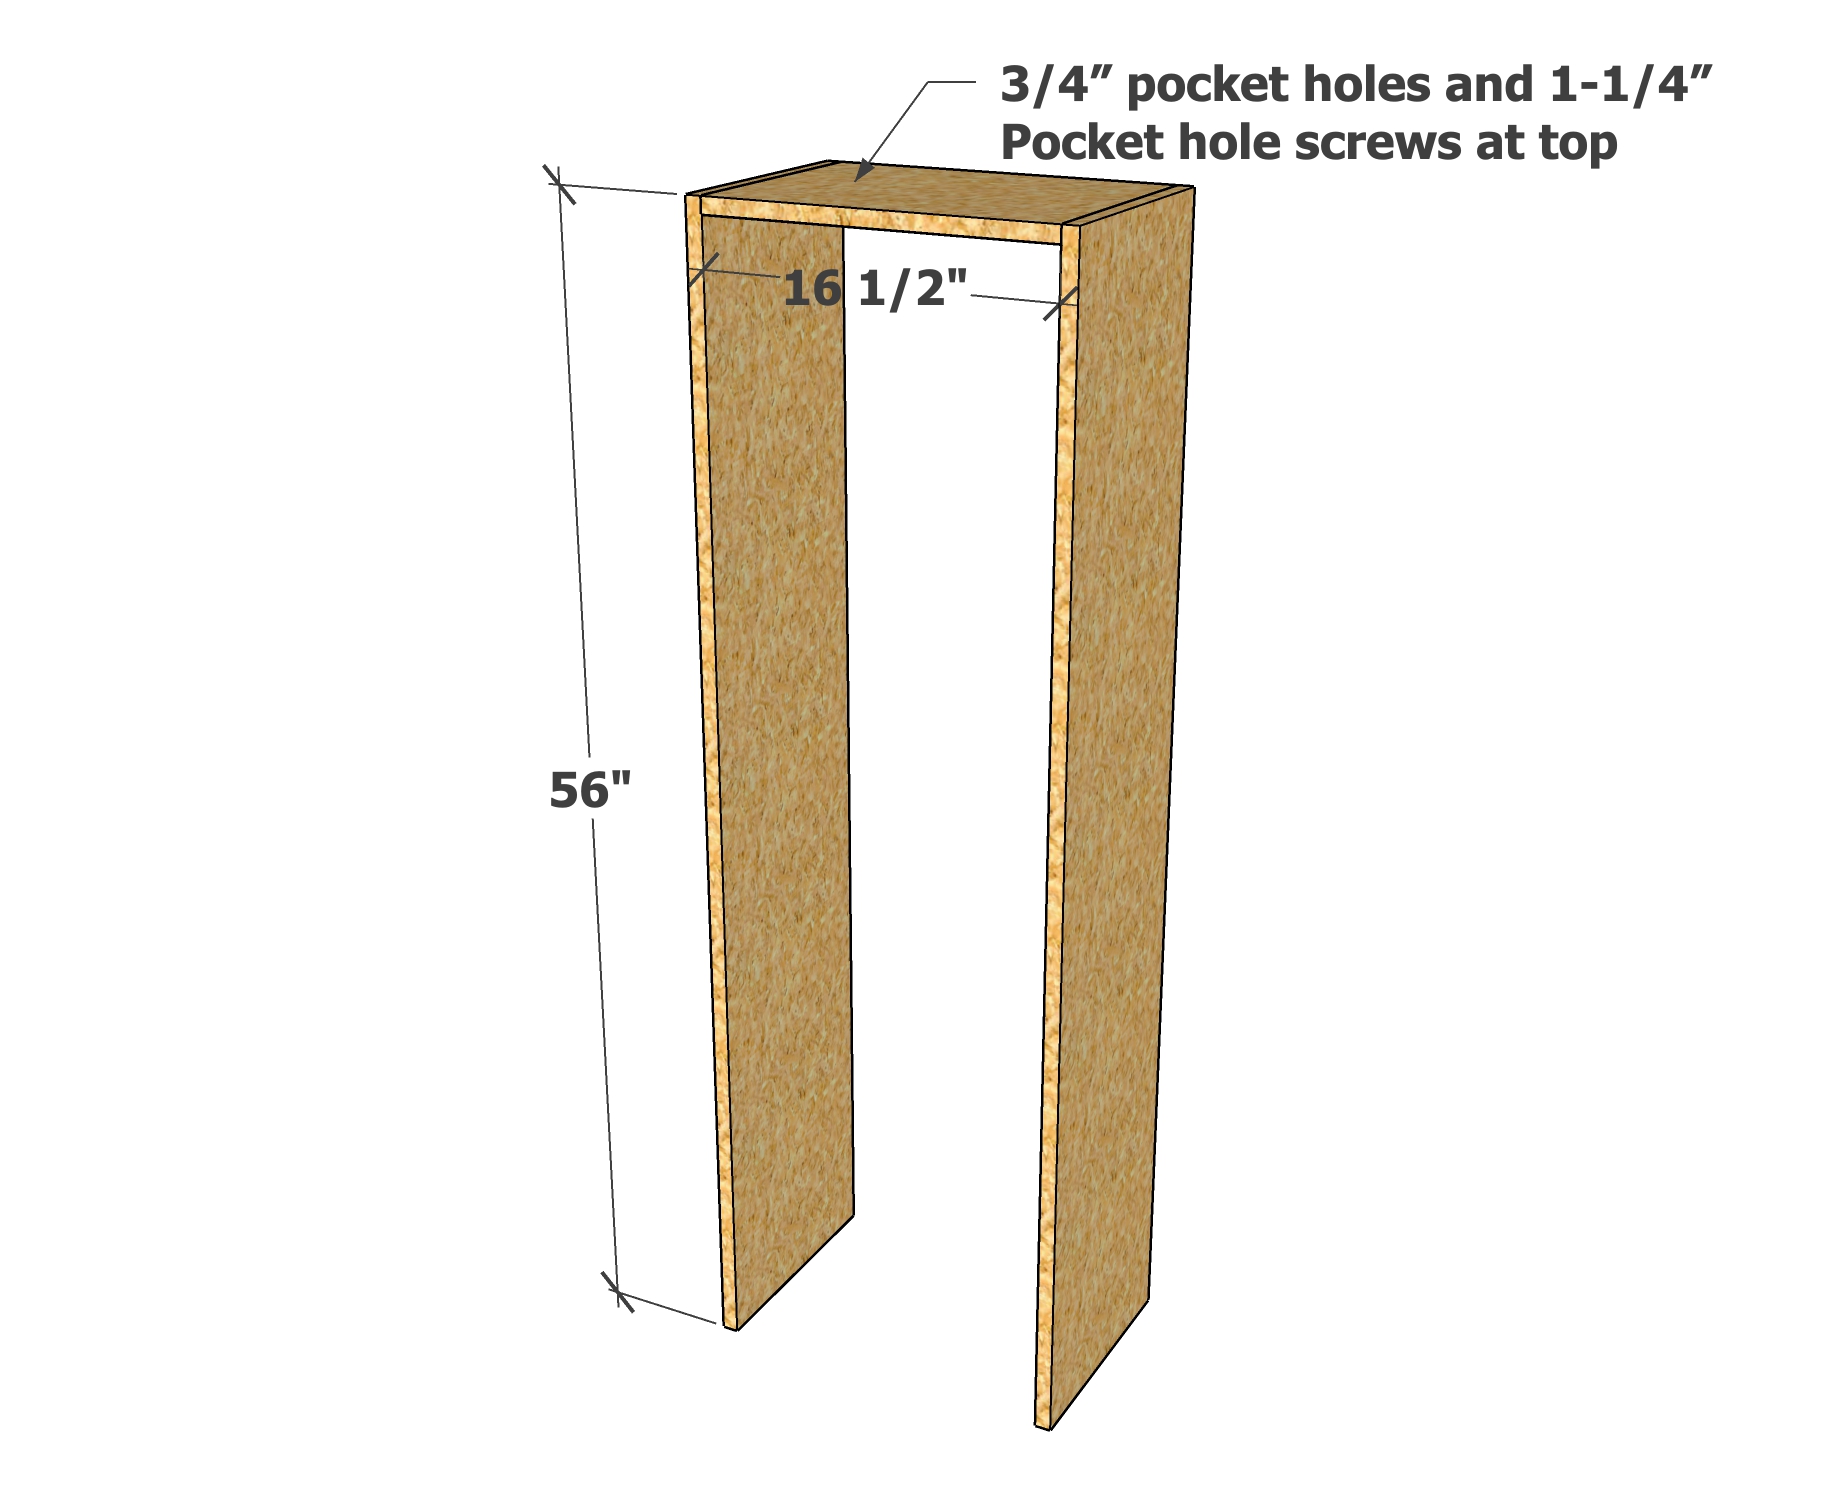
Attaching the Top
I attached the top to the sides with 3/4" pocket holes and 1-1/4" pocket hole screws, with the pocket holes on the outside. Yes, you can nail and glue instead if you don't have a pocket hole jig.
Step 4
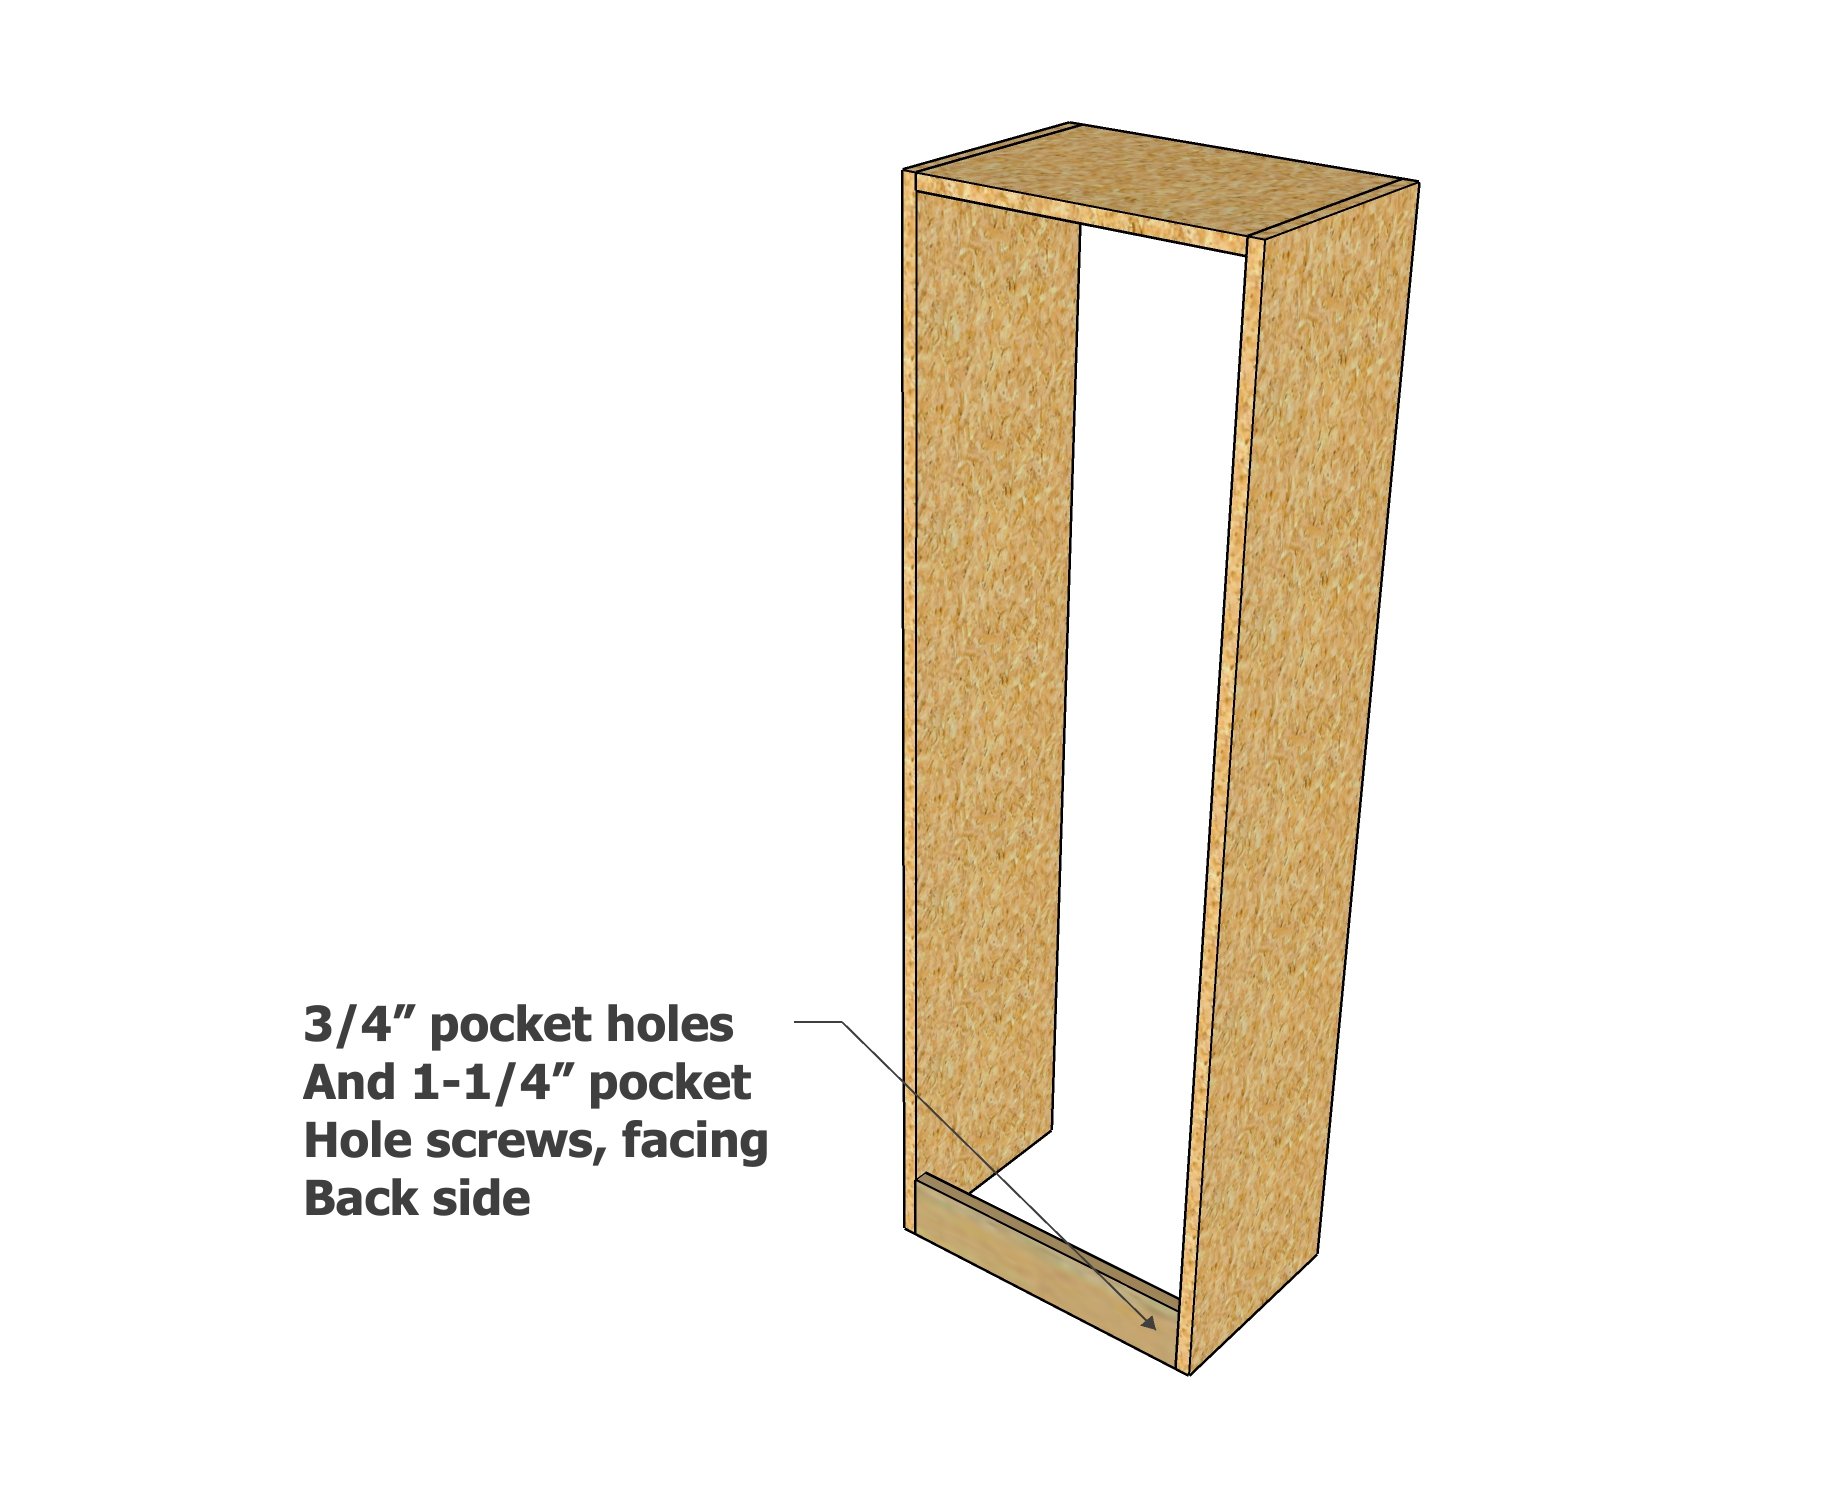
Attaching the Back Bay Support
I attached the back bay support with 3/4" pocket holes and 1-1/4" pocket hole screws on the back side.
Step 5
Adding the Shelves
For the shelves, I wanted them to have a finished front edge without a face frame.
So I ripped the shelf down to 11-1/8" width on my tables.
Then I applied edge banding to the front edge of the shelves. The process is shown in the video.
I attached the shelves with 1-1/4" brad nails and wood glue.
Step 6
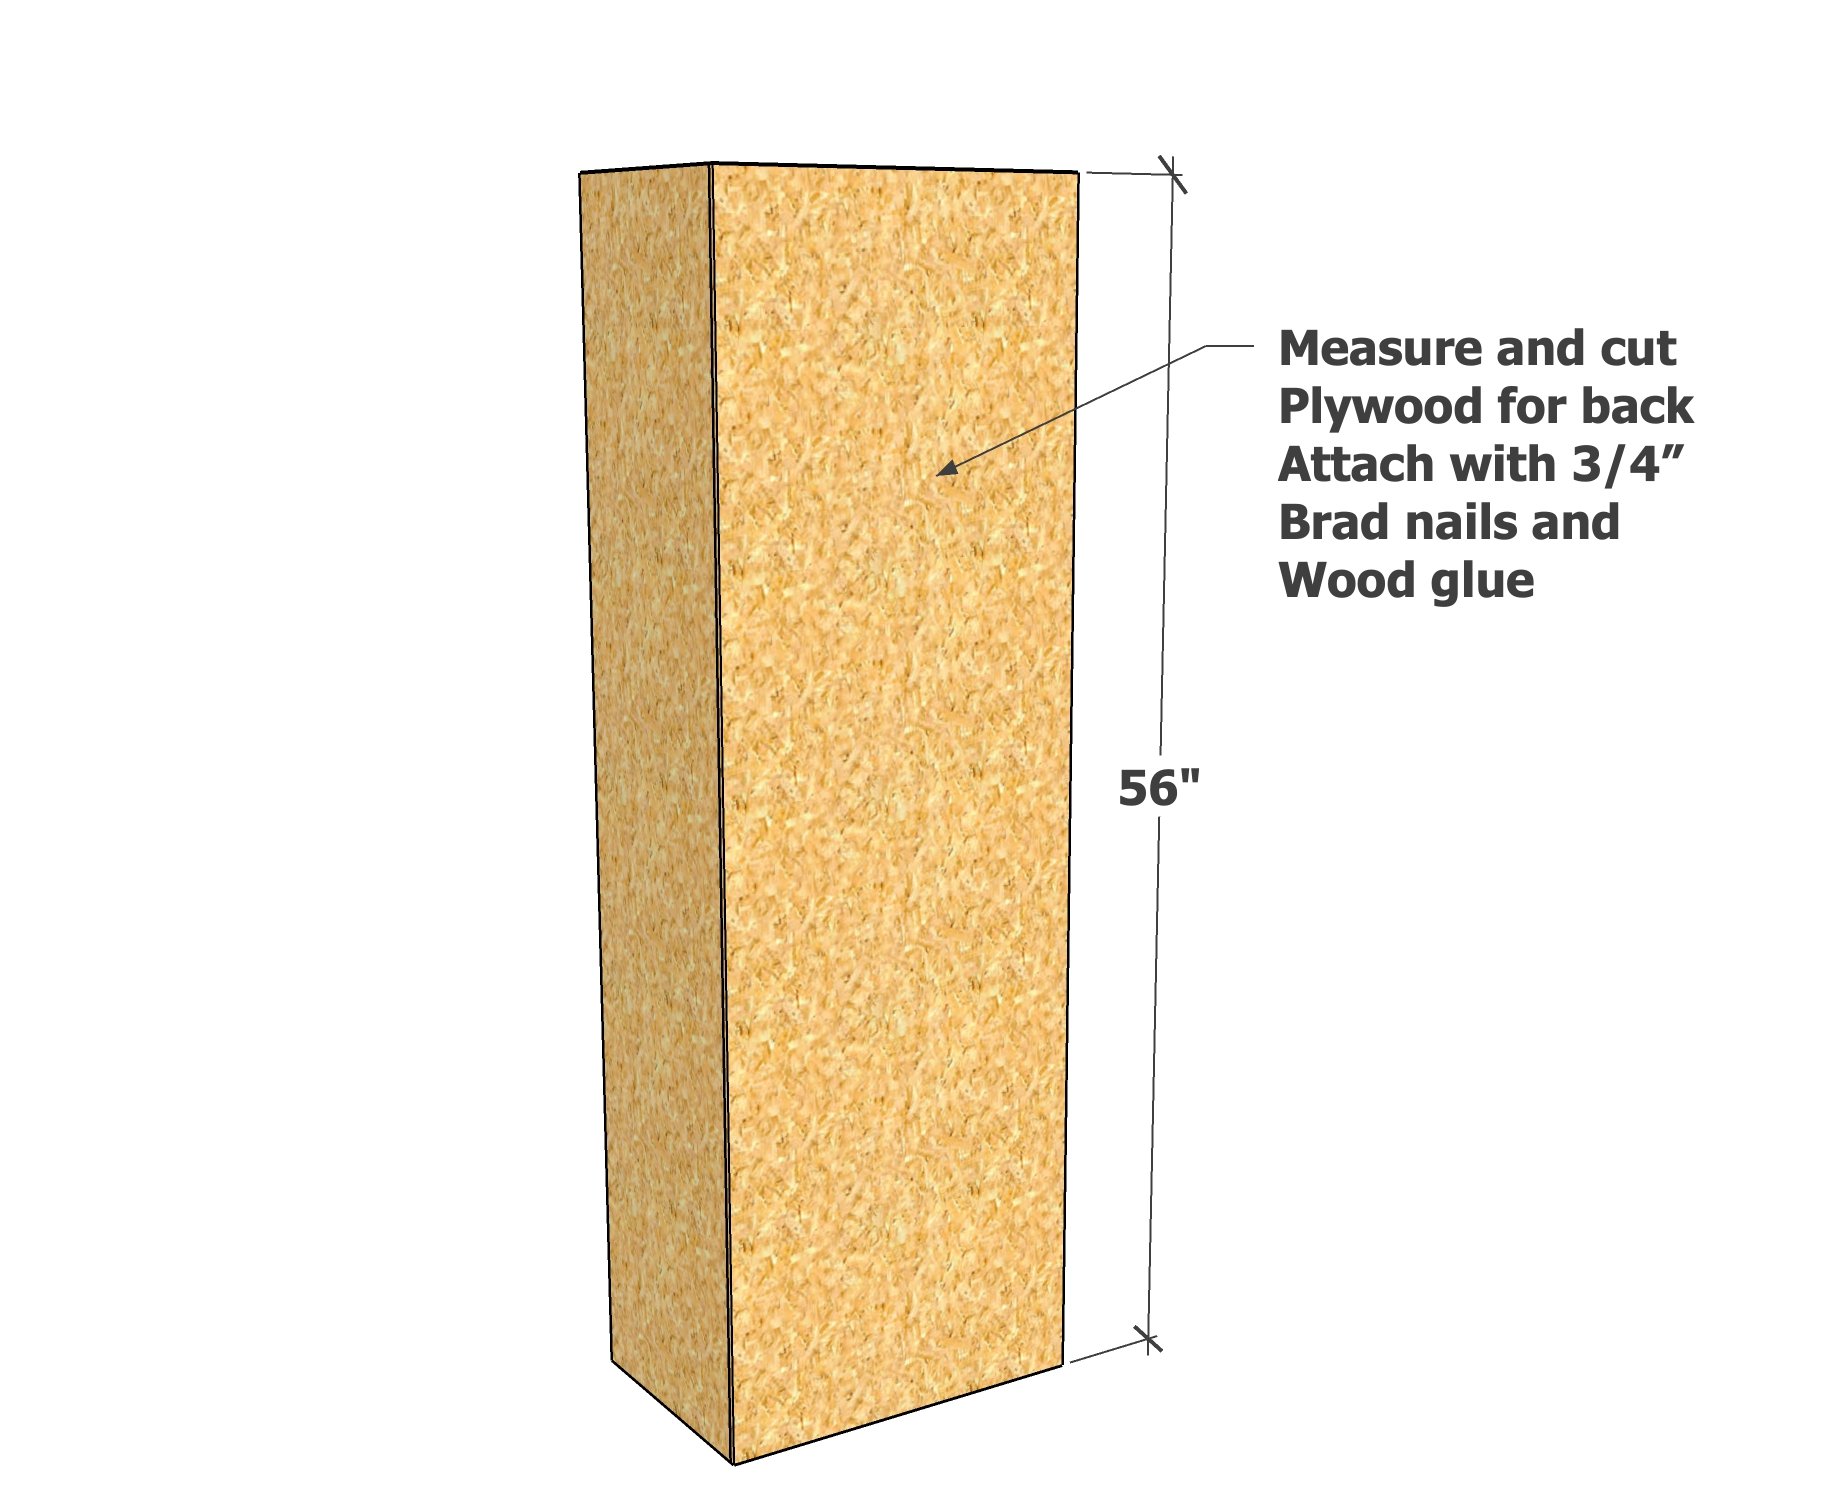
Adding the Back
I measure the back and cut 1/4" plywood and attached with glue and 3/4" brad nails to the back.
TIP: I cut the back 1/4" smaller so it doesn't quite reach the outside edge of the piece, so the edge of the back is hidden from sight.
Step 7

Face Frame
For the face frame, I first attached the two vertical pieces with glue and 1-1/4" brad nails.
Then I measured and cut the top piece and attached it.
Then I sanded with 120 grit sandpaper.
I removed all sanding residue with a vacuum with soft bristled brush and wiped clean with a damp, lint free cloth.