Are you looking for the perfect desk, custom fit for your space, designed to match your cabinets and home? Have you thought about building your own modular desk system?
This free template will help you build professional level custom desk bases, designed to fit your space, needs and style. Top with any countertop or build your own out of wood planks.
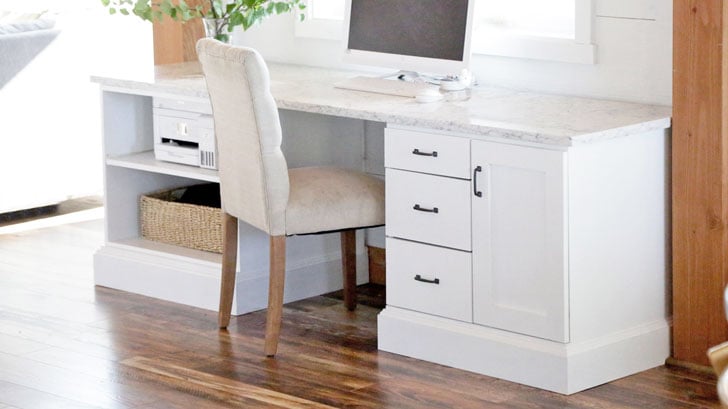
I built this desk ALL by myself! It was so easy to do, and it looks 100% professional. We get TONS of compliments on it, and it is a permanent piece that will be with the house indefinitely. We have been using it for a couple of years and it looks fantastic and we couldn't be happier.
These days your desk gets as much or more use than your kitchen!
So your desk really needs to be done RIGHT.
I just built a new desk with modular bases customized for my needs.

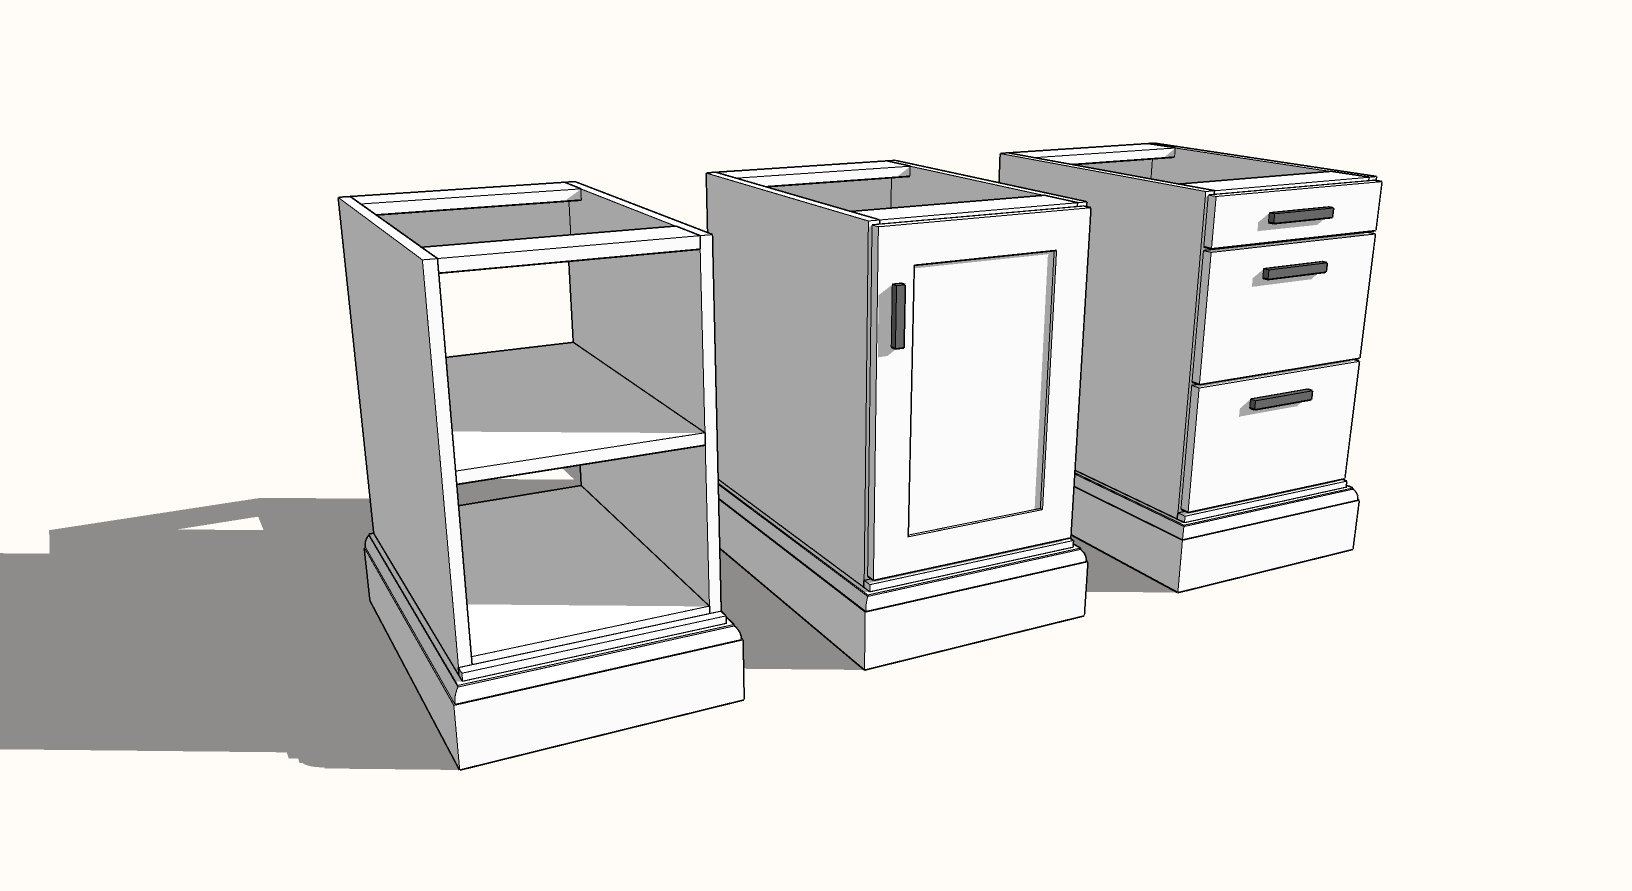
This is an easy to customize system, both in size and in functionality!
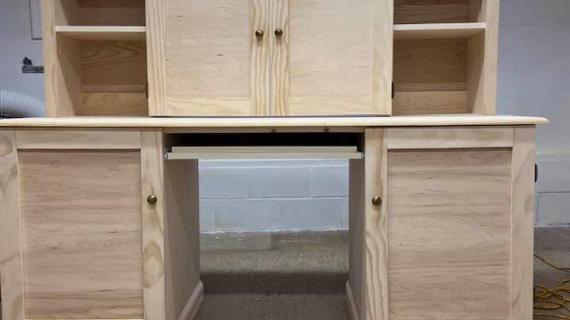
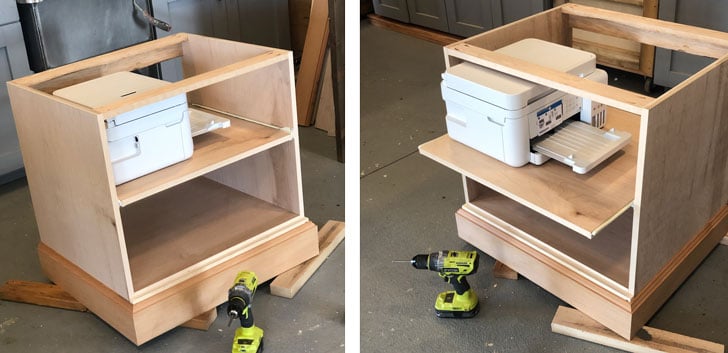
On the left I did an open shelf with a roll out for the printer. On the right I did a row of drawers and then a CPU tower/wastebasket cabinet.
UPDATE - I Built Hutches and Shared the Plans Too!
I loved this desk so much that I went on to build matching hutches for on top of the desk -
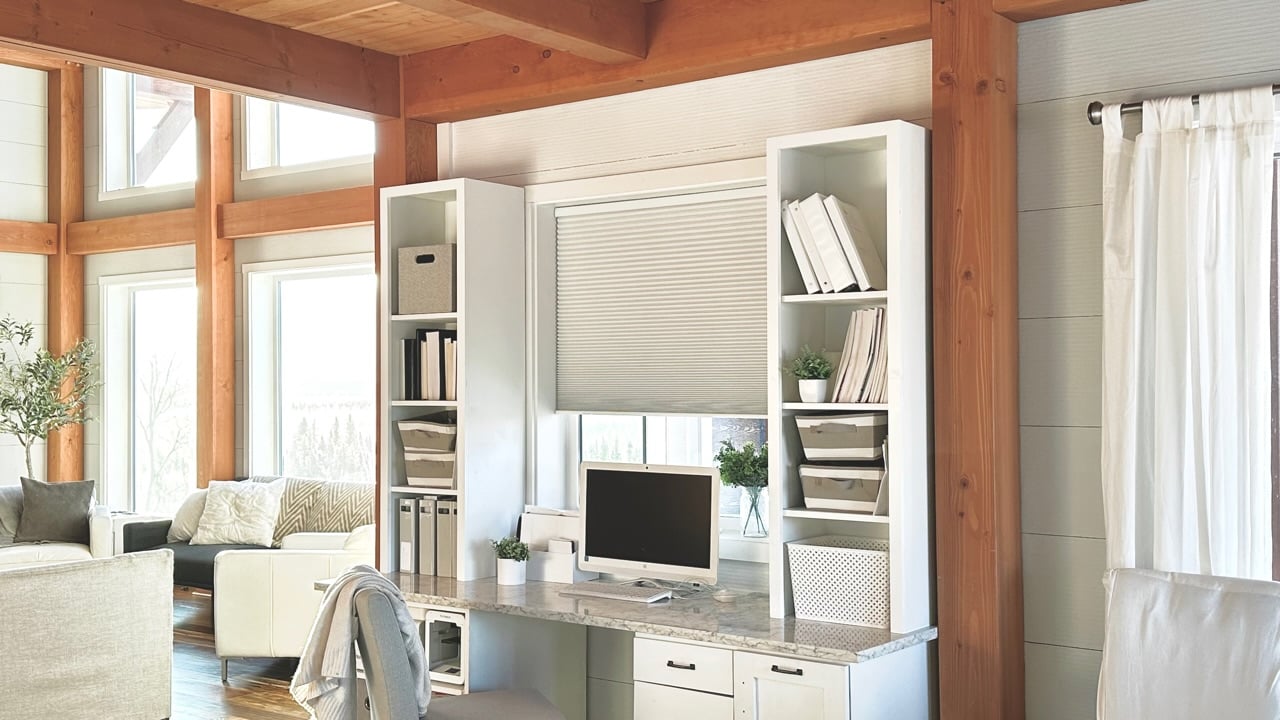
I shared the plans for the matching bookshelf hutch towers here.
Watch - How I Built My Own Custom Desk System
Here is a video of my building this desk:
If you aren't able to watch the video, here's the photo steps:
1. Design the Bases
I used my Free Design App to design my desk bases to fit my needs.

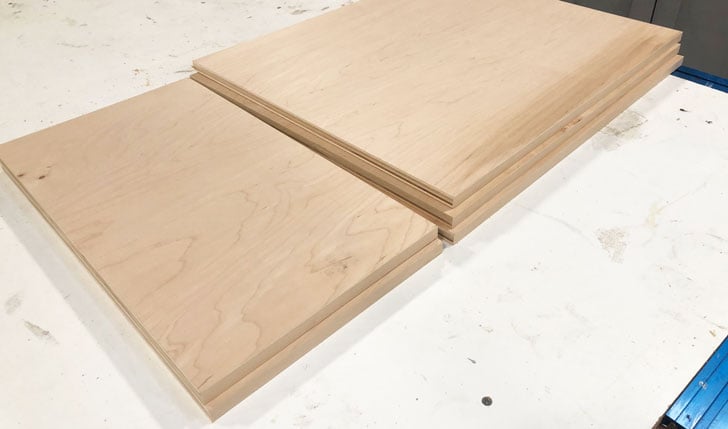
2. Create Plywood Panels from Plywood
Once you create the perfect desk bases in my design app, you can download your custom plan right from the app. The custom plan will have a cut list.
Simply rip the 3/4" plywood into strips at your desired width. Then cross cut the plywood strips as outlined in the custom plan.
Finish the front edges of the plywood pieces with 3/4" wide edge banding. Carefully trim excess edge banding and sand with 120 grit sandpaper.
3. Assemble
Assembling the plywood pieces is pretty straight forward - just drill 3/4" pocket holes on the horizontal pieces and attach to the vertical pieces with 1-1/4" pocket hole screws.
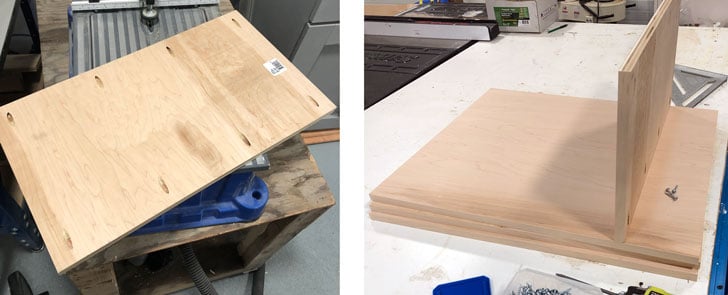
Instead of a full plywood top or back, I used 1x3 furring strips to tie the sides in. This saves weight, cost, and bulk in the project.
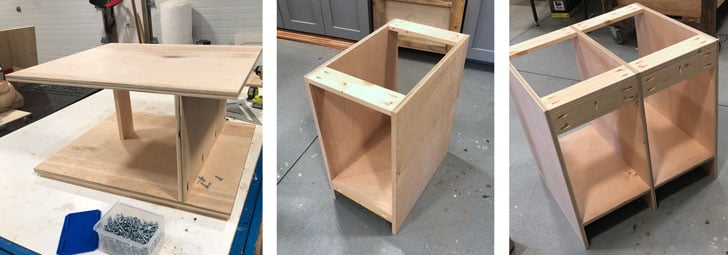
4. Customize
Once the carcass is done, it's easy to customize to suit your needs. Since you are working with a square project, you can just measure as you go - no need for a detailed plan.For the desk base on the right, I added three drawers and a cabinet door.
For the base on the left, I added a roll out printer shelf. All the bases have 5" baseboard.
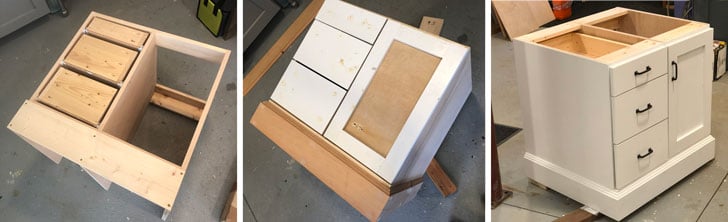
5. Finish and Top
The finish on the desk is primer and white semi-gloss paint from Sherwin Williams (color is Extra White). The countertop is quartz, the color is Rococo. The quartz countertop is just sitting on the desk bases. It is very heavy, so glad the desk bases are well made with 3/4" thick plywood!
Free Plans to Build Your Own Modular Desk System
Are you ready to build your own desk? Here's how!
Preparation
- 3/4" hardwood plywood (amount needed depends on how big your project is)
- 3/4" edge banding in a matching wood veneer
- 1x3 or 1x4 pine wood to be used as bay supports
- 1x6 for the bottom base front
- 5-1/4" wide baseboard moulding for the base
- 1-1/4" pocket hole screws
- 1-1/4" brad nails
- wood glue
- Cabinet door (is using) with full overlay frameless euro hinge
- Drawer boxes, drawer slides and drawer faces (if using)
- Printer shelf - need a 22" euro drawer slide
Cut list is generated when you create a custom plan in step 1 below.
Once you have the cut list, to cut the pieces, simply rip the 3/4" plywood down into the rip width.
Then cross cut the ripped strips to the needed lengths supplied in the custom plan cut list.
Apply edge banding to front edges of the plywood pieces.


For long term durability and more professional results, I recommend using a pocket hole joinery system for wood joints. Here is a video with tips for using a pocket hole jig:
Instructions
Step 1
Design Your Base Carcasses in Ana's Design App
Use the above app to create your design. You can customize to any width, below is the standard recommendations.
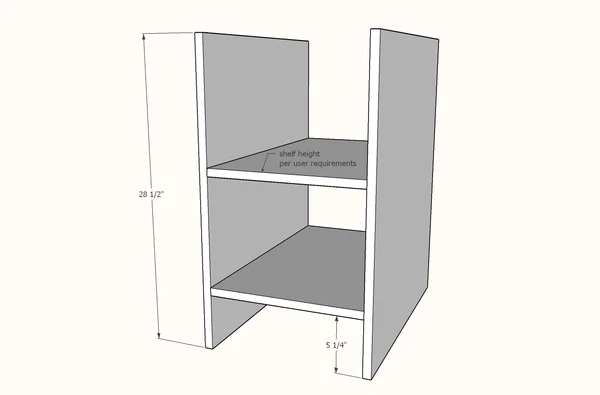
- Height = 28-1/2" (for standard 30" desk height with added countertop)
- Width = 16" (can be modified up to 36" wide before shelves may start to sag)
- Depth = 24" rip
- Number of Shelves = All bases require one shelf for the bottom. Order additional shelves for the open shelf base or the cabinet door base if more shelving is desired
Step 2
Carcass Assembly
I recommend four 3/4" pocket holes on each end of the shelves to attach to the sides. Leave a 5-1/4" gap underneath (to fit with 5-1/4" base moulding) - or adjust to match your baseboard height.
Optional shelves can be mounted at any height.

For the printer pull out shelf, I simply cut the plywood shelf piece 1" less than the width of the interior of the cabinet and mounted on a Euro Drawer slide.
Step 3
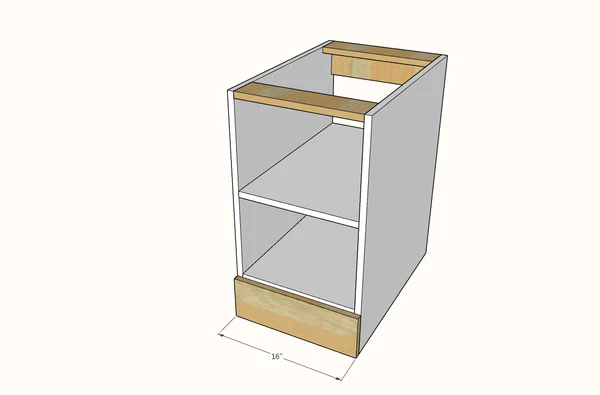
Bay Supports
You'll need some bay supports to tie everything in. This reduces your plywood pieces (reducing cost) and adds structure.
I recommend 1x3 or 1x4 (furring strips are fine!) at the top, and a 1x6 piece at the bottom.
The inside bay supports at the top are equal in length to the shelves.
The front 1x6 bay support is on the outside, so is the total width of the cabinet. I recommend measuring and cutting to fit, as this piece is visible from the front of the cabinet. You can screw or nail and glue it in place. The purpose of the 1x6 is to bring the base moulding out 3/4" so door and drawer faces don't stick out past the base moulding.
Base Moulding
I used a 5-1/4" wide base moulding, with mitered corners to finish out the base of my modular desk pieces. I attached with 1" brad nails.
Step 4
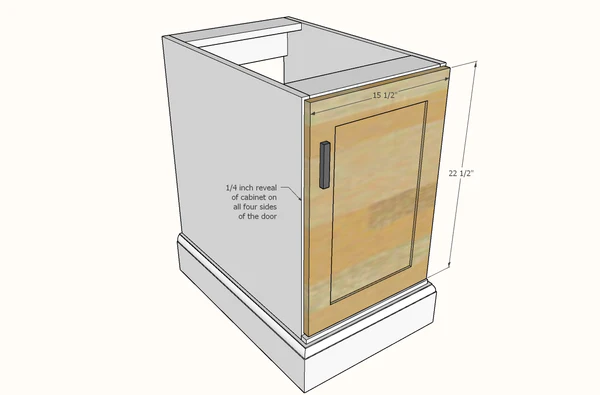
Cabinet Door Addition
You can add a door to the base. I recommend ordering doors, but you can also build your own.
- The door height is 1/2" smaller than the overall height of the space on the front of the cabinet (above baseboard)
- The door width is 1/2" smaller than the overall width of the cabinet (outside measurements)
- I recommend Full Overlay Frameless Concealed Hinges.
Step 5
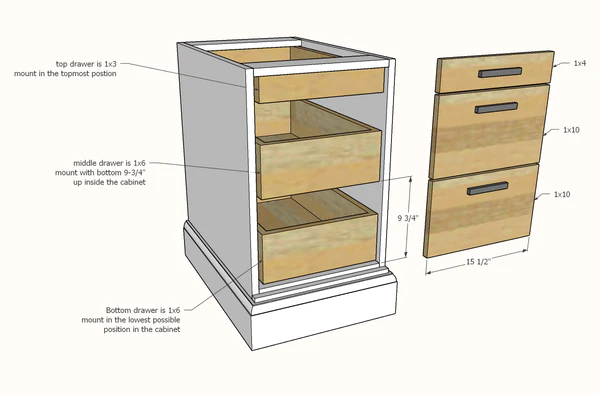
Adding Drawers
You can add drawers as well. Here's what I recommend for drawer placement so you can use off the shelf boards for the drawer faces (1x6 and 1x12 drawer faces).
I recommend 20" or 22" drawer slides. Here is a video showing how I install drawers.
Then I sanded the entire project with 120 grit sandpaper.
I then removed sanding residue with a vacuum with a soft bristled brush. Then I wiped clean with a damp lint free cloth.