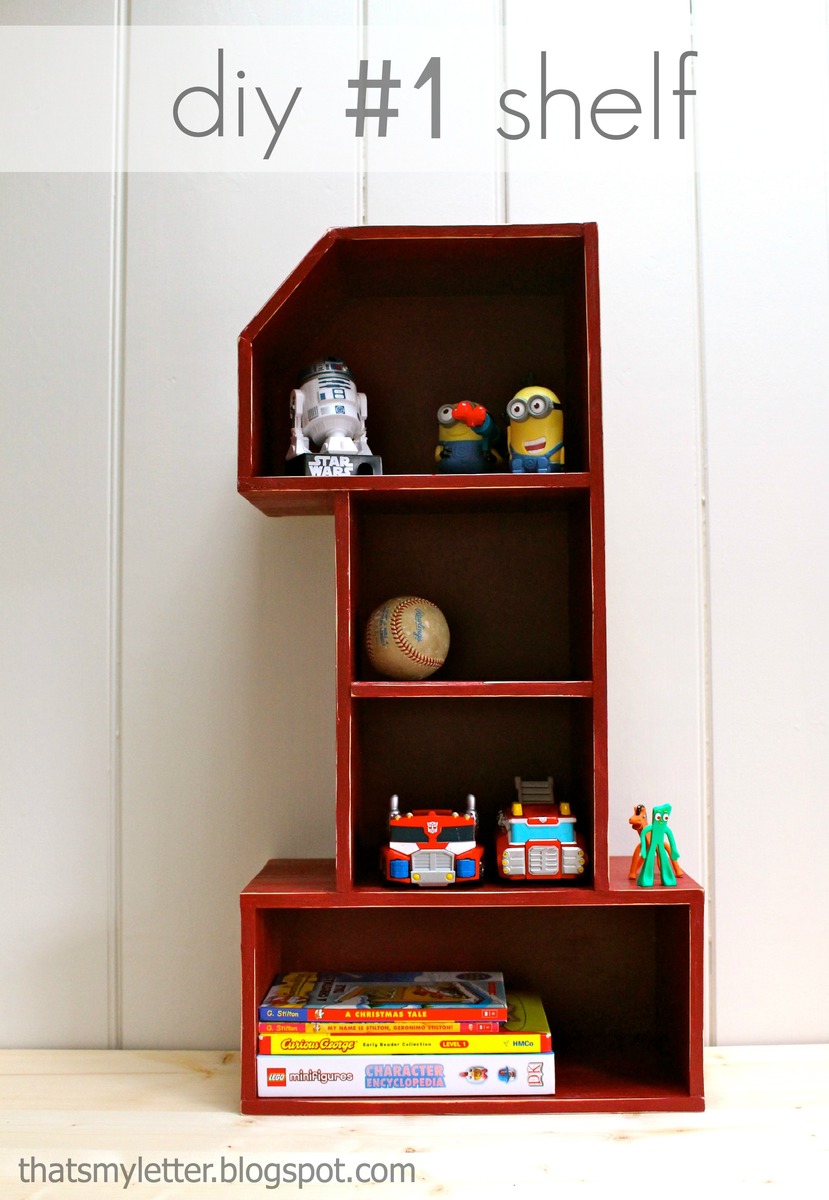
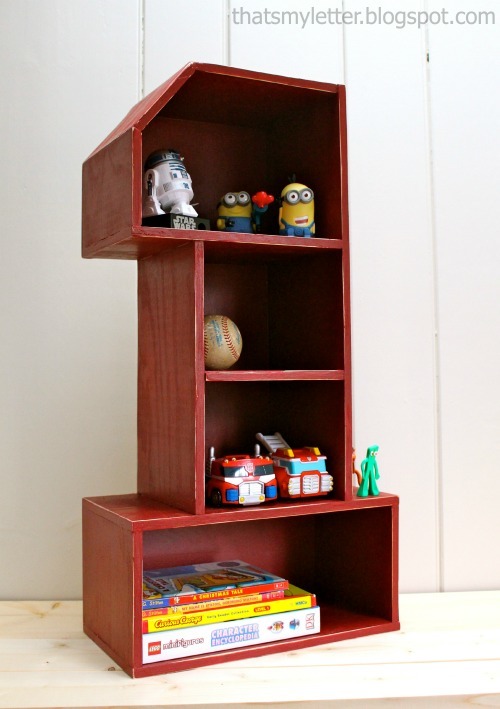
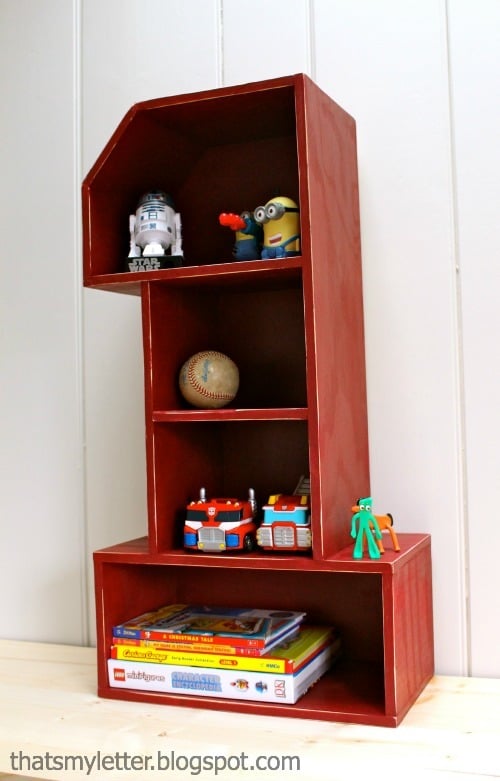
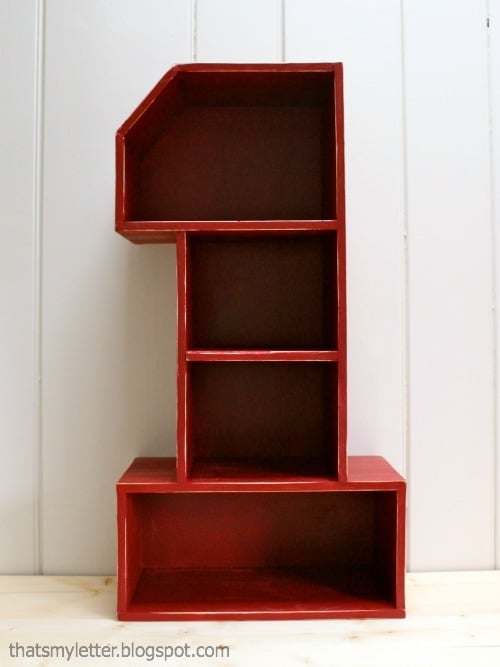
Free plans to build a Number 1 Shelf - from Ana-White.com
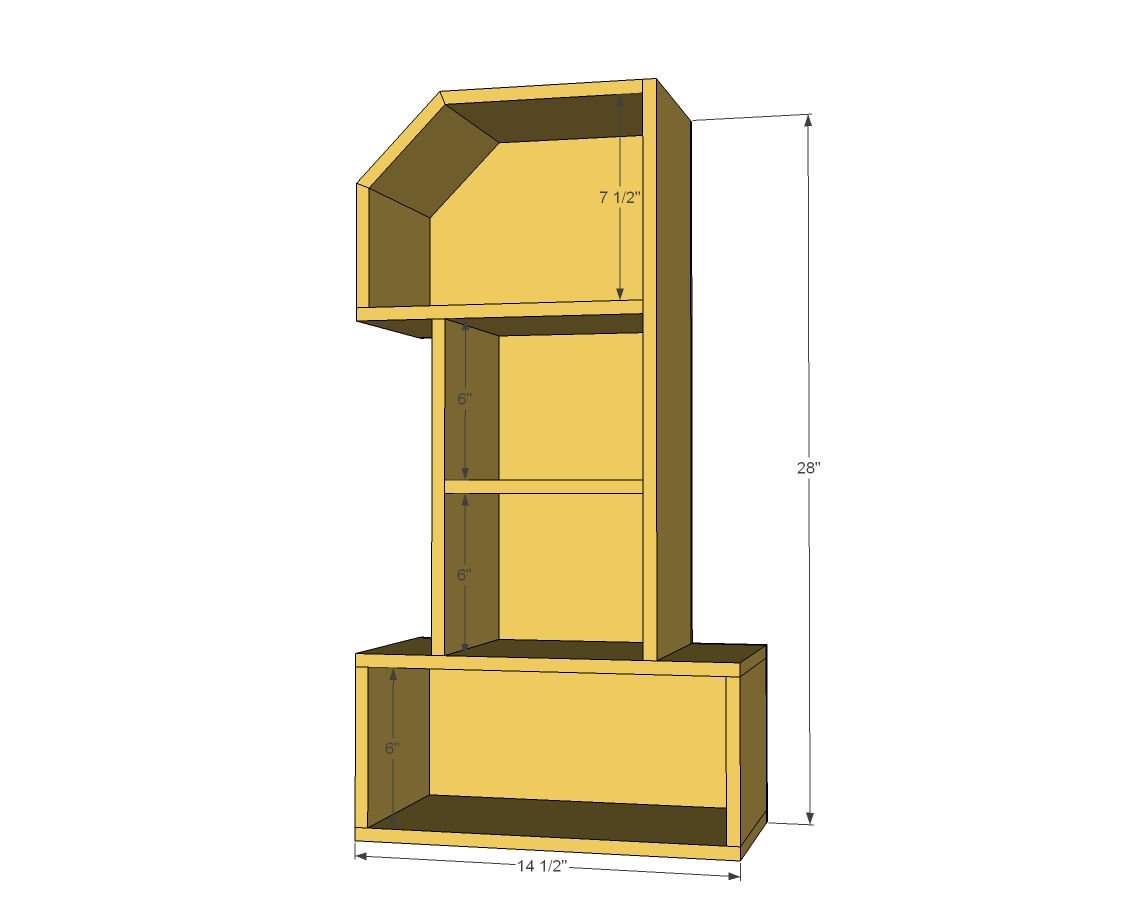
Preparation
8-9 feet of 1/2" thick plywood cut into strips 7-1/2" wide (width can vary depending on desired depth of shelf)
1/4" plywood or other material for the back - minimum size 14-1/2" x 28"
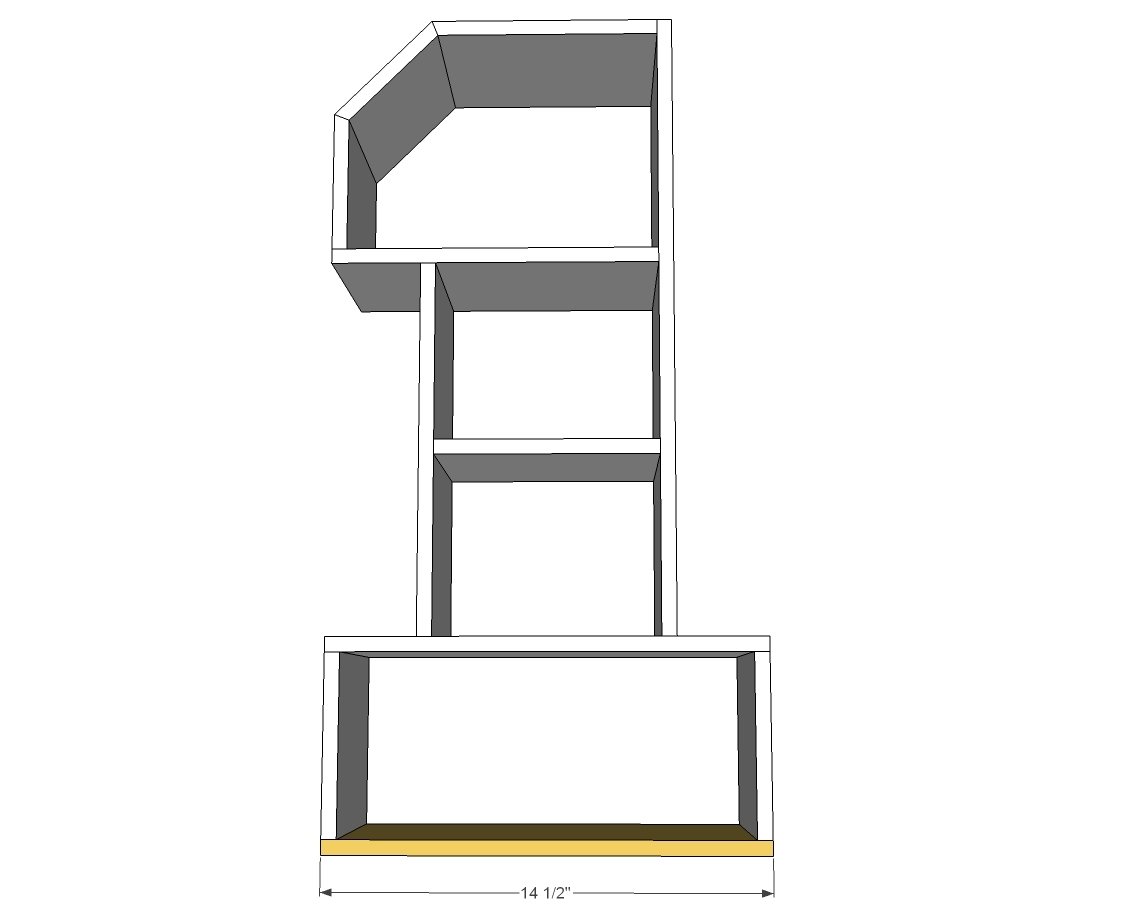
CUT LIST - ALL 1/2" plywood 7 1/2" width
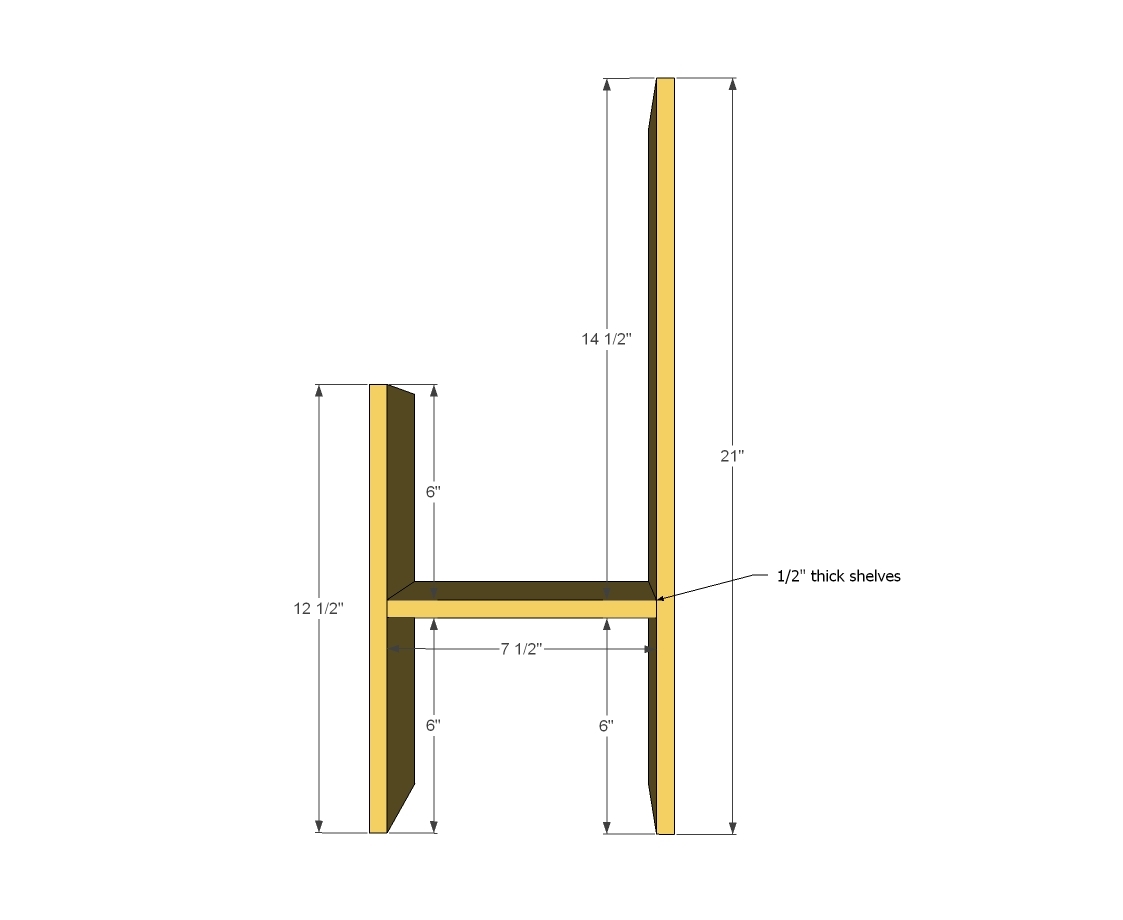
1 - 1/2" plywood @ 7-1/2" x 12-1/2" long
1 - 1/2" plywood @ 7-1/2" x 21" long
1 - 1/2" plywood @ 7-1/2" x 7-1/2" long
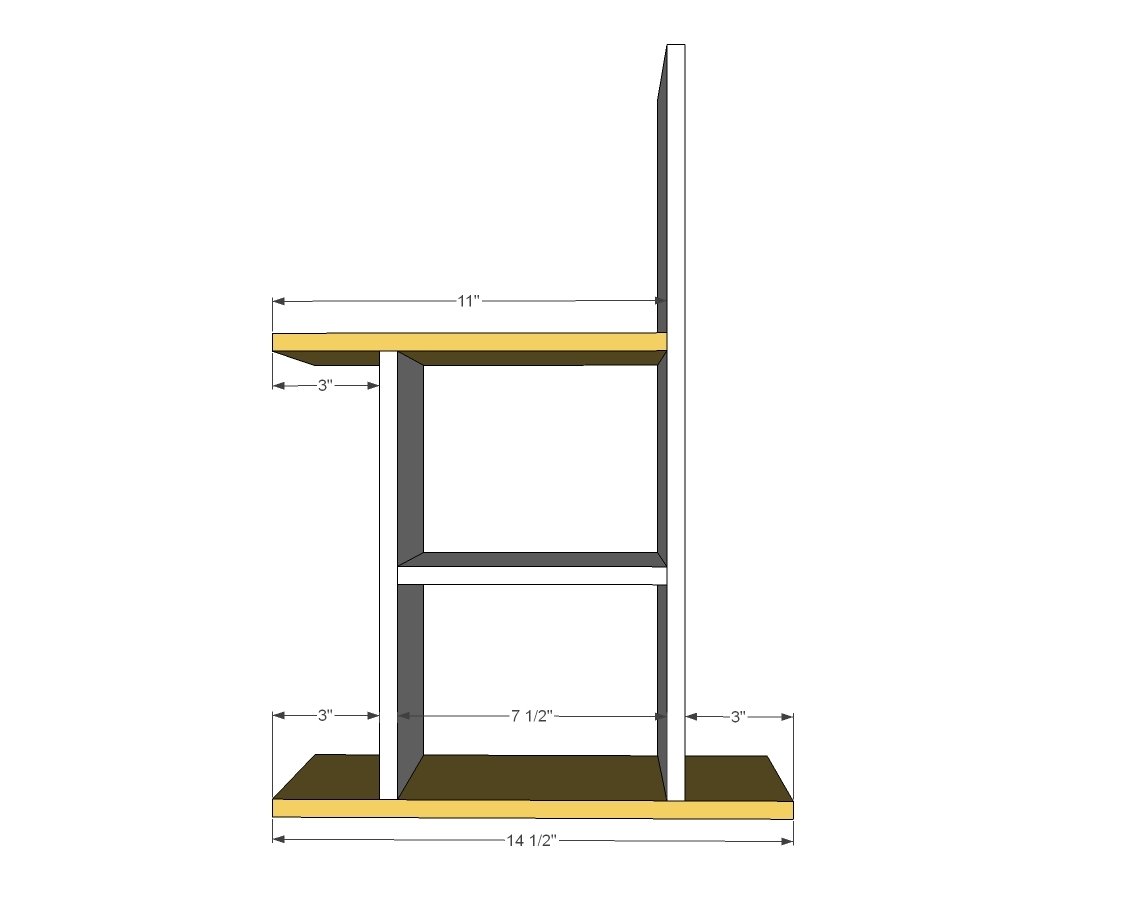
1 - 1/2" plywood @ 7-1/2" x 11" long
2 - 1/2" plywood @ 7-1/2" x 14-1/2" long
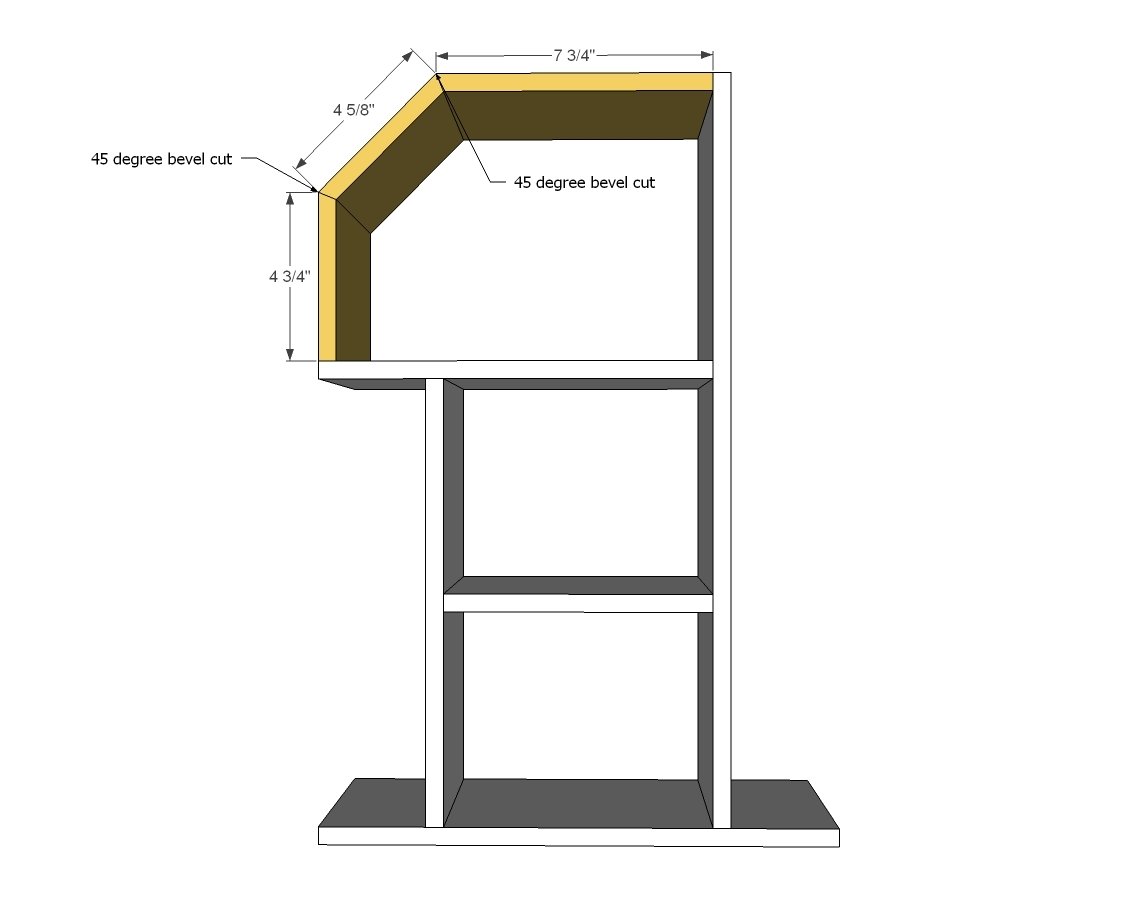
1 - 1/2" plywood @ 7-1/2" x 7-3/4" long (long point measurement, one end cut at 45 degree bevel)
1 - 1/2" plywood @ 7-1/2" x 4-5/8" (long point measurement, both ends cut at 45 degree bevels)
1 - 1/2" plywood @ 7-1/2" x 4-3/4" long (long point measurement, one end cut at 45 degree bevel)
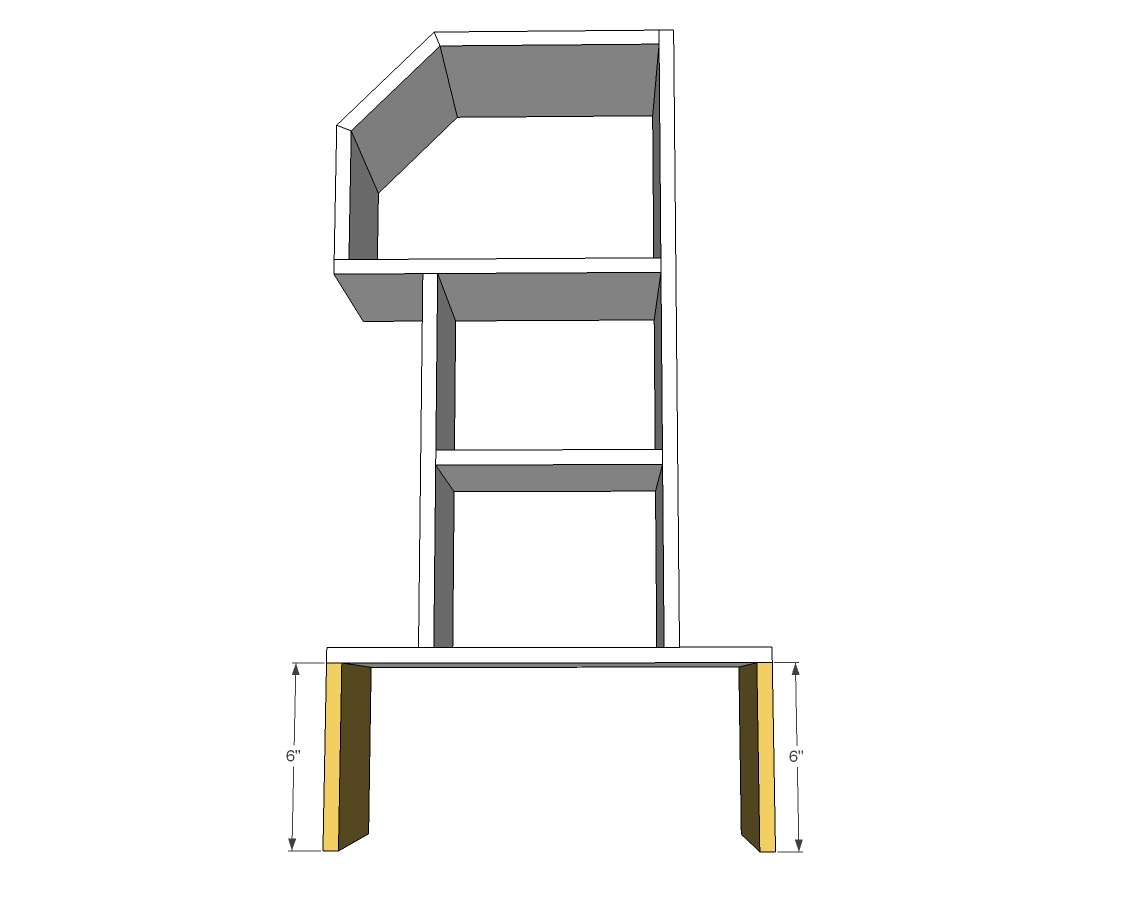
1 - 1/2" plywood @ 7-1/2" x 6" long
Back plywood minimum size is 14-1/2" x 28"
Please read through the entire plan and all comments before beginning this project. It is also advisable to review the Getting Started Section. Take all necessary precautions to build safely and smartly. Work on a clean level surface, free of imperfections or debris. Always use straight boards. Check for square after each step. Always predrill holes before attaching with screws. Use glue with finish nails for a stronger hold. Wipe excess glue off bare wood for stained projects, as dried glue will not take stain. Be safe, have fun, and ask for help if you need it. Good luck!
Instructions
Step 1
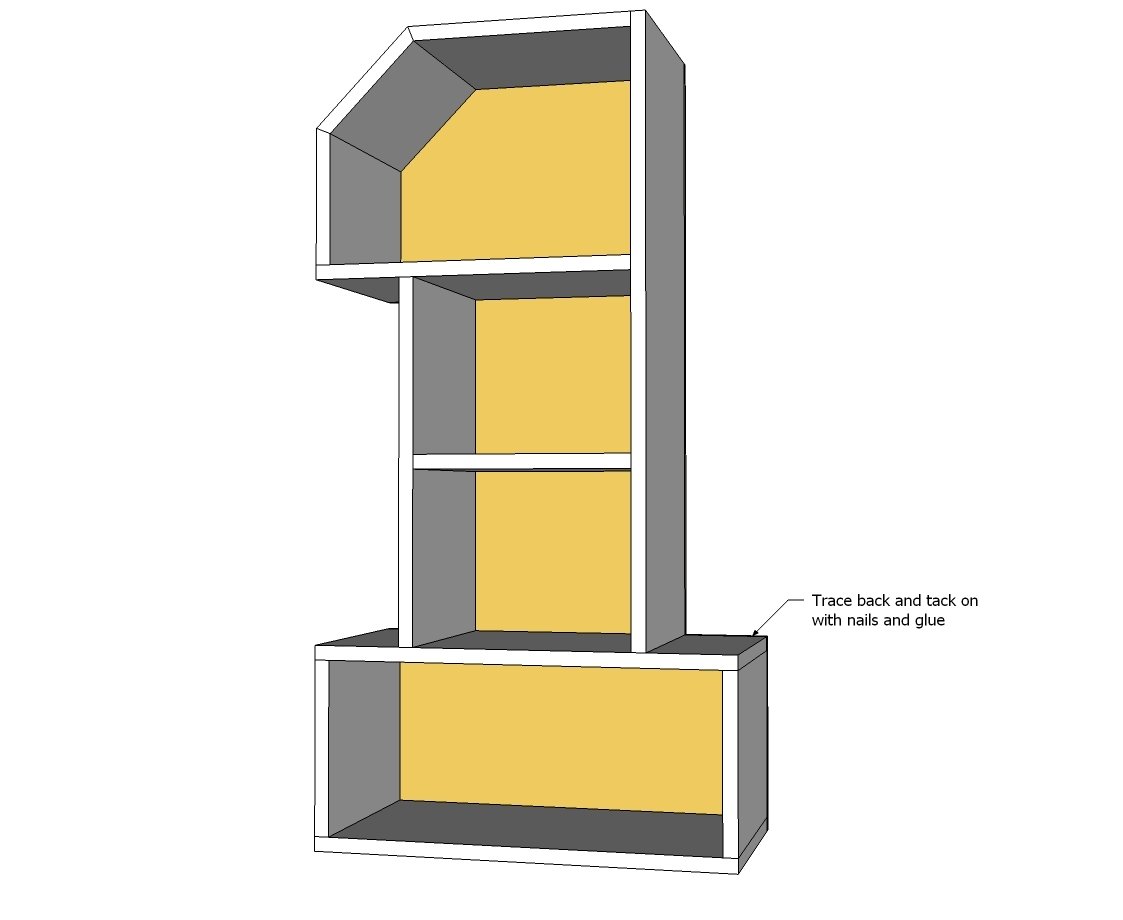
There's countless ways to put this shelf together - the deeper your shelves - and if you are hanging it on the wall - or if you are planning on placing especially heavy objects inside like books - then you should definitely error on the side of overbuilding. Screws recommended, or you can use a pocket hole jig on the 1/2" setting with 1" pocket hole screws.
If you are planning to use this shelf without hanging, then you could get away with nails or staples and GLUE.
This plan calls for using 1/2" plywood, but you could also use cedar fence pickets, 3/4" stock (1x boards) or alter the depth - you may need to alter some of the cuts, though.
Start in the middle and work your way outward, so it's easy to assemble. Remember, this plan assumes your boards are 1/2" thick.
Step 2
Step 4
It is always recommended to apply a test coat on a hidden area or scrap piece to ensure color evenness and adhesion. Use primer or wood conditioner as needed.






Comments
Stacie
Wed, 01/15/2014 - 07:15
I found a couple of changes
I found a couple of changes that needed to be made for this project to fit together properly. The cut list should list two 7-1/2 x 6 instead of one for the sides of the base. Also, the beveled cuts of 45 degrees didn't work because two 45 degree pieces fit together to form a 90 degree angle on the shelf. Instead, I changed all of the beveled cuts to 22.5 degrees and the center piece fit perfectly. This was a really nice and quick project! Thank you.
fun_at_Home_De…
Sun, 08/31/2014 - 21:32
PDF File not working
Thanks for the WONDERFUL idea for our Workshop! We plan to do this in November at The Home Depot in Oxford, AL.