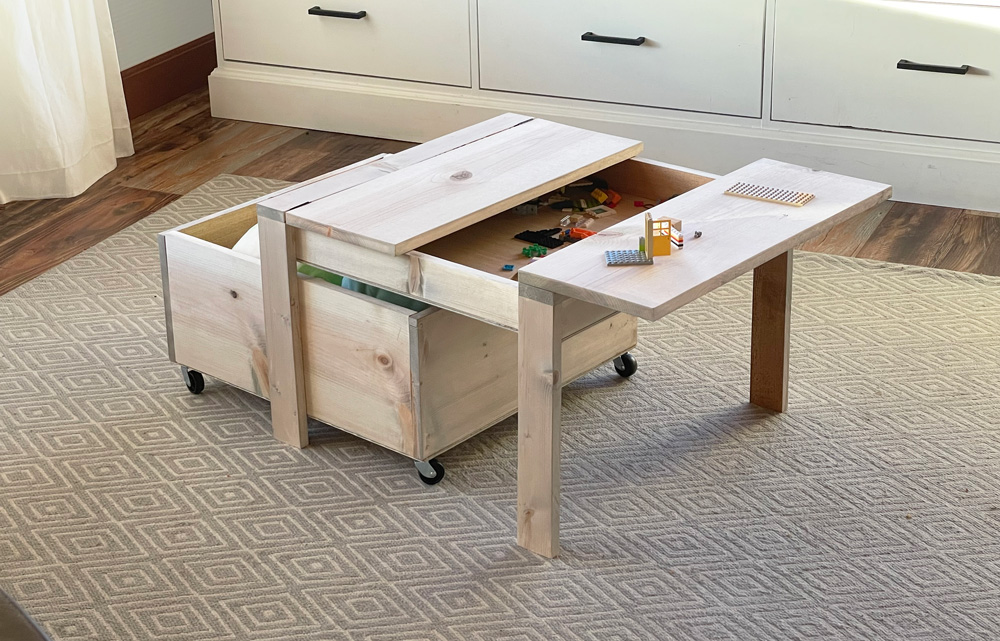
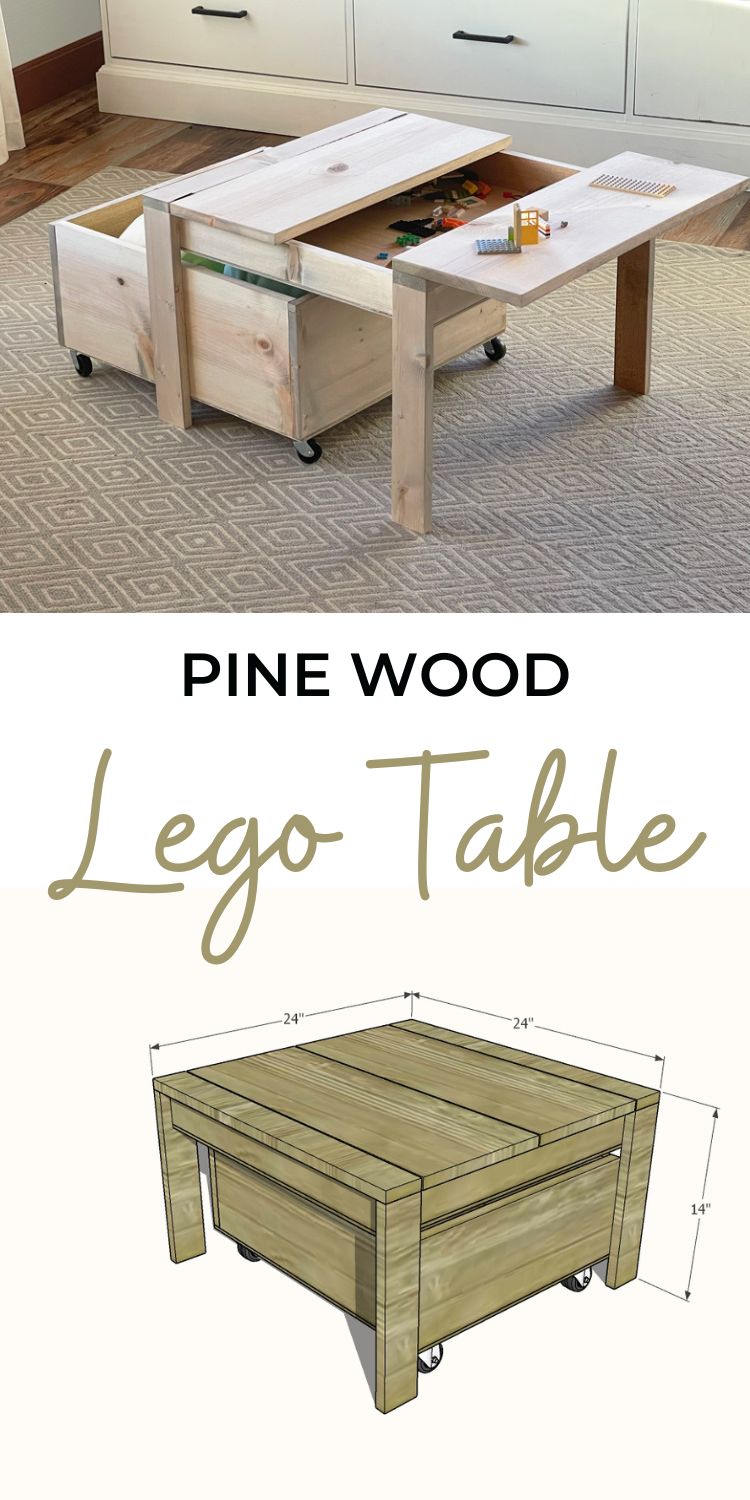
Build a lego table out of pine wood boards! This lego table features fold open top, to create surfaces and expose a large lego storage compartment in the middle. Add a trundle for extra storage, or slide benches underneath. Free DIY Lego Table plans from Ana-White.com - easy build with basic tools includes step by step diagrams, shopping and cut lists, and a build video.
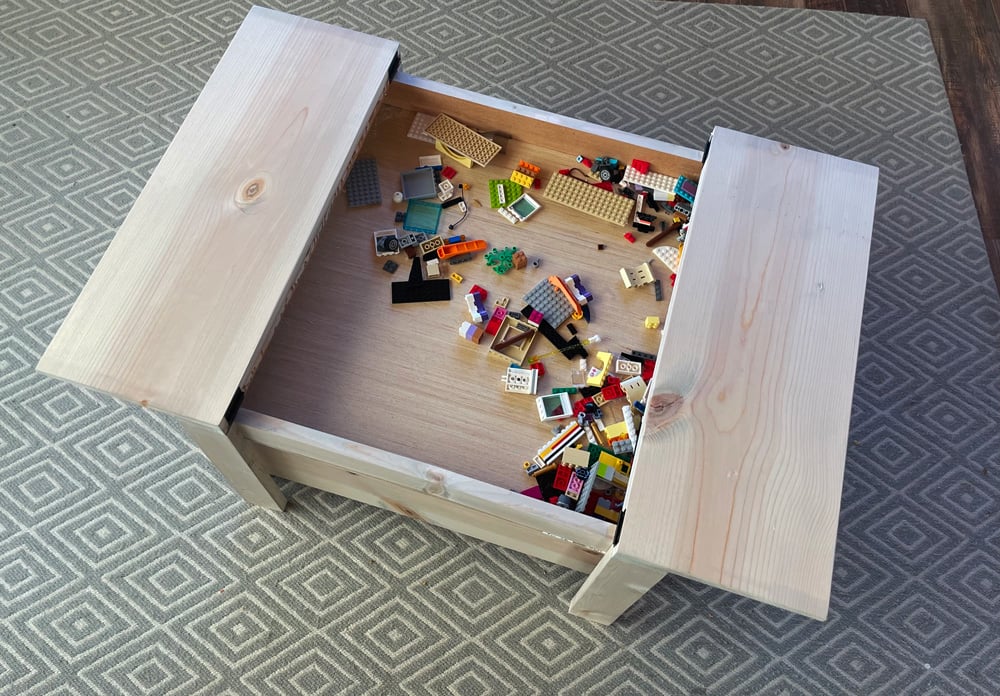
The spare lego pieces are both the best and worst. The best because this is where imaginations come alive. The worst because no one wants to step on a lego, much less pick them up constantly. Lego pieces are getting smaller and smaller. And more of them.
So I decided to build a lego table for my littles to pile their mix matched and leftover legos into.

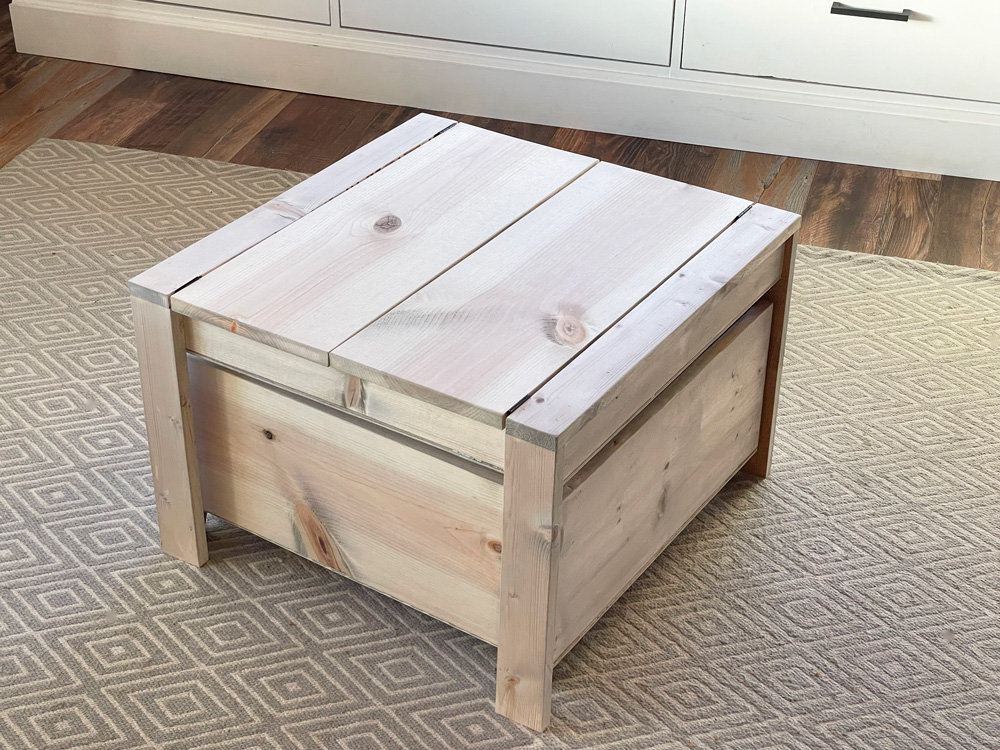
It conveniently hinges closed to hide it all and create a surface for other play -

And you can build storage for under it, if you want.

I know this one looks complicated, but it really isn't!
You can build this project with just off the shelf pine boards, some screws or nails, and your basic saws. Nothing fancy needed here!
Skeptical? Watch the build video -
And the free plans follow:
Pin For Later!
Preparation
Lego Table Only
- 2 - 1x3 @ 8 feet long
- 1 - 1x10 @ 4 feet long
- 1 - 1/4" plywood panel 24" x 48"
- 5/8" and 1-1/4" brad nails
- wood glue
- one set of basic butt hinges, six screws per hinge
- 14 - 1-1/4" long self tapping wood screws (SPAX or similar)
Optional Trundle:
- 1 - 1x8 @ 8 feet long
- scrap plywood from the lego table build
- 4 caster wheels and screws
For lego table only:
- 2 - 1x3 @ 22-1/2"*
- 2 - 1x3 @ 21"
- 1 - 1/4" plywood @ 22-1/2" x 22-1/2"*
- 2 - 1x3 @ 24"*
- 2 - 1x10 @ 24"*
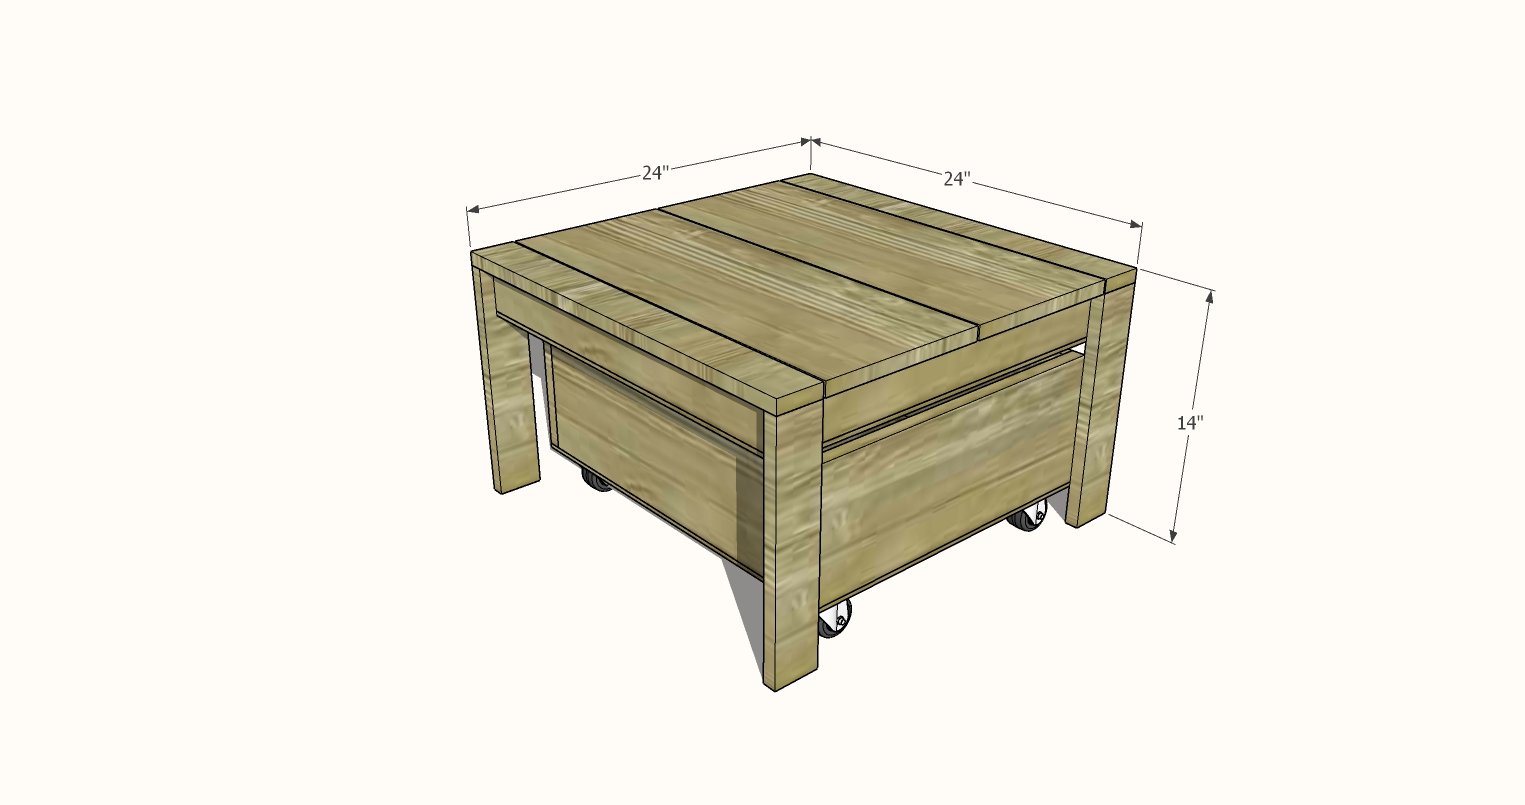
- 4 - 1x3 legs @ 13-1/4" (as shown, can be taller or shorter, depending on desired table height)
For optional storage trundle - trundle can be taller with a wider width board (1x10 or 1x12) if taller legs are used.
- 2 - 1x8 @ 20-1/4"
- 2 - 1x8 @ 18-1/4"
- 1 - 1/4" plywood @ 18-1/4" x 21-3/4"
NOTE: If you are working with a 1x10 board that is exactly 4 feet long (48"), shorten the boards marked with a * by 1/4" so you can fit the two cuts on the 48" long board. The tabletop boards would then work out to 23-3/4".


Instructions
Step 1
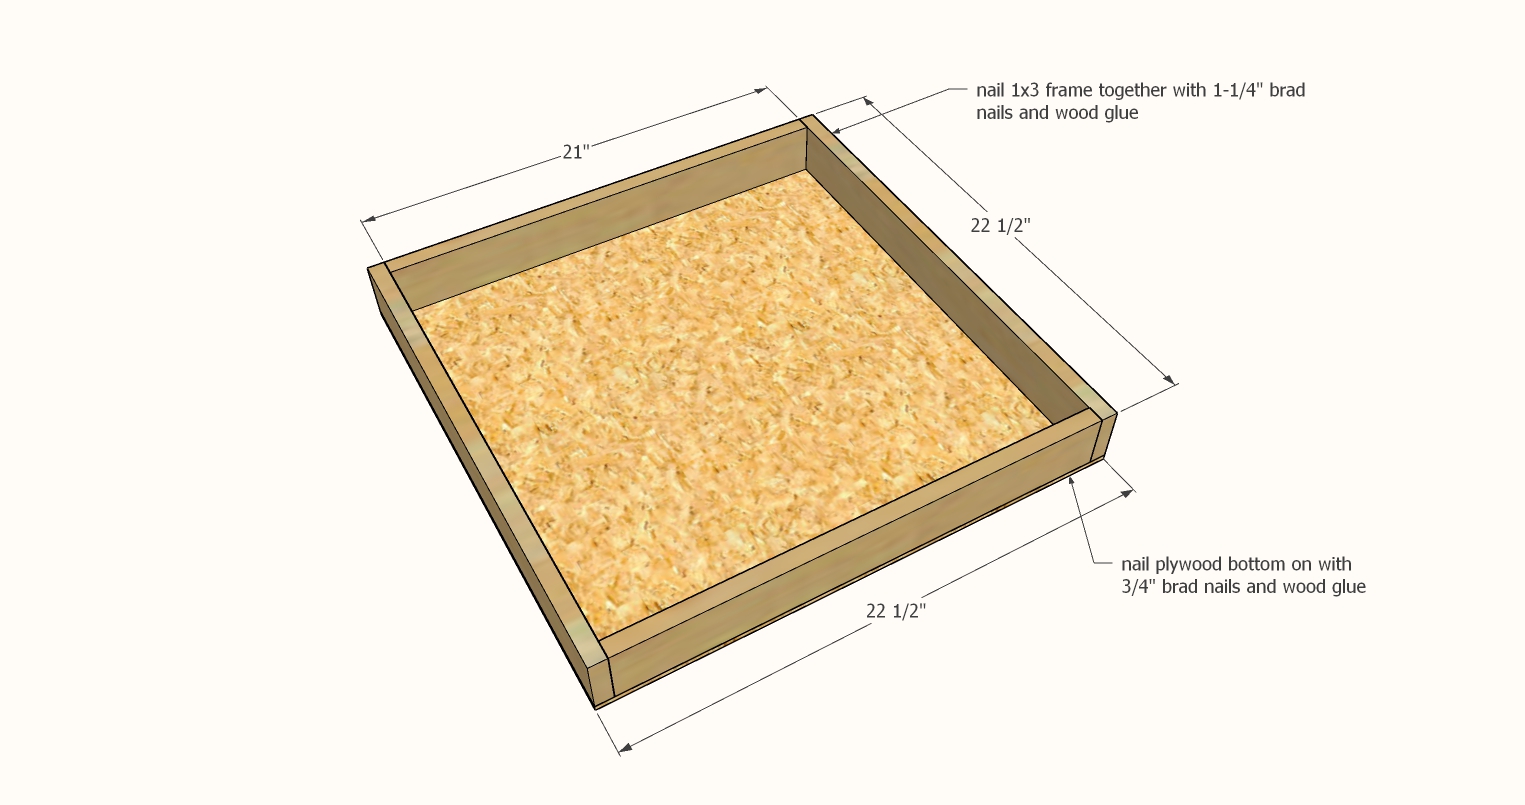
Build the basic box with 1-1/4" brad nails and glue.
Attach the 1/4" plywood panel to the bottom with the shorter brad nails. Use the plywood panel to square up the 1x3 frame.
Step 2
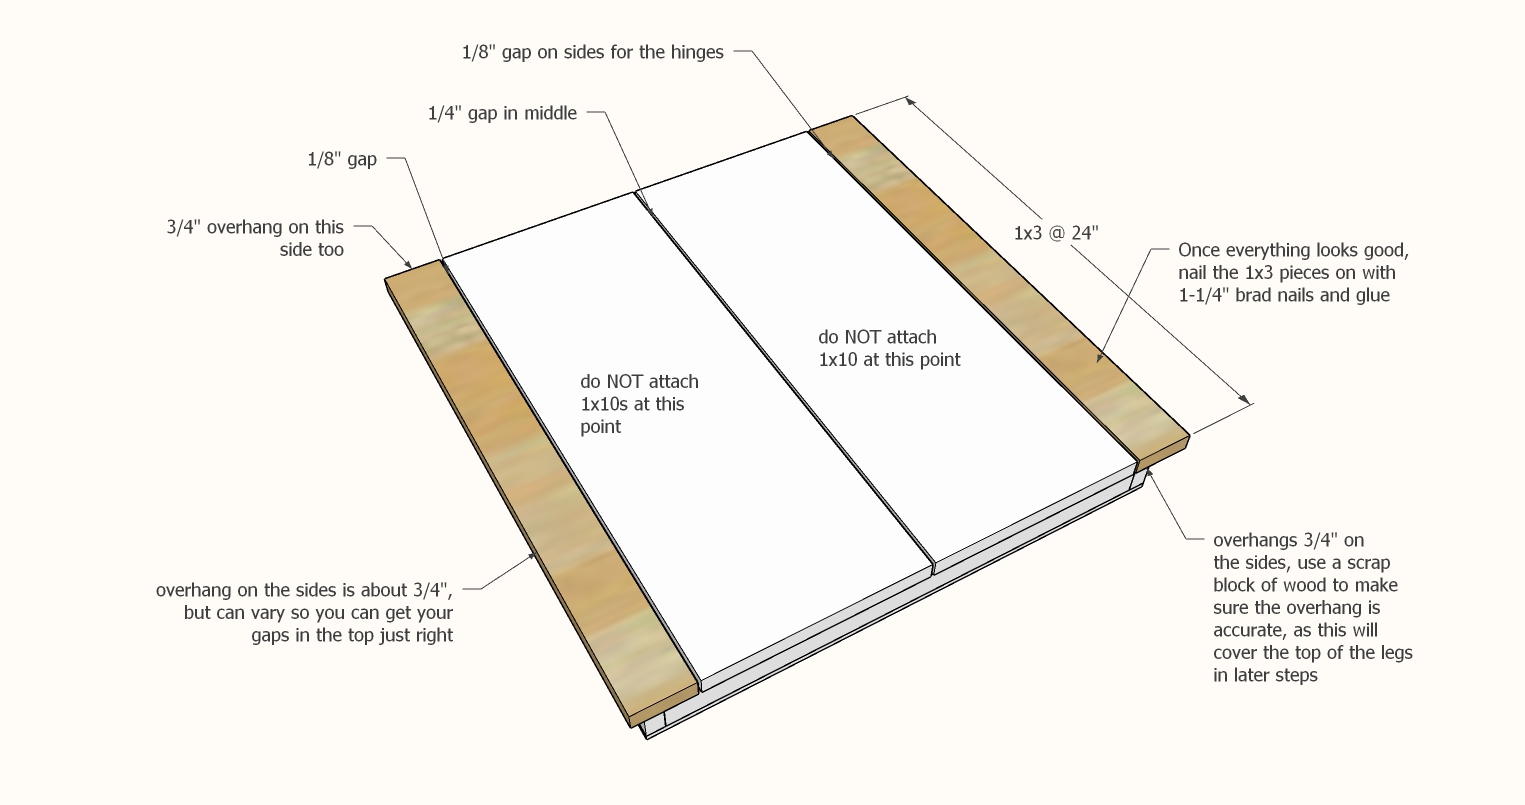
Place the tabletop boards on top.
Line up so there is gaps in between, you can use the hinges to help space out the gaps. Make sure there is a gap in between the 1x10 boards.
Once satisfied with the gap placement, carefully remove the 1x10 boards.
Use a pencil to trace the placement of the 1x3 boards, as you will need to remove and attach with glue.
Remove the 1x3 boards, apply glue and replace.
IMPORTANT: Make sure there is a 3/4" overhang on the ends of the 1x3s (where legs will go in next step) on both sides. Use a scrap piece of wood to help you.
Nail down with 1-1/4" brad nails.
IMPORTANT: Also attach the 1x3 boards to the top with three 1-1/4" screws per 1x3 - as this is the main attachment point for the entire tabletop.
Step 3
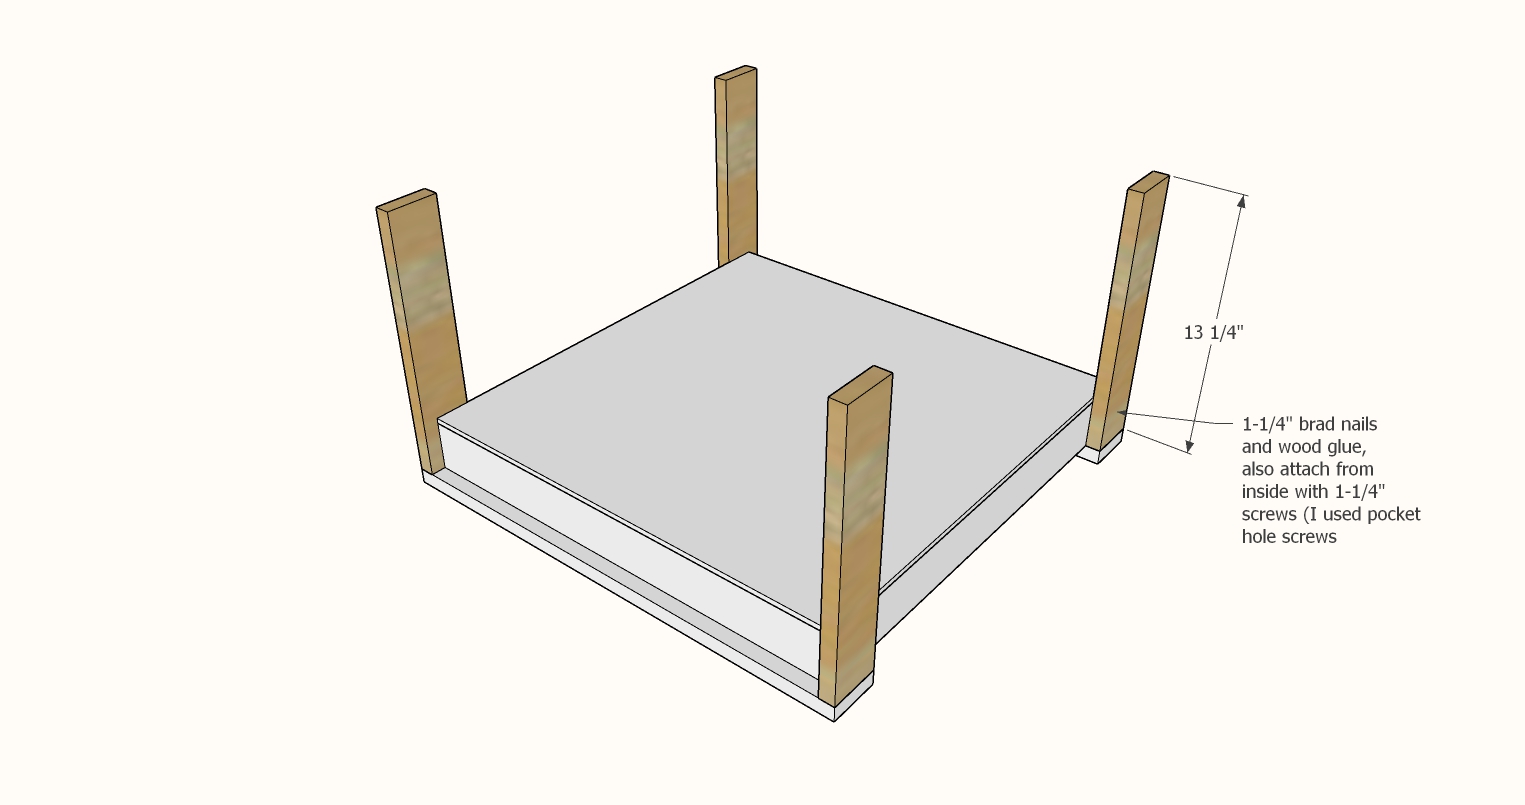
Attach legs to tabletop.
Two screws from inside per leg are needed to secure the legs.
Step 4

Attach 1x10s to the 1x3s with hinges as shown.
Step 5
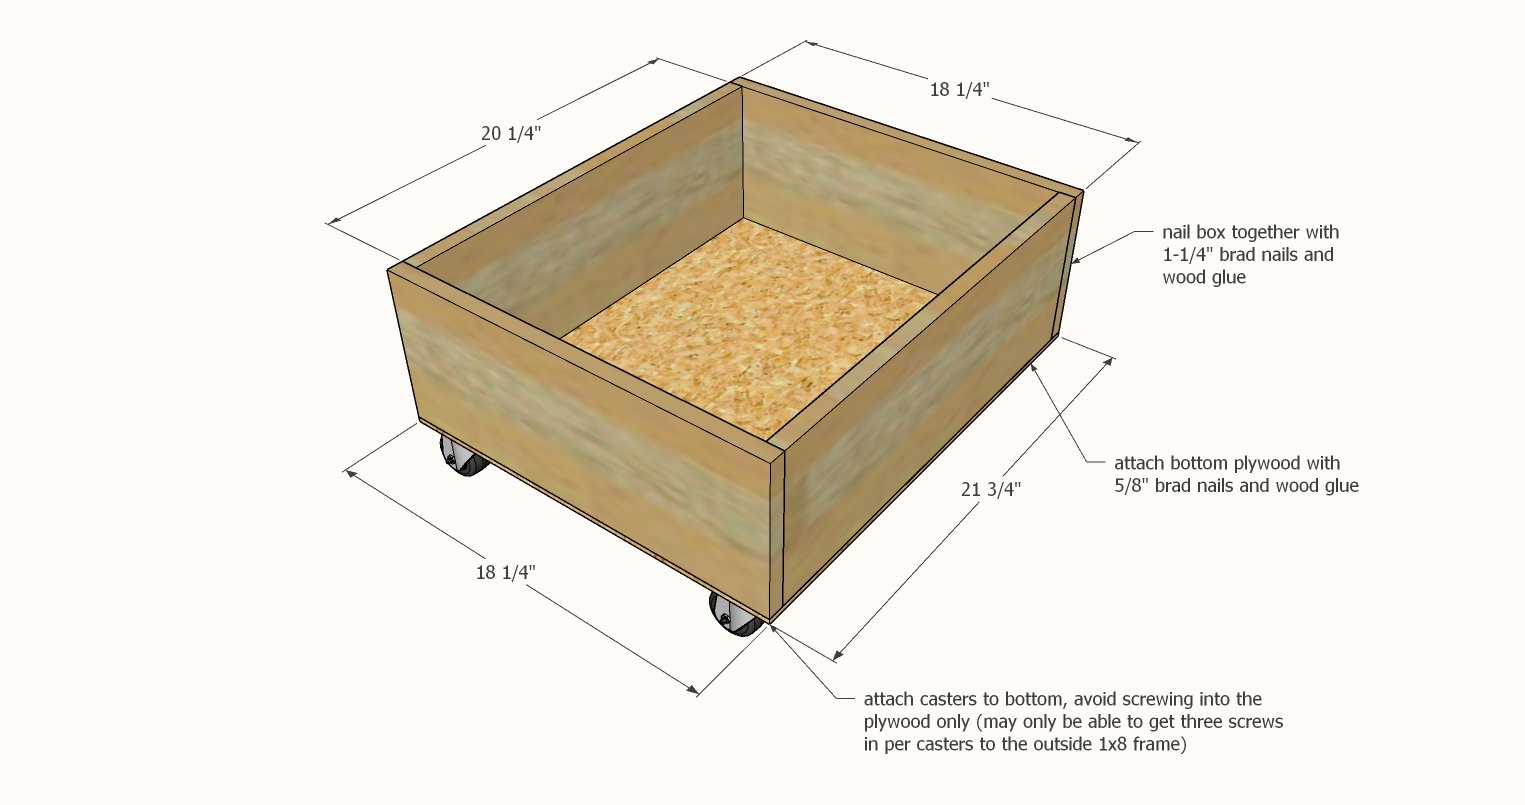
The trundle is built the same as the tray from step 1.
Add casters with screws.
I then sanded the entire project with 120 grit sandpaper. I smoothed out all the outside edges.
Then I sanded with 150 grit sandpaper.