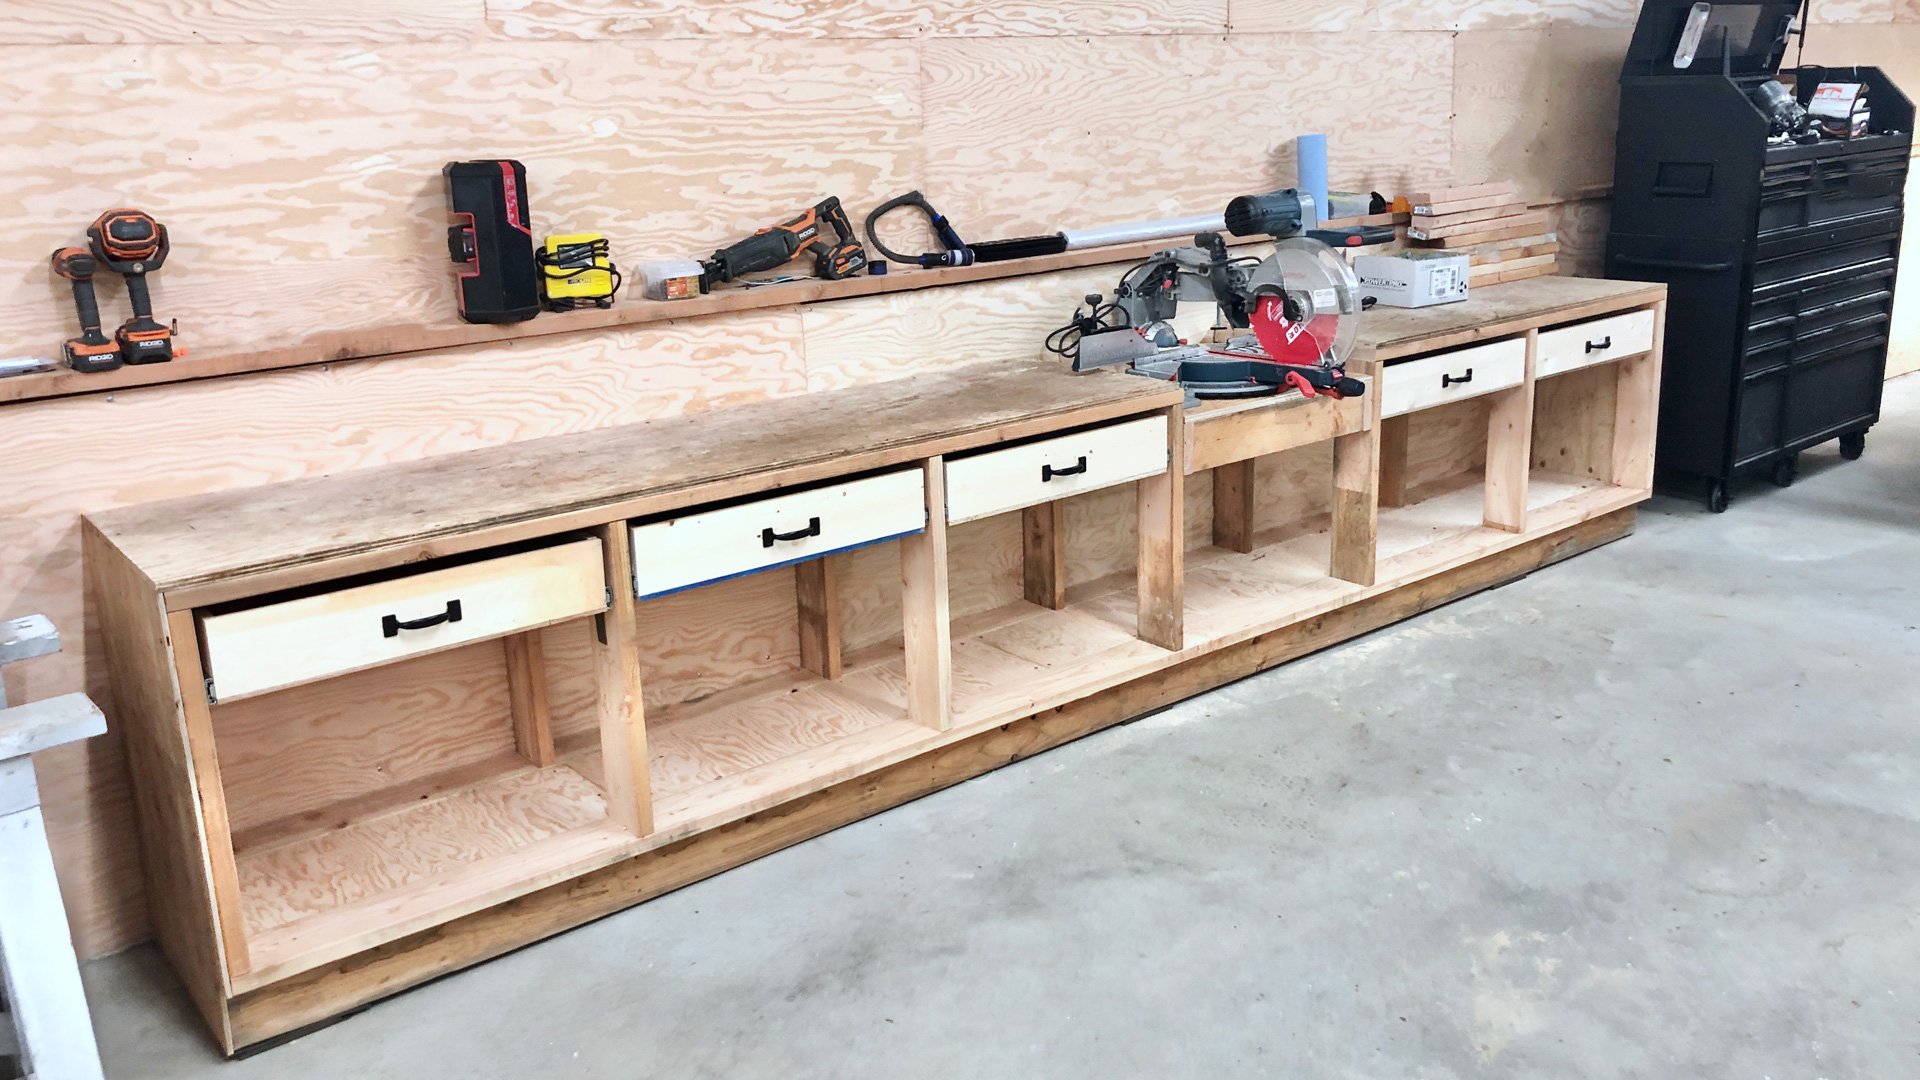


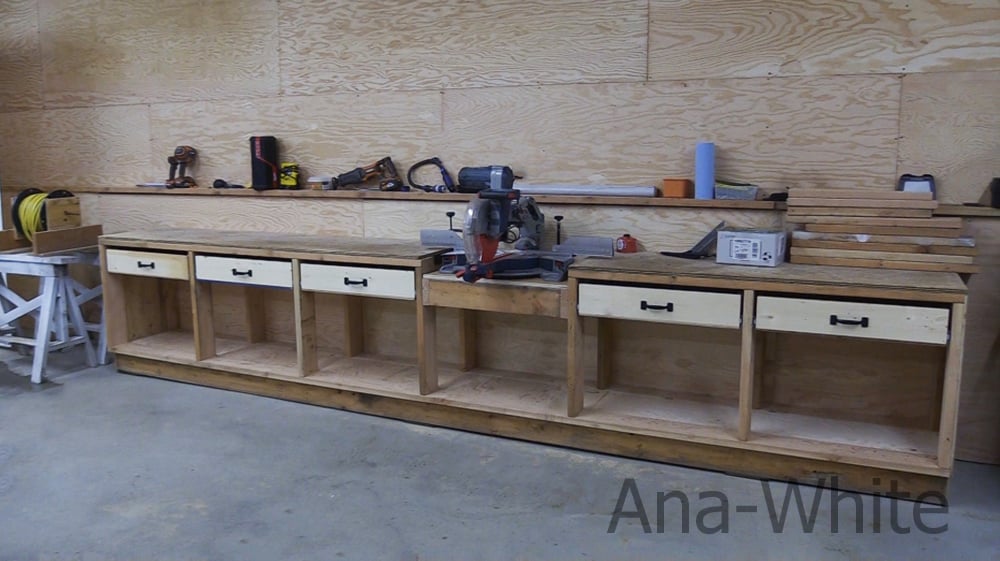
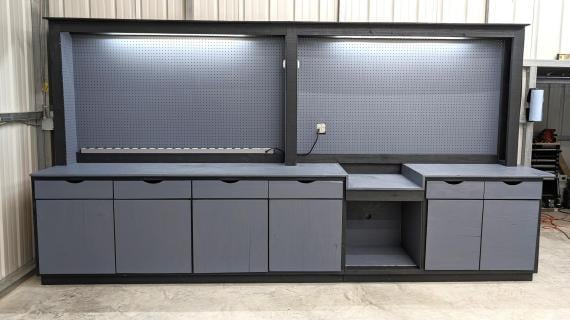
If you can build a pony wall your can build a workbench with drawers. All the functionality of cabinetry - but at a fraction of the cost and time! Free plans from Ana-White.com
Do you want kitchen cabinet style functionality in your garage, but don't want to take the time and money to build kitchen cabinets?
We just built a new workbench with a new method - we call it the "pony wall method" - and in this post, we'll share with you how and also the plans so you can build it too.
Why We Love It
There's alot of different ways of building workbenches, here's why we love this way and this workbench:
- Spacious drawers at waist height (instead of bulky framing)
- Toekick elevates the bottom shelf and allows user to stand closer to workbench top
- Fully enclosed base is easy to clean around
- Treated wood for the base is good for garages and will hold up to potentially wet conditions
- Inexpensive and easier to build compared to other methods of building
- Designed to work on uneven garage floors
- Easy to add a chop saw
- 16 feet overall length supports cutting on either side of the saw
- Easy to modify in length and width
- Can make any length you want (plywood is limited to 8' runs)
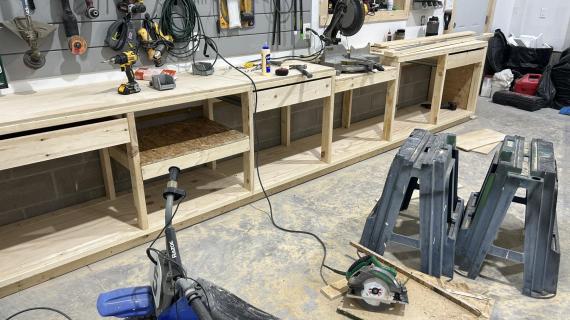
How We Built It
We had some leftover 2x framing boards, so we tried out a new way of building the same ole same ole -
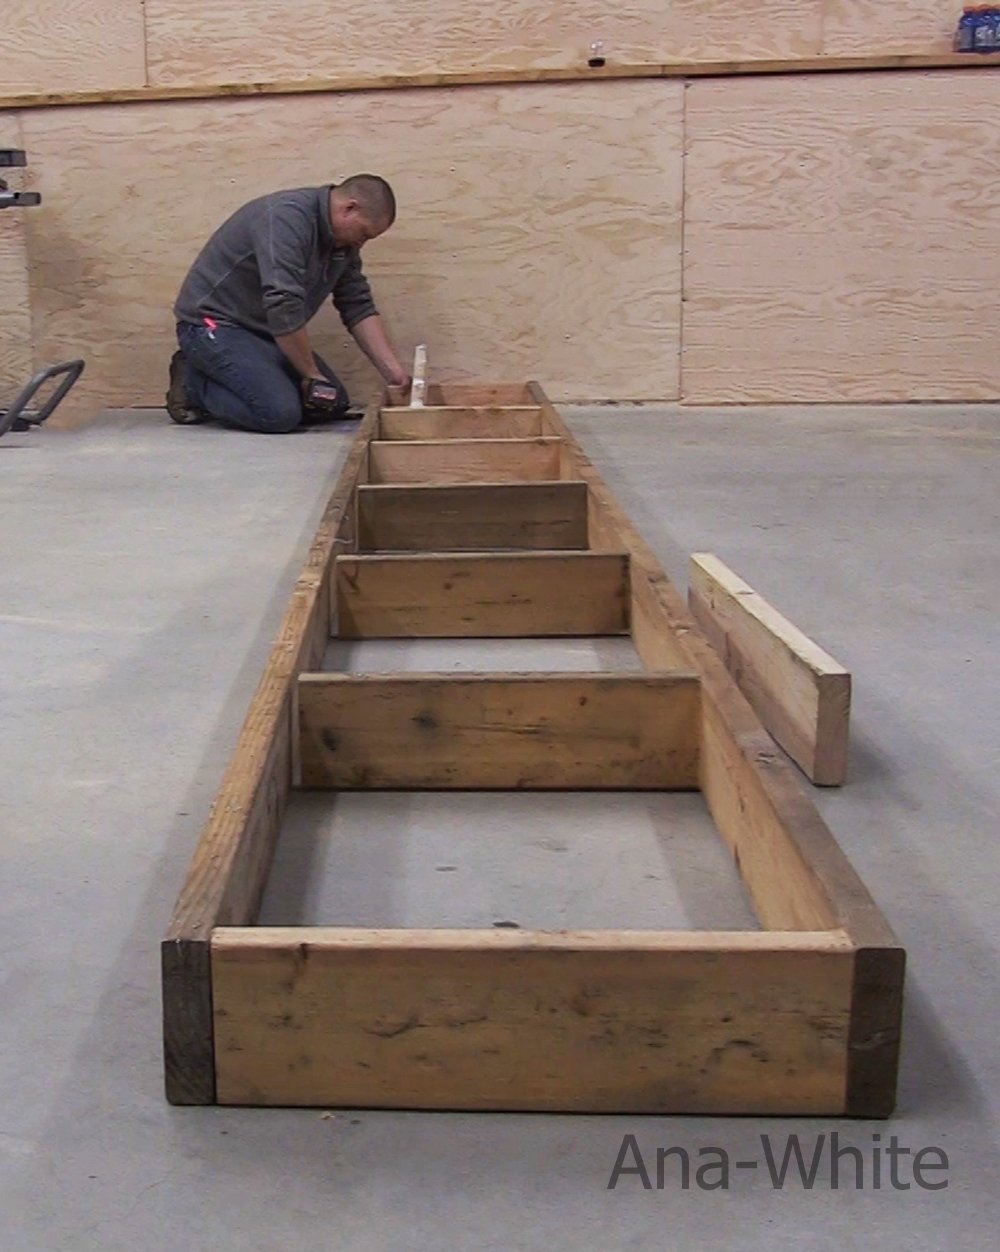
Basically, you build three pony walls. You set the first one on the floor and level it up and screw it to the wall behind.
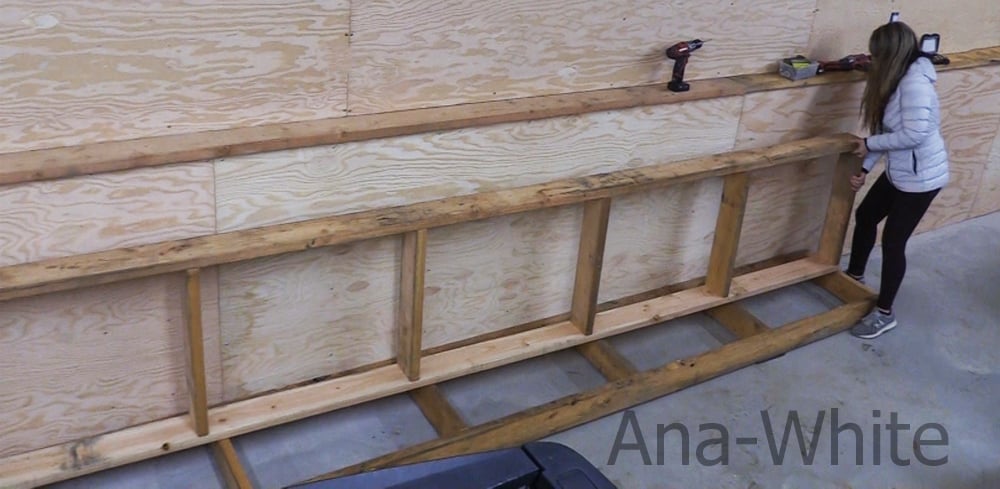
Then you set the second pony wall at the back and screw it to the bottom one.
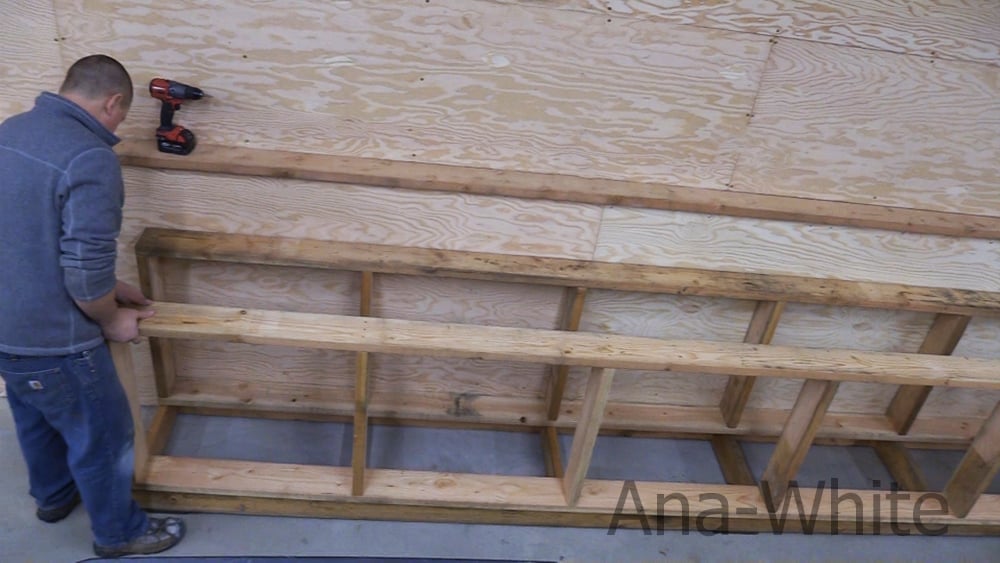
Then you set the third pony wall on the front, so this gives you a toekick and the front of your workbench.
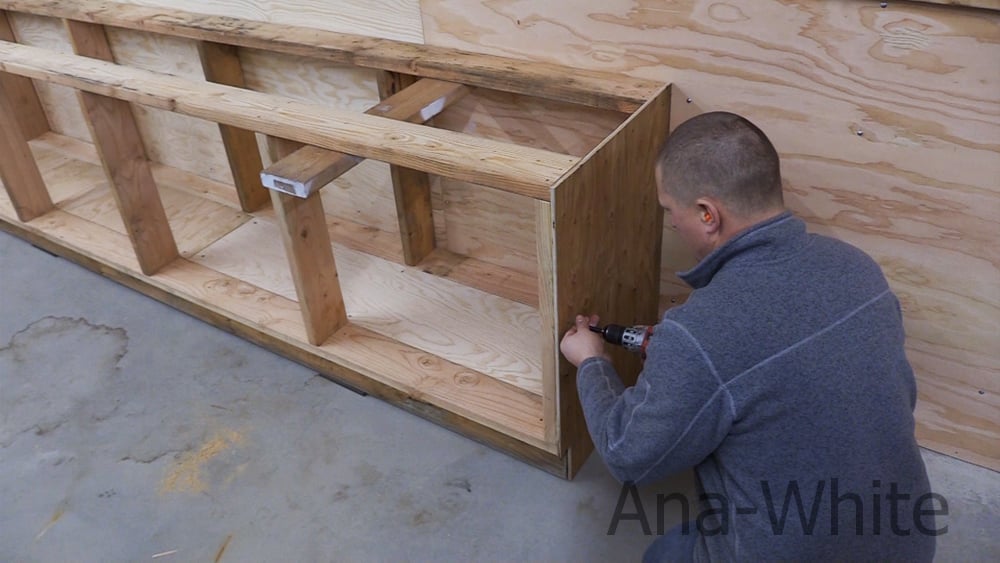
Then you screw plywood down in between the frames to create the floor, and on the ends to enclose it.
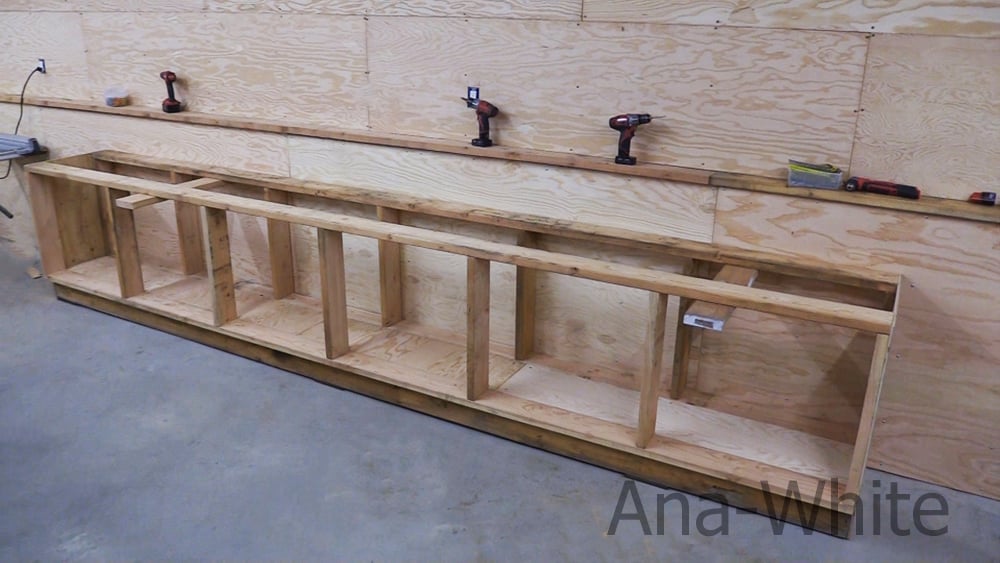
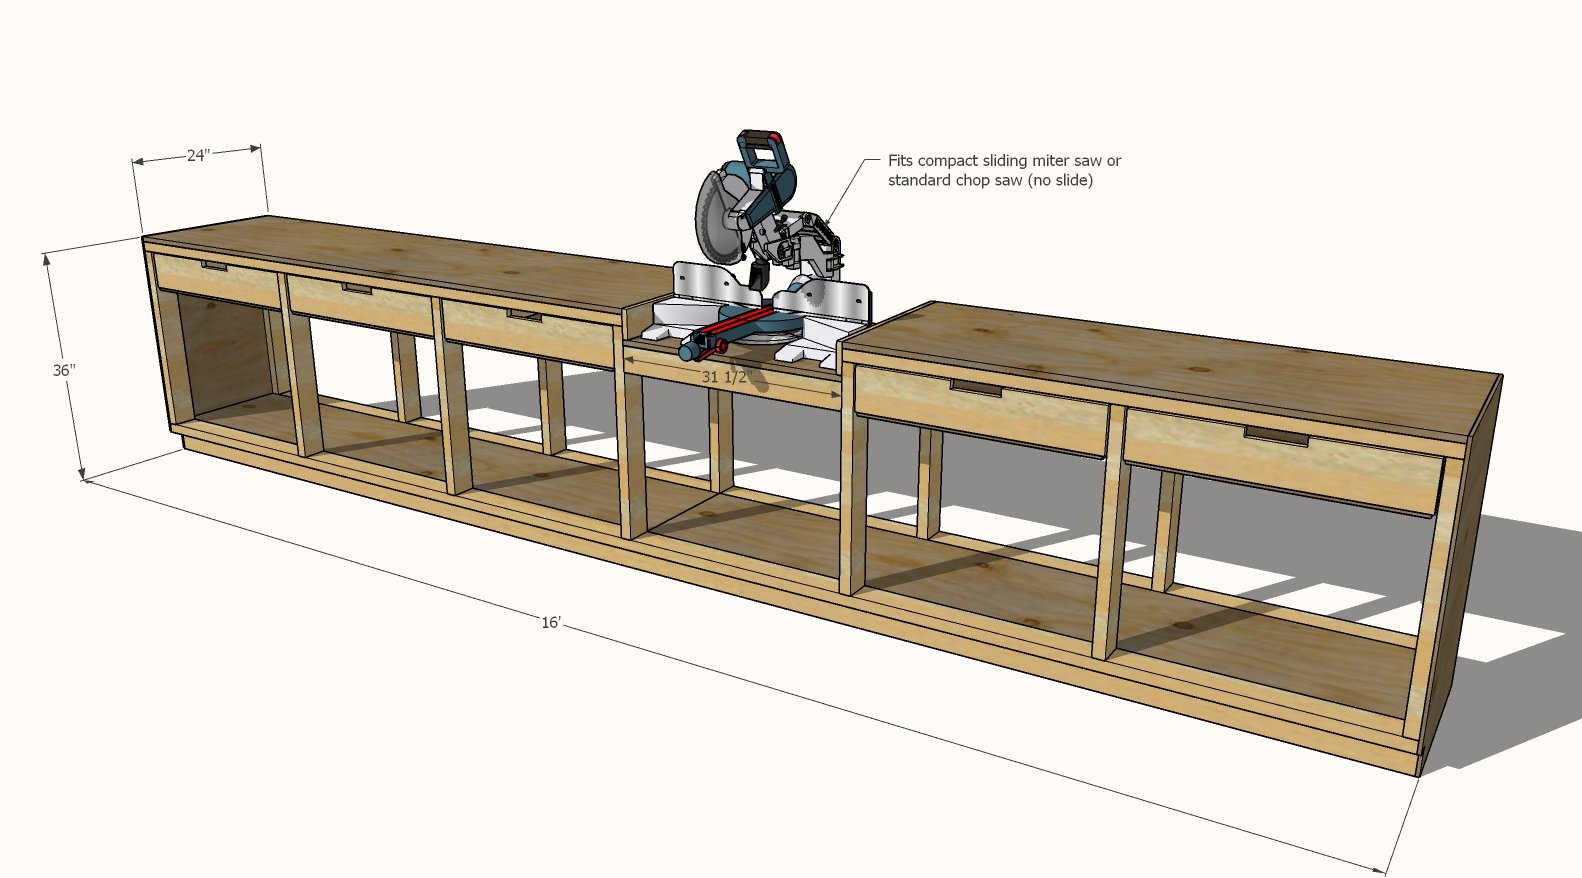
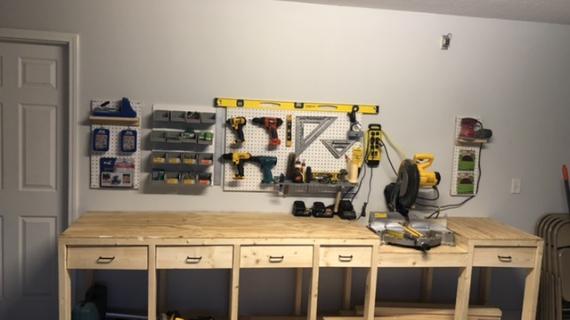
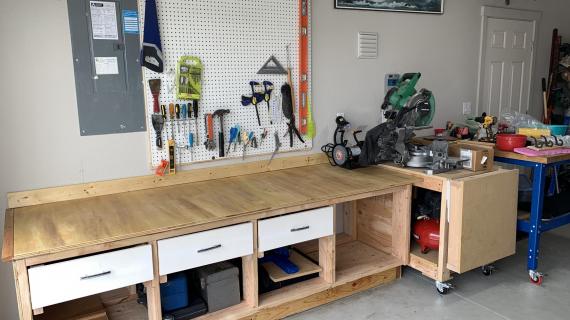
You can just add a top at this point, or you can set a chop saw in it too.
Just cut the framing out where you want to add the chop saw,
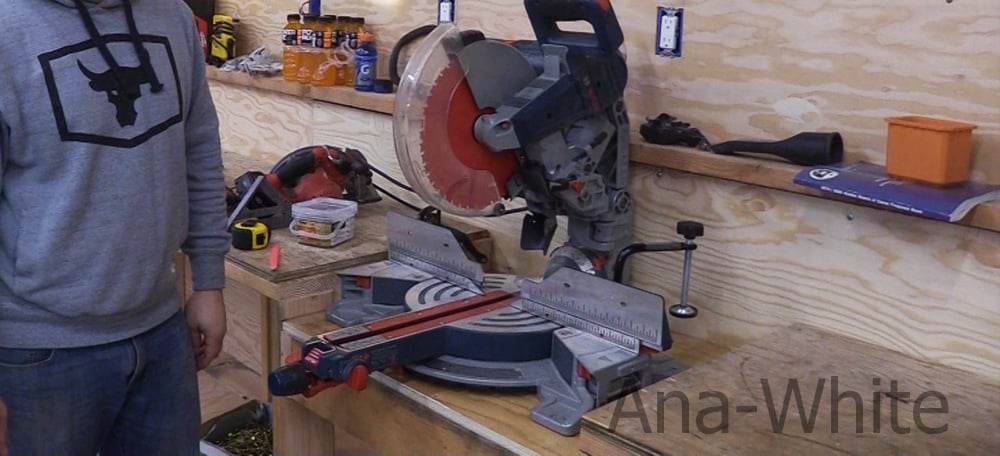
And screw to the sides, place the scrap plywood on top and set the miter saw.
Compact Sliding Miter Saws
In this plan, you need a miter saw that will work with 24" of cabinet depth. I put together a list of sliding miter saws that don't need rear clearance here, or you can use a chop saw that does NOT slide.
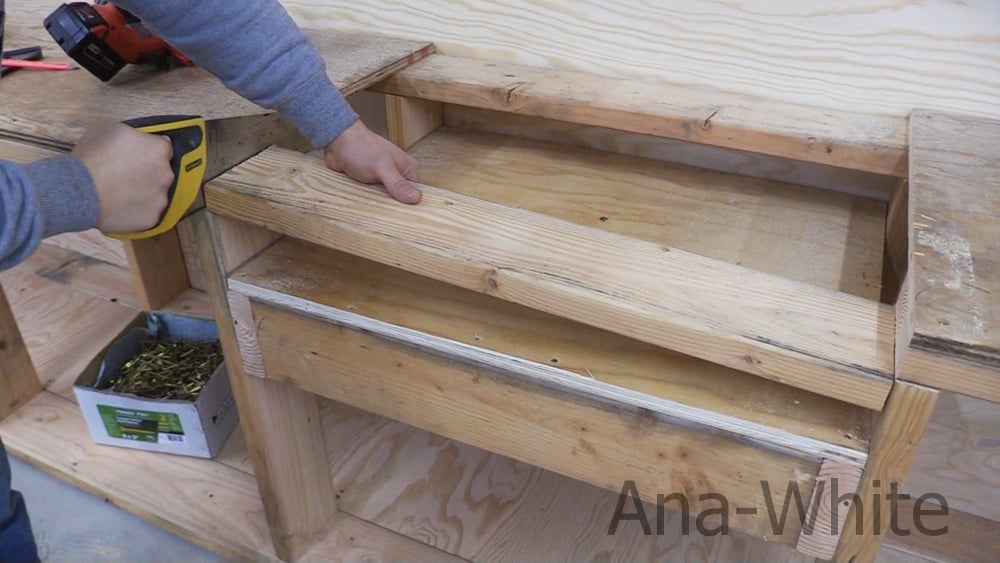
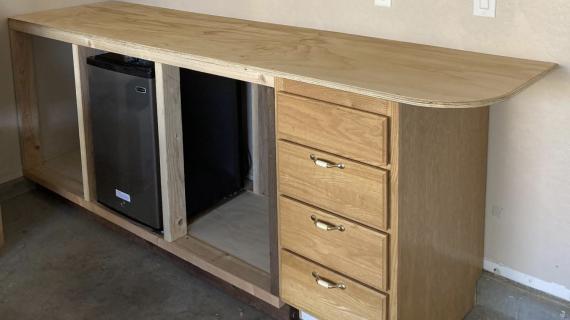
On to the drawers - just attach to the frames (no, you don't need to attach in the middle, just get the three screws in somewhere)
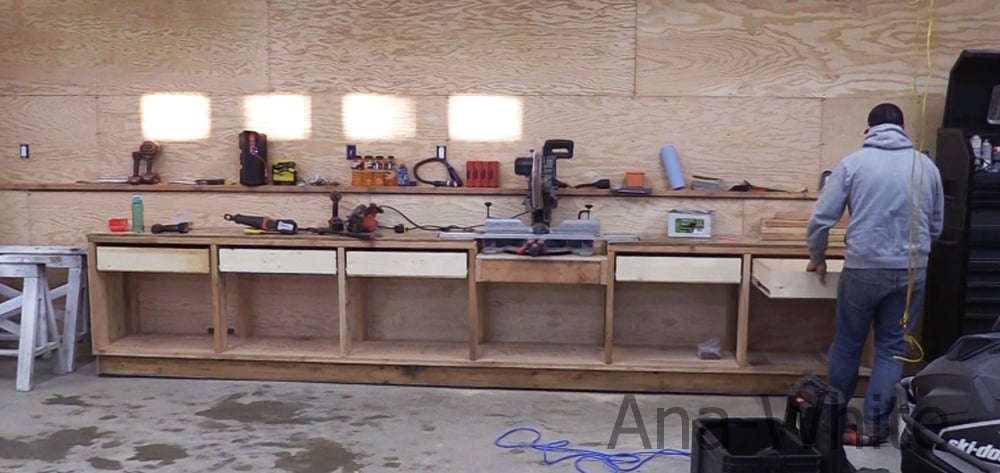
And slide the drawers in.
Video Tutorial
Watch us build the pony wall workbench in this video
Please Pin!
If you have a second to pin, please use this image. Pinning helps us get the word out about new plans, and helps us keep up with website maintenance and server expenses. We very much appreciate the support.

Preparation
3 - 2x4 @ 16" - treated for base recommended
4 - 2x4 @ 16"
6 - 2x4 @ 8 feet or stud length
4 - 1x4 @ 8 feet long
2 - 1x6 @ 8 feet long
2 - 4x8 sheets of AC plywood
1 - sheet of 1/4" or 3/8" plywood for drawer bottoms and sides of workbench PLUS an additional drawer bottom 29" x 22-3/4"
150 - 2-3/4" self tapping construction screws
100 - 2" self tapping construction screws
1-1/4" brad nails
wood glue
5 - 22" full extension drawer slides
BASE
- 2 - 2x4 @ 16' - treated
- 9 - 2x4 @ 19" - treated
CARCASS
- 4 - 2x4 @ 16'
- 14 - 2x4 @ 28-3/4"
- 2 - 3/4" plywood @ 8' x 17" - bottom shelf
- 4 - 3/4" plywood @ 8' x ~3-1/2" - hidden spacers under bottom shelf
- 1 - 3/4" plywood @ 8' x 24" - larger top
- 1 - 3/4" plywood @ 64-1/2" x 24" - smaller top
- 2 - 3/8" plywood @ 24" x 36" - sides
MITER SAW MOD
- 2 - 2x4 @ 22-1/2" - side supports
- 1 - 2x4 @ ~31-1/2" - front support
- 1 - 3/4" plywood @ 31-1/2" x 24"
DRAWERS
- 10 - 1x4 @ 22" - drawer sides
- 5 - 1x4 @ ~27-1/2" - drawer backs
- 5 - 1x6 @ 29-1/2" - drawer fronts
- 5 - 3/8" plywood @ 22-3/4" x 29"


Instructions
Step 1

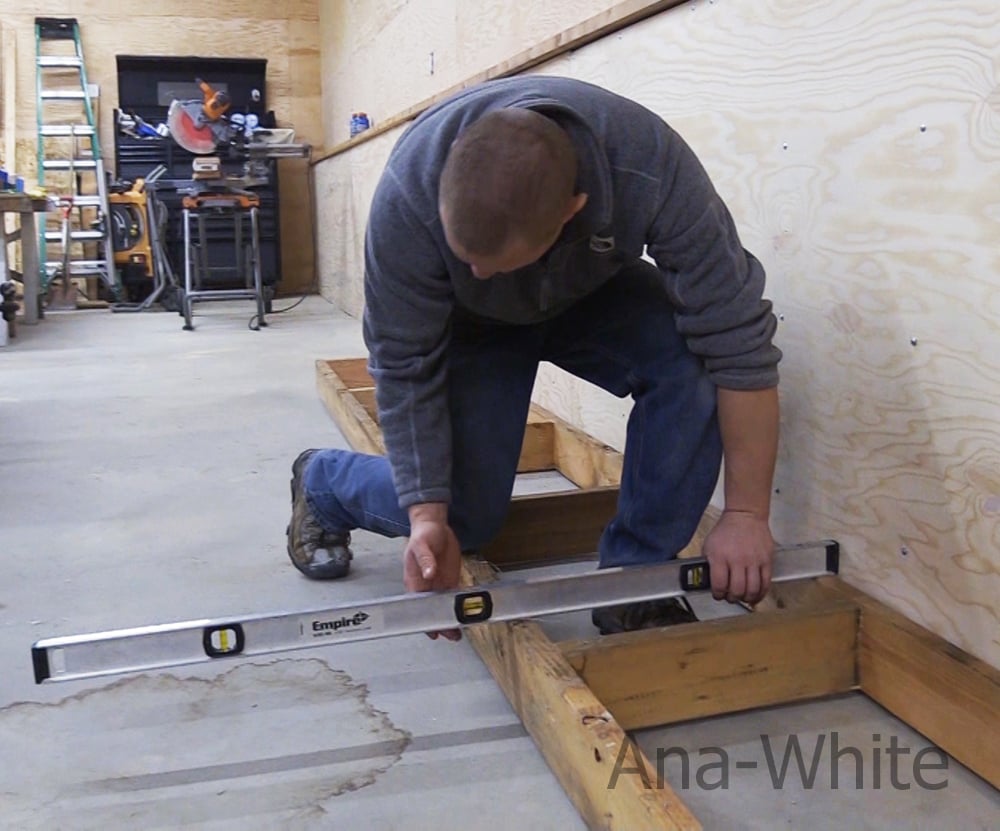
Build the base frame using the treated 2x4s and 2-3/4" screws. Set the base frame in it's final position and shim with composite wood shims until perfectly level. Adjust for square by taking opposite diagonals and adjusting the base until the diagonal are perfect matches. Attach to back wall with 2-3/4" screws.
Build two of the cabinet frames. Use a spacer cut 30" long to space the openings on the left three bays and right two bays. Fasten with 2-3/4" screws. Check for square and adjust if necessary.
Step 2

Attach upper frames to the base with 2-3/4" screws. Make sure the frames are square on top.
A temporary brace can be added to keep the two frames square and the front frame from falling forward.
Step 3

Measure the distance between the two frames on the inside.
Rip plywood to this width, should be about 17" wide x 8 feet long.
Rip the remaining scraps into four pieces, each about 3-1/2" wide x 8 feet long.
Attach the strips inside the cabinet with 1-1/4" brad nails and glue.
Then set the shelf pieces on top of the strips and glue and nail down.
Step 4
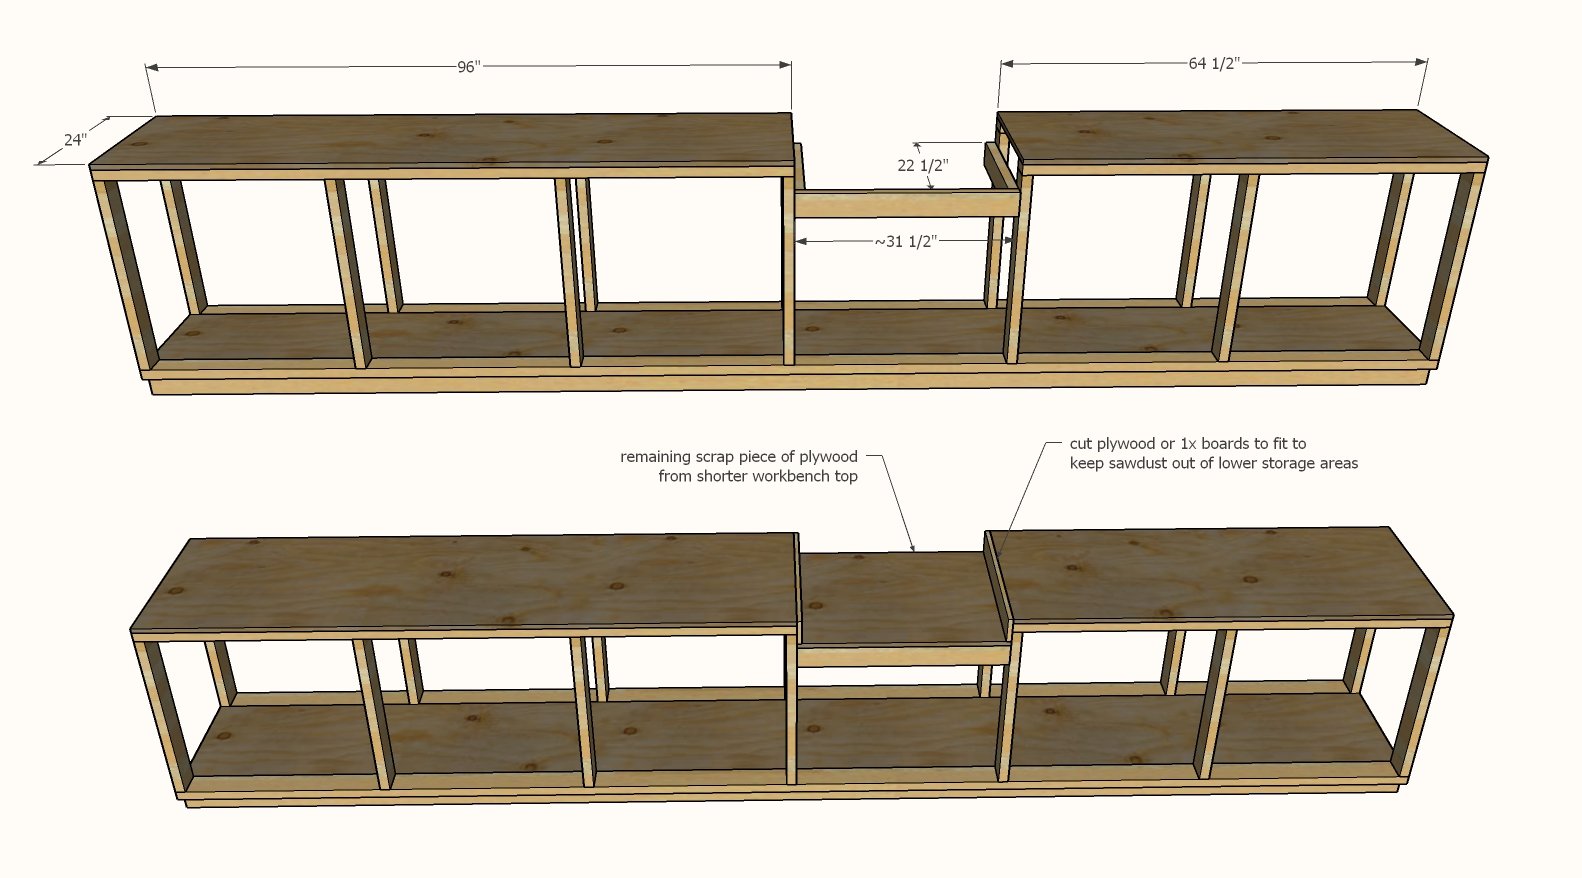
Cut the remaining sheet of 3/4" plywood in half width wise, so you have two pieces each 8 feet long and 24" wide.
Attach one piece on the top left of the cabinet with the 2" screws. For no miter saw installation, attach the second piece on the right.
For miter saw installation, cut the remaining piece of plywood to fit on the right.
Cut out the 2x4s where the miter saw will be placed.
Install the miter saw platform with 2-3/4" screws and add the remaining scrap piece of plywood on top. Screw plywood down with 2" screws.
Step 5

Take the sheet of 3/8" plywood and cut off a piece 36" x 48" - then cut that piece in half (two 24" x 36" pieces). Trace the toekicks and cut the toekicks out. Attach to ends with 1-1/4" brad nails and wood glue.
Step 6
NOTE: I recommend building and installing one drawer first, to make sure it fits, and then build the remaining drawers.
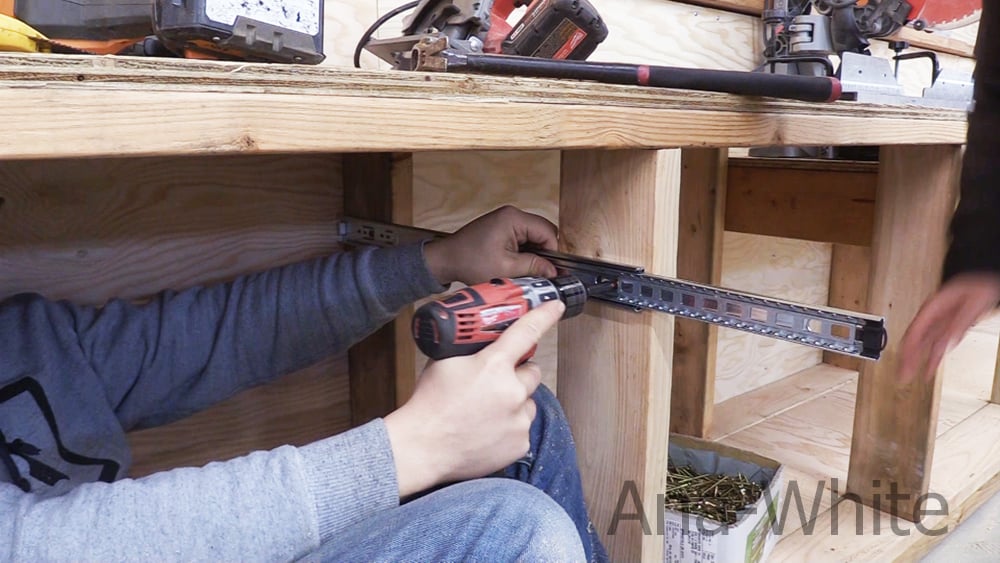
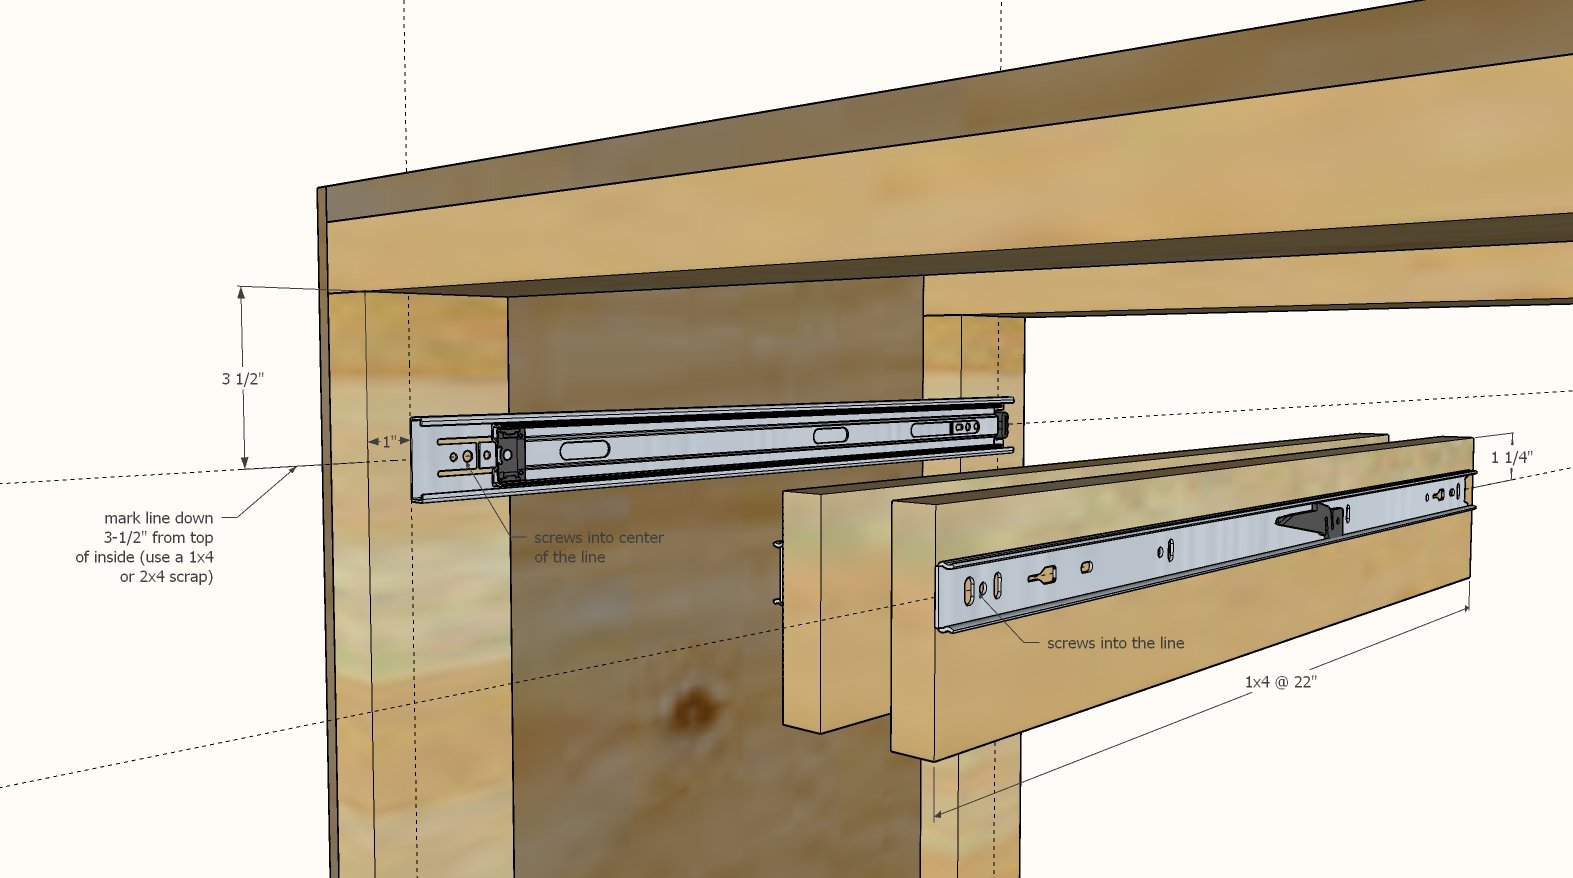
Installing the drawer slides
Use a scrap piece of 1x4 or 2x4 to draw a line 3-1/2" down from the top of the inside of each of the openings as shown in the diagram.
Draw a line parallel to the front edge, inset 1" from the front edge.
Separate the drawer slides into cabinet member and drawer members.
Screw the cabinet member to the inside of the cabinet, with screws placed on the line, front edge of the drawer slide set in on the 1" line.
Mark the drawer sides down 1-1/4" from top edge. Screw drawer members to the 1x4 drawer sides with screws started on the line.
Step 7
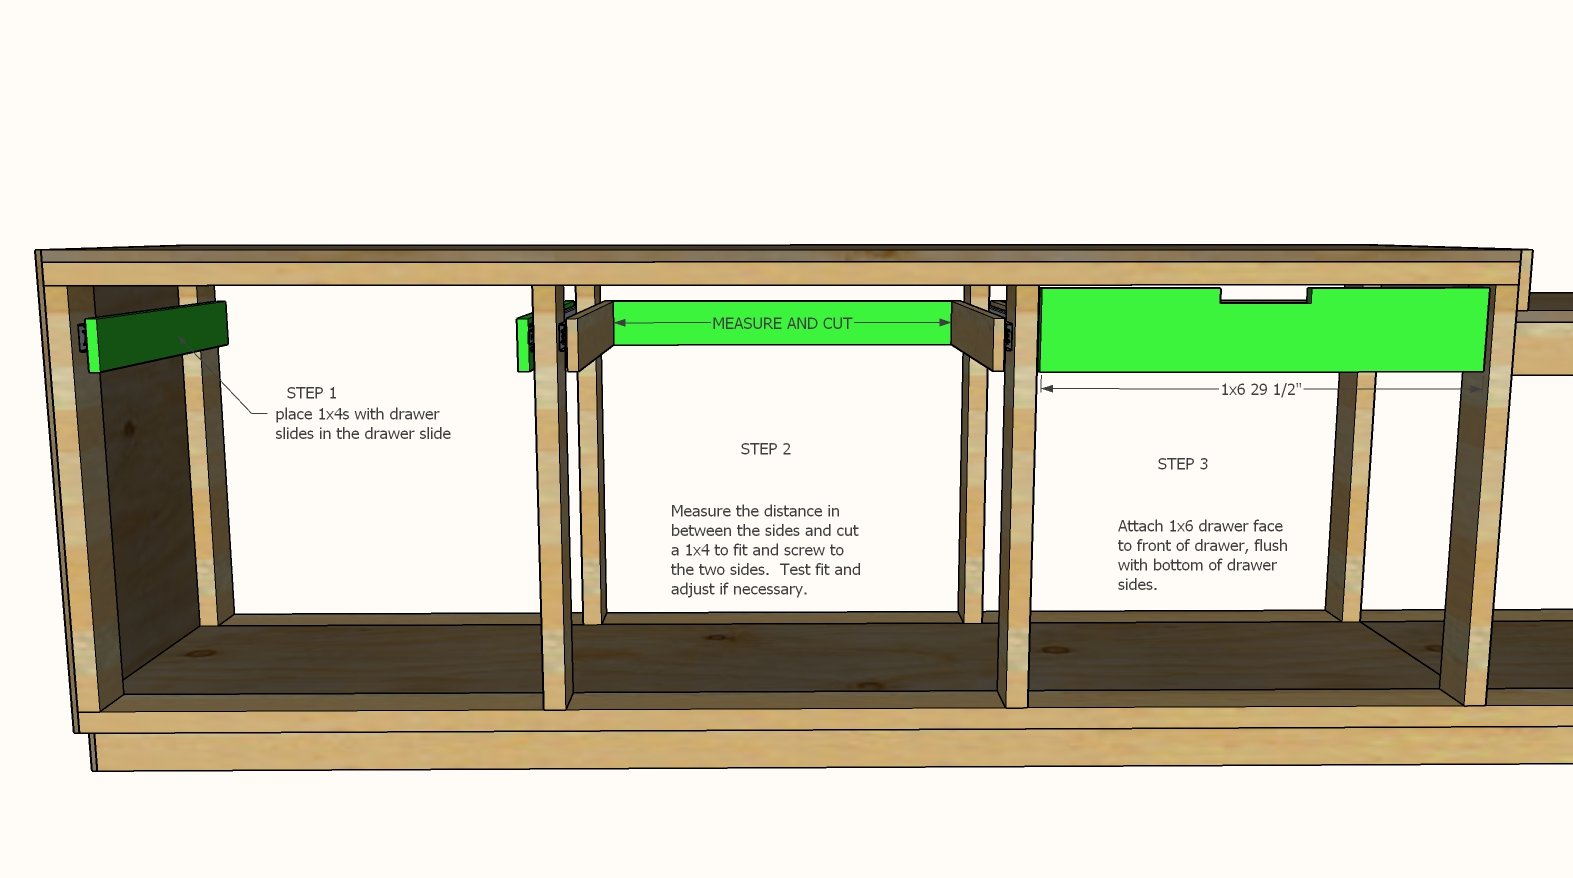
Put the drawer sides inside the cabinet members and fully close the drawer slides.
Measure in between and cut 1x4s to fit. Use the 2" screws to attach the drawer sides to the drawer backs. Test to make sure the drawer slides smoothly, adjust if necessary.
Once the drawer slides good, attach the front face to the sides. Test the slide, adjust if necessary.
Step 8

Once the drawers are sliding good, attach plywood to the bottom with 1-1/4" brad nails and glue.


Comments
Tsu Dho Nimh
Wed, 01/29/2020 - 08:10
That's SLICK! On the saws …
That's SLICK!
On the saws ... they don't stick out in back, but how far over the front do they go?
Johnny D
Sat, 04/04/2020 - 15:27
You rock!!! Me and my wife…
You rock!!! Me and my wife have built many of your plans, and plan to build many more. Thanks for what you do.
janci65
Sat, 05/23/2020 - 09:14
size
Hi
I find this way to build workbench very interesting, thank you for sharing.
I am from Europe and we are not using in units but mm :-) thats OK. Please, can you really make measurement of 2x4 board, is it exactly 2x4? If I multiply by 25.4 I get cca 50x100mm but from those images and video it is not look that it is 50x100mm.
thank you
ZenAtWork
Fri, 11/27/2020 - 16:51
Correction suggested in shopping list section
Cute build! Very effective use of your materials. Quick note: in your shopping list, you probably need either 10 full-extension drawer slides, or 5 sets of them. Not trying to nitpick; if someone really has no idea what they're doing...
Janettx
Sun, 04/10/2022 - 07:05
What brand of draw slides did you go with?
The material list... the top two listed at 16" should be 16' if you wanted to correct that. As for the drawer slides, they come in sets of two so that update is not necessary as I don't believe you can even purchase just one. But I'd like to know which ones you chose to use. Can you list the brand here?
Thanks,
Janet