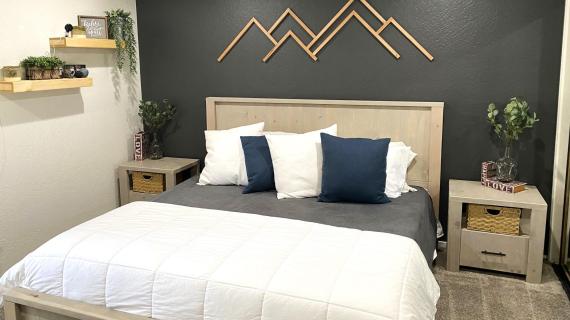
Rustic Modern Farmhouse Nightstand

The free plans on this website are made possible with advertising and affiliate links.  Thank you for helping us keep plans free.


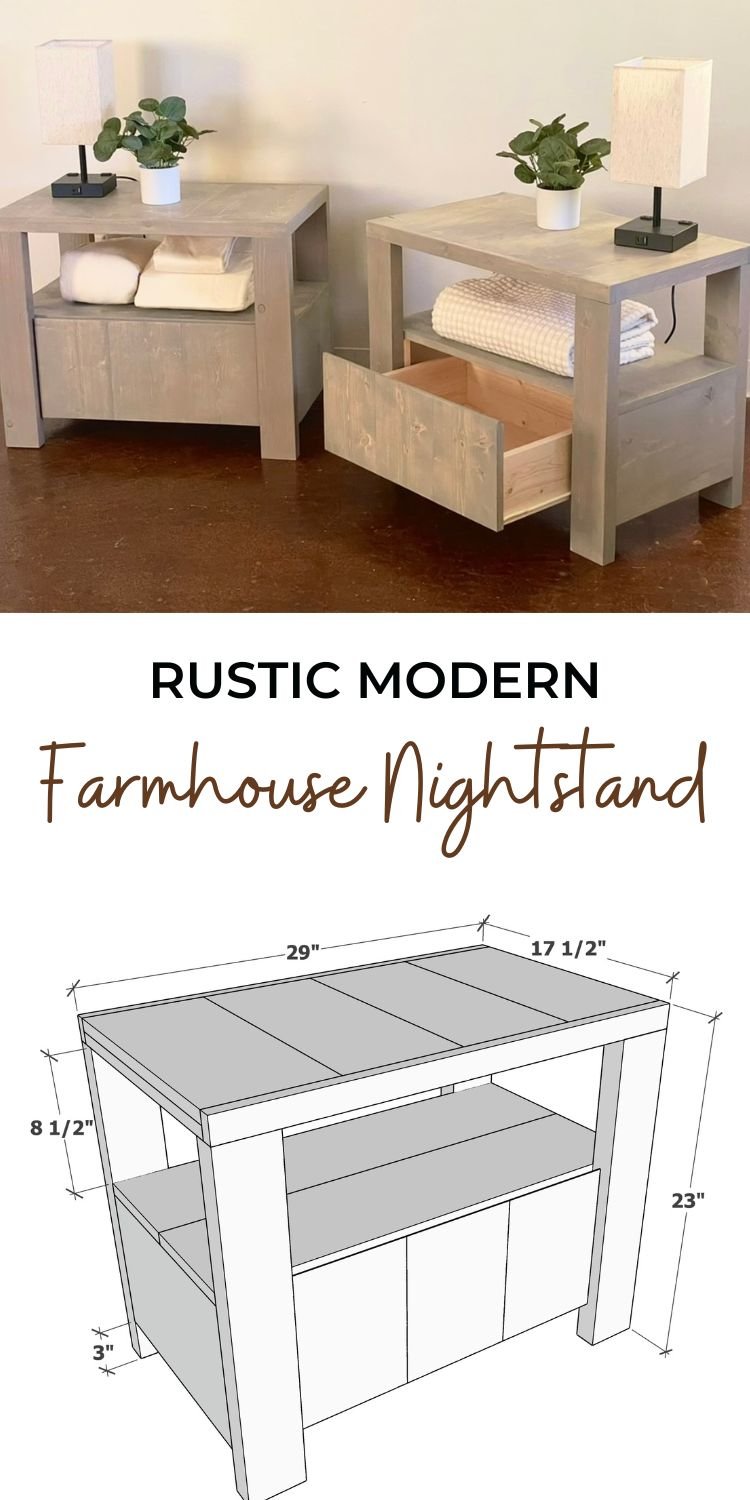
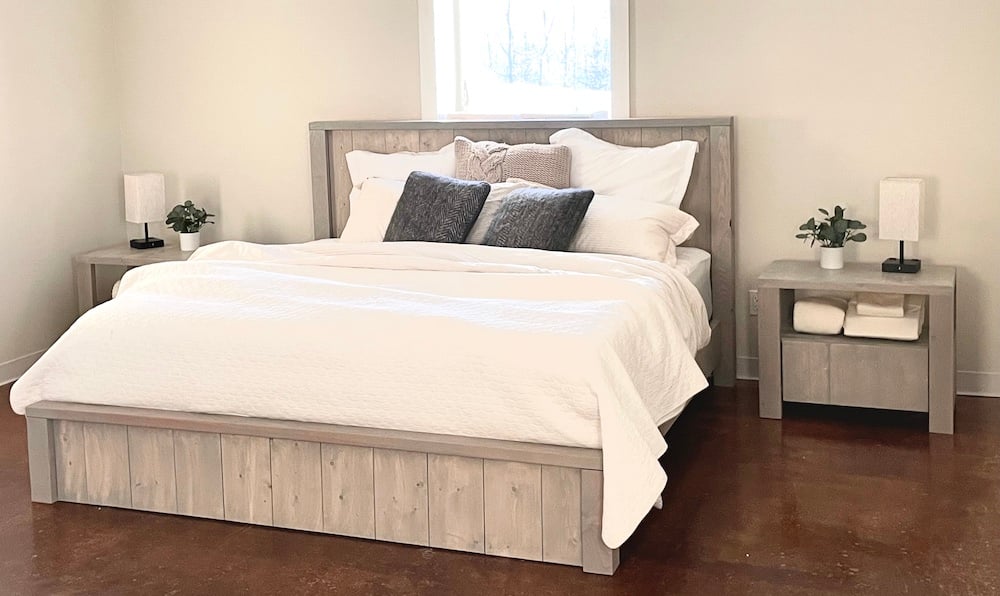
Rustic modern nightstand pottery barn Keene knockoff
Difficulty
Intermediate
| Print this plan

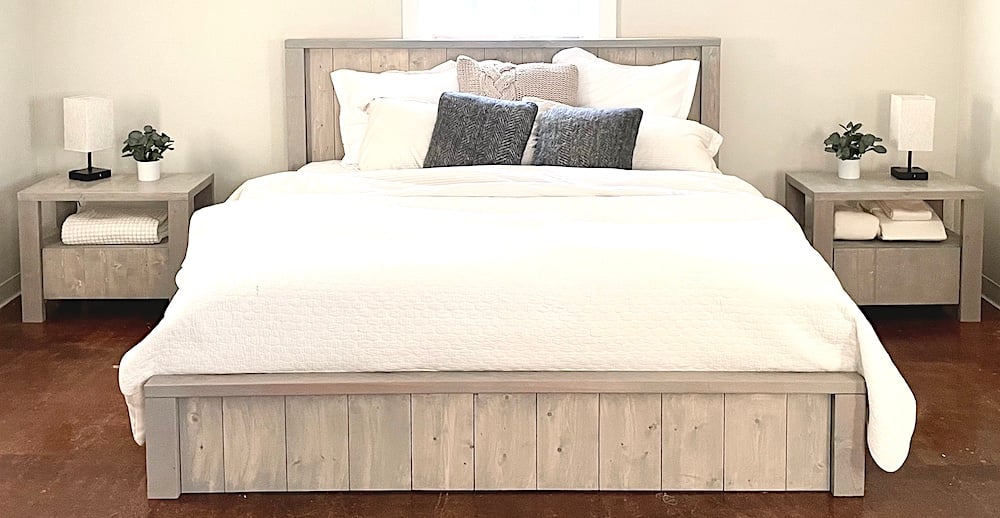
Build your own rustic modern nightstands, with an open shelf and large drawer.  All pine wood boards can be painted or stained.  Free plans with step by step diagrams, video and detailed instructions from Ana-White.com

RELATED: Rustic Modern Farmhouse Bed Plans


Pottery barn Keene nightstand


rustic modern farmhouse bed ana white

rustic modern bed free plans ana white

Why You'll Love It

  • All wood design, accepts paint or stain beautifully
  • Roomy drawer, makes lower storage more accessible
  • Open shelf provides quick storage options
  • Large top surface
  • About $80 to build (compared with $500+ each retail)
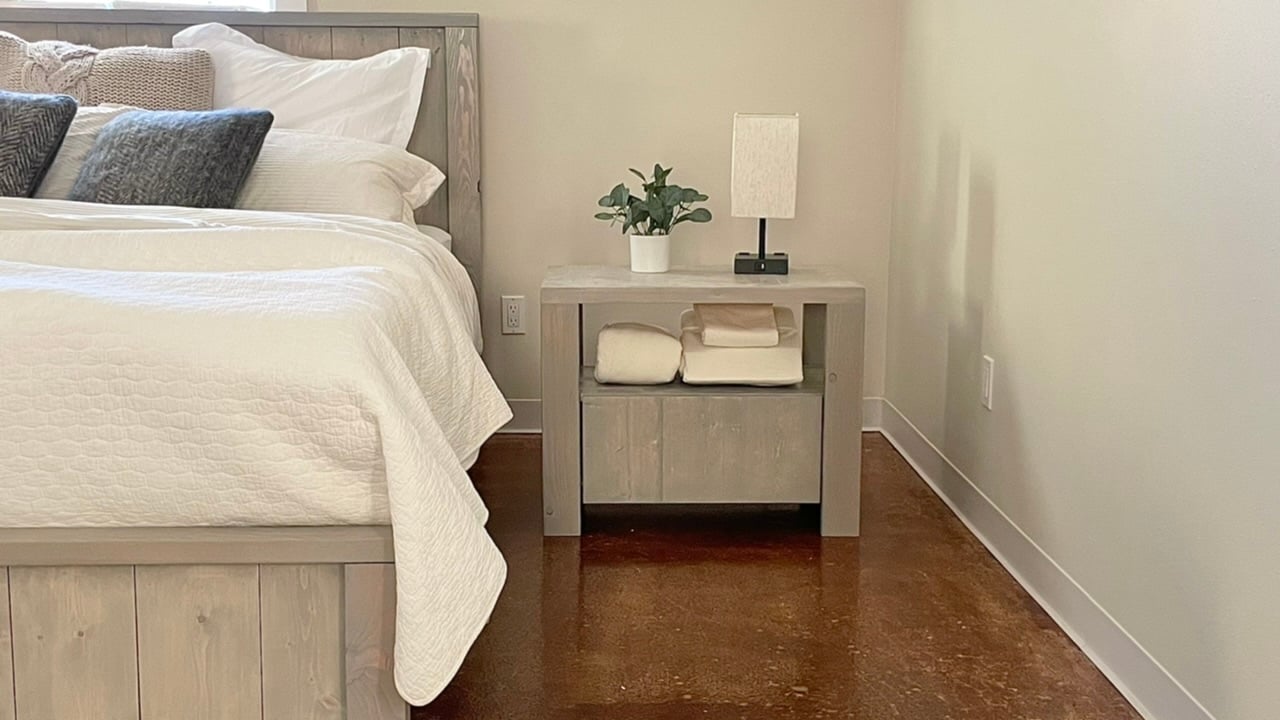
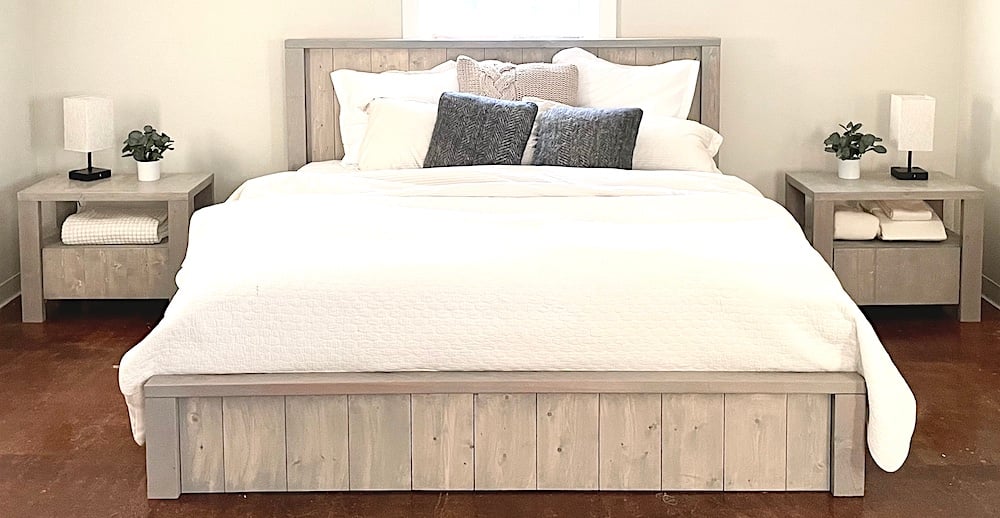
  • Matches our beautiful rustic modern farmhouse bed

Other Plans in this Collection

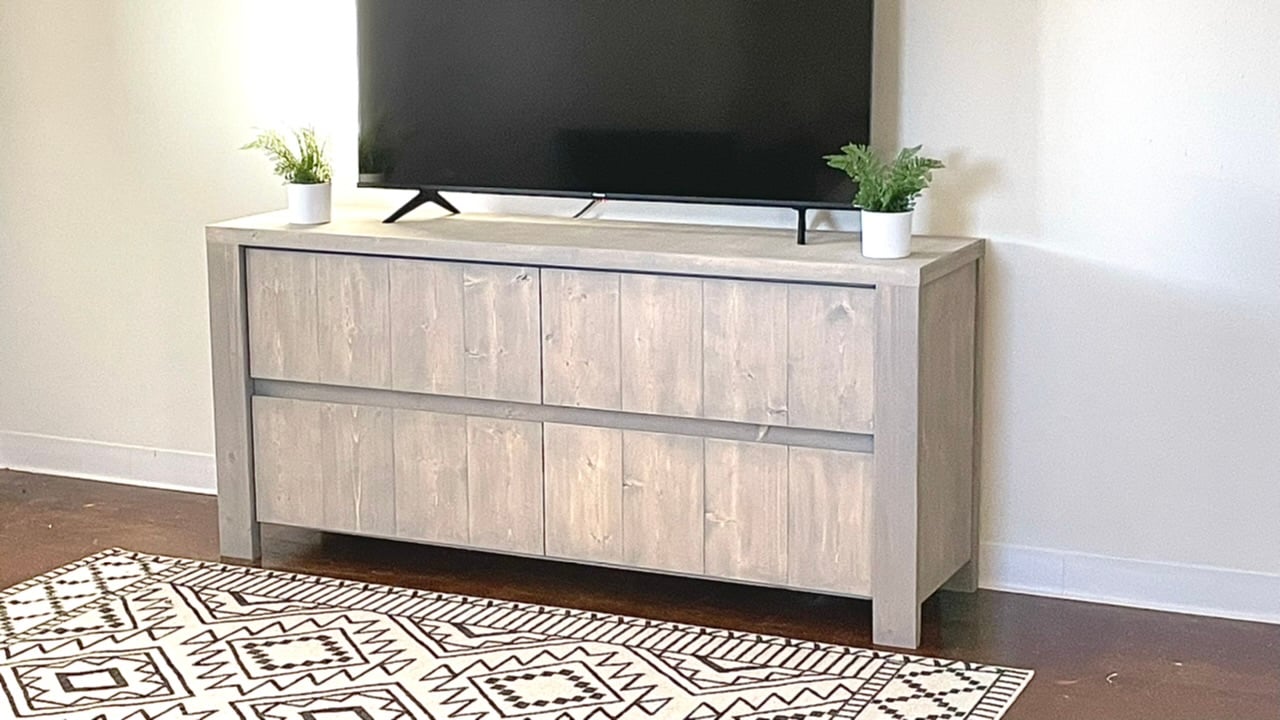
Rustic modern farmhouse dresser

rustic modern bed diy plans ana white

Pin For Later!

Rustic Modern Farmhouse Nightstand

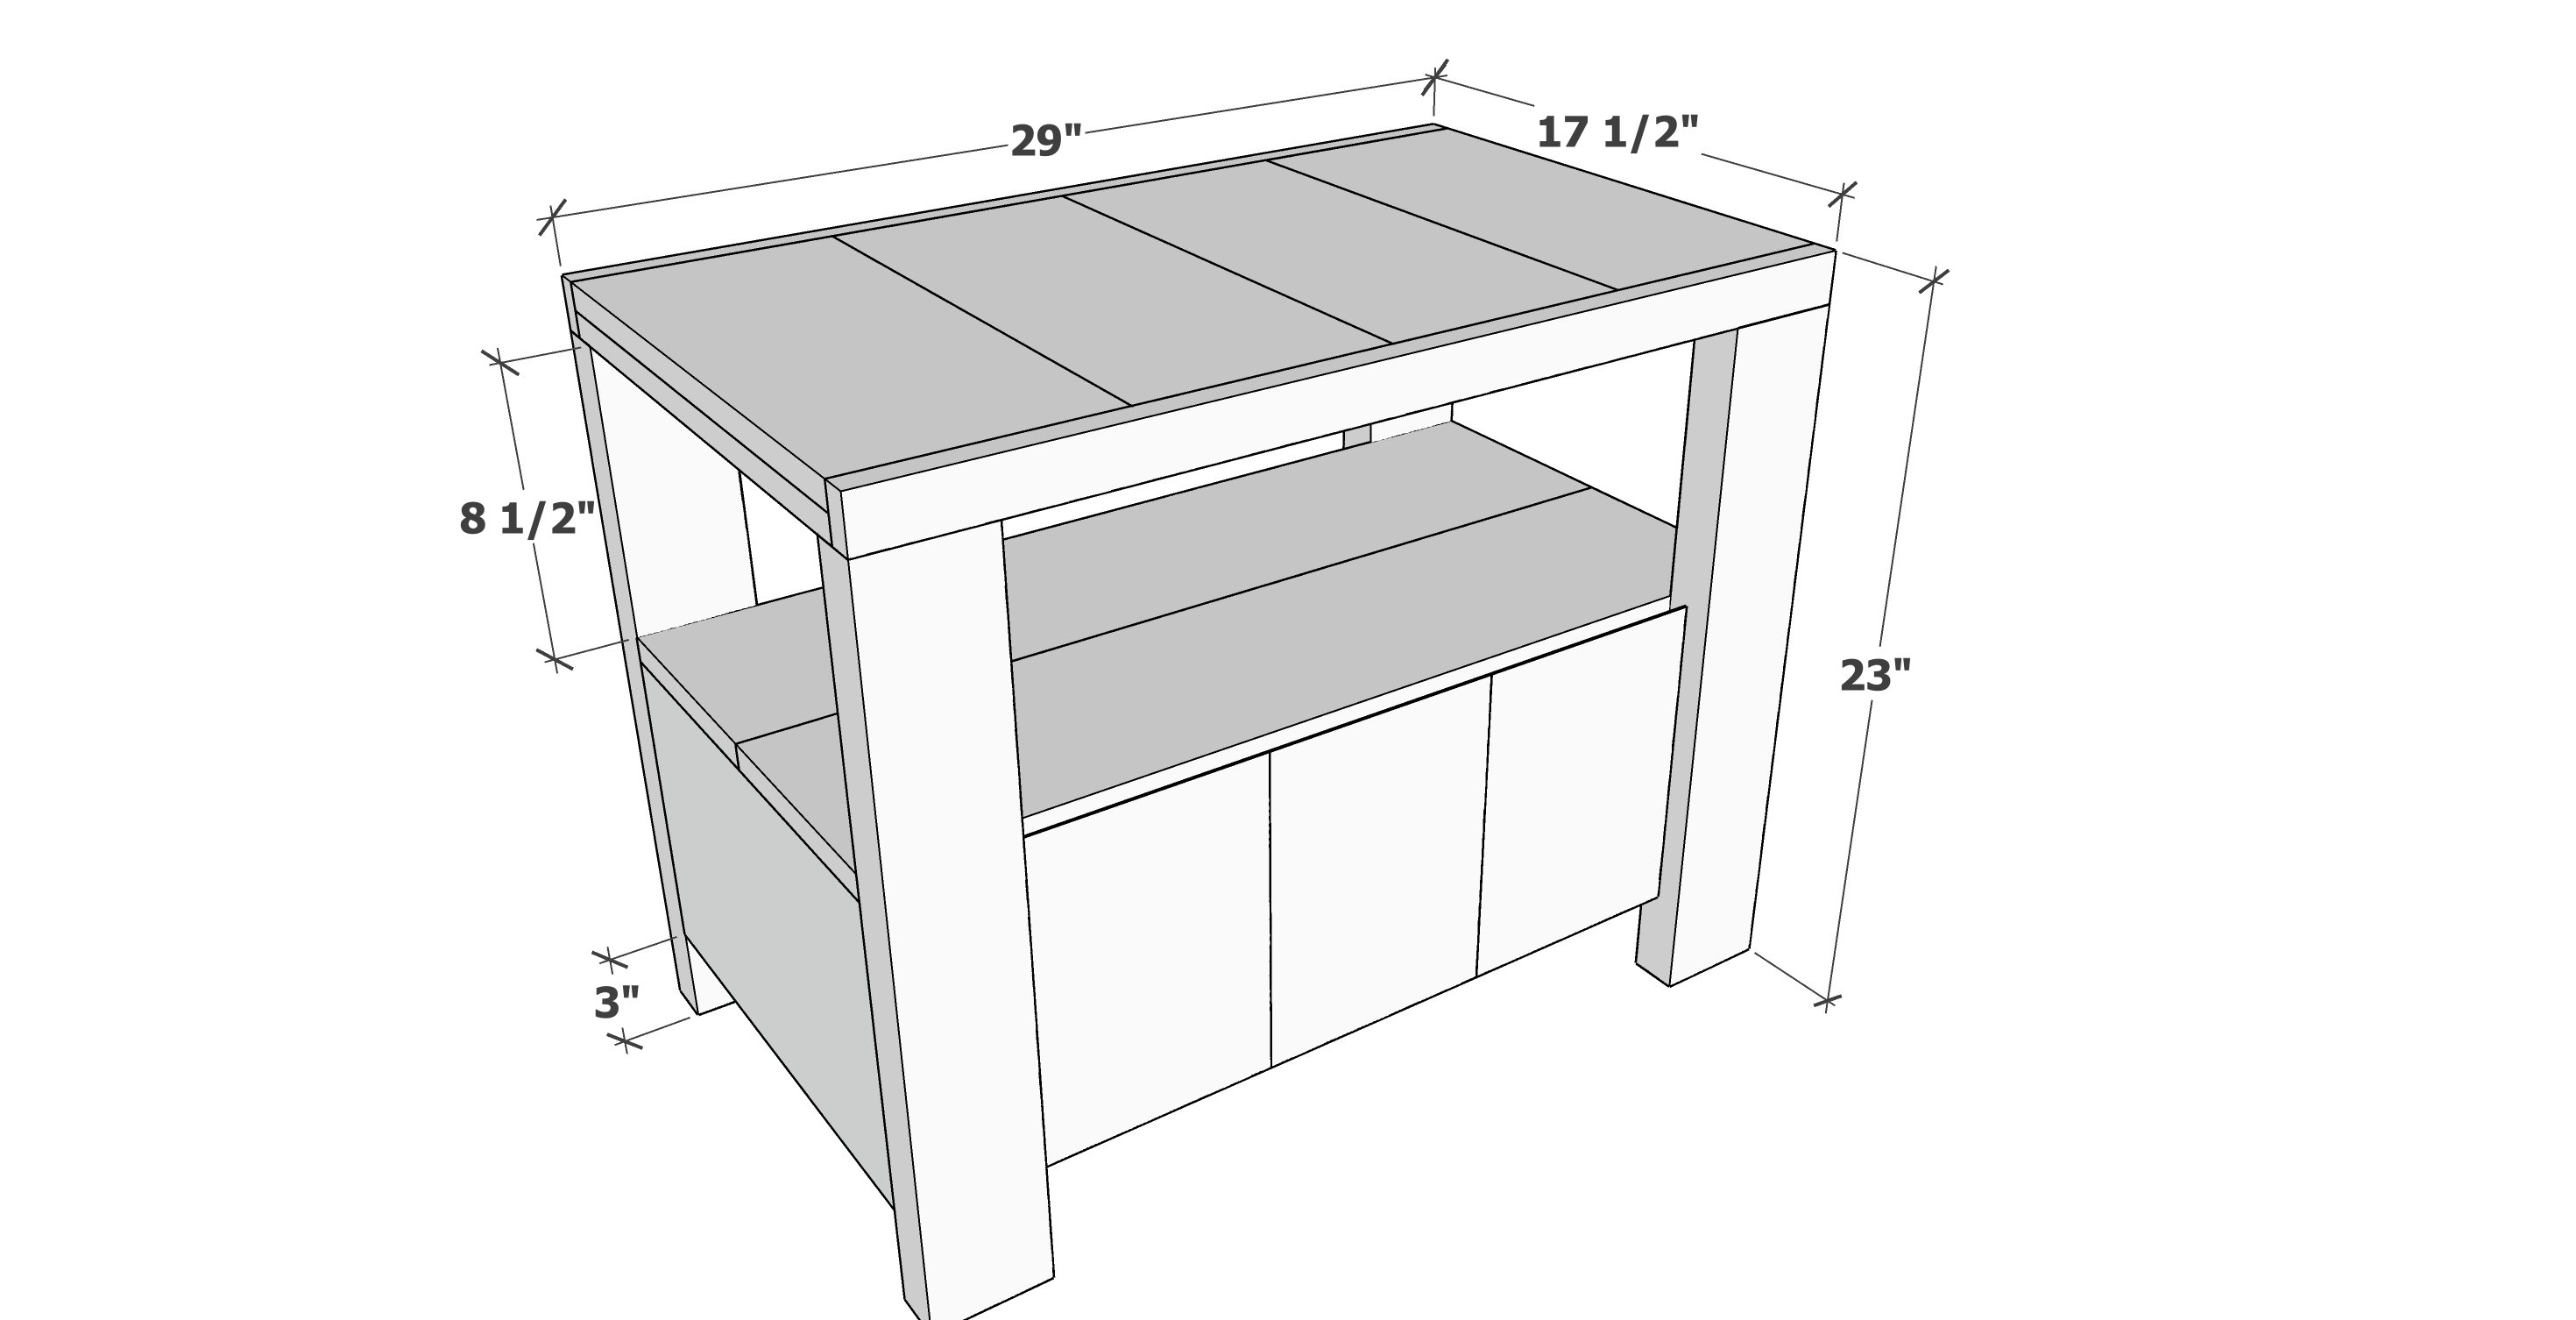
Dimensions
dimensions shown in diagram
Dimensions for Rustic Modern Nightstand Plans

Preparation

Shopping List

Materials needed for 1 nightstand

  • 1x8 - 13 board feet total, can use 8' and 5' pieces
  • 1x10 - 29" total needed
  • 1x6 - 6 board feet total
  • 1x2 - 5 board feet total
  • 1x4 - 3 board feet total
  • 2x4 - 1 8' long 2x4, pine or soft yellow wood is preferred
  • 1/4" plywood - 16" x 21" piece
  • 16" euro drawer slide (white bottom corner mount)
  • 1-1/4" pocket hole screws (about 25)
  • 2-1/2" pocket hole screws (8)
  • 1-1/4" and 3/4" brad nails
  • wood glue
  • 120 and 220 grit sandpaper
  • stain or paint
  • poly top coat if staining
Cut List

Top

  • 4 - 1x8 @ 16"
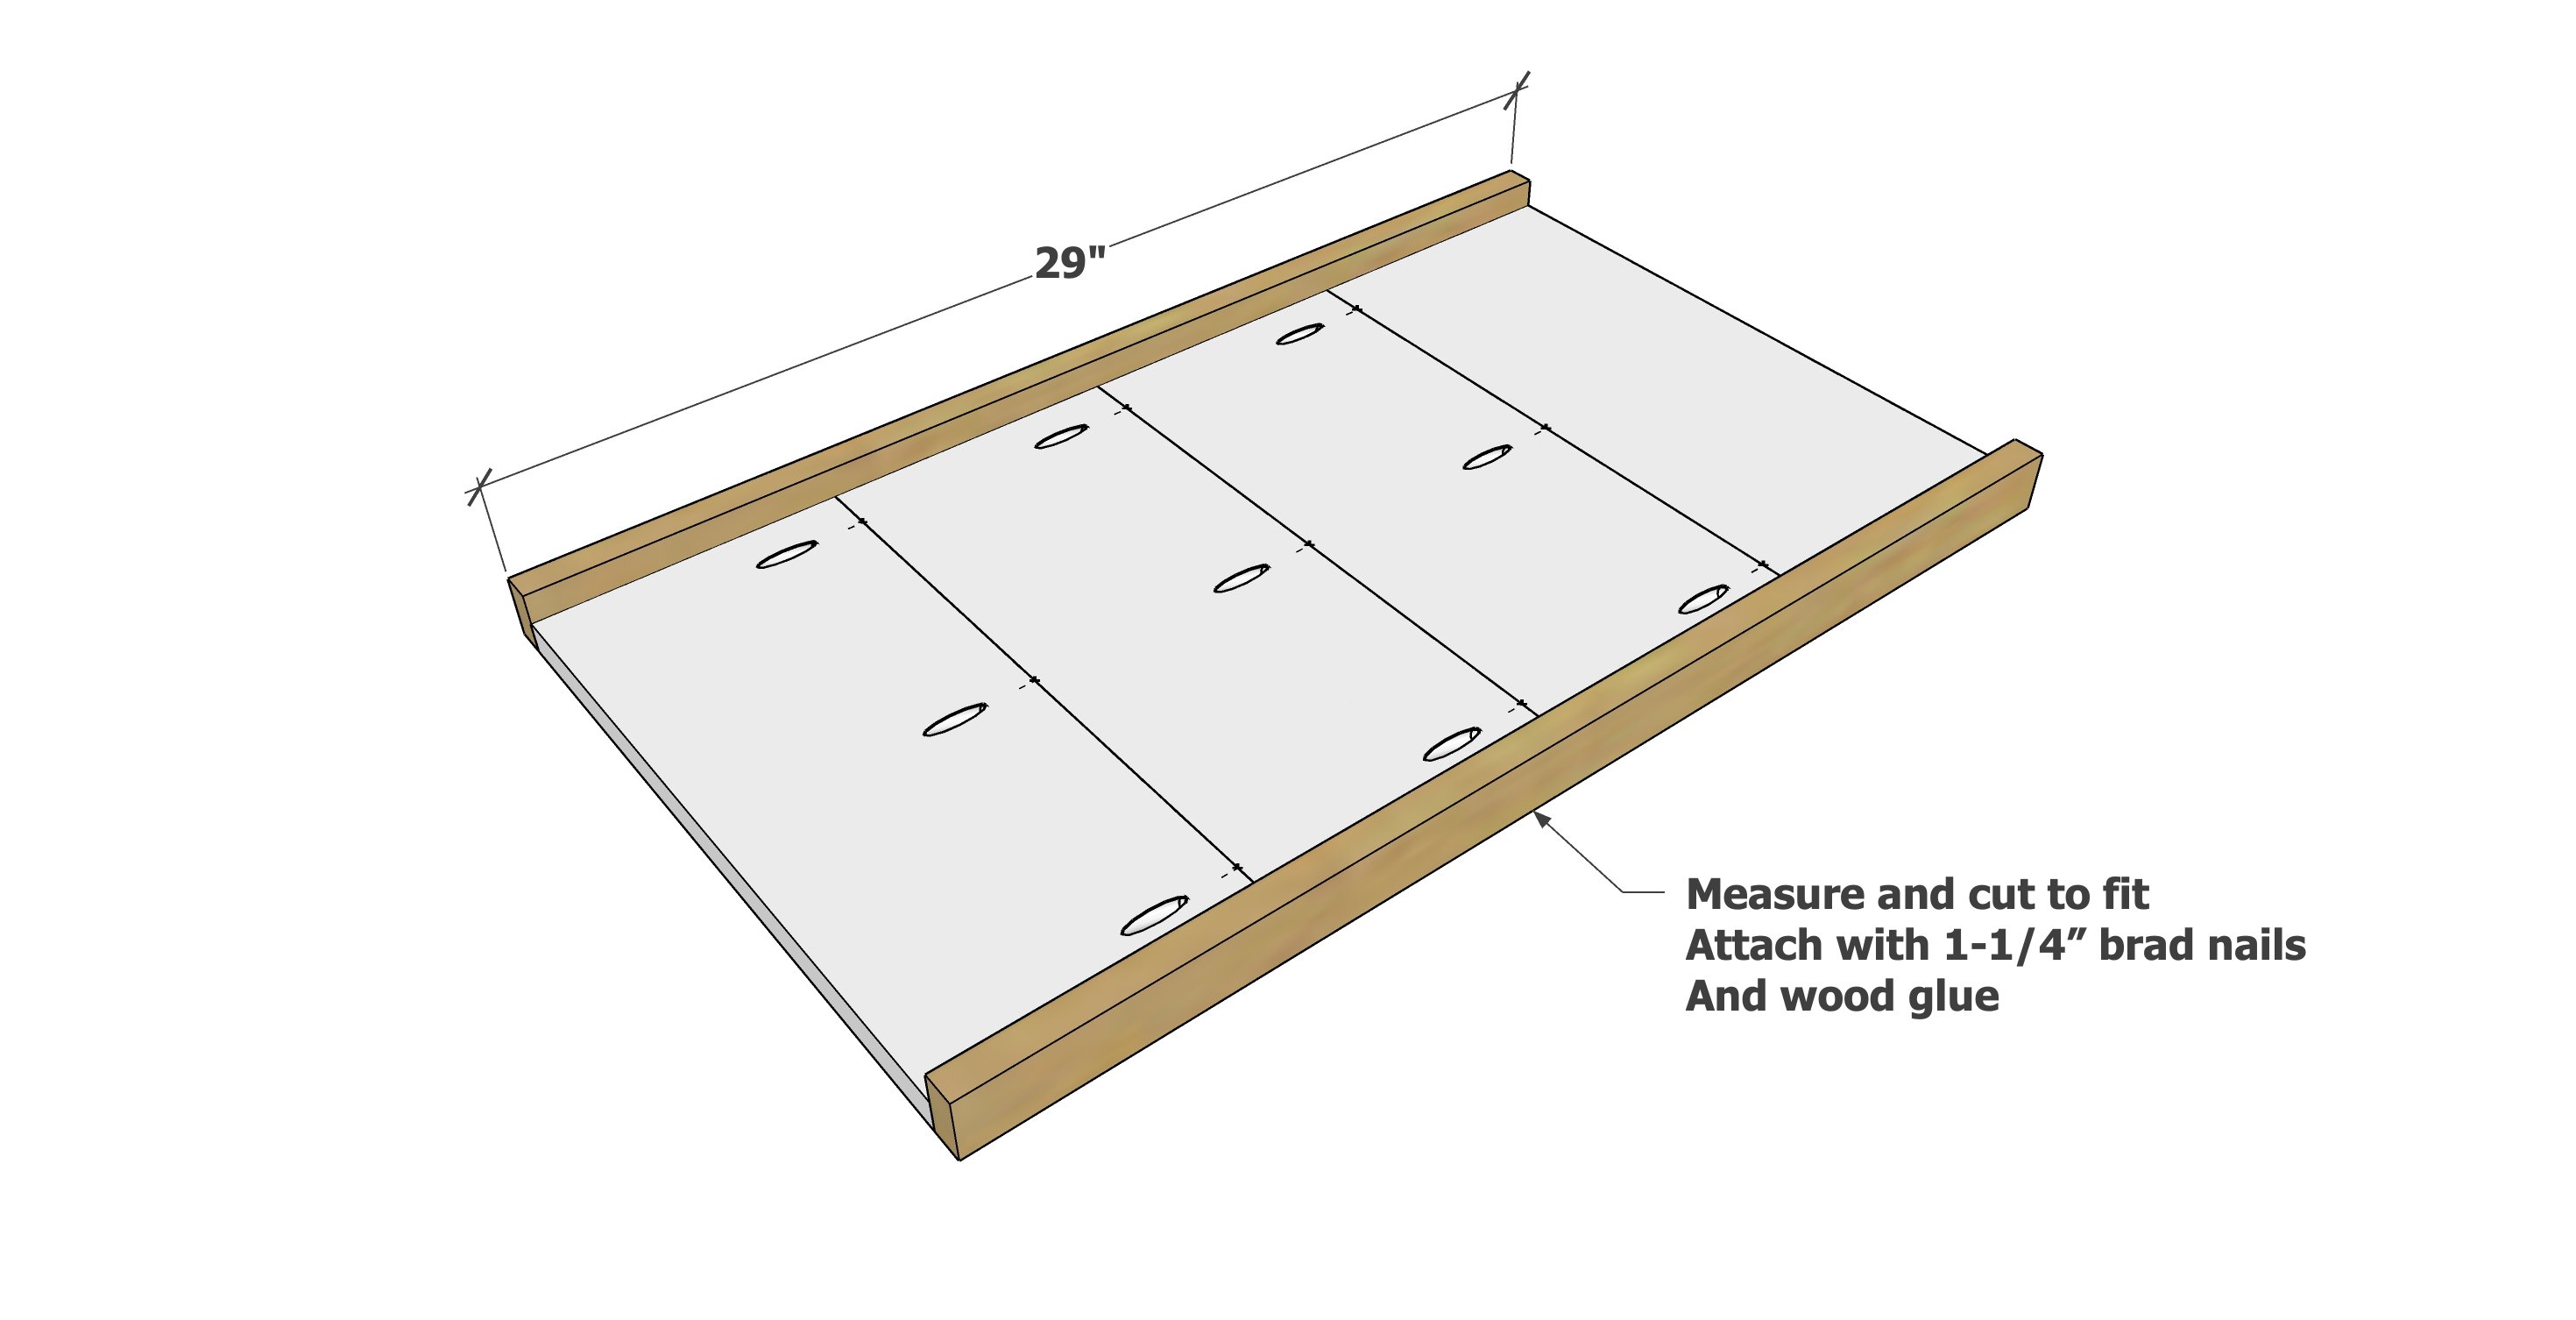
  • 2 - 1x2 @ 29" (approximate, measure and cut to fit)
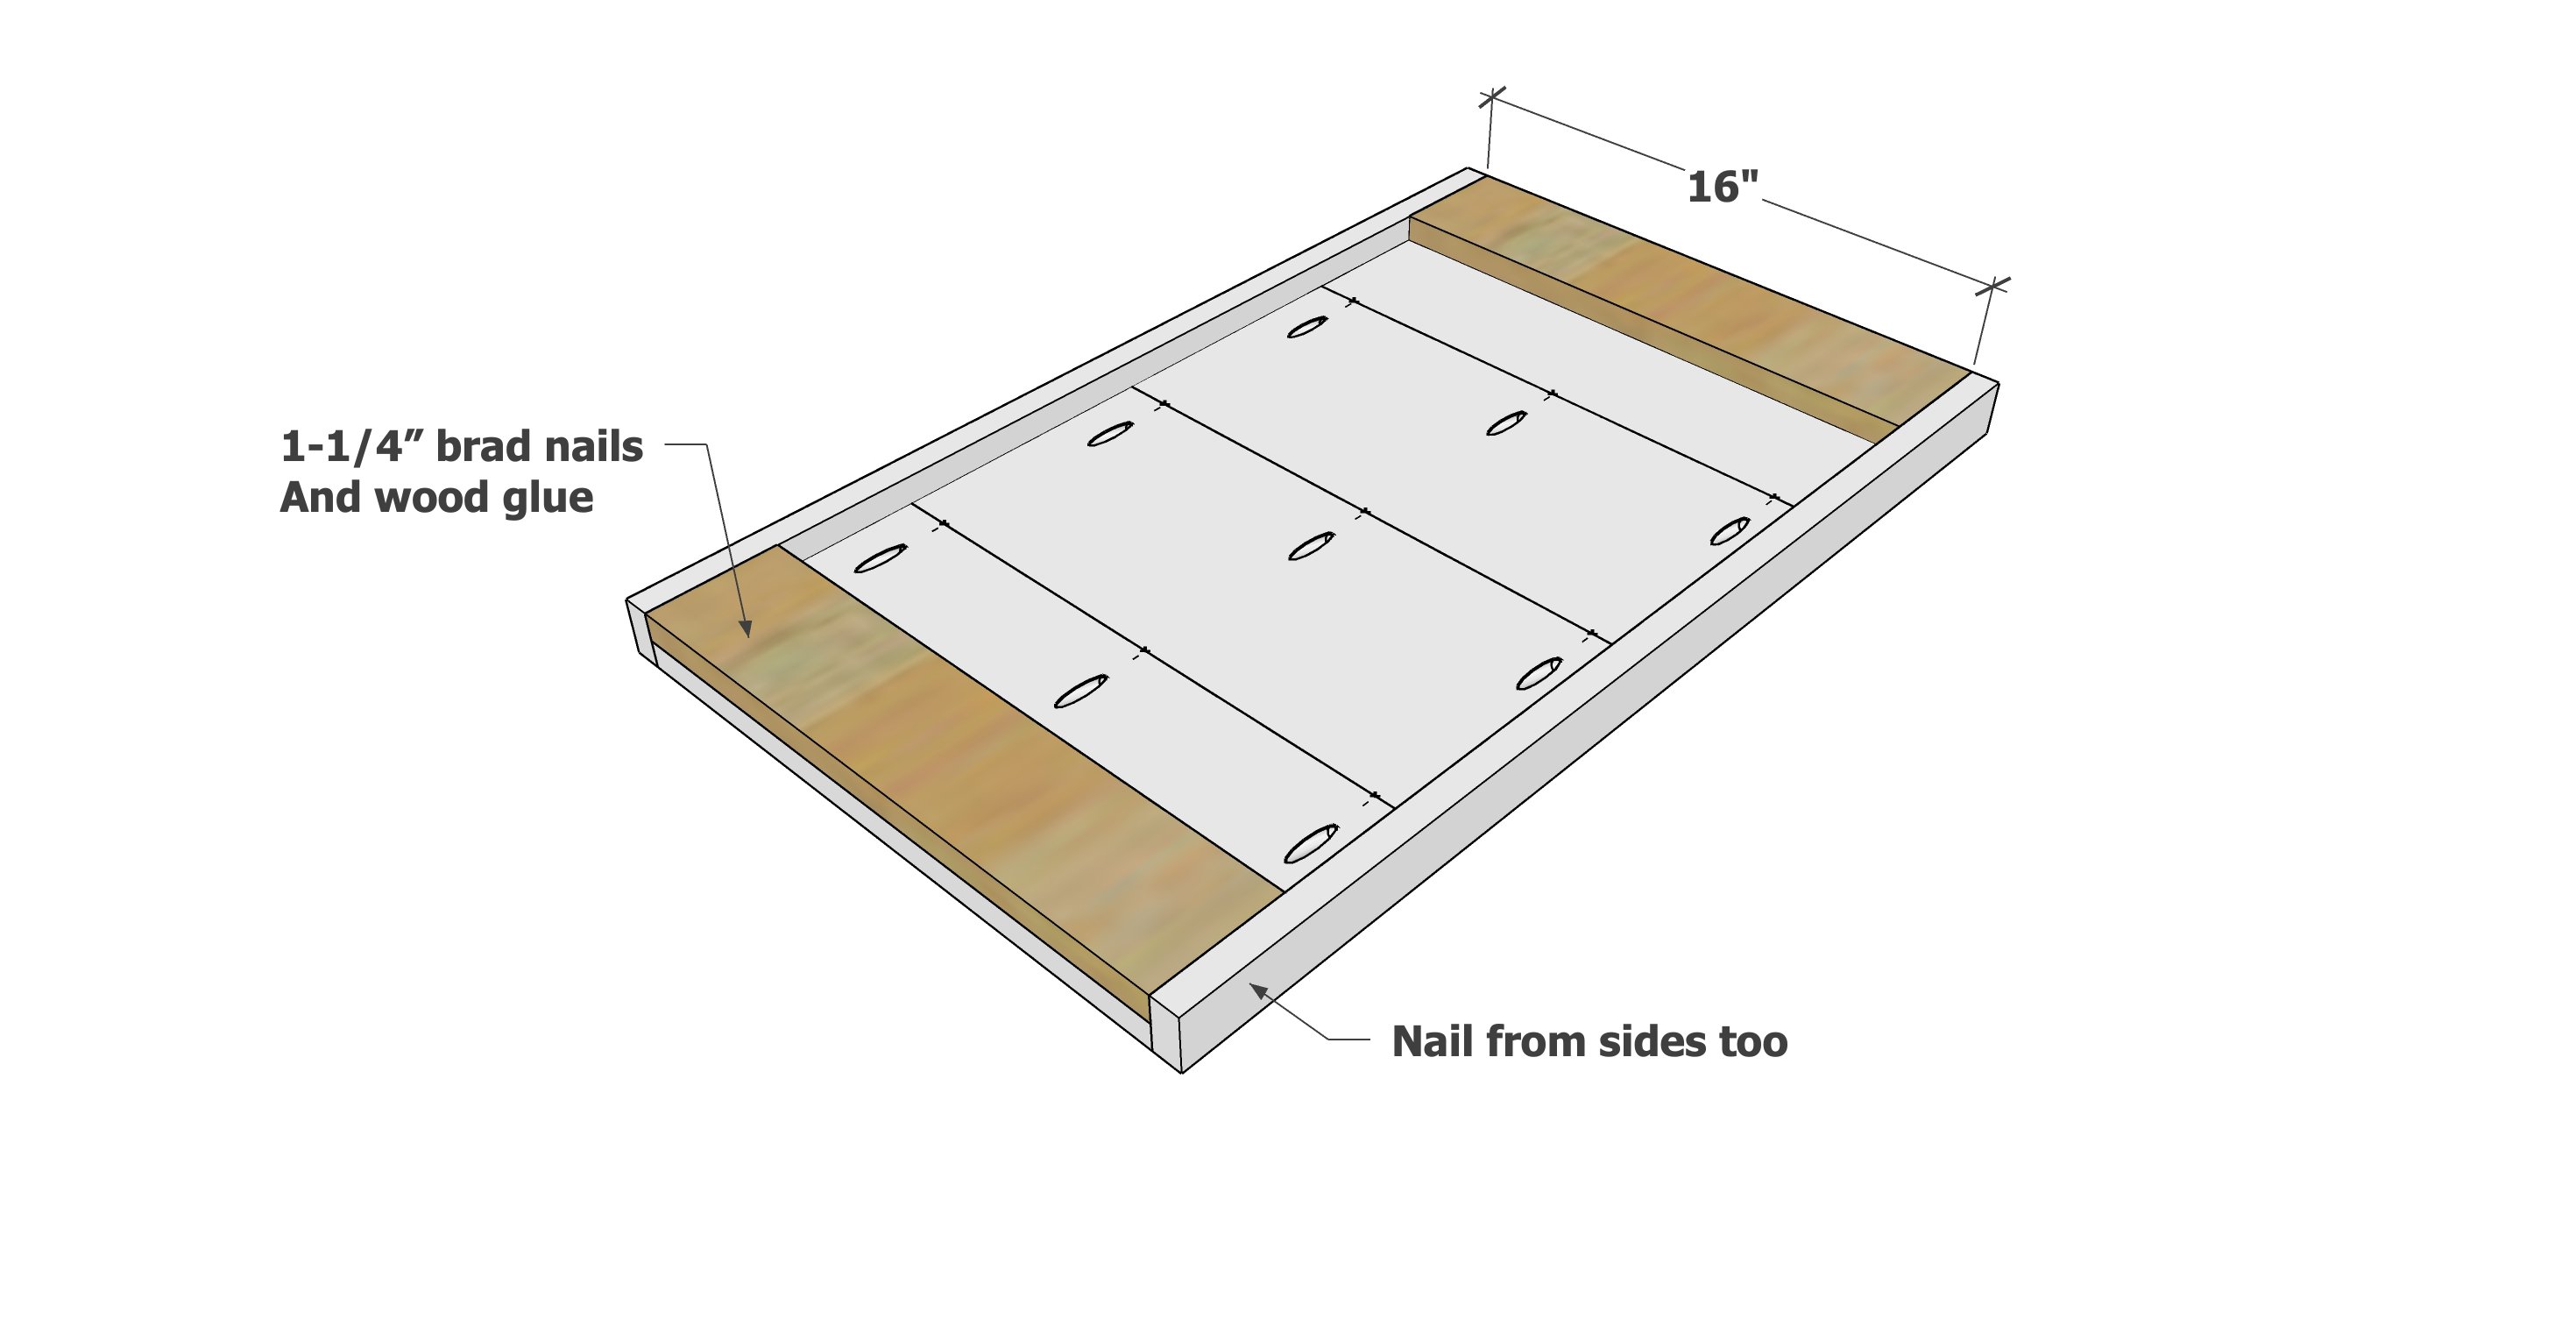
  • 2 - 1x4 @ 16"

Frame

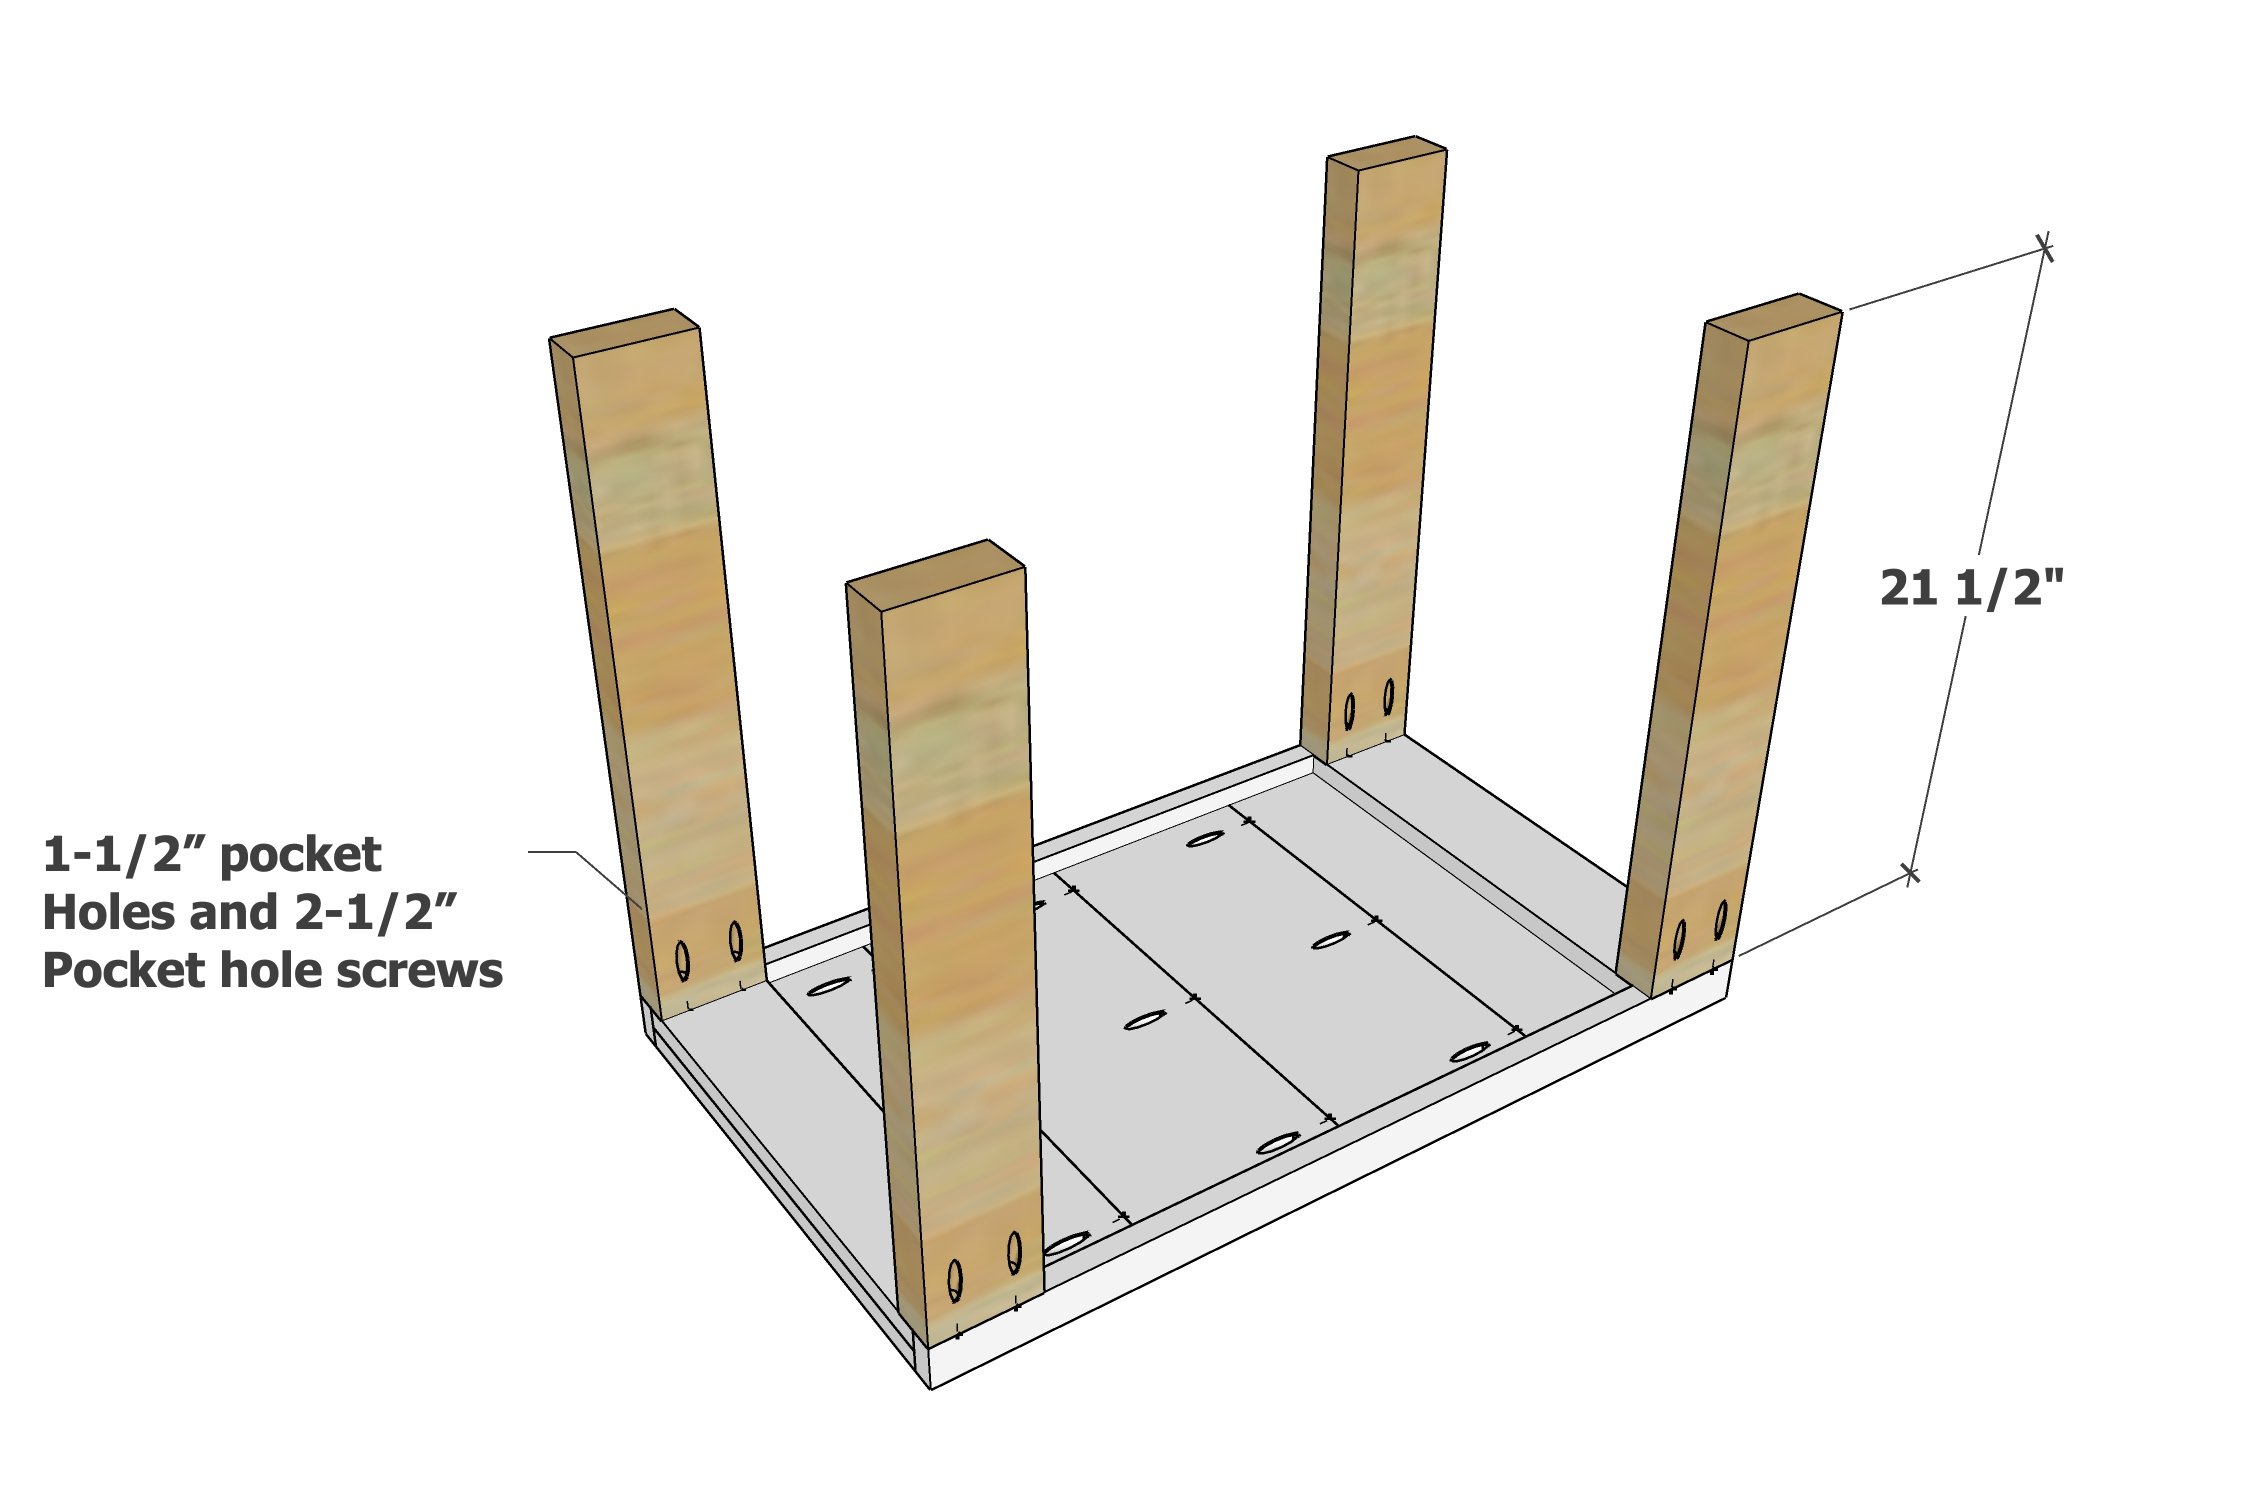
  • 4 - 2x4 @ 21-1/2" - legs
  • 2 - 1x10 @ 14-1/2" - sides
  • 2 - 1x8 @ 29" (approximate, cut to fit 1x2 from top) - shelf boards

Drawer

  • 2 - 1x6 @ 16" - drawer sides
  • 2 - 1x6 @ 19-1/2"(approximate, measure and cut to fit) - drawer front and back
  • 1 - 1/4" plywood @ 16" x 21" (approximate, 1" less than opening) - drawer bottom
  • 3 - 1x8 @ 10" - drawer faces, also cut top at angle for finger pull


Tools
Tape Measure
Speed Square
Pencil
Safety Glasses
Kreg Jig
Drill
Miter Saw
Table Saw
Brad Nailer
Power Sander

Instructions

Step 1

Note: this plan expects 1x8s to measure 7-1/4" wide.  If your boards measure differently, a "cut as you go" approach is recommended.

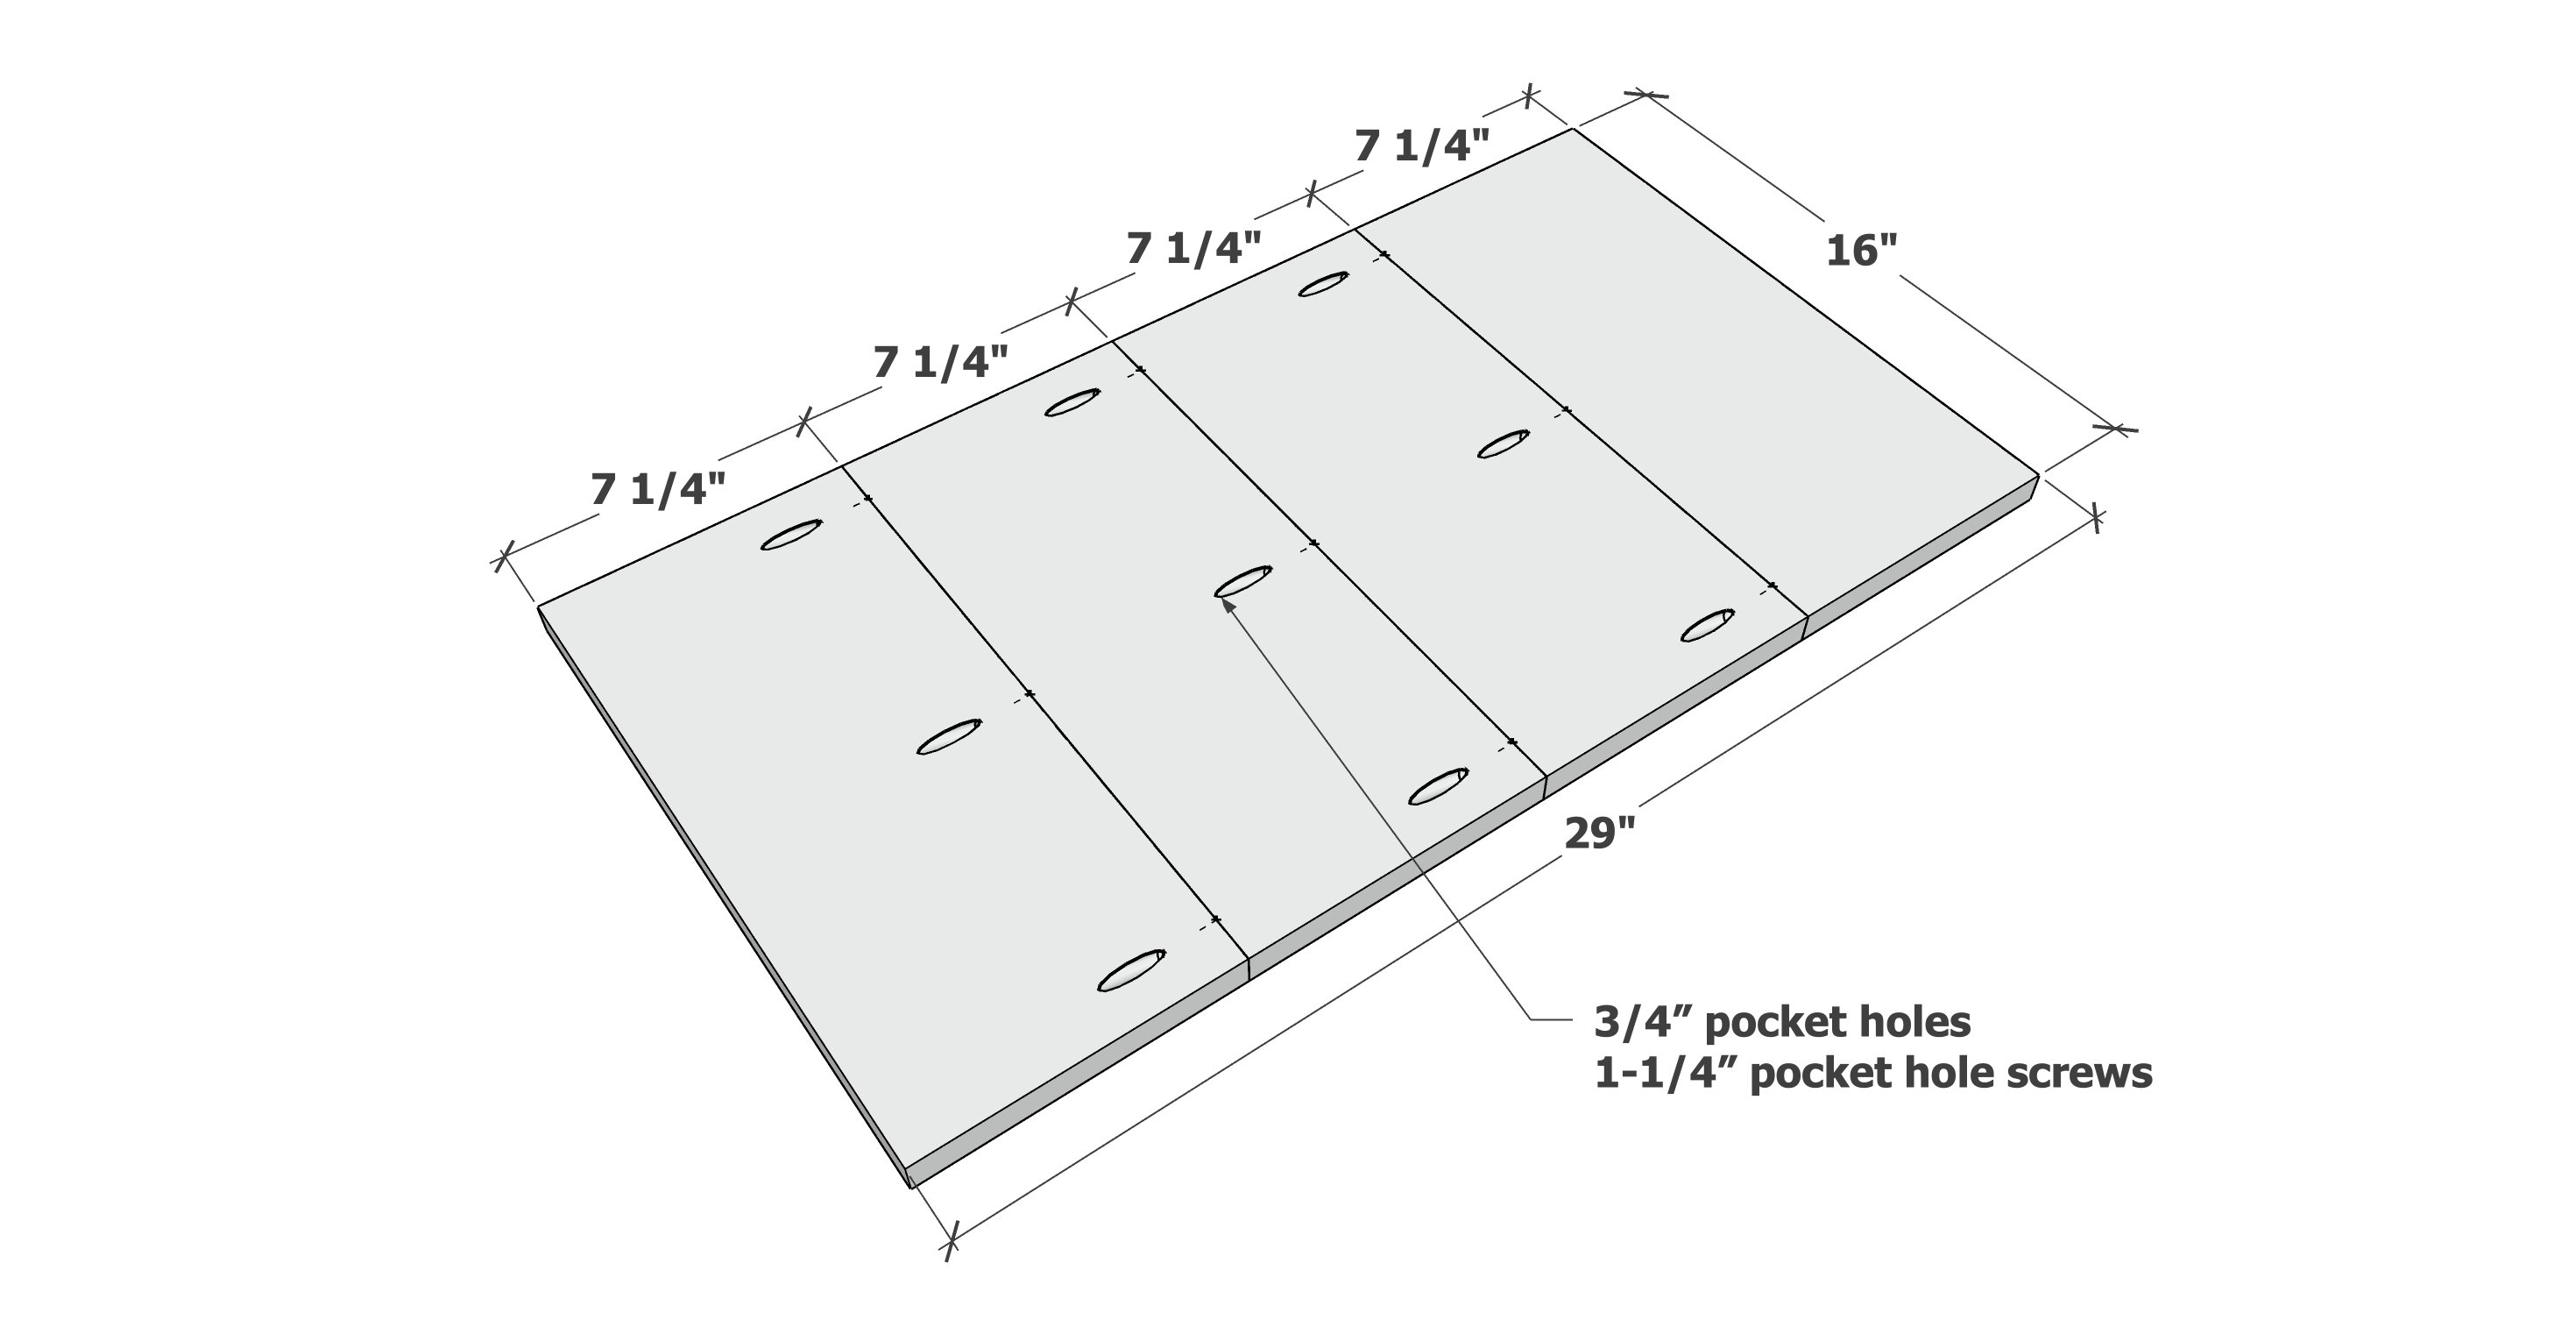
Cut the tabletop boards and drill 3/4" pocket holes on three of the four boards.

Clamp and attach edge to edge with 1-1/4" pocket hole screws.

Step 2

Measure and cut the 1x2 side trim.

Attach flush to front with 1-1/4" brad nails.  Top should be smooth and flush.

Step 3

Attach 1x4s to inside of 1x2s with 1-1/4" brad nails and wood glue.

Step 4

Set pocket hole jig for 1-1/2" material.

Drill two 1-1/2" pocket holes on one end of all four 2x4 leg boards.

Attach as shown in the diagram to the tabletop, with the pocket holes all facing backwards.

Step 5

Set the pocket hole jig back to 3/4" setting.

Attach with 1-1/4" pocket hole screws to the legs, flush to the outside.

Step 6

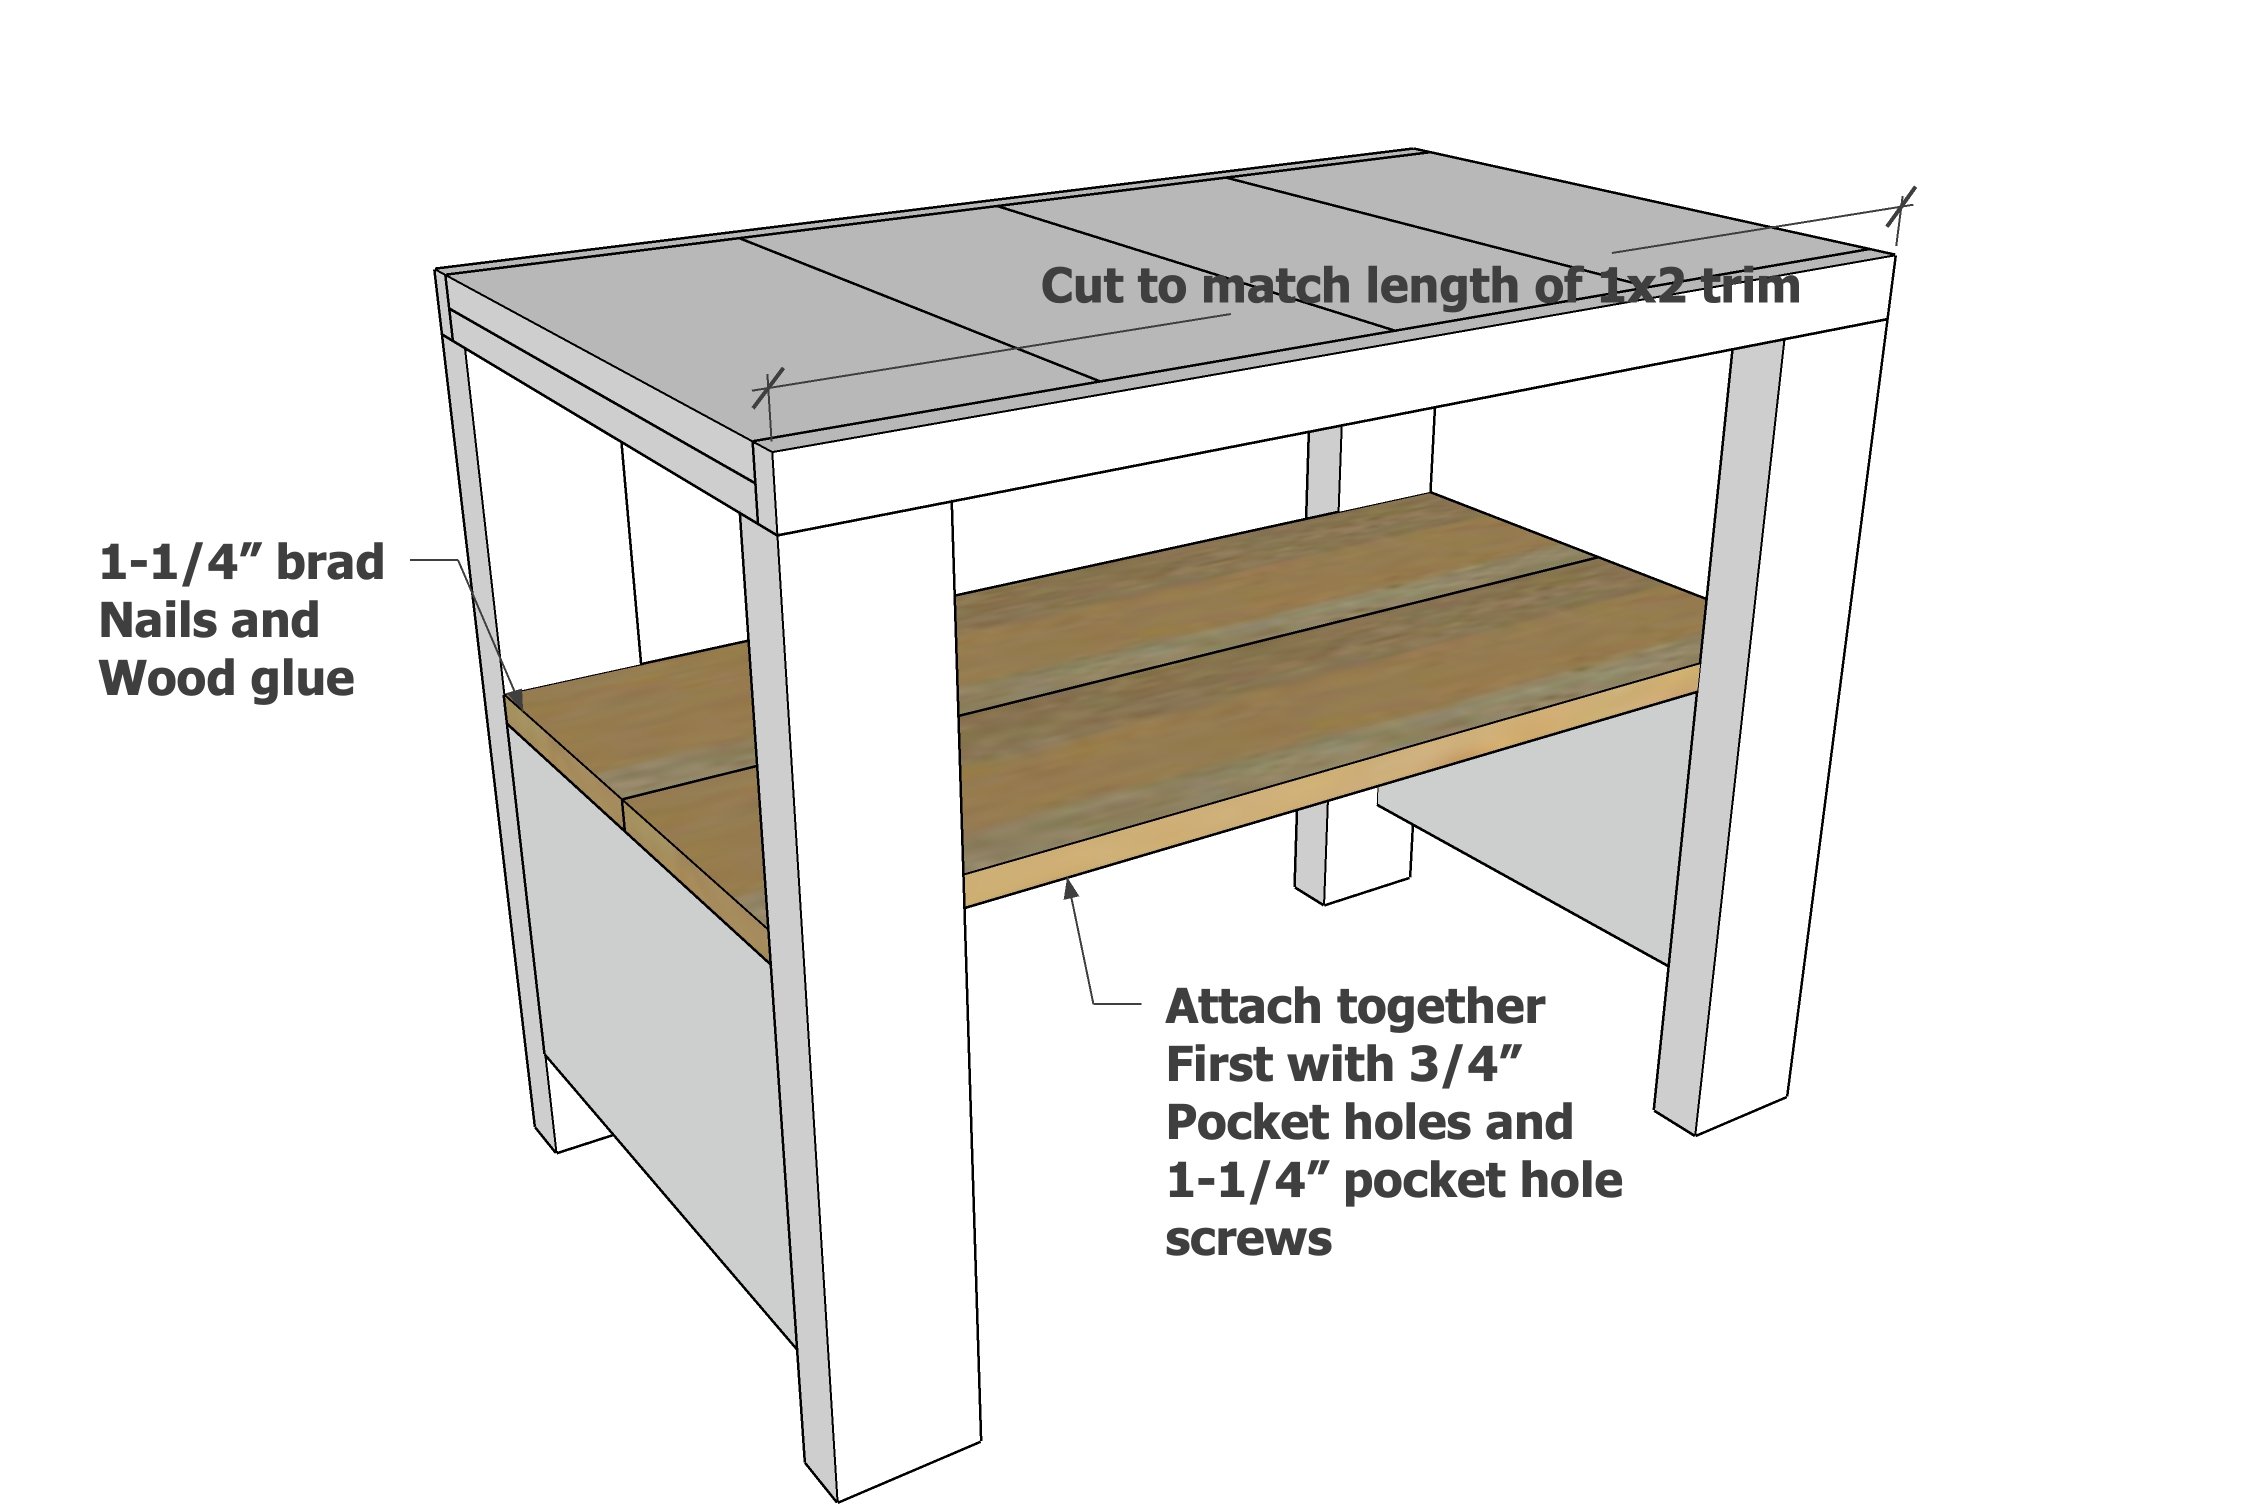
Cut the 1x8 shelf boards to match the length of the 1x2 top trim.

Join with 3/4" pocket holes and 1-1/4" pocket hole screws first.

Then place the shelf inside the nightstand and attach with glue and 1-1/4" brad nails.

Outside edges are flush.

Step 7

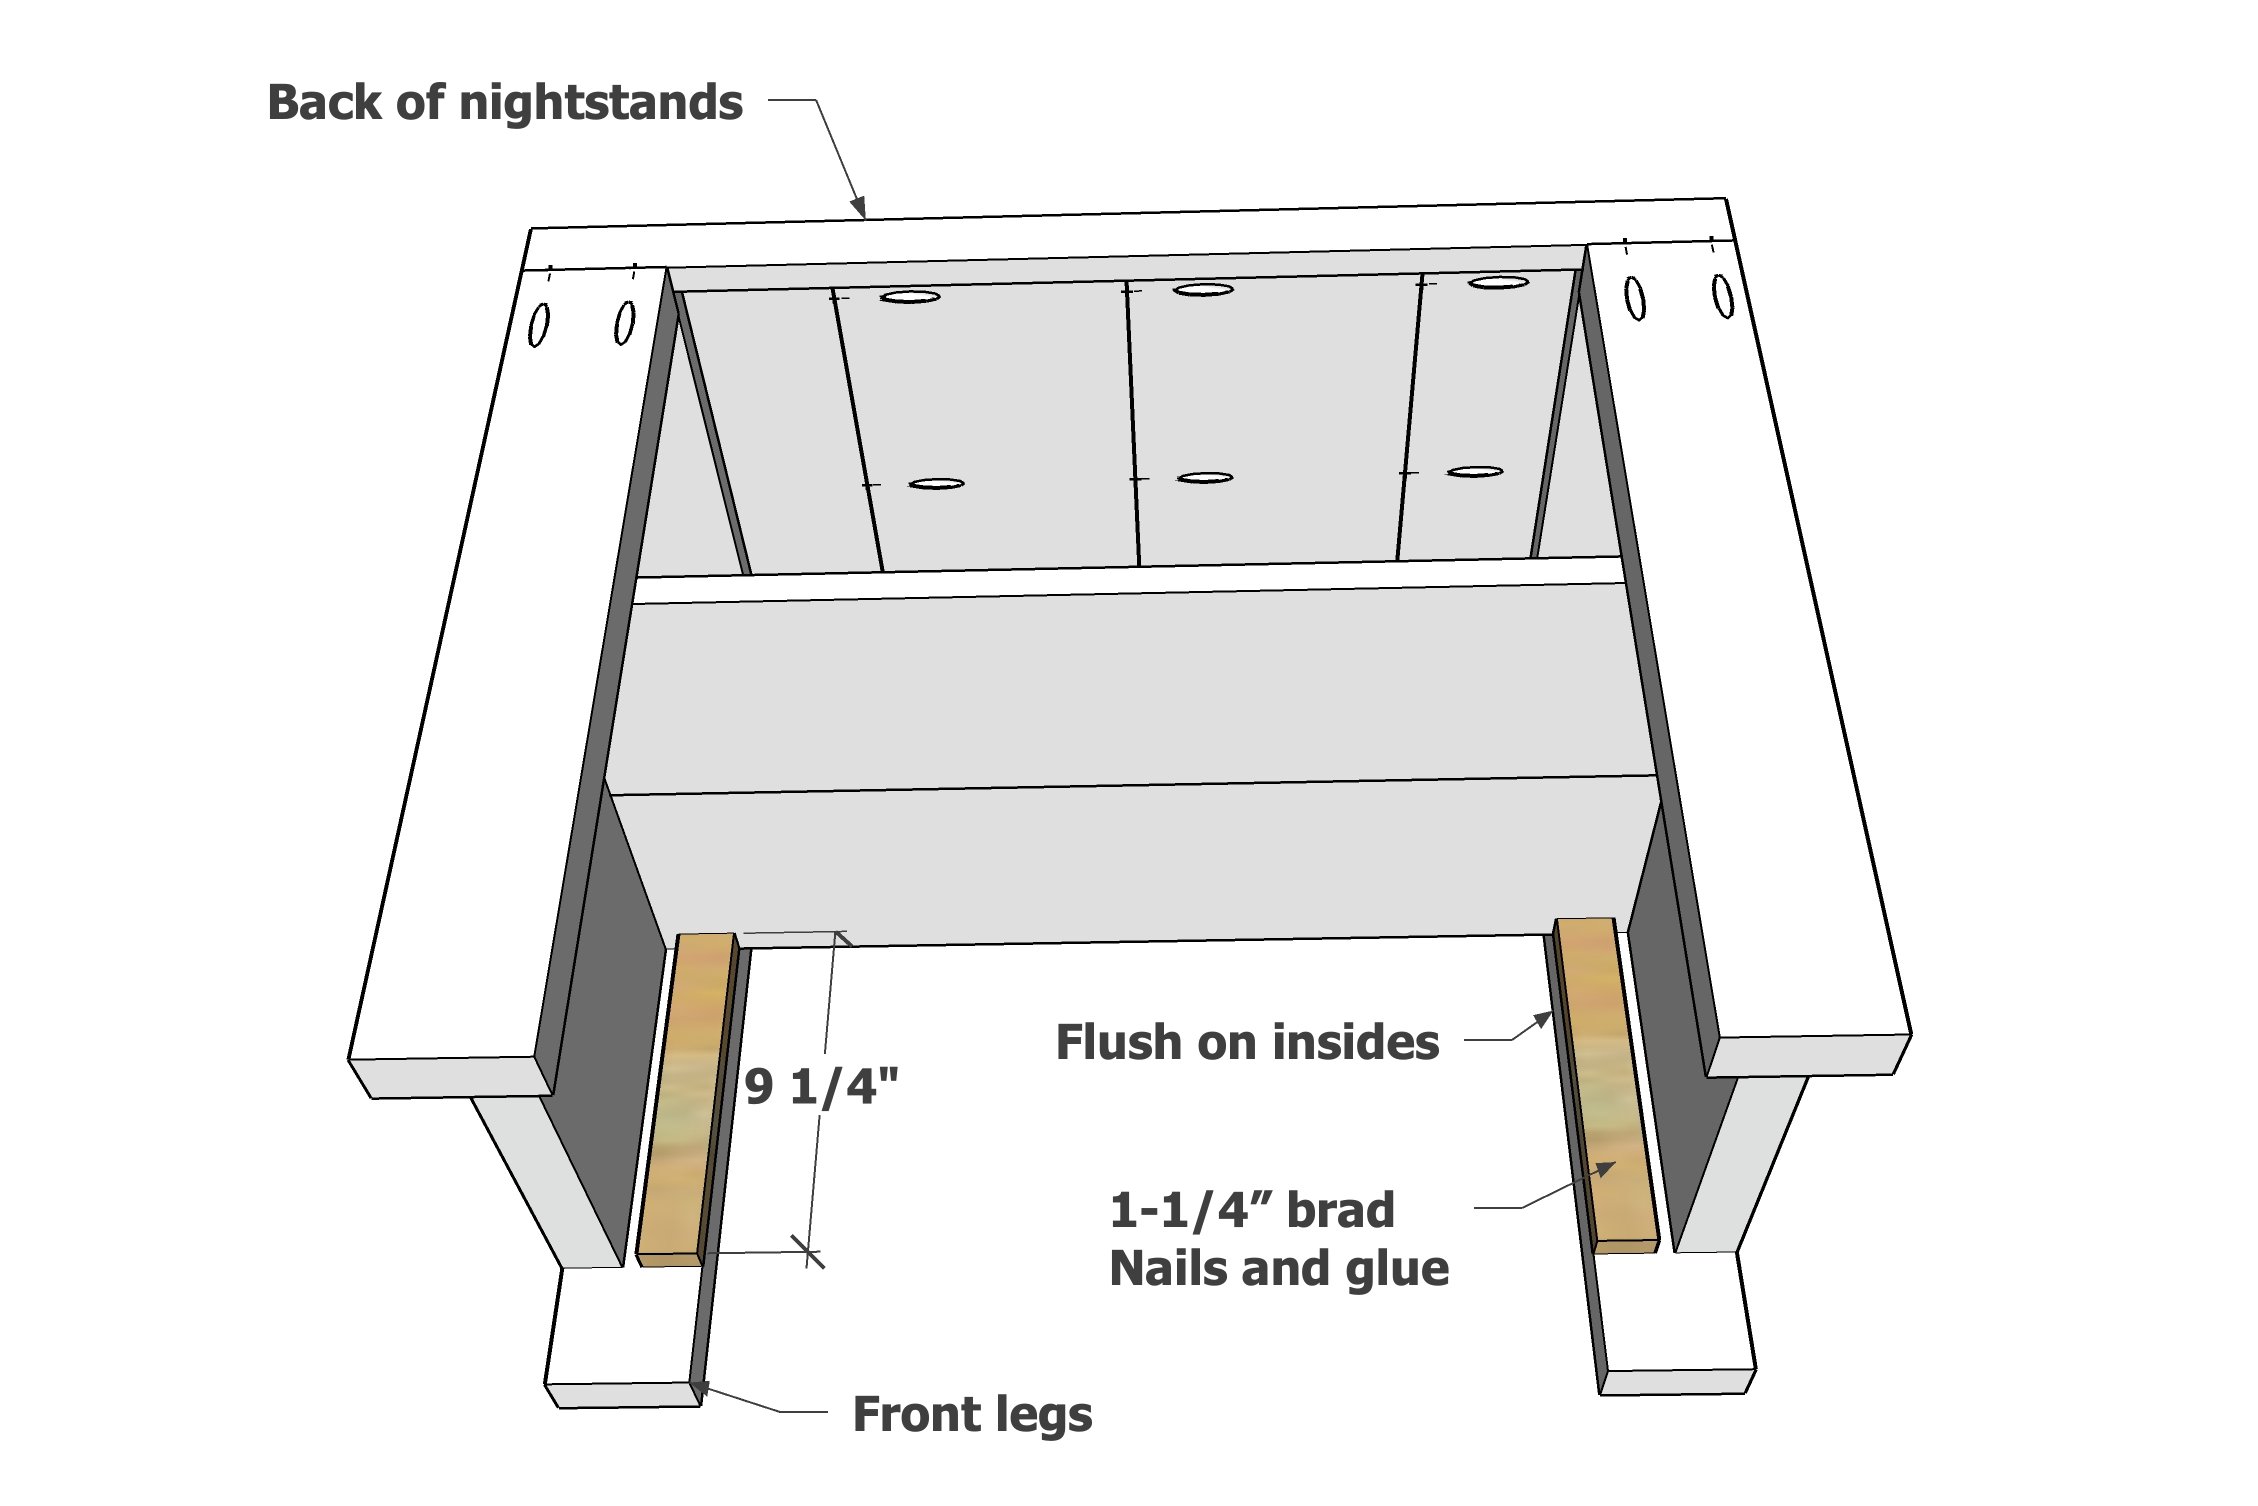
To support the drawer slides, attach 1x2s to the front inside edge of the legs with 1-1/4" brad nails.  The 1x2 should be perfectly flush to the inside of the 2x4 leg.

Step 8

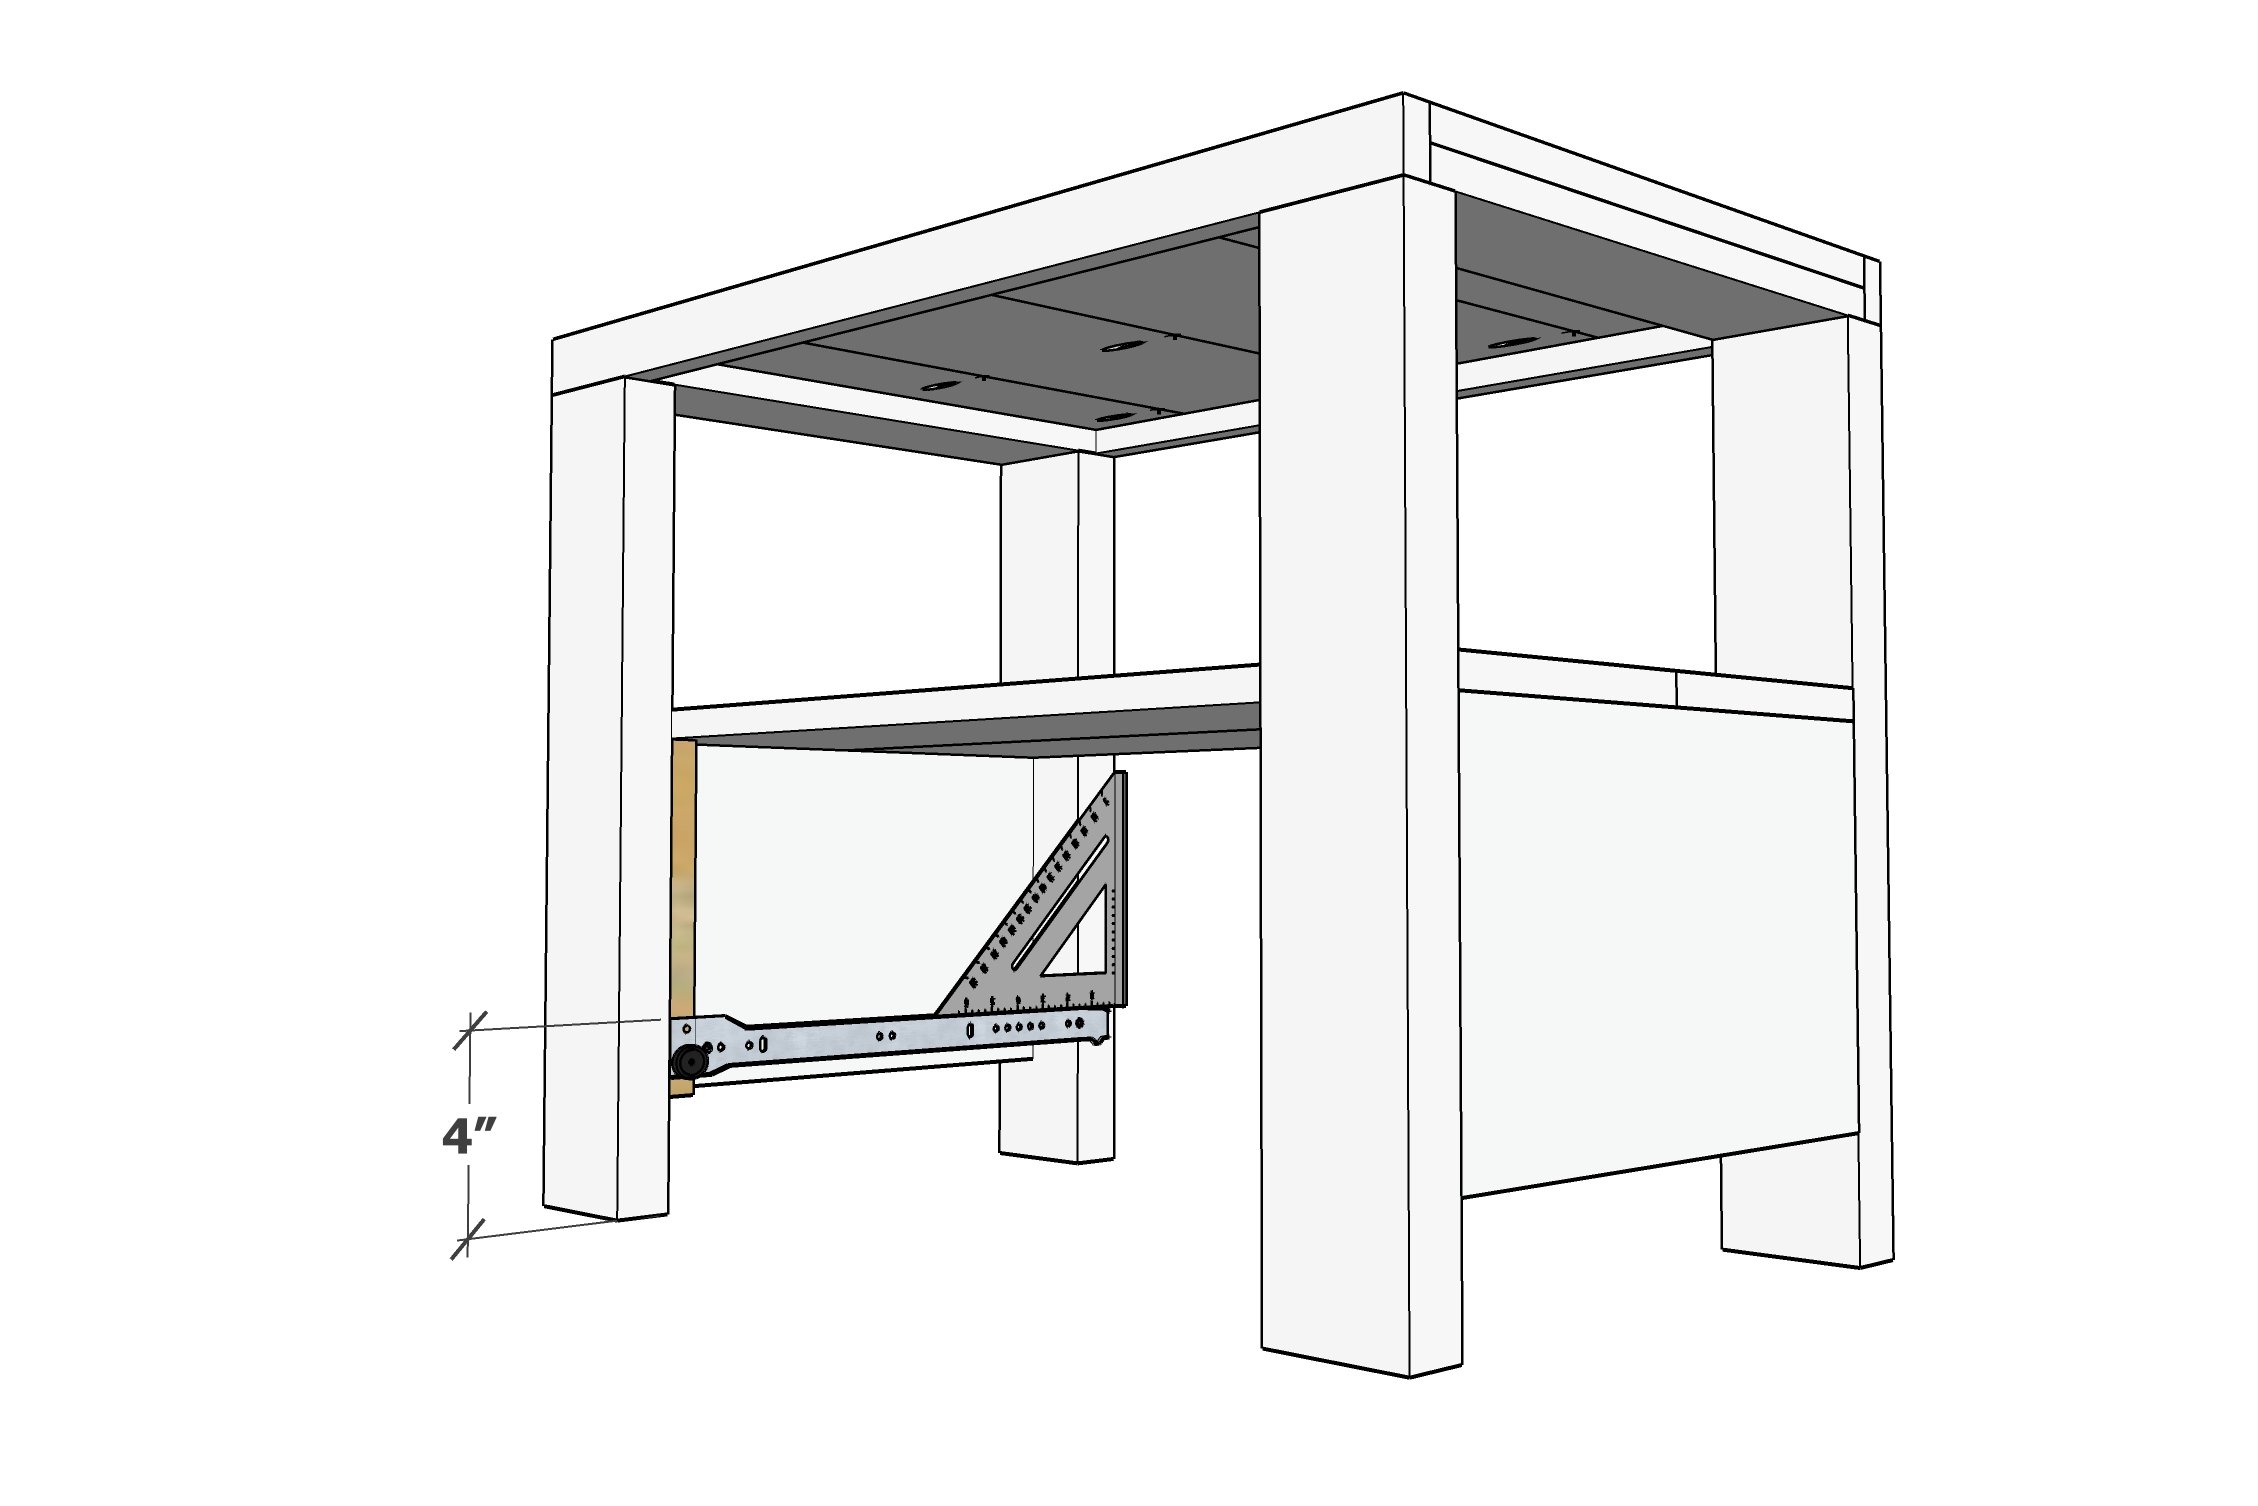
Read instruction for drawer slides.

Attach drawer slide as shown, use a square to make sure top of drawer slide is level.

Step 9

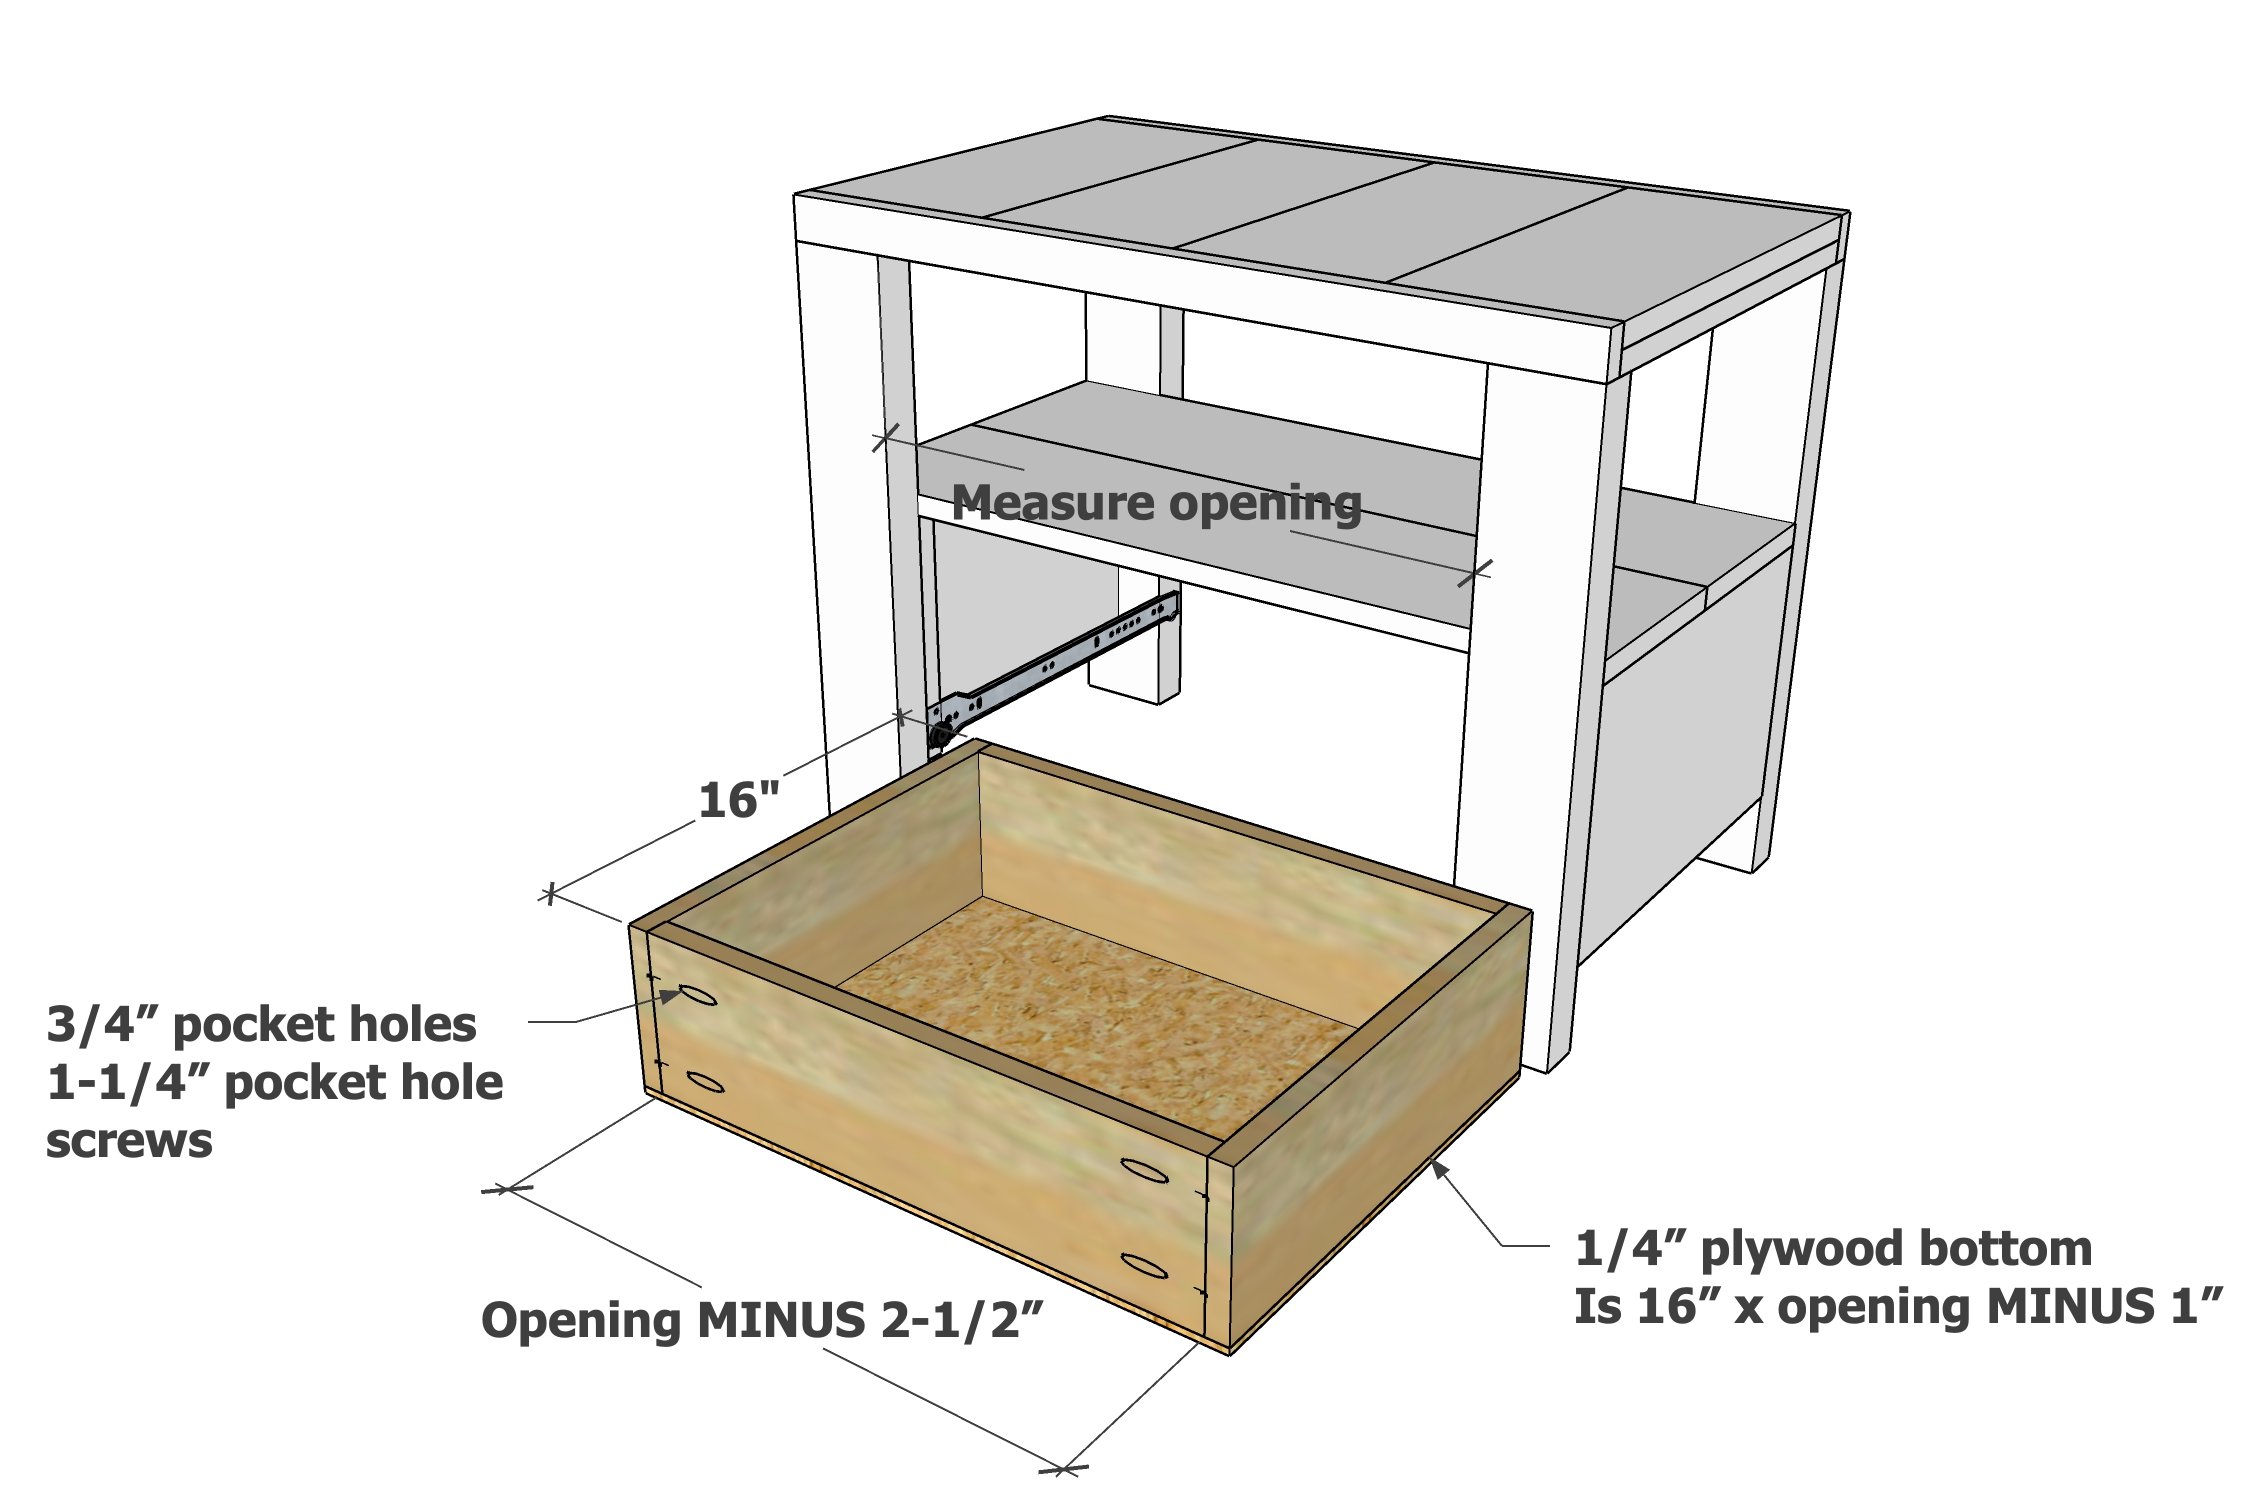
Build the drawer box as shown with 1x6s.

Cut the 1/4" plywood with a circular saw or tablesaw.

Attach 1/4" plywood with 3/4" brad nails to bottom.

Step 10

Cut the drawer face boards.

Recommended: Cut the back of the drawer faces boards at a 45 degree angle to create a lip to use as a drawer pull

Join boards together with 3/4" pocket holes and 1-1/4" pocket hole screws (two per joint).

Step 11

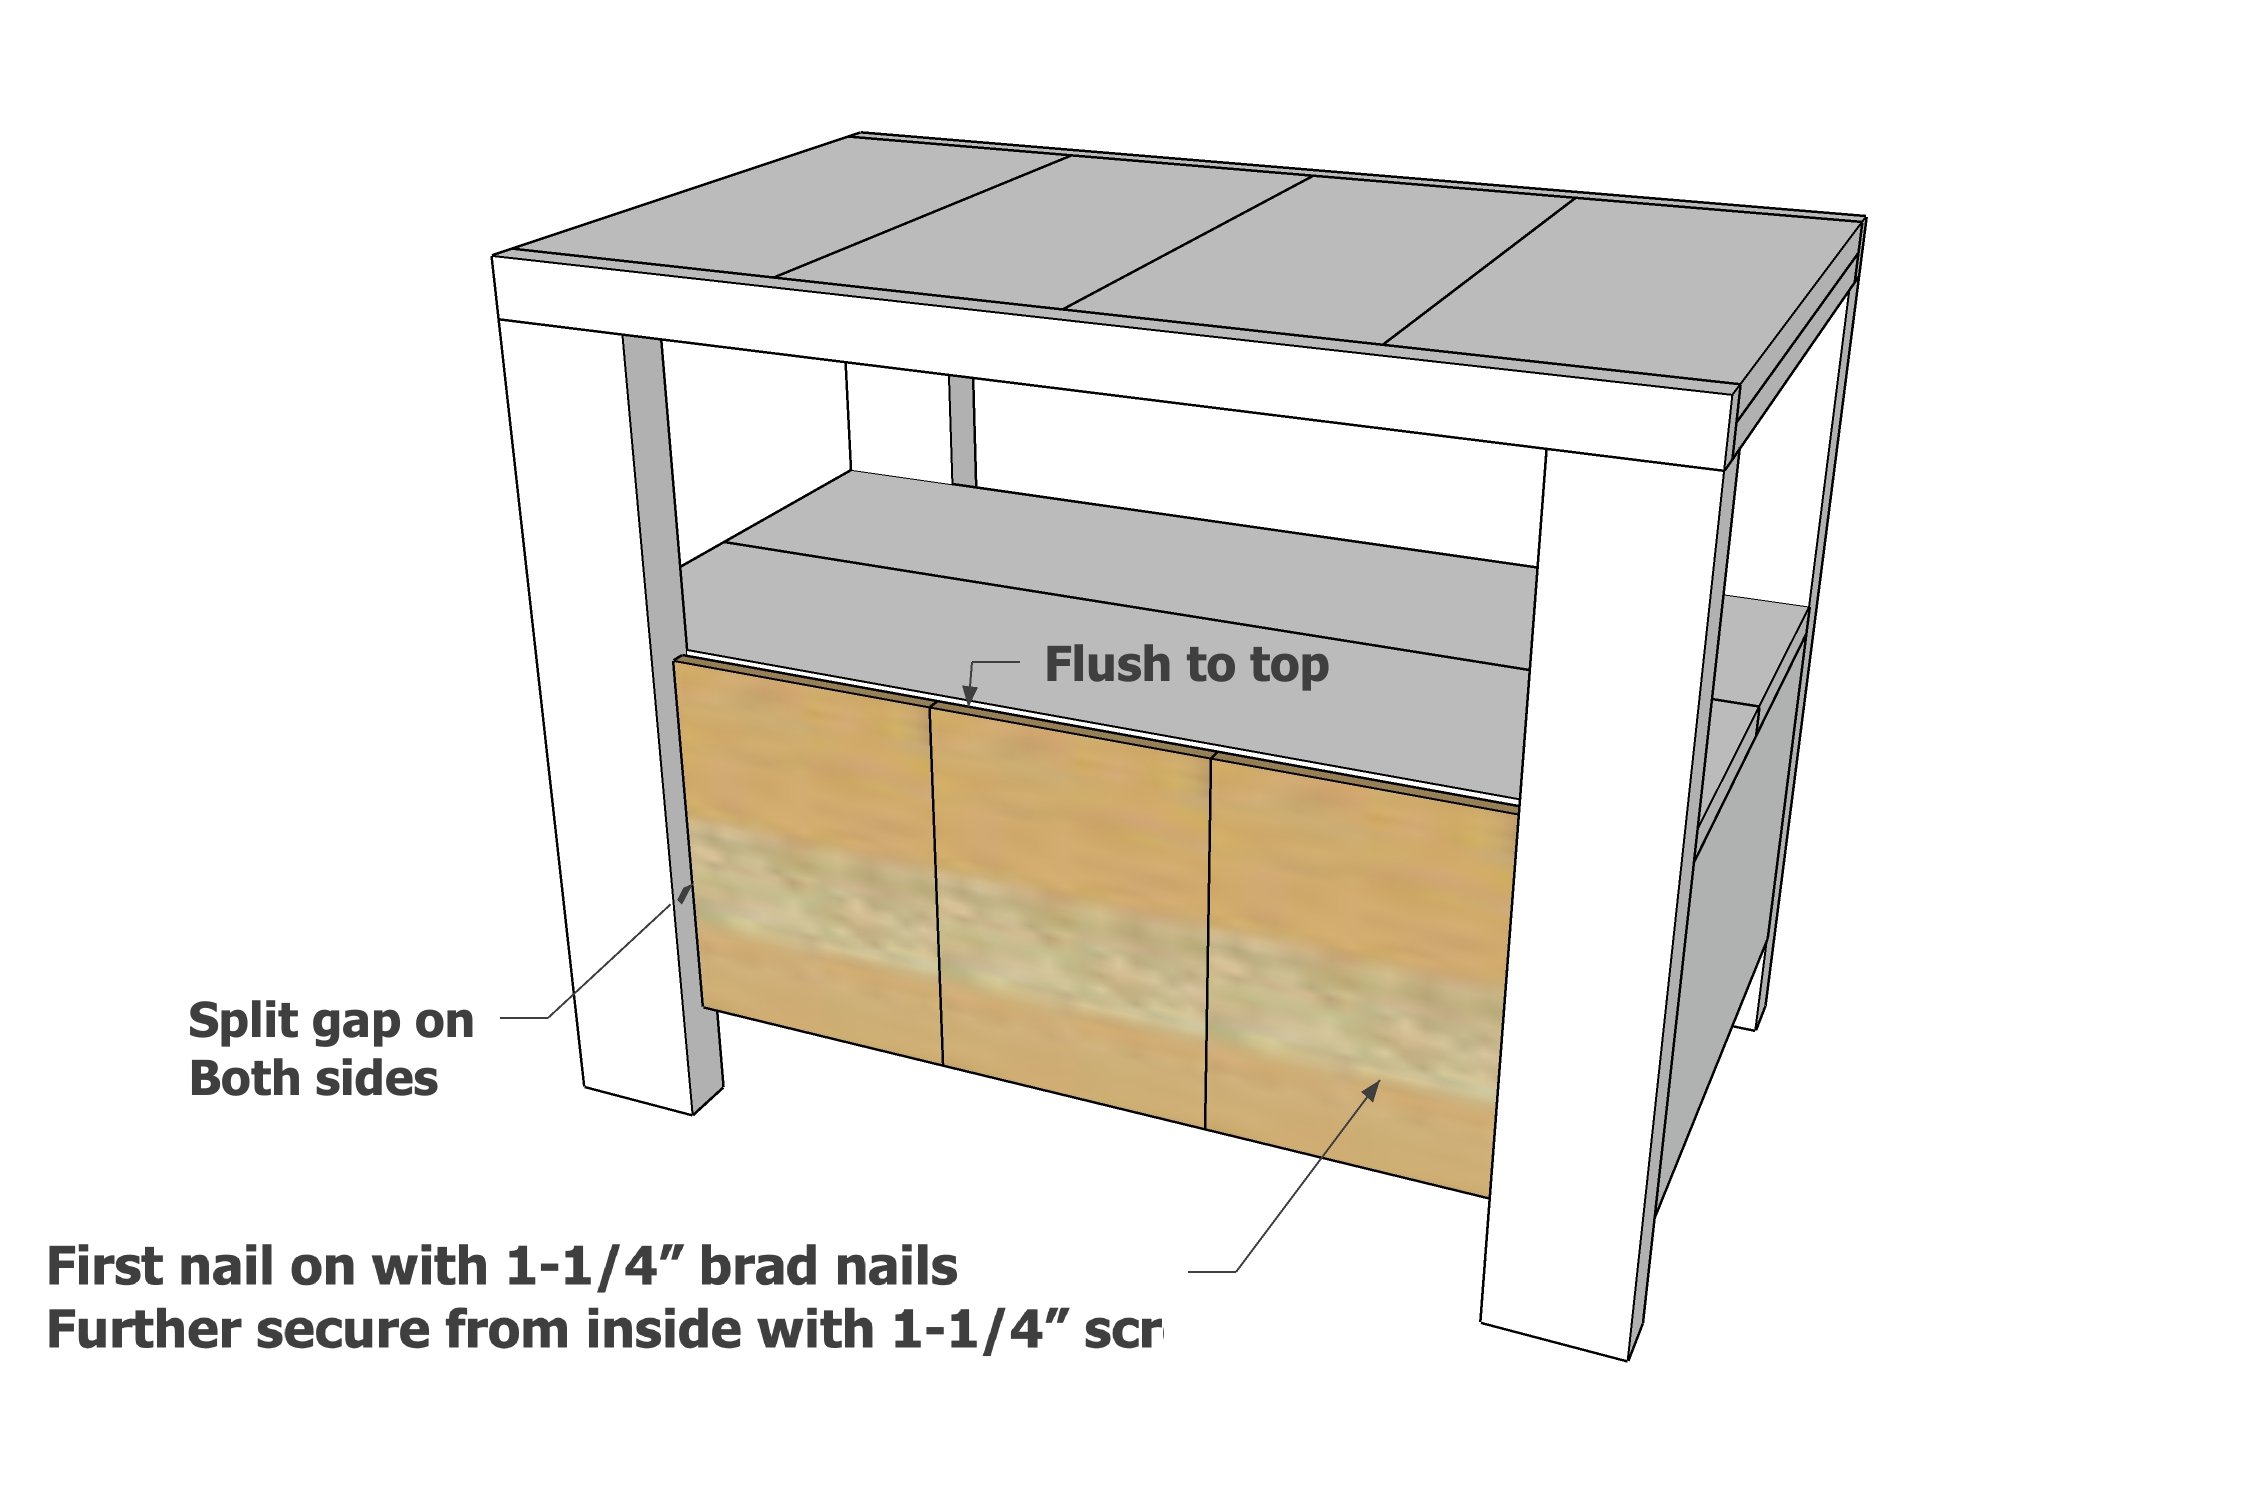
Attach the drawer face to the drawer box, even gaps on sides, top is level with the top of the shelf.

Finishing Instructions
Preparation Instructions
I filled nail holes with wood filler and let dry.
I sanded well with 120 grit sandpaper, in the direction of the wood grain.
Then I sanded with 220 grit sandpaper.
Finish Used
I used Varathane Sunbleached to stain.
I also added a top coat of water based polyurethane to protect the top.

Comments