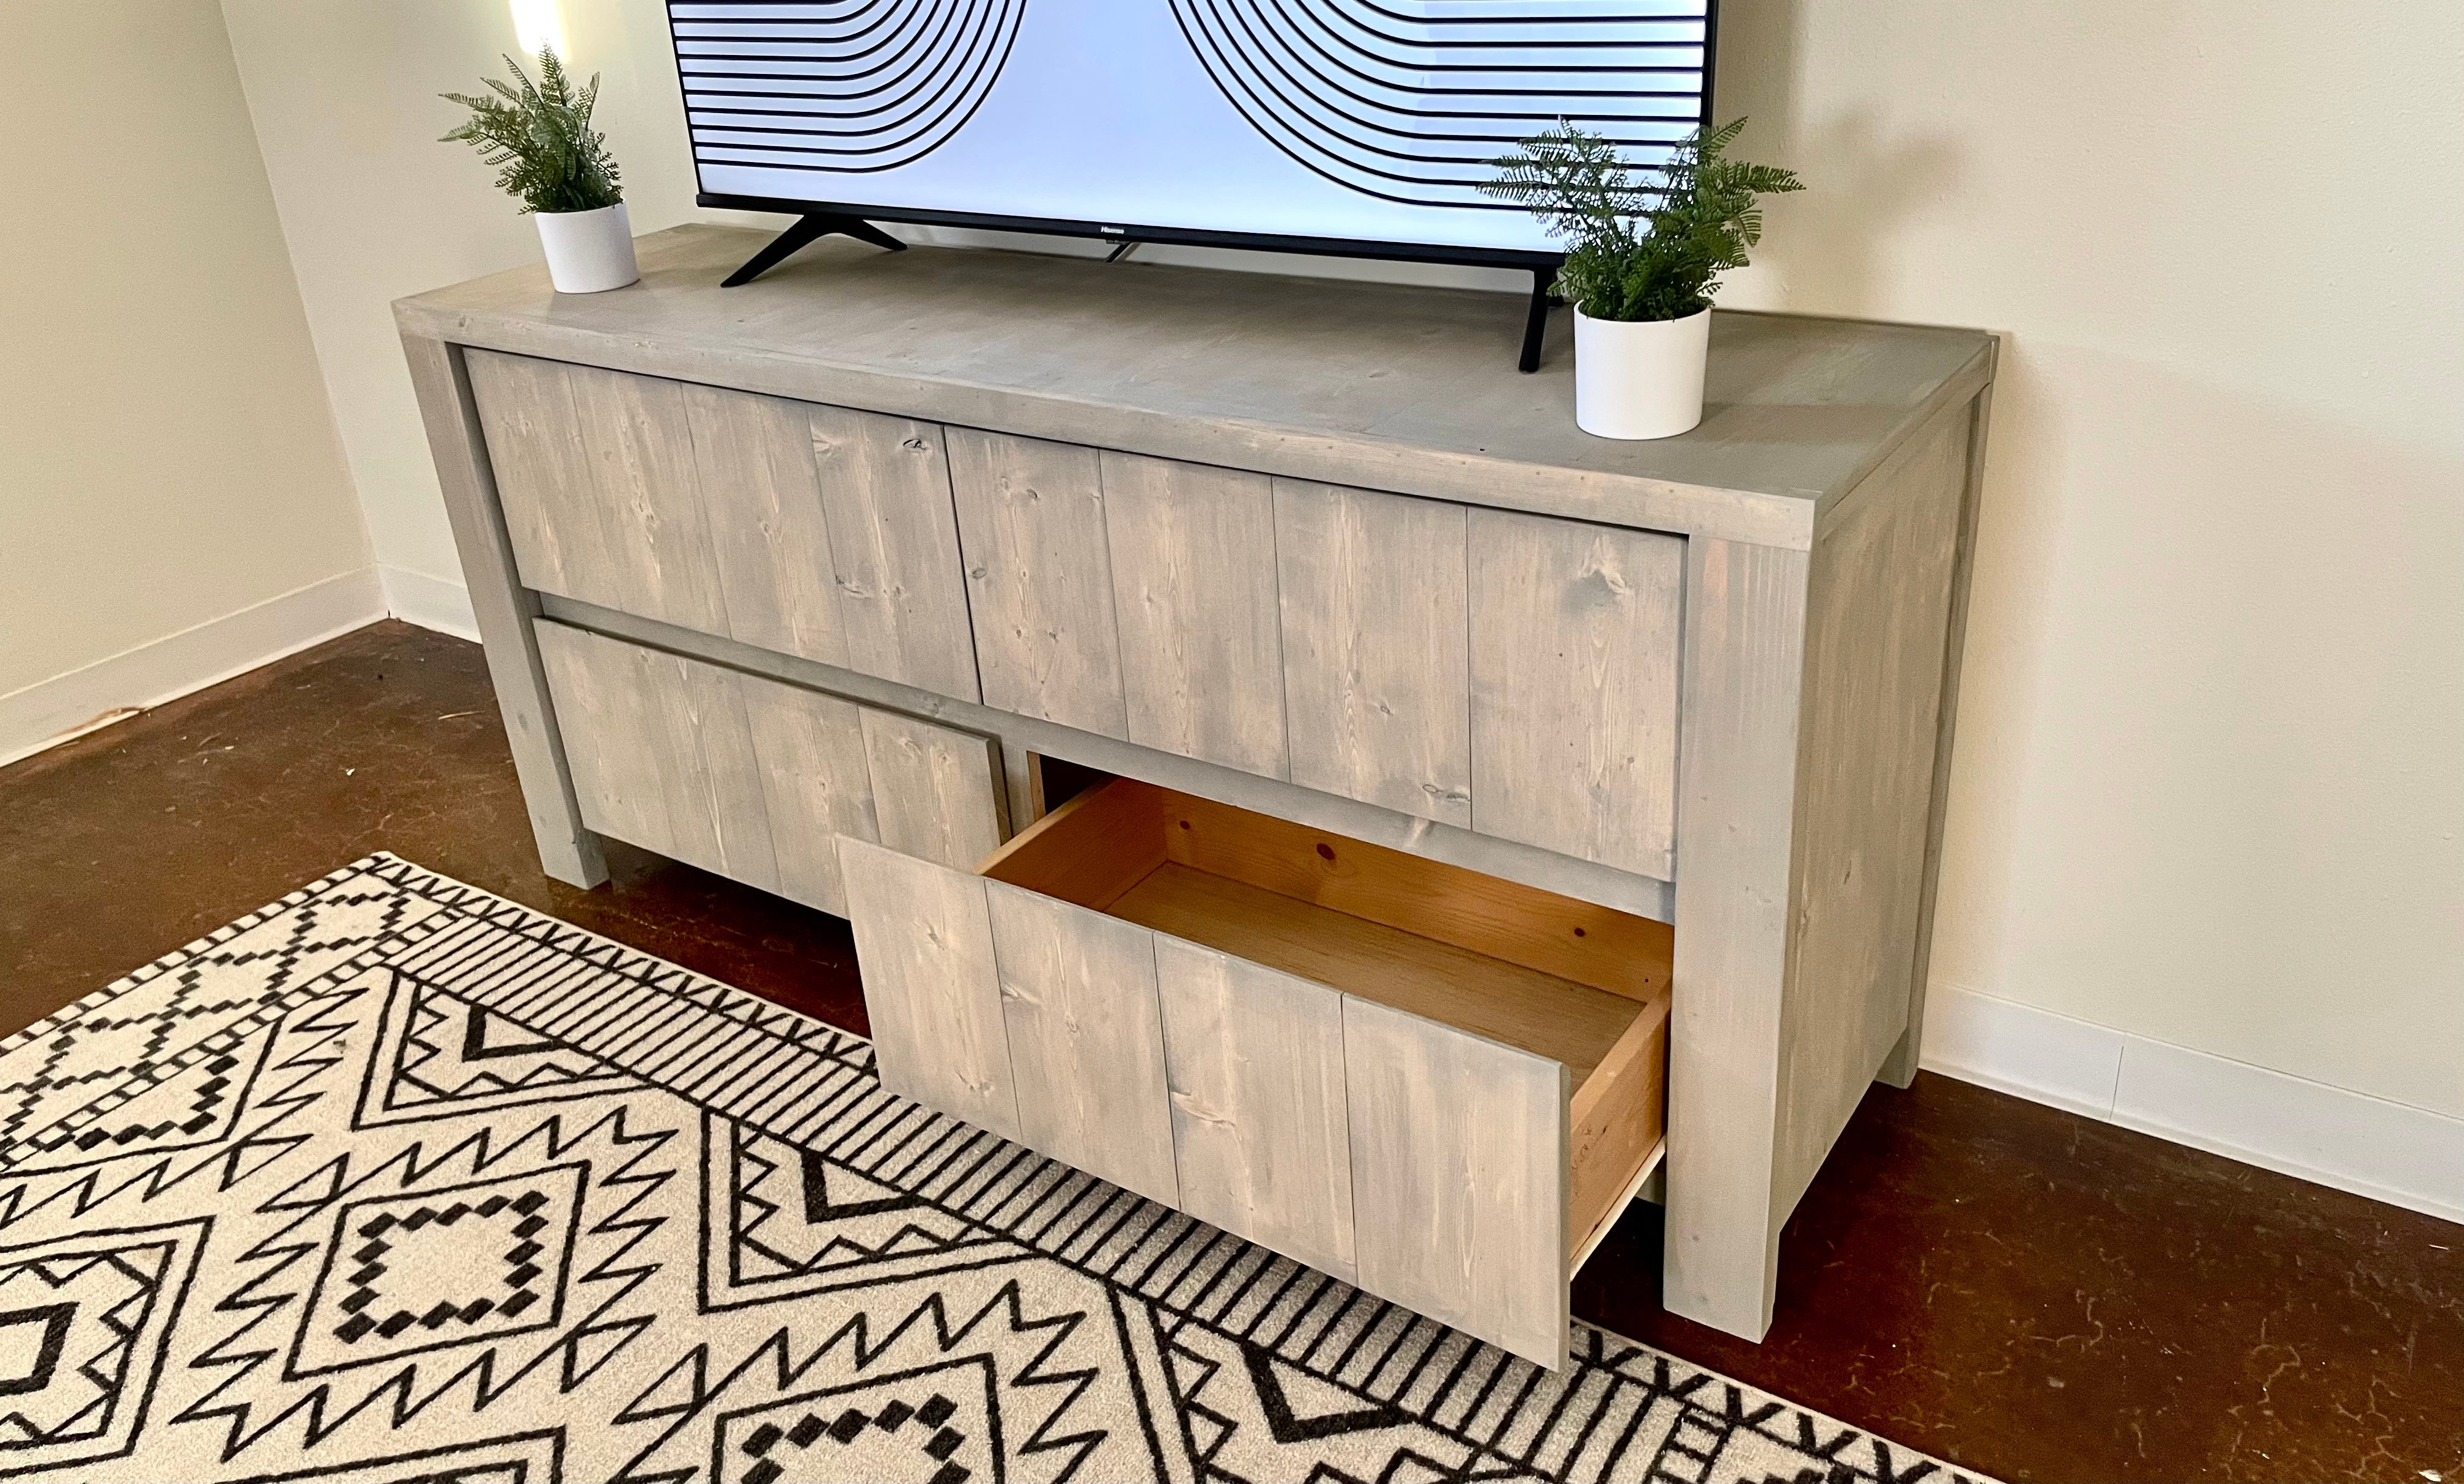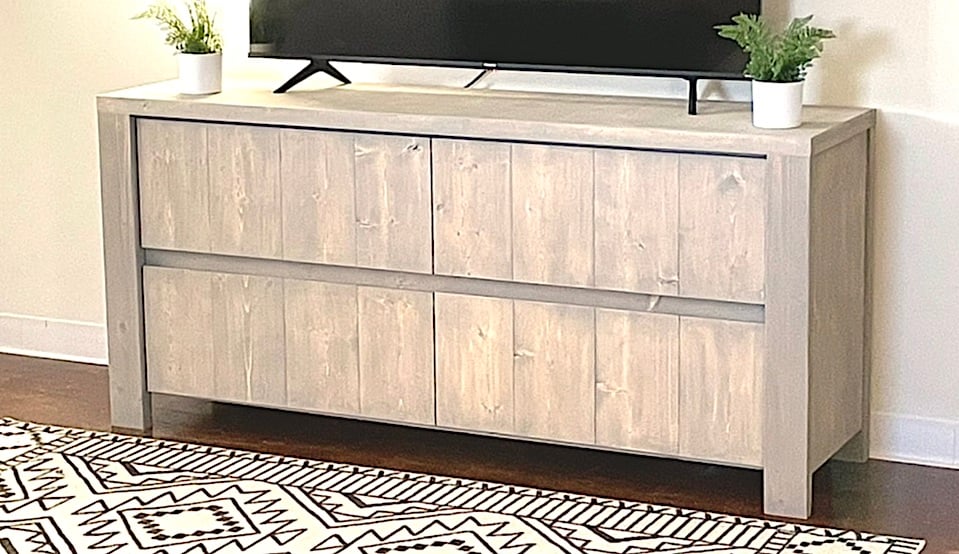
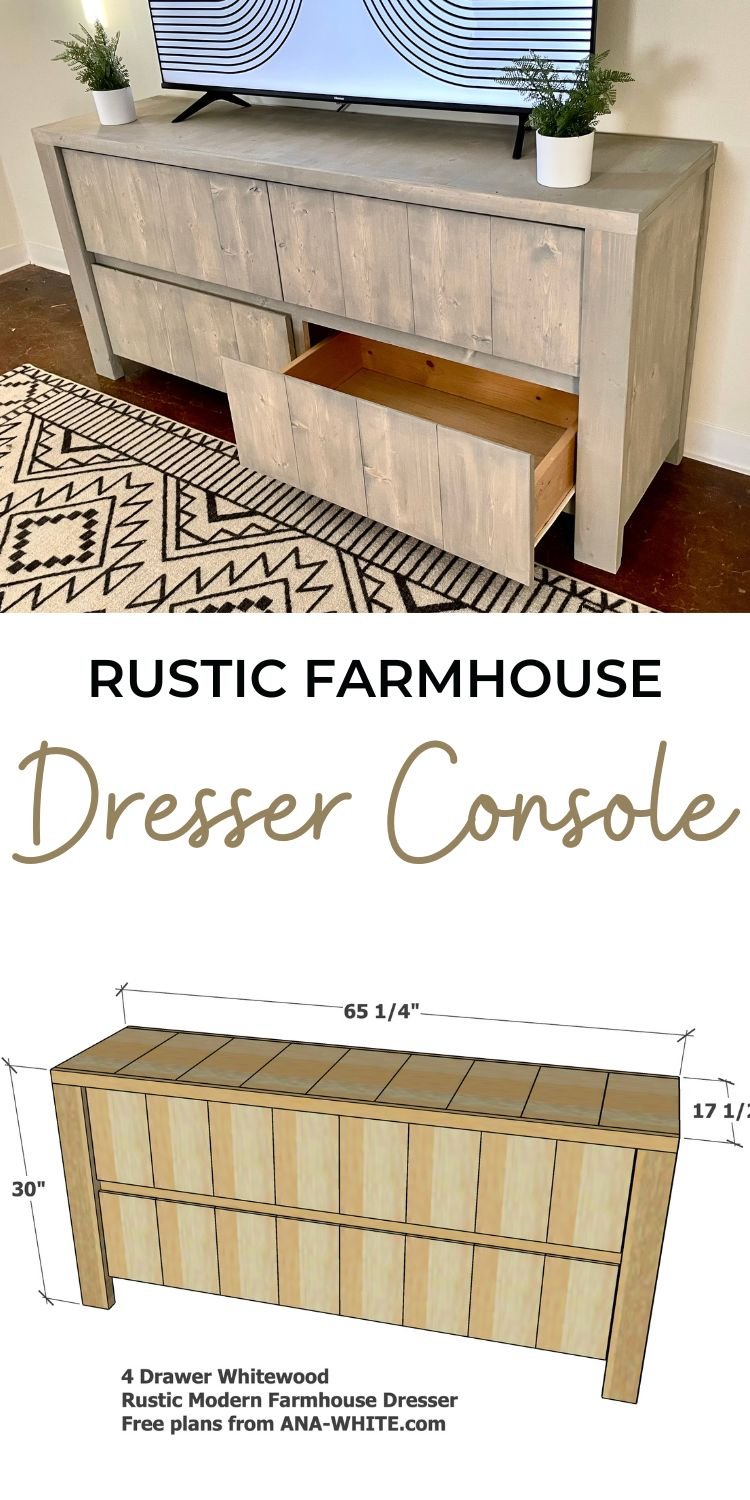
Stunning dresser diy using whitewood boards, features four big drawers and a modern design. Free plans to build your own rustic modern farmhouse dresser by Ana-white.com
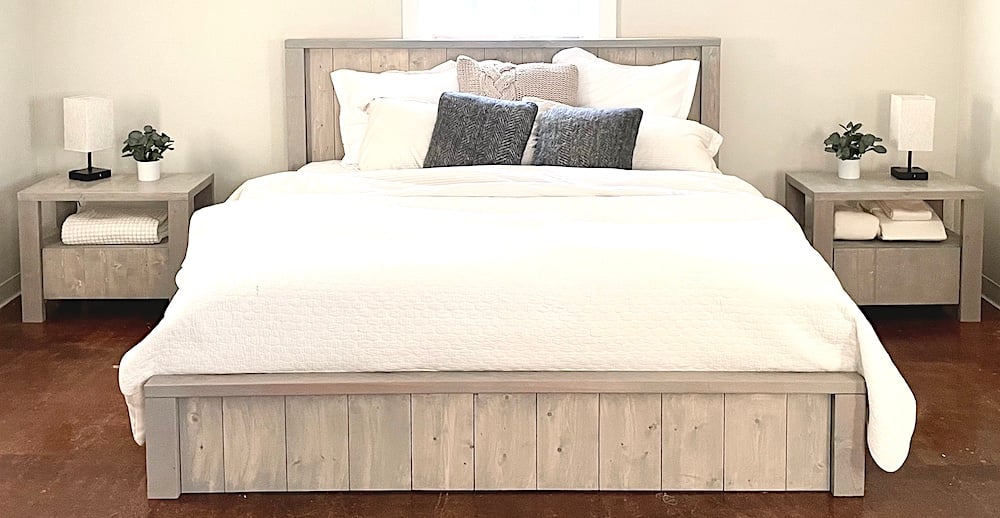
RELATED: Free plans for matching bed and matching nightstands
Pin For Later!
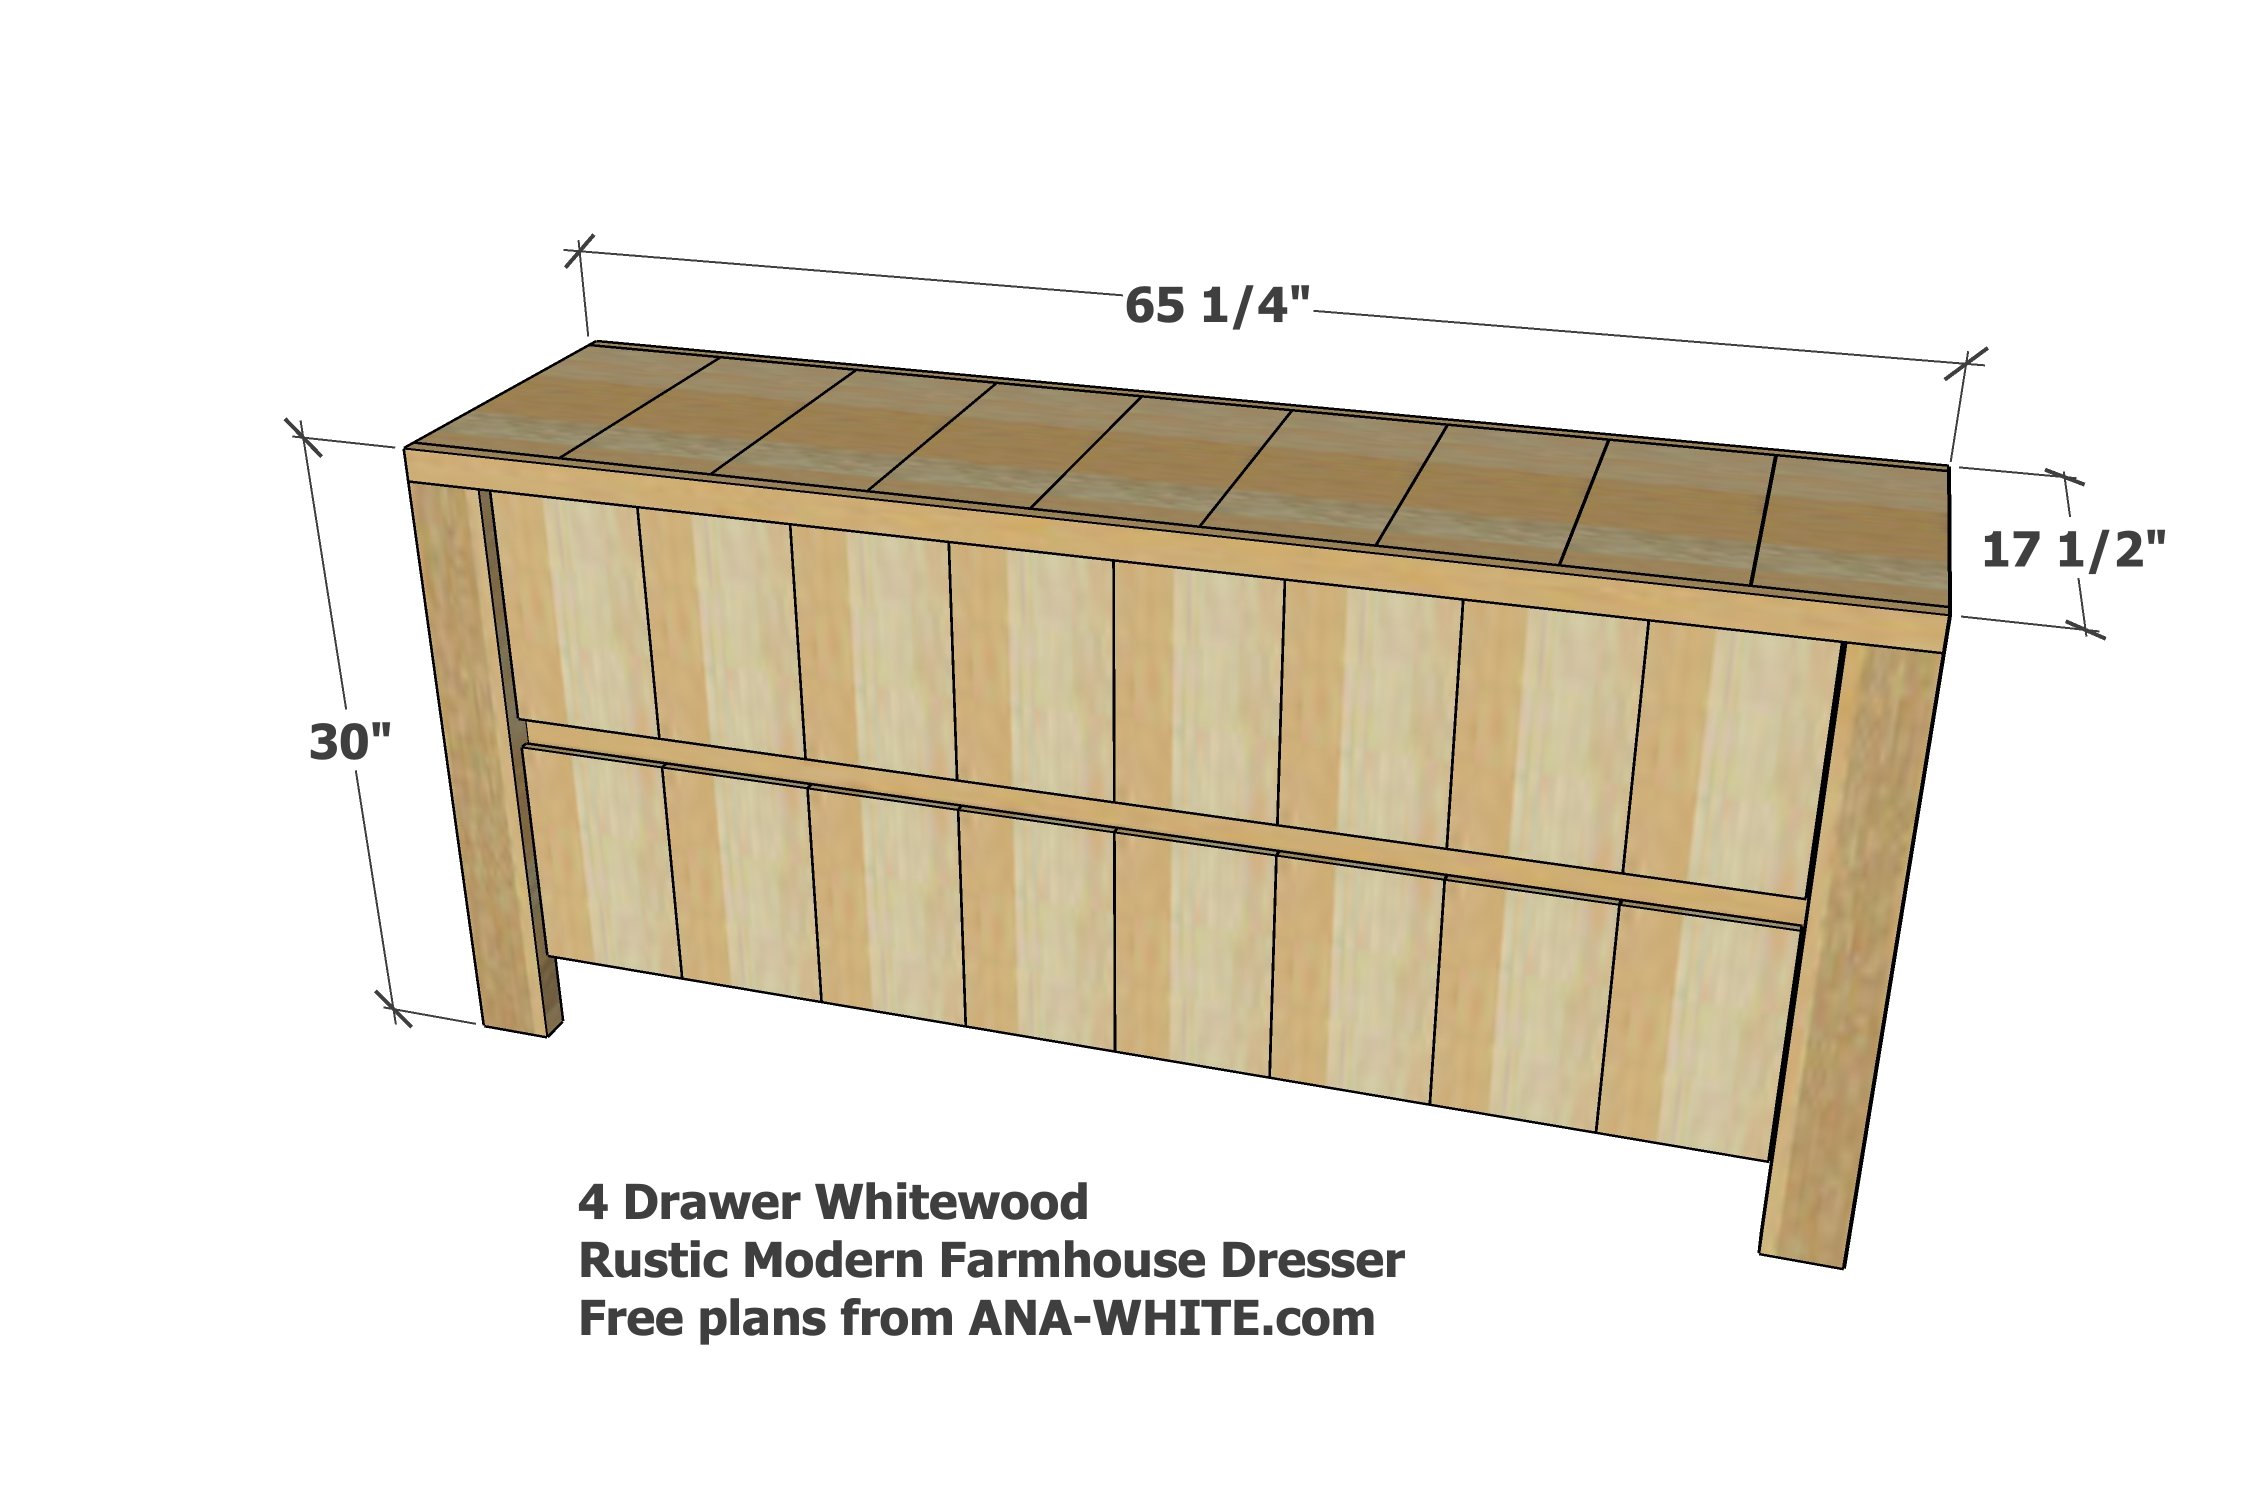
Preparation
- 5 - 1X8 @ 8 feet long
- 4 - 1x6 @ 8 feet long
- 1 - 1x4 @ 8 feet long
- 1 - 1x3 @ 8 feet long
- 5 - 1x2 @ 8 feet long
- 1 - 2x4 @ 12 feet long
- 1 - 1/4" plywood panel, 48" x 48"
- 4 - 16" white euro style drawer slides
- 100 - 1-1/4" Pocket Hole Screws
- 10 - 2-1/2" Pocket Hole Screws
- 1-1/4" and 5/8" Brad Nails
- medium and fine grit sandpaper
- Stain and clear poly
1x8s are expected with of 7-1/4". If width varies, this will complicate plans and adjustments will need to be made.
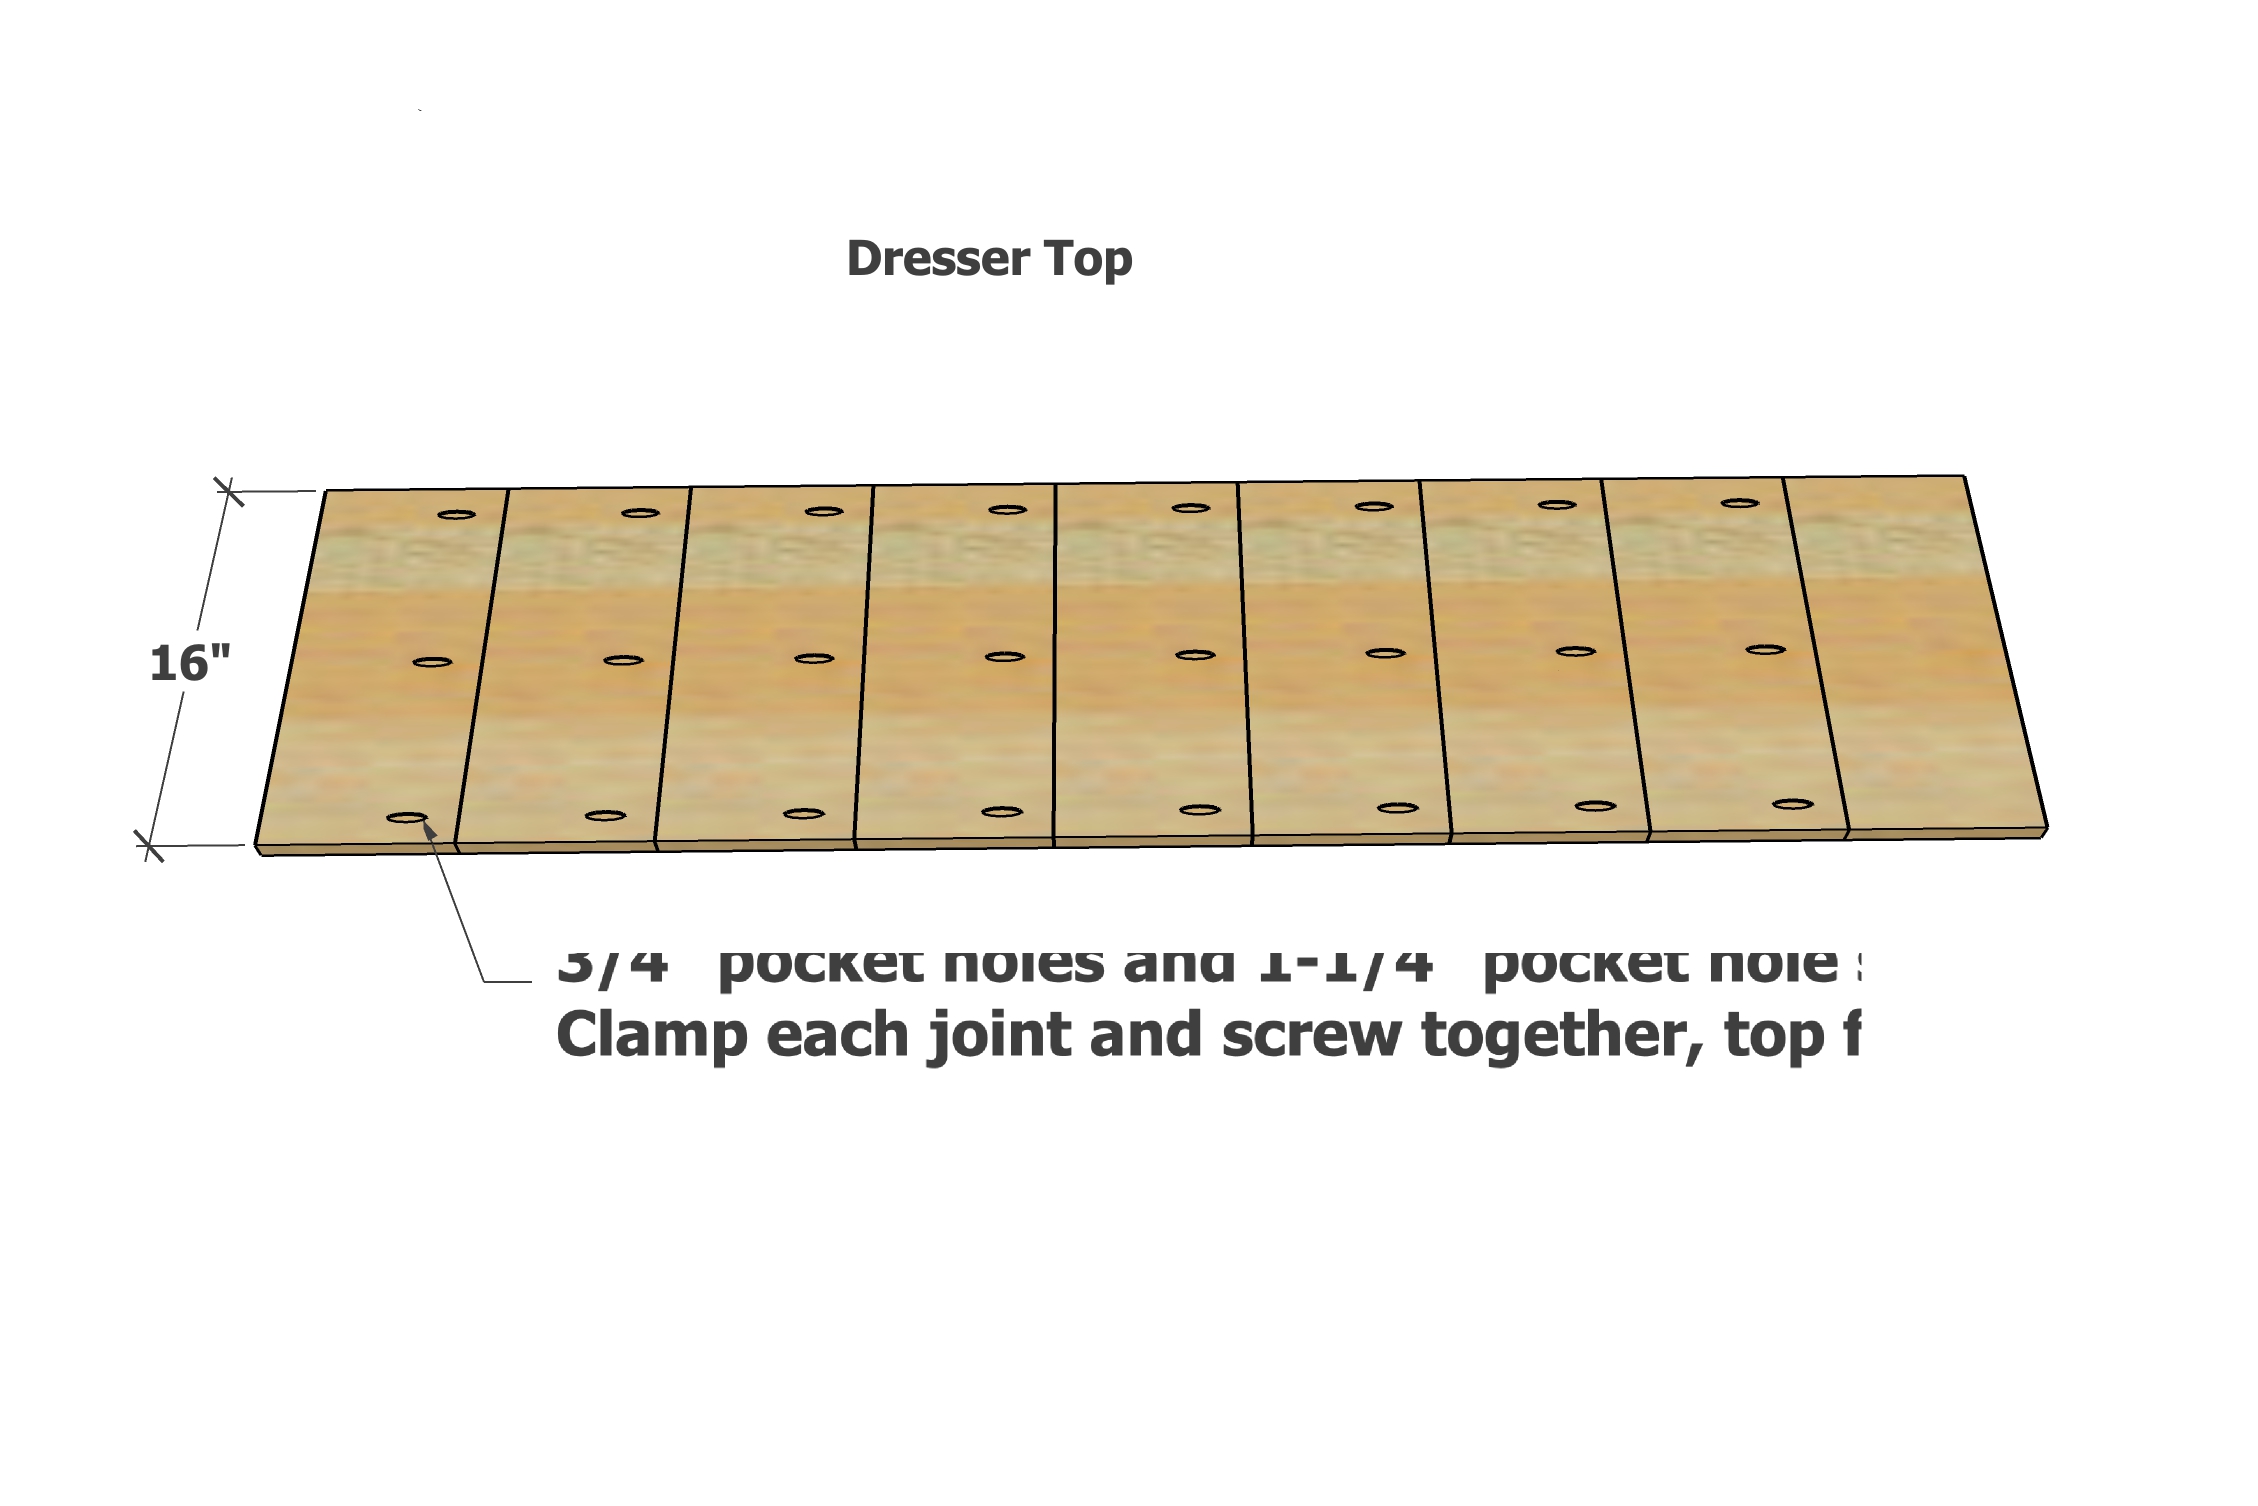
Top
- 9 - 1x8 @ 16"
- 3 - 1x4 @ 16"
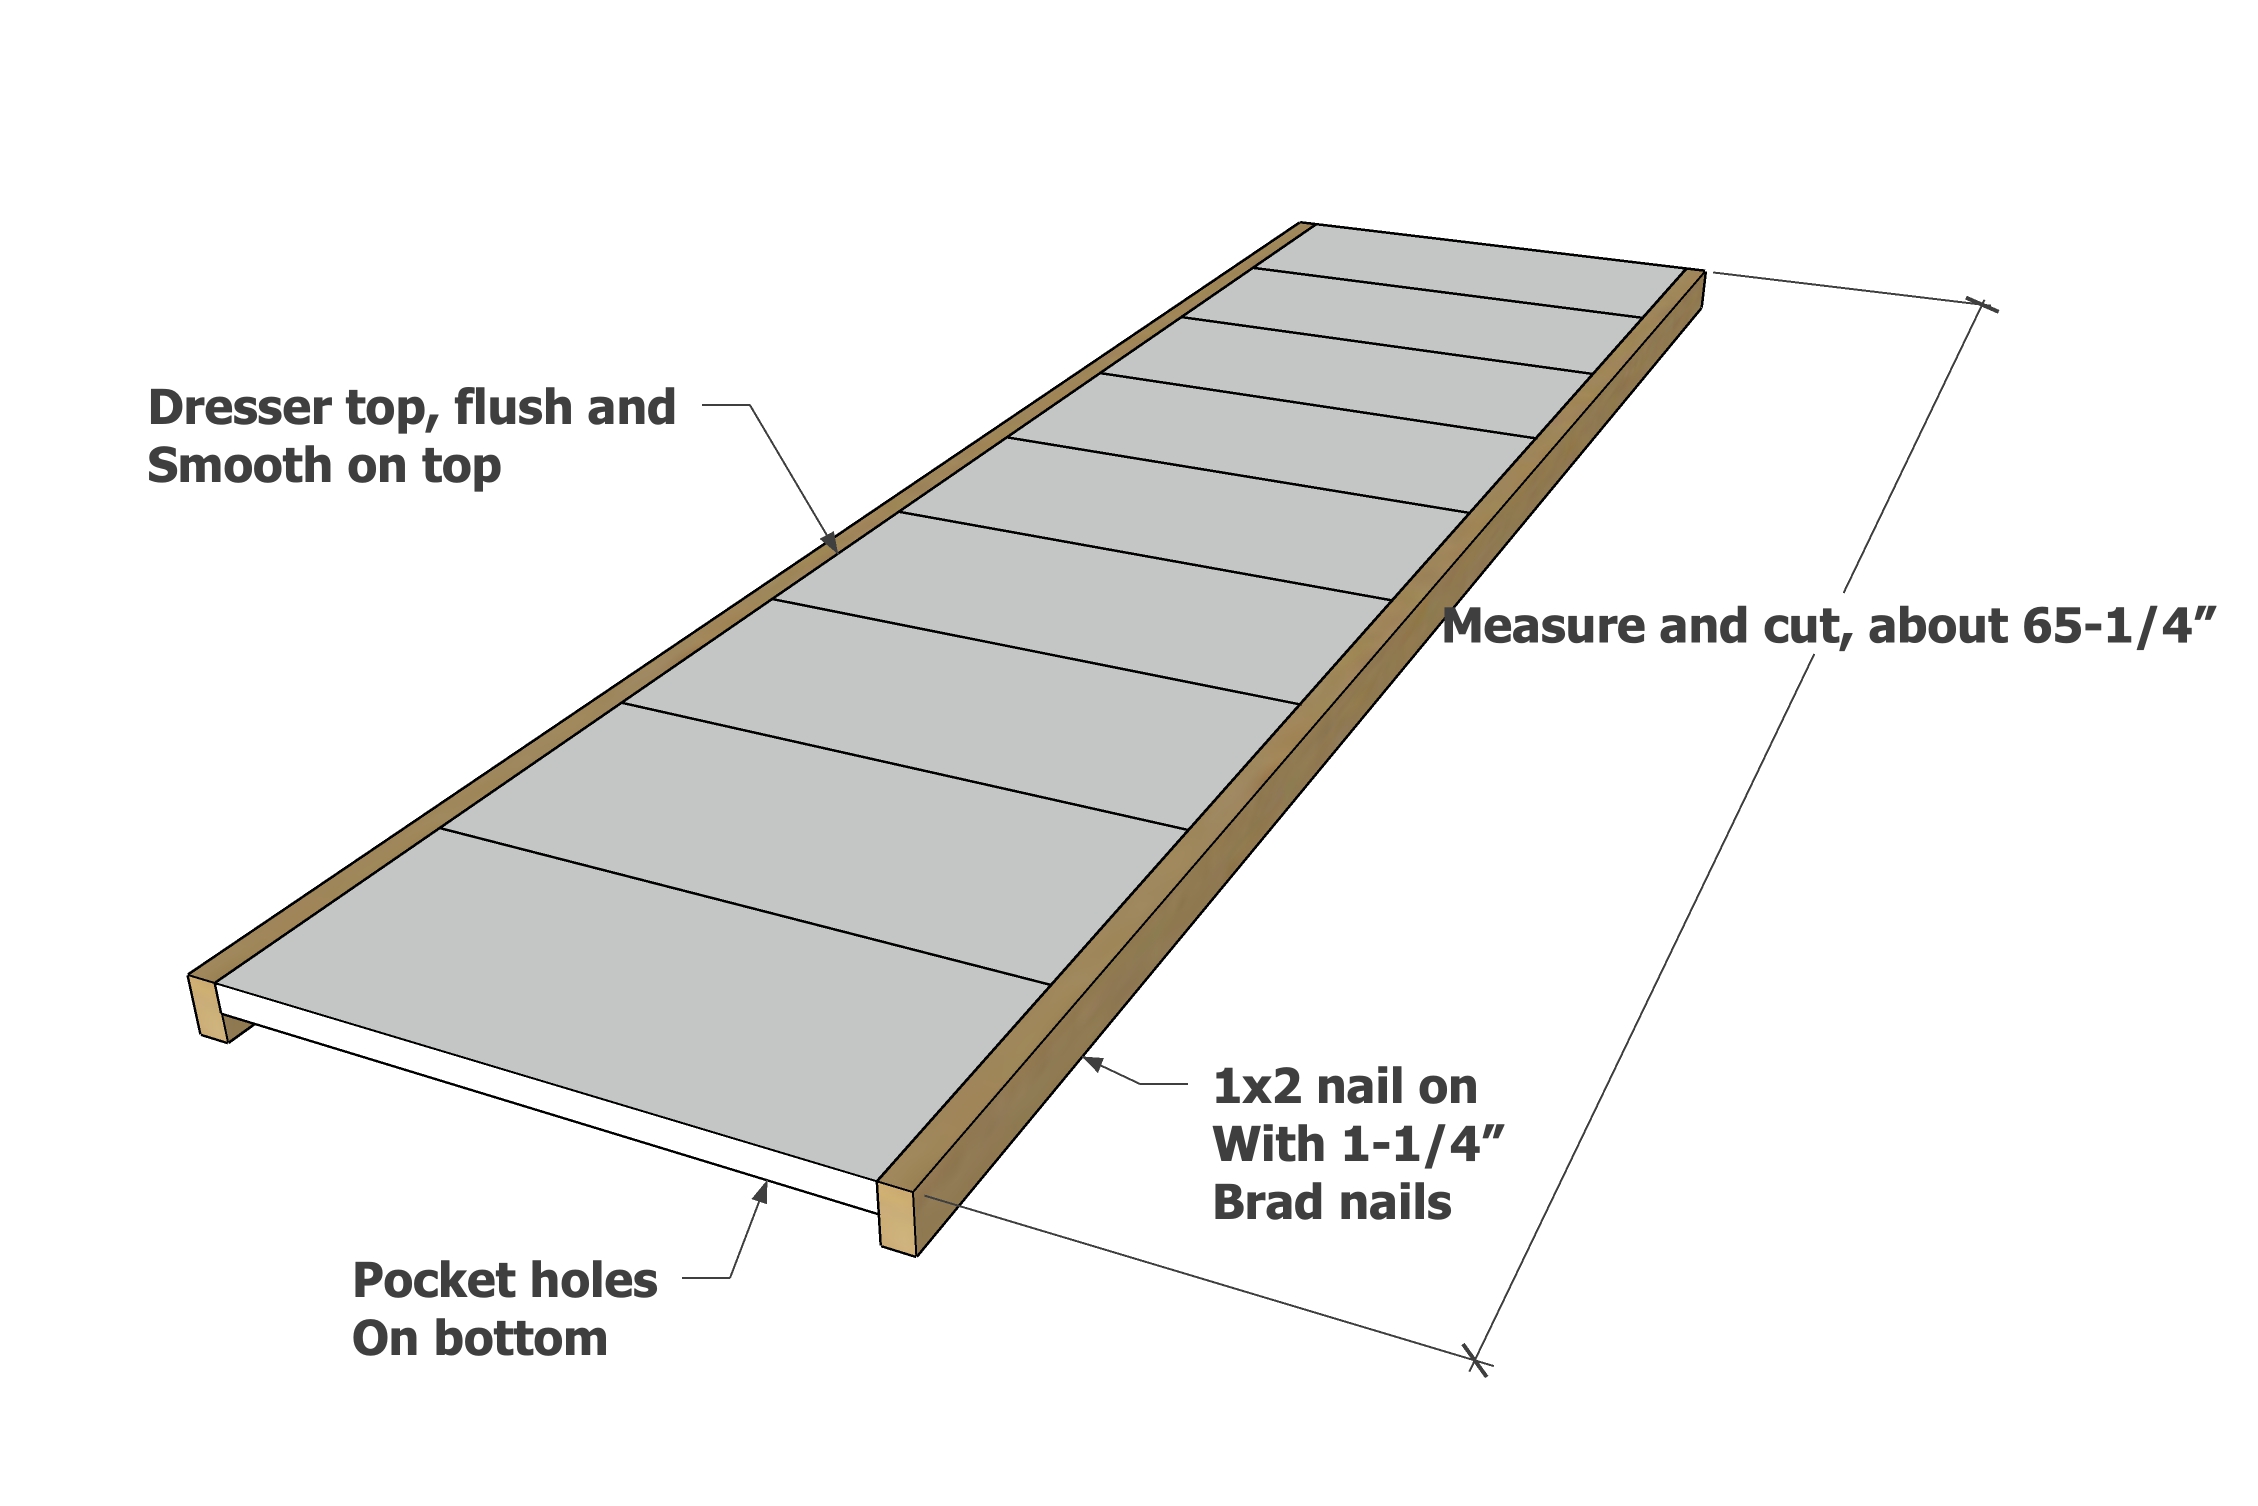
- 2 - 1x2 @ 65-1/4" - measure and cut to fit
Frame
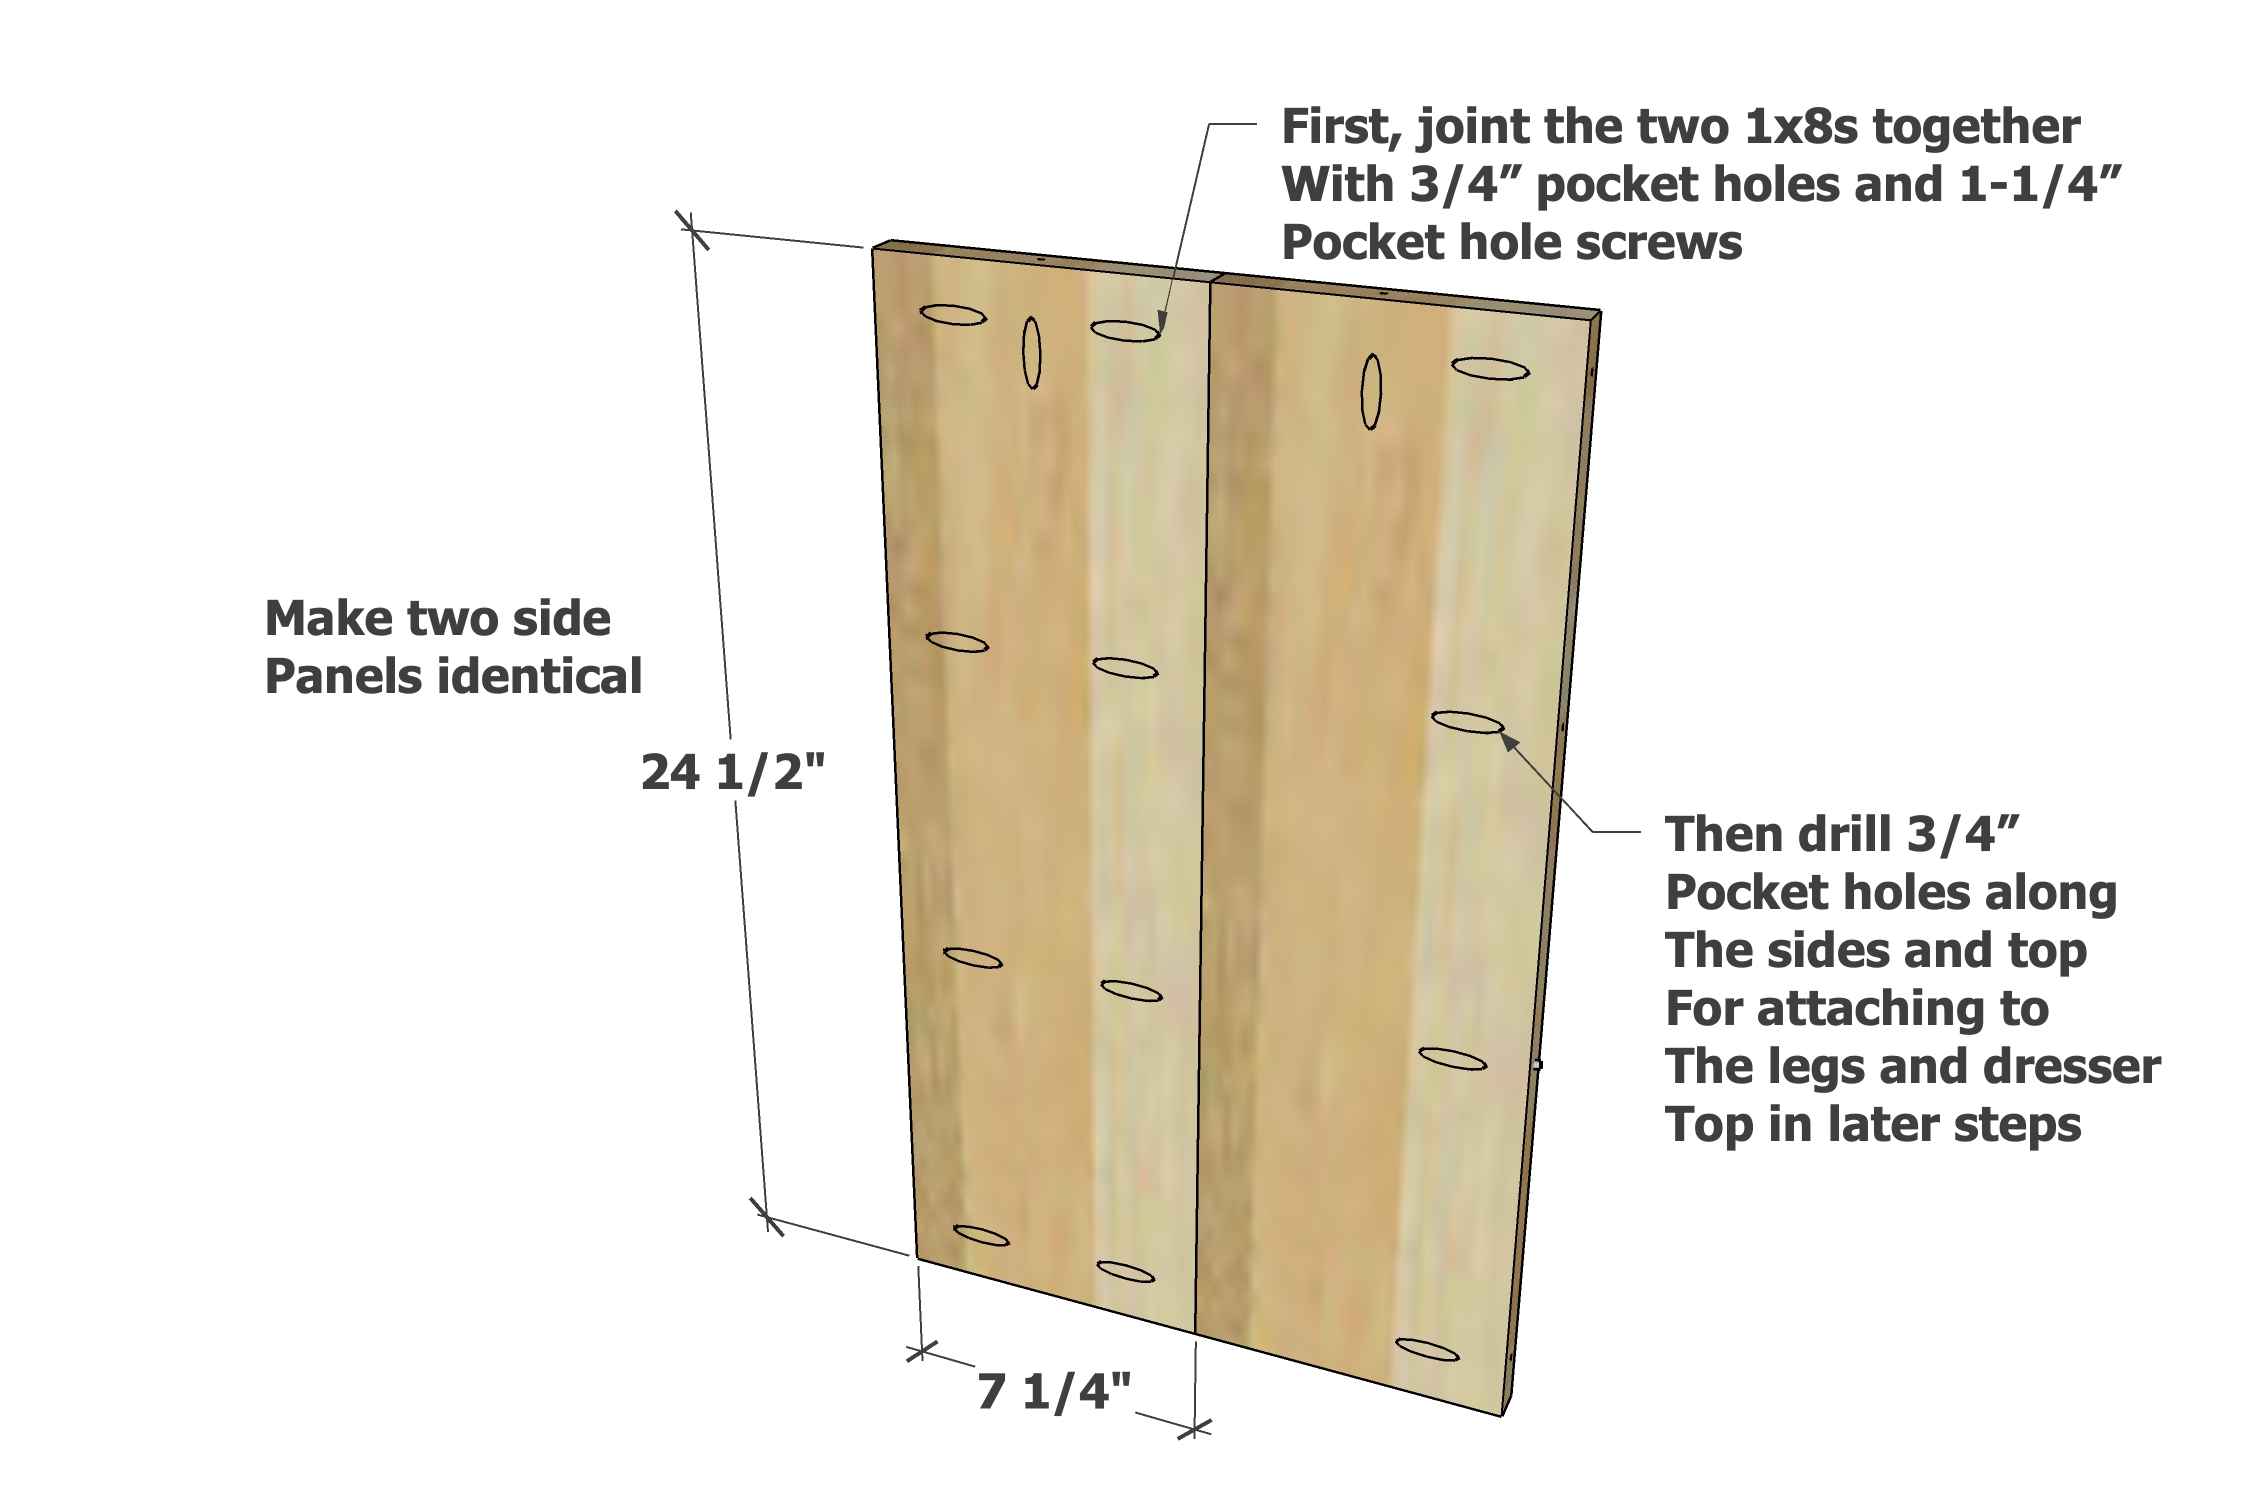
- 4 - 1x8 @ 24-1/2" - side panels
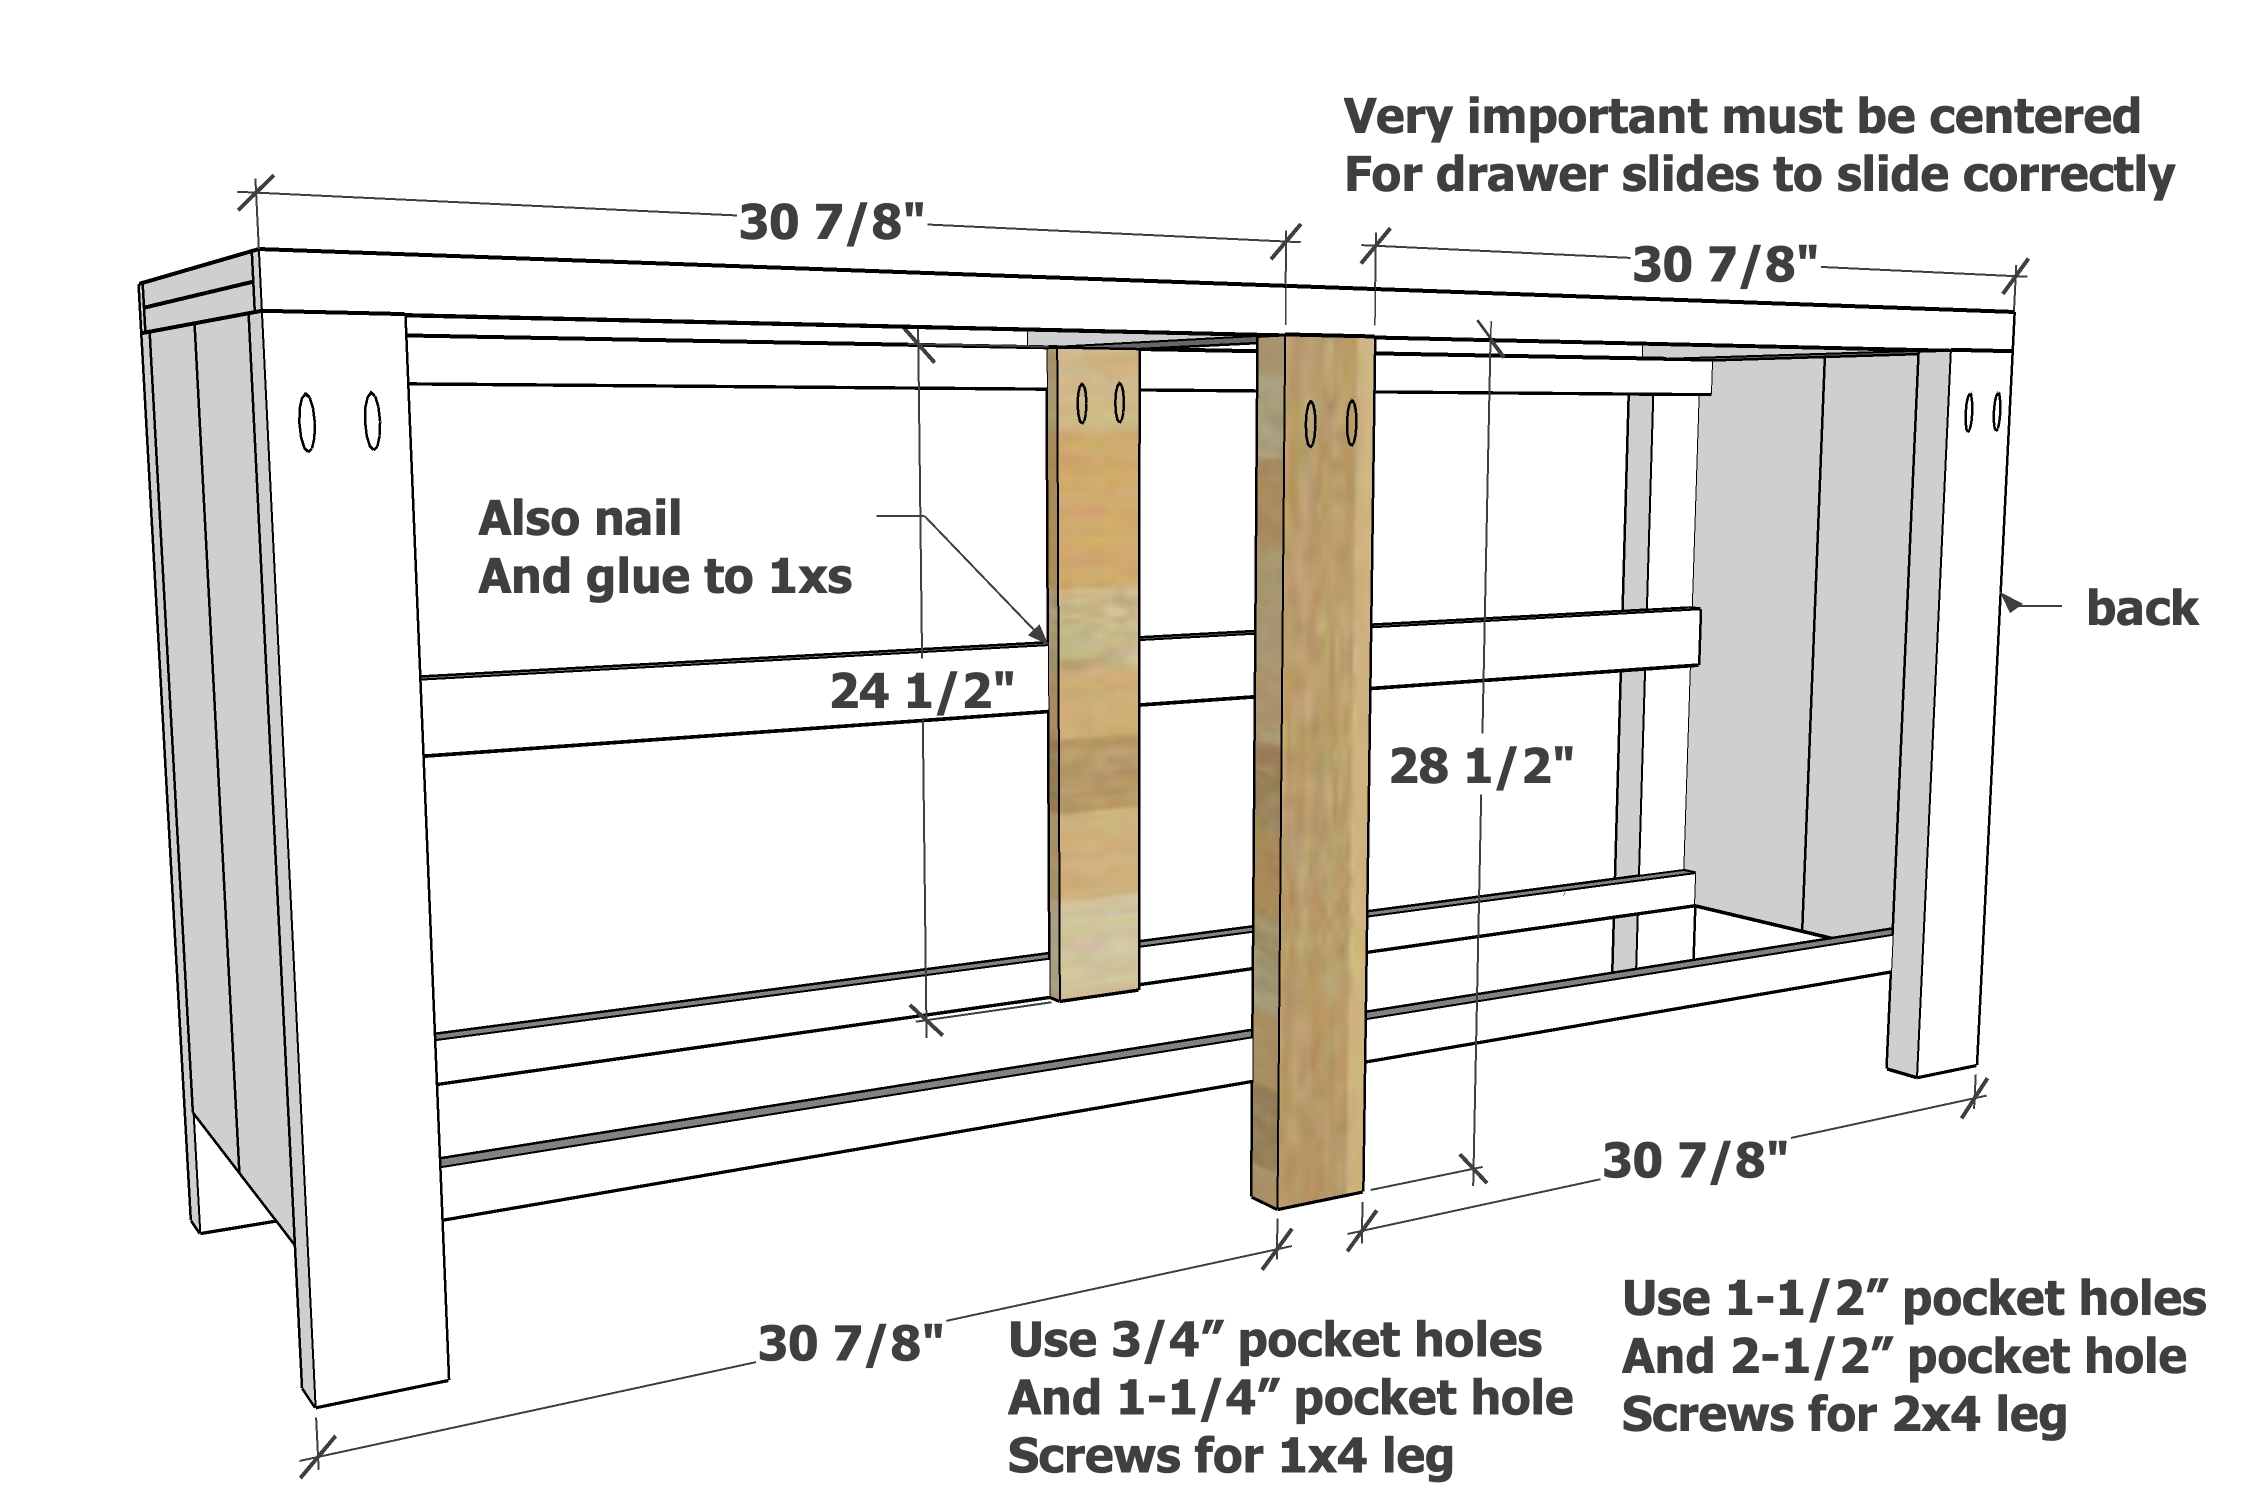
- 5 - 2x4 @ 28-1/2" - legs
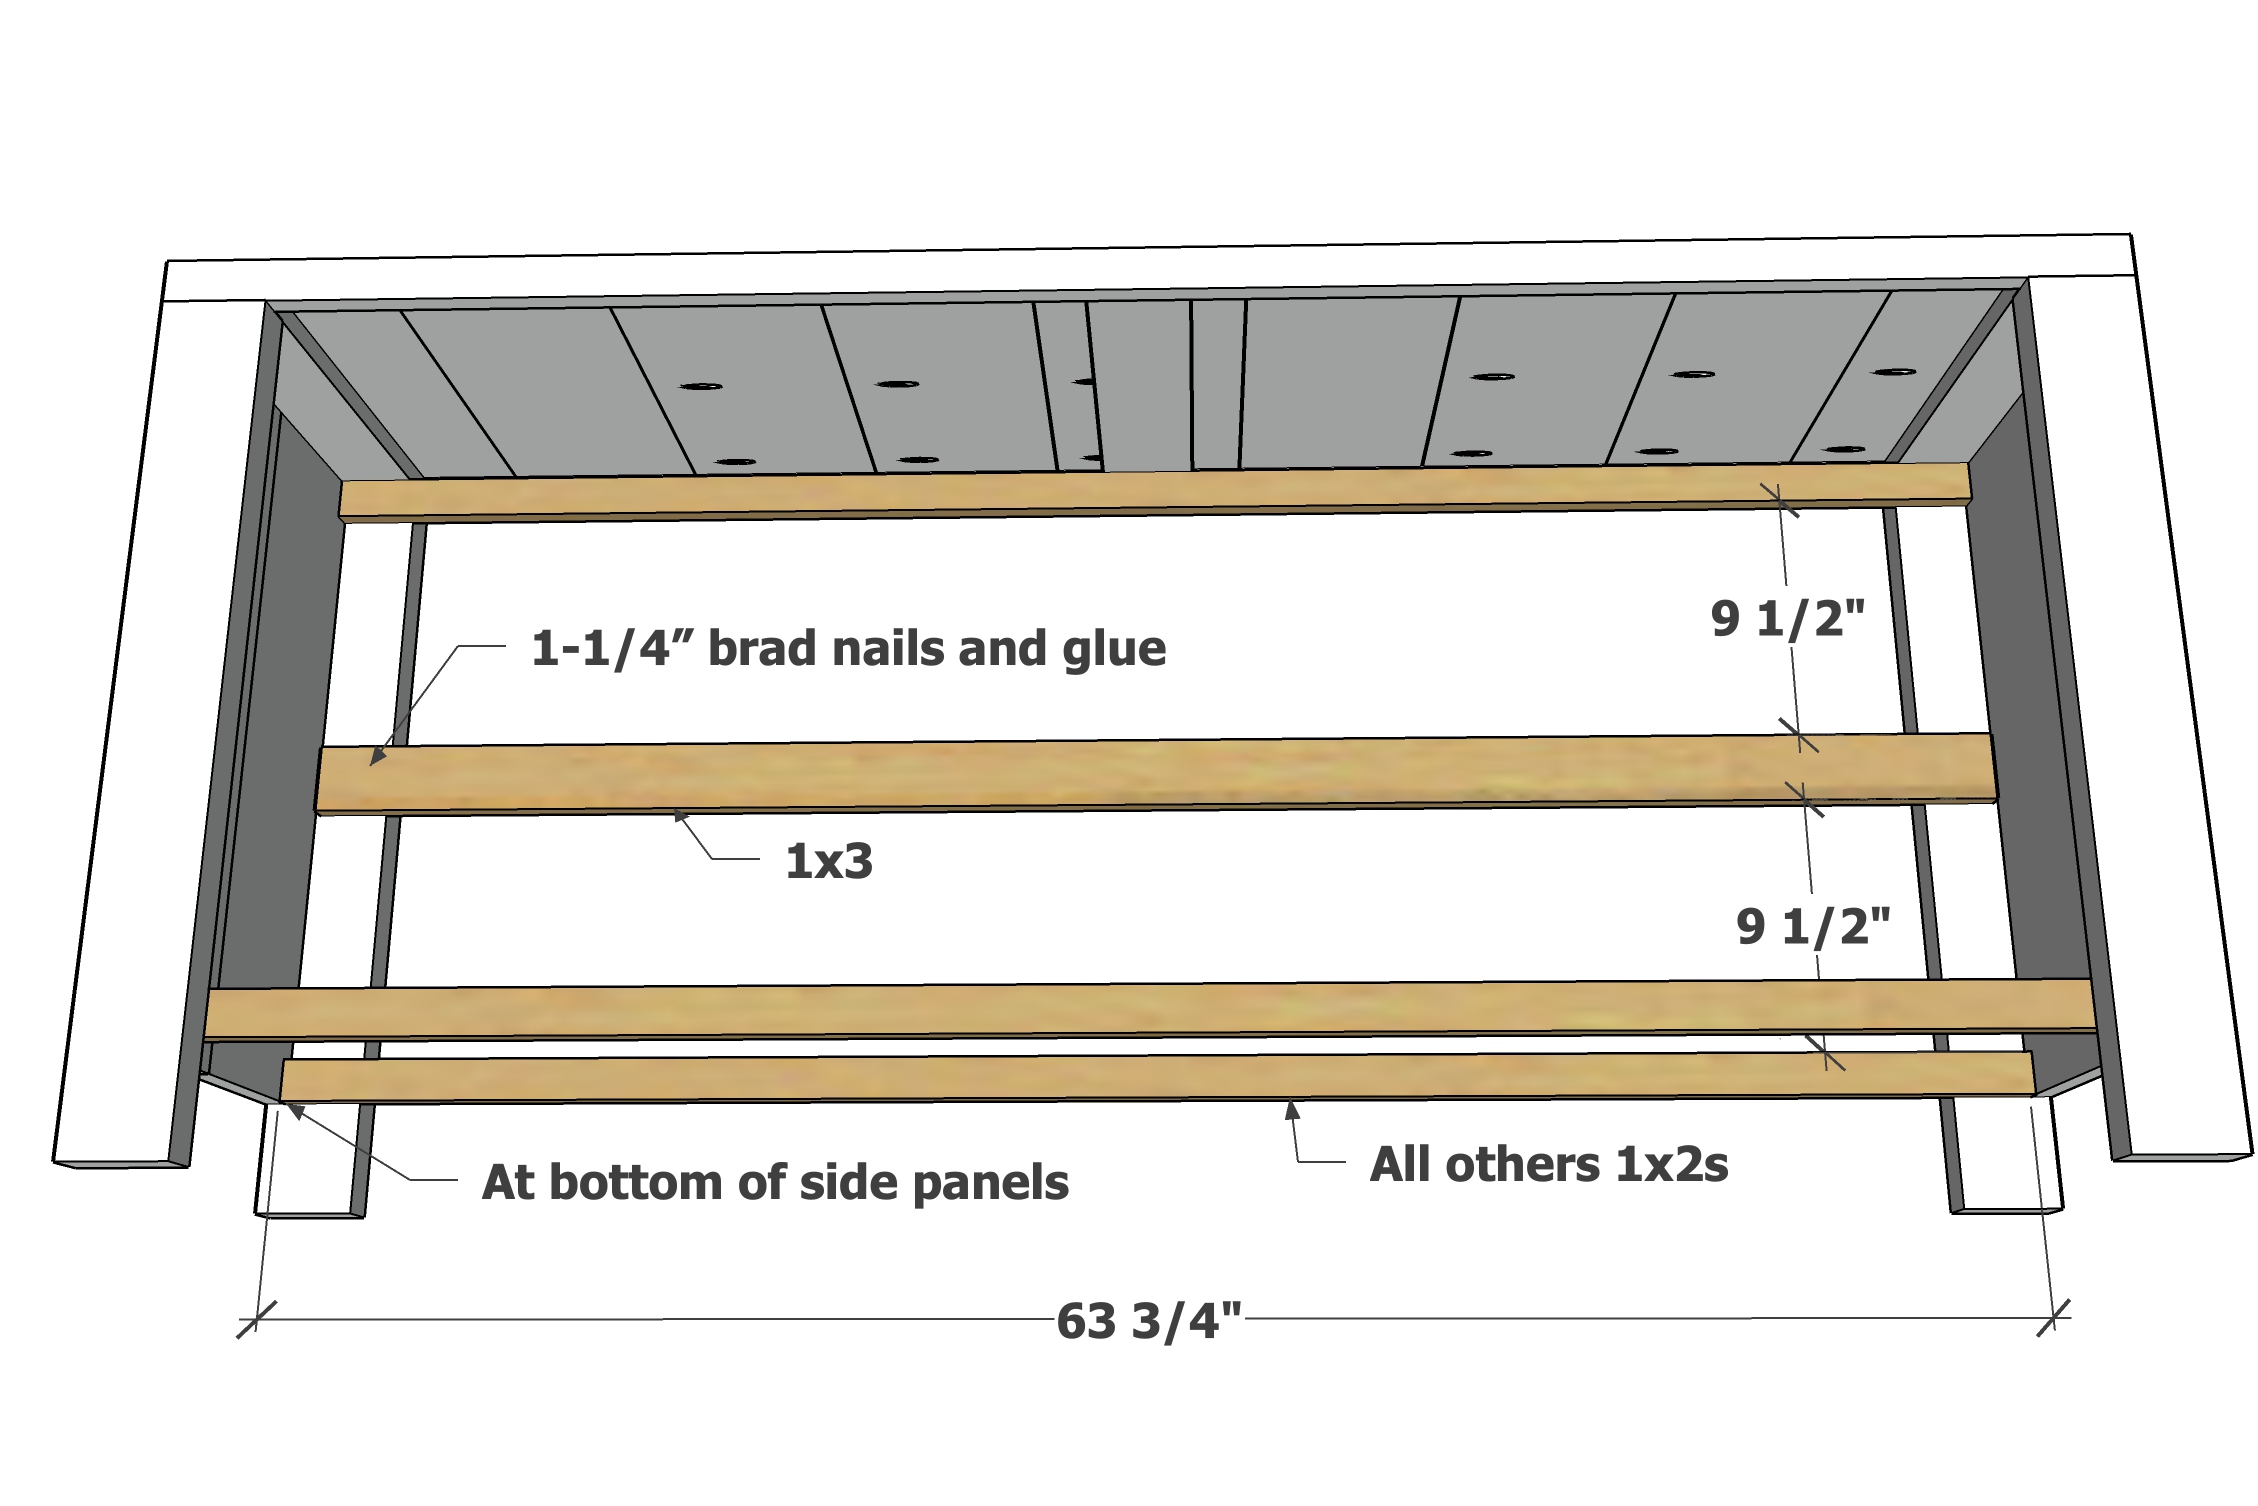
- 3 - 1x2 @ 63-3/4" - frame rails
- 1 - 1x3 @ 63-3/4" - middle frame rail
- 1 - 1x4 @ 24-1/2" - front middle leg
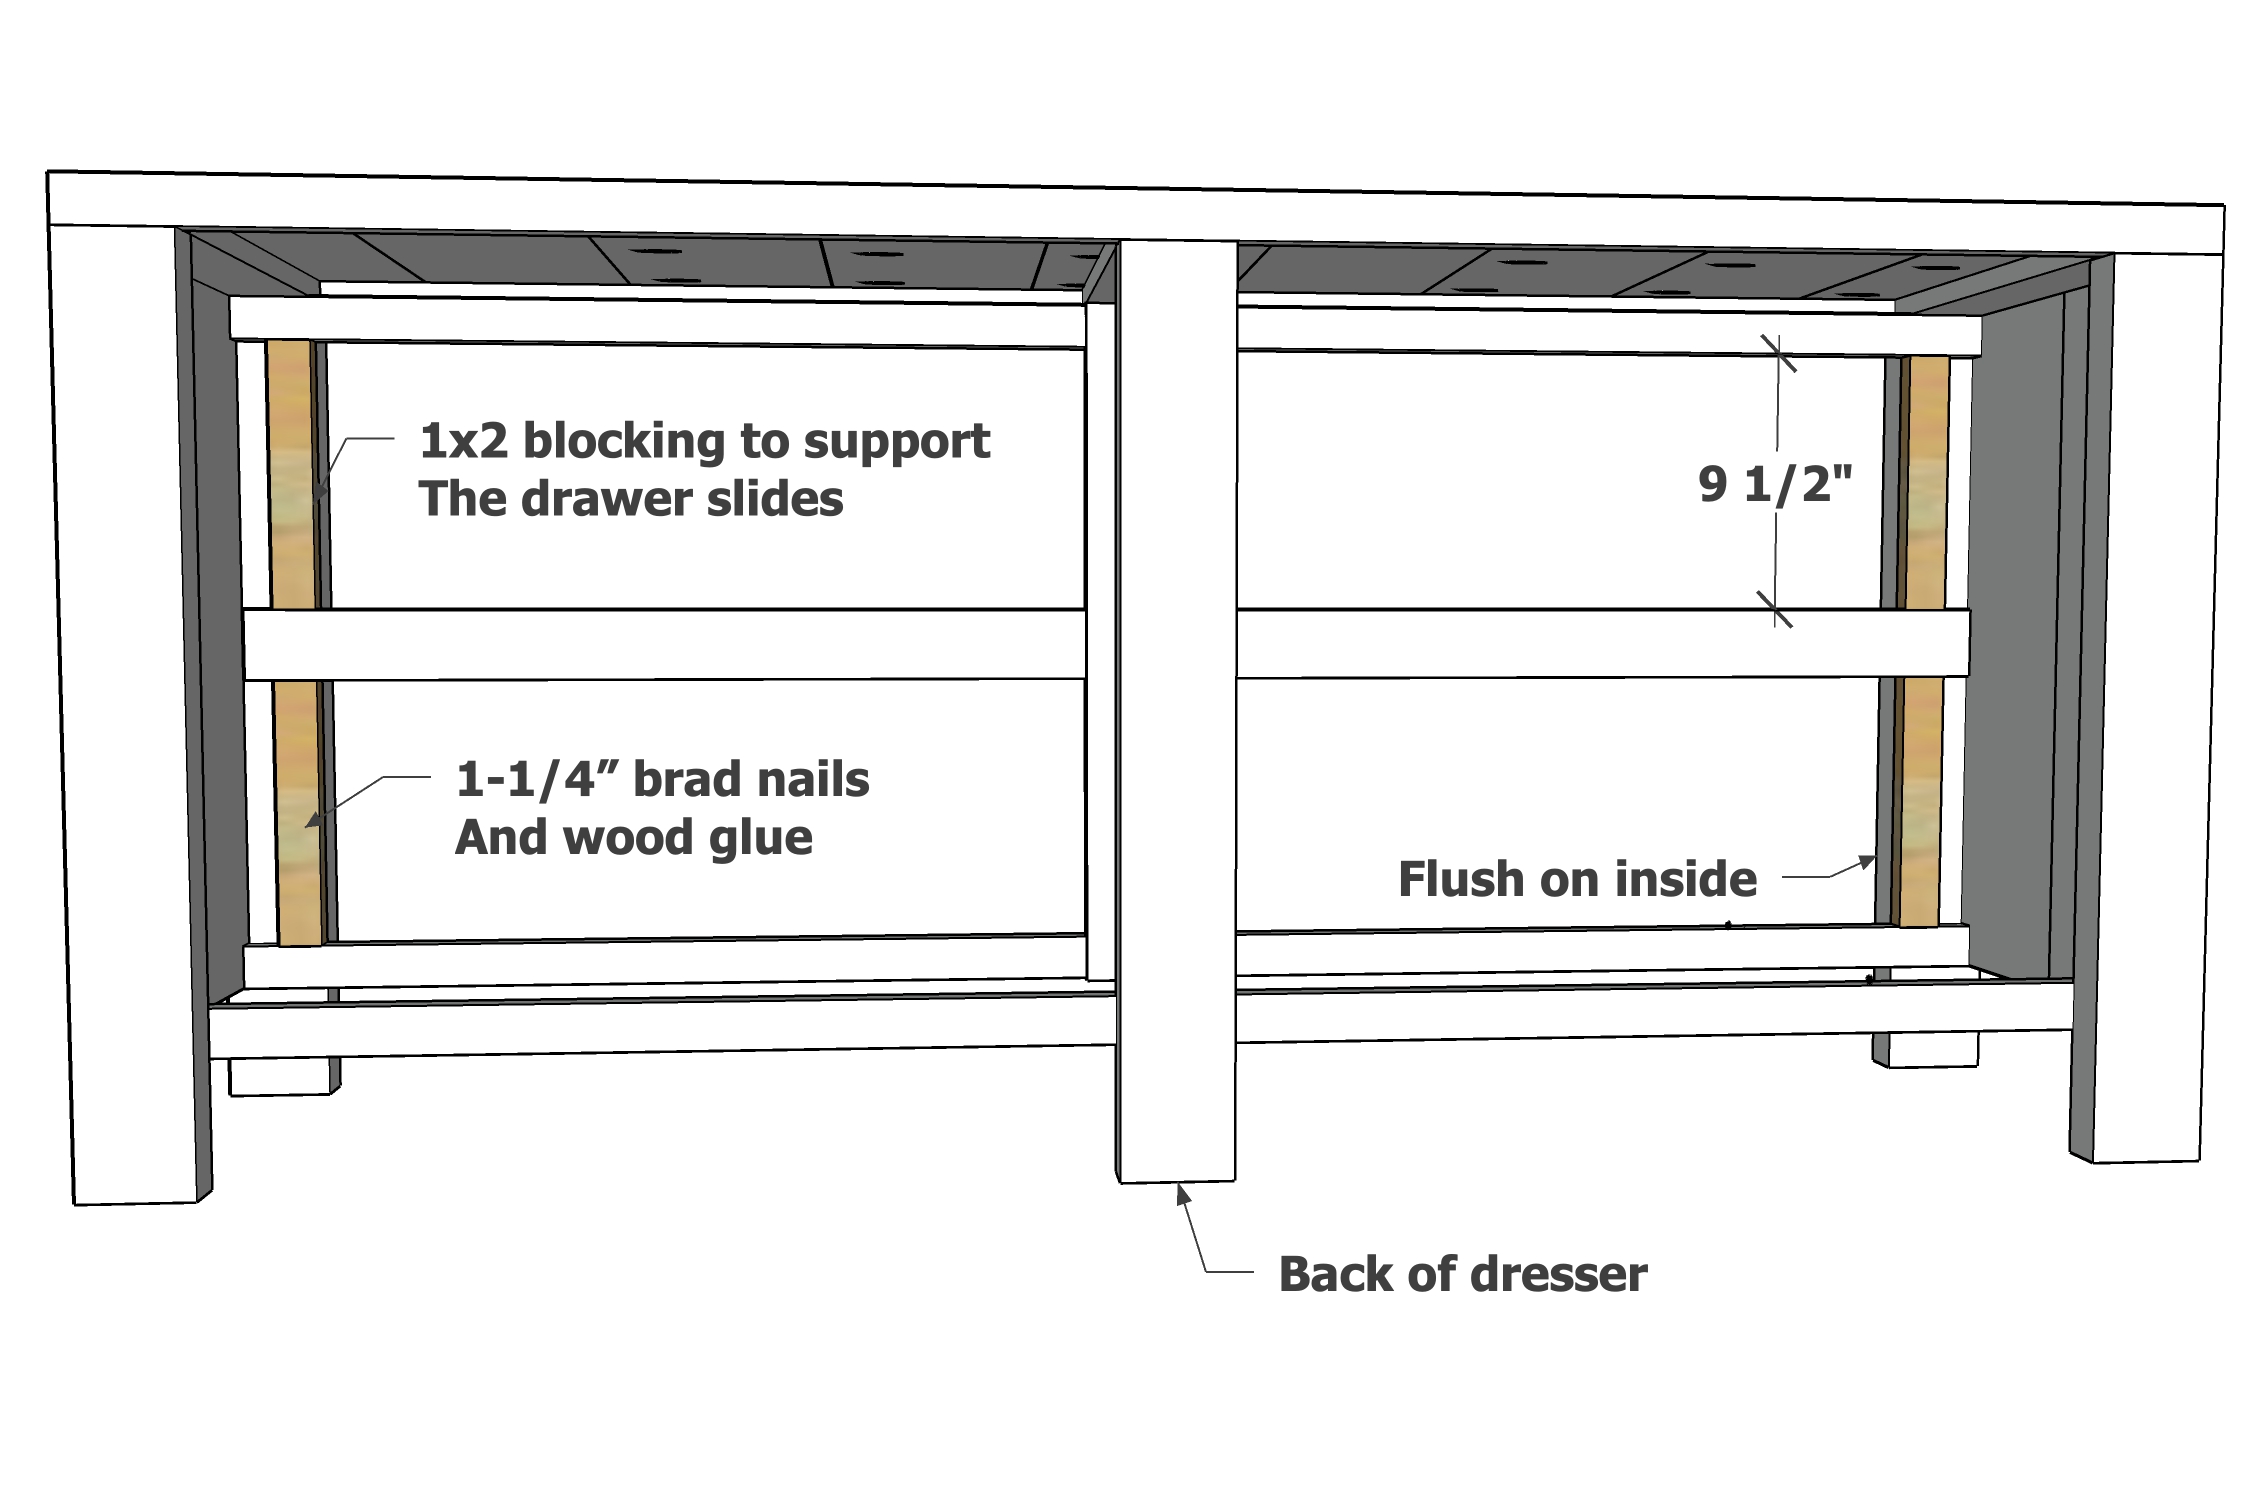
- 4 - 1x2 @ 9-1/2" - back blocking
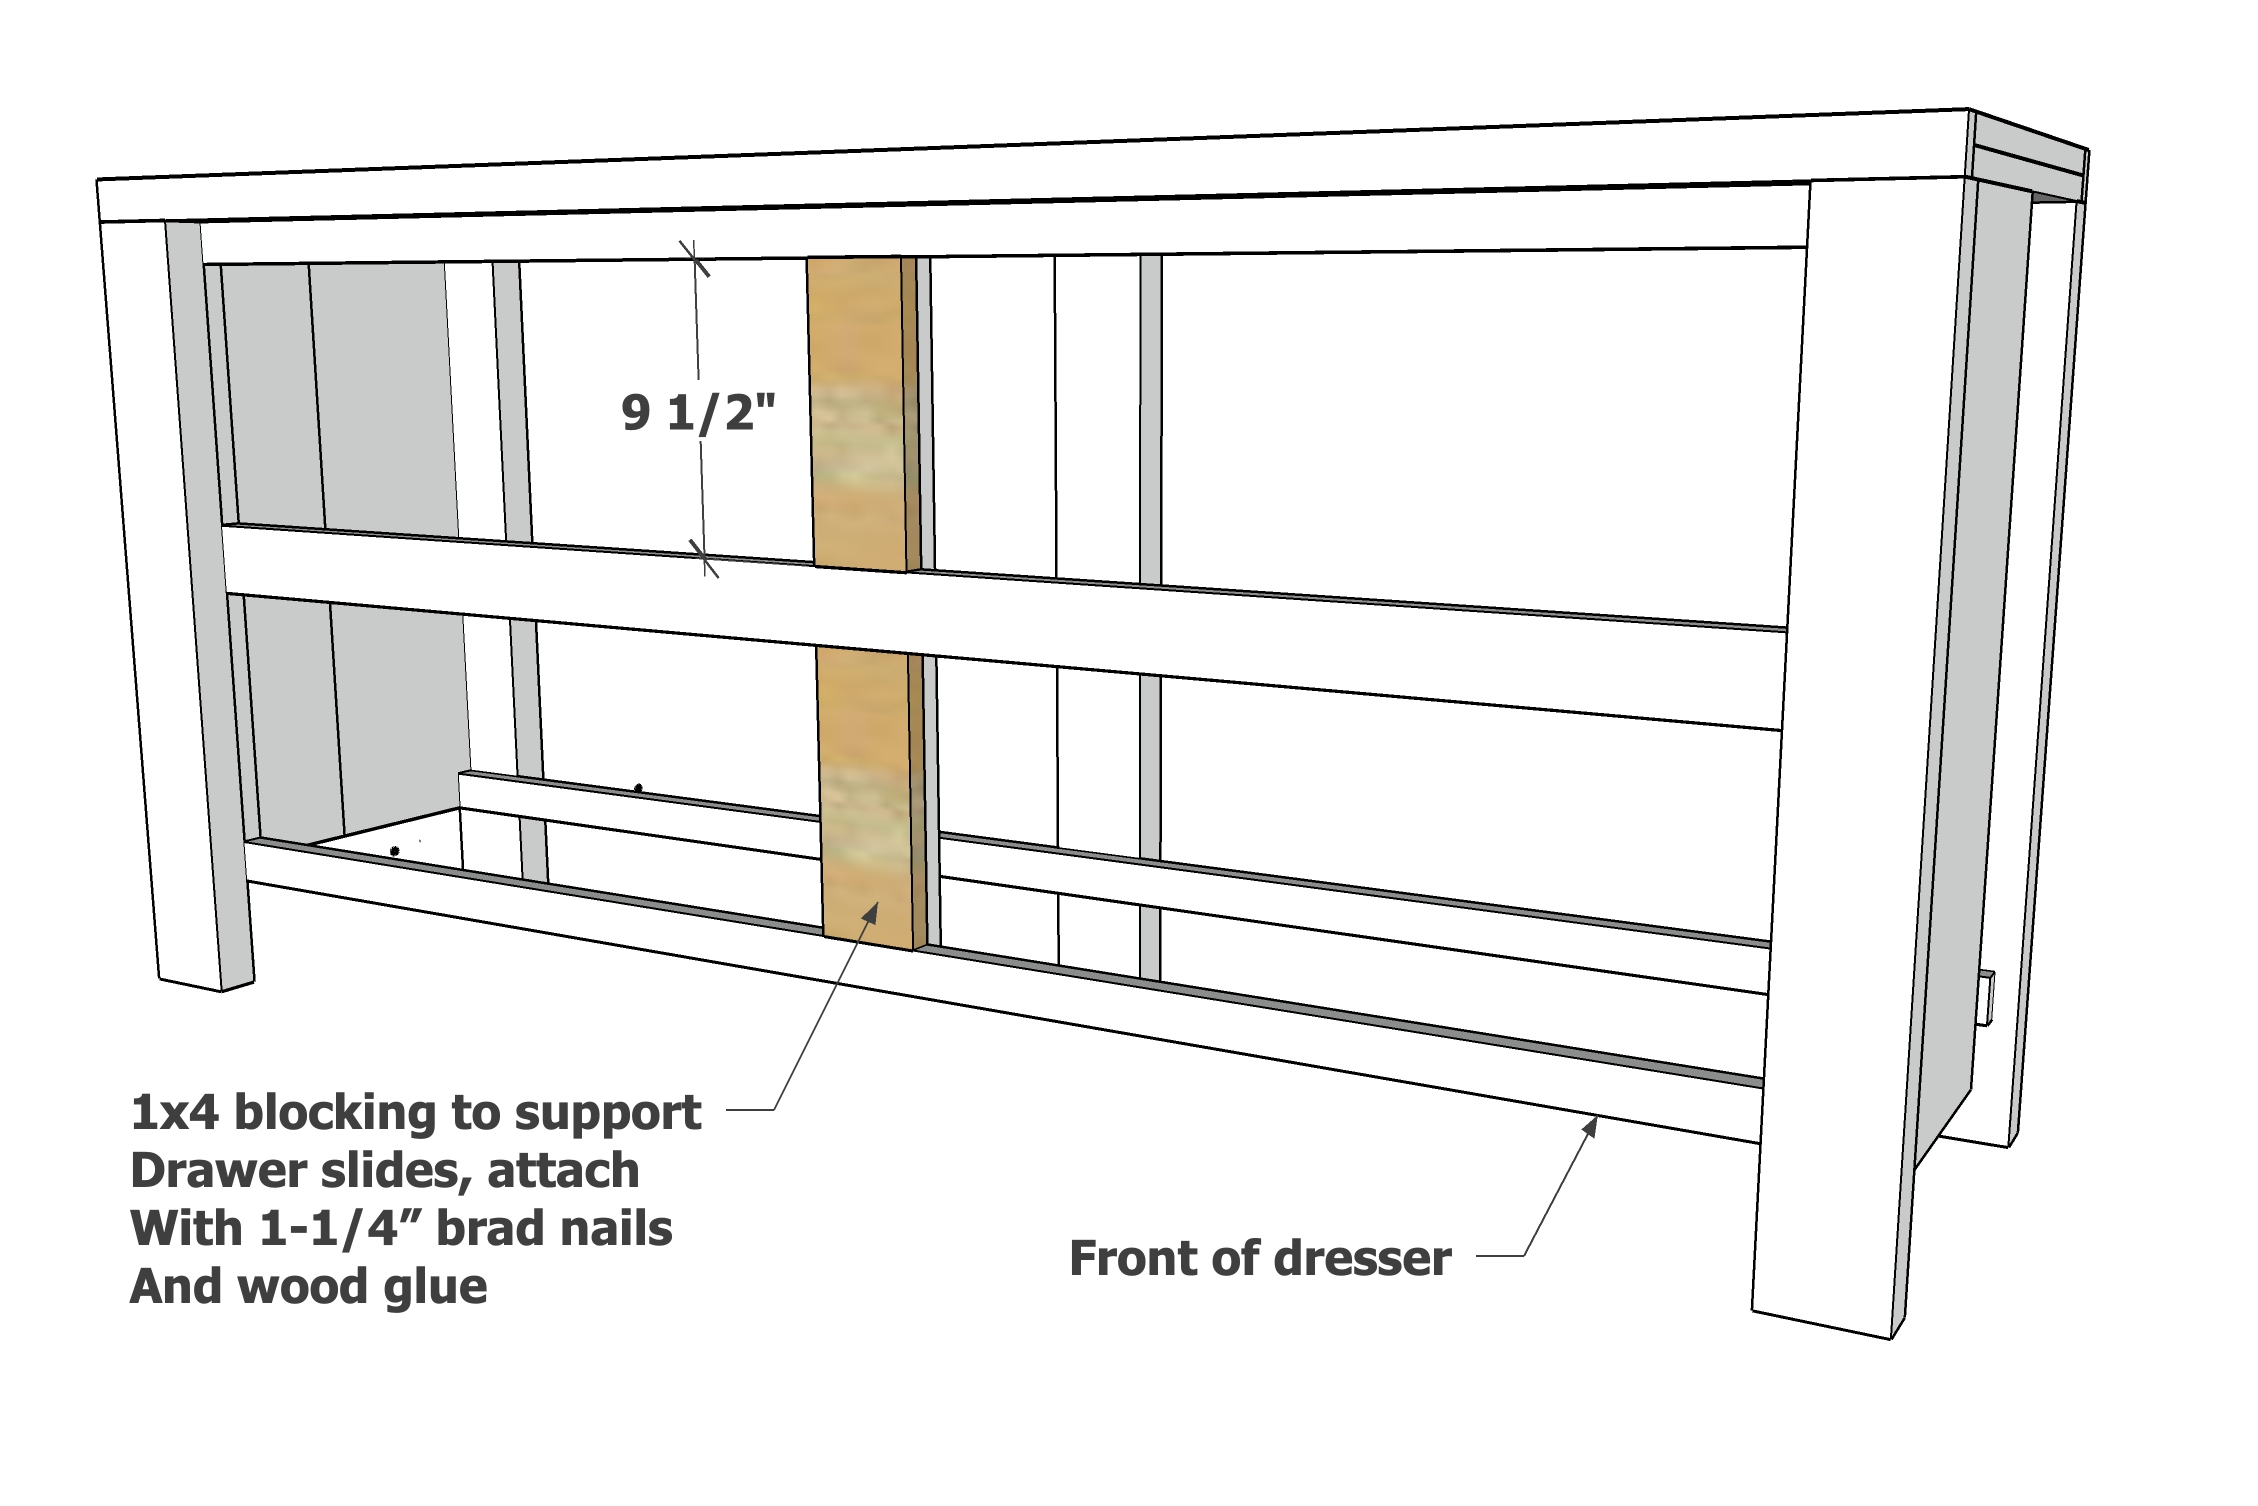
- 2 - 1x4 @ 9-1/2" - front blocking
Drawers
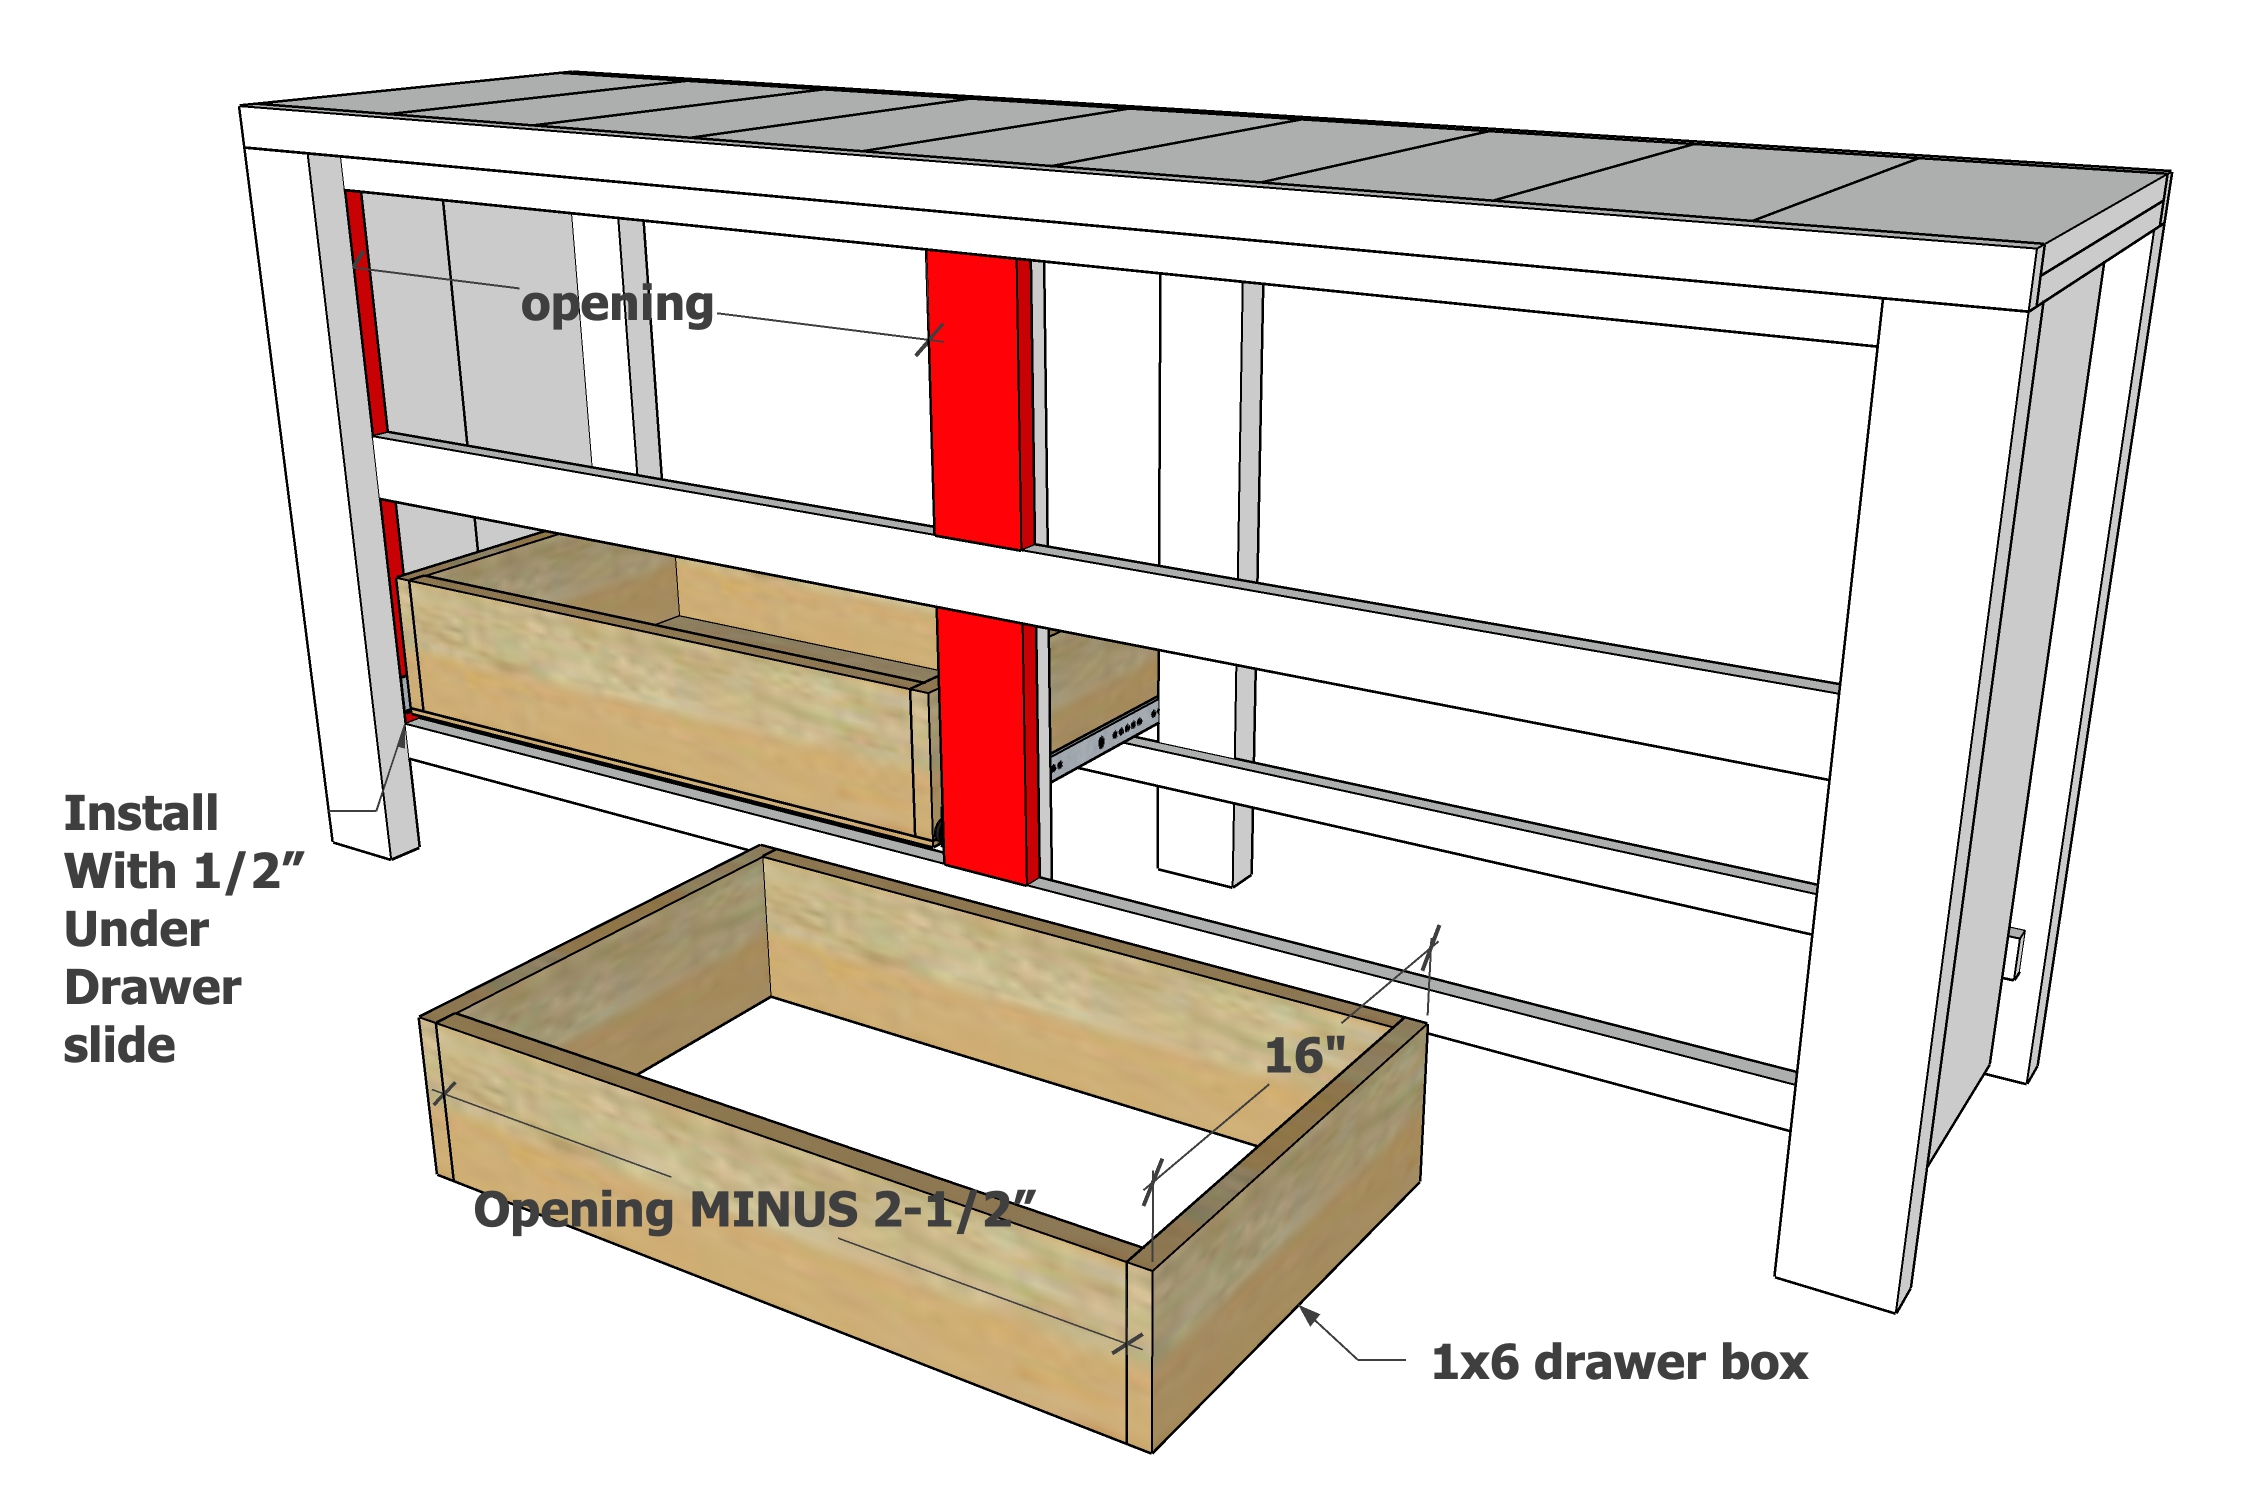
- 8 - 1x6 @ 16" - drawer sides
- 8 - 1x6 @ about 28-3/8" - drawer front and back
- 4 - 1/4" plywood @ 16" x about 29-7/8" - drawer bottoms
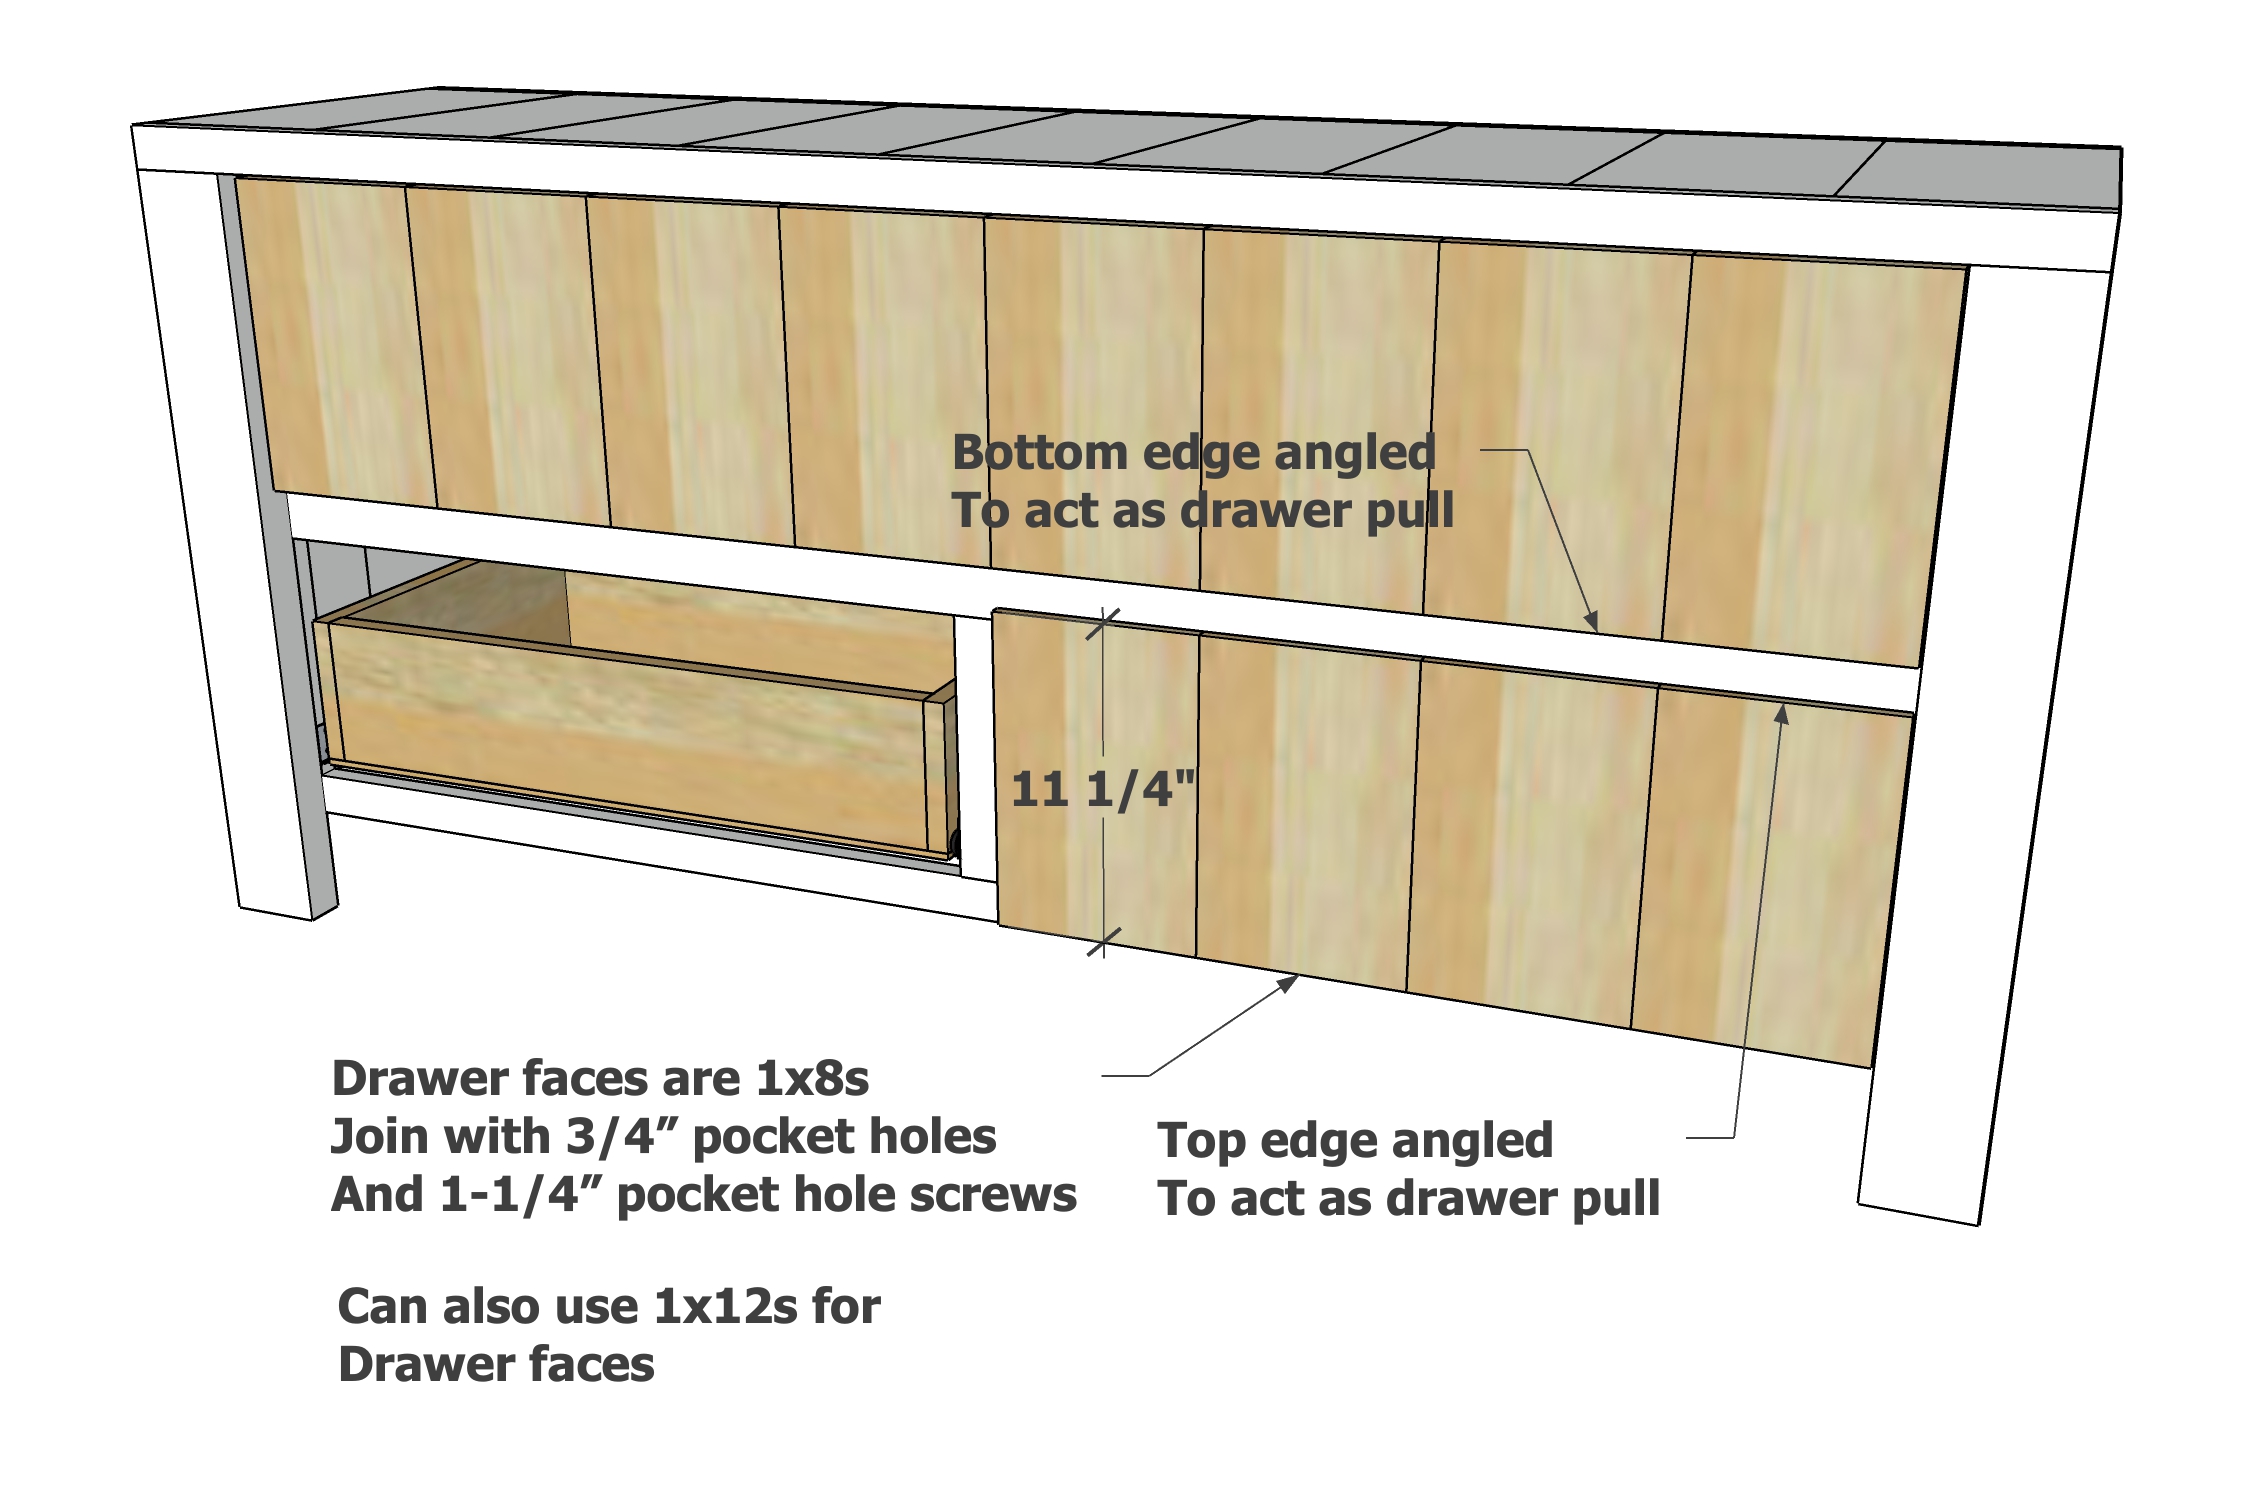
- 16 - 1x8 @ 11-1/4" - drawer faces
Instructions
Step 1
Step 2
Step 3
Step 4
Step 5
Sides
Set pocket hole jig up for 1-1/2" pocket holes.
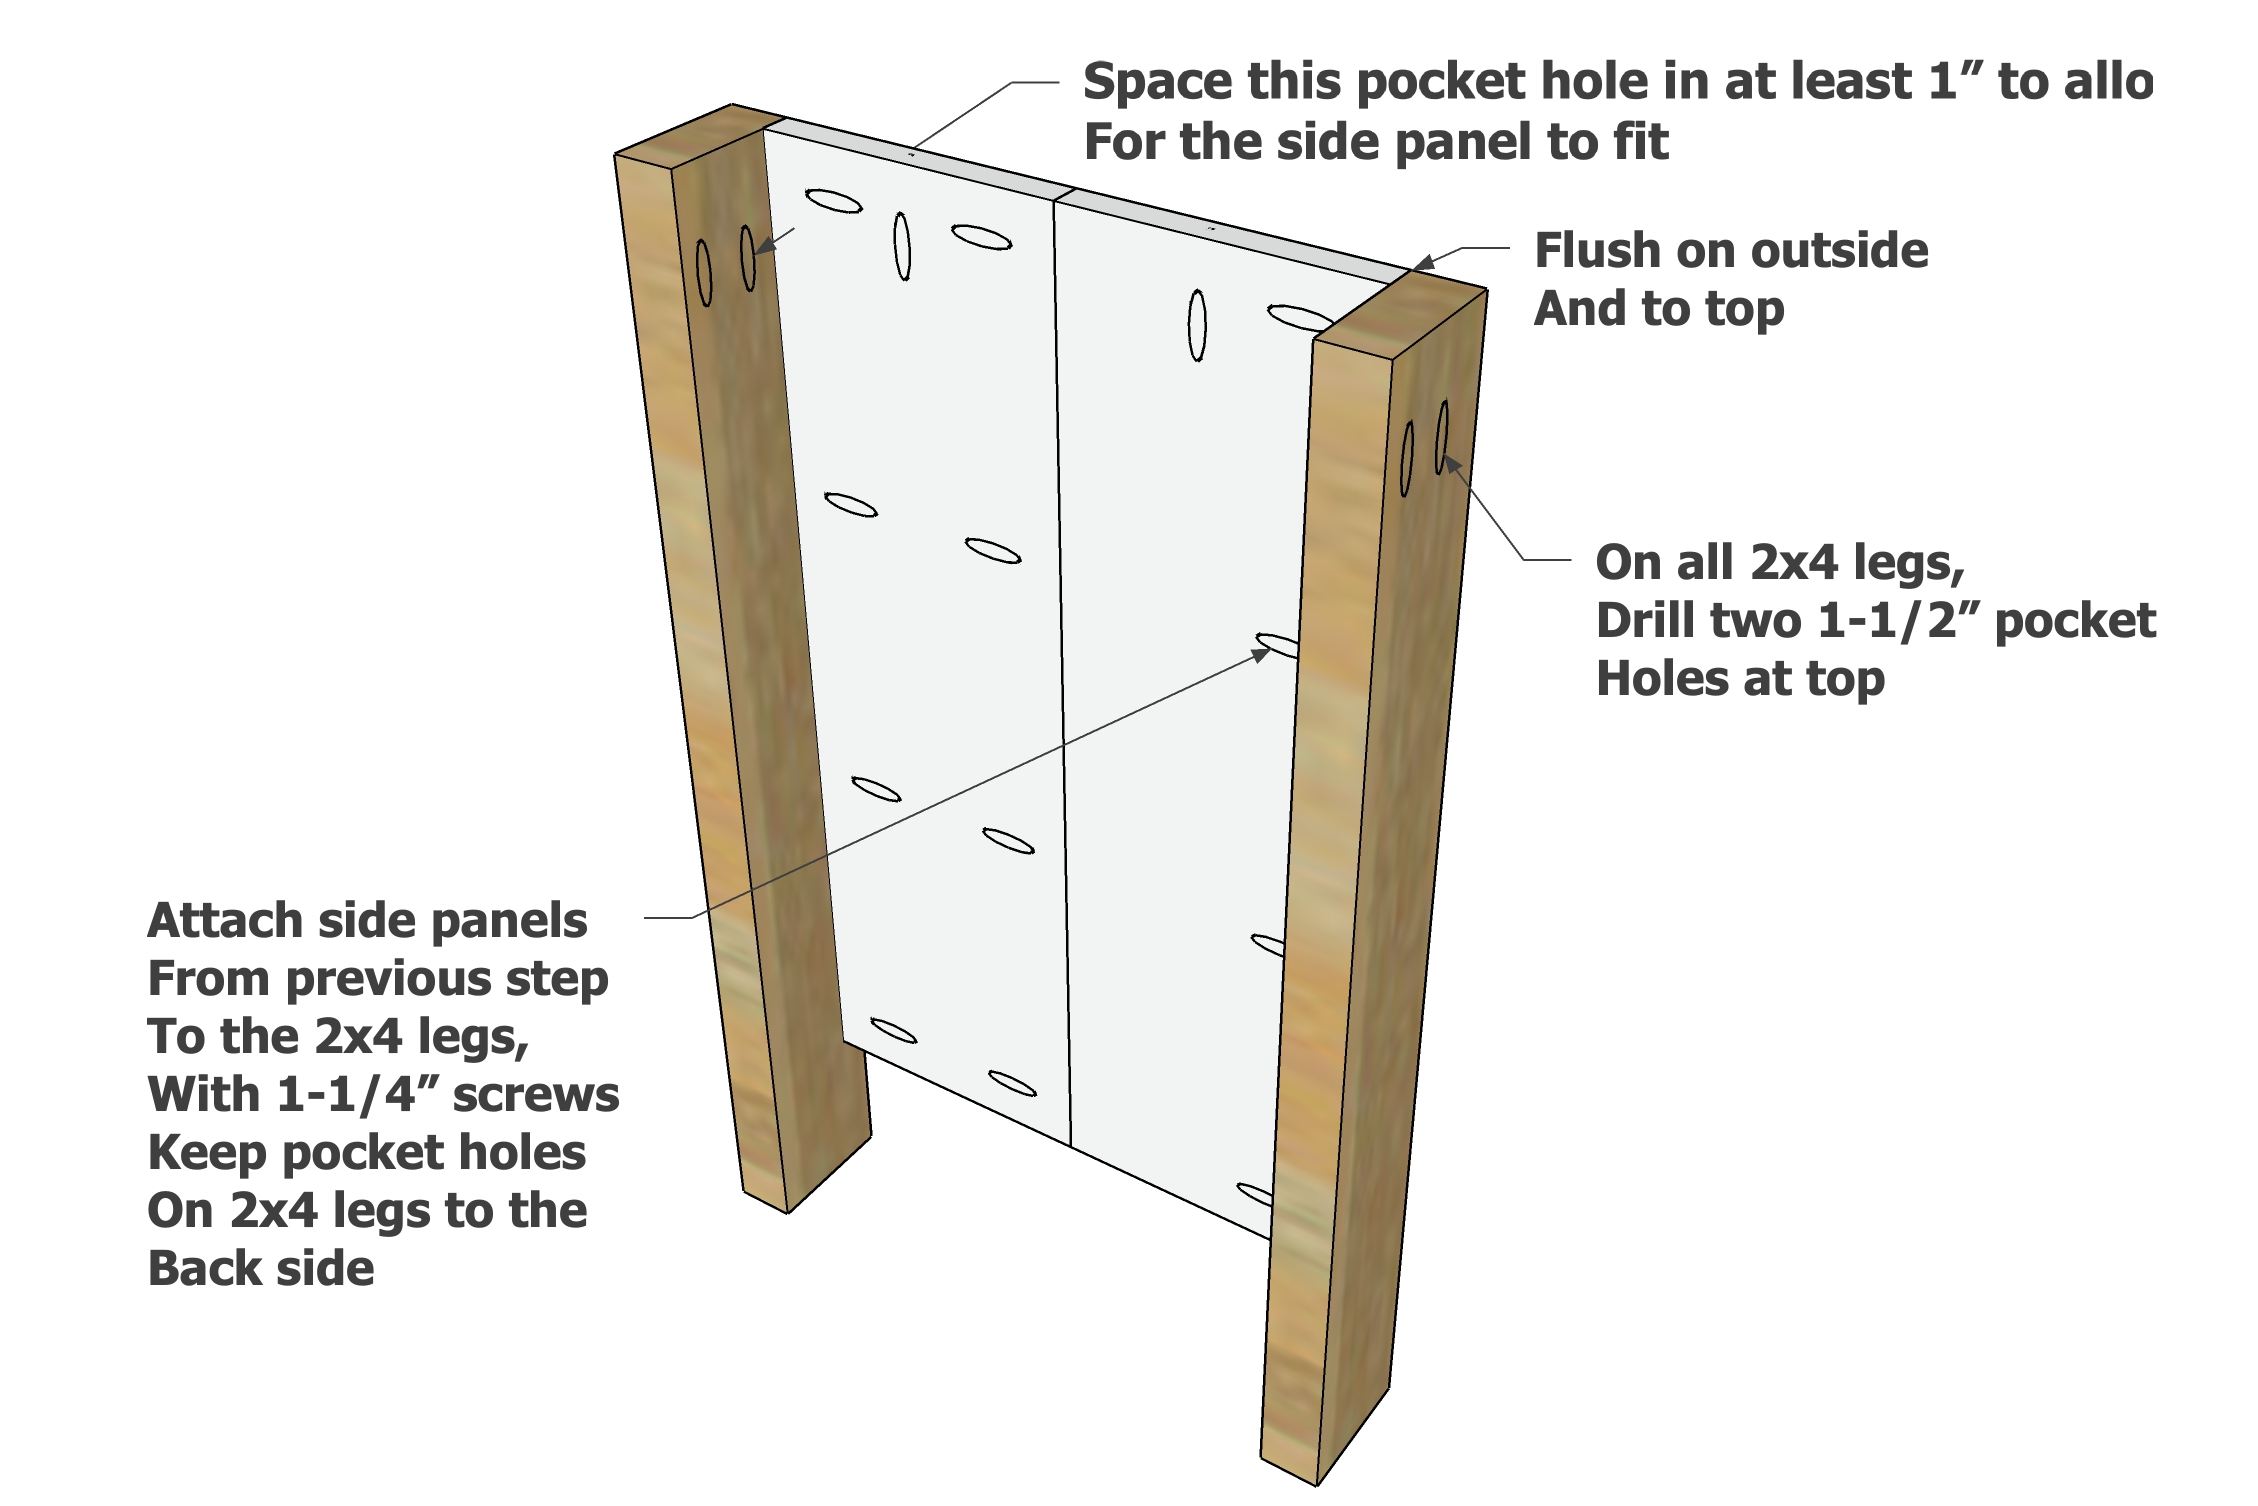
Drill two 1-1/2" pocket holes on tops of the legs. Keep pocket hole held in 1" on the inside leg, so it is not covered up by the 1x8 side panel.
Now attach the 1x8 side panels to the legs with 1-1/4" pocket hole screws.
The two leg sets are built in mirror, with the pocket holes in the legs facing backward, and the pocket holes in the center panel hidden to the inside.
Step 6
Step 7
Inner Framing Rails
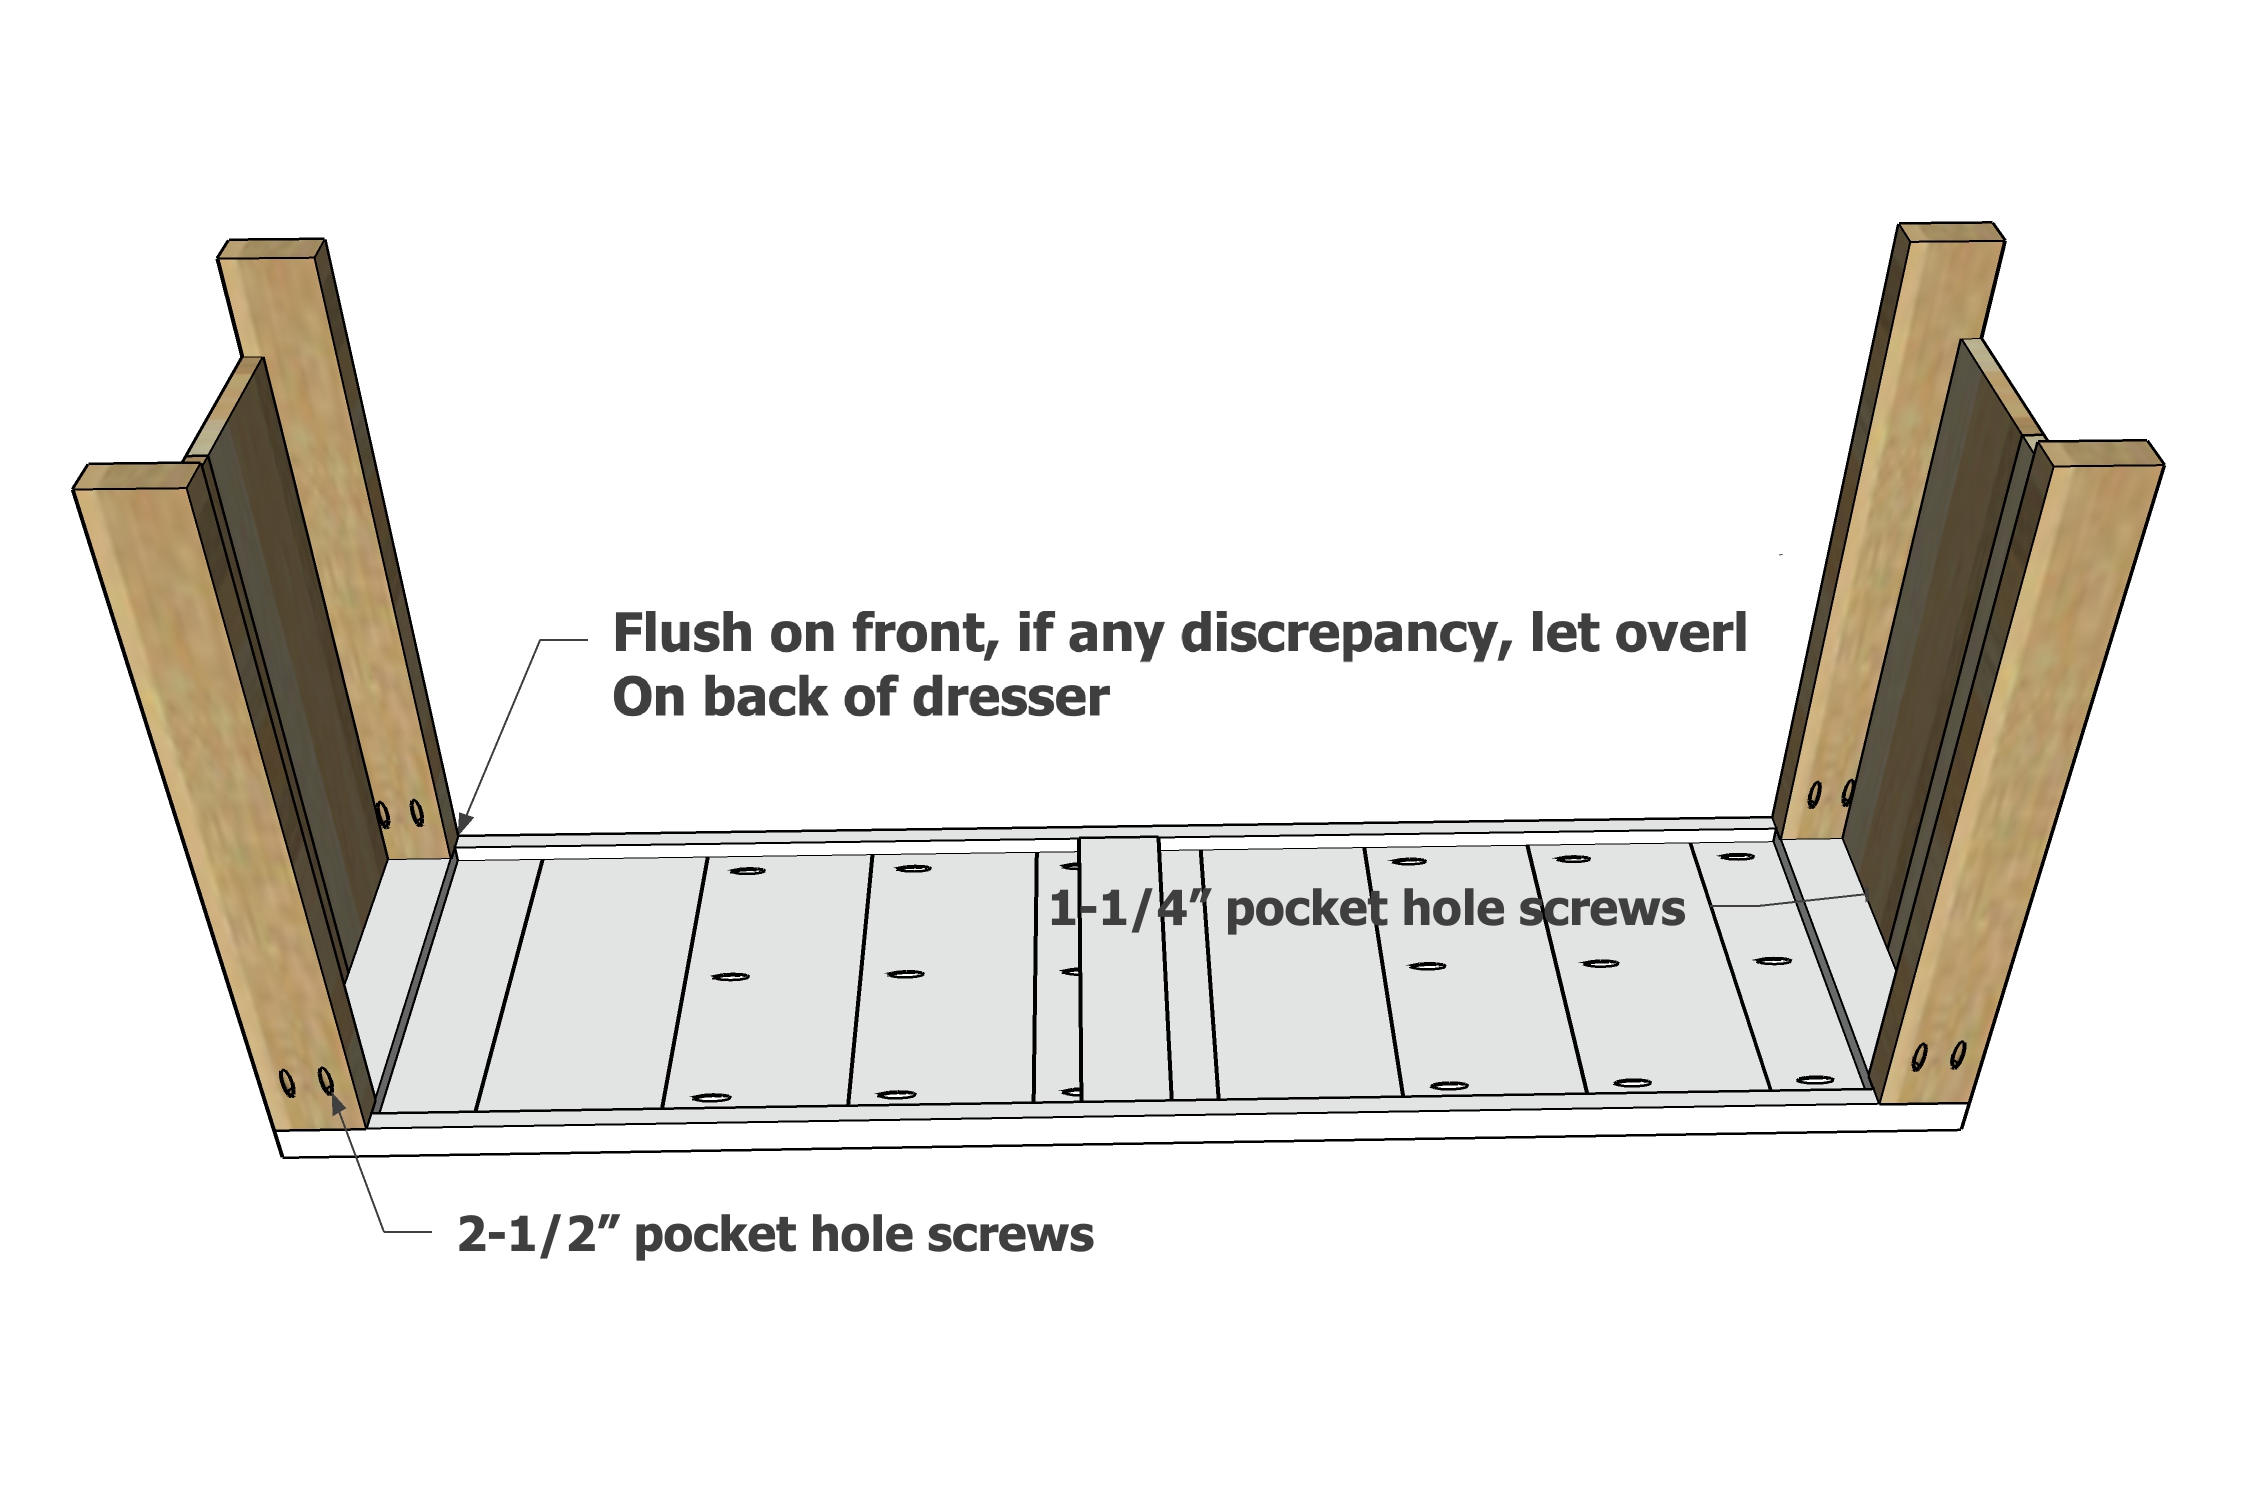
Adjust the project for square by taking opposite diagonals - before this step, the legs have to be square (not a parallelogram or trapazoid) to the top.
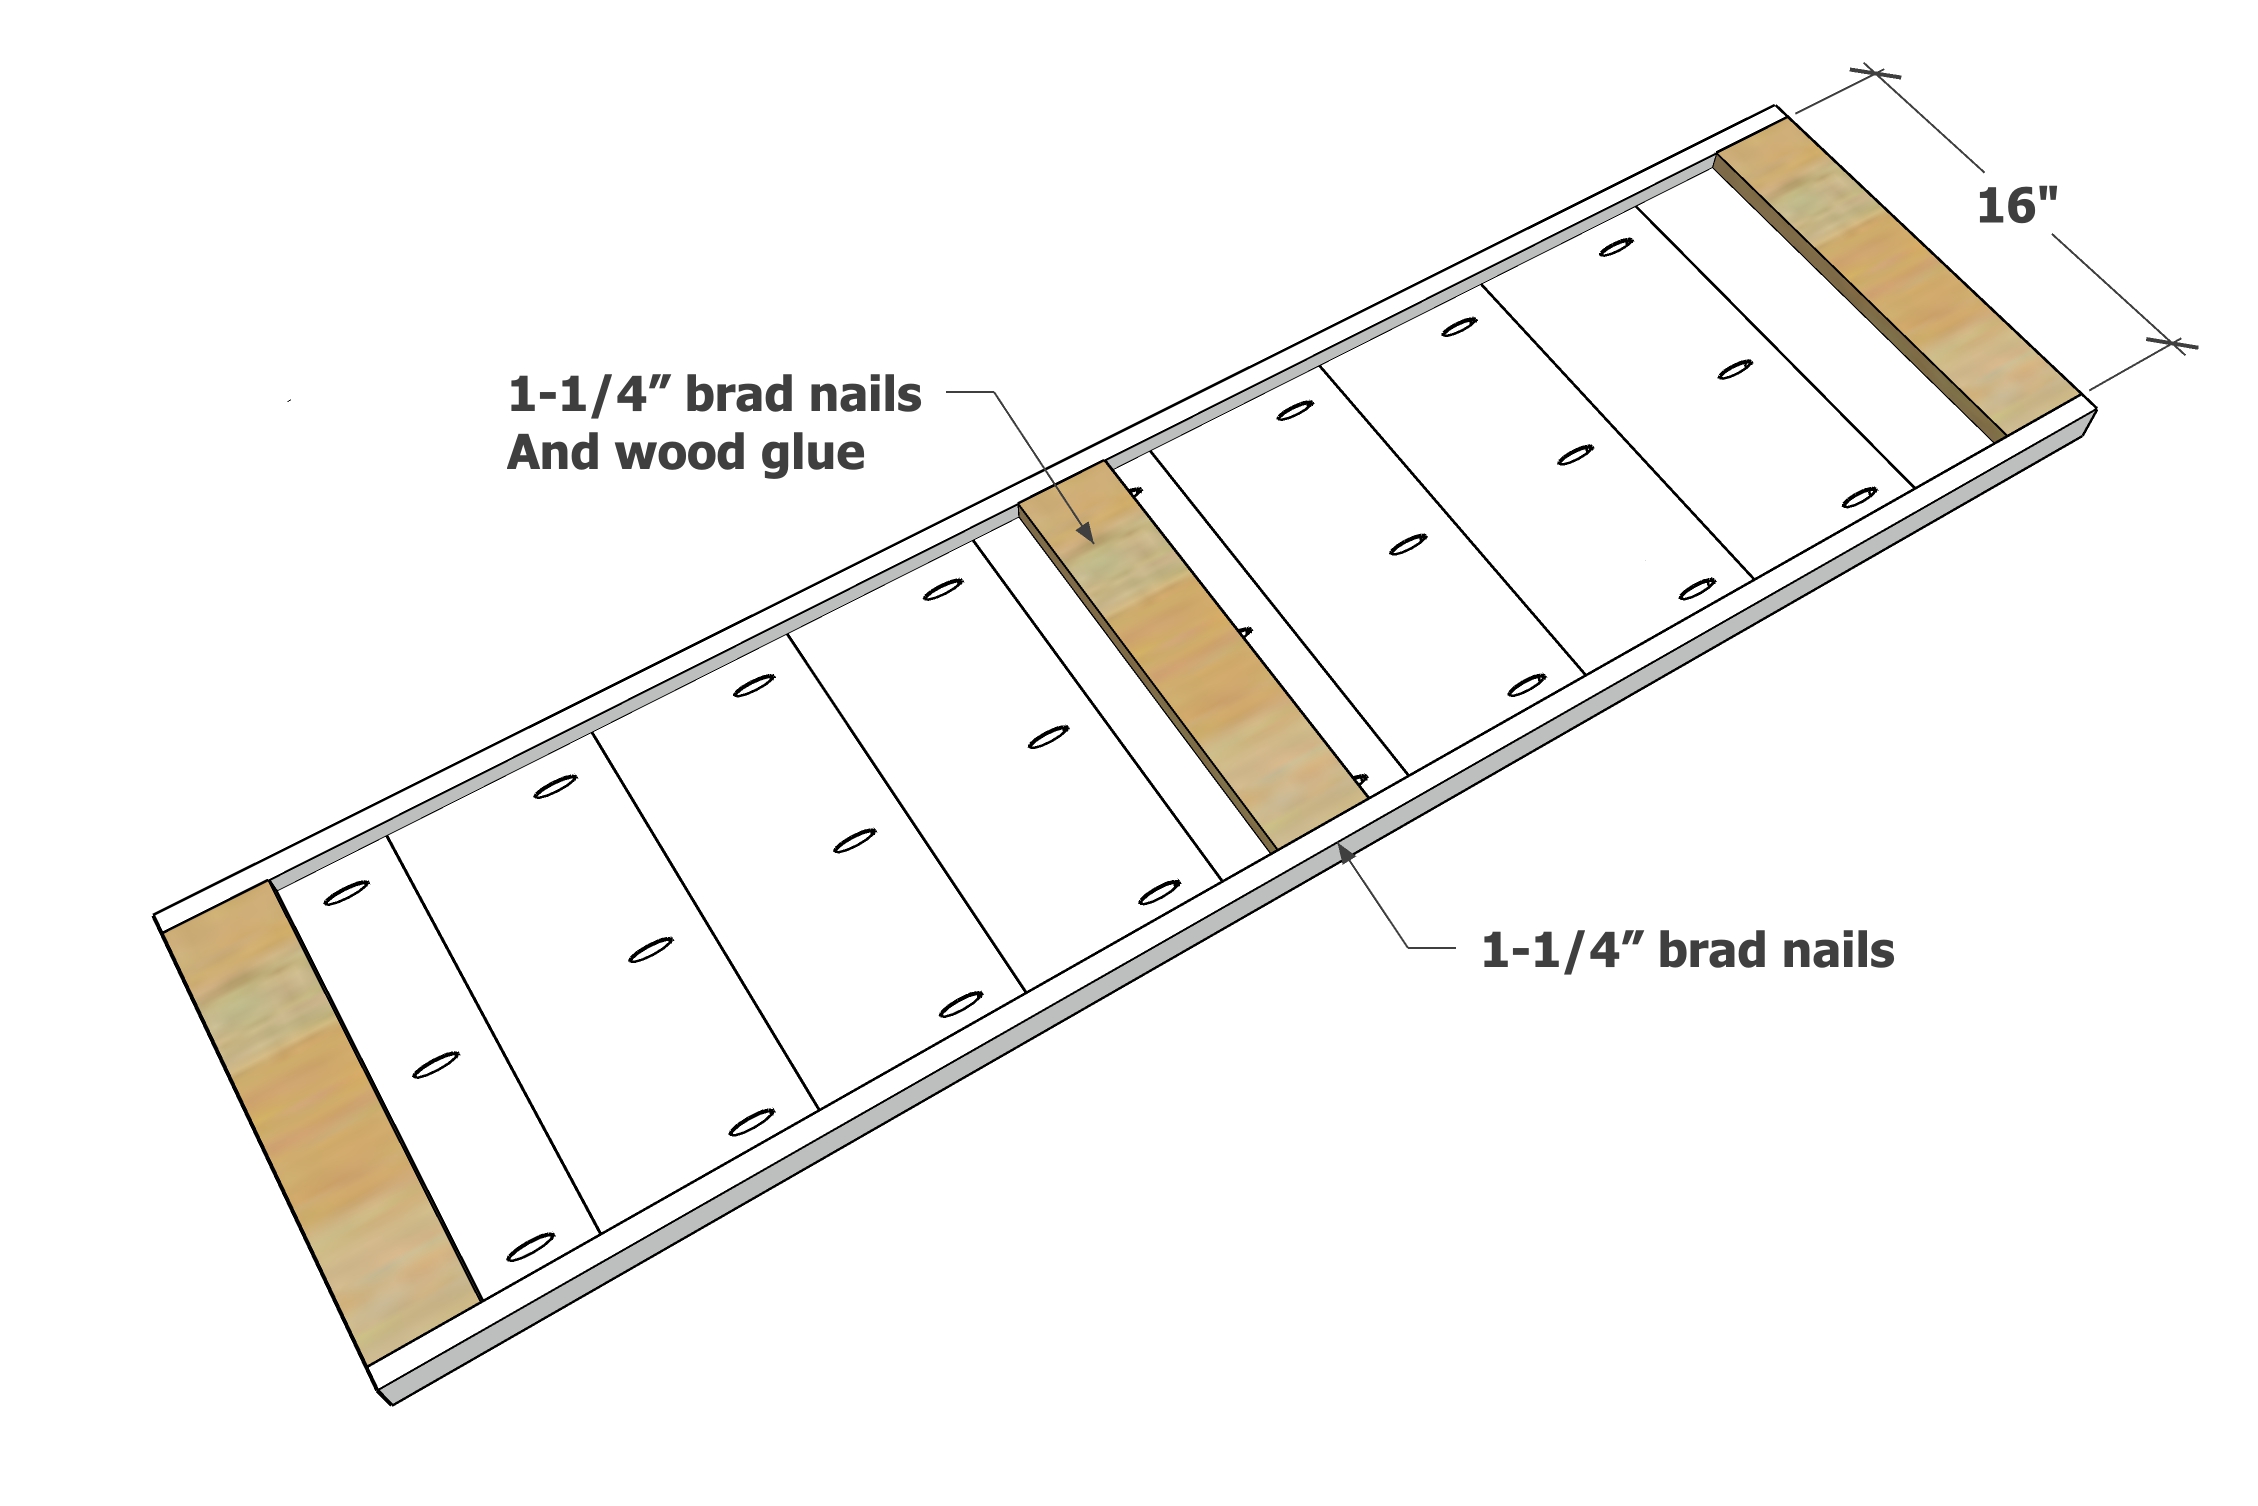
Attach the inner framing pieces to the 2x4 legs with glue and 1-1/4" brad nails.
Maintain distances in between and double check for square.
Step 8
Step 9
Step 10
Step 11
Drawer Boxes
Drawer sides: 16" long
Drawer front and back: Measure the opening width (distance between the red boards in the diagram) and subtract 2-1/2" - should be about 28-3/8". Measure each opening individually. Cut the drawer front and backs.
Drawer Bottom: 16" x opening MINUS 1"
Cut the pieces and build the drawer boxes. You can use pocket holes or 1-1/4" brad nails. Attach bottom with 5/8" brad nails and glue.
Install the drawer slides, so the front of the drawer slide is flush to the front of the "red" blocking boards in the diagram. I installed my slides with about 1/2" gap under the slide, to make sure the drawer doesn't rub on the framing pieces.
Please watch the nightstand video here as the process is almost identical.
Step 12
Drawer Faces
Cut the drawer faces and join together with pocket holes.
Then carefully attach to the drawer boxes with 1-1/4" brad nails.
Further secure from inside with 1-1/4" screws (I used pocket hole screws).
This step is not easy to get perfect. Another person holding the drawer faces will help.
OPTION: Use 1x12s for the drawer faces instead of the 1x8s - it will be a different look but will save quite a few steps.
Light sanding with fine sandpaper.
Removed all sanding residue by vacuuming and wiping clean before staining.
Added a clear coat of Polyurethane to protect.
Finished with a light, fine grit sanding.


