photo by Jaime Costiglio
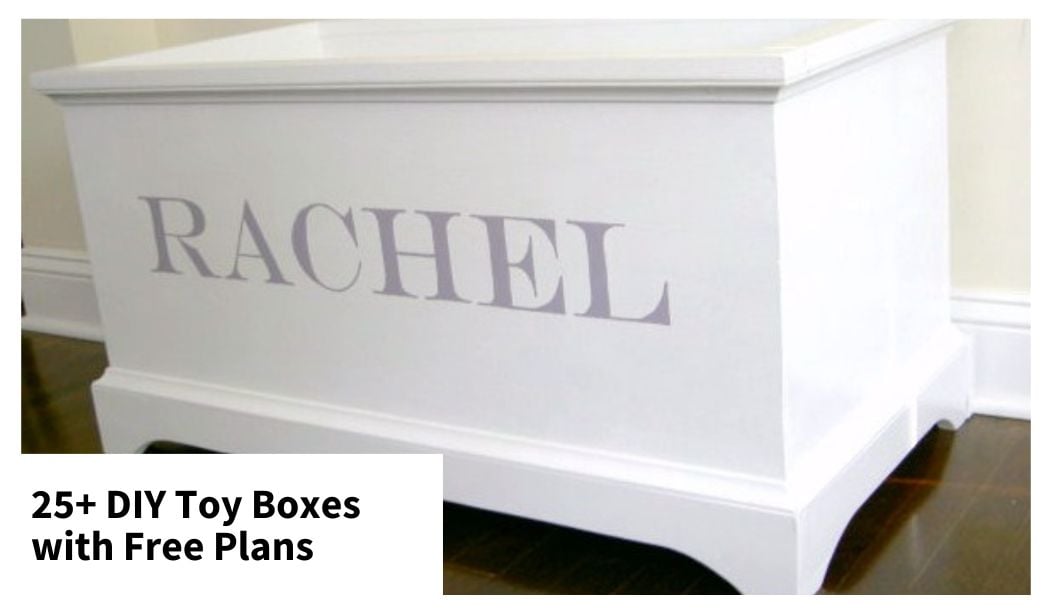
Kids and toys are a part of life. Keeping a neat and tidy house can be difficult with young children who have toys. A well made, sturdy toy box that doesn't collapse or fall apart can be a huge part of your toy storage plan. Here's some things to think about when choosing a toy box.
- Looks great in any room
- Easy to access
- Easy for children to help pick up their own toys
- Add storage
- Quick and easy organization
- Keep a space tidy
Well made, durable toy boxes can be expensive! If you make it yourself, you can save at least half the cost and create a system that will last through childhood.
1. Bucket Rack
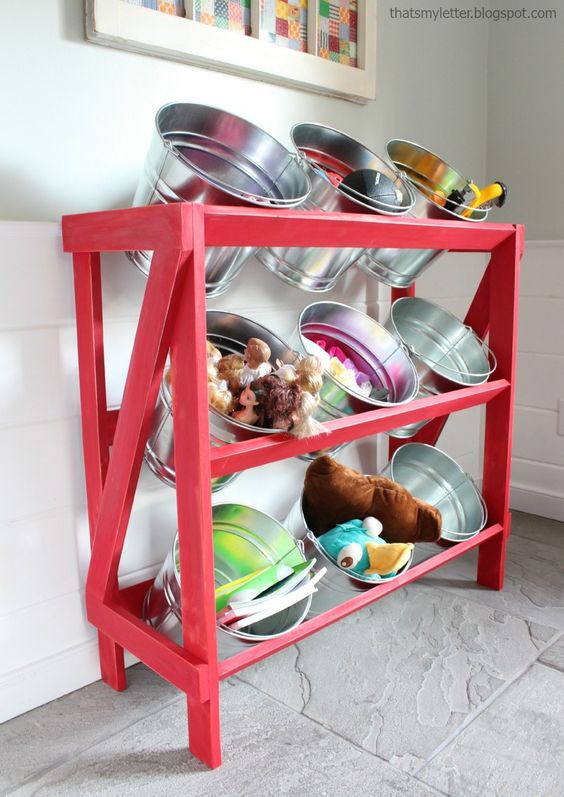
Image Credit: Jaime Costiglio
| Skill Level: | Beginner |
|---|---|
| Tools Needed: | Tape Measure, Miter Saw, Drill or Brad Nailer, Sander, Safety Glasses |
| Materials: | 1x3 Boards, Brad Nails or Self Tapping Screws, Paint, Buckets |
Inspired by general stores a century ago, this bucket rack features an easy to set space for buckets or pails, so they can be removed and used, and replaced. We love this creative storage center for organizing small items and supporting easy clean up!
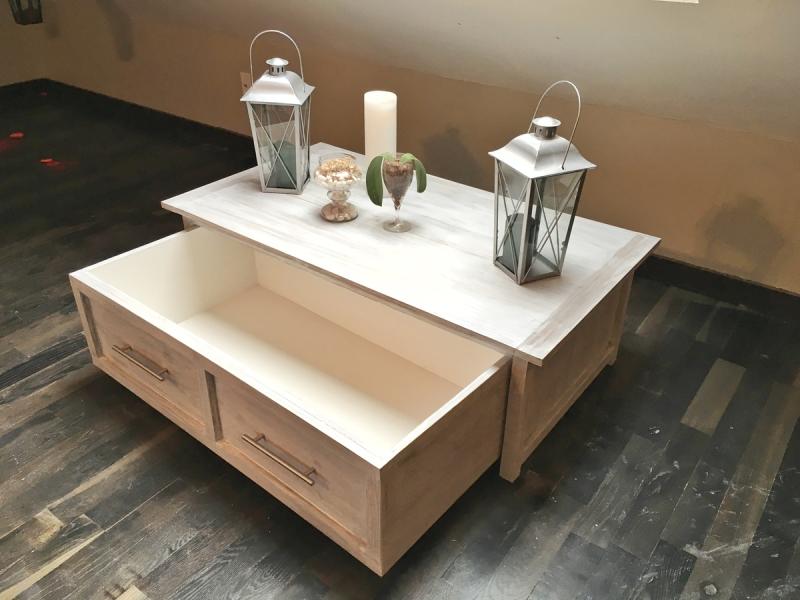
2. Coffee Table with Toy Trundle
Image Credit: Reader submitted photo
| Skill Level: | Intermediate |
|---|---|
| Tools Needed: | Tape Measure, Miter Saw, Drill, Pocket Hole Jig, Sander, Safety Glasses, Brad Nailer |
| Materials: | 1x and 1x boards, plywood, caster wheels, drawer handles |
Hide a toy box right in the middle of your family room or living room! This coffee table with large trundle, pulls out to hold all the toys in seconds. We loved using our for years, it was roomy enough for having bins to organize even more.
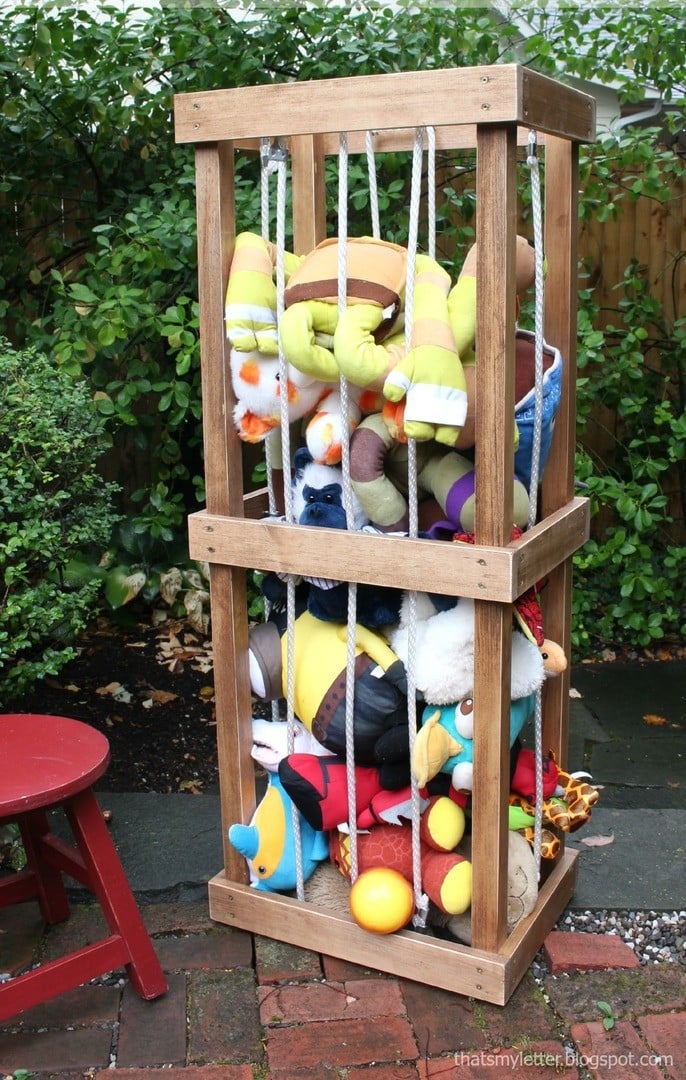
3. Stuffed Animal Tower
Image Credit: Jaime Costiglio
| Skill Level: | Beginner |
|---|---|
| Tools Needed: | Tape Measure, Saw, Drill, Sander, Safety Glasses |
| Materials: | 2x2s, 1x3s, rope or bungee cords or elastic, hooks, self tapping screws |
For the stuffie lover! Don't ever toss a single stuffie, out that is! Simply toss into the tower, retrieve by pulling through the sides to play with. This is perfect for all the squishamalls! This is a very easy build that is inexpensive and fast, and could tidy up a room, and create more playing space.
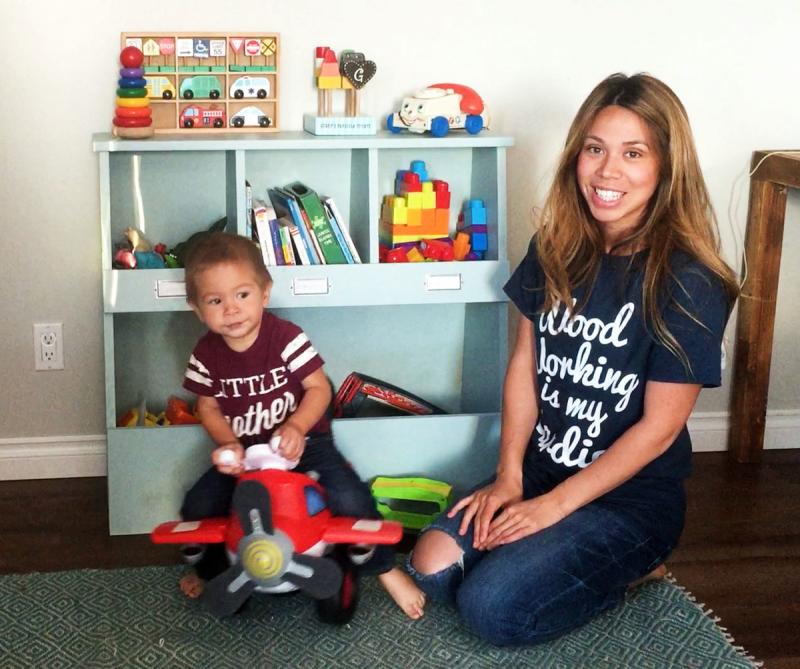
4. Sort and Stuff Toy Bin
Image Credit: Ana White
| Skill Level: | Intermediate |
|---|---|
| Tools Needed: | Tape Measure, Miter Saw, Circular Saw, Brad Nailer, Drill, Sander, Safety Glasses |
| Materials: | 1x12, plywood 1x6, 1x8, brad nails, brad nails, wood glue |
Stack and sort all the toys in this unique toy bin featuring small compartments up top, and a larger bin on the bottom. We love that this solution hides toys, and saves you money because you don't have to buy toy bins.
5. Wood Bulk Bins
Image Credit: Ana White
| Skill Level: | Advanced |
|---|---|
| Tools Needed: | Tape Measure, Miter Saw, Drill, Brad Nailer, Sander, Safety Glasses |
| Materials: | 1x12, 1x4, 1x6, Brad nails or pocket holes, wood glue |
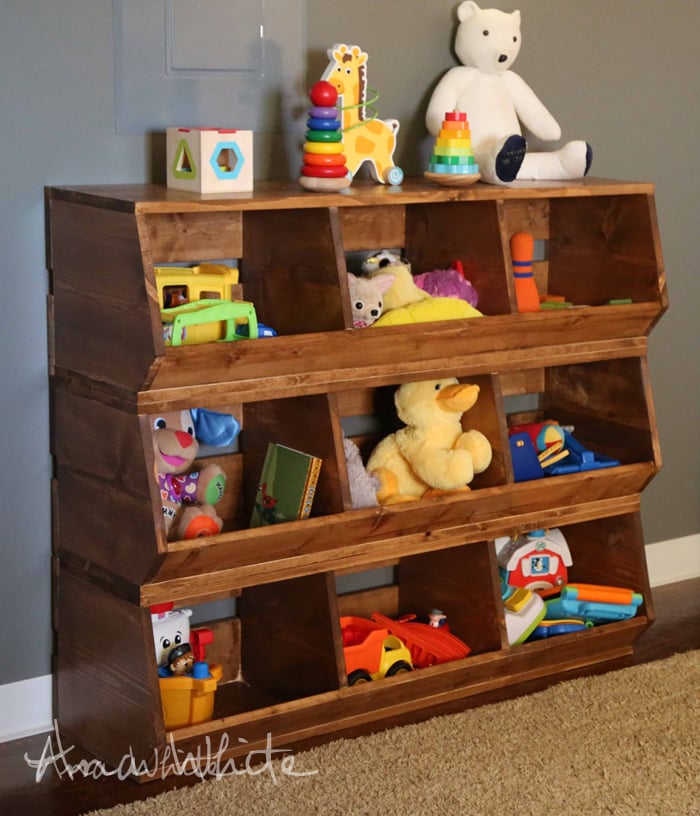
Bins, bins, bins! Using 1x12 boards create stacking bins, easy to modify for your space. These bins are great for organizational storage for just about anything, today we focus on all the toys. The design includes nice open storage for easy reach and clean up.
6. Ladder Book and Toy Storage
Image Credit: Ana White
| Skill Level: | Beginner Intermediate Advanced |
|---|---|
| Tools Needed: | Tape Measure, Saw, Drill, Sander, Safety Glasses |
| Materials: |
This ladder design bookshelf with toy storage is great for the bedside nighttime storybooks and bedroom play! Nice and compact for any space or room for some extra book and toy storage.
7. Flip, Stack and Store Toy Boxes
Image Credit: Ana White
| Skill Level: | Intermediate |
|---|---|
| Tools Needed: | Tape Measure, Saw, Drill, Sander, Safety Glasses |
| Materials: | 1x12, 1x3, plywood, 1x2, wood glue, self tapping screws |
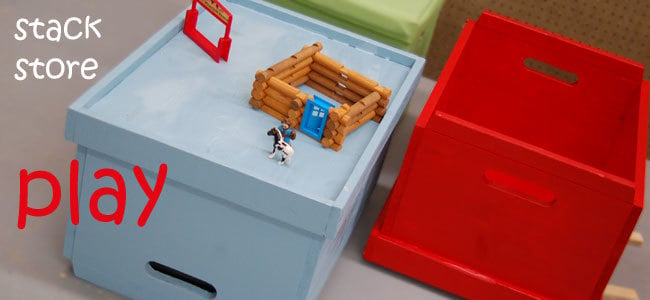
Toy boxes that stack and store, and can be turned over to be used as a play table. This brilliant solution can be stacked up three or more high, can be used as individual play stations, and are beautiful solid wood, so you can paint or stain any color of your preference.
8. General Store Style Toy Bin
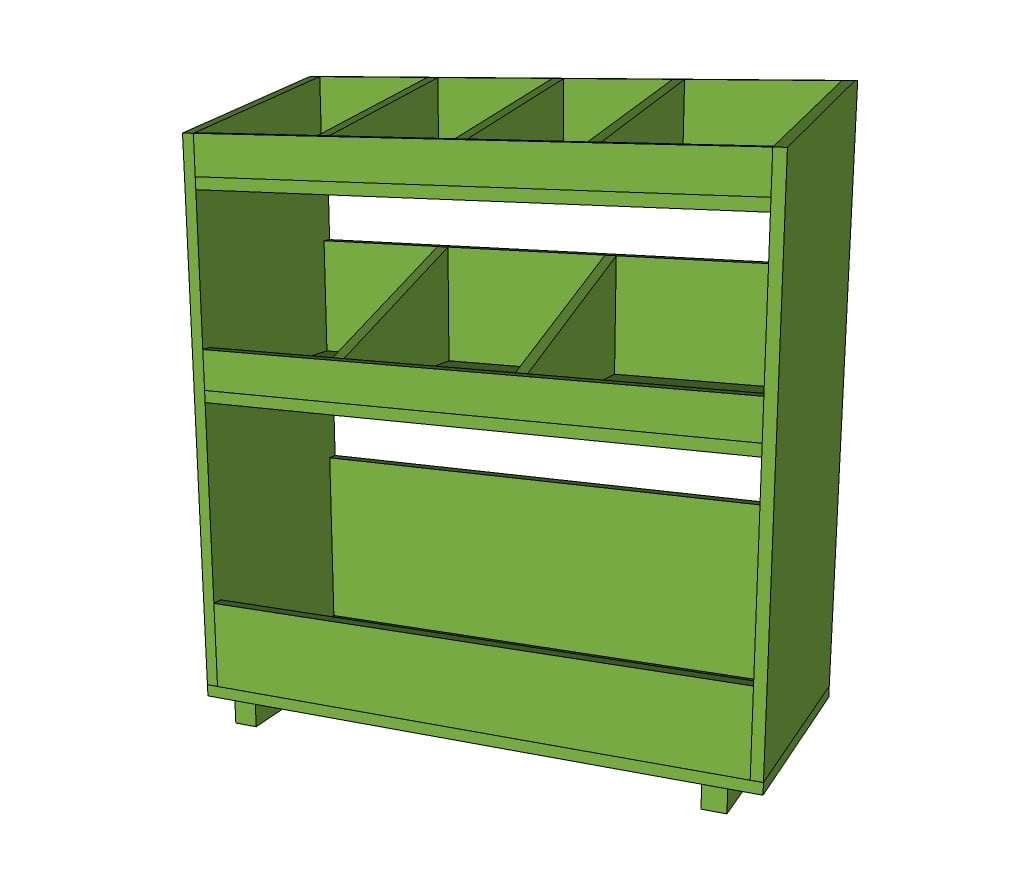 Image Credit: Ana White
| Skill Level: | Advanced |
|---|---|
| Tools Needed: | Tape Measure, Saw, Drill, Sander, Safety Glasses, Brad Nailer |
| Materials: | Plywood, 1x boards, brad nails, wood glue |
This is a large, versatile toy bin that features many different options for storing toys of all sizes! It is a plywood based project, but you could also use 1x12s, although it will create narrower storage.
9. Farmhouse Toybox
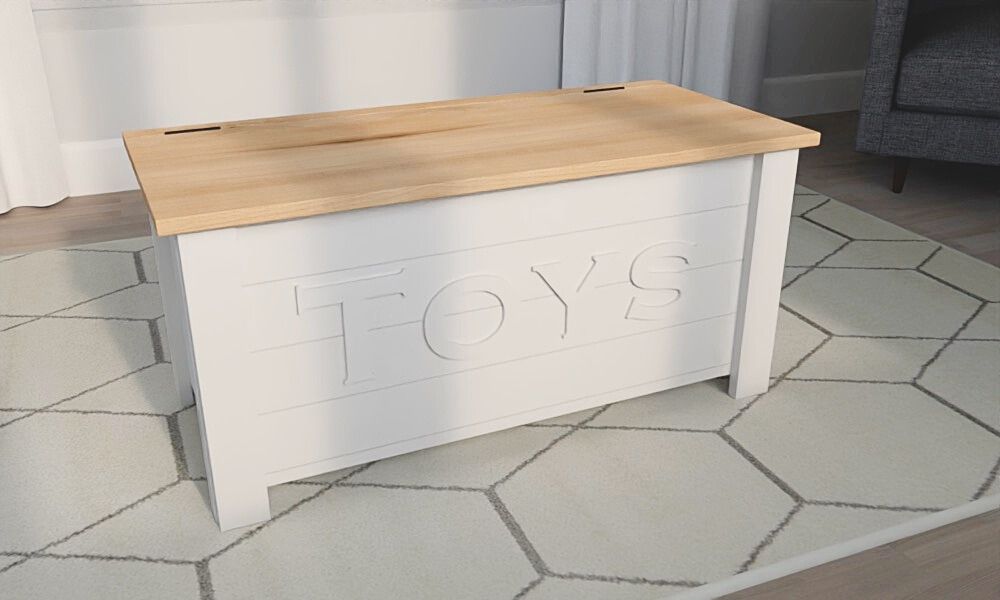
Image Credit: Ana White
| Skill Level: | Beginner |
|---|---|
| Tools Needed: | Tape Measure, Saw, Drill, Brad Nailer, Sander, Safety Glasses |
| Materials: | 1x boards, brad nails, wood glue |
This beautiful farmhouse toy box is easy to build with common pine boards. We have simplified the design to make this a beginner friendly build! Works great in a living room to double up as a coffee table too.
10. Open Closet Toy Storage
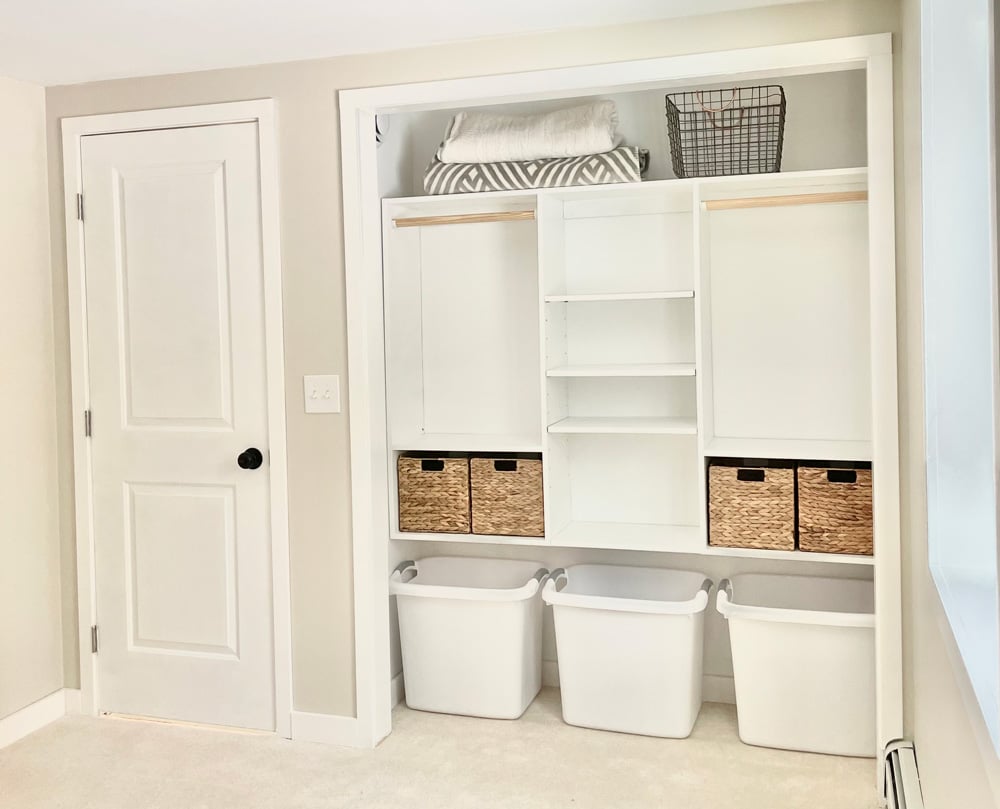
Image Credit: Ana White
| Skill Level: | Beginner Intermediate Advanced |
|---|---|
| Tools Needed: | Tape Measure, Saw, Drill, Sander, Safety Glasses |
| Materials: | Plywood, 1x12 or shelving boards, pocket holes |
Our full width closet plan includes a great space at the bottom for custom storage bins. Perfect for bedroom play and at the perfect height for kids to learn to pick up their toys by themselves. Tuck away when done!
11. Angled Bookrack and Toybin
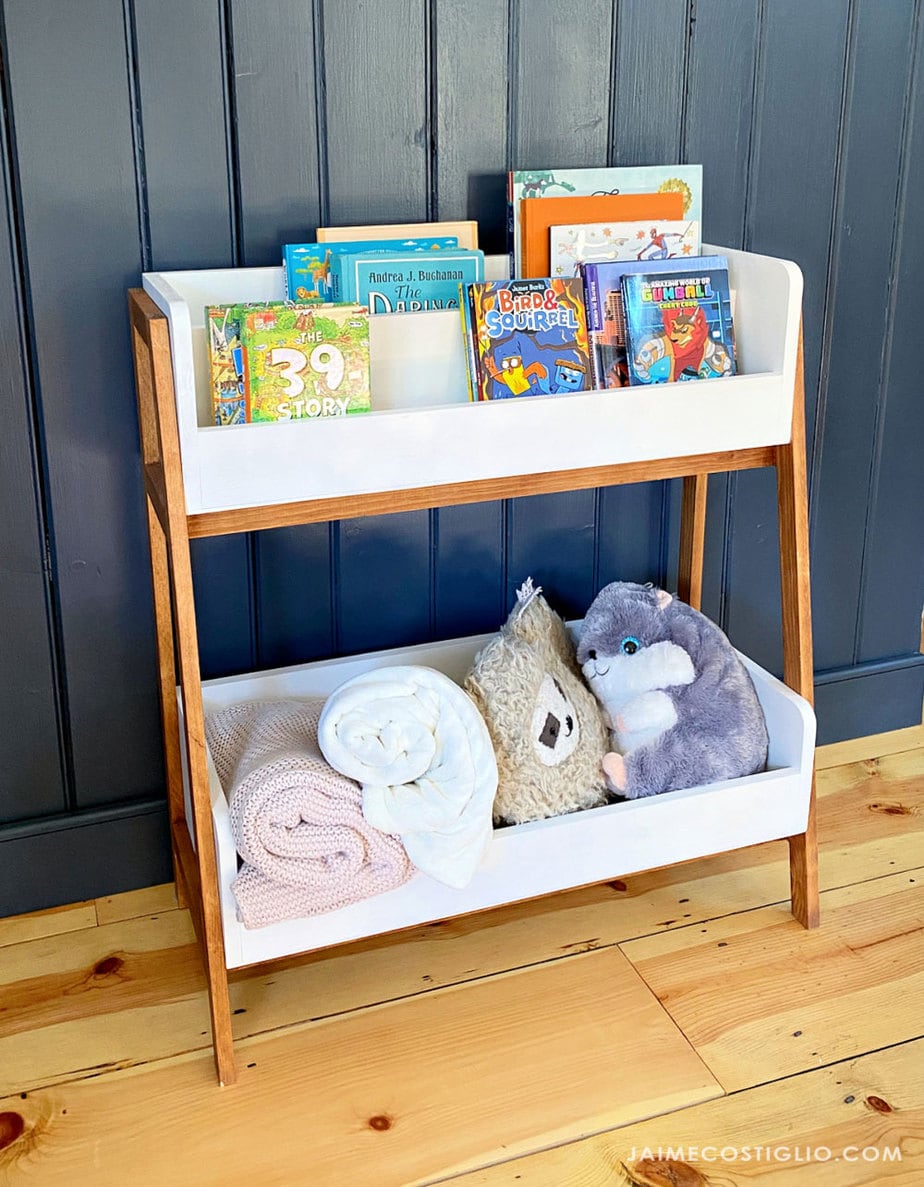
Image Credit: JaimeCostiglio.com
| Skill Level: | Beginner Intermediate Advanced |
|---|---|
| Tools Needed: | Tape Measure, Saw, Drill, Sander, Safety Glasses |
| Materials: | 1x3 boards, plywood, pocket hole screws |
Build your own bookrack with toy bin with our free plans! Features a upper shelf for sorting books of different sizes, and a generous bottom bin for holding stuffies and larger items. Perfect plan for any part of the house!
12. Cubby Bookshelf
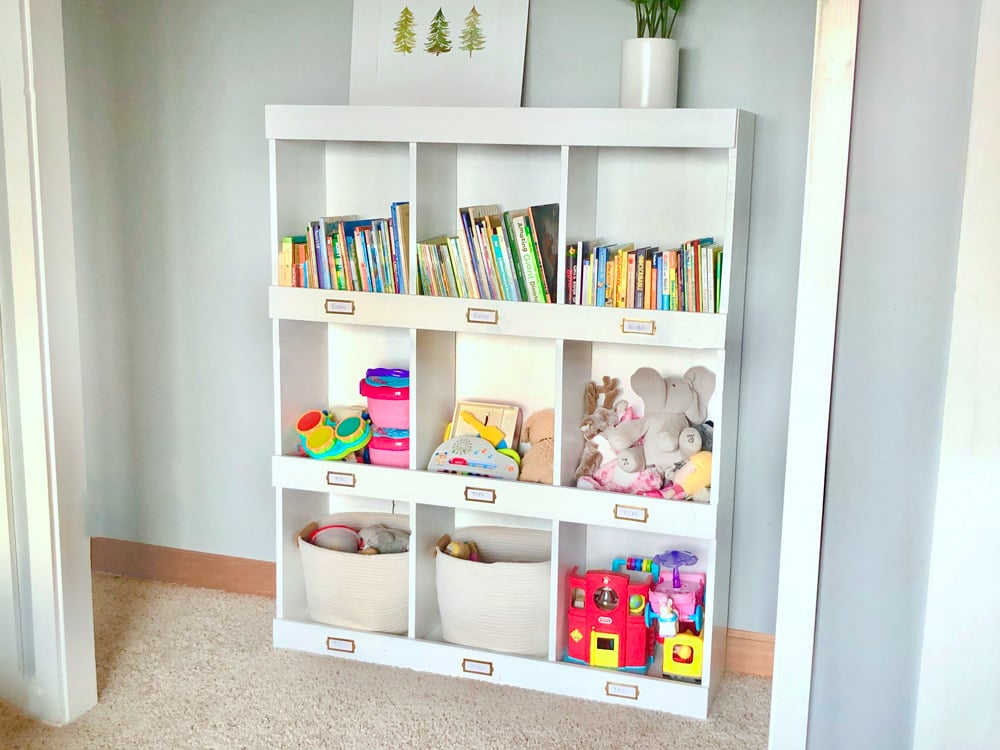
Image Credit: Ana White
| Skill Level: | Beginner Intermediate Advanced |
|---|---|
| Tools Needed: | Tape Measure, Saw, Drill, Sander, Safety Glasses |
| Materials: | 1x12s, 1x3s, 1/4" plywood, pocket hole screws, brad nails |
Nine big cubbies can store everything from books to toys, this design looks great in any room in the house, with a vintage vibe!
13. Simple Open Top Toybox
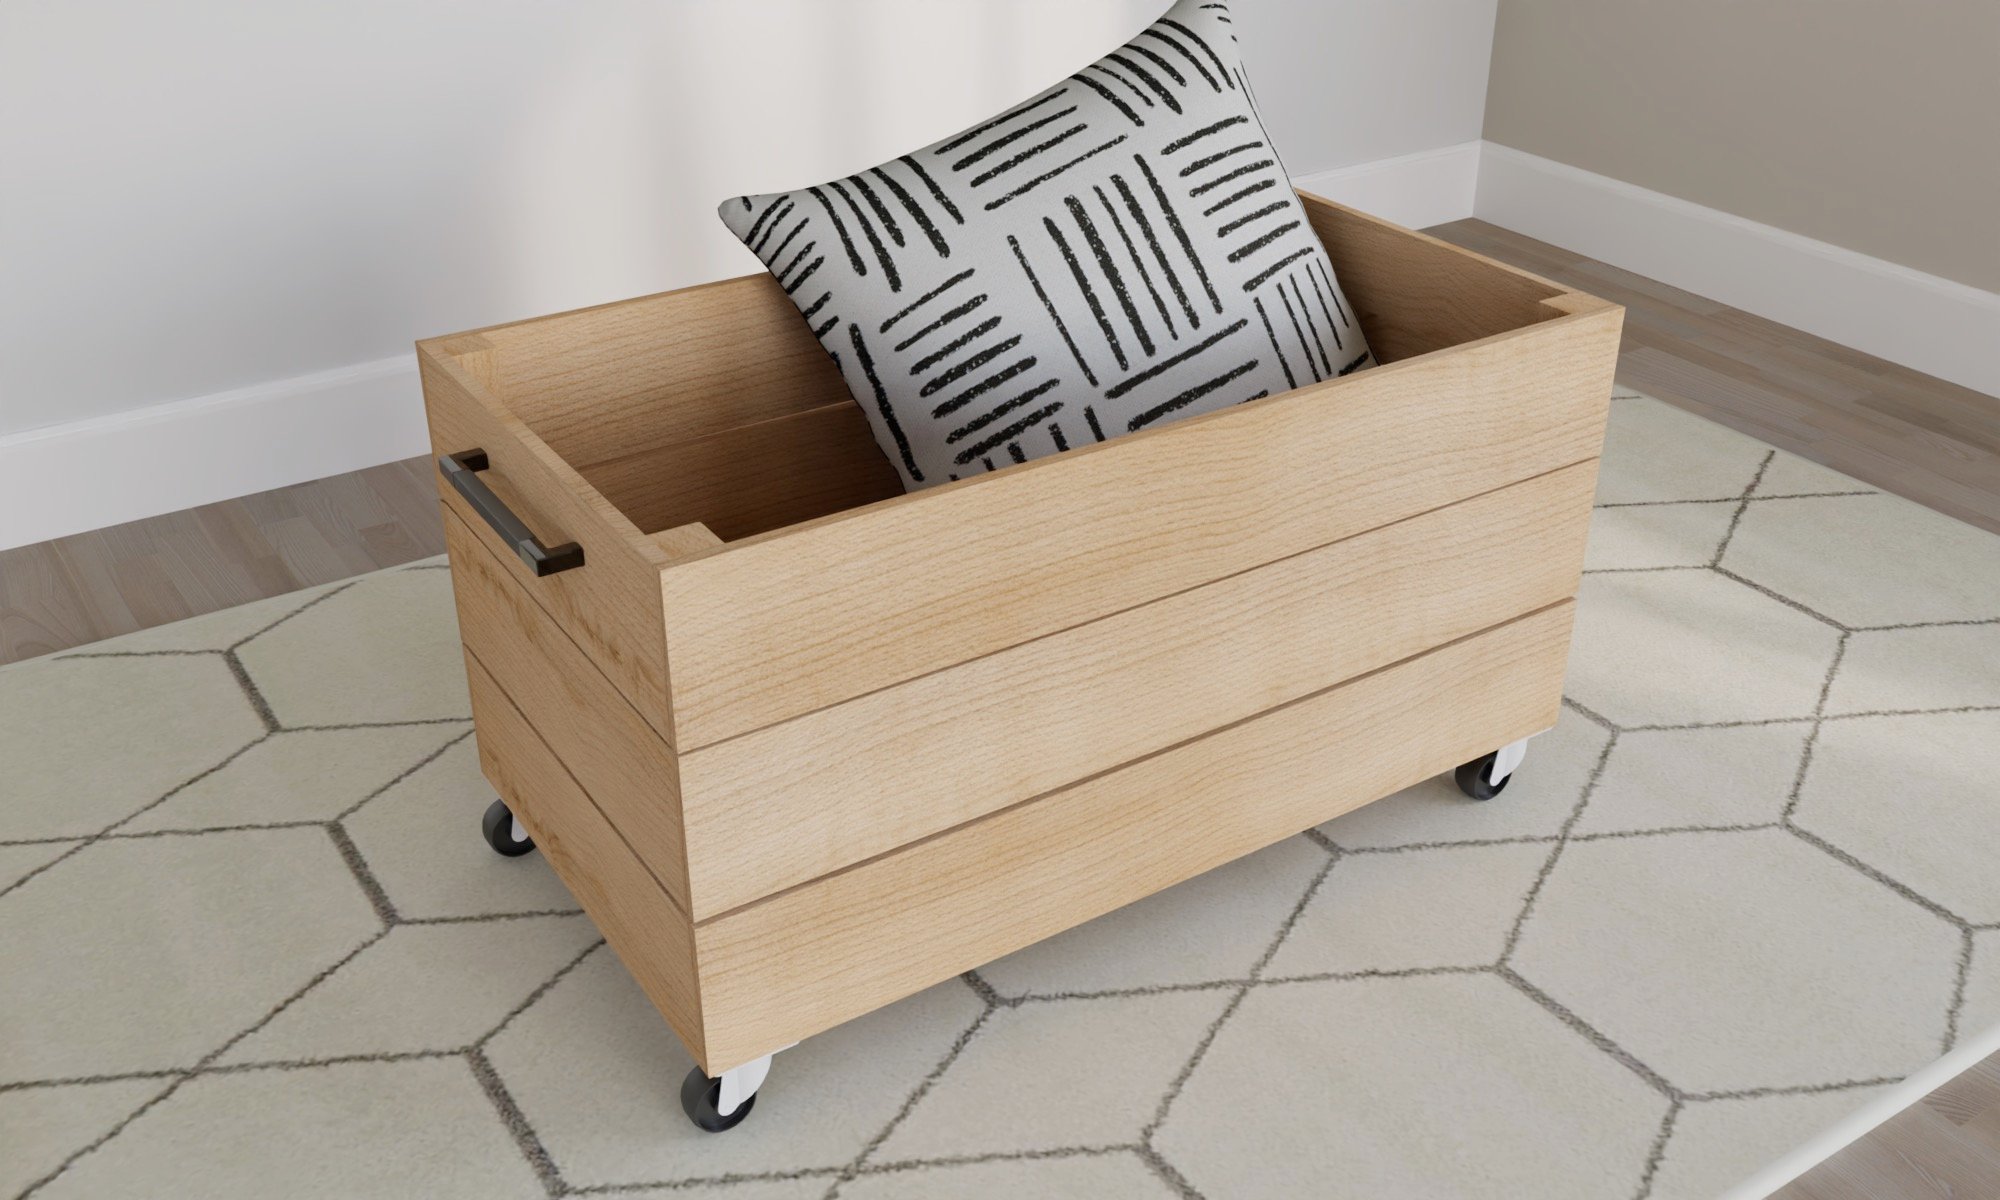
Image Credit: Ana White
| Skill Level: | Beginner |
|---|---|
| Tools Needed: | Tape Measure, Saw, Drill, Sander, Safety Glasses |
| Materials: | 1x6 or fence pickets, 3/4" plywood base, 2x2s, brad nails or screws, wood glue, caster wheels |
This plan is the easiest one we have as far as toyboxes go! This quick easy build creates a large storage crate. Have fun with the paint or stain selection and any decorative hardware to get the look you want! Add casters and roll it away when done playing.
14. Toy Armoire
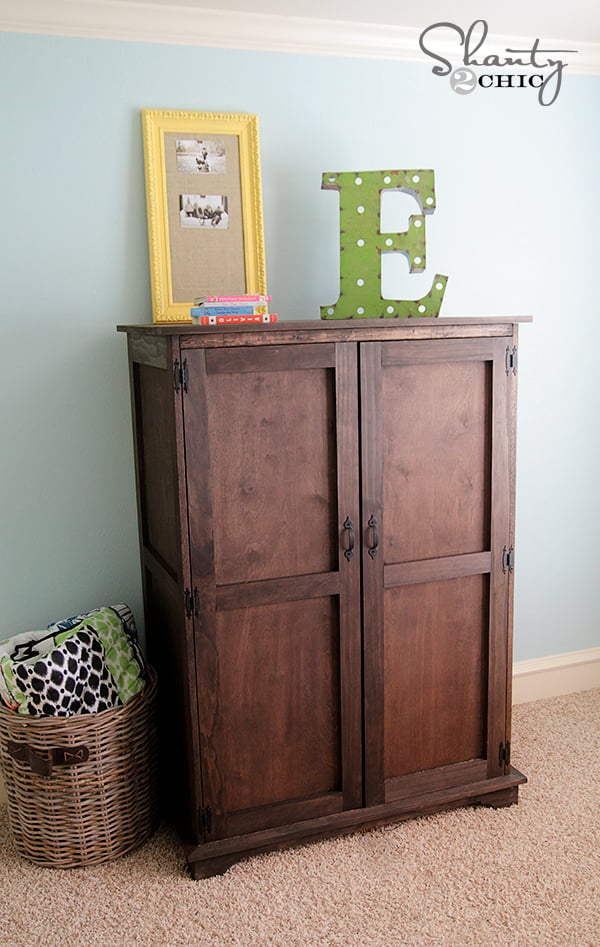
Image Credit: Shanty 2 Chic
| Skill Level: | Advanced |
|---|---|
| Tools Needed: | Tape Measure, Saw, Drill, Sander, Safety Glasses |
| Materials: | Plywood, 1x boards, pocket hole screws, brad nails |
It you aren't wanting open storage this toy armoire is a great solution for any room. Don't be intimidated by the size, we have you covered every step of the way! We've included a plan to add a drawer insert HERE!
15. Rustic Meadows Wood Slanted Toy Bin
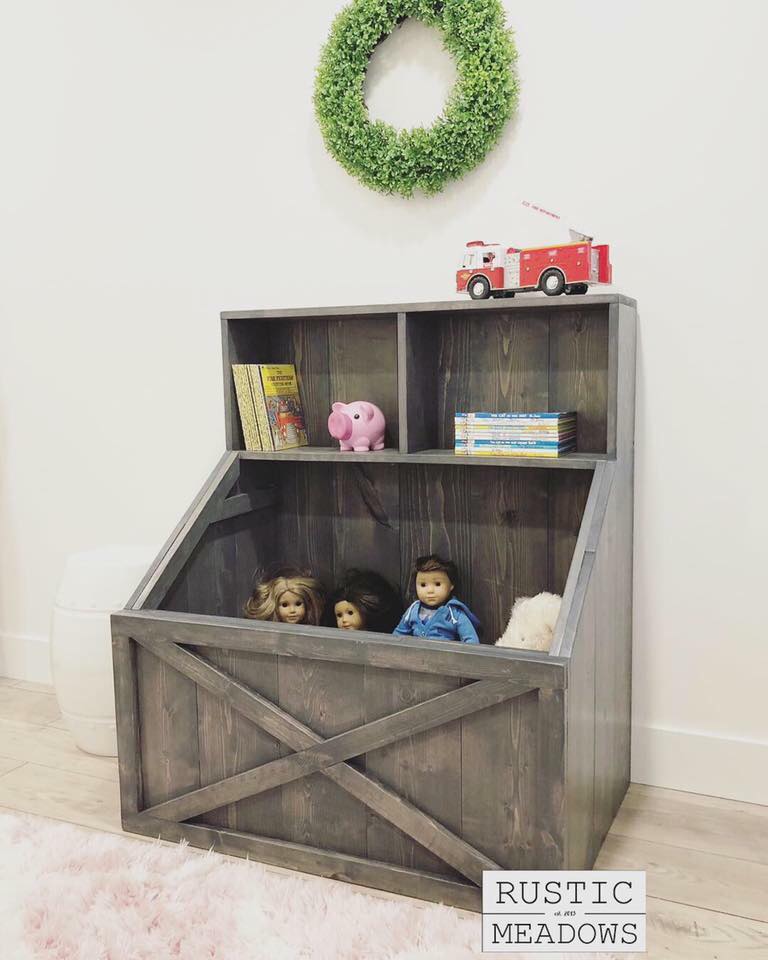
Image Credit: Rustic Meadows
| Skill Level: | Intermediate |
|---|---|
| Tools Needed: | Tape Measure, Saw, Drill, Brad Nailer, Sander, Safety Glasses |
| Materials: | 1x boards, brad nails, wood glue |
This beautiful toy box looks gorgeous in any room! All 1x boards - this is a premium plan from Rustic Meadows.
16. Kids Storage Bookshelf
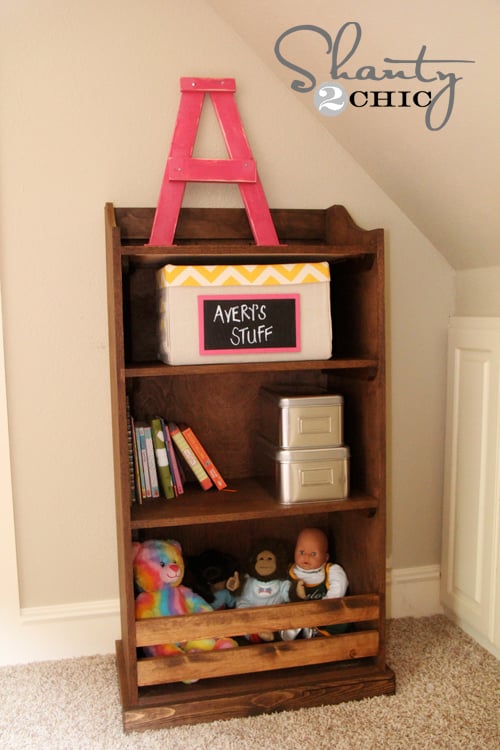
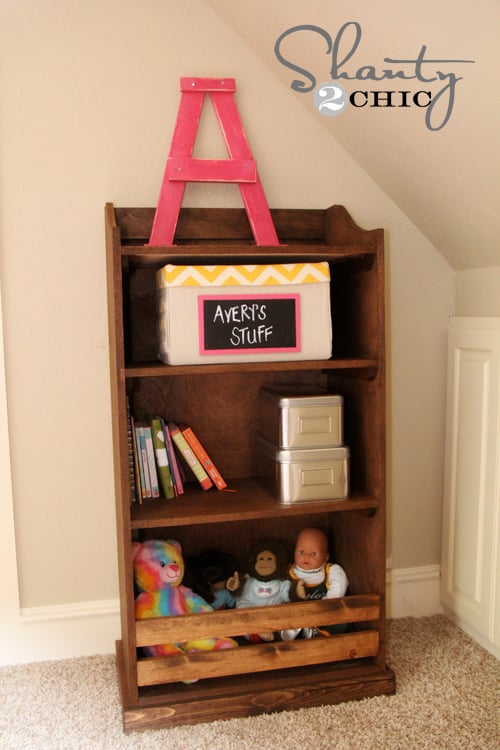
Image Credit: Shanty 2 Chic
| Skill Level: | Beginner Intermediate Advanced |
|---|---|
| Tools Needed: | Tape Measure, Saw, Drill, Brad Nailer, Sander, Safety Glasses |
| Materials: | 1x12s, 1x3s, 1x4s, 1/4" plywood, brad nails |
This simple bookshelf plan with curved top is designed shorter for kid use. The extra storage at the bottom is perfect for toys while the higher shelves can store books or more toy bins/baskets for smaller items.
17. Little Leaning Bookshelf
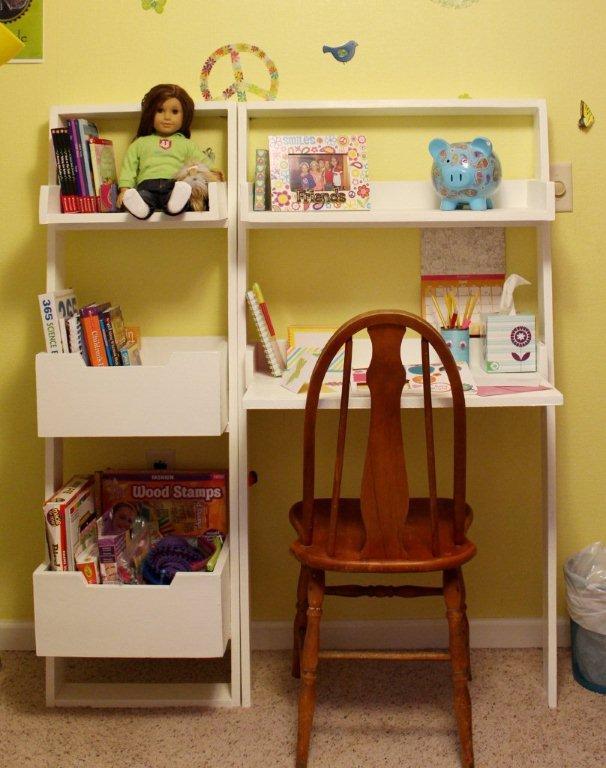
Image Credit: Reader Submitted Photo
| Skill Level: | Intermediate |
|---|---|
| Tools Needed: | Tape Measure, Miter Saw, Drill, Brad Nailer, Sander, Safety Glasses |
| Materials: |
This leaning bookshelf is perfect for books and toys. The design is a nice size for a kids room, add the desk for a study space to go with the leaning bookshelf.
18. Simple Modern Toybox with Lid
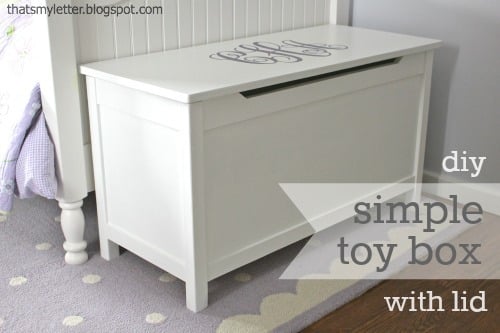
Image Credit: Jaime Costiglio
| Skill Level: | Beginner Intermediate Advanced |
|---|---|
| Tools Needed: | Tape Measure, Saw, Drill, Pocket Hole Jig, Sander, Safety Glasses |
| Materials: | 2x2s, plywood, 1x boards, pocket holes, project panel, plywood |
A simple, classic toybox is a great solution for many toys and can be kept in any part of the house. This classic toybox with hinged lid is not only beautiful, but functional too, add a soft close hinge to keep those little fingers safe!
Reader Build
19. Toy Bin Nightstand
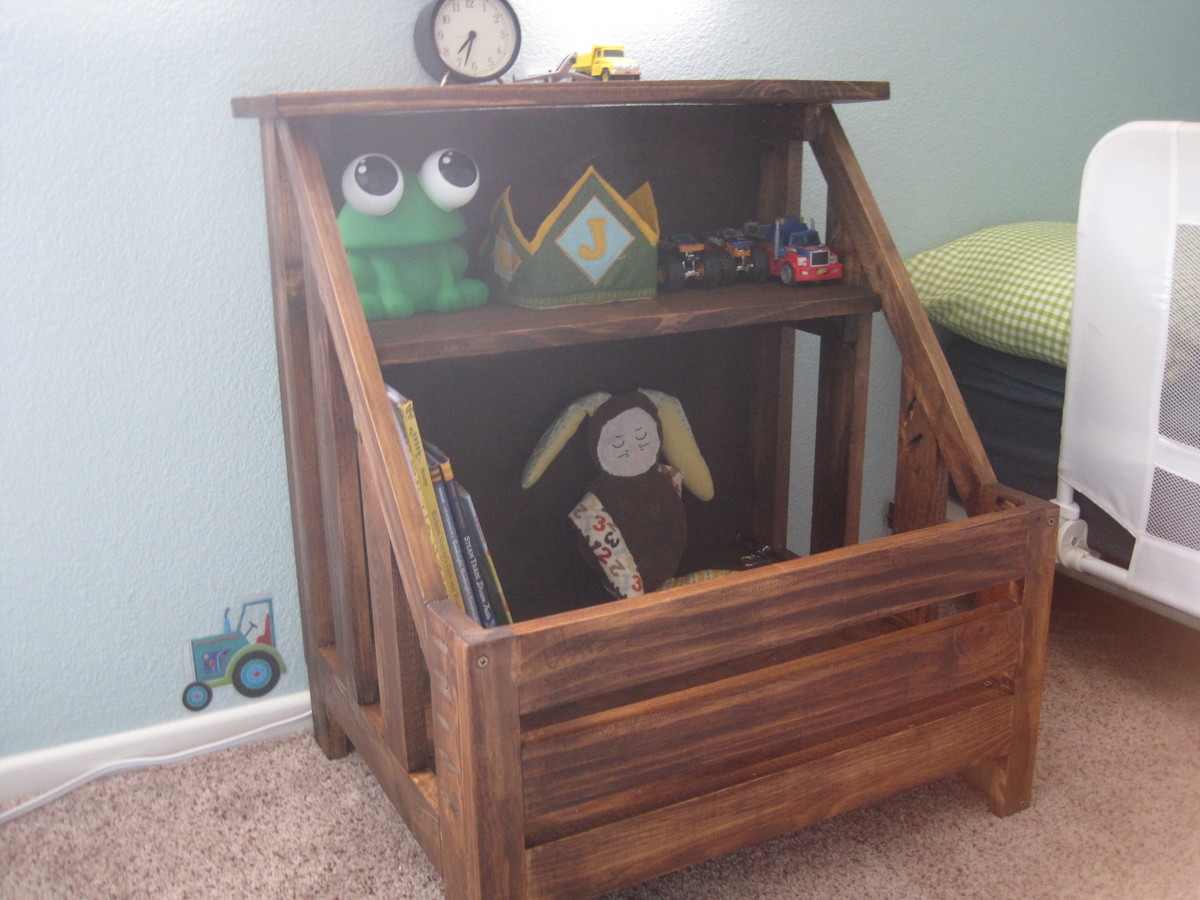
Image Credit: MAMAMEA33
| Skill Level: | Beginner Intermediate Advanced |
|---|---|
| Tools Needed: | Tape Measure, Miter Saw, Drill, Pocket Hole Jig, Sander, Safety Glasses |
| Materials: | 1x2, 1x3, 1x4, 1x6, pocket hole screws |
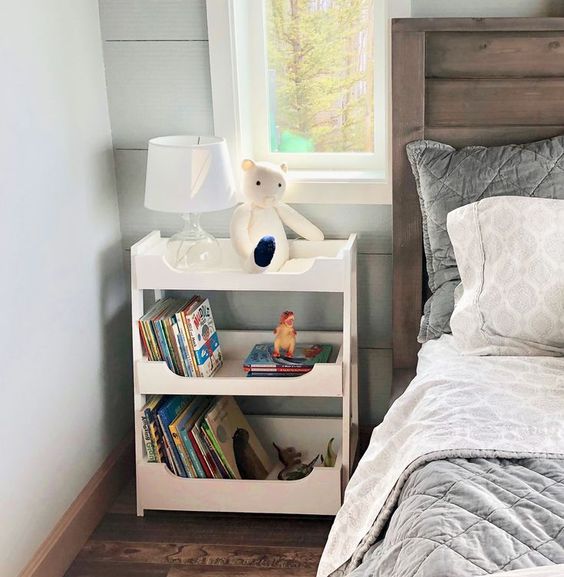
An economical side table or nightstand for a child's room that features a open bin base and two top shelves. Perfect for holding stuffed animals or ball or other toys in the bin, shelves great for books, clocks, art and other toys
20. Open Top Classic Toybox
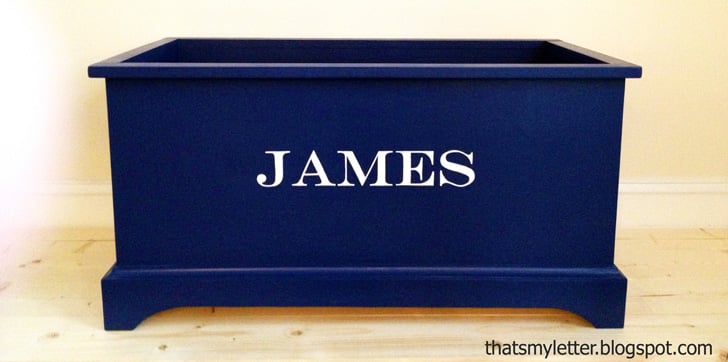
Image Credit: Jaime Costiglio
| Skill Level: | Intermediate |
|---|---|
| Tools Needed: | Tape Measure, Miter Saw, Table Saw, Pocket Hole Jig, Brad Nailer, Drill, Sander, Safety Glasses |
| Materials: | Plywood, 1x Boards, Pocket Holes, Brad Nails, Pocket Hole Screws |
A beautiful, professional quality toy box with an open top! We love how sturdy and stylish this piece is, sure to add to a rooms elegance and function. The plans are free too!
21. Vintage Trunk Toy Chest
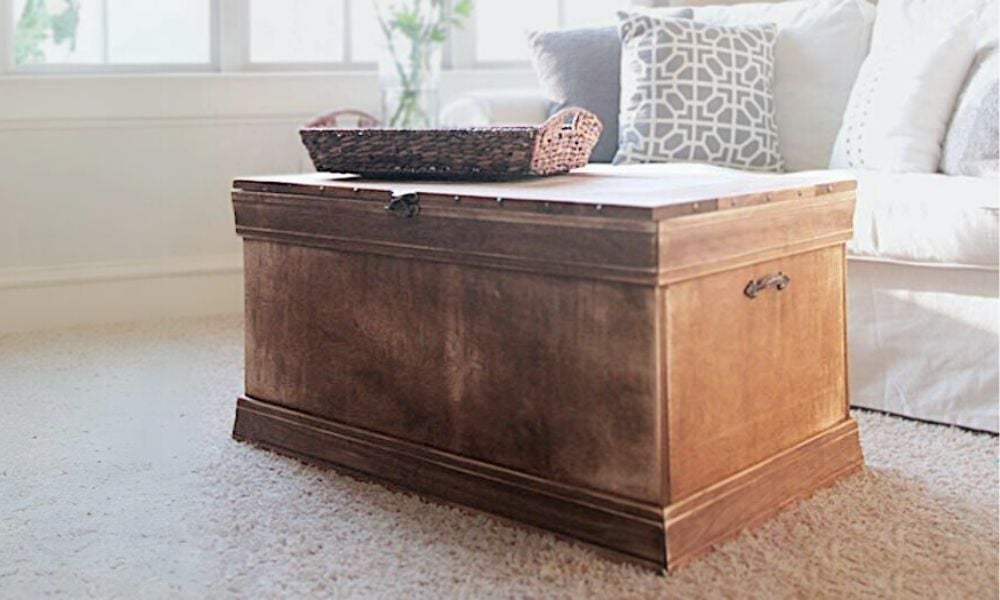
Image Credit: Shanty2Chic
| Skill Level: | Advanced |
|---|---|
| Tools Needed: | Tape Measure, Saw, Drill, Pocket Hole Jig, Brad Nailer, Sander, Safety Glasses |
| Materials: | Plywood, 1x Materials, Trim Boards, Brad Nails, Pocket hole Screws, Wood Glue |
This gorgeous vintage style chest is beautiful enough to be in the middle of your living room! But it's handy enough to hold all the toys! Free plans with photos, and lots of reader submitted brag posts to browse.
22. Toy Train Trundle
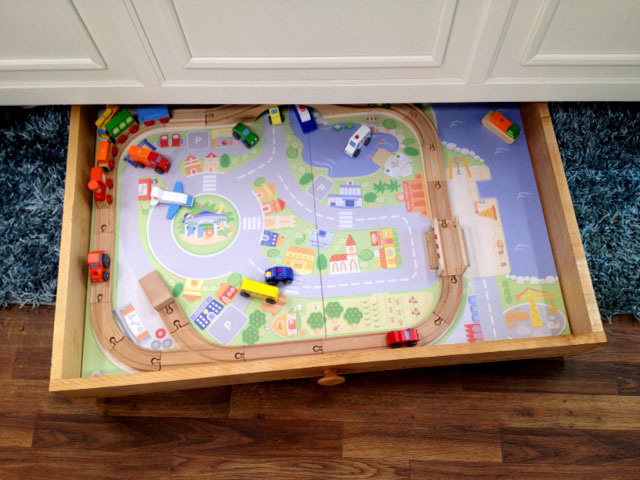
Image Credit: Ana White
| Skill Level: | Beginner |
|---|---|
| Tools Needed: | Tape Measure, Saw, Drill, Sander, Safety Glasses |
| Materials: | 1x boards, plywood |
Slide it under the bed, pull it out to play! This train trundle plan is easy to use for extra storage for toys too! A great space saving option, allows children to pull out and play, and push back under the bed when done. This trundle can be made to any size, or add dividers for different types of play!
23. Long Planked Wood Trunk
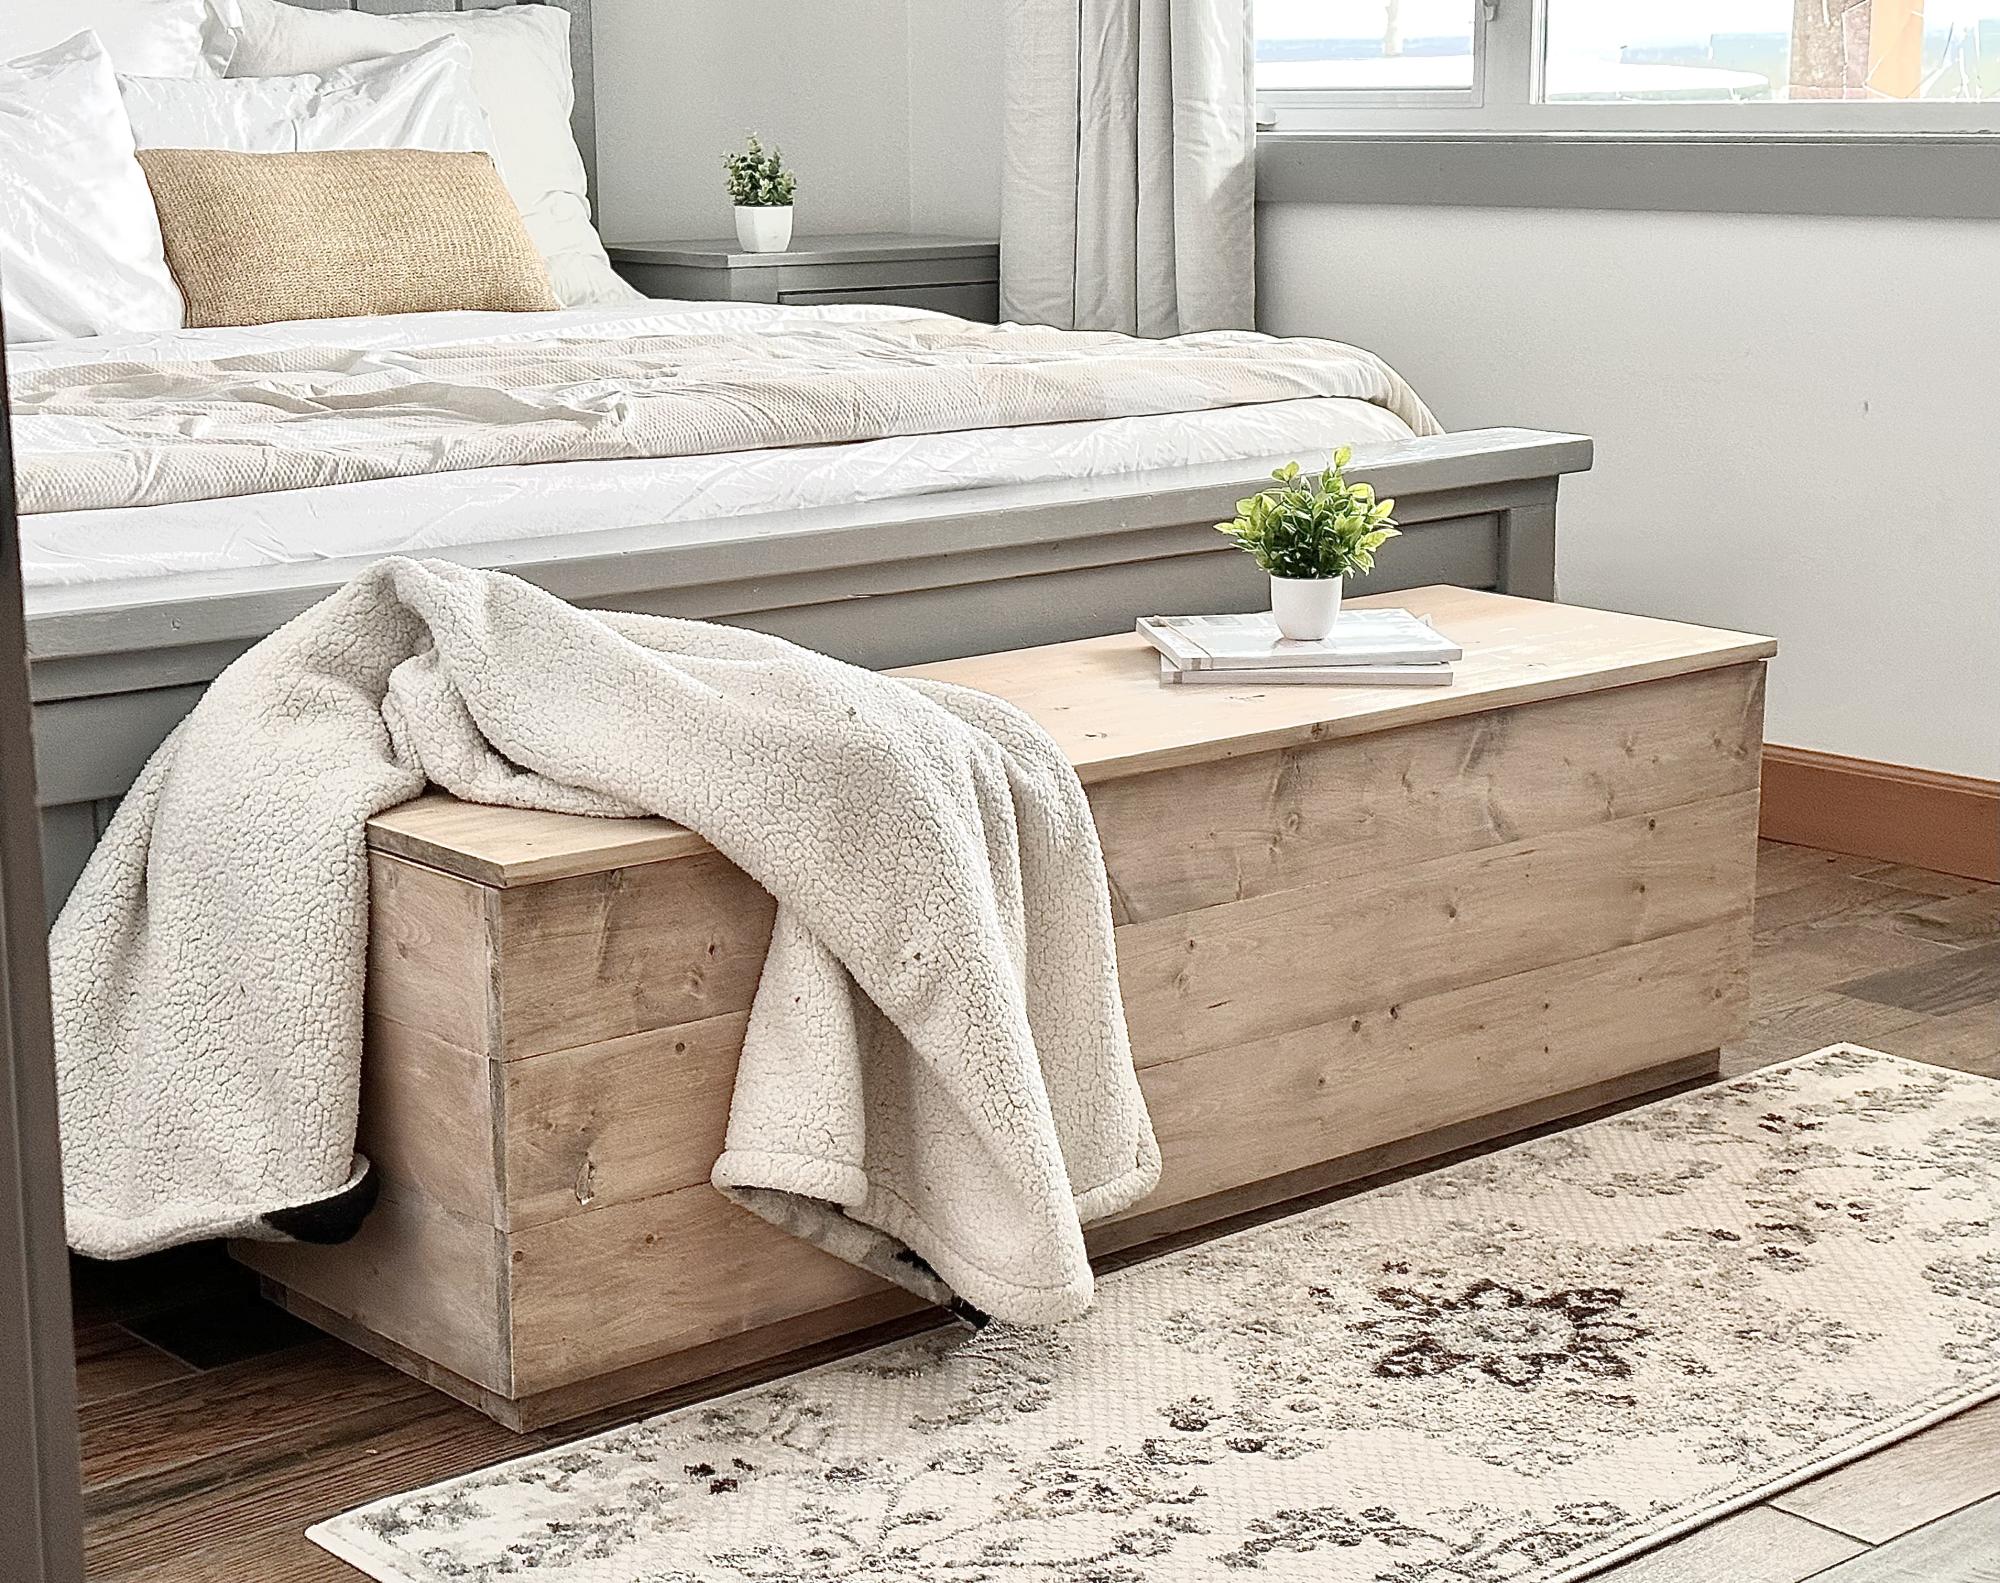
Image Credit: Ana White
| Skill Level: | Beginner Intermediate Advanced |
|---|---|
| Tools Needed: | Tape Measure, Saw, Drill, Sander, Safety Glasses |
| Materials: | 1x6, 1x8 pocket holes |
I built this trunk a few years ago, and it has been one of my all time favorites! It is still super beautiful and functional, and holds TONS of items. We love this as an end of bed storage solution, or under a window, or even as a coffee table for a longer sofa. Free plans include video, step by step diagrams and lots of photos!
24. Coffee Table with Inset Top Storage
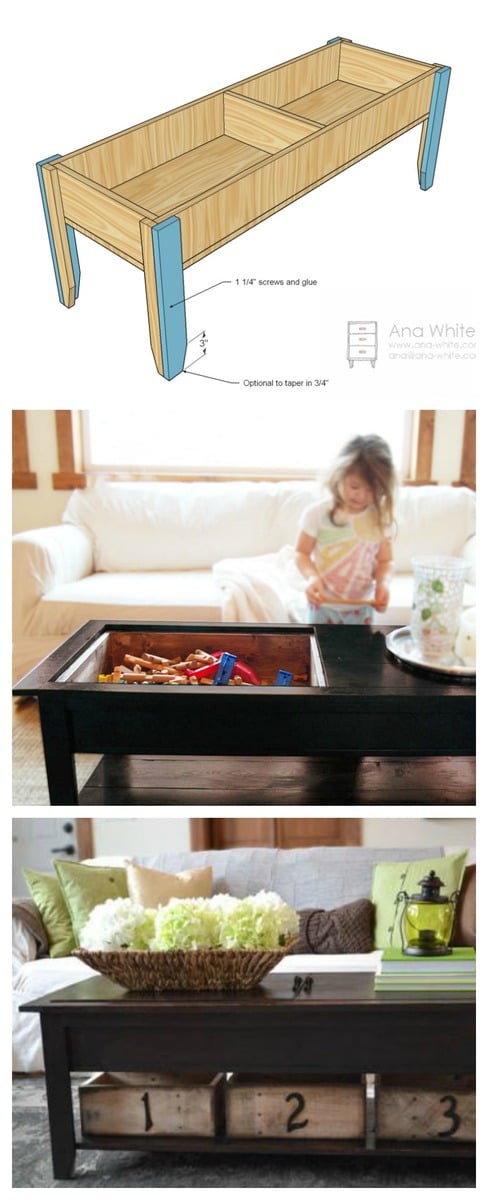
Image Credit: Ana White
| Skill Level: | Beginner Intermediate Advanced |
|---|---|
| Tools Needed: | Tape Measure, Saw, Drill, Sander, Brad Nailer, Pocket Hole Jig, Safety Glasses |
| Materials: | 1x Boards, Brad Nails, Pocket Hole Screws |
This beautiful coffee table has a secret! The top panels remove, with lots of storage inside. We love it as a play table (legos and lincoln logs anyone?) or a workcenter for your laptop, or just a place to store board games, toys, extra blankets, or magazines.
25. Flip Top Storage Coffee Table
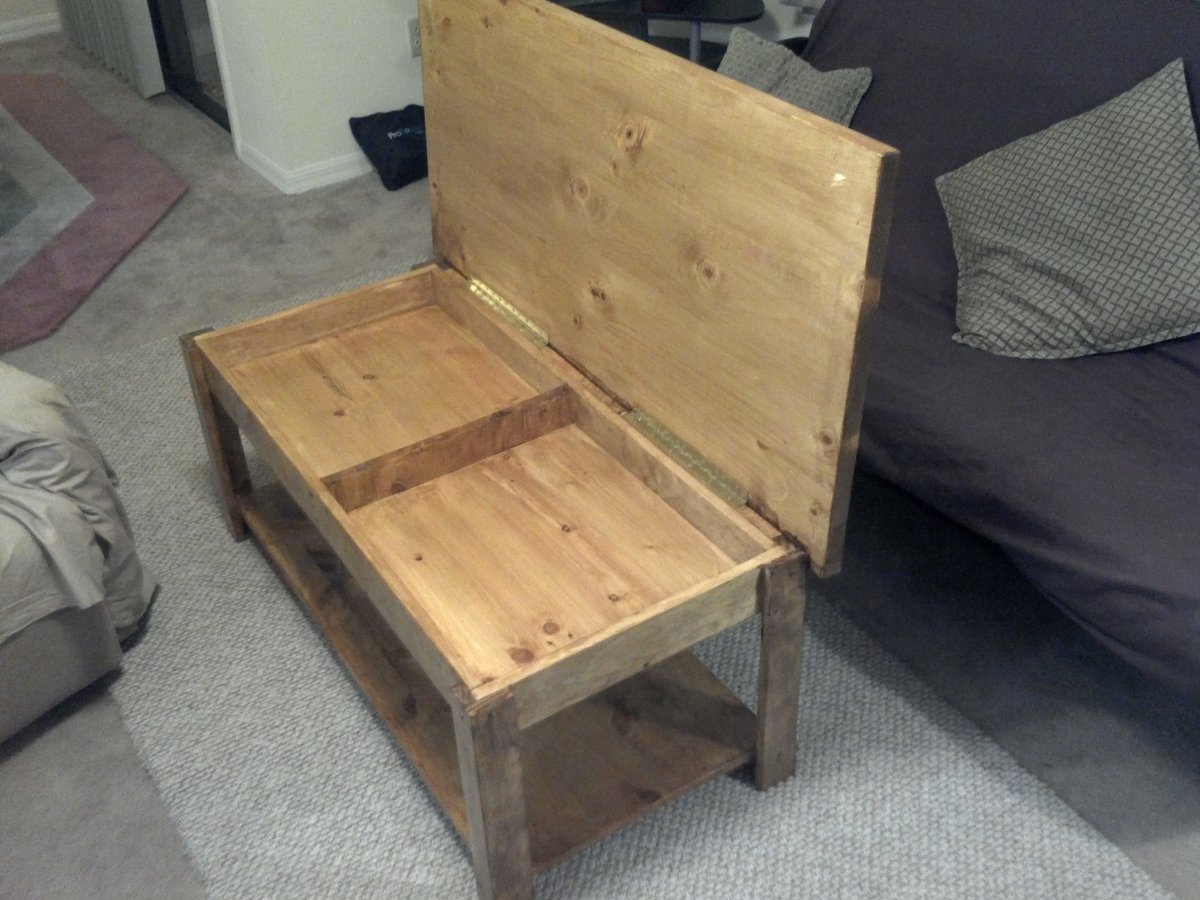
Image Credit: GREENESERRORS
| Skill Level: | Intermediate |
|---|---|
| Tools Needed: | Tape Measure, Saw, Drill, Sander, Safety Glasses |
| Materials: | 1x boards, project panel or plywood, brad nails, screws, wood glue |
Flip open to store more! Bottom shelf holds binds, board games and more! This flip top storage coffee table or bench can help keep toys organized and double as a seating or surface.
26. Storage Wall System
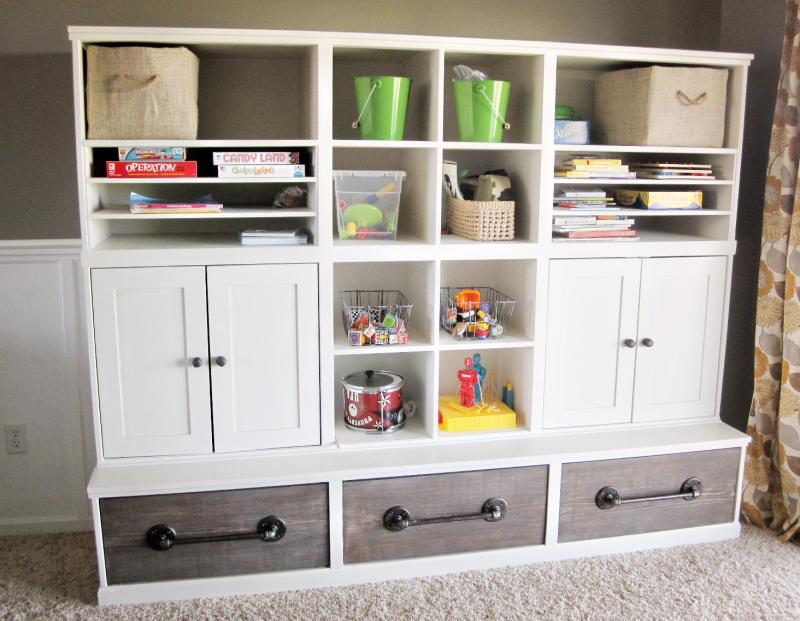
Image Credit: Reader submitted photo
| Skill Level: | Advanced |
|---|---|
| Tools Needed: | Tape Measure, Table Saw, Pocket Hole Jig, Brad Nailer, Drill, Sander, Safety Glasses |
| Materials: | Plywood carcass, pocket hole screws |
For that Pottery Barn Kids look on a budget, build your own toy storage wall system! This is an entire collection of plans, so you can modify your system to fit your needs and space!
27. Outdoor Toy Box
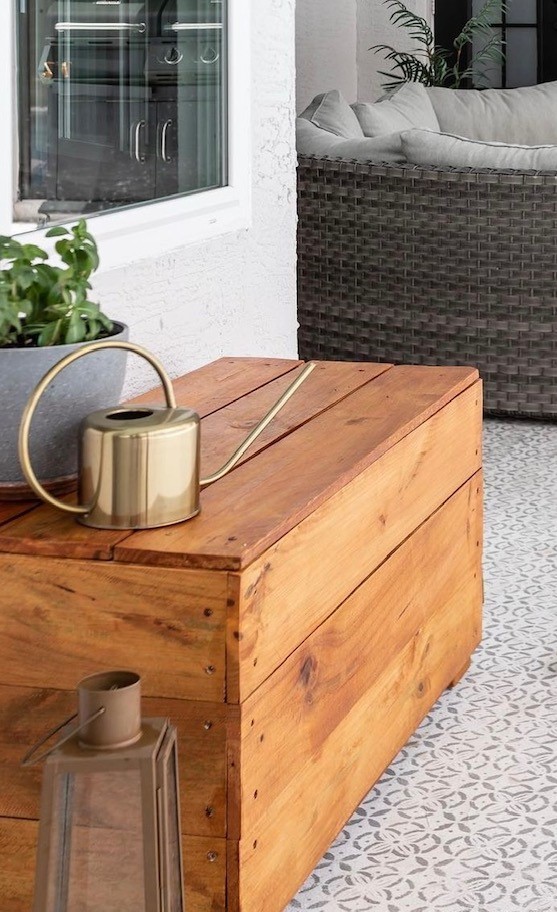
Image Credit: Crazy Life with Littles on Instagram
| Skill Level: | Beginner |
|---|---|
| Tools Needed: | Tape Measure, Saw, Drill, Sander, Safety Glasses |
| Materials: | 2x4 Frame, Cedar Fence Picket, Screws, Hinge Hardware |
This VERY simple to make outdoor storage chest is made using fence pickets, durable and exterior appropriate, but also inexpensive and beautiful! Free plans include step by step diagrams and video tutorial.
28. Reclaimed Wood Toy Carts
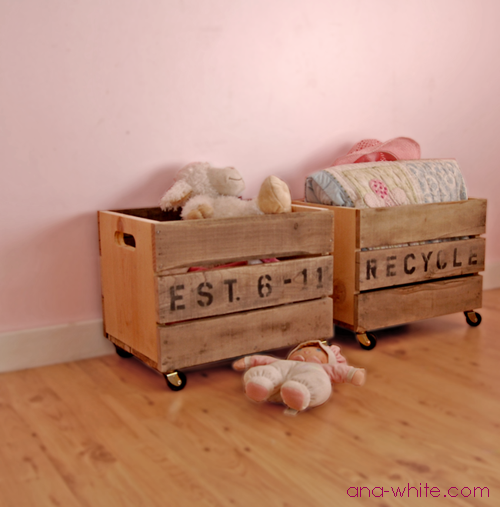
Image Credit: Ana White
| Skill Level: | Beginner |
|---|---|
| Tools Needed: | Tape Measure, Saw, Drill, Sander, Safety Glasses |
| Materials: | 1x12s, pallet boards, caster wheels |
These little rustic carts can be so handy! Store them in the closet bottom, or push them out of the way - they are beautiful, small enough to go through doorways, and sturdy enough to push kids around in (not that you would...).
The free plans include step by step diagrams, shopping and cut list, and lots of reader submitted photos.

